|
|

|
Porsche, and the Porsche crest are registered trademarks of Dr. Ing. h.c. F. Porsche AG.
This site is not affiliated with Porsche in any way. Its only purpose is to provide an online forum for car enthusiasts. All other trademarks are property of their respective owners. |
|
|
  |
| dlee6204 |
 Mar 30 2015, 06:22 PM Mar 30 2015, 06:22 PM
Post
#21
|
|
Howdy     Group: Members Posts: 2,162 Joined: 30-April 06 From: Burnsville, NC Member No.: 5,956 |
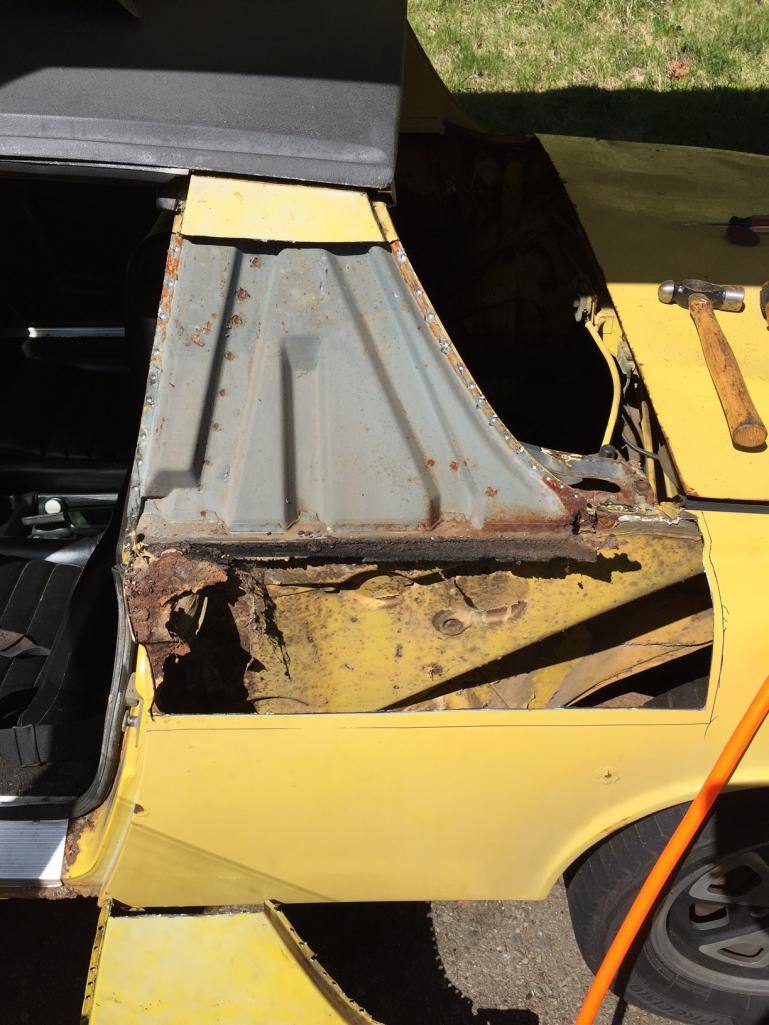
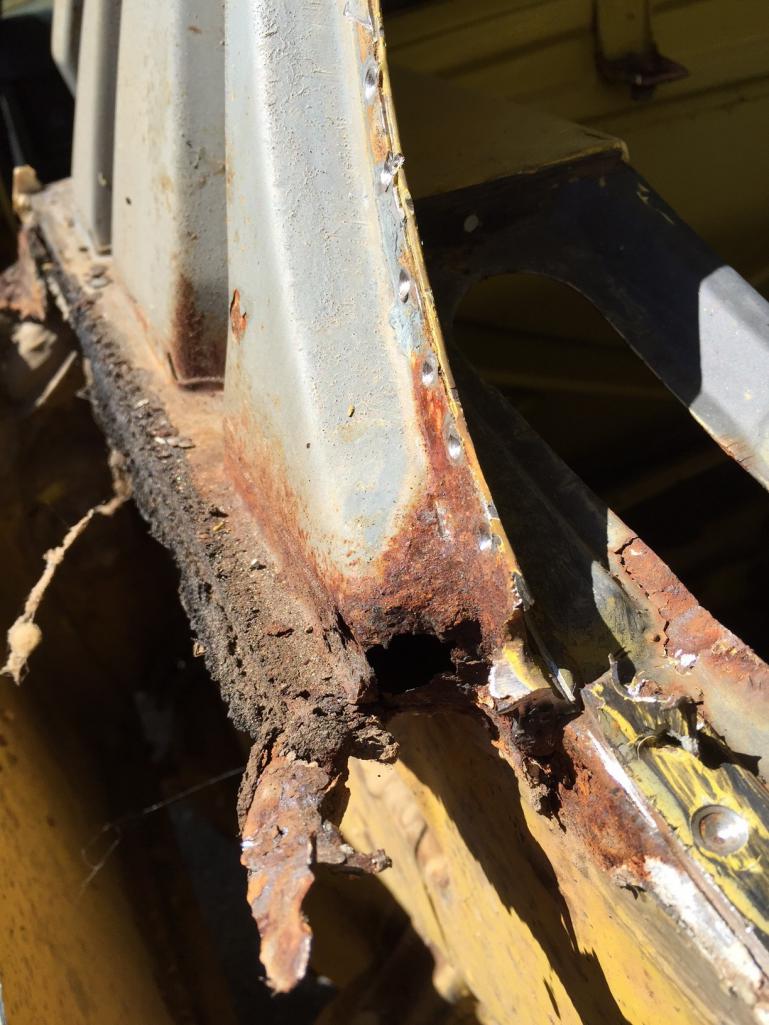
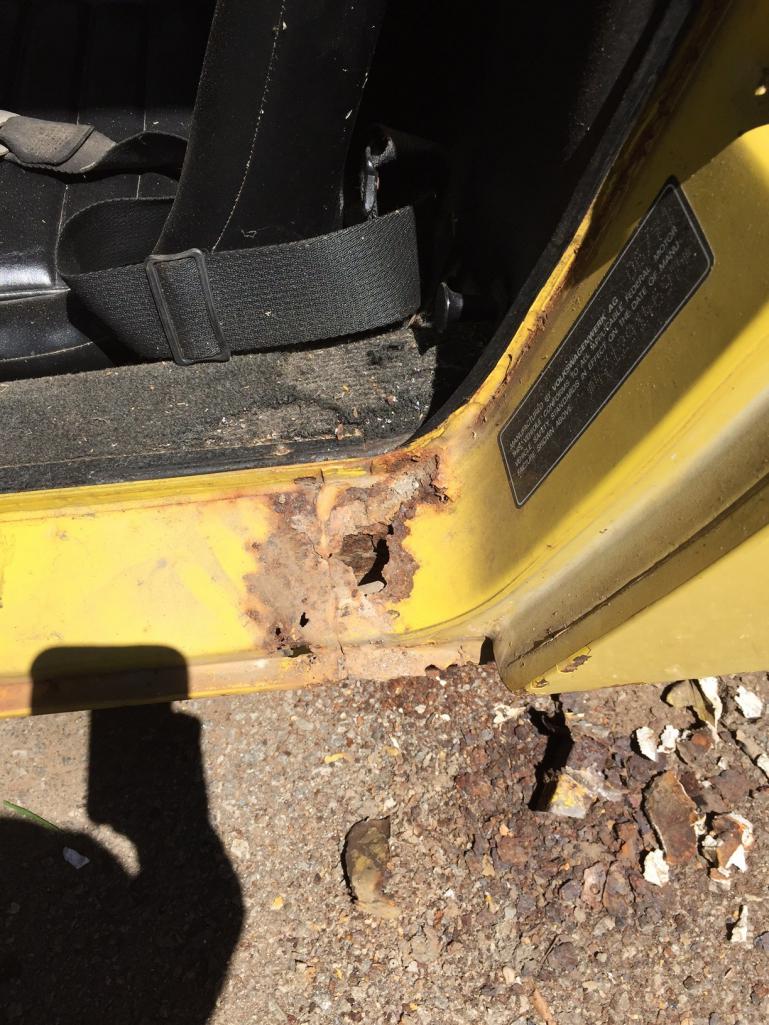
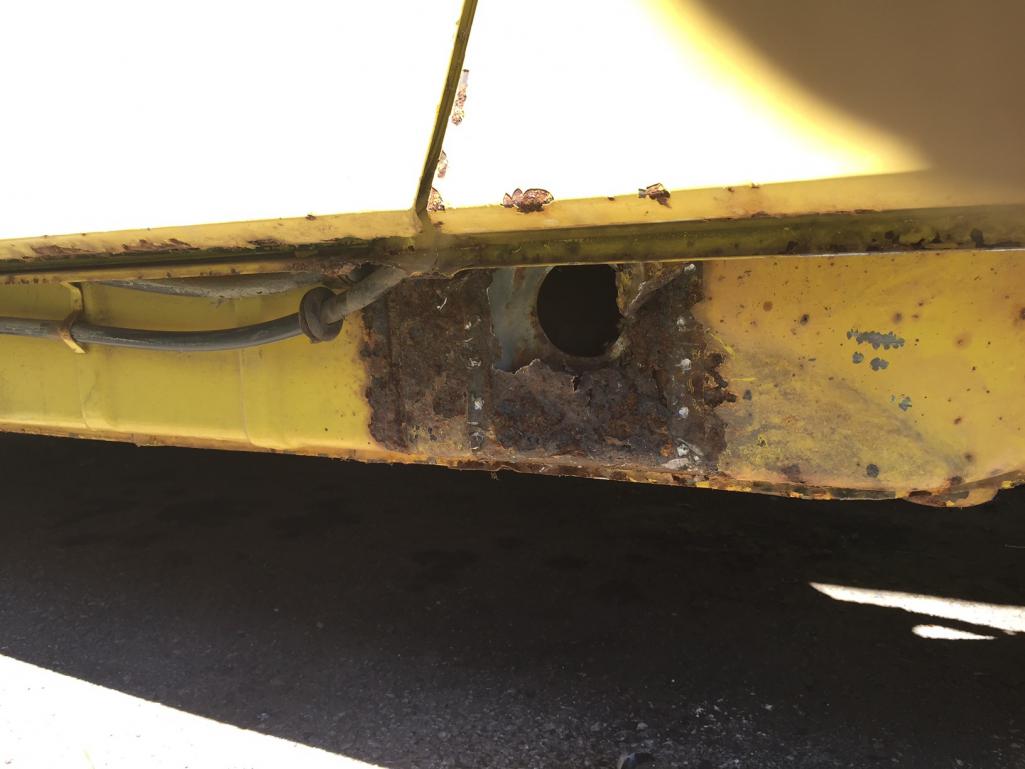
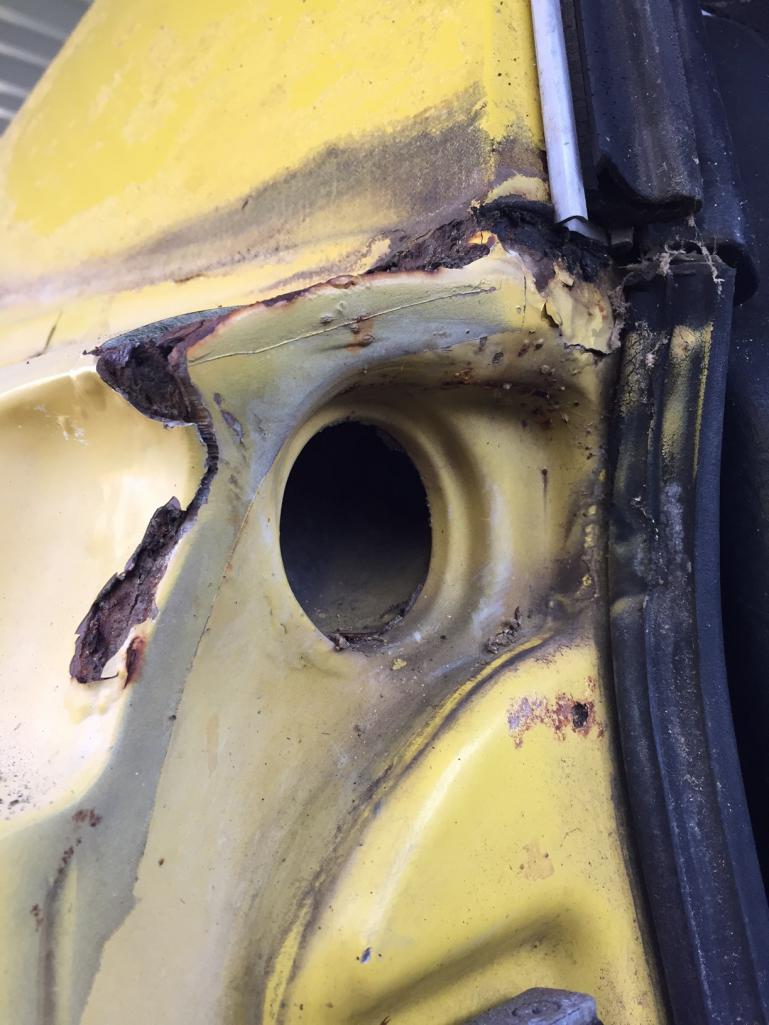
Well I started digging into some of the rust over the weekend. The plan was to replace both sail panels but after digging into it, I'm going to have to replace a little bit more. Both sail panels have rust in exactly same place so although I only cut open the driver's side I'm going to have to do the same things to passenger side. There's a small area on the inner sail support I will have to patch. The door jamb is rusted by the vent tube as well as down by the sill panel. I'm going to order new door jamb panels soon. I've done my fair share of panel forming but its much easier to just open up the wallet and buy replacement panels. I'll be removing the front of the fender which will give better access to the jackpoint too.
     |
| dlee6204 |
 Mar 30 2015, 06:23 PM Mar 30 2015, 06:23 PM
Post
#22
|
|
Howdy     Group: Members Posts: 2,162 Joined: 30-April 06 From: Burnsville, NC Member No.: 5,956 |
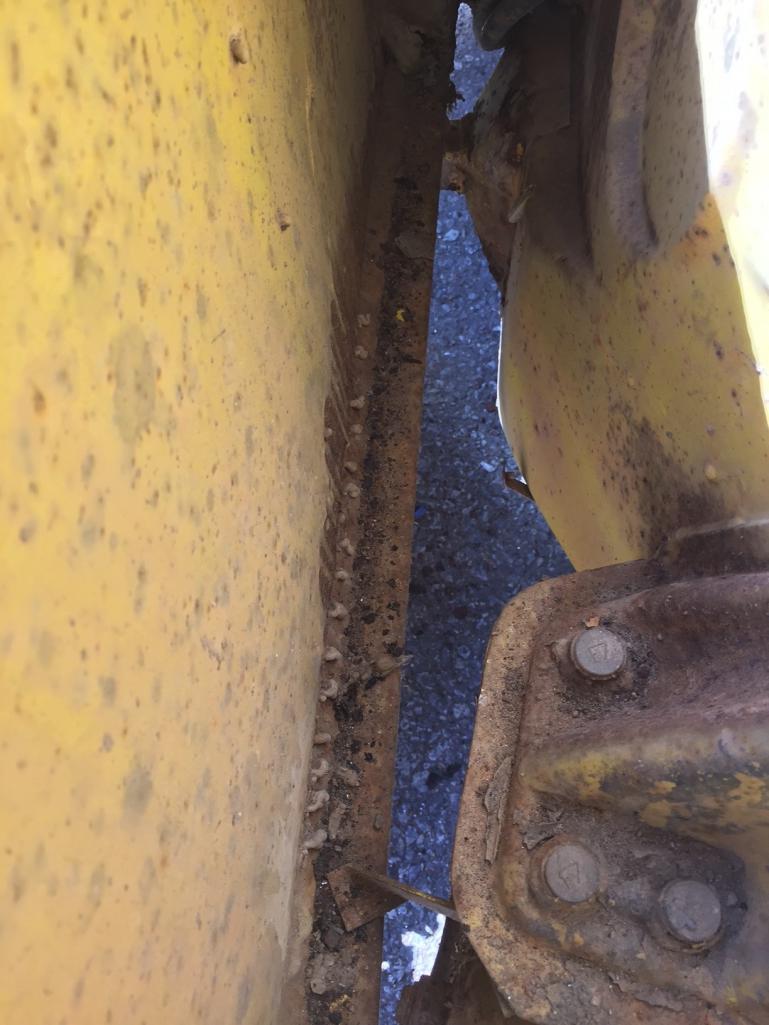
I also found some previous bodywork damage on the driver's side fender. Quite a few holes with filler. (IMG:style_emoticons/default/icon8.gif) Surprise!
 |
| dlee6204 |
 May 3 2015, 05:01 AM May 3 2015, 05:01 AM
Post
#23
|
|
Howdy     Group: Members Posts: 2,162 Joined: 30-April 06 From: Burnsville, NC Member No.: 5,956 |
|
| trojanhorsepower |
 May 3 2015, 07:24 AM May 3 2015, 07:24 AM
Post
#24
|
|
Senior Member    Group: Members Posts: 867 Joined: 21-September 03 From: Marion, NC Member No.: 1,179 Region Association: None |
Congrats Doug!
Where about is your new place? |
| dlee6204 |
 Jun 11 2015, 11:25 AM Jun 11 2015, 11:25 AM
Post
#25
|
|
Howdy     Group: Members Posts: 2,162 Joined: 30-April 06 From: Burnsville, NC Member No.: 5,956 |
Nevermind
|
| dlee6204 |
 Oct 18 2015, 06:09 PM Oct 18 2015, 06:09 PM
Post
#26
|
|
Howdy     Group: Members Posts: 2,162 Joined: 30-April 06 From: Burnsville, NC Member No.: 5,956 |
I finally had some time to get back to this project a little bit. Hoping to keep chugging away at it as part of the build-off.
I started by removing part of the fender on the driver's side. I had previously removed the sail panel area. I drilled all the spot welds to remove the piece. 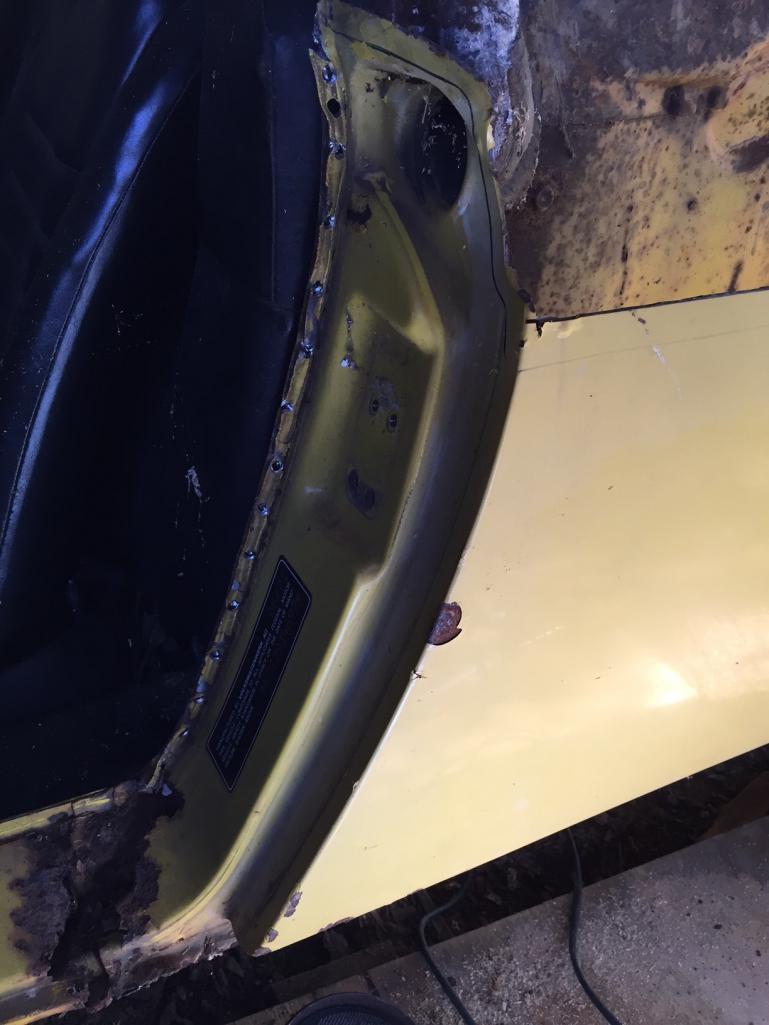 Now I have easy access to do the repairs. 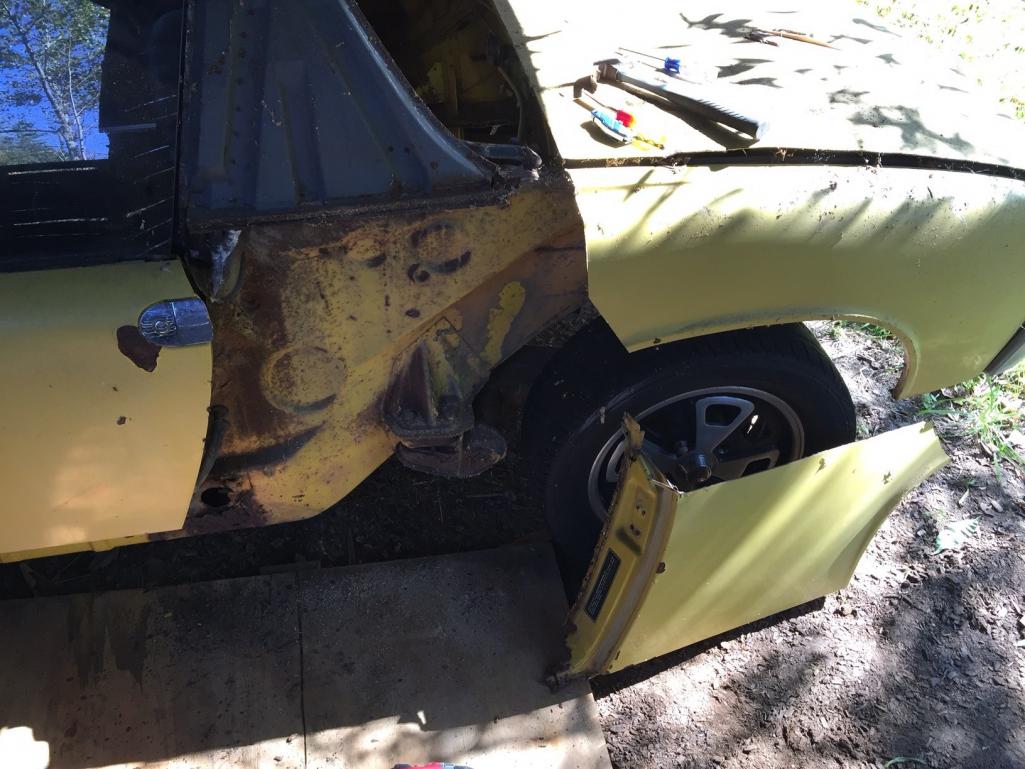 Here's what I'm working with for the jackpoint area. 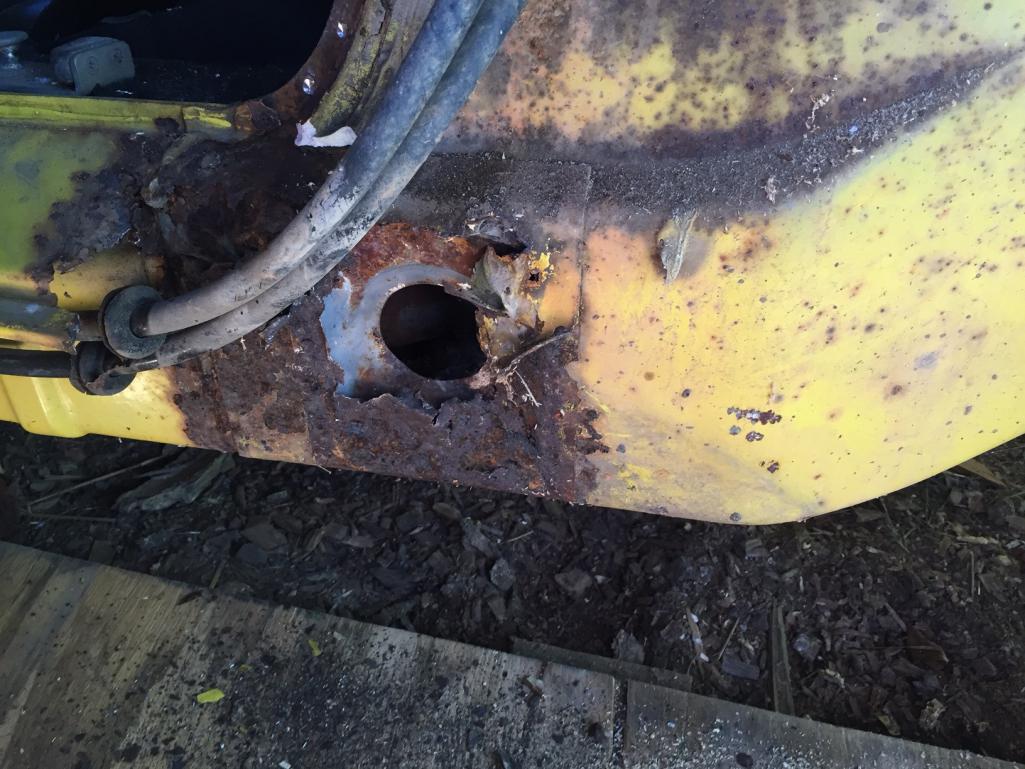 |
| dlee6204 |
 Oct 18 2015, 06:24 PM Oct 18 2015, 06:24 PM
Post
#27
|
|
Howdy     Group: Members Posts: 2,162 Joined: 30-April 06 From: Burnsville, NC Member No.: 5,956 |
I had to remove the bad material which meant more spot welds. I thought I would share how I drill out spot welds. I've never had good results with spot weld cutters so I just use simple drill bits. A 1/8" and 5/16", also a hammer and chisel. Nothing fancy.
I start by drilling through the first layer and into the second layer with the 1/8" bit. I do not drill all the way through. 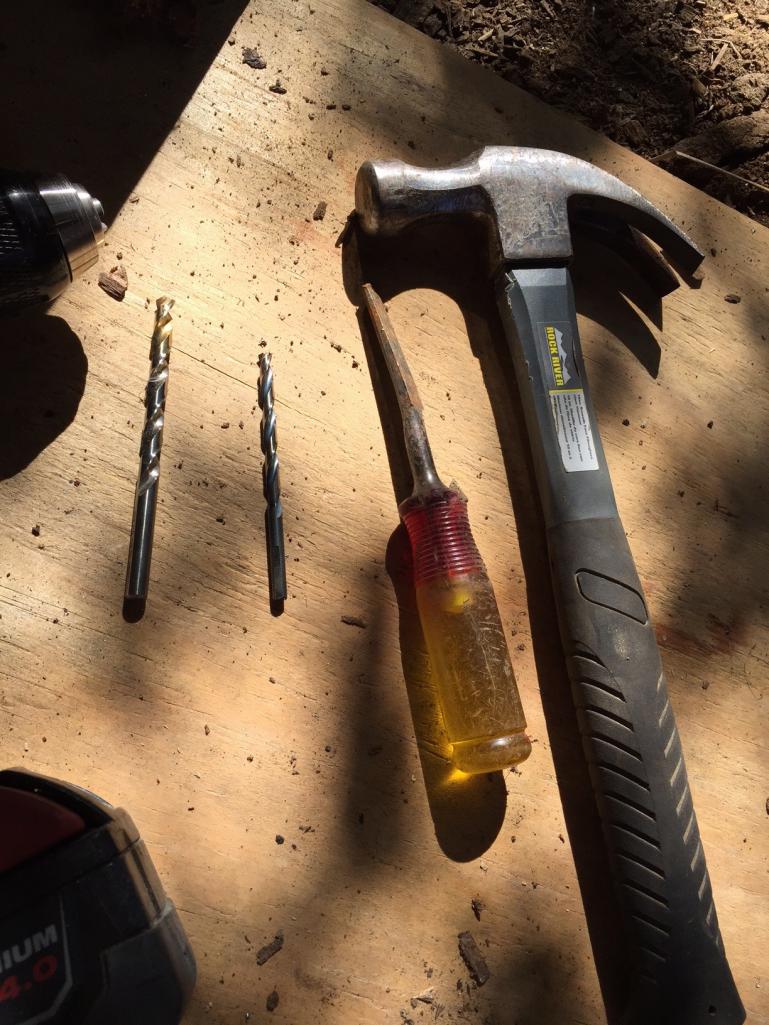 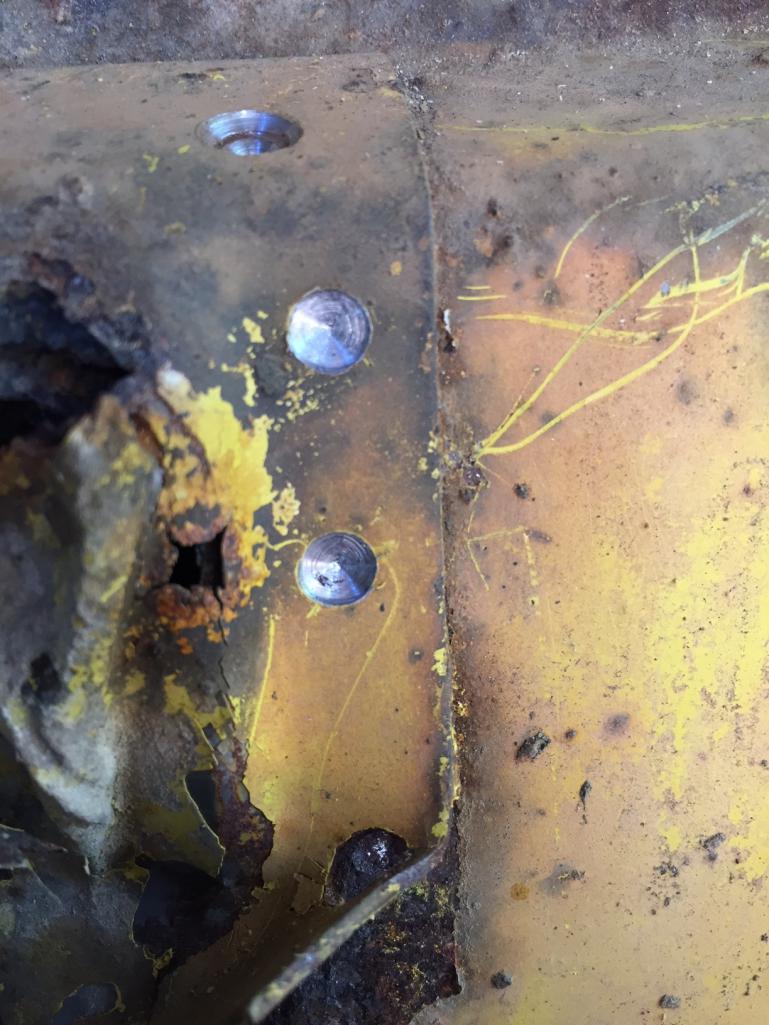 I then open up the little craters with the 5/16" bit. You know you successfully drilled the spot welds when you can clearly see an inner ring The metal separates very easily at this point. 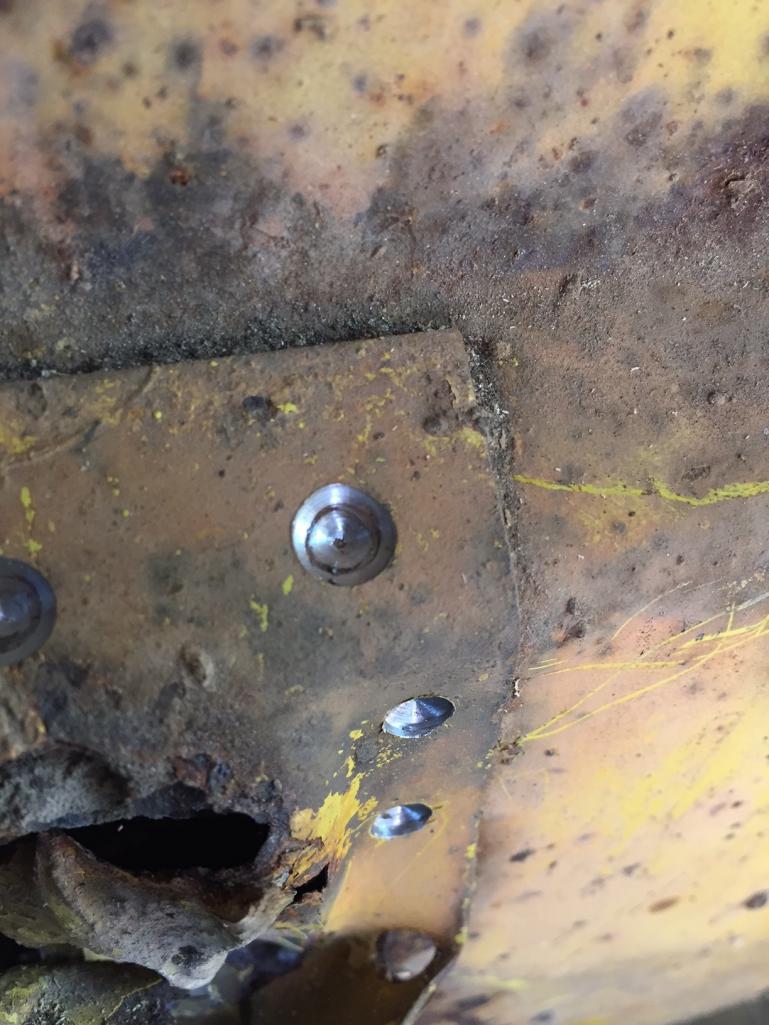 And all that's left is a small divot in the base layer. These can easily be filled later on if desired. 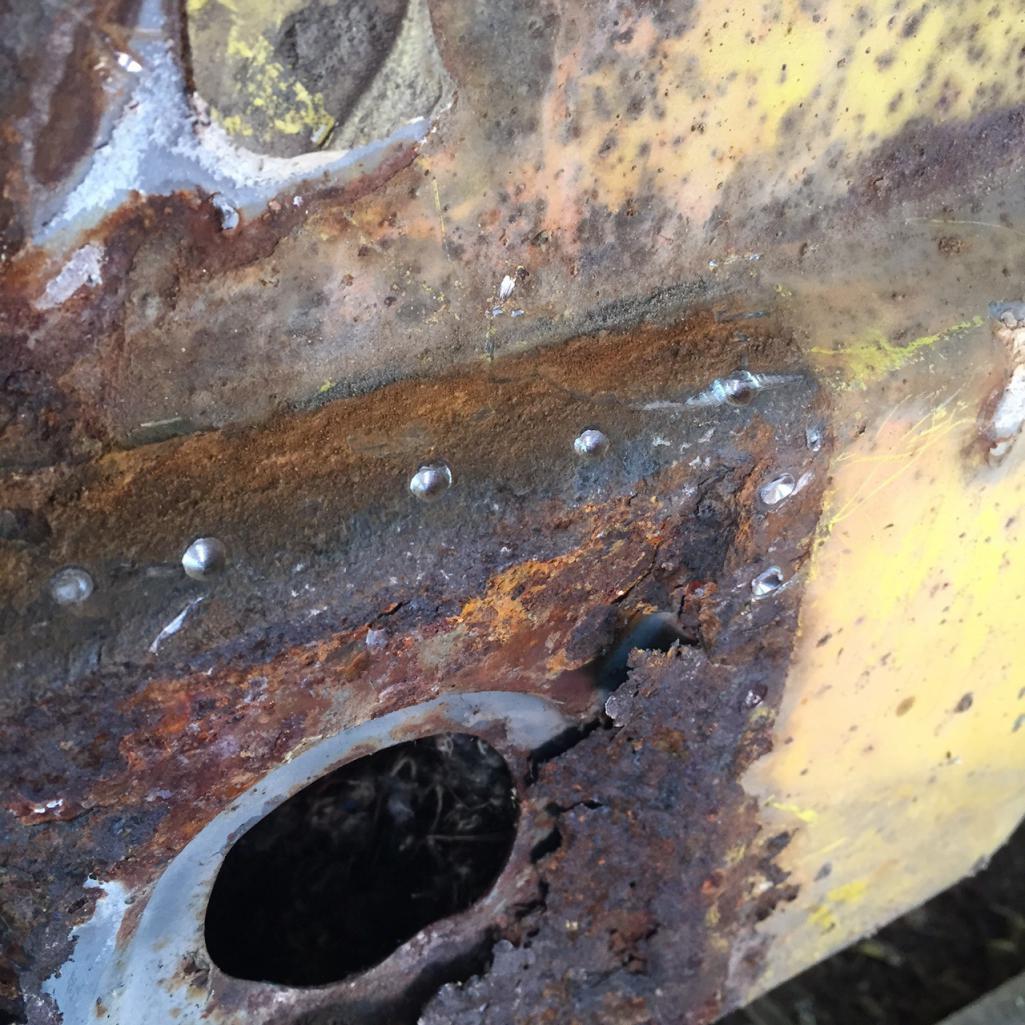 |
| dlee6204 |
 Oct 18 2015, 06:28 PM Oct 18 2015, 06:28 PM
Post
#28
|
|
Howdy     Group: Members Posts: 2,162 Joined: 30-April 06 From: Burnsville, NC Member No.: 5,956 |
So I used this technique to remove all the bad material from the jackpoint area. That part of the long is multiple layers thick so I only removed one layer. This was extremely important IMO because my inner layer of metal was still is good shape. There was no need to cut it out and risk structural integrity.
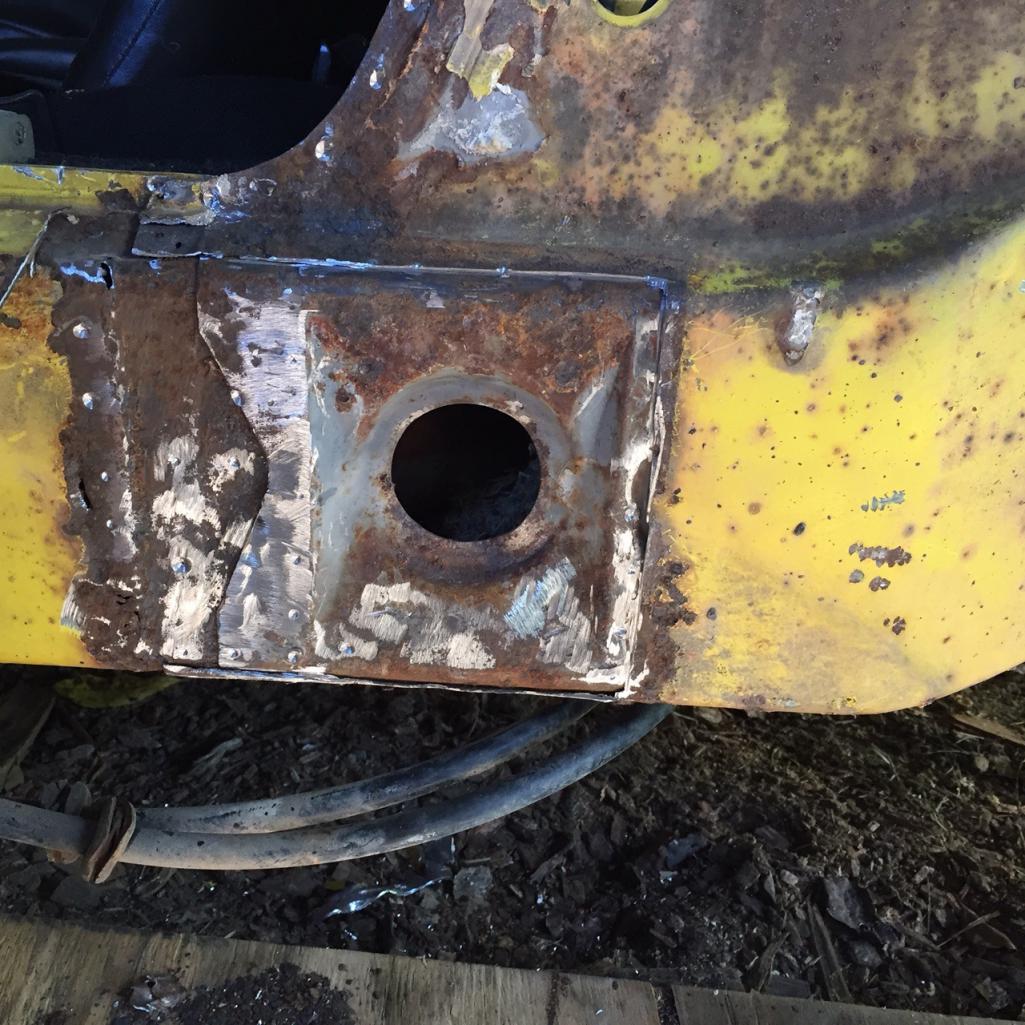 |
| Cairo94507 |
 Oct 19 2015, 06:56 AM Oct 19 2015, 06:56 AM
Post
#29
|
|
Michael           Group: Members Posts: 10,267 Joined: 1-November 08 From: Auburn, CA Member No.: 9,712 Region Association: Northern California 
|
(IMG:style_emoticons/default/popcorn[1].gif) Nice work.
|
| mrfourteen |
 Oct 19 2015, 07:24 AM Oct 19 2015, 07:24 AM
Post
#30
|
|
Member   Group: Members Posts: 74 Joined: 1-November 13 From: Oregon out in the Mozarks Member No.: 16,596 Region Association: Pacific Northwest |
Another yellow one in the Build Off.
Looks like a challenging build,but you seem to have it well in hand. East coast should get bonus points, or maybe a handicap system. (IMG:style_emoticons/default/smoke.gif) |
| dlee6204 |
 Feb 10 2016, 06:34 PM Feb 10 2016, 06:34 PM
Post
#31
|
|
Howdy     Group: Members Posts: 2,162 Joined: 30-April 06 From: Burnsville, NC Member No.: 5,956 |
So I am finally getting back to this build, between remodeling my house, my DD blowing its motor, vacation, etc. I have had zero extra time but things are finally smoothing out.
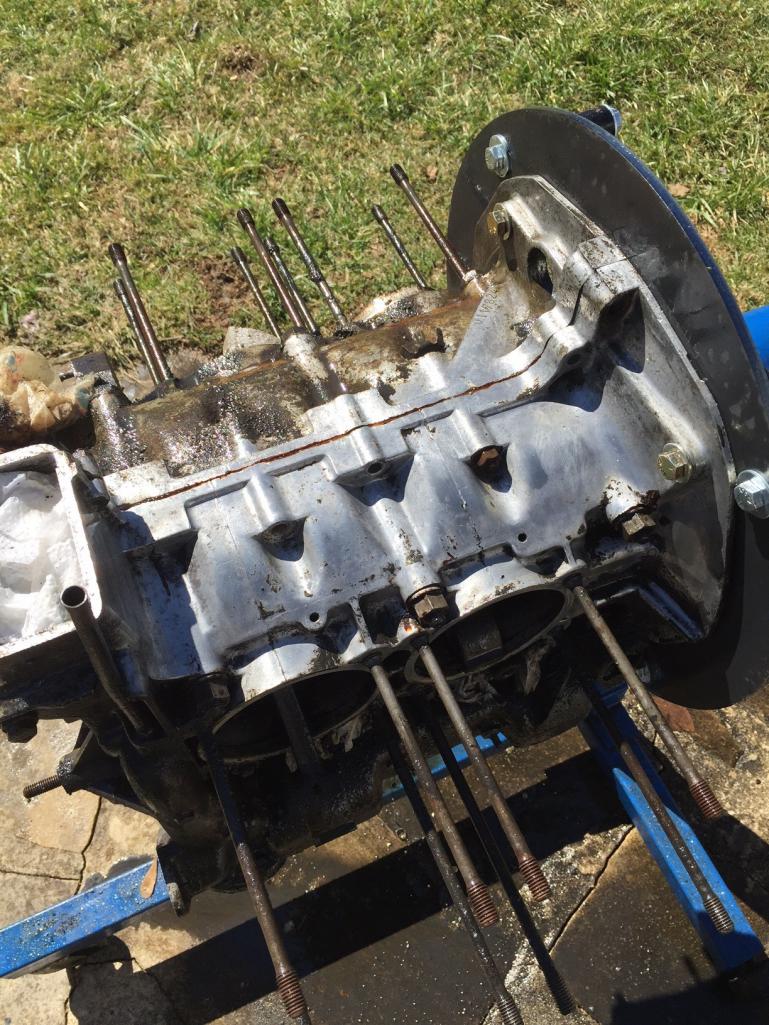
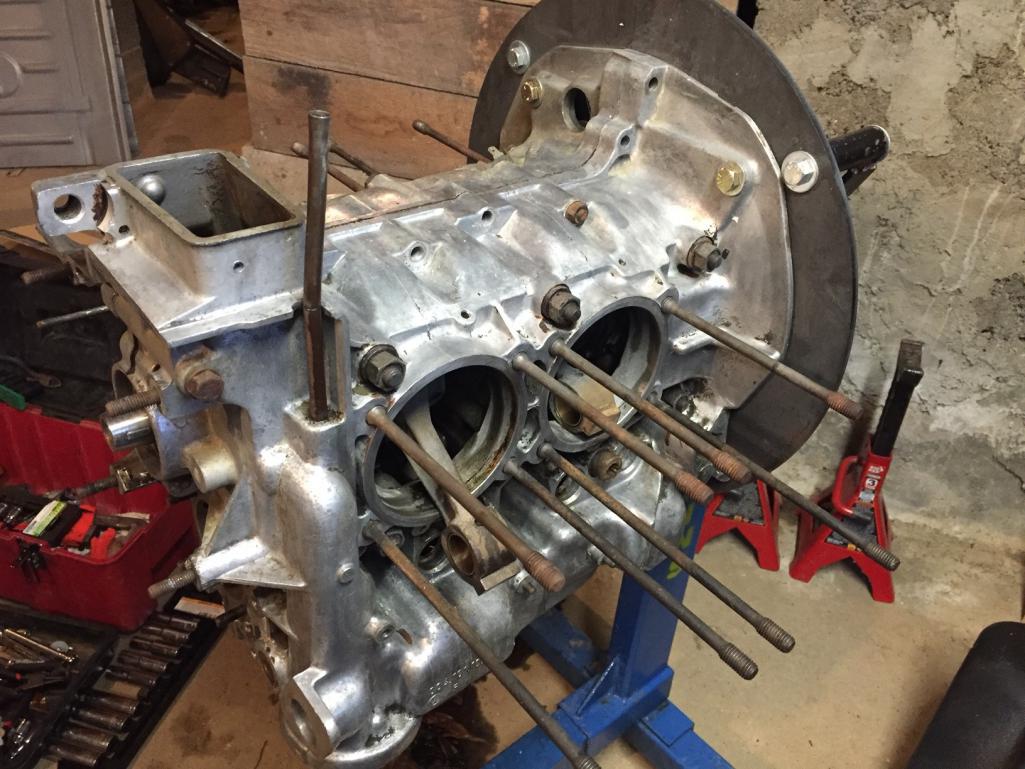
I got started today by getting the motor on the engine stand. I first had to make an adapter ring so that it could bolt up. I drew something up and got it cut out at work on the laser. Came out alright and it will serve its purpose. It was quite the chore it lift it by myself with oil spewing out of it but I got it done. 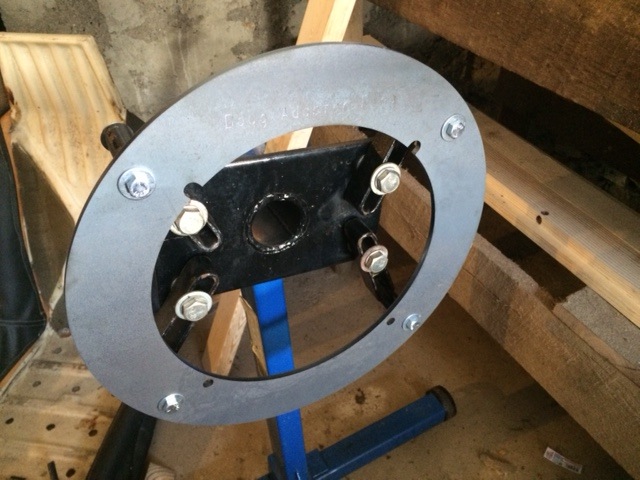 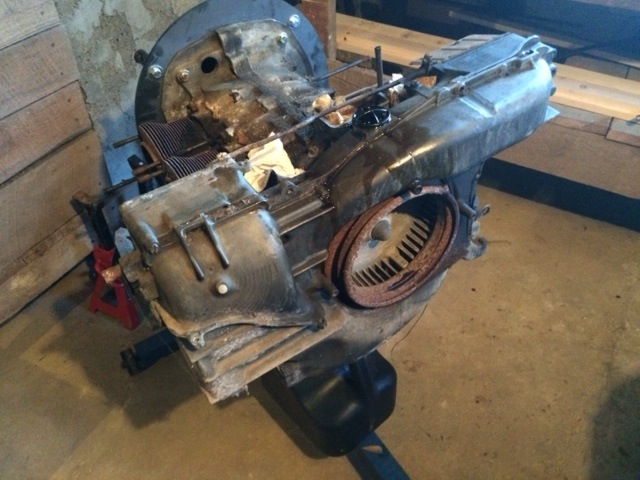 |
| dlee6204 |
 Feb 10 2016, 06:44 PM Feb 10 2016, 06:44 PM
Post
#32
|
|
Howdy     Group: Members Posts: 2,162 Joined: 30-April 06 From: Burnsville, NC Member No.: 5,956 |
Started to tear it down. The plan is to tear it all the way down without splitting the case, clean it, and simply refresh it with new rings and refurbish the heads.
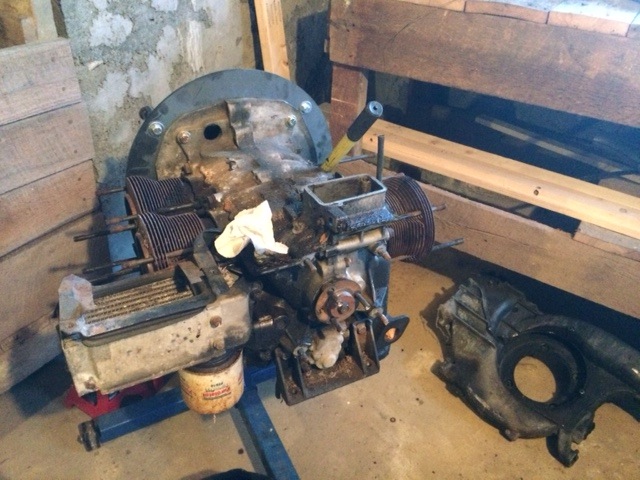 I couldn't find my oil wrench for the life of me so I had to improvise. 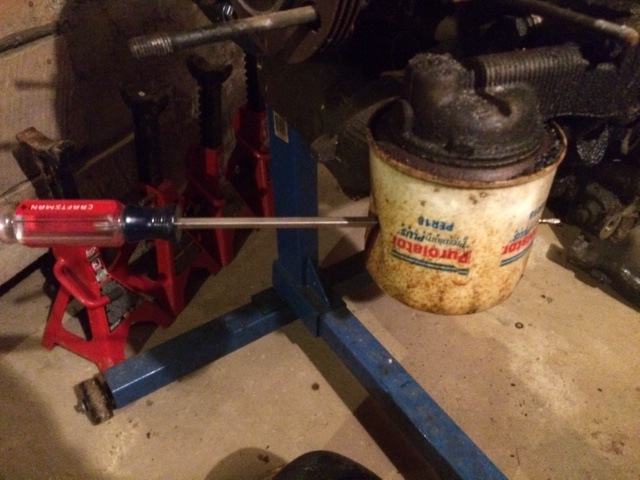 So it didn't appear that the engine had ever been rebuilt but upon removing the oil pump I found that the camshaft has bolts... My experience is that the stock cam has rivets. Can anyone confirm this? 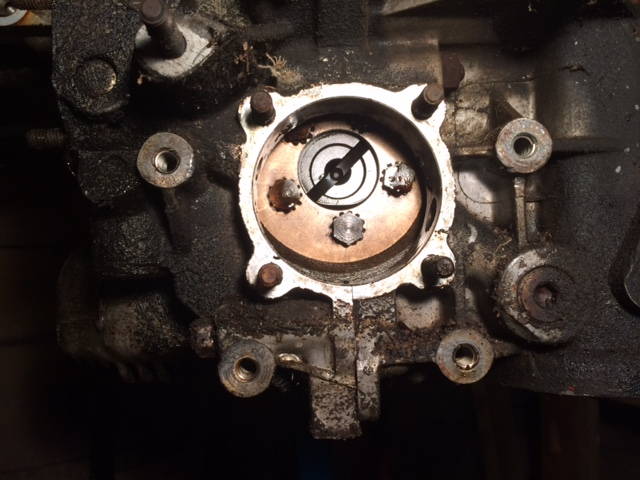 |
| dlee6204 |
 Feb 10 2016, 06:46 PM Feb 10 2016, 06:46 PM
Post
#33
|
|
Howdy     Group: Members Posts: 2,162 Joined: 30-April 06 From: Burnsville, NC Member No.: 5,956 |
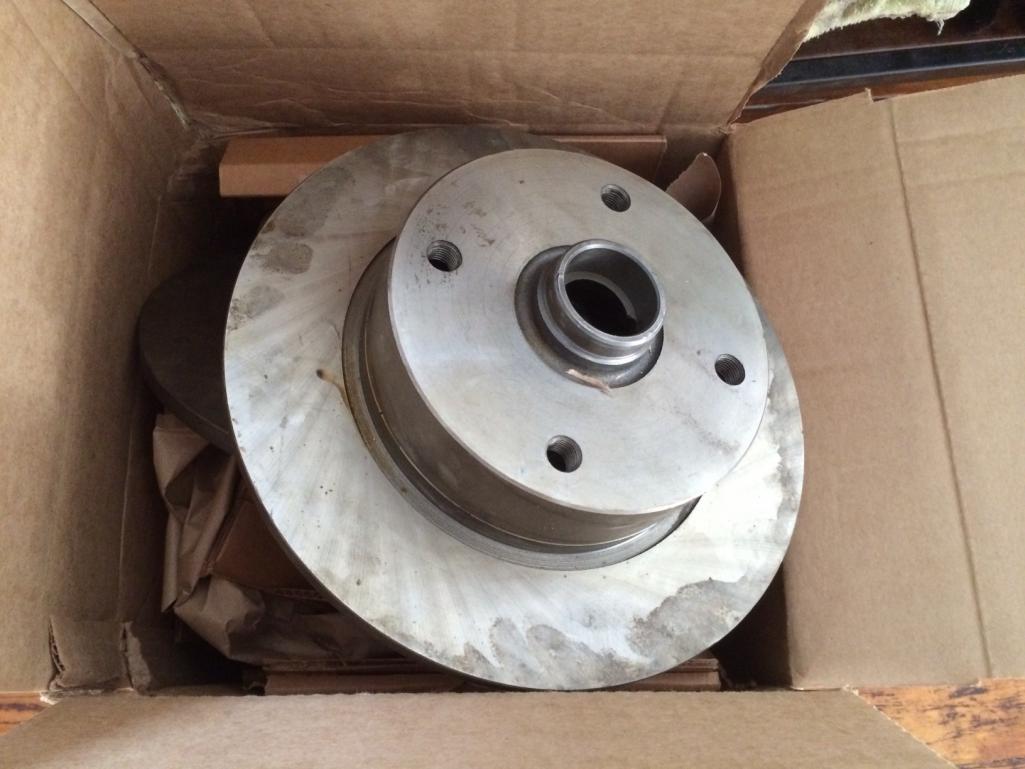
Also just because I haven't had time to work on the car, I still have been buying parts for it... mostly from 914Rubber
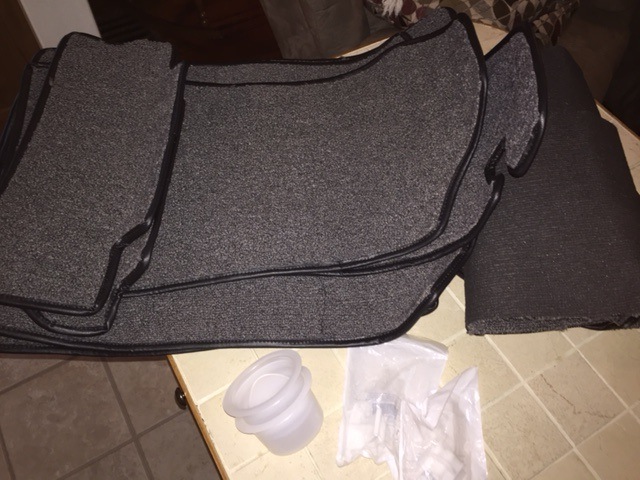 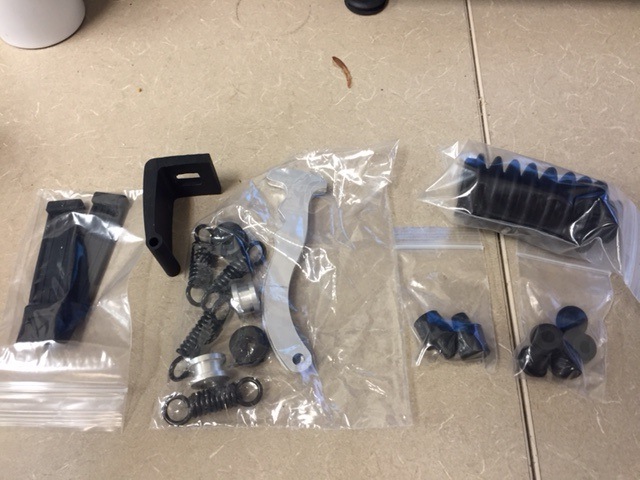 |
| dlee6204 |
 Feb 10 2016, 06:51 PM Feb 10 2016, 06:51 PM
Post
#34
|
|
Howdy     Group: Members Posts: 2,162 Joined: 30-April 06 From: Burnsville, NC Member No.: 5,956 |
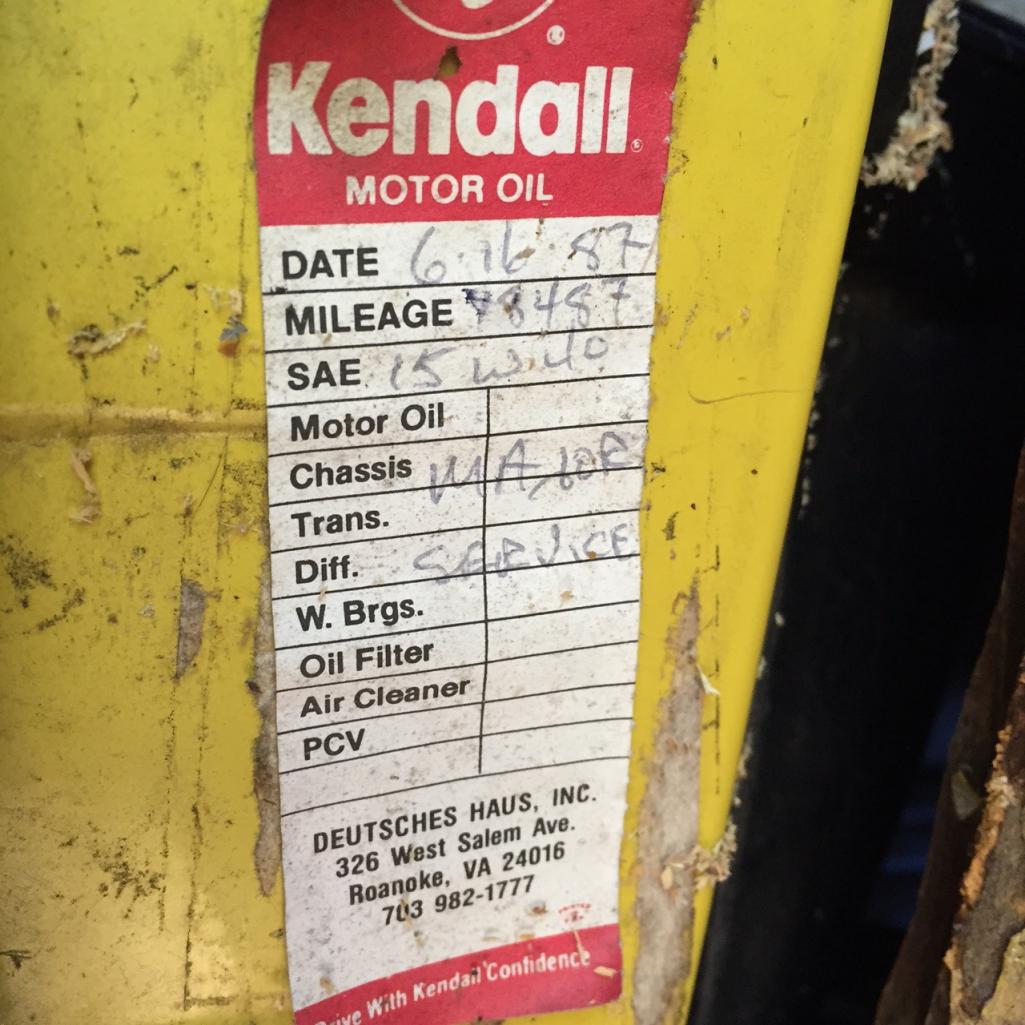
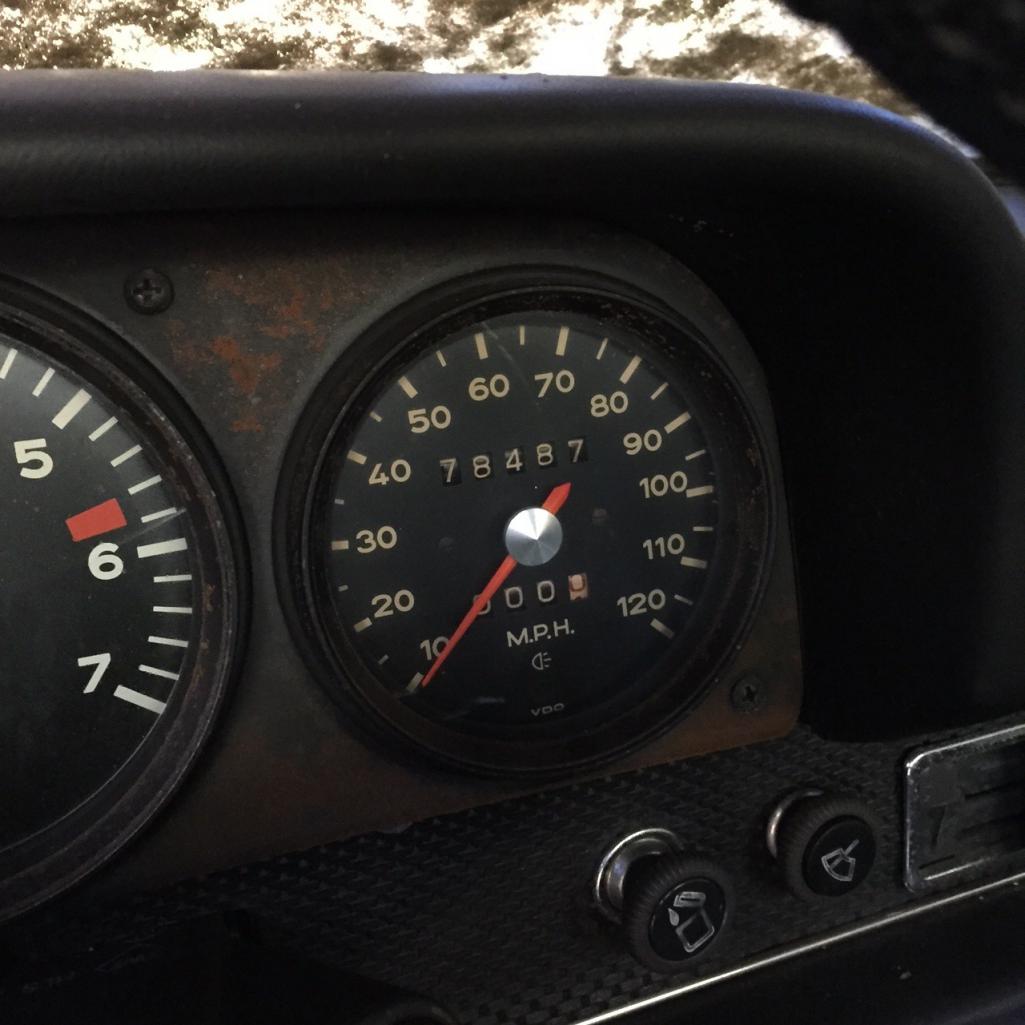
One more thing... I found out the speedometer is broken so it probably doesn't have 78K miles on it. (IMG:style_emoticons/default/blink.gif) (IMG:style_emoticons/default/laugh.gif)
  |
| Olympic 914 |
 Feb 11 2016, 11:46 AM Feb 11 2016, 11:46 AM
Post
#35
|
   Group: Members Posts: 1,725 Joined: 7-July 11 From: Pittsburgh PA Member No.: 13,287 Region Association: North East States 
|
Started to tear it down. The plan is to tear it all the way down without splitting the case, clean it, and simply refresh it with new rings and refurbish the heads.  So it didn't appear that the engine had ever been rebuilt but upon removing the oil pump I found that the camshaft has bolts... My experience is that the stock cam has rivets. Can anyone confirm this?  I'm sure the stock cam had rivets. I can't see a number on the end of the cam to give you an indication of what is in there, It may be stock and the PO just replaced the cam gear. Something is different looking about that cam gear. Not to want to spend your money for you, but, with the miles showing and broken speedo you may want to rethink not splitting the cases and refreshing the bearings. Plus gives you a chance to see what you really have.. Ya know, while you're in there. JMHO. nice looking longs, you were lucky there. |
| dlee6204 |
 Feb 11 2016, 01:57 PM Feb 11 2016, 01:57 PM
Post
#36
|
|
Howdy     Group: Members Posts: 2,162 Joined: 30-April 06 From: Burnsville, NC Member No.: 5,956 |
Started to tear it down. The plan is to tear it all the way down without splitting the case, clean it, and simply refresh it with new rings and refurbish the heads. [attachmentid=54035 So it didn't appear that the engine had ever been rebuilt but upon removing the oil pump I found that the camshaft has bolts... My experience is that the stock cam has rivets. Can anyone confirm this? [attachmentid=54036 I'm sure the stock cam had rivets. I can't see a number on the end of the cam to give you an indication of what is in there, It may be stock and the PO just replaced the cam gear. Something is different looking about that cam gear. Not to want to spend your money for you, but, with the miles showing and broken speedo you may want to rethink not splitting the cases and refreshing the bearings. Plus gives you a chance to see what you really have.. Ya know, while you're in there. JMHO. nice looking longs, you were lucky there. Yeah I don't really disagree with you on that. I'm going to give it a closer look tonight and go from there. Hopefully there would be some rebuild markings somewhere on it. |
| dlee6204 |
 Mar 1 2016, 07:35 PM Mar 1 2016, 07:35 PM
Post
#37
|
|
Howdy     Group: Members Posts: 2,162 Joined: 30-April 06 From: Burnsville, NC Member No.: 5,956 |
|
| dlee6204 |
 Mar 1 2016, 07:41 PM Mar 1 2016, 07:41 PM
Post
#38
|
|
Howdy     Group: Members Posts: 2,162 Joined: 30-April 06 From: Burnsville, NC Member No.: 5,956 |
|
| dlee6204 |
 Mar 23 2016, 11:13 AM Mar 23 2016, 11:13 AM
Post
#39
|
|
Howdy     Group: Members Posts: 2,162 Joined: 30-April 06 From: Burnsville, NC Member No.: 5,956 |
|
| dlee6204 |
 Apr 21 2016, 06:30 PM Apr 21 2016, 06:30 PM
Post
#40
|
|
Howdy     Group: Members Posts: 2,162 Joined: 30-April 06 From: Burnsville, NC Member No.: 5,956 |
Finally some more progress!
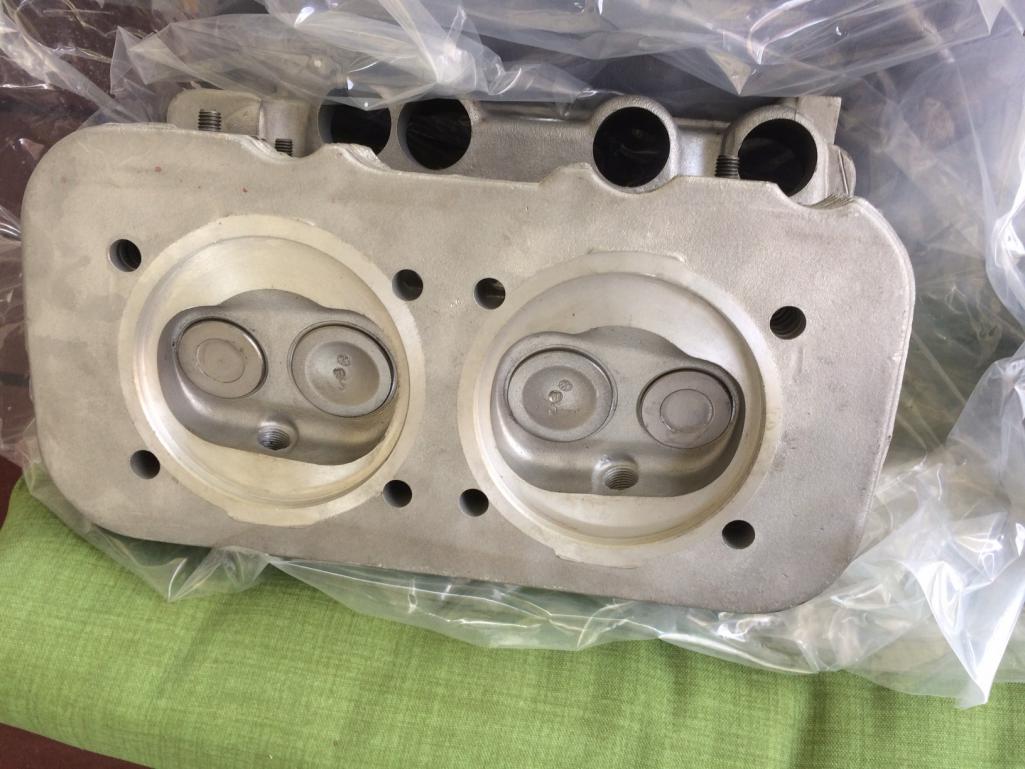
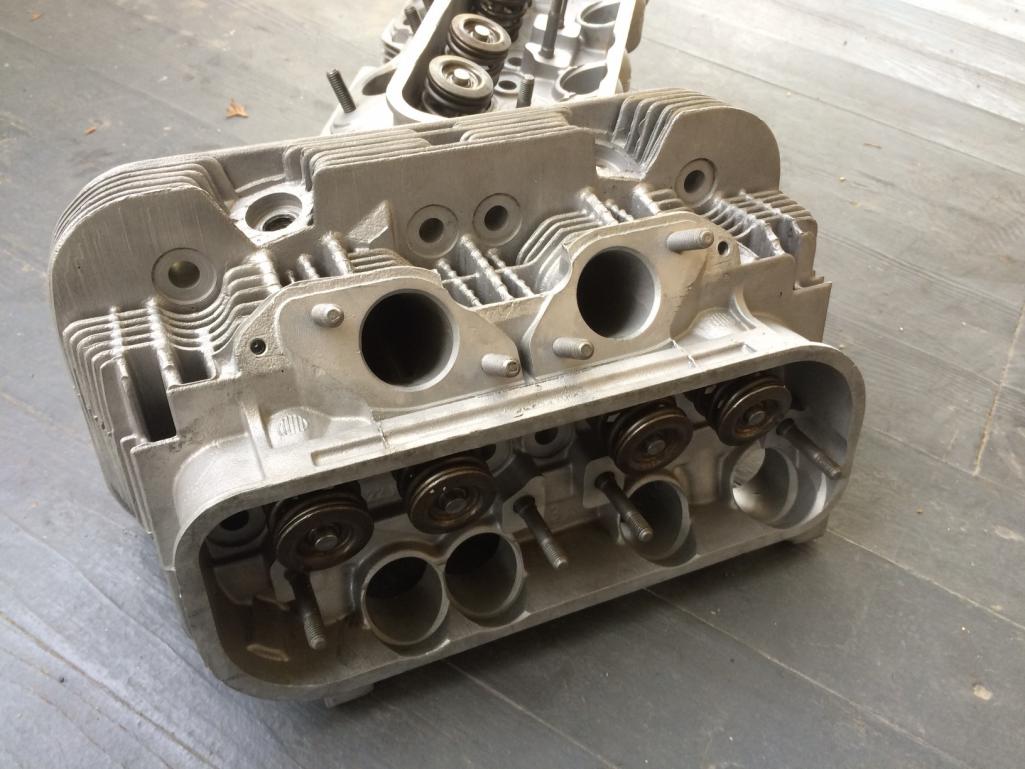
Originally I hoped to just refresh the top end of the motor but upon checking out the motor some more, I decided to go ahead and split the case. There was a nice thick layer of sludge on the bottom so I'm glad I did. Overall the motor was in pretty good shape though. All bearing surfaces looked great and there were no hidden surprises so the plan now is to clean everything up, replace bearings, and start assembly. I also took advantage of the situation and replaced the 5 main galley plugs. 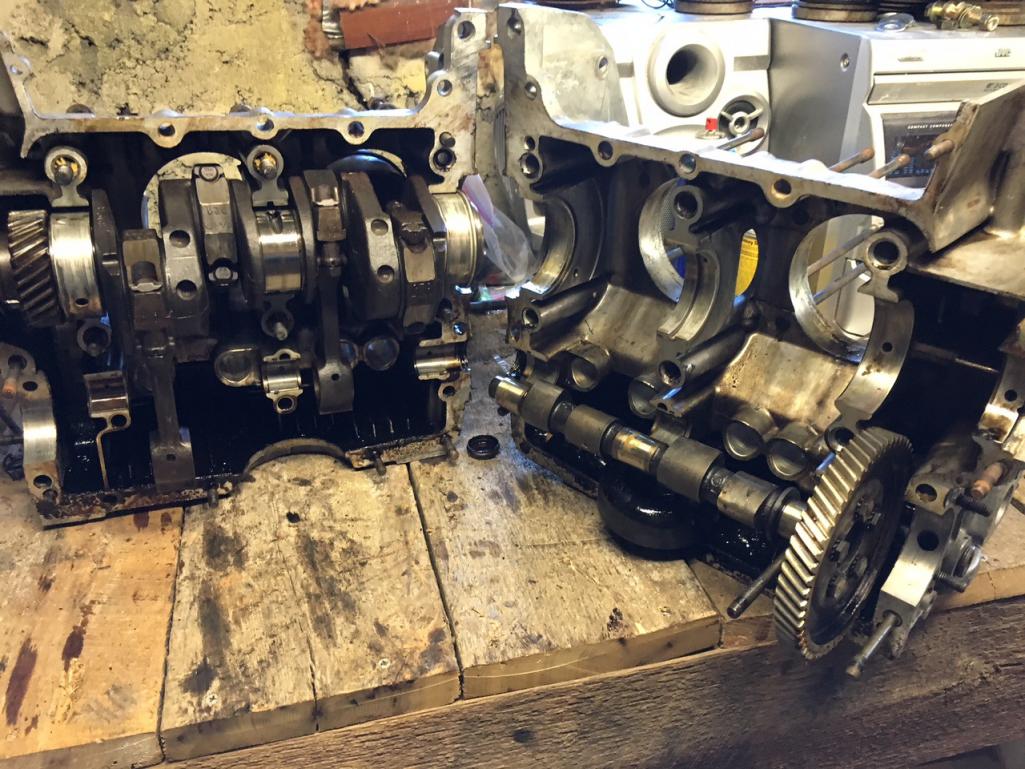 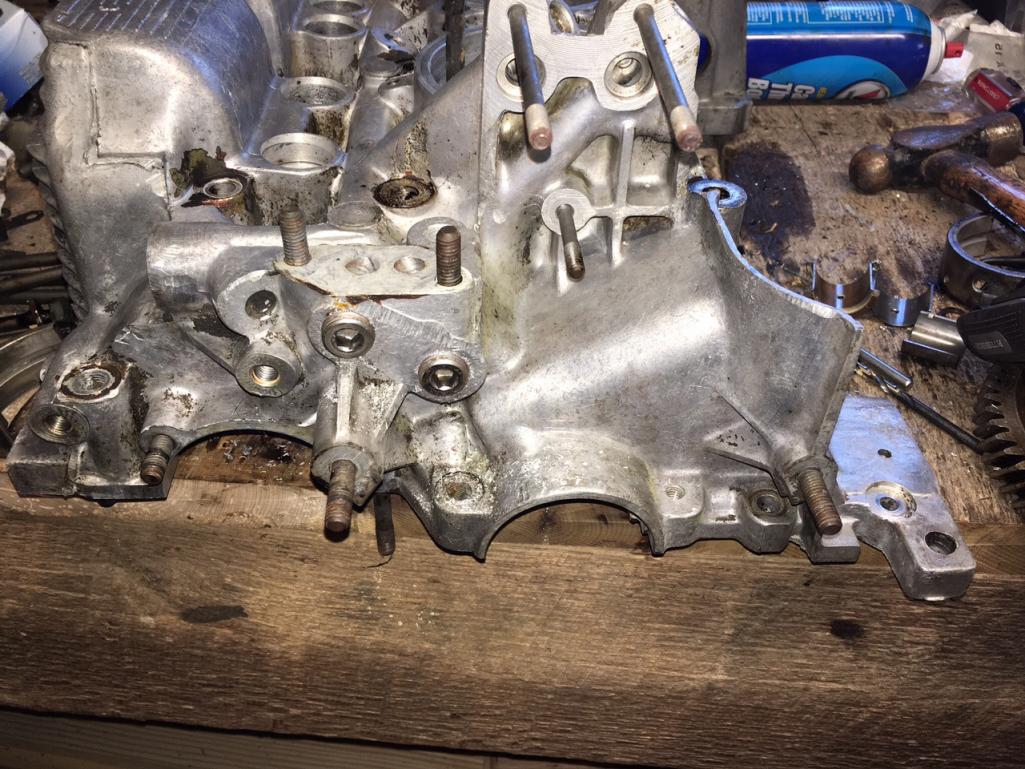 |
  |
1 User(s) are reading this topic (1 Guests and 0 Anonymous Users)
0 Members:

|
Lo-Fi Version | Time is now: 2nd April 2025 - 02:07 AM |
Invision Power Board
v9.1.4 © 2025 IPS, Inc.


