|
|

|
Porsche, and the Porsche crest are registered trademarks of Dr. Ing. h.c. F. Porsche AG.
This site is not affiliated with Porsche in any way. Its only purpose is to provide an online forum for car enthusiasts. All other trademarks are property of their respective owners. |
|
|
  |
| Lucky9146 |
 Aug 21 2017, 10:21 PM Aug 21 2017, 10:21 PM
Post
#141
|
|
Always Wanted A Bigger Go Cart    Group: Members Posts: 1,675 Joined: 22-September 14 From: Poway California Member No.: 17,942 Region Association: Southern California 
|
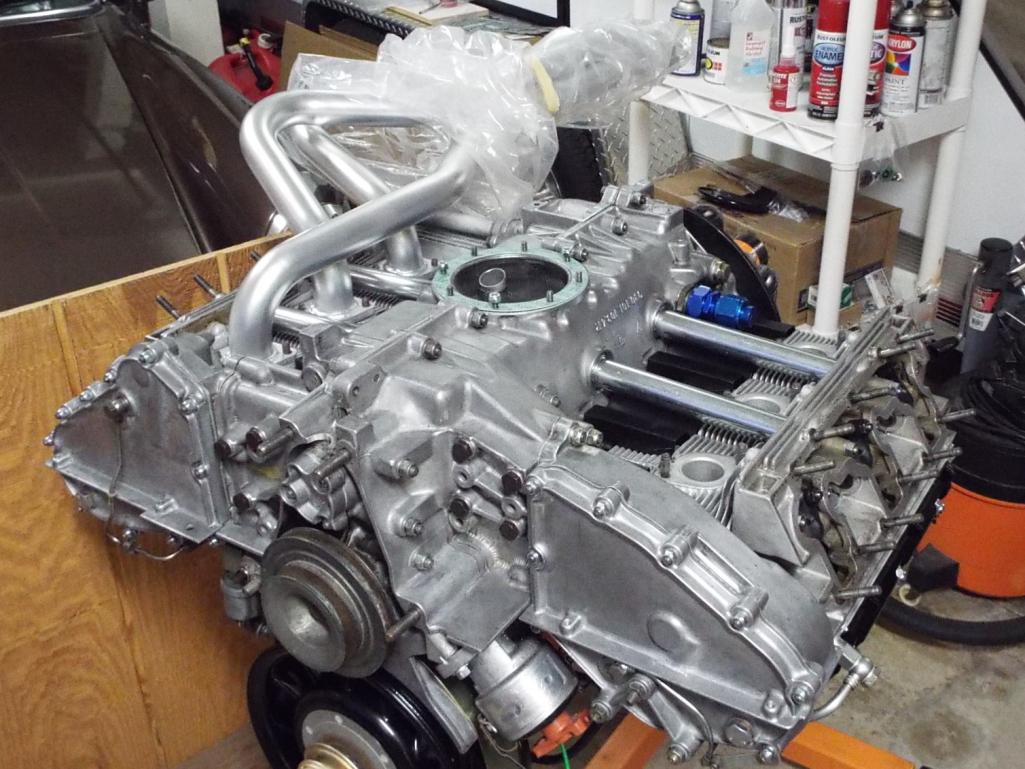
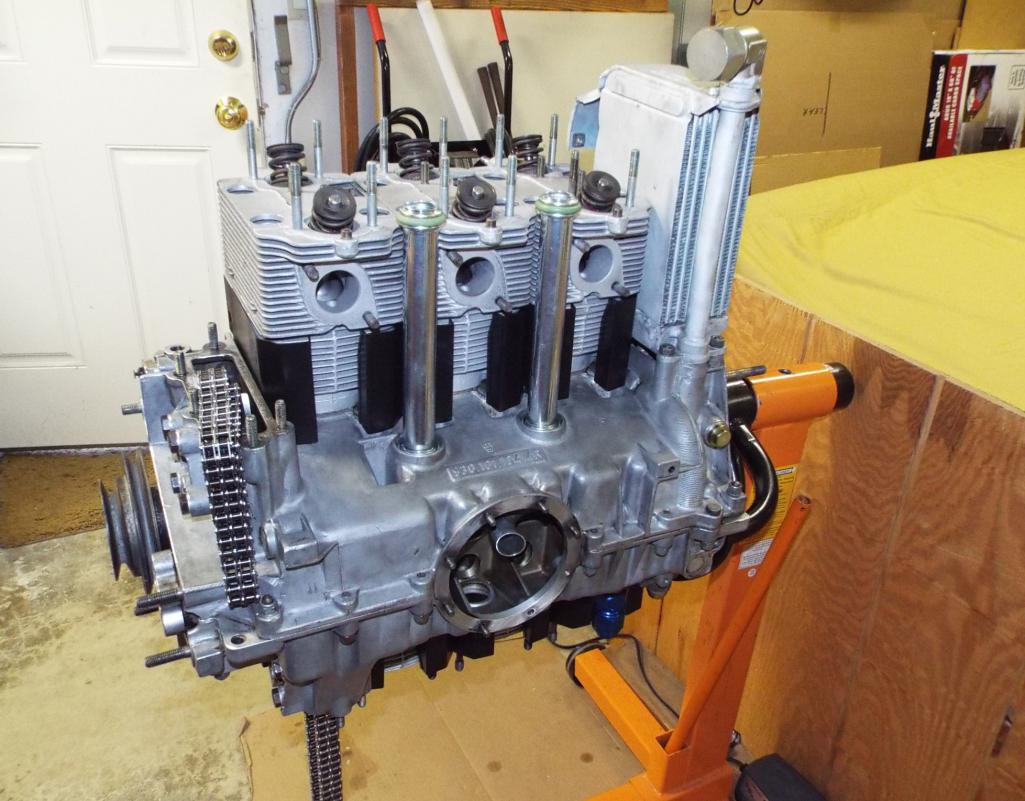
Heads on and temporary install of the oil cooler for the cam tower install. This allows you to make sure the heads are lined up on that side for head to oil cooler clearance when assembling the cam towers. There is just the slightest bit of play in the heads, so why not? Another tip from Porsche engine builder friend of mine.
 Cam tower on, and I wish I had thought to take a pic of how much (really how little) Locktite 472 to be put on. Missed pic on both sides!! UGH! There is a lot going on at this point though with the Locktite 574, 2 lubricated oil drain tubes, and 6 pins in the three heads to line up, and a host of studs, it is easy to forget the camera even moving at the snail pace I am. 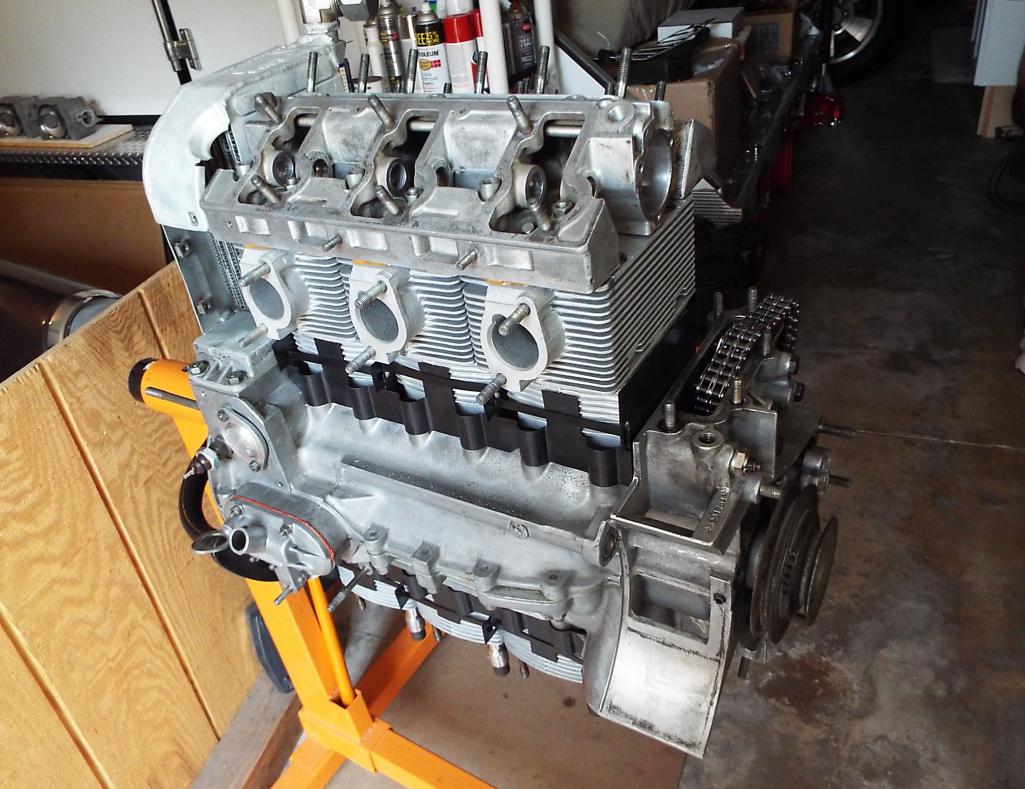 Funny, the build book says the way to check proper installation of the cam towers is to try the cam and see if it turns freely. Yikes!... and re-torque if necessary. Really? Well good news on mine, both sides!! Good to go! 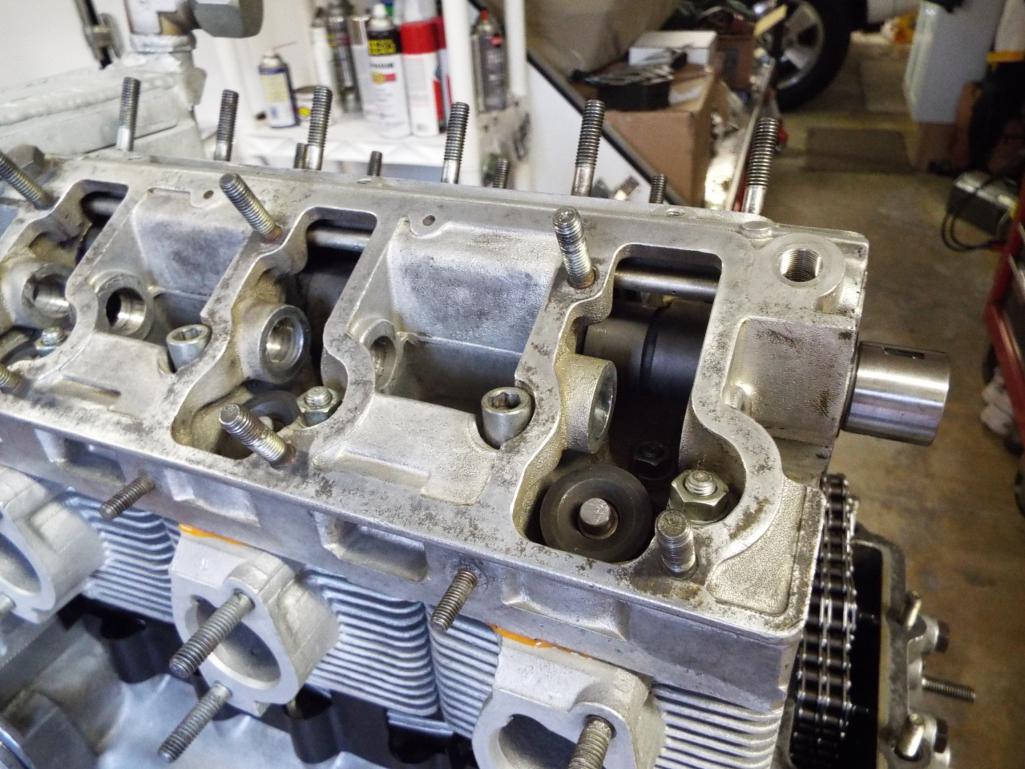 Starting to look like an engine again.... 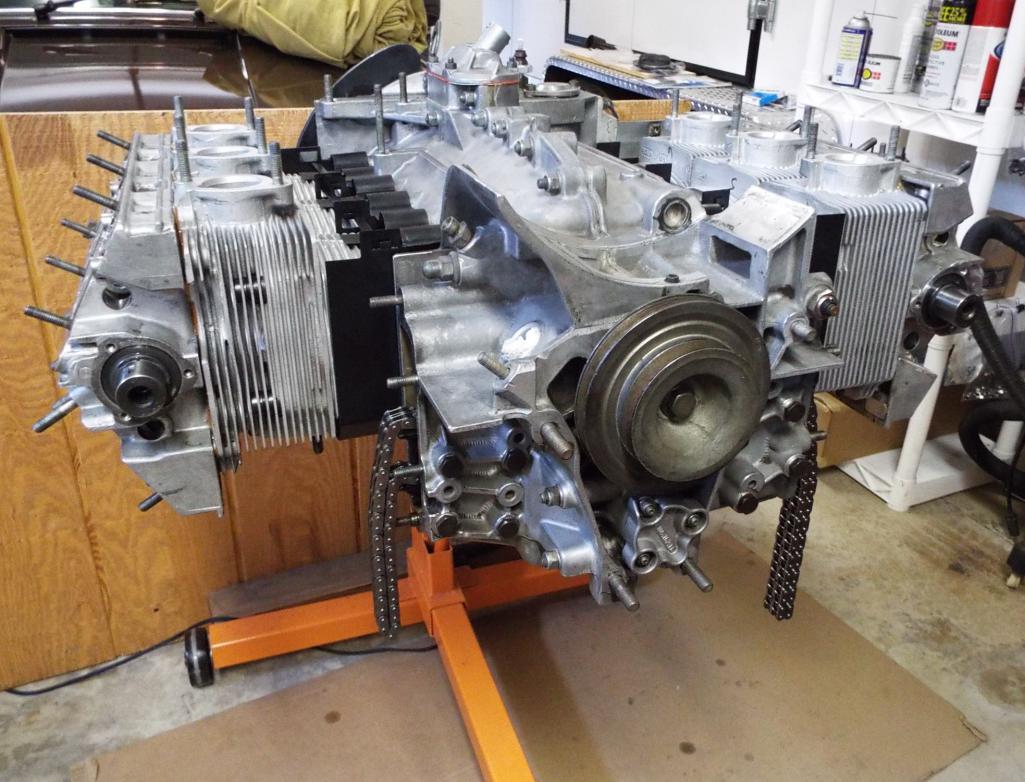 |
| Lucky9146 |
 Aug 24 2017, 07:59 AM Aug 24 2017, 07:59 AM
Post
#142
|
|
Always Wanted A Bigger Go Cart    Group: Members Posts: 1,675 Joined: 22-September 14 From: Poway California Member No.: 17,942 Region Association: Southern California 
|
Had a lot of problems with the Dougherty DC40 cams as they punched the front end to mark the key way DC40 right in the end of the front of the cam.
That punch marks, which took me quite a while to figure out, deformed material on the front of the shaft that would not allow the timing gear to go on or the sprocket for that matter. It was as though the ends of the cams were mushroomed. After dickin with the cams for hours I alerted John Dougherty they were putting the punch too close to the O.D. and raising material. He was surprised and was going to make a change to his process. So I either had to return (more lost time) or hand dress them myself, which I chose to do. 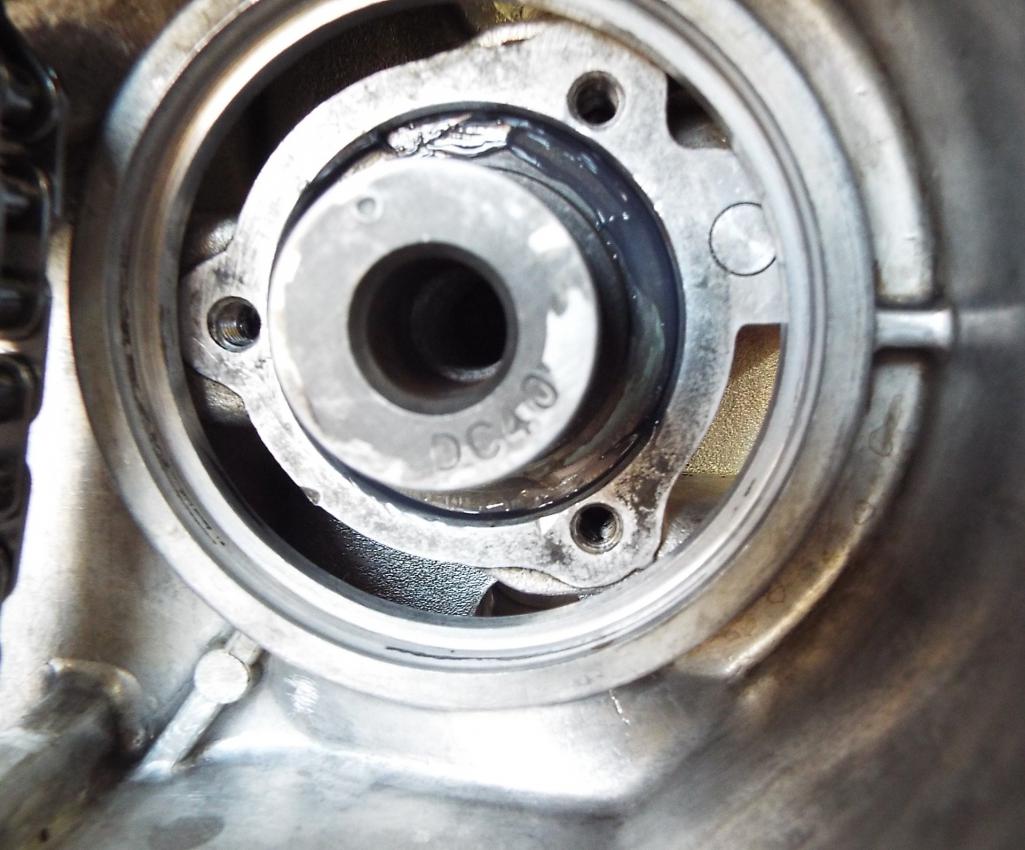 Reconditioned chain tensioner arms with the upgraded integral spacer makes for a much wider bearing surface. Old and new shown here. Pricey improvement but the original arms were galled and had no brass bushing. Really had no choice but now I have a much improved nice wide bronze bushing and spacer! Again these were exchange from Supertec through Ken at 911 Vintage in Fallbrook. 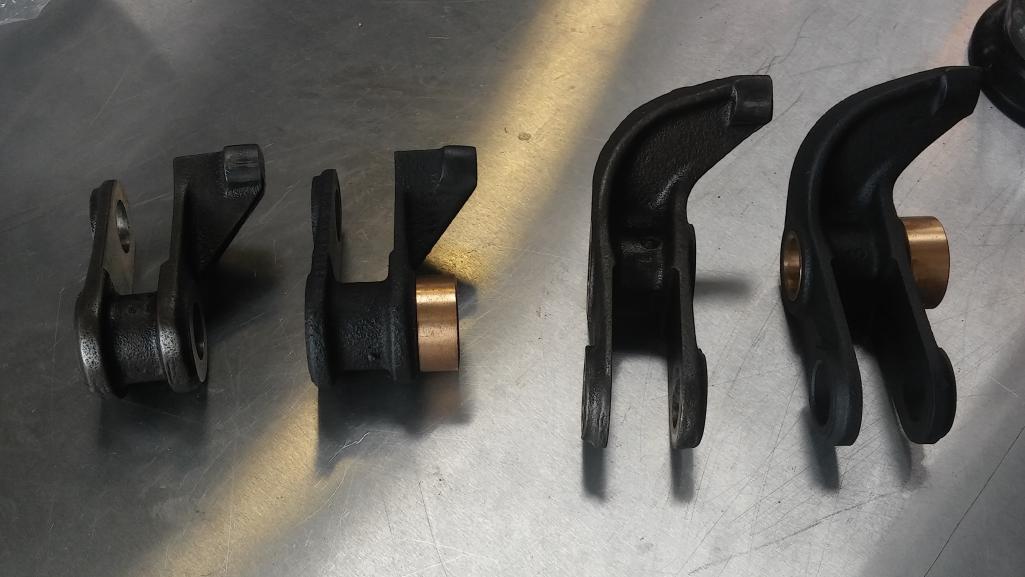 Ready to set the chain timing! 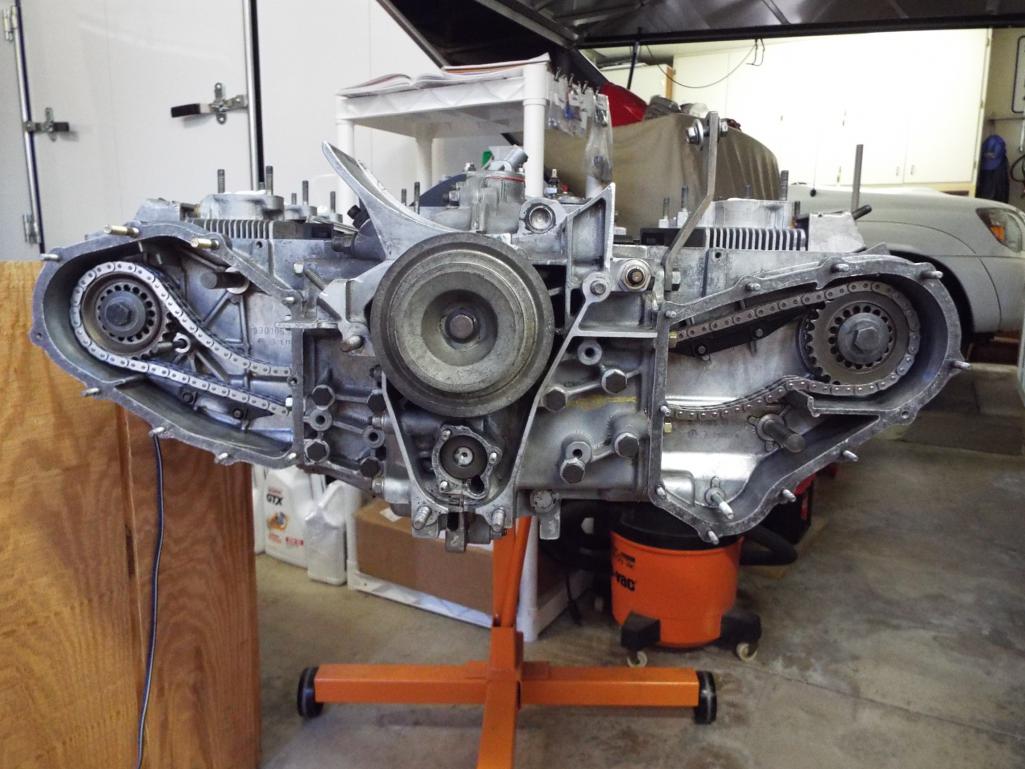 |
| Lucky9146 |
 Aug 24 2017, 12:05 PM Aug 24 2017, 12:05 PM
Post
#143
|
|
Always Wanted A Bigger Go Cart    Group: Members Posts: 1,675 Joined: 22-September 14 From: Poway California Member No.: 17,942 Region Association: Southern California 
|
So now with the timing set, and lucky for me that I happen to know one of the best Porsche engine guys in San Diego, I am ready to finish build this puppy. I feel comfortable building the engine alright but the cam timing with the Dougherty Cams is another story. There was a trick to setting it and we figured it out because it behaved differently than a regular Porsche cam due to the lift. This guru also helped me with the cam timing on my SC motor as well and that sucker runs like a watch. There are little nuances you can do with setting cam timing and you don’t read that in a book!
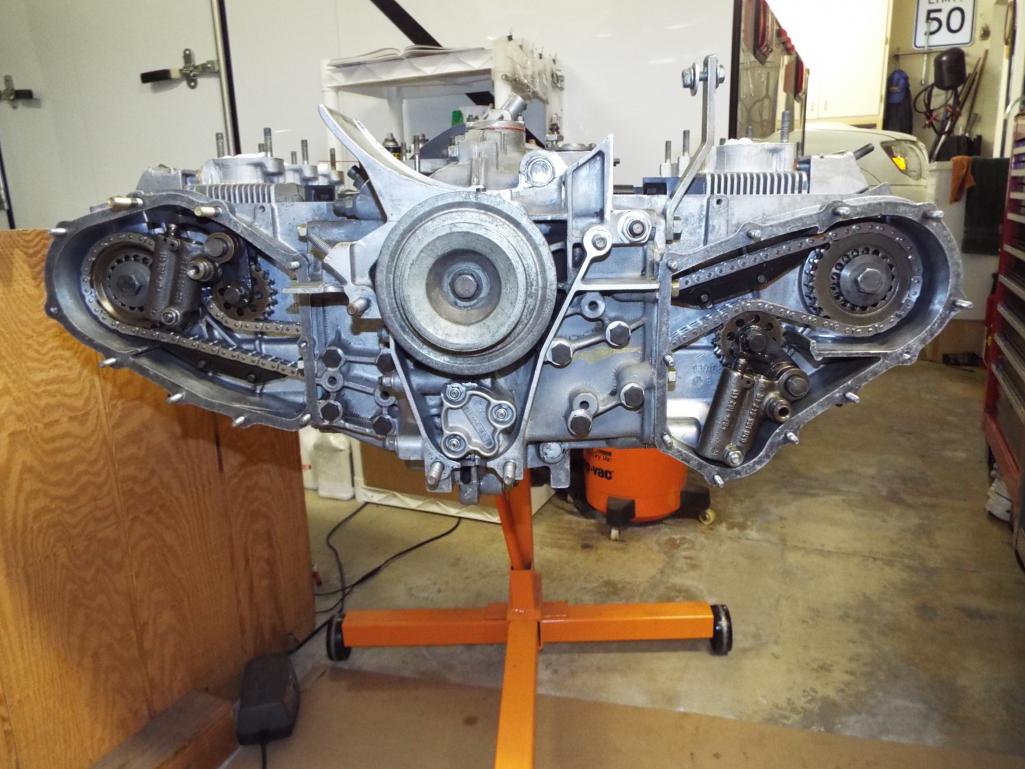 Chain housing covers installed after sanding them for flatness. Buttoning it up! Then the chain tensioner oil lines were the next order of business. Might seem like a simple thing but cleaning up all the fittings, flushing, and then having to re-bend both the larger and the smaller feed lines on both sides took the day! You see a small bend in the larger line relocates the fitting for the intersecting smaller line and so a bend in the one results is needing to bend the other. Fun. Looked like the metal line segments, having been installed at angles as shown in the before picture, was putting stress on the rubber hose part of the larger line. Before 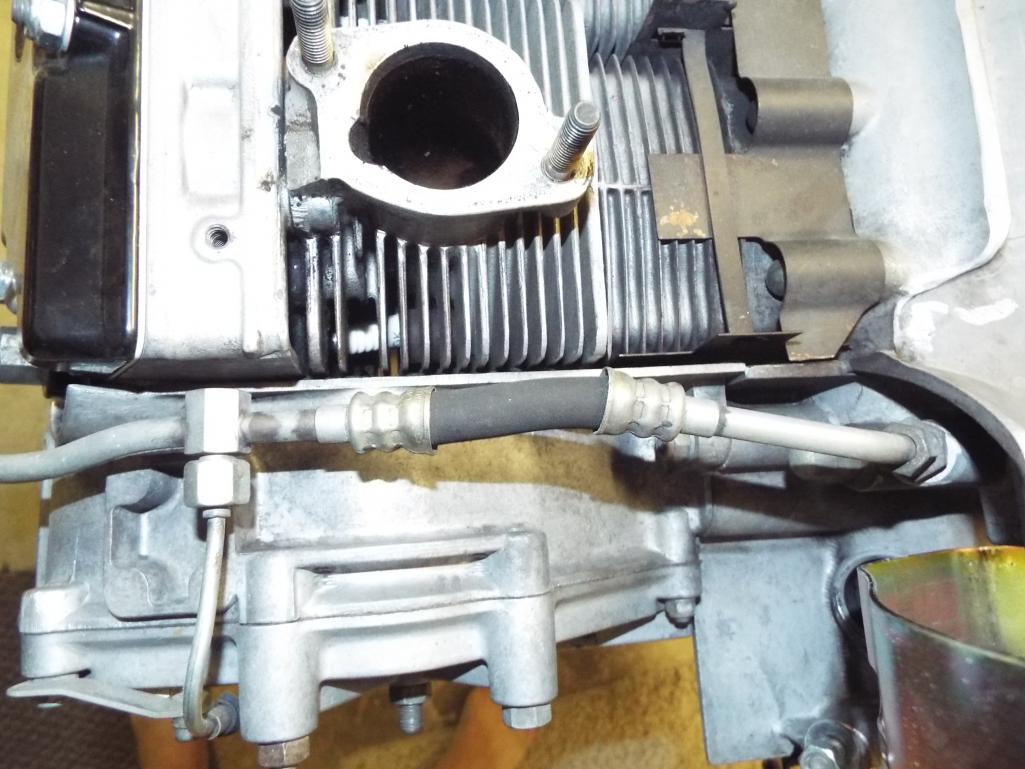 After 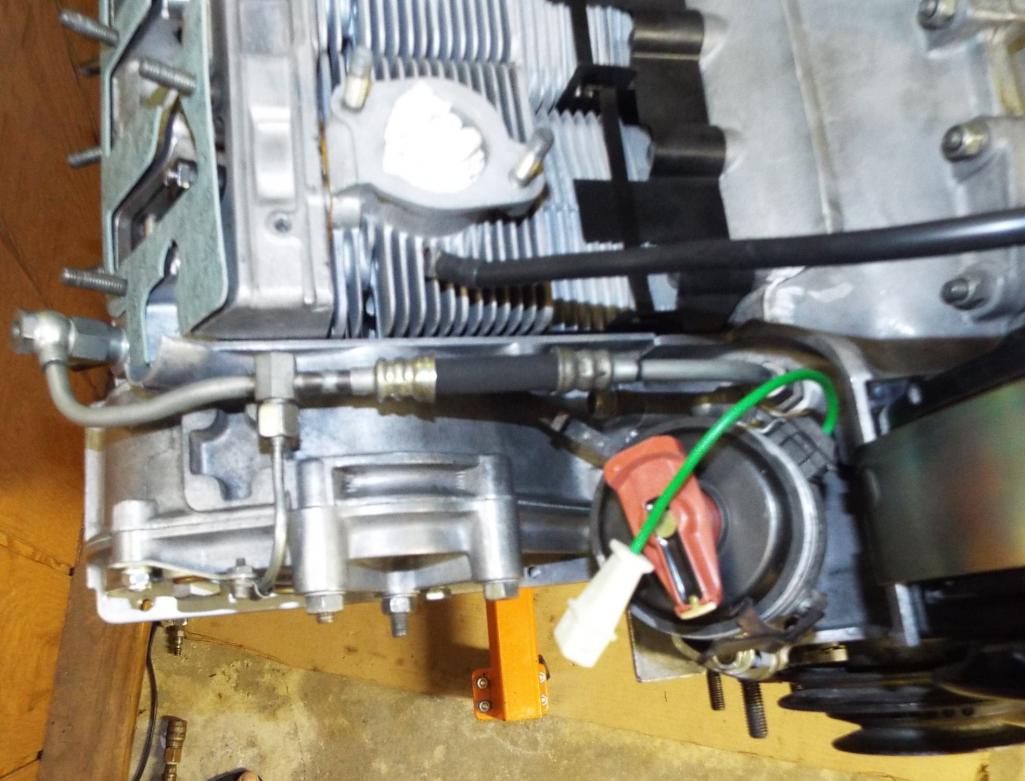 |
| moparrob |
 Aug 24 2017, 12:22 PM Aug 24 2017, 12:22 PM
Post
#144
|
|
Senior Member    Group: Members Posts: 646 Joined: 27-April 10 From: Los Angeles Member No.: 11,663 Region Association: None |
Your spectacular attention to detail and thorough explanation of problems and solutions is greatly appreciated. These are the things you don't learn in a book. Thanks for sharing.
|
| Lucky9146 |
 Aug 24 2017, 12:23 PM Aug 24 2017, 12:23 PM
Post
#145
|
|
Always Wanted A Bigger Go Cart    Group: Members Posts: 1,675 Joined: 22-September 14 From: Poway California Member No.: 17,942 Region Association: Southern California 
|
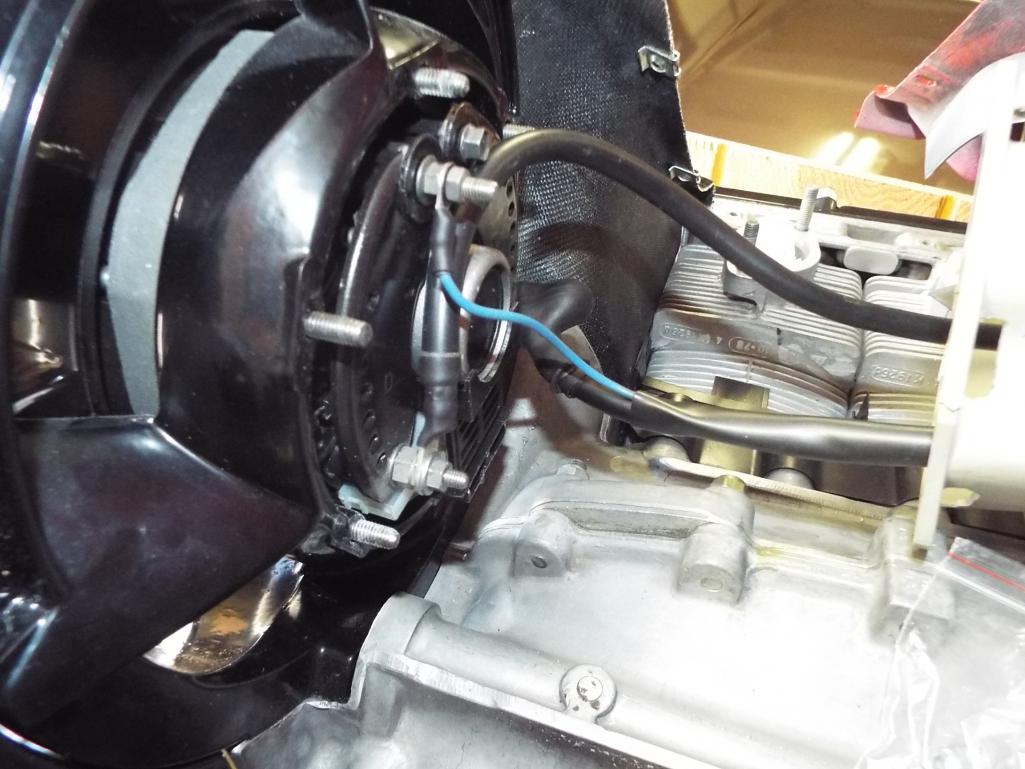
Additionally I filed a relief in the front of the timing chain cover for the small oil line on the right side for clearance and added plastic tube for insulator to prevent line chafing.
Before 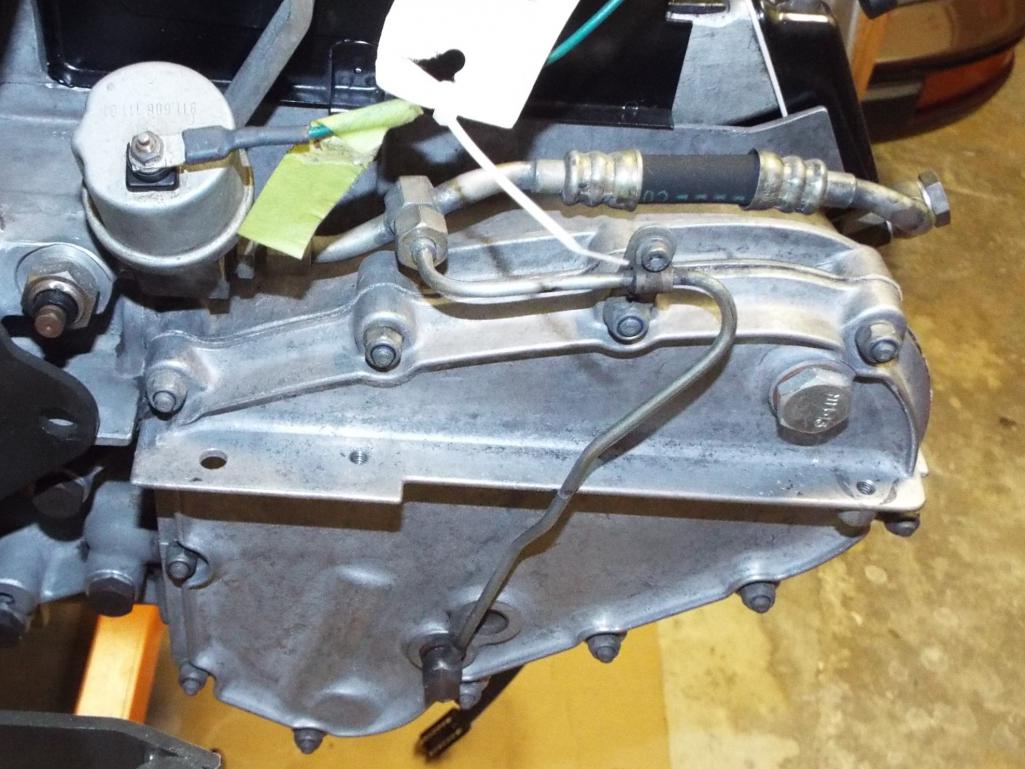 After 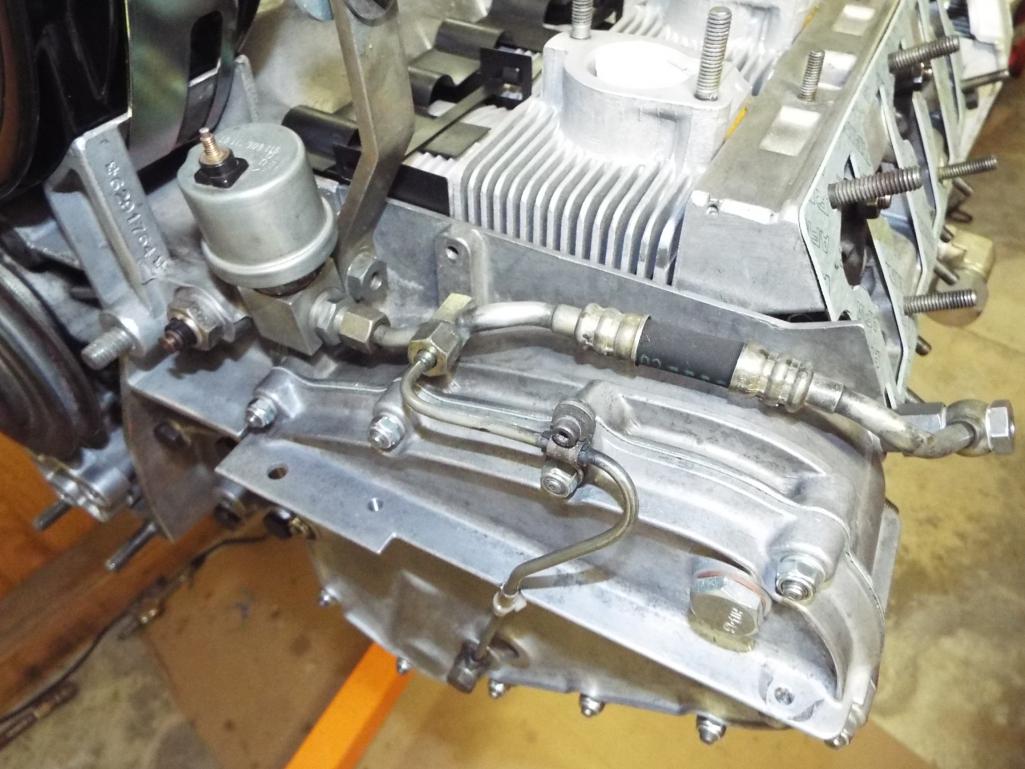 And I decided to install the fan and clamp now because I know you can’t get the clamp in after the dizzy goes in. 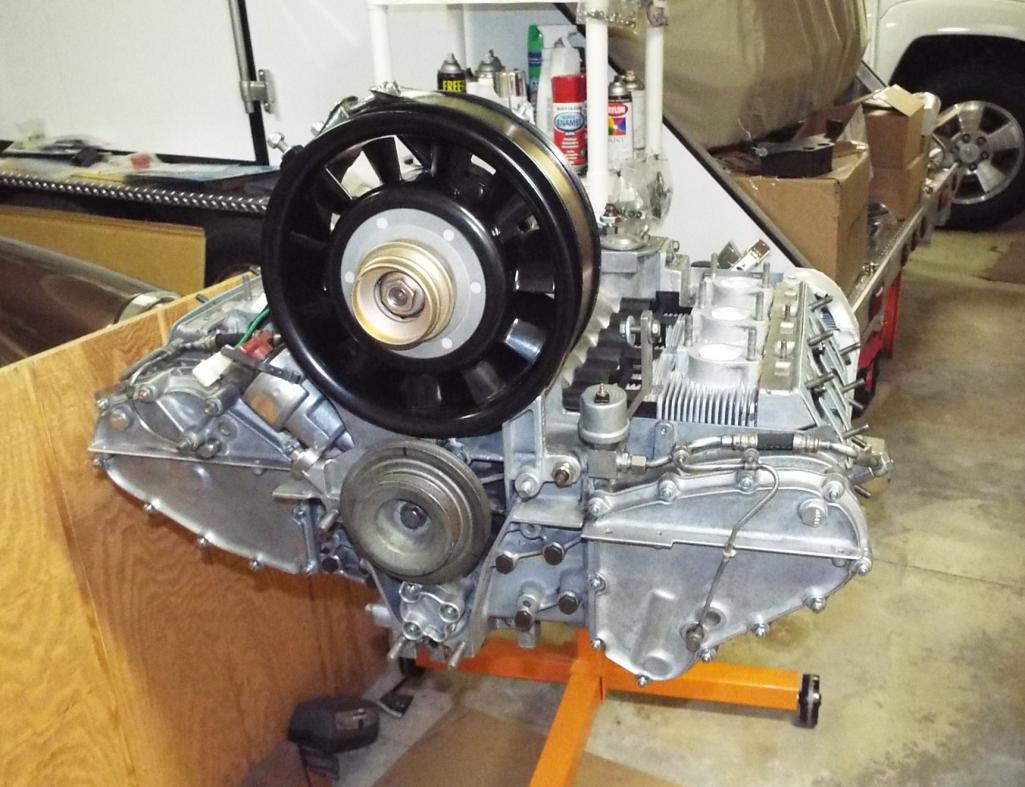 |
| mb911 |
 Aug 24 2017, 01:02 PM Aug 24 2017, 01:02 PM
Post
#146
|
|
914 Guru      Group: Members Posts: 7,527 Joined: 2-January 09 From: Burlington wi Member No.: 9,892 Region Association: Upper MidWest 
|
In all the 911 engines I have built over the years I have always put the heads and cam towers on as 1 assembly.. I know others do it just like you but just don't know if one way is better then the other..
|
| Lucky9146 |
 Aug 25 2017, 08:56 AM Aug 25 2017, 08:56 AM
Post
#147
|
|
Always Wanted A Bigger Go Cart    Group: Members Posts: 1,675 Joined: 22-September 14 From: Poway California Member No.: 17,942 Region Association: Southern California 
|
In all the 911 engines I have built over the years I have always put the heads and cam towers on as 1 assembly.. I know others do it just like you but just don't know if one way is better then the other.. mb911 with only 2 of these particular engines under my belt I am always willing to learn and it sounds like you have more experience than me. My thought is that the joint between the cam towers to heads assembly is said to be one of the most critical, that using the head studs to line up the heads would be beneficial to mating the cam tower to them. Additionally it makes the application of RTV574 one operation when putting the cam tower to the heads instead of three when assembling each head to the cam tower. Just my 2 cents. I would say if you are having good success with your method to continue on. Thanks for looking at the thread. |
| Lucky9146 |
 Aug 25 2017, 09:16 AM Aug 25 2017, 09:16 AM
Post
#148
|
|
Always Wanted A Bigger Go Cart    Group: Members Posts: 1,675 Joined: 22-September 14 From: Poway California Member No.: 17,942 Region Association: Southern California 
|
|
| ValcoOscar |
 Aug 25 2017, 09:36 AM Aug 25 2017, 09:36 AM
Post
#149
|
|
Garage Life     Group: Members Posts: 2,494 Joined: 19-November 13 From: SoCal Member No.: 16,669 Region Association: Southern California 

|
You D'man....
Truly a work of art. Great skills and patience indeed. (IMG:style_emoticons/default/pray.gif) Oscar |
| worn |
 Aug 25 2017, 09:42 AM Aug 25 2017, 09:42 AM
Post
#150
|
|
Winner of the Utah Twisted Joint Award     Group: Members Posts: 3,466 Joined: 3-June 11 From: Madison, WI Member No.: 13,152 Region Association: Upper MidWest 
|
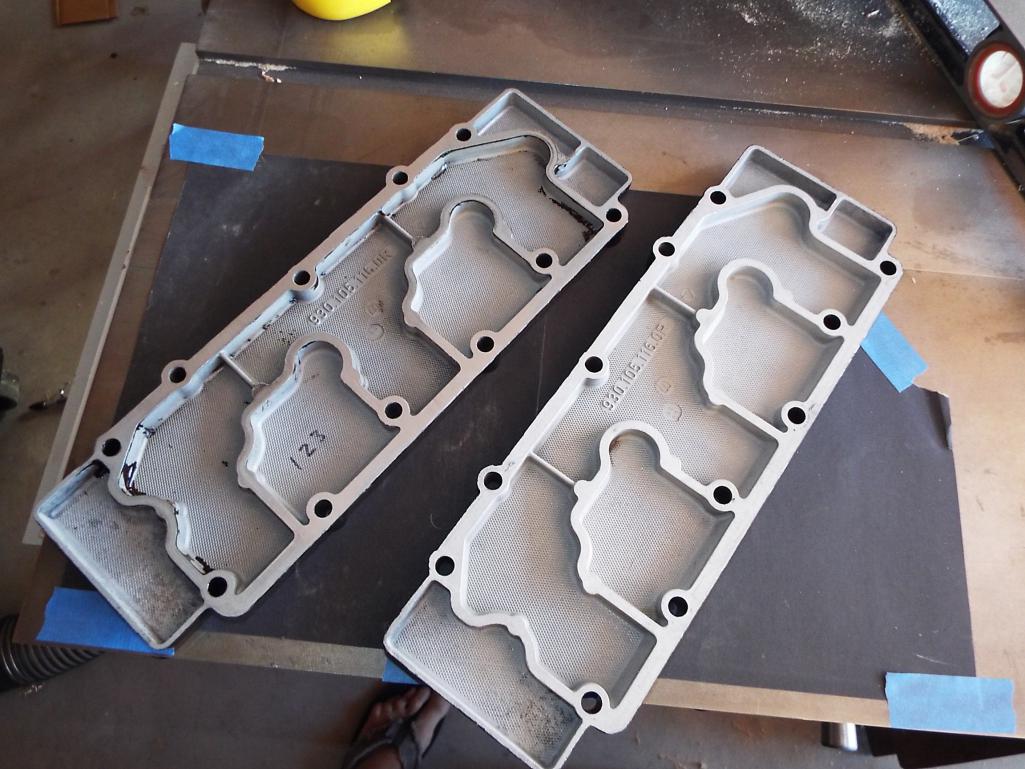
Valve covers were the next opportunity for flatness. More sanding……. Doesn't it look grand at that point? Good flattening. Wish I had done that with my chain covers (IMG:style_emoticons/default/wacko.gif) |
| mb911 |
 Aug 25 2017, 03:21 PM Aug 25 2017, 03:21 PM
Post
#151
|
|
914 Guru      Group: Members Posts: 7,527 Joined: 2-January 09 From: Burlington wi Member No.: 9,892 Region Association: Upper MidWest 
|
In all the 911 engines I have built over the years I have always put the heads and cam towers on as 1 assembly.. I know others do it just like you but just don't know if one way is better then the other.. mb911 with only 2 of these particular engines under my belt I am always willing to learn and it sounds like you have more experience than me. My thought is that the joint between the cam towers to heads assembly is said to be one of the most critical, that using the head studs to line up the heads would be beneficial to mating the cam tower to them. Additionally it makes the application of RTV574 one operation when putting the cam tower to the heads instead of three when assembling each head to the cam tower. Just my 2 cents. I would say if you are having good success with your method to continue on. Thanks for looking at the thread. Oh completely understand but I always approached it from the dowl pins in the heads made it easy to locate into the cam towers and put it on as a completed unit though a bit harder to torque the heads .. Its all good.. Keep up the good work. |
| moparrob |
 Aug 25 2017, 09:55 PM Aug 25 2017, 09:55 PM
Post
#152
|
|
Senior Member    Group: Members Posts: 646 Joined: 27-April 10 From: Los Angeles Member No.: 11,663 Region Association: None |
Marty Schneider (MSDS) makes some awesome headers here in So Cal. He is also a really nice guy who owns a bad ass turbo 914 (6 cyl).
I know, I know... you can't turbo a 914... (IMG:http://www.914world.com/bbs2/uploads_offsite/forums.pelicanparts.com-11663-1503719737.1.jpg) |
| Lucky9146 |
 Aug 26 2017, 02:16 PM Aug 26 2017, 02:16 PM
Post
#153
|
|
Always Wanted A Bigger Go Cart    Group: Members Posts: 1,675 Joined: 22-September 14 From: Poway California Member No.: 17,942 Region Association: Southern California 
|
Your spectacular attention to detail and thorough explanation of problems and solutions is greatly appreciated. These are the things you don't learn in a book. Thanks for sharing. Thanks man. It truly is a learning experience and if I can help one person with anything I've come across then all this posting is worth it. I have to say that I sure have learned a lot from this site and it is one of the things that keeps me inspired it is my way of contributing. I appreciate the others who have done or are doing 6 conversions like forrestkhaag and larmo63 and I am sure there are many others. Starting with a car this far along was perfect for me at this point in my life. My hats off to those doing the heavy lifting of major rust reapir and GT conversions. These truly are cool cars worth the effort. |
| Lucky9146 |
 Aug 26 2017, 02:23 PM Aug 26 2017, 02:23 PM
Post
#154
|
|
Always Wanted A Bigger Go Cart    Group: Members Posts: 1,675 Joined: 22-September 14 From: Poway California Member No.: 17,942 Region Association: Southern California 
|
You D'man.... Truly a work of art. Great skills and patience indeed. (IMG:style_emoticons/default/pray.gif) Oscar Thanks for weighing in and the complement. I am fortunate that I am not in a hurry and can take the time. Rushing was never one of my strong points and I can see that In a lot of folks cars. Look at what defianty is doing with detail in the UK amazing! Look forward to meeting you in Temecula. |
| Lucky9146 |
 Aug 26 2017, 02:38 PM Aug 26 2017, 02:38 PM
Post
#155
|
|
Always Wanted A Bigger Go Cart    Group: Members Posts: 1,675 Joined: 22-September 14 From: Poway California Member No.: 17,942 Region Association: Southern California 
|
|
| mepstein |
 Aug 26 2017, 03:40 PM Aug 26 2017, 03:40 PM
Post
#156
|
|
914-6 GT in waiting                Group: Members Posts: 19,827 Joined: 19-September 09 From: Landenberg, PA/Wilmington, DE Member No.: 10,825 Region Association: MidAtlantic Region 
|
Marty Schneider (MSDS) makes some awesome headers here in So Cal. He is also a really nice guy who owns a bad ass turbo 914 (6 cyl). I know, I know... you can't turbo a 914... Dropping a 935 engine in a 914 is just a whole 'nother level. (IMG:style_emoticons/default/smilie_pokal.gif) |
| Lucky9146 |
 Aug 27 2017, 01:20 PM Aug 27 2017, 01:20 PM
Post
#157
|
|
Always Wanted A Bigger Go Cart    Group: Members Posts: 1,675 Joined: 22-September 14 From: Poway California Member No.: 17,942 Region Association: Southern California 
|
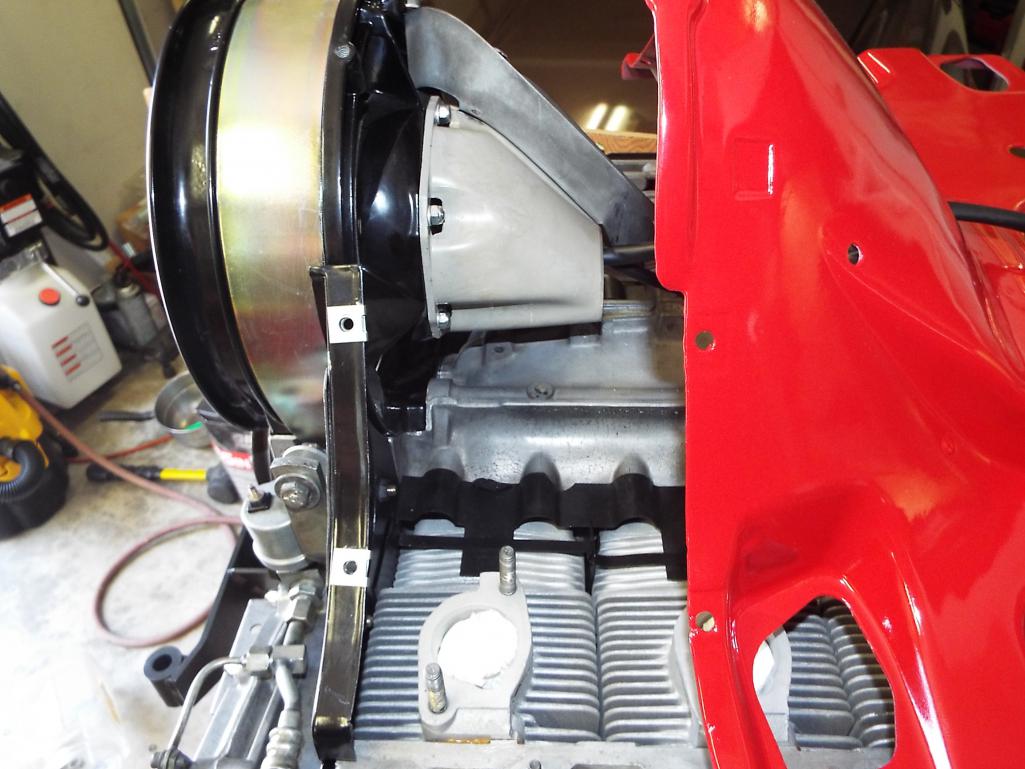
Almost ready to come off the stand
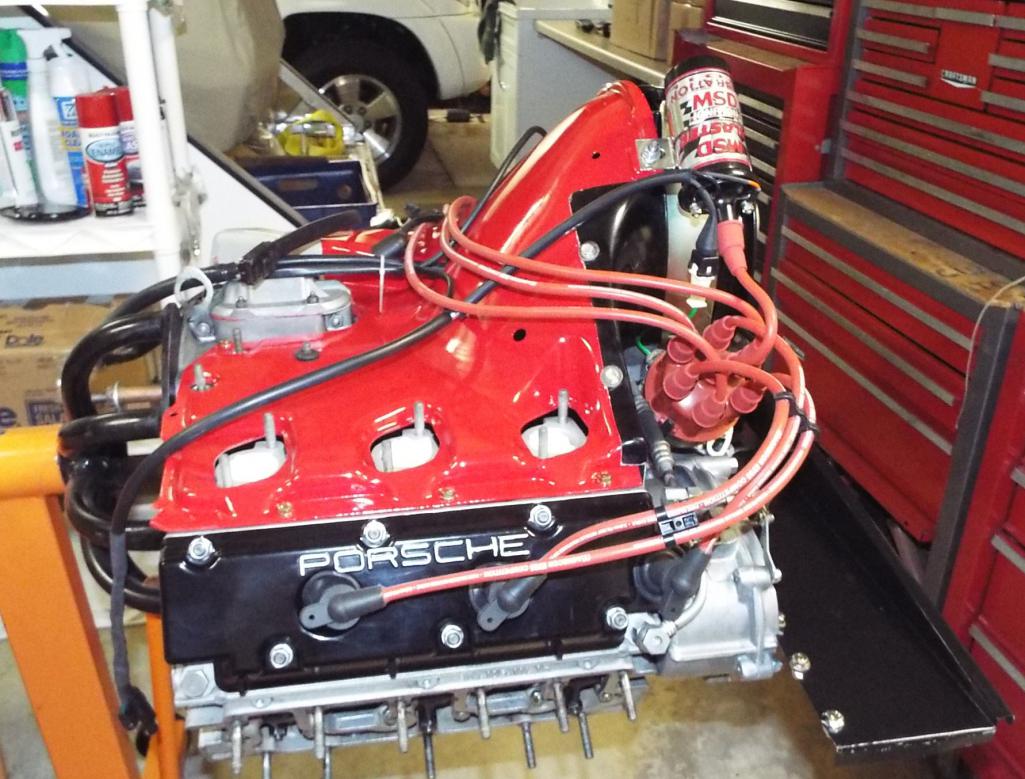 Kind a like giving birth! I took it off the stand because I was again waiting parts and top side work from here on out. 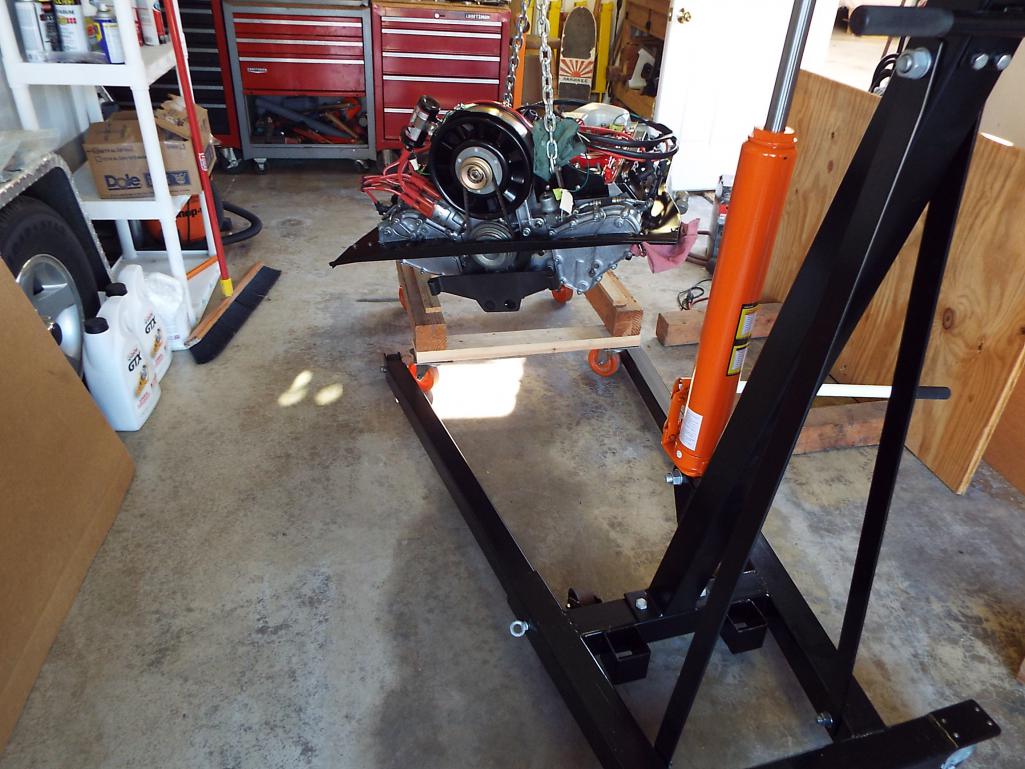 But I was not quite as ready as I thought because when I went to order new intake manifold gaskets and insulators so I could mount my manifolds and Weber 40’s, I began yet another fun educational experience. I'm hearing the intake manifolds that I have which are actual Porsche intake manifolds, that have been lightly ported and came with my project purchase, won’t work well. These great looking Porsche PN manifolds are for an early 2.0 engine and now present major complications especially when trying to use them on a 3.0 CIS to Weber conversion application. Hmmmm…….. Really? (IMG:style_emoticons/default/confused24.gif) 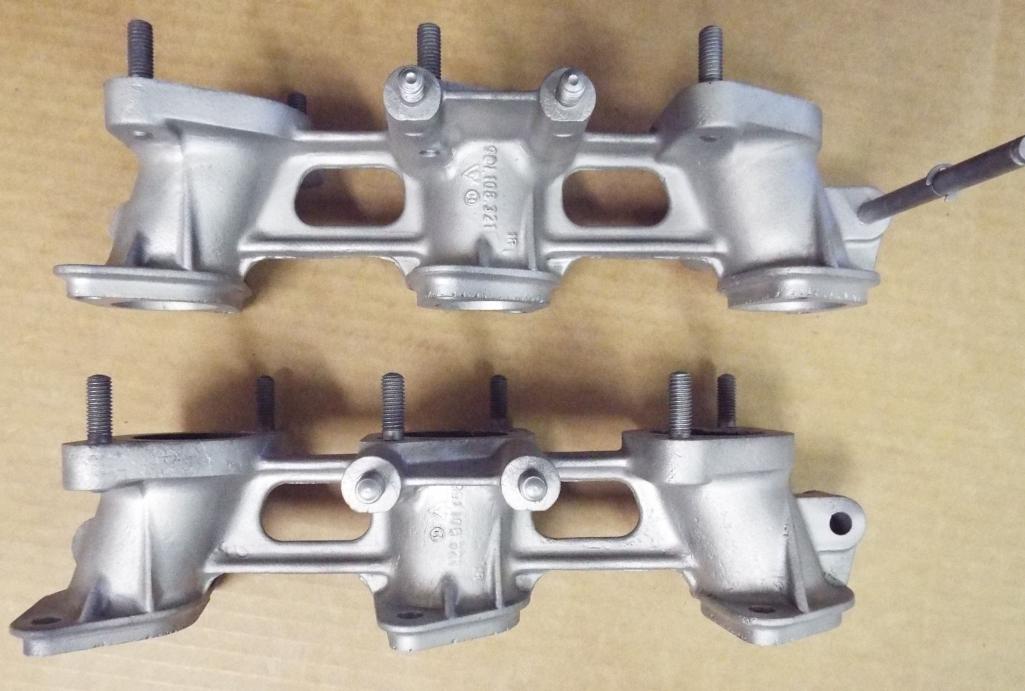 Took me a while to buy into the concept that my recently bead blasted, beautiful ready to go manifolds, were really not a good idea to use. Made a couple calls to Richard at PMO and Paul at Performance Oriented (he did the carbs), plus contacting a few guys here on the World who have also done 3.0 conversions, and I finally came to realize that another investment was necessary. That being new PMO CIS manifolds had to be ordered. Just when I thought all the large purchases were behind me. Man, I can’t wait to see the difference of these PMO’s, this better be worth it. (IMG:style_emoticons/default/dry.gif) Here is another shot of the original Porsche Manifolds flange that mates to heads. 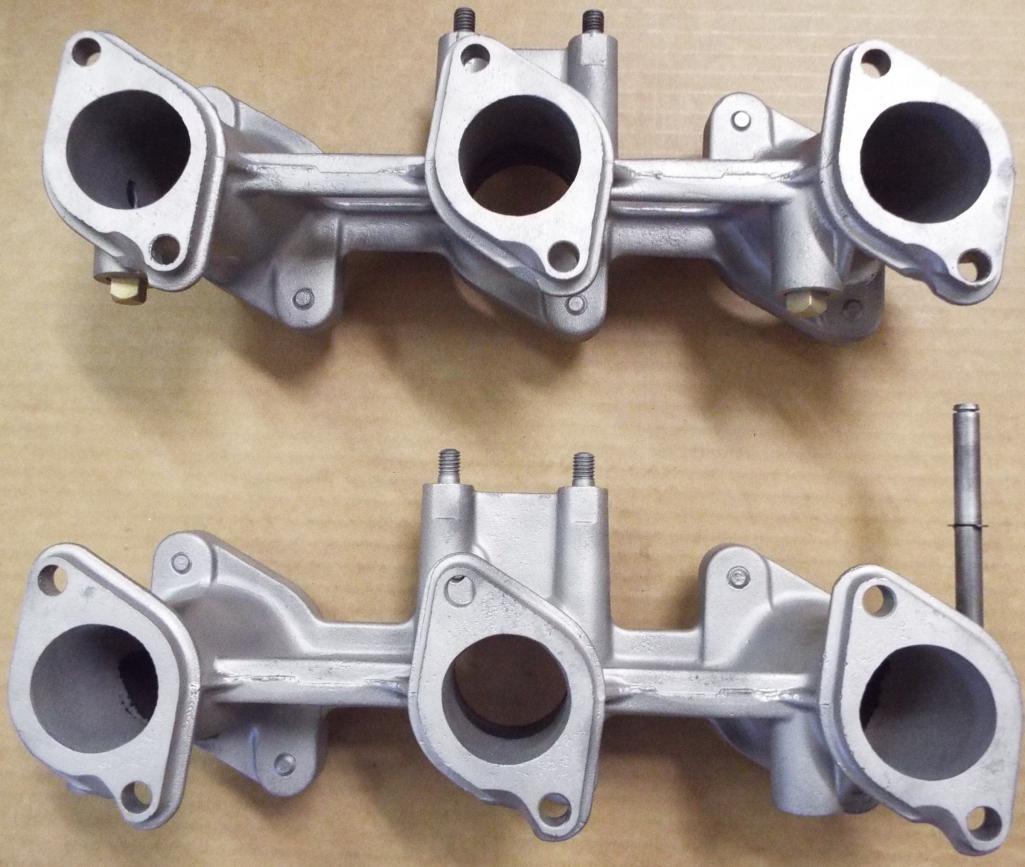 |
| gms |
 Aug 27 2017, 02:10 PM Aug 27 2017, 02:10 PM
Post
#158
|
|
Advanced Member     Group: Members Posts: 2,717 Joined: 12-March 04 From: Chicagoland Member No.: 1,785 Region Association: Upper MidWest 
|
Yup those manifold will leak air because they don't cover the CIS injector cut out on the intake of the head.
Head 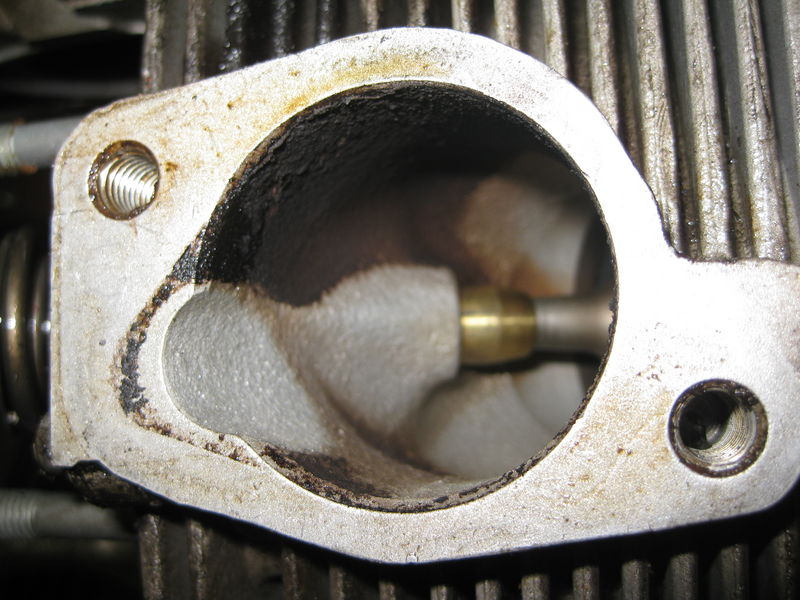 Recommended intake 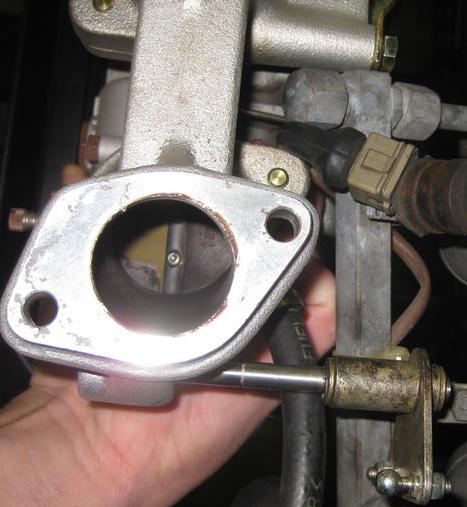 |
| mepstein |
 Aug 27 2017, 02:18 PM Aug 27 2017, 02:18 PM
Post
#159
|
|
914-6 GT in waiting                Group: Members Posts: 19,827 Joined: 19-September 09 From: Landenberg, PA/Wilmington, DE Member No.: 10,825 Region Association: MidAtlantic Region 
|
|
| sixnotfour |
 Aug 27 2017, 02:20 PM Aug 27 2017, 02:20 PM
Post
#160
|
|
914 Wizard           Group: Members Posts: 10,771 Joined: 12-September 04 From: Life Elevated..planet UT. Member No.: 2,744 Region Association: Rocky Mountains 

|
rick 918-S, made some plates he was selling to solve that coverage, or PMO has plastic spacers that would work also..
http://www.914world.com/bbs2/index.php?sho...=263516&hl= |
  |
1 User(s) are reading this topic (1 Guests and 0 Anonymous Users)
0 Members:

|
Lo-Fi Version | Time is now: 10th April 2025 - 04:23 PM |
Invision Power Board
v9.1.4 © 2025 IPS, Inc.


