|
|

|
Porsche, and the Porsche crest are registered trademarks of Dr. Ing. h.c. F. Porsche AG.
This site is not affiliated with Porsche in any way. Its only purpose is to provide an online forum for car enthusiasts. All other trademarks are property of their respective owners. |
|
|
  |
| amfab |
 Mar 25 2019, 09:17 AM Mar 25 2019, 09:17 AM
Post
#121
|
|
Member   Group: Members Posts: 401 Joined: 17-May 16 From: Los Angeles Member No.: 20,004 Region Association: None 
|
It's Hammer time! Way to go on making your own parts. Damn impressive. You look like you're really enjoying yourself with all the fab work. It's very motivational so please keep the pics coming! I tried to make a patch for that piece so I can attest to how difficult it is to get it right. I gave up and bought the outer/inner. You are a better man than I sir! -Andrew |
| mbseto |
 Apr 16 2020, 08:00 PM Apr 16 2020, 08:00 PM
Post
#122
|
|
Senior Member    Group: Members Posts: 1,257 Joined: 6-August 14 From: Cincy Member No.: 17,743 Region Association: North East States |
Good grief, it's been a year since I posted on my build thread. Last post was the eve of my 49th birthday. What happened? My wife and I decided to try to expand her business a while back. Four years of effort came to fruition and we began building last winter. It required all of my attention and it was quite a roller coaster. New location was opened in September of 2019. Of course that ended up being another tidal wave of activity. Friends kept asking, hey now you're open, nice to sit back and rest finally, eh? Glrb. Got an augmented staff trained up, and well my wife is a force of nature, and slowly I started sneaking back into the garage. Just in time for a global pandemic. Spent this birthday quarantined on a cold concrete floor with a welding gun in one hand and a whiskey bottle in the other. Not half bad, really. Here come the pics...
|
| mbseto |
 Apr 16 2020, 08:08 PM Apr 16 2020, 08:08 PM
Post
#123
|
|
Senior Member    Group: Members Posts: 1,257 Joined: 6-August 14 From: Cincy Member No.: 17,743 Region Association: North East States |
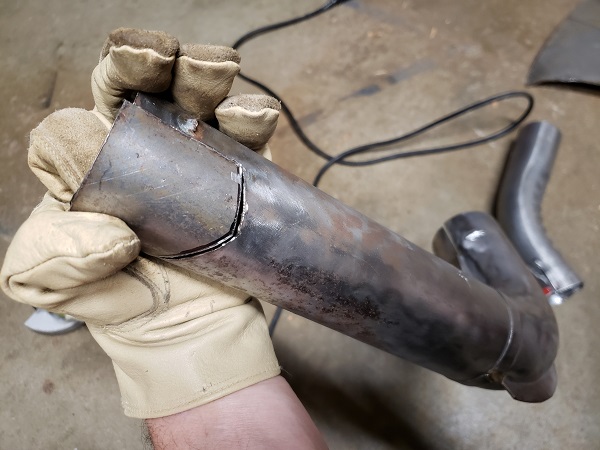
So where the heck did we leave off? Prepping the driver's side long... Looks like I can salvage a heater tube, just need to patch the end of it.
 This is the new long with all the little bits welded in. Same drill as the passenger side, so I didn't take many pics, but to recap, made new brackets for the heater tube, made new spring clips for the heater tube (once again, my buddy with the forge helped my heat treat them to a springy consistency), welded it all in place. New seat belt boss is in there, too. 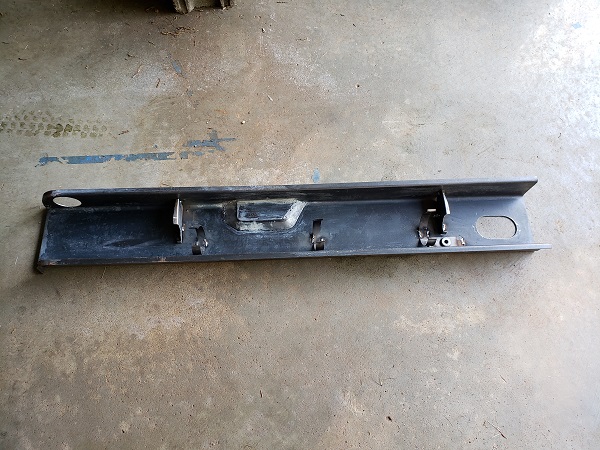 Here it is with a coat of primer and weld-thru on the flanges. 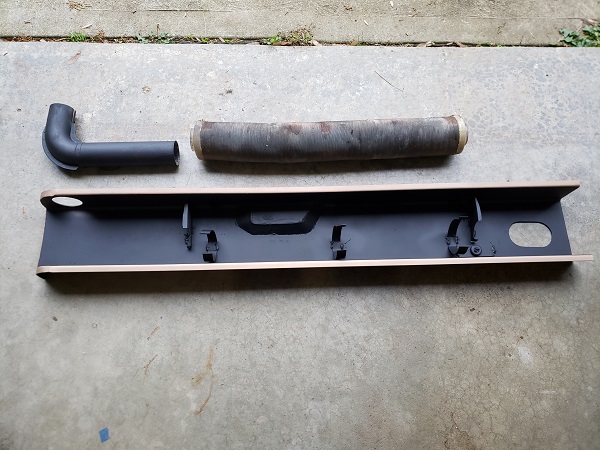 |
| mbseto |
 Apr 16 2020, 08:20 PM Apr 16 2020, 08:20 PM
Post
#124
|
|
Senior Member    Group: Members Posts: 1,257 Joined: 6-August 14 From: Cincy Member No.: 17,743 Region Association: North East States |
A little more blood and gore. The crime scene from the outer long is above, here's the inner. Had to dig into these layers, find out where the rust ends and fair metal begins.
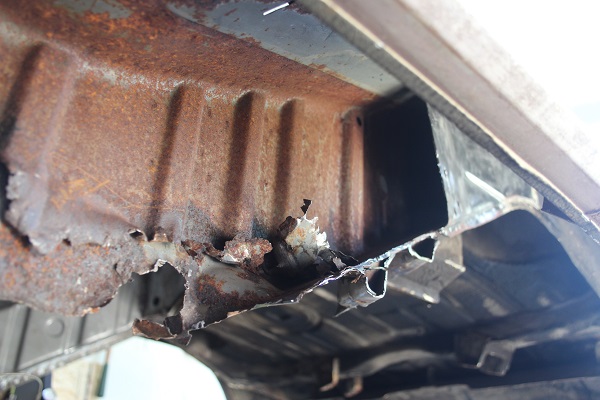 Worked in to where I was happy and tried to pick cut lines where I'b be OK welding. Not shown here is peeling back and extra couple inches of the inner layer so that the welds of the two layers would not be right over each other. There will be a decent pic of that later. 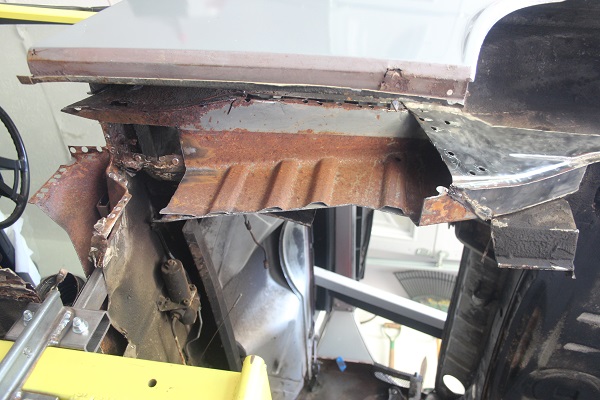 Looking up into the long, no other surprises. We'll spray something up in there before we seal it up. Ospho, then some primer. 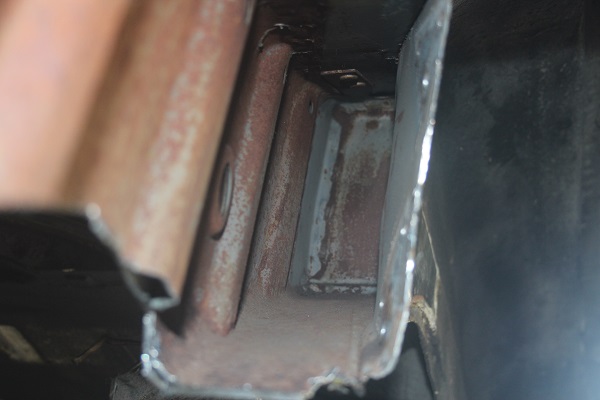 Out with the old... 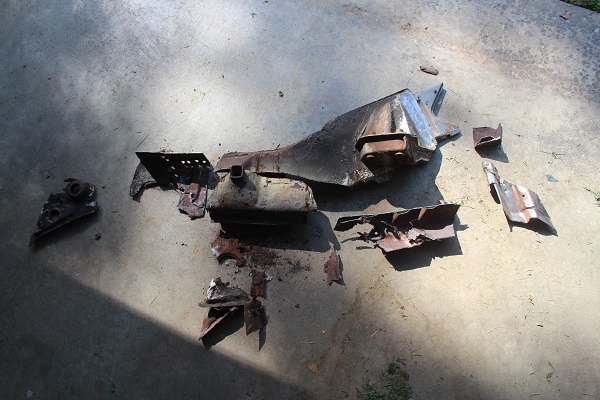 This is a nasty looking long. I'll stand this up against anything in anyone's hall of shame. Good riddance. 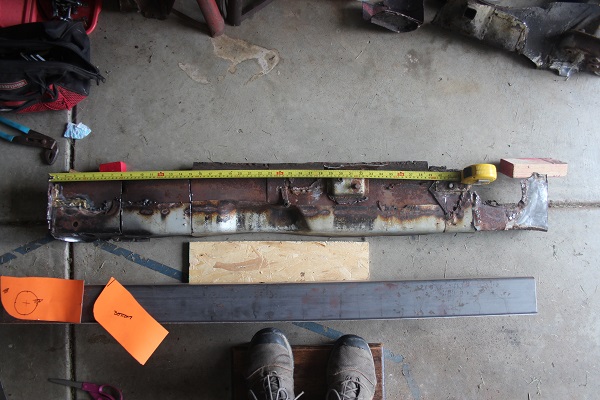 |
| mbseto |
 Apr 16 2020, 08:29 PM Apr 16 2020, 08:29 PM
Post
#125
|
|
Senior Member    Group: Members Posts: 1,257 Joined: 6-August 14 From: Cincy Member No.: 17,743 Region Association: North East States |
Agonized a bit over whether the old engine mount was still good or if I should fab this side. Cleaned it up good - some pitting in there - decided to run with it.
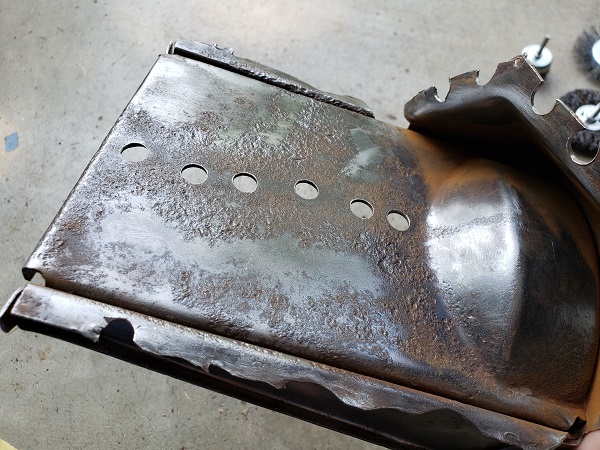 Primer and weld-thru on the mount and also on the long. 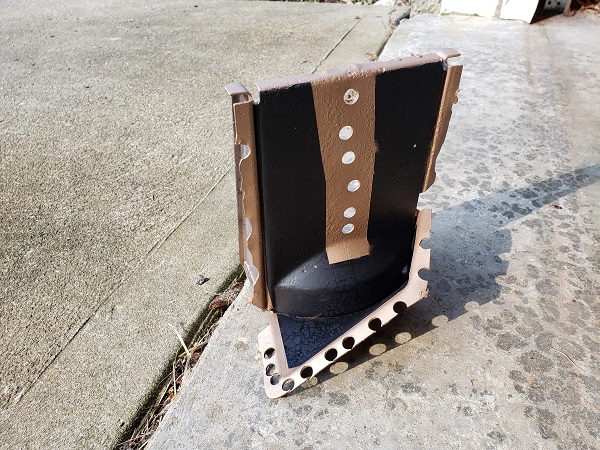 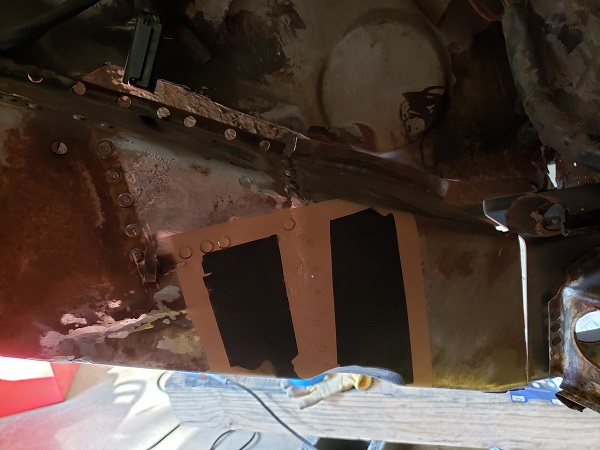 I tacked it in place and don't have any pics. I do hope I remember at some point it is only tacked... Also notice this last pic shows my fabbed piece in place and I don't have any pics of that going in. You get the idea, though. |
| Dion |
 Apr 16 2020, 08:30 PM Apr 16 2020, 08:30 PM
Post
#126
|
|
RN     Group: Members Posts: 2,836 Joined: 16-September 04 From: Audubon,PA Member No.: 2,766 Region Association: MidAtlantic Region 

|
Just brilliant work! Way to go Matthew.
Attached image(s) 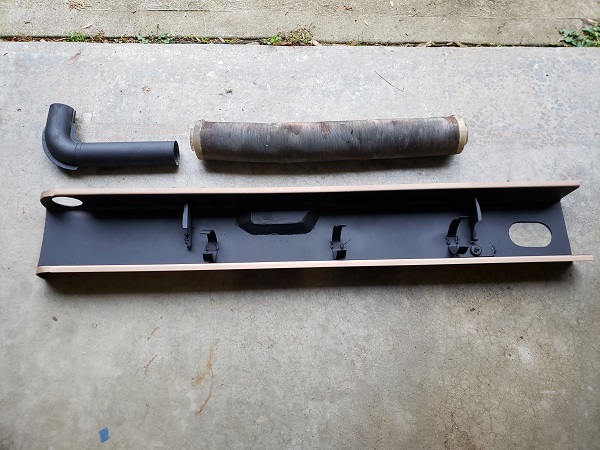
|
| mbseto |
 Apr 16 2020, 08:44 PM Apr 16 2020, 08:44 PM
Post
#127
|
|
Senior Member    Group: Members Posts: 1,257 Joined: 6-August 14 From: Cincy Member No.: 17,743 Region Association: North East States |
Tacked the inner long in place and scratched my head over how to deal with this gap. I made a couple attempts to try to make these two meet nicely. One of my guiding principles in fabricating is to try to make a thing as one piece if I can with as little welding as possible. As this project draws out, I have another little voice asking me, do you ever want to drive this thing? Yes, I do.
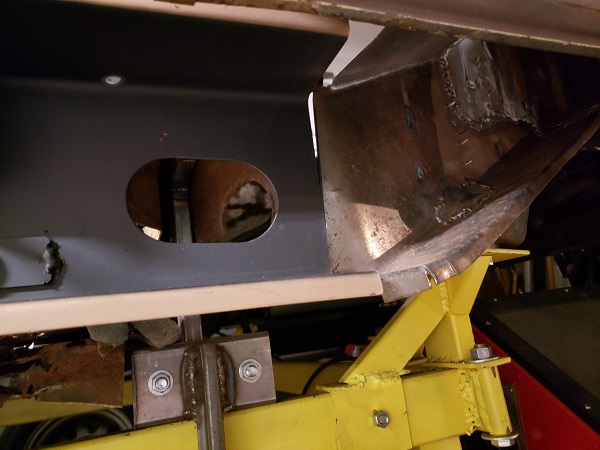 Here's working out the solution. I am posting pictures from months ago and now I find it does not itch my brain so much as it did at the time. 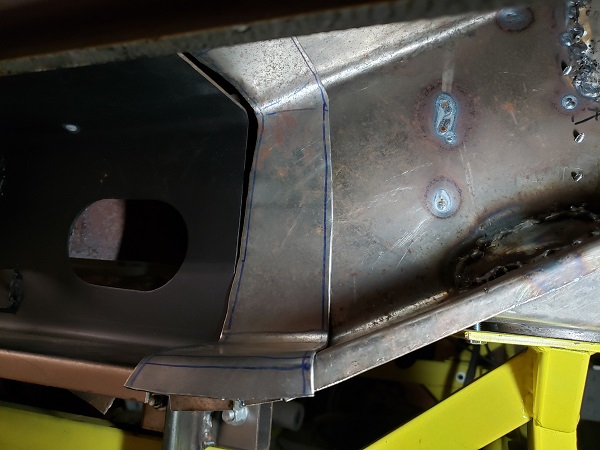 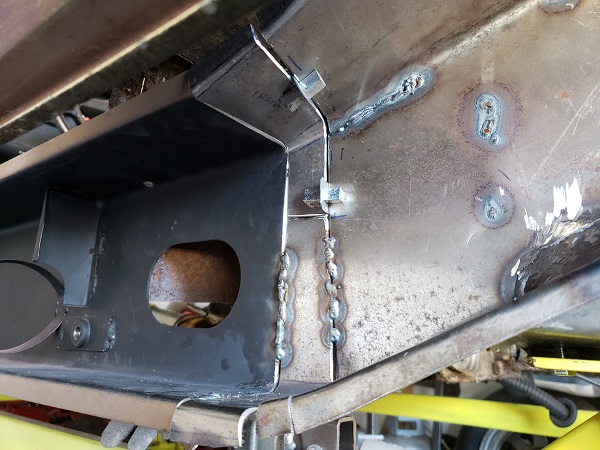 |
| mbseto |
 Apr 16 2020, 08:57 PM Apr 16 2020, 08:57 PM
Post
#128
|
|
Senior Member    Group: Members Posts: 1,257 Joined: 6-August 14 From: Cincy Member No.: 17,743 Region Association: North East States |
Need to pattern up a sleeve to join the sections of the long. I actually fabricated the ribbed piece a few posts back (last year!! (IMG:style_emoticons/default/sad.gif) ) so this pattern just guides how to trim it and how to make the sides.
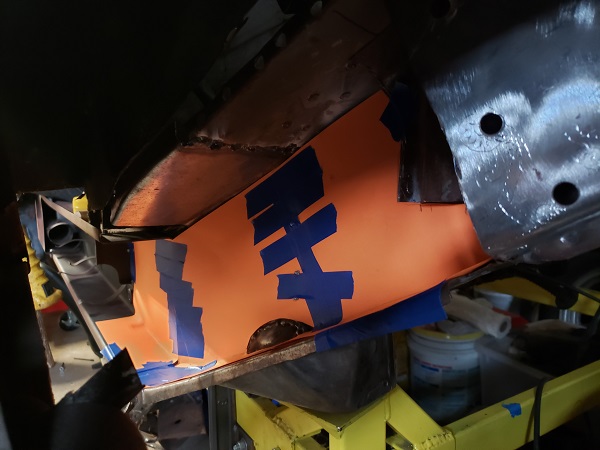 Cut the pieces up, pushed them around a little and pre-drilled the rosettes. 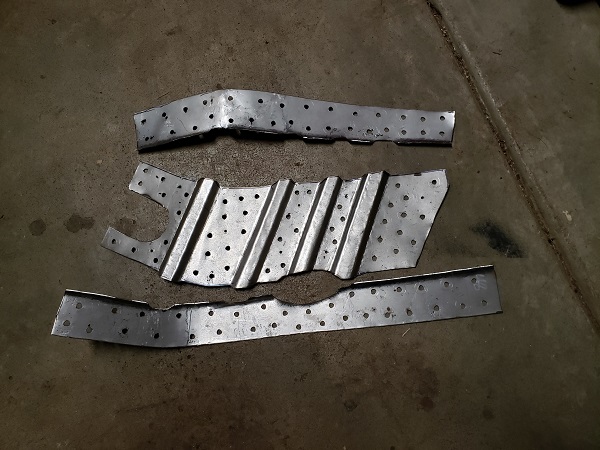 What you don't see is the constant test fitting and grinding edges to get them to fit nicely. Aside from it being much easier to drill the holes before it is welded up, I was also able to see how close the sleeve layers lay against the outer layer and mach sure it is line-to-line. This is final fit and tacking them together. 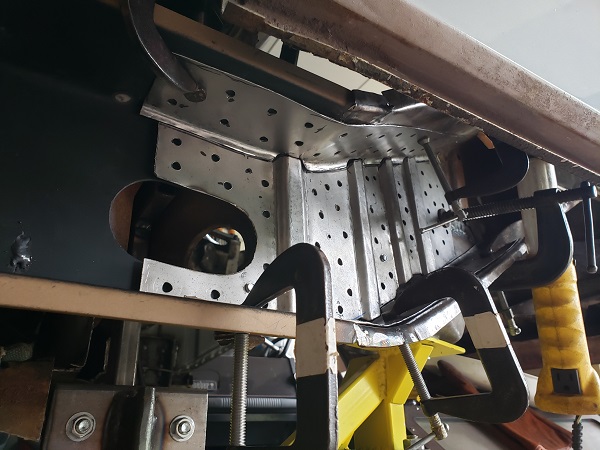 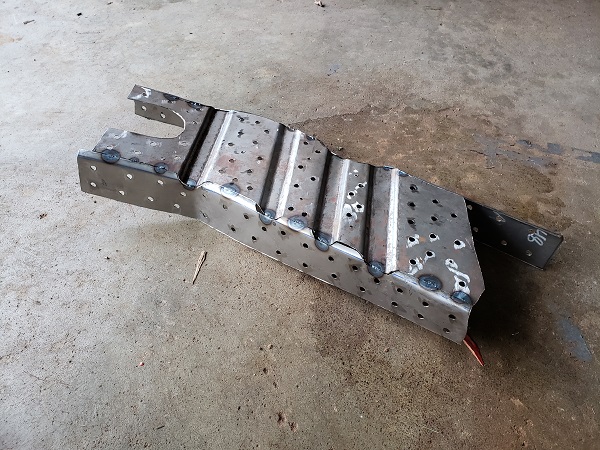 Nice to weld this together sitting in the middle of the garage floor instead of hunkered up in the wheel well or something. Added a little corner in there with the last rib in the line, also a piece to cover the bulge of the engine mount. 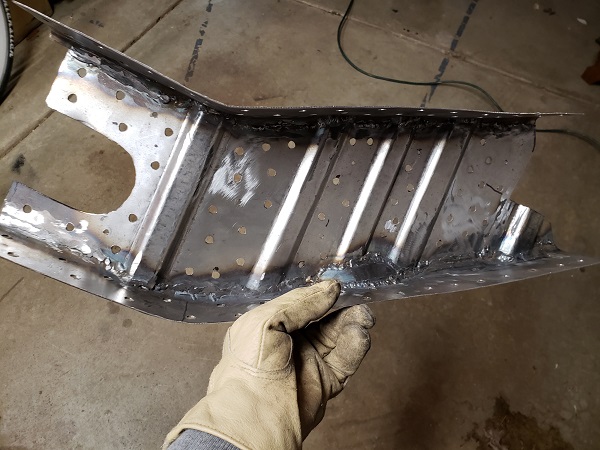 |
| tygaboy |
 Apr 16 2020, 09:58 PM Apr 16 2020, 09:58 PM
Post
#129
|
|
914 Guru      Group: Members Posts: 5,542 Joined: 6-October 15 From: Petaluma, CA Member No.: 19,241 Region Association: Northern California 
|
That is great looking work. Very. Nice. Fit. And I know what a pain it is to get things to that point! Again, great, great work. (IMG:style_emoticons/default/aktion035.gif)
|
| jaredmcginness |
 Apr 27 2020, 01:21 PM Apr 27 2020, 01:21 PM
Post
#130
|
|
...    Group: Members Posts: 508 Joined: 12-June 19 From: Baltimore Member No.: 23,209 Region Association: MidAtlantic Region 
|
Holy smokes.
I just found this thread from your signature. (Same year and motor as me, so I was intrigued.) How I wish i had seen this before I started my long replacement. Goes to show if you really put the patience into this, it turns out beautifully. Seriously top notch work. |
| Mueller |
 Apr 27 2020, 01:54 PM Apr 27 2020, 01:54 PM
Post
#131
|
|
914 Freak!                Group: Members Posts: 17,150 Joined: 4-January 03 From: Antioch, CA Member No.: 87 Region Association: None 
|
Very inspirational and tons of great fab work and ideas.
|
| dereknlee |
 May 26 2020, 06:12 PM May 26 2020, 06:12 PM
Post
#132
|
|
Member   Group: Members Posts: 72 Joined: 16-March 12 From: Shoreline, WA Member No.: 14,259 Region Association: Pacific Northwest 
|
Matthew,
Holy crap! Your fabrication skills are amazing. (IMG:style_emoticons/default/smiley_notworthy.gif) That home made sheet metal brake is clever, bookmarked. Inspiring stuff, keep it up! -Derek |
| Krieger |
 May 26 2020, 06:46 PM May 26 2020, 06:46 PM
Post
#133
|
|
Advanced Member     Group: Members Posts: 4,799 Joined: 24-May 04 From: Santa Rosa CA Member No.: 2,104 Region Association: None 
|
Wow! That's a lot of really good work!
|
| mbseto |
 Aug 1 2020, 01:43 PM Aug 1 2020, 01:43 PM
Post
#134
|
|
Senior Member    Group: Members Posts: 1,257 Joined: 6-August 14 From: Cincy Member No.: 17,743 Region Association: North East States |
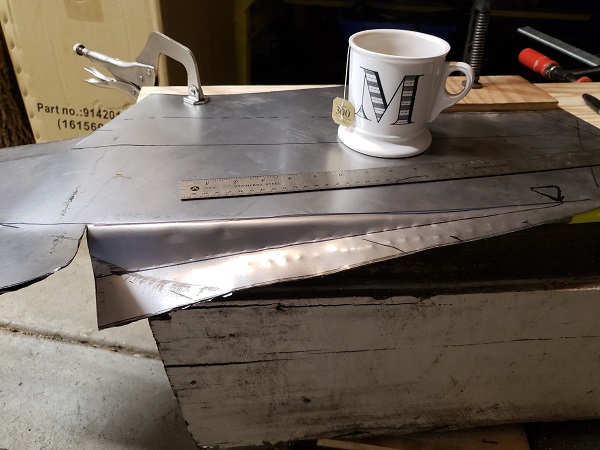
Sometimes it feels like everything is a jury-rig. Guess what this is going to be? Making it out of 12-gauge so I will not need to weld the stiffening kit over it. Was worried that my hammer-forming abilities would not be up to it, but the whole "bigger hammer" thing seems to be working.
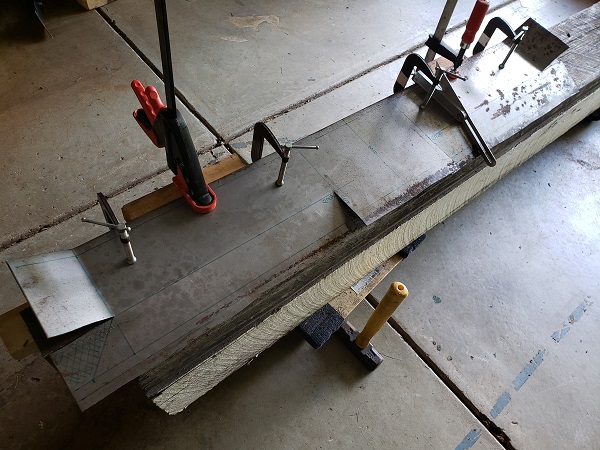 More updates coming - had a piece that was giving me trouble but I think I've worked through it. Stay tuned. |
| mbseto |
 Aug 18 2020, 10:27 PM Aug 18 2020, 10:27 PM
Post
#135
|
|
Senior Member    Group: Members Posts: 1,257 Joined: 6-August 14 From: Cincy Member No.: 17,743 Region Association: North East States |
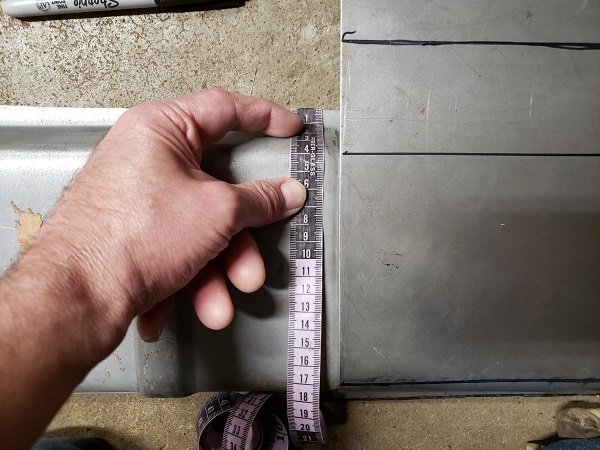
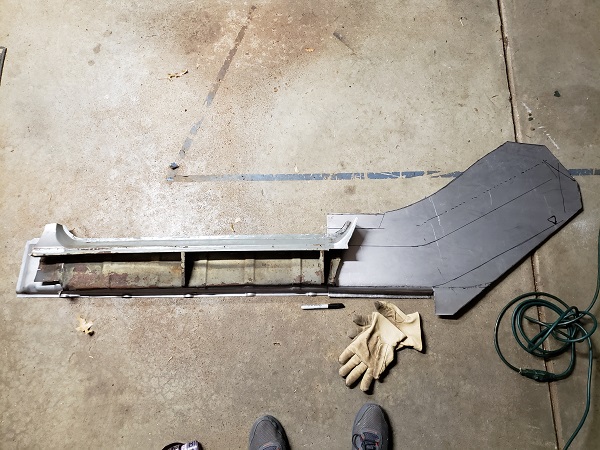
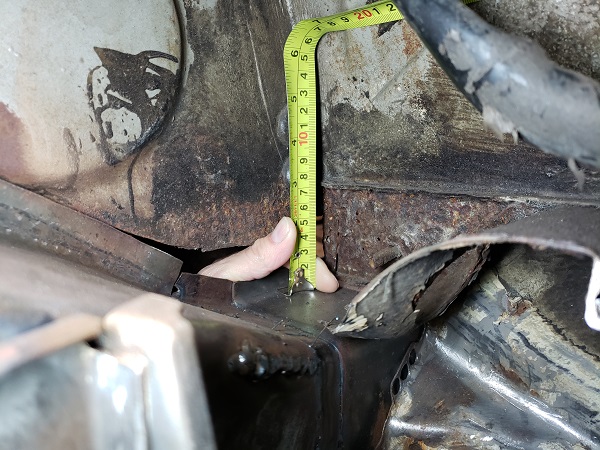
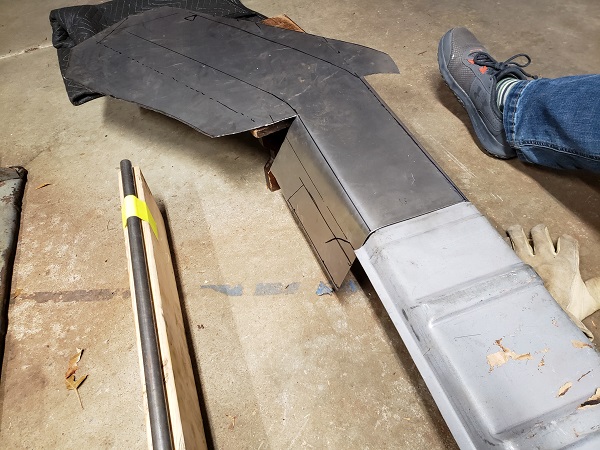
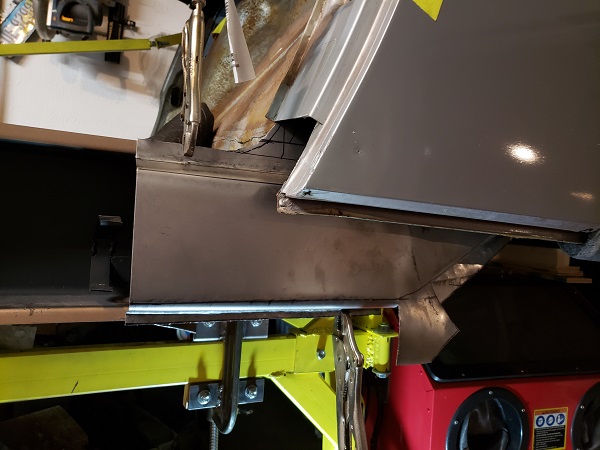
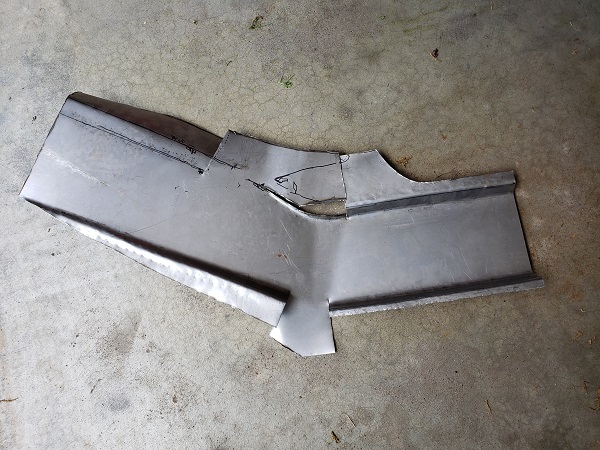
Photo assault to get the thread caught up a little. Driver's side outer long, if you're following along, fabbing the piece that no one makes aft of the door.
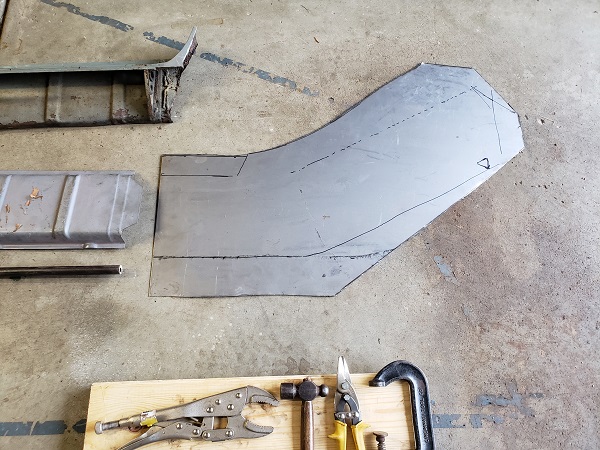 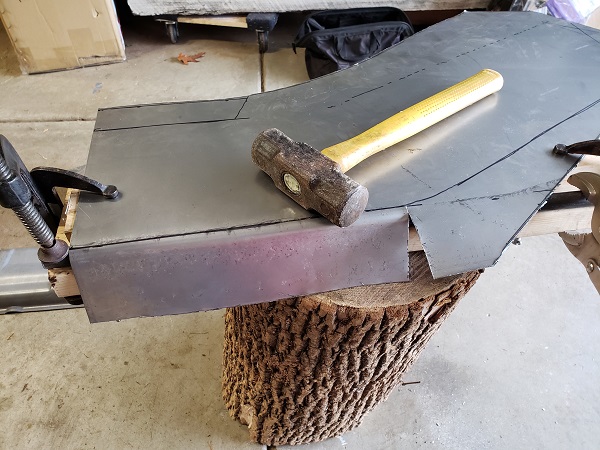 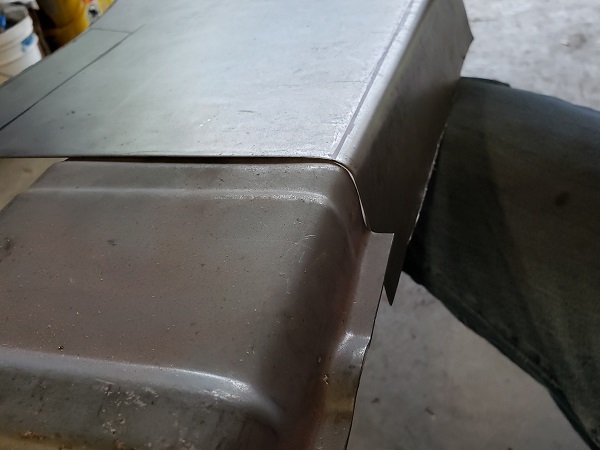   |
| mbseto |
 Aug 18 2020, 10:30 PM Aug 18 2020, 10:30 PM
Post
#136
|
|
Senior Member    Group: Members Posts: 1,257 Joined: 6-August 14 From: Cincy Member No.: 17,743 Region Association: North East States |
     |
| mbseto |
 Aug 18 2020, 10:33 PM Aug 18 2020, 10:33 PM
Post
#137
|
|
Senior Member    Group: Members Posts: 1,257 Joined: 6-August 14 From: Cincy Member No.: 17,743 Region Association: North East States |
Got to this point and wasn't really happy with the fit. Cut a blank for attempt number 2...
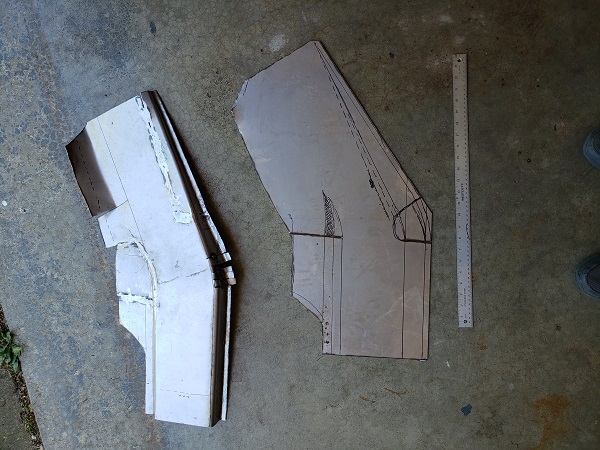 Here's the final fit I was OK with. See the #3 written on there? 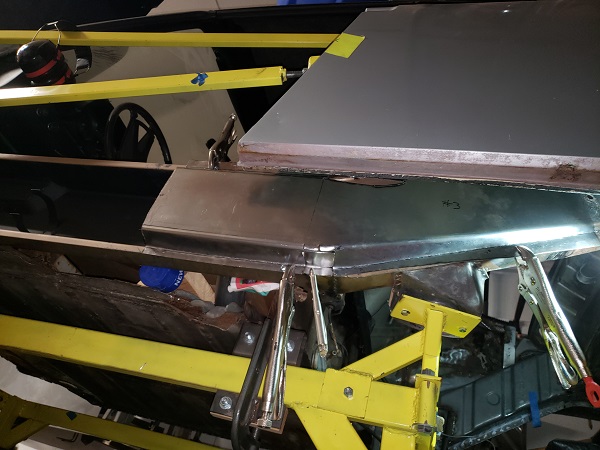 On deck: The inner layer for this piece... |
| djway |
 Aug 19 2020, 12:28 AM Aug 19 2020, 12:28 AM
Post
#138
|
|
Senior Member    Group: Members Posts: 787 Joined: 16-October 15 From: Riverside Member No.: 19,266 Region Association: Southern California |
Beautiful fab skills.
Does the stump have auto shrink? |
| porschetub |
 Aug 19 2020, 02:44 AM Aug 19 2020, 02:44 AM
Post
#139
|
|
Advanced Member     Group: Members Posts: 4,781 Joined: 25-July 15 From: New Zealand Member No.: 18,995 Region Association: None |
Beautiful fab skills. Does the stump have auto shrink? (IMG:style_emoticons/default/lol-2.gif) (IMG:style_emoticons/default/lol-2.gif) ,my first rustaration was a fairly rare one year only 66 Beetle,used pieces of hardwood to form parts and could custom fit parts shape with any common woodworking tools (IMG:style_emoticons/default/lol-2.gif) ,new floors and repaired rotten tunnel came out nice. But you have to look @ what mbseto has hand formed .... (IMG:style_emoticons/default/pray.gif) excellent work. |
| bbrock |
 Aug 19 2020, 08:16 AM Aug 19 2020, 08:16 AM
Post
#140
|
|
914 Guru      Group: Members Posts: 5,269 Joined: 17-February 17 From: Montana Member No.: 20,845 Region Association: Rocky Mountains 
|
Your fab skills continue to impress. Such nice work. It's a shame nobody is making that part though. Seems about half of these serious rustorations need it.
|
  |
1 User(s) are reading this topic (1 Guests and 0 Anonymous Users)
0 Members:

|
Lo-Fi Version | Time is now: 3rd April 2025 - 01:12 AM |
Invision Power Board
v9.1.4 © 2025 IPS, Inc.


