|
|

|
Porsche, and the Porsche crest are registered trademarks of Dr. Ing. h.c. F. Porsche AG.
This site is not affiliated with Porsche in any way. Its only purpose is to provide an online forum for car enthusiasts. All other trademarks are property of their respective owners. |
|
|
  |
| mbseto |
 Aug 21 2016, 10:23 AM Aug 21 2016, 10:23 AM
Post
#61
|
|
Senior Member    Group: Members Posts: 1,257 Joined: 6-August 14 From: Cincy Member No.: 17,743 Region Association: North East States |
Now the car is mounted on 4 points again and I can adjust to get those points level. But the two halves are tilted away from each other. I can adjust the door braces to fix that, but I need to know how much.
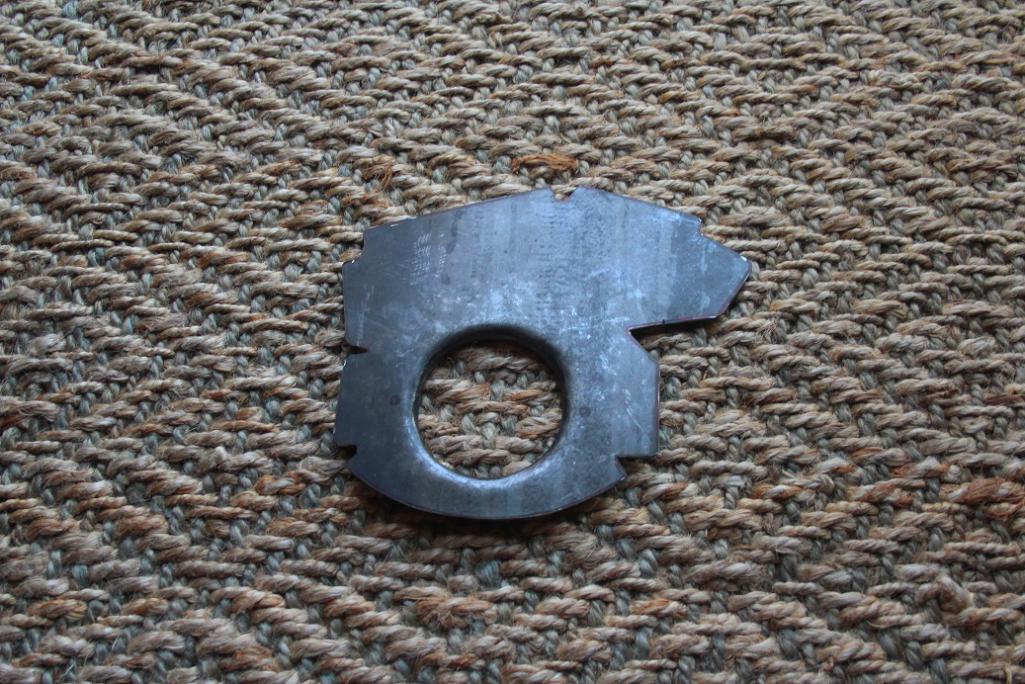
I made a couple little metal tabs with a hole, and clamped them to the corners of the wheel wells, front and back. 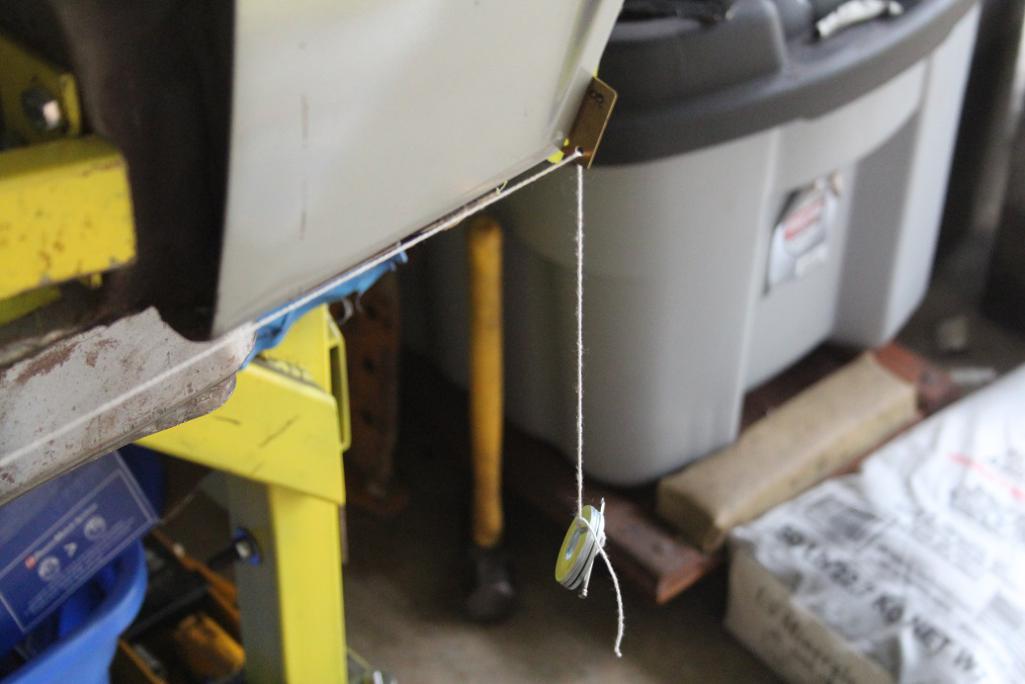 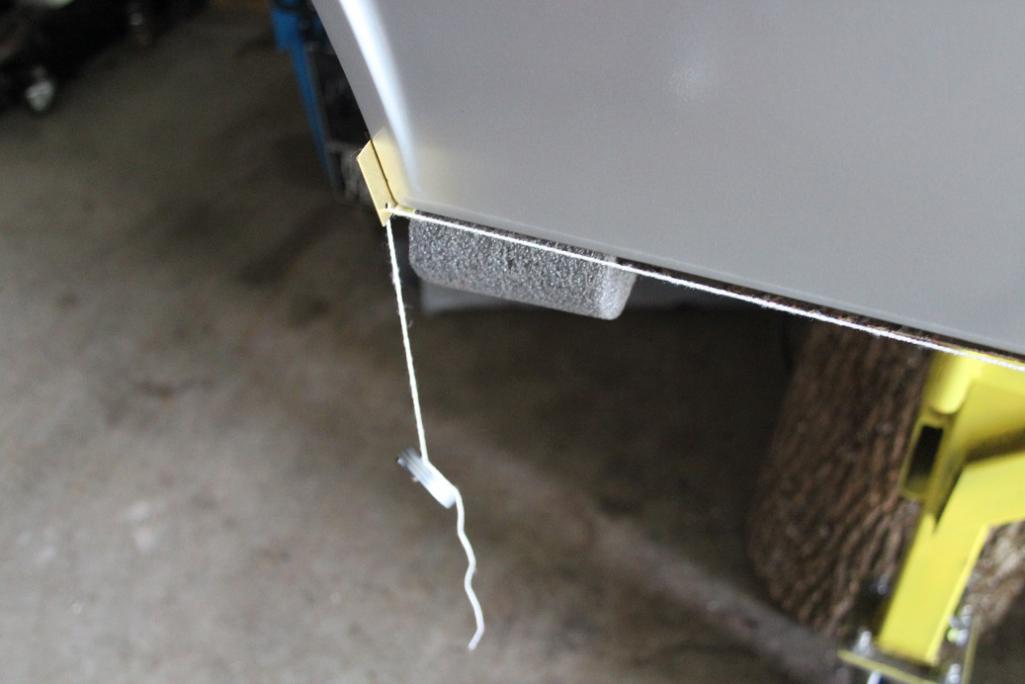 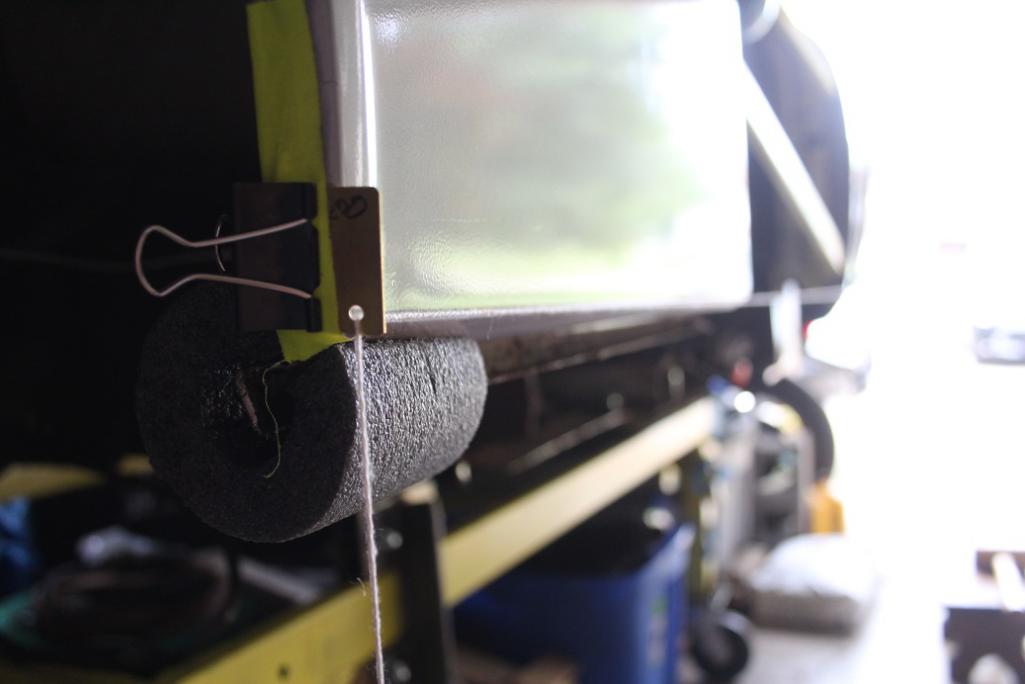 Now I can see if the bottom edges of the quarter panels line up or not... 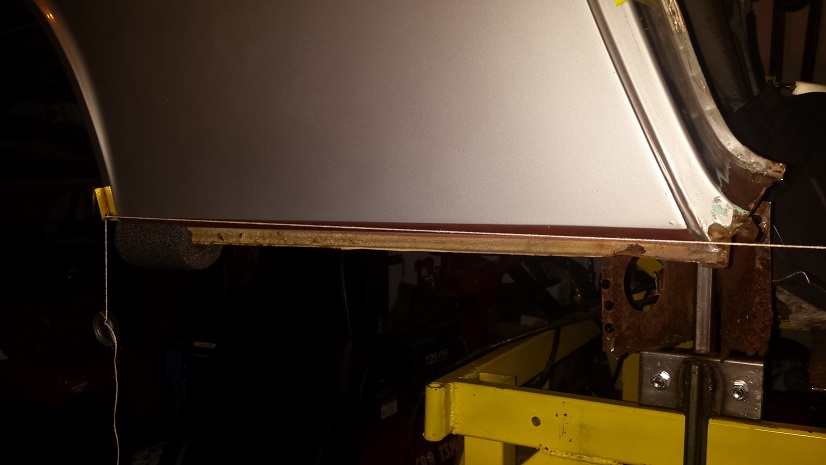 Then I can crank on the door braces to tilt the halves until they line up... 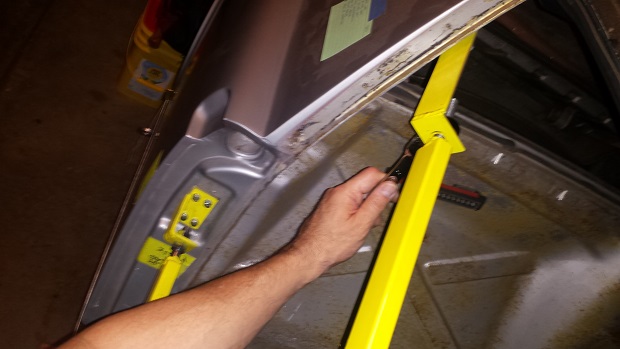 Looks better: 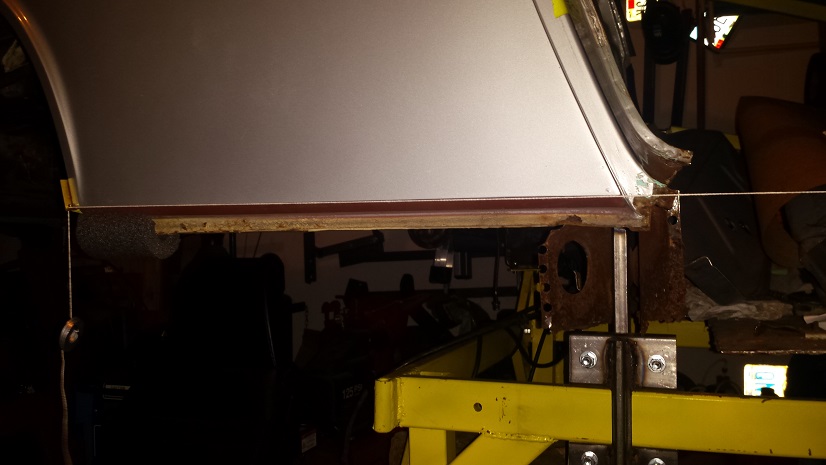 Now I'm sure someone is thinking, what about door gaps? I haven't forgotten... 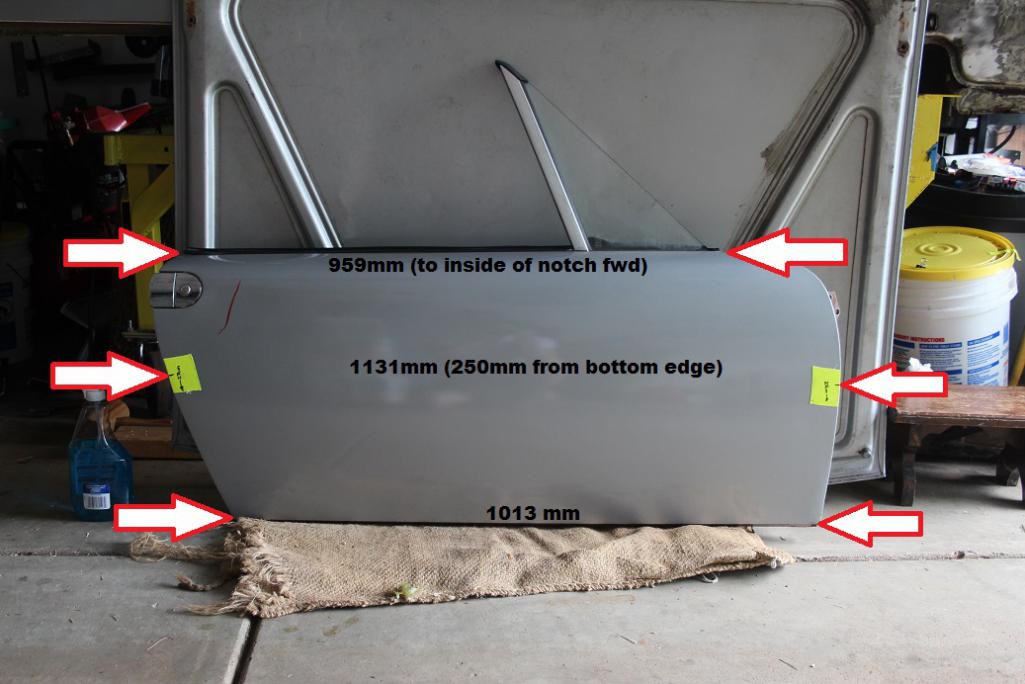 The door braces have to be adjusted in tandem to get the gaps right and also the alignment. That said, getting this right is probably the thing I am most worried about. And a little postscript... Took a hint from Jeff Hail's thread and got myself one of these little monkeys. I've seen them for as much as $30 at industrial and car places... Home Dep has them for $8 and change. 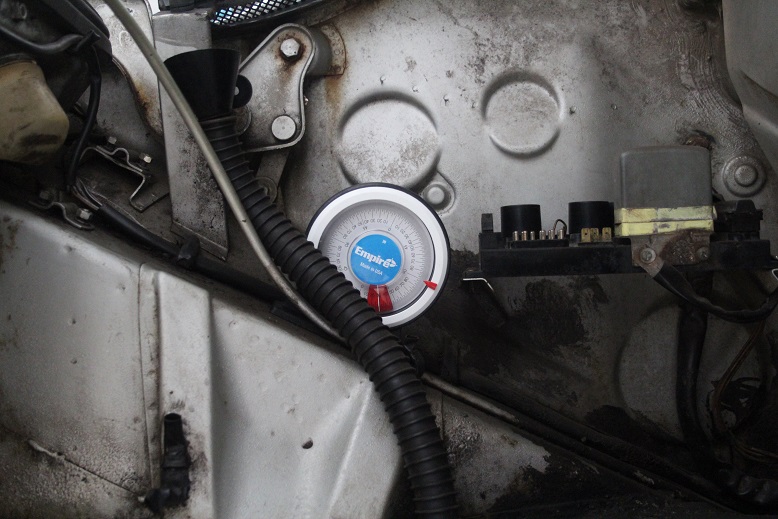 - |
| jmitro |
 Aug 29 2016, 11:10 AM Aug 29 2016, 11:10 AM
Post
#62
|
|
Senior Member    Group: Members Posts: 713 Joined: 23-July 15 From: Oklahoma Member No.: 18,986 Region Association: None 
|
Very nice work. i'm impressed with your forethought and creativity.
Reading this is making me think I need to redo my longitudinal restoration. |
| mbseto |
 Aug 29 2016, 09:21 PM Aug 29 2016, 09:21 PM
Post
#63
|
|
Senior Member    Group: Members Posts: 1,257 Joined: 6-August 14 From: Cincy Member No.: 17,743 Region Association: North East States |
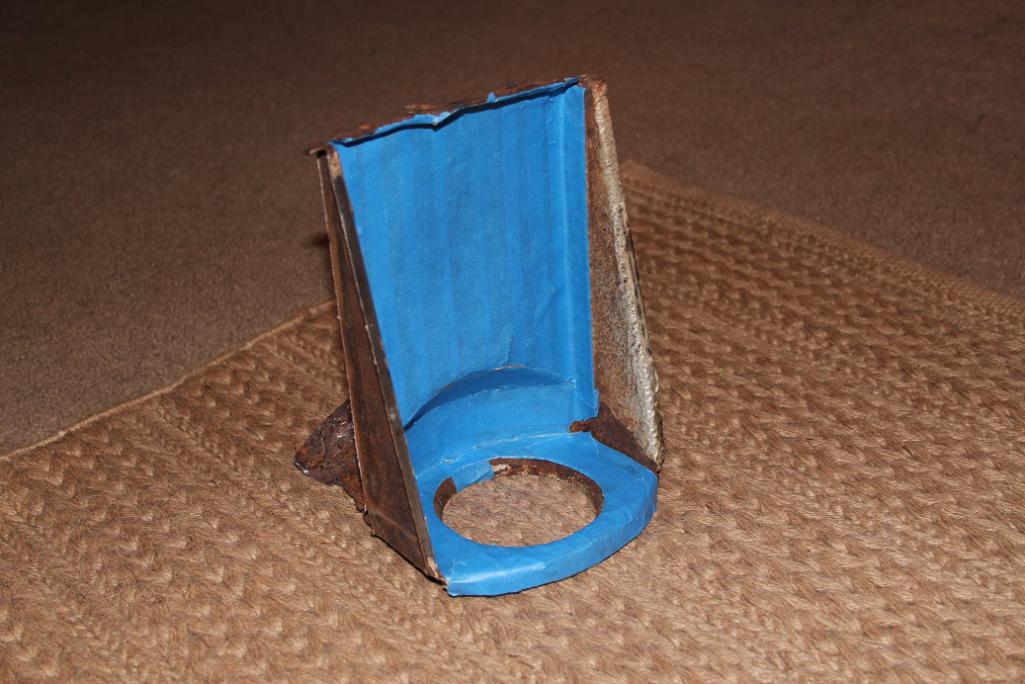
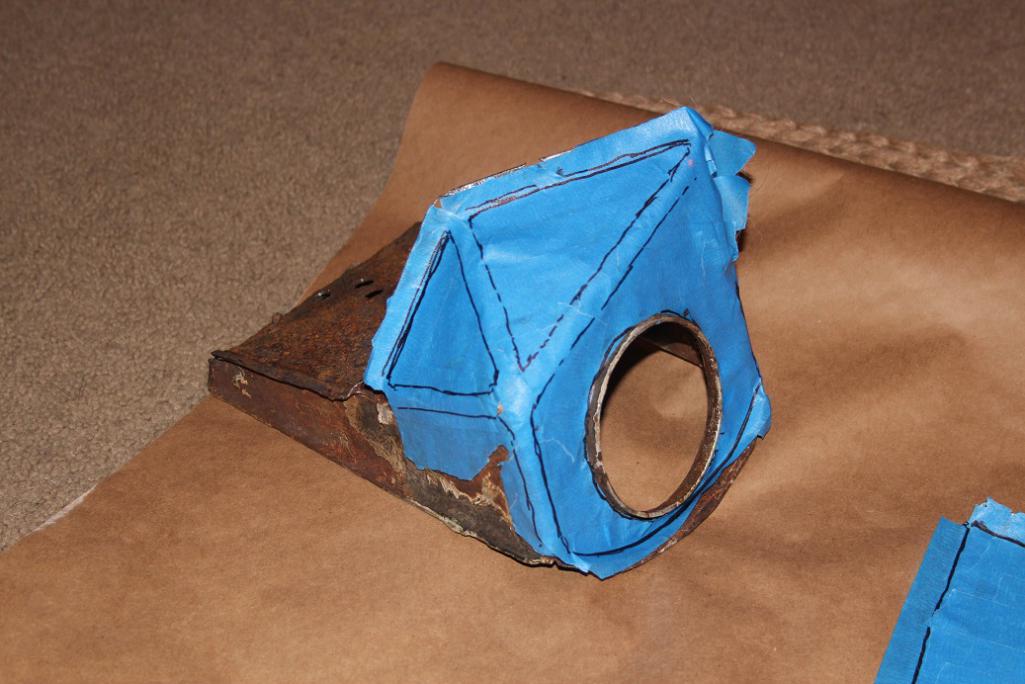
Continuing work on fabricating the inner long. Need to cut the aft hole for the heater tube. Made some templates..
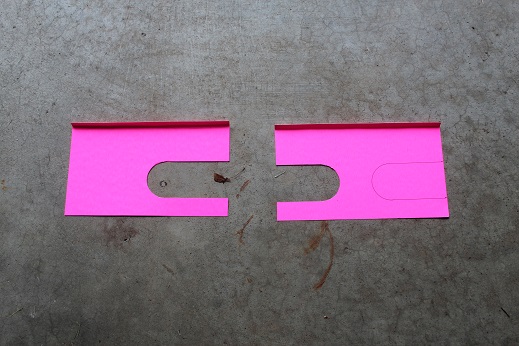 Put the heater tube in position and slid the templates together and taped them. 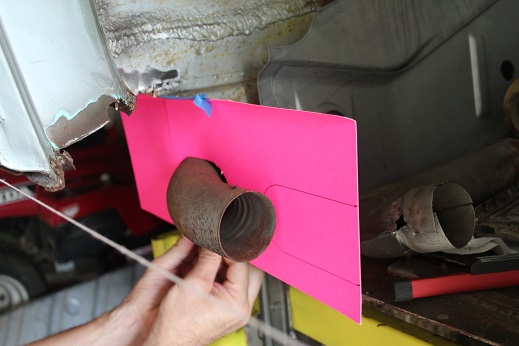 Removed the heater tube, leaving the templates in place... 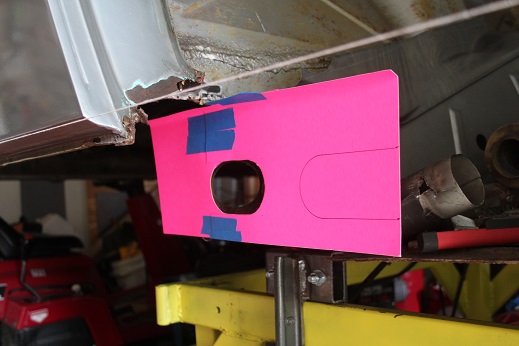 ...put the long in place and taped the templates to the long. 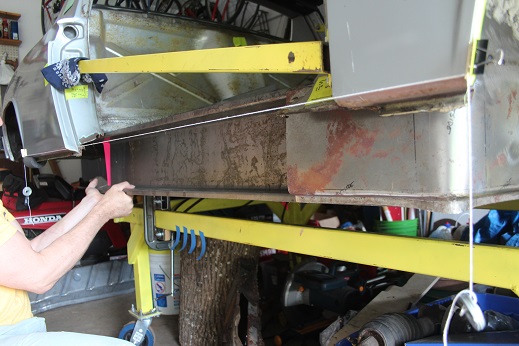 Trace out the hole and cut. 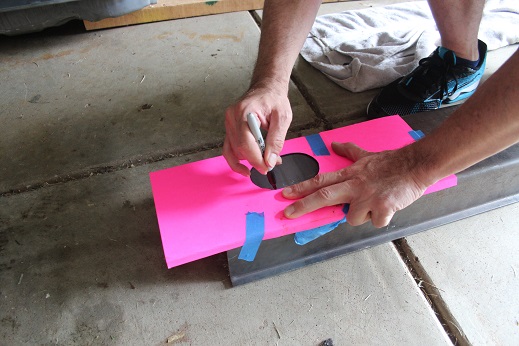 Et voila. 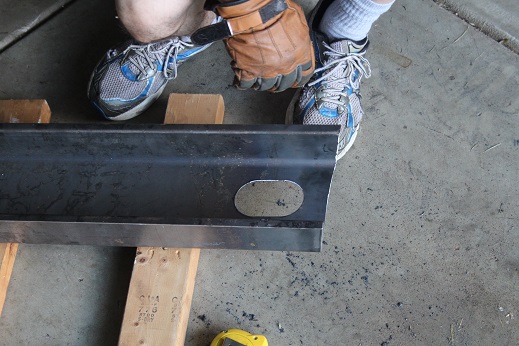 |
| mbseto |
 Aug 29 2016, 09:33 PM Aug 29 2016, 09:33 PM
Post
#64
|
|
Senior Member    Group: Members Posts: 1,257 Joined: 6-August 14 From: Cincy Member No.: 17,743 Region Association: North East States |
Puzzled over how to match up the inner long to the wheelhouse long, decided on a similar process. What you will not see in this series is me levelling the car across the little ledge in the firewall and constantly measuring the door gaps. I'm checking these at intervals as I go.
Made a template to represent the inner long. It's taped to the body. I've mode some witness marks on it so that I can remove it and then put it back in the same place. 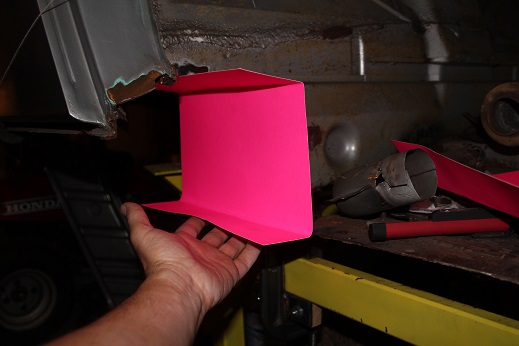 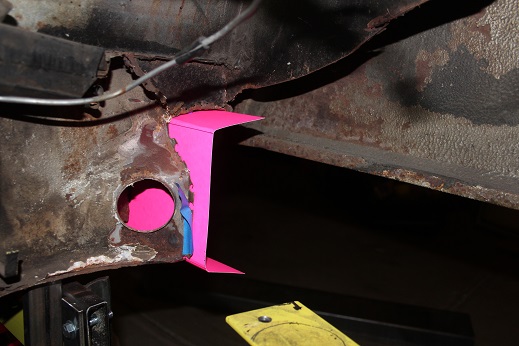 Put the wheelhouse long in place... 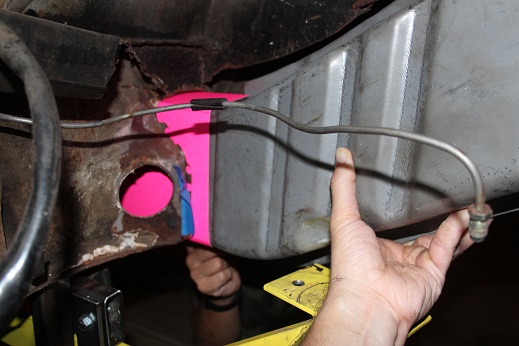 ...and traced the edge on the template. 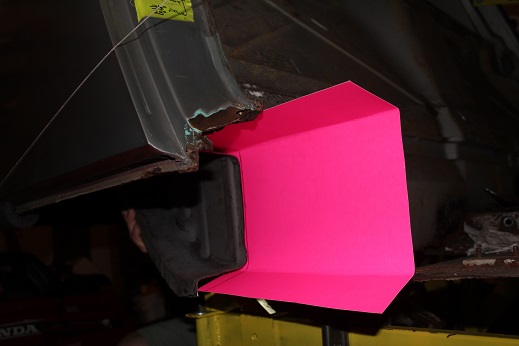 Removed the wheelhouse long. The template is then removed, cut on the traced line, and then replaced using the witness marks. Then I put the inner long in place over the template. 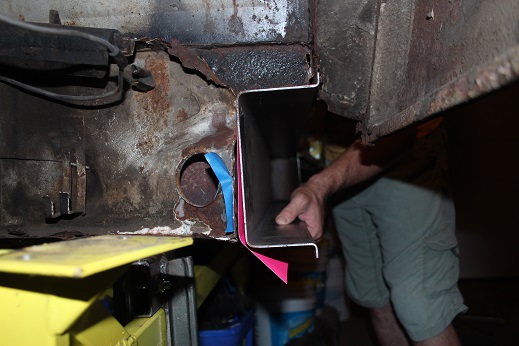 Taped the template to the inner long. 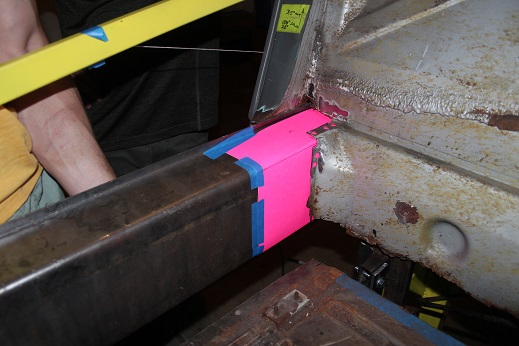 Traced it and cut. Cut outside the line a bit so I have a little room for adjustment. 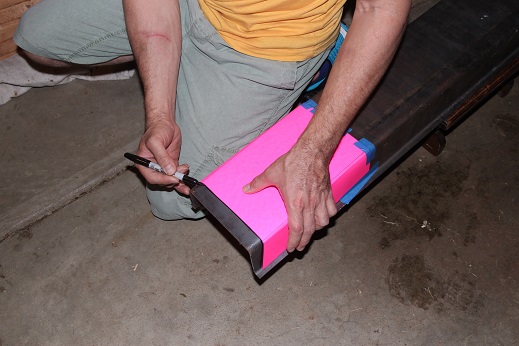 |
| mbseto |
 Aug 29 2016, 09:40 PM Aug 29 2016, 09:40 PM
Post
#65
|
|
Senior Member    Group: Members Posts: 1,257 Joined: 6-August 14 From: Cincy Member No.: 17,743 Region Association: North East States |
Test fitting the heater tube.
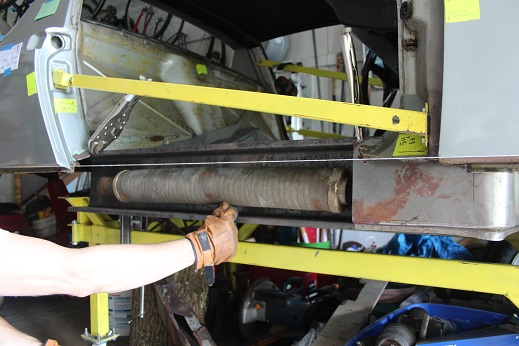 Going to need a little adjustment work to get all this fitting together. 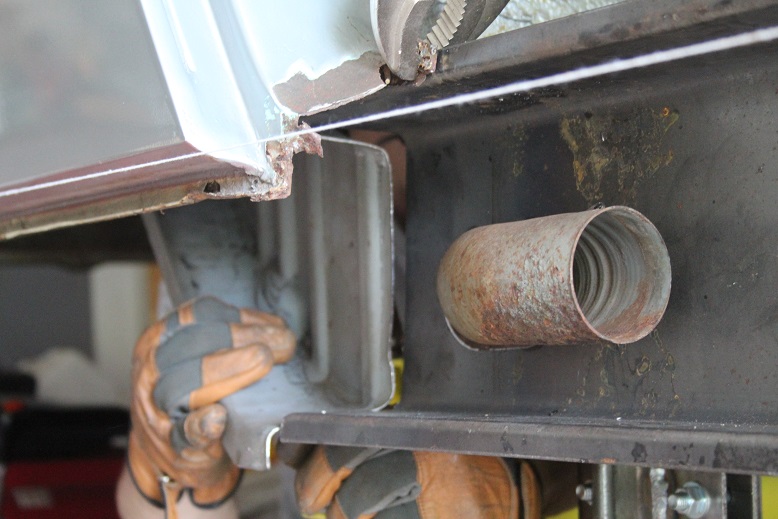 I just like this picture. 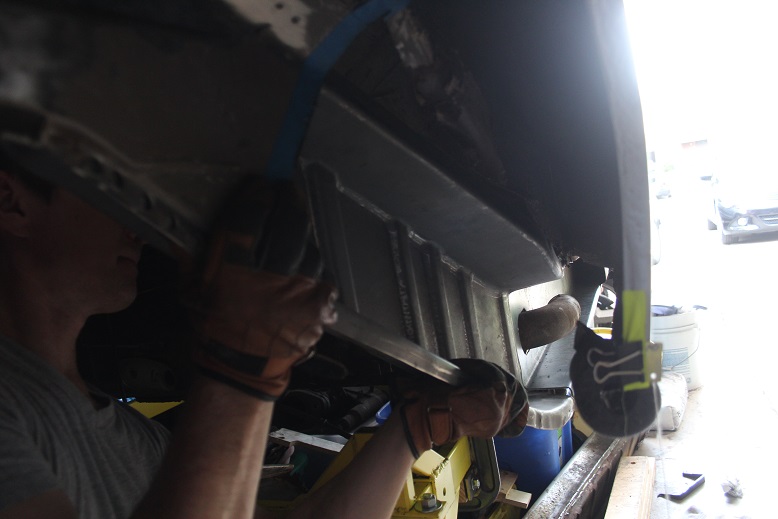 I'd be lying if I said I wasn't a little excited to see all this healthy metal so close to being in the car. A good strong backbone again. 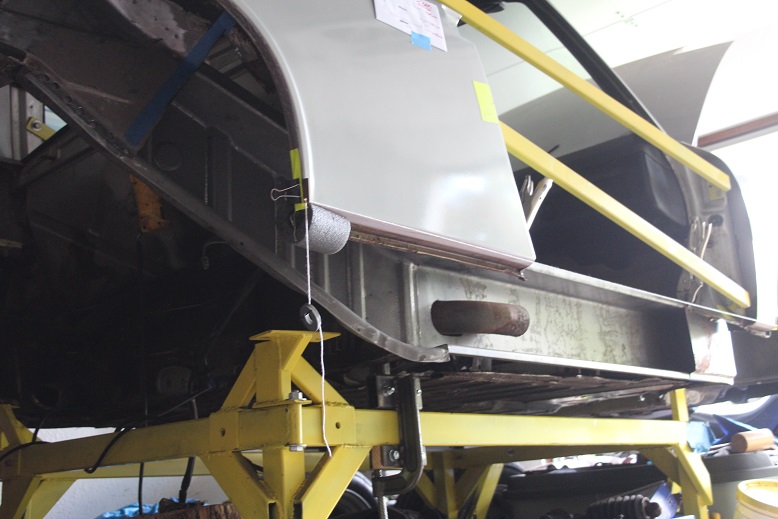 |
| 914forme |
 Aug 30 2016, 06:00 AM Aug 30 2016, 06:00 AM
Post
#66
|
|
Times a wastin', get wrenchin'!     Group: Members Posts: 3,896 Joined: 24-July 04 From: Dayton, Ohio Member No.: 2,388 Region Association: None 
|
(IMG:style_emoticons/default/drooley.gif) Loving the work, We all know how frustrating this stuff can be. Your doing a great job. And the attention to detail is phenomenal.
If I could make a suggestion. I would get my pieces aligned, then add a scab plate to the inside over the joints. Jeff shows this in his thread also. larger the plate the better. Just remember to coat it between the plates. |
| mbseto |
 Aug 30 2016, 11:43 AM Aug 30 2016, 11:43 AM
Post
#67
|
|
Senior Member    Group: Members Posts: 1,257 Joined: 6-August 14 From: Cincy Member No.: 17,743 Region Association: North East States |
Thank you!
I definitely plan to sleeve that joint. Truth is I'm still a ways from welding this all together- that wheelhouse long looks like it was made to attach to whatever is left of the long that was cut out, not extend to the trunk wall. Well, I cut mine out completely so I need to make some tabs to bridge that gap. I'll post photos of that process. Then get that butt joint lined up which will require squeezing the one side so the walls are at right angles and tapering the other to match the height of the section. Then I'll make a sleeve. Finally some primer, and I think I'll be close to welding. |
| mbseto |
 Aug 31 2016, 10:43 AM Aug 31 2016, 10:43 AM
Post
#68
|
|
Senior Member    Group: Members Posts: 1,257 Joined: 6-August 14 From: Cincy Member No.: 17,743 Region Association: North East States |
Acquired a mascot:
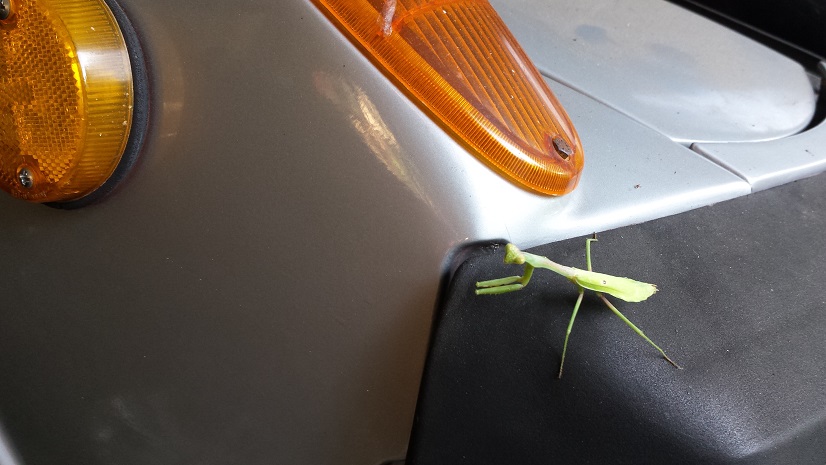 |
| mbseto |
 Jan 2 2017, 05:00 PM Jan 2 2017, 05:00 PM
Post
#69
|
|
Senior Member    Group: Members Posts: 1,257 Joined: 6-August 14 From: Cincy Member No.: 17,743 Region Association: North East States |
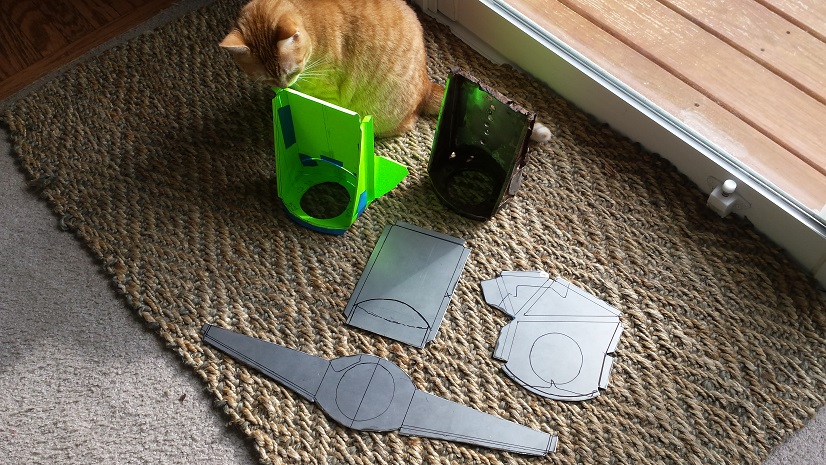
Getting behind on my updates. Got the long sleeved before Christmas...
Made it in three pieces from 12g steel (because the long was already fabricated in 12g...) EDIT: sleeve is 14g: 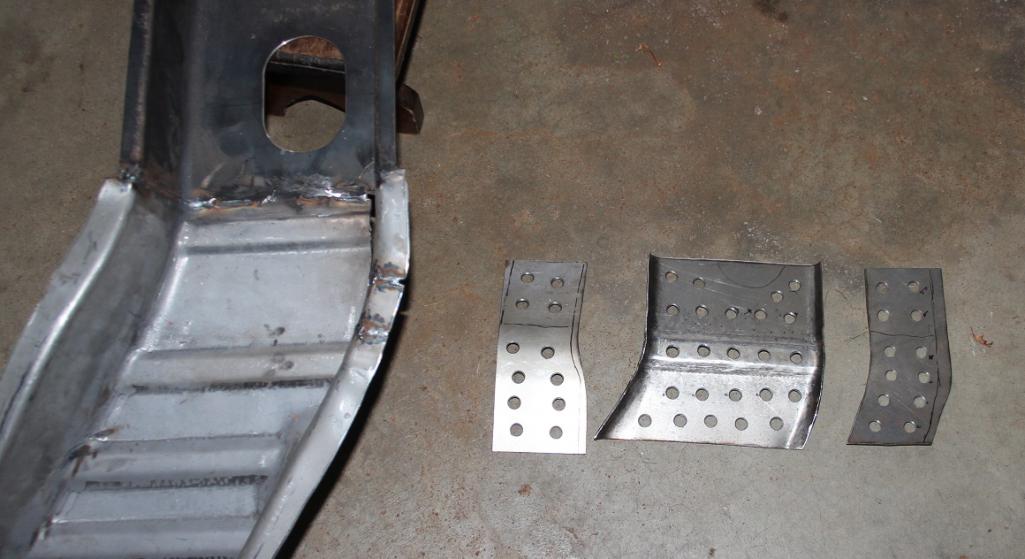 Checking the fit: 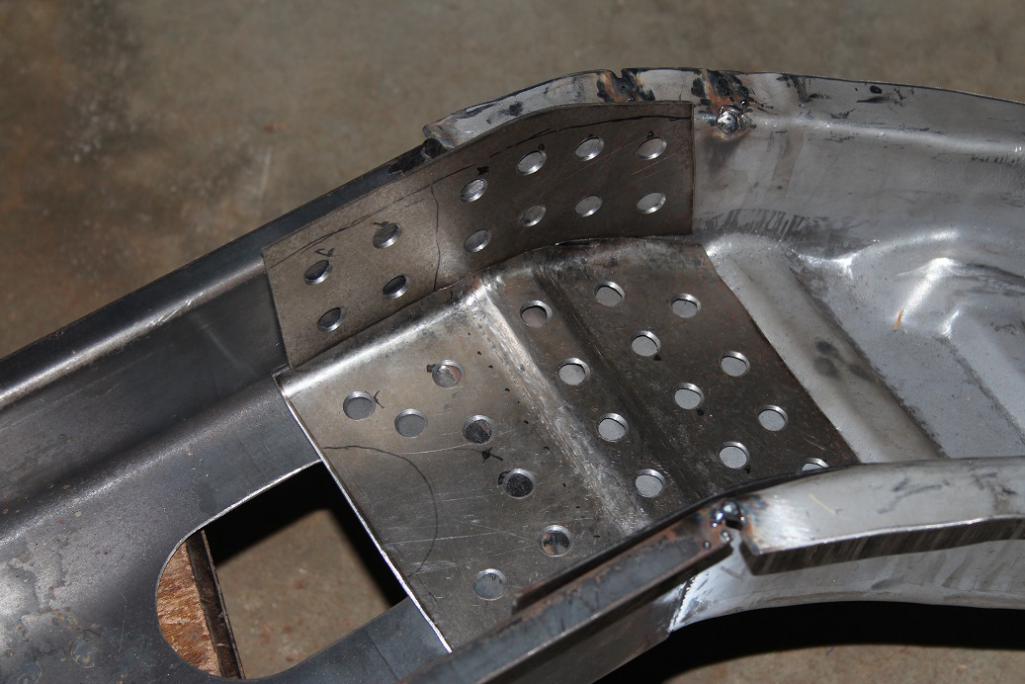 Clamped in place to tack together: 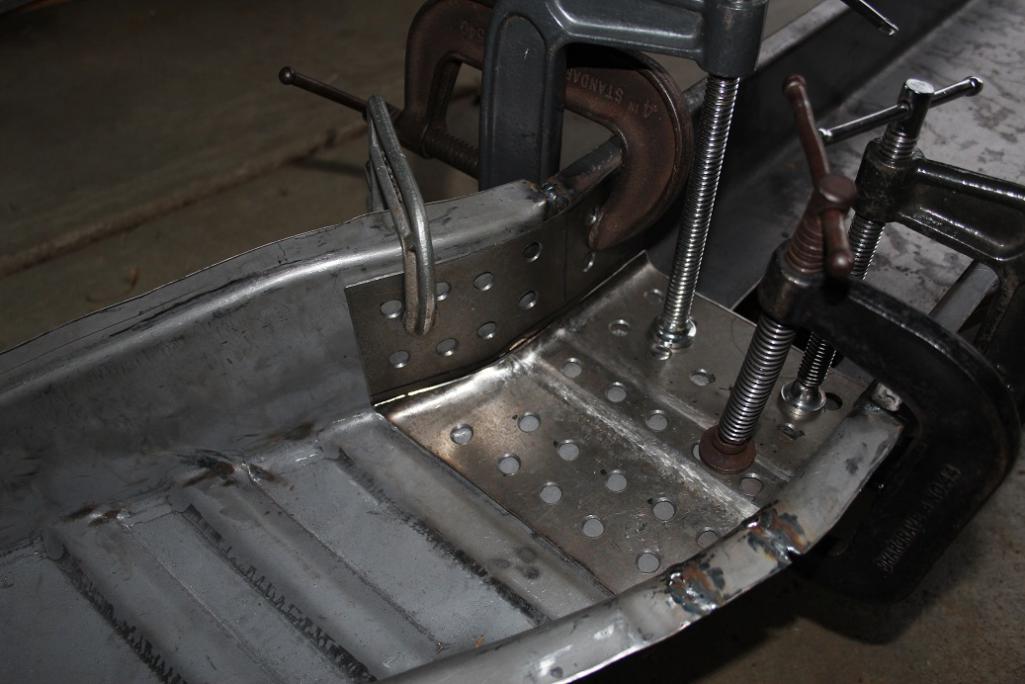 All tacked up: 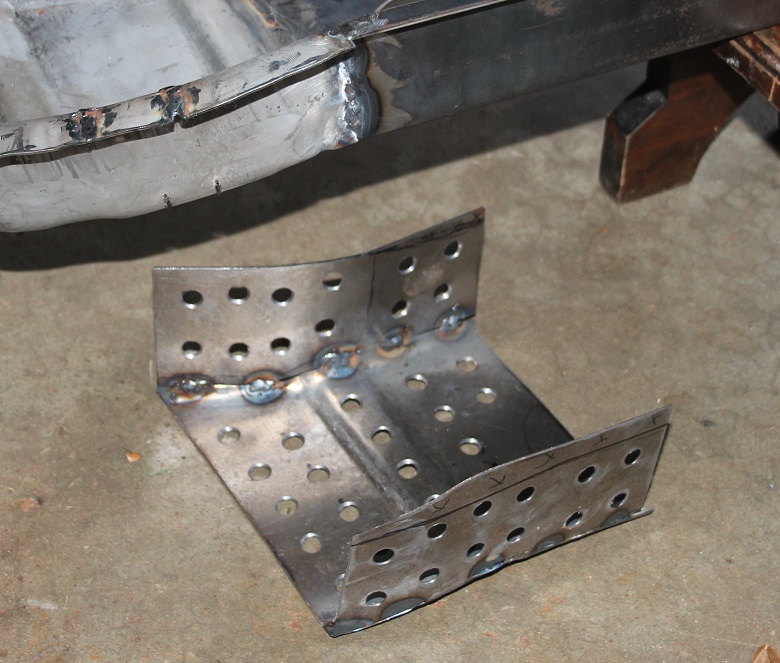 Welded those seams up solid. Did a little trimming, also sprayed on some weld-thru primer to both pieces before the final weld up. In situ: 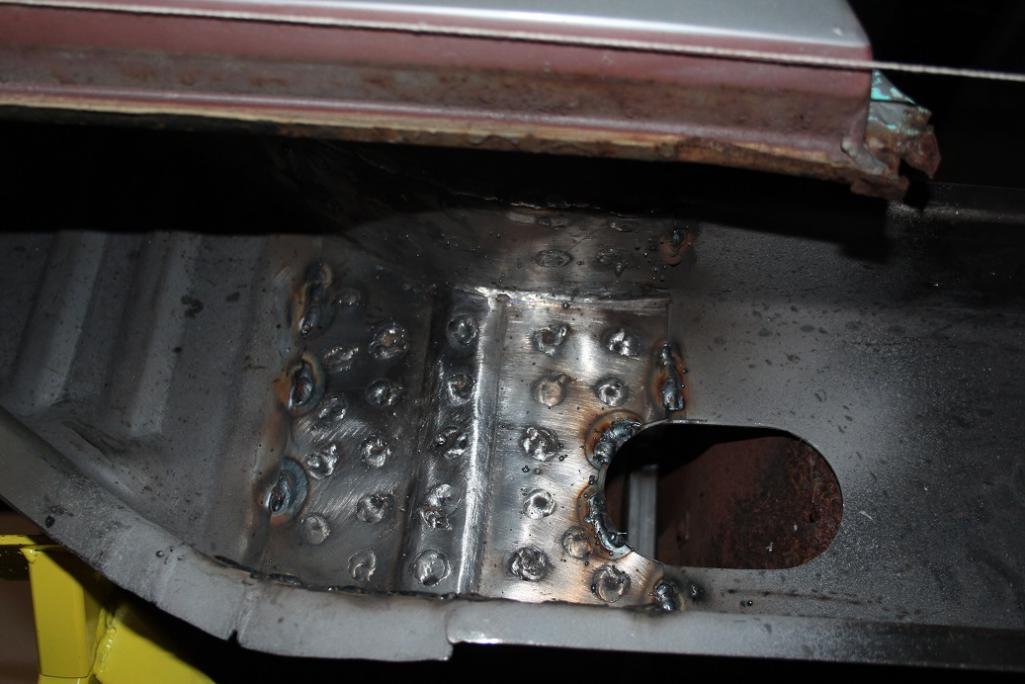 |
| 914forme |
 Jan 2 2017, 07:00 PM Jan 2 2017, 07:00 PM
Post
#70
|
|
Times a wastin', get wrenchin'!     Group: Members Posts: 3,896 Joined: 24-July 04 From: Dayton, Ohio Member No.: 2,388 Region Association: None 
|
Matthew, working it 12 ga. is a little (IMG:style_emoticons/default/screwy.gif) I like crazy so keep up the great work. (IMG:style_emoticons/default/aktion035.gif)
|
| SixerJ |
 Jan 4 2017, 02:03 AM Jan 4 2017, 02:03 AM
Post
#71
|
|
Member   Group: Members Posts: 448 Joined: 24-June 13 From: UK Member No.: 16,042 Region Association: England |
How did I miss this great thread before now, subscribed! (IMG:style_emoticons/default/popcorn[1].gif)
|
| amfab |
 Jan 4 2017, 10:18 PM Jan 4 2017, 10:18 PM
Post
#72
|
|
Member   Group: Members Posts: 401 Joined: 17-May 16 From: Los Angeles Member No.: 20,004 Region Association: None 
|
I am about a month behind you...
http://www.914world.com/bbs2/index.php?showtopic=301894 I hope my fabrications look this good. Subscribed -Andrew |
| mbseto |
 Jan 5 2017, 05:06 PM Jan 5 2017, 05:06 PM
Post
#73
|
|
Senior Member    Group: Members Posts: 1,257 Joined: 6-August 14 From: Cincy Member No.: 17,743 Region Association: North East States |
Matthew, working it 12 ga. is a little (IMG:style_emoticons/default/screwy.gif) I like crazy so keep up the great work. (IMG:style_emoticons/default/aktion035.gif) Well, that got me thinking... Had to go back and measure. The sleeve is 14 gauge, as is the upper long from RD- only the inner long is 12, bent by a local shop. |
| mbseto |
 Jan 5 2017, 05:14 PM Jan 5 2017, 05:14 PM
Post
#74
|
|
Senior Member    Group: Members Posts: 1,257 Joined: 6-August 14 From: Cincy Member No.: 17,743 Region Association: North East States |
|
| mbseto |
 Jan 5 2017, 05:22 PM Jan 5 2017, 05:22 PM
Post
#75
|
|
Senior Member    Group: Members Posts: 1,257 Joined: 6-August 14 From: Cincy Member No.: 17,743 Region Association: North East States |
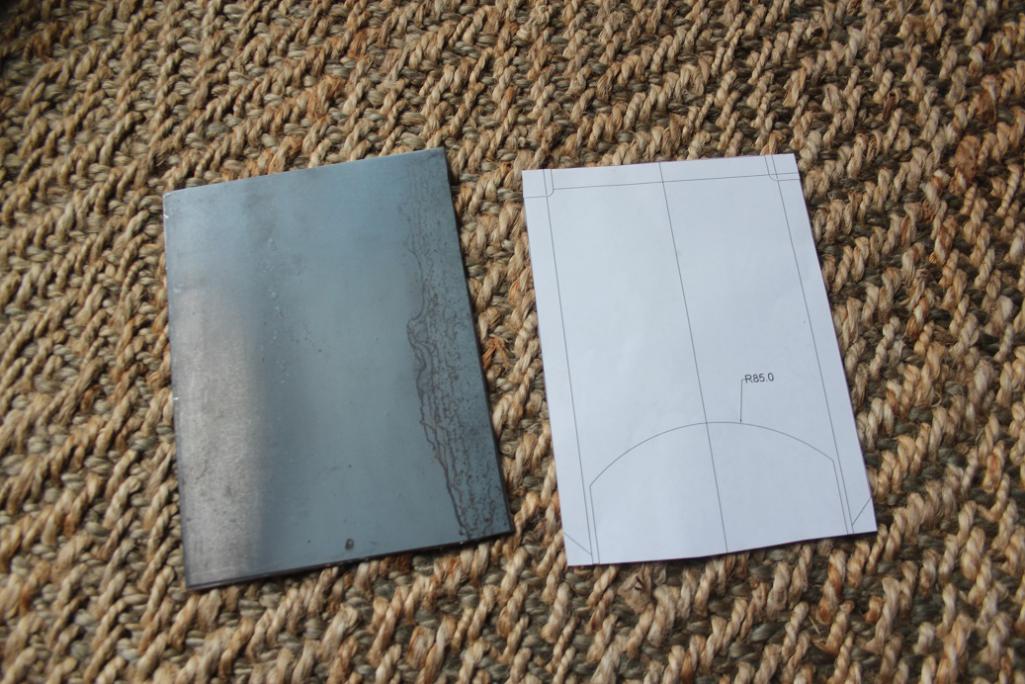
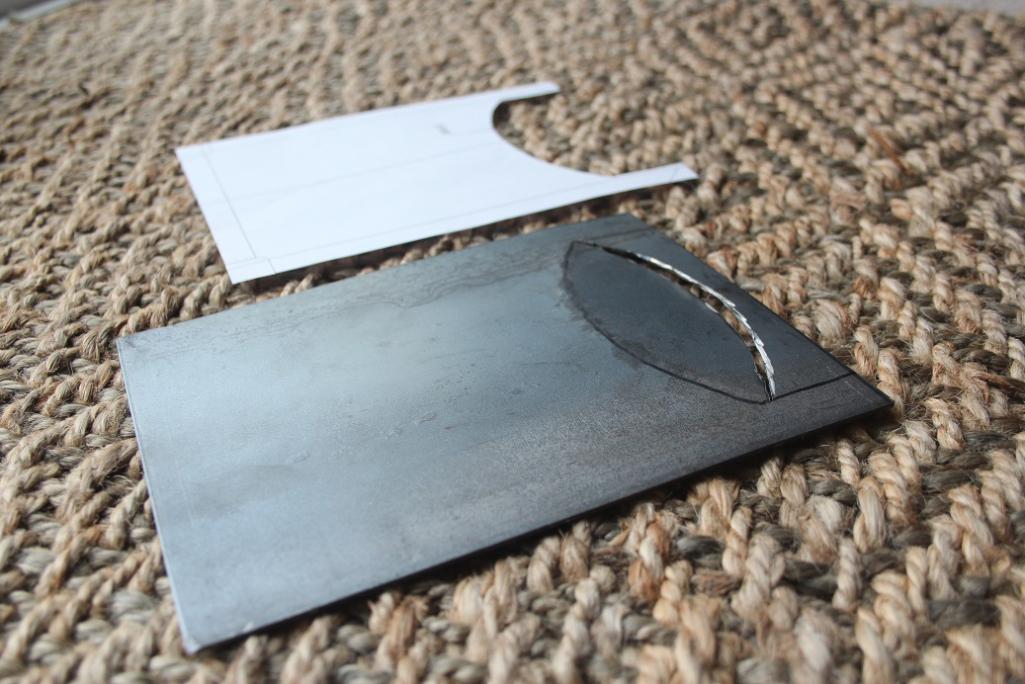
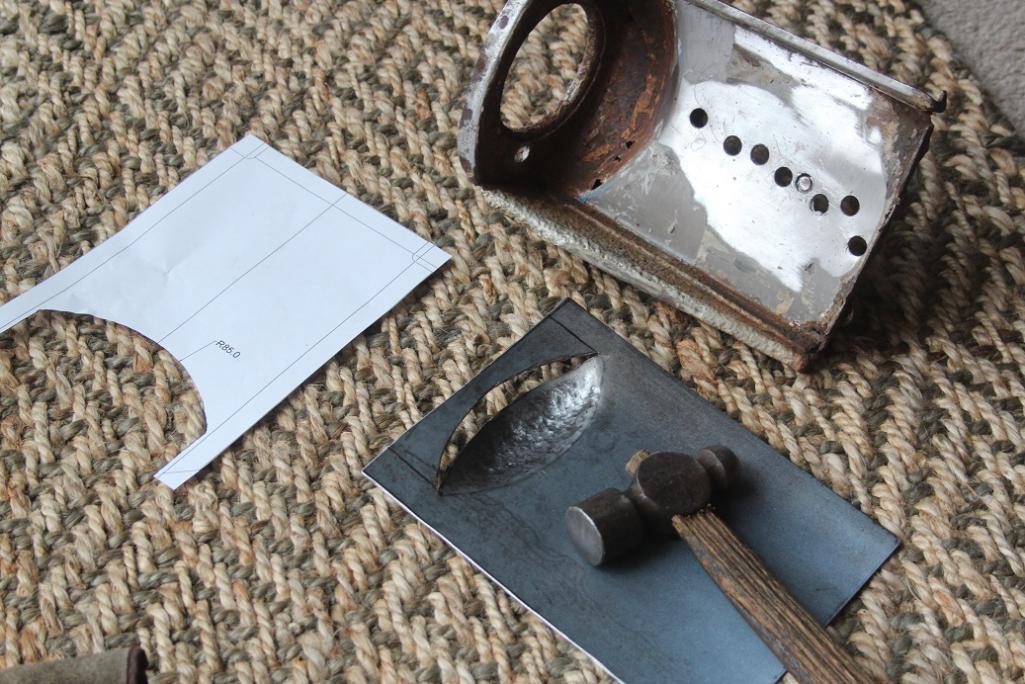
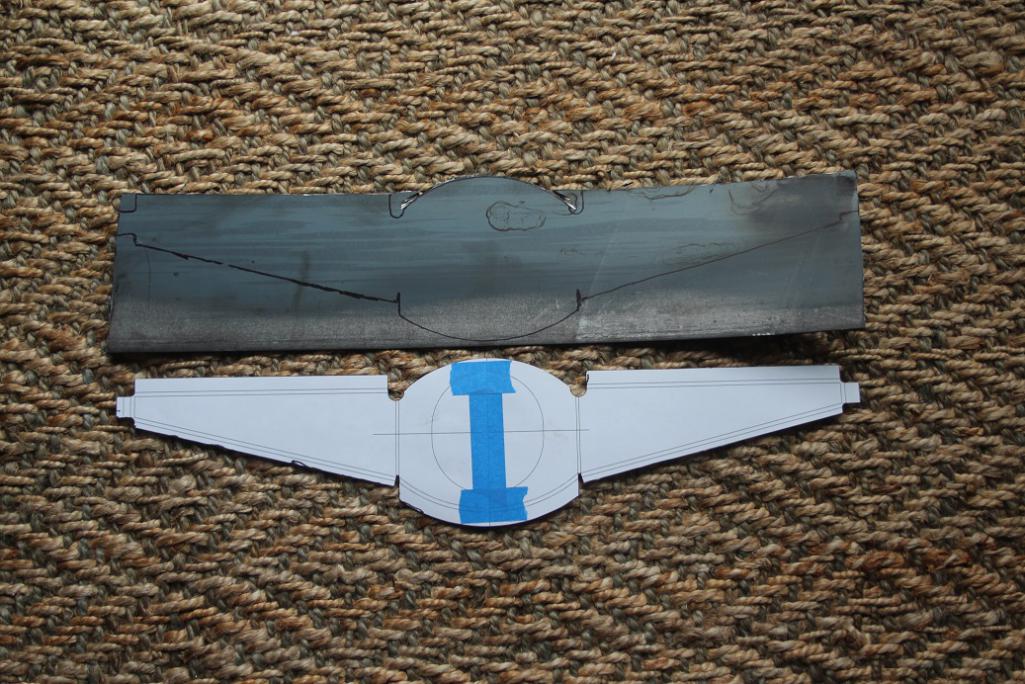
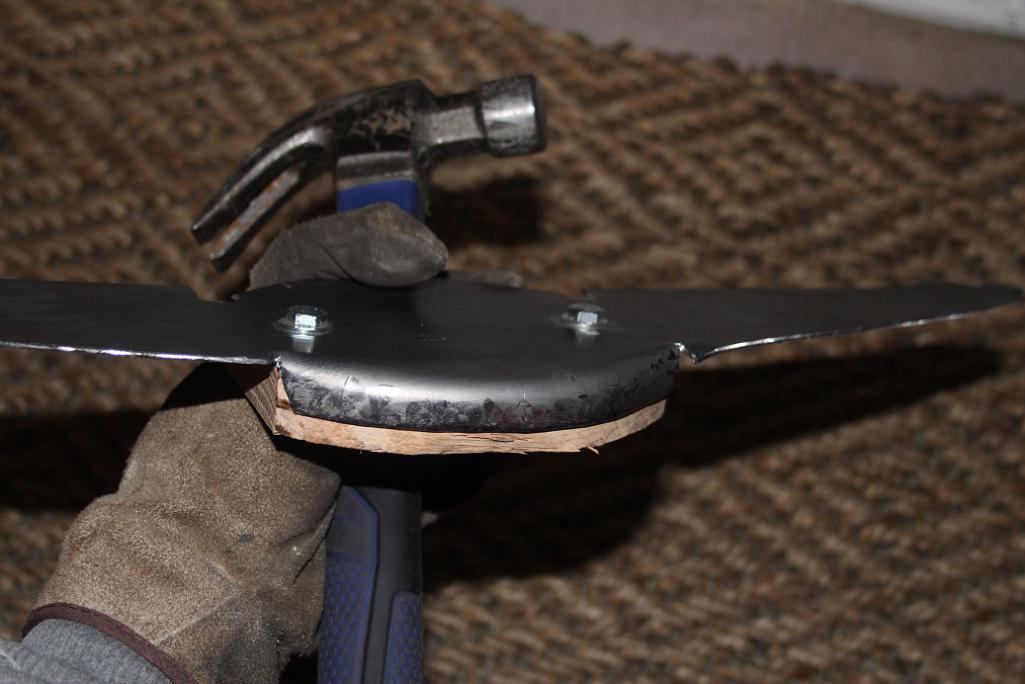
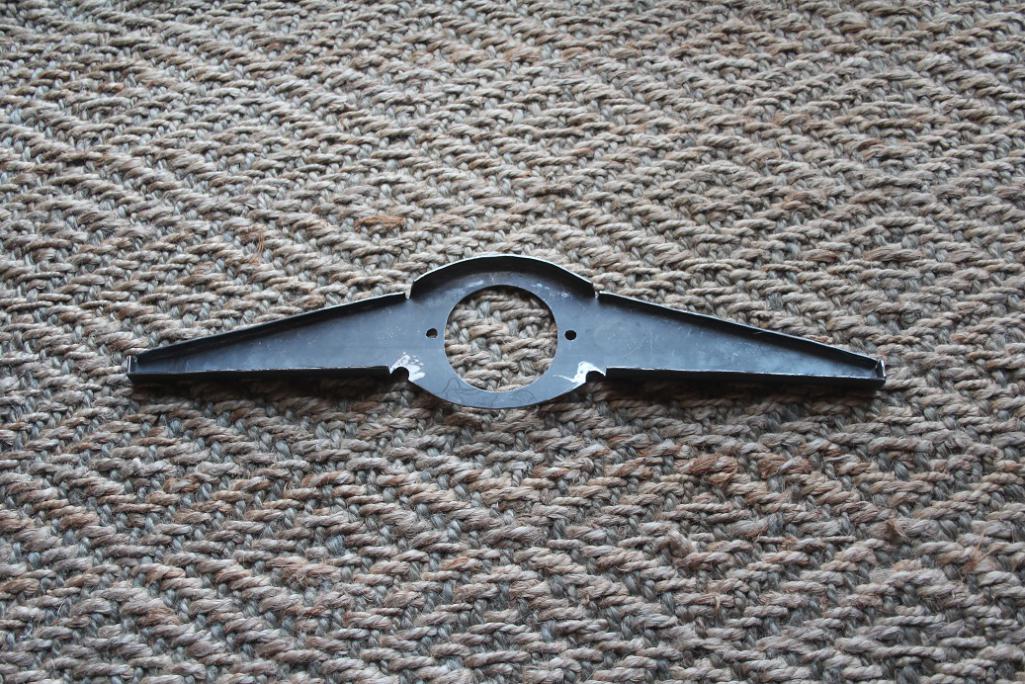
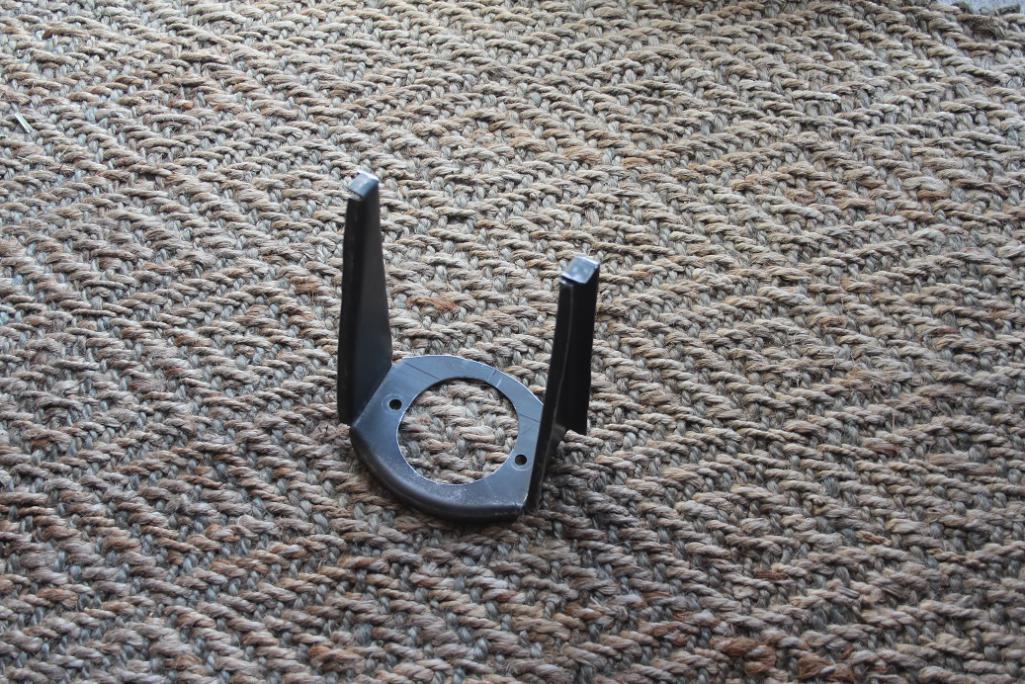
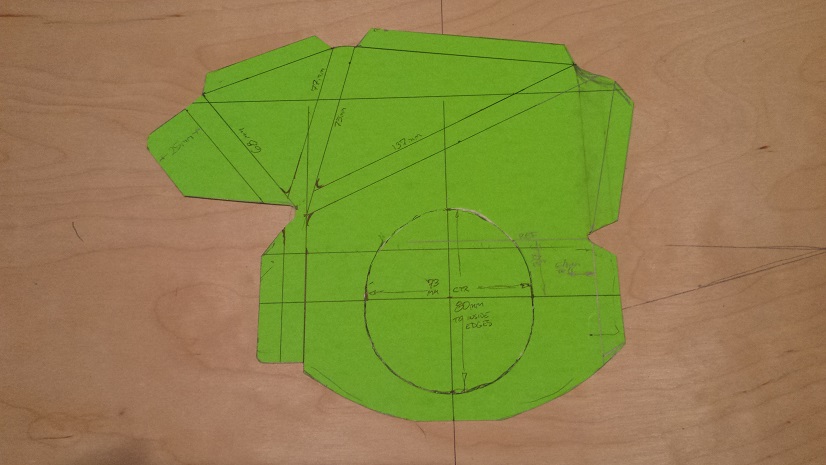
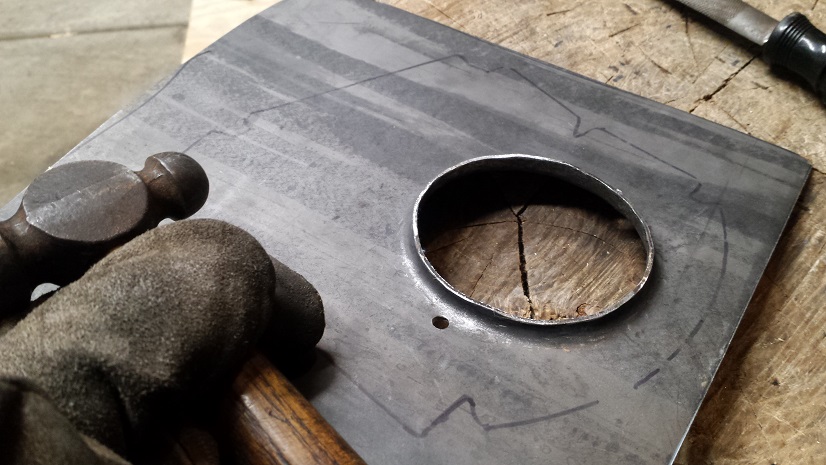
All the bits... These are actually the bits from the light gauge practice piece I made. Can't find a picture of the 14g stuff. Anyway, on to welding...
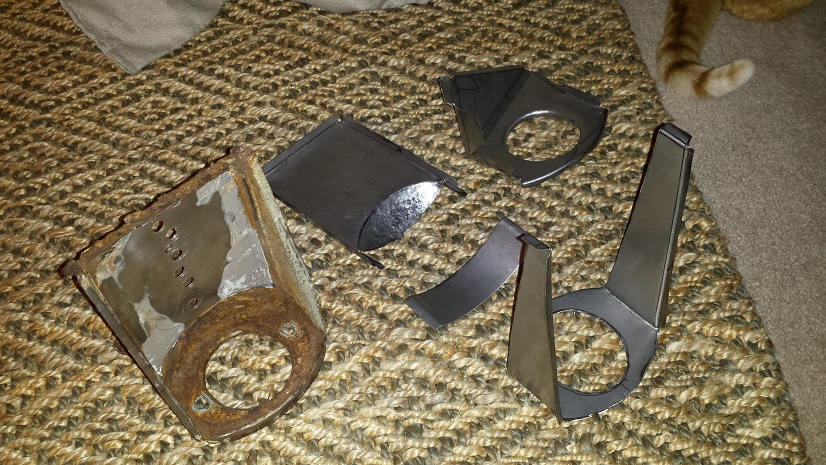 Welded together. I used weld through primer where there are flanges here. The bottom piece is just bolted to the main part of the bracket, I need to fit it to the long and to my dolly/jig and some bends may need a little tweaking. 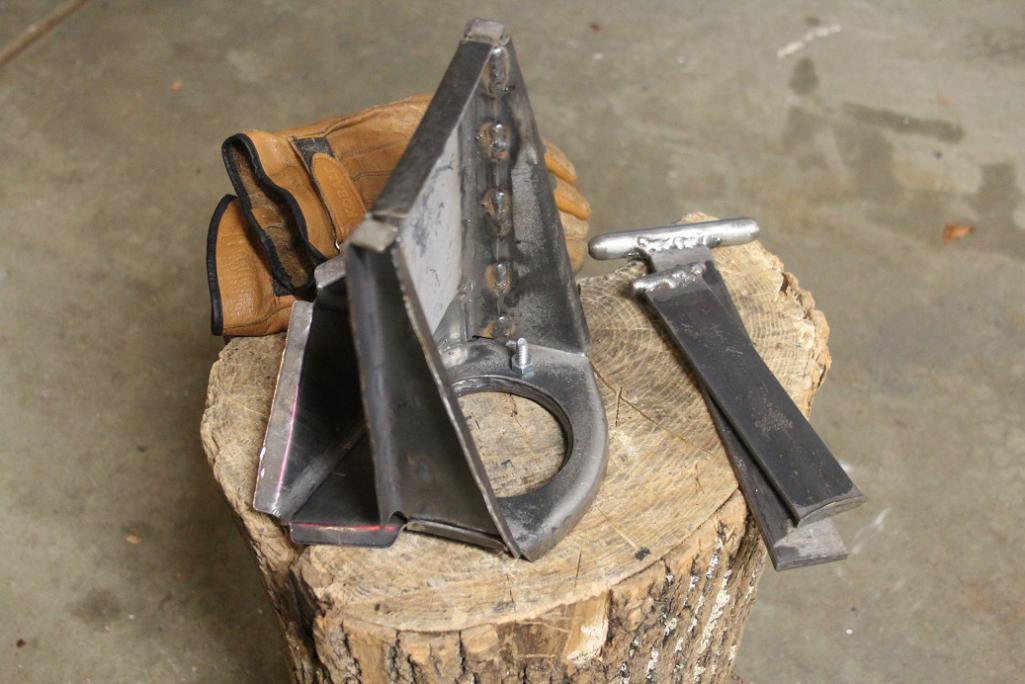 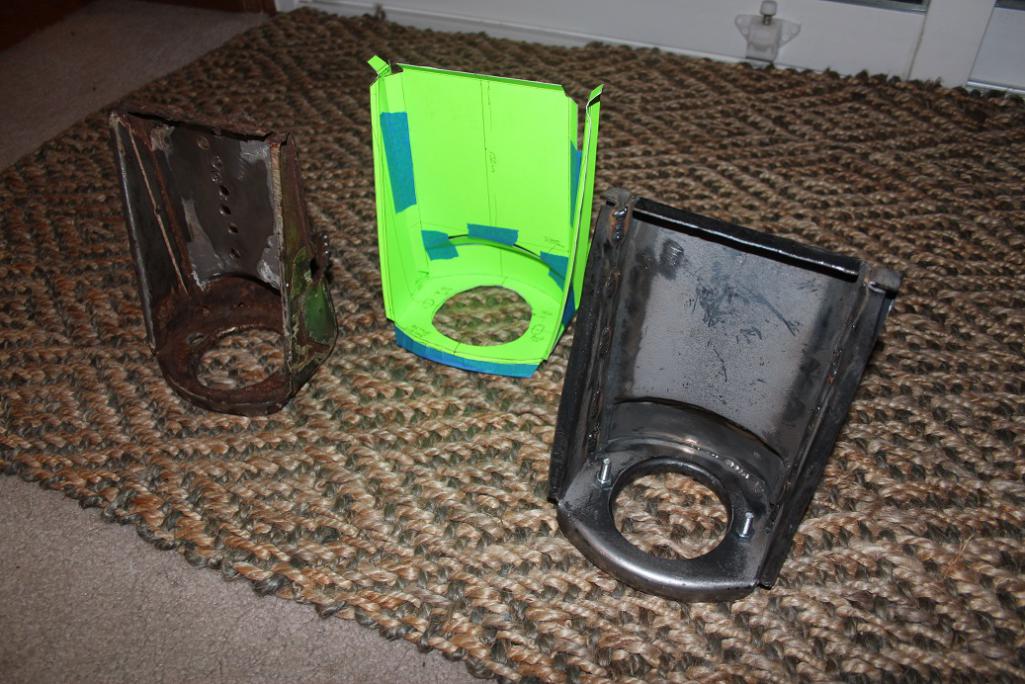 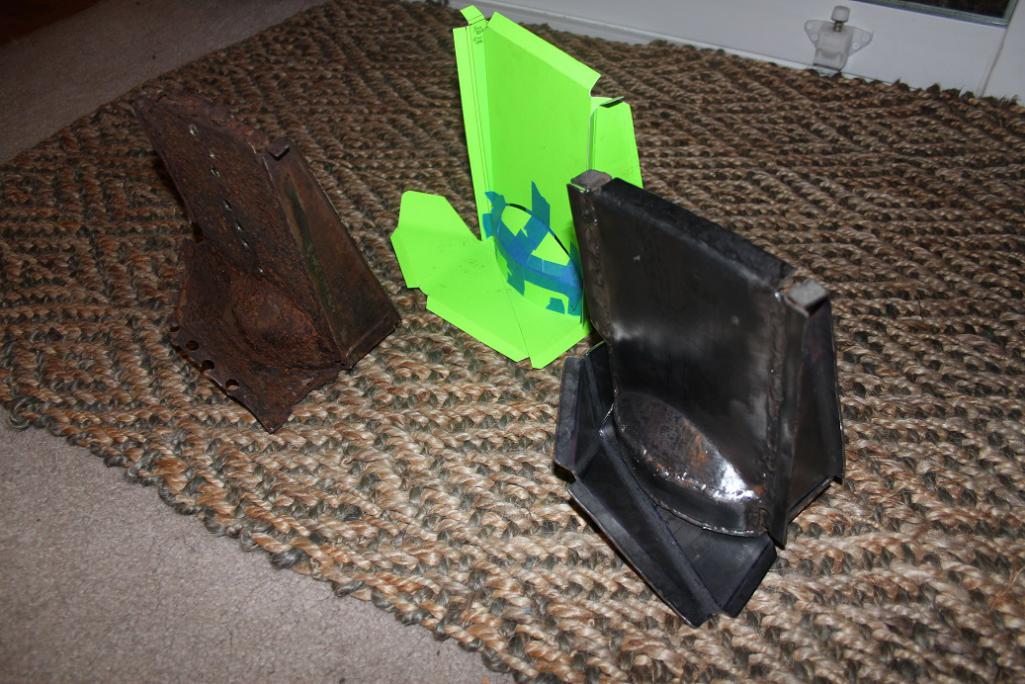 |
| 914forme |
 Jan 5 2017, 05:40 PM Jan 5 2017, 05:40 PM
Post
#76
|
|
Times a wastin', get wrenchin'!     Group: Members Posts: 3,896 Joined: 24-July 04 From: Dayton, Ohio Member No.: 2,388 Region Association: None 
|
Nice work there (IMG:style_emoticons/default/smash.gif)
|
| JoeDees |
 Jan 5 2017, 06:10 PM Jan 5 2017, 06:10 PM
Post
#77
|
|
Senior Member    Group: Members Posts: 515 Joined: 10-November 14 From: Northern Kentucky Member No.: 18,106 Region Association: None |
That...is...awesome!!!!
|
| amfab |
 Jan 5 2017, 10:12 PM Jan 5 2017, 10:12 PM
Post
#78
|
|
Member   Group: Members Posts: 401 Joined: 17-May 16 From: Los Angeles Member No.: 20,004 Region Association: None 
|
Man, that is great
Matthew you have similar spots that I uncovered. Having this thread has helped my anxiety about taking on too big a project. Are you learning as you go or have you worked in sheetmetal before? |
| mbseto |
 Jan 6 2017, 08:00 AM Jan 6 2017, 08:00 AM
Post
#79
|
|
Senior Member    Group: Members Posts: 1,257 Joined: 6-August 14 From: Cincy Member No.: 17,743 Region Association: North East States |
Are you learning as you go or have you worked in sheetmetal before? Before I started on this car I would have said, oh yeah I've worked with sheet metal before. What I knew then feels pretty small compared to what I've been learning. So, yes, I am absolutely learning as I go. It's fun for me, and it's why I took on this project. I often make a piece in a lighter gauge first, just to see how the metal is going to behave when I try to make that shape. I also spend some time on sheet metal forums, where they tend to show more about the actual making of a piece, whereas here most people just show the finished piece and then how it is patched in to the car. |
| Cairo94507 |
 Jan 6 2017, 08:19 AM Jan 6 2017, 08:19 AM
Post
#80
|
|
Michael           Group: Members Posts: 10,268 Joined: 1-November 08 From: Auburn, CA Member No.: 9,712 Region Association: Northern California 
|
|
  |
1 User(s) are reading this topic (1 Guests and 0 Anonymous Users)
0 Members:

|
Lo-Fi Version | Time is now: 3rd April 2025 - 01:12 AM |
Invision Power Board
v9.1.4 © 2025 IPS, Inc.


