|
|

|
Porsche, and the Porsche crest are registered trademarks of Dr. Ing. h.c. F. Porsche AG.
This site is not affiliated with Porsche in any way. Its only purpose is to provide an online forum for car enthusiasts. All other trademarks are property of their respective owners. |
|
|
  |
| rick 918-S |
 Jan 31 2016, 10:19 PM Jan 31 2016, 10:19 PM
Post
#41
|
|
Hey nice rack! -Celette                Group: Members Posts: 20,911 Joined: 30-December 02 From: Now in Superior WI Member No.: 43 Region Association: Northstar Region 

|
Nice progress.
|
| Olympic 914 |
 Feb 8 2016, 08:16 PM Feb 8 2016, 08:16 PM
Post
#42
|
   Group: Members Posts: 1,725 Joined: 7-July 11 From: Pittsburgh PA Member No.: 13,287 Region Association: North East States 
|
January...
What happened to that month?? Little body work done. Got my bearings and finished the steering rack. 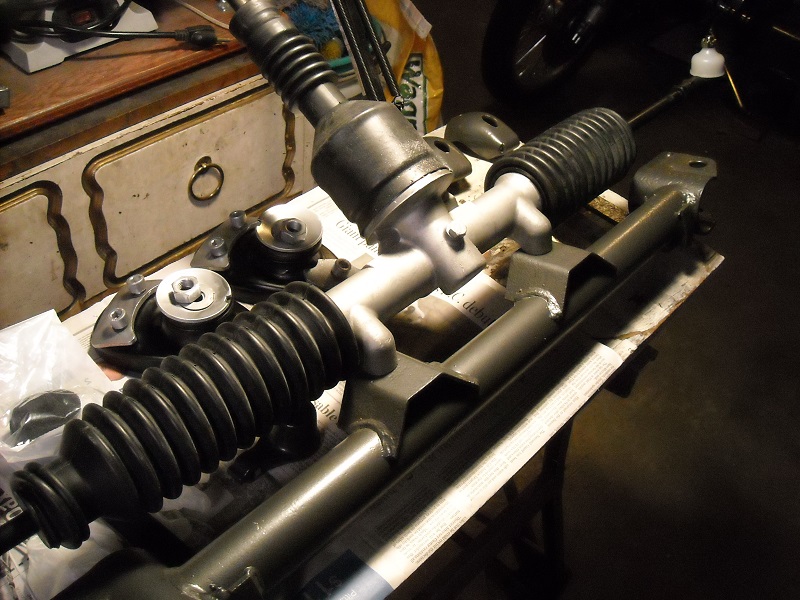 Rack rebuild thread Then Feb 2 went to Punxsutawney for Phil's prognostication. 130 yrs. anniversary. and for only the 18th time in 130 years Phil did not see his shadow. portending an early spring instead of the usual 6 more weeks of Winter...Yeah !! (IMG:style_emoticons/default/piratenanner.gif) 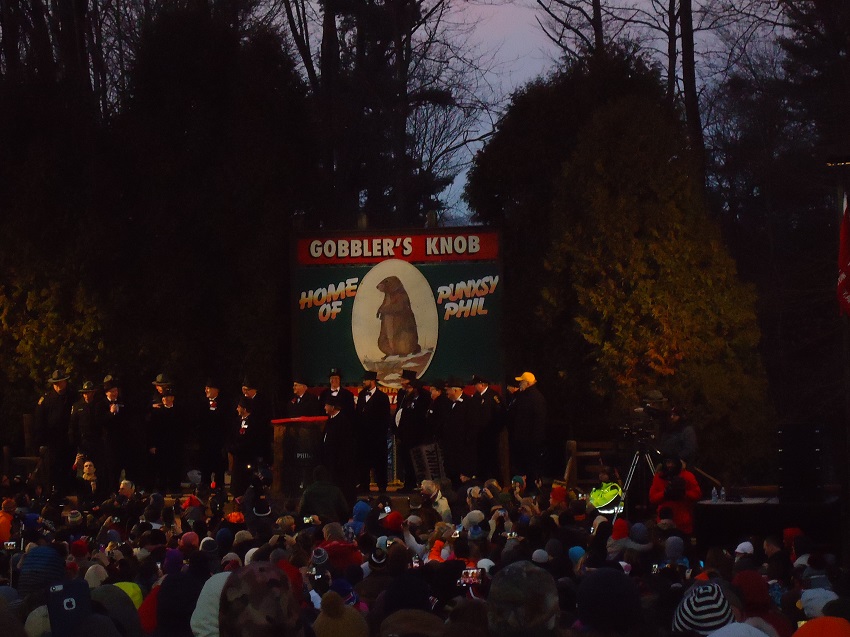 Since then I got most of the front suspension installed. still have to connect the sway bar. think I will start it at 1/4 from the soft position. 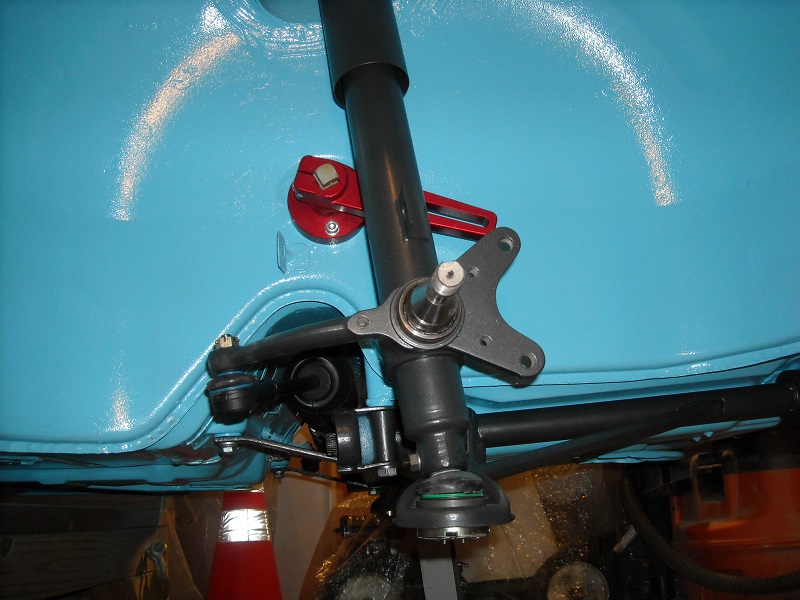 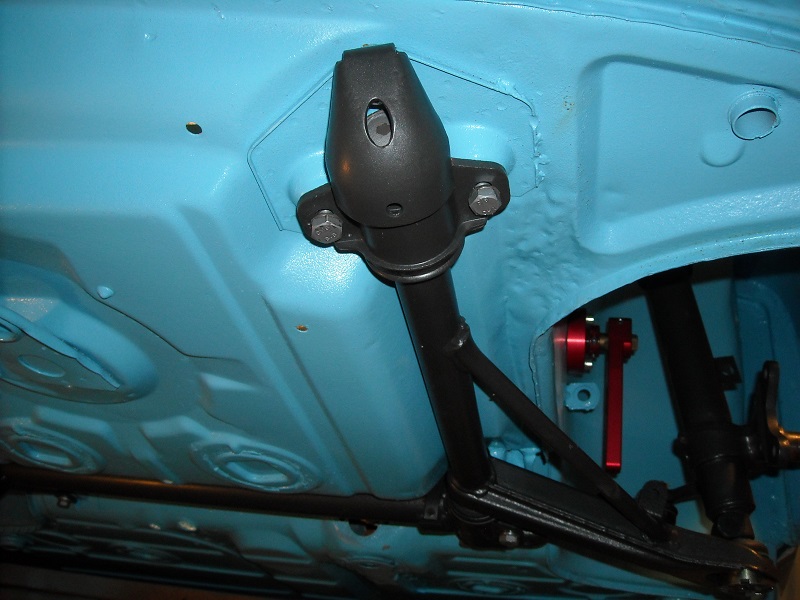 I know most people would finish the body work before starting to put stuff on. (IMG:style_emoticons/default/confused24.gif) I like to do some mechanical work to get away from the bodywork for a little... Not my plan, but the car will be able to drive even if its still in primer...and with the early spring that Phil predicted I should have plenty of time to get the bodywork done and paint it.... . |
| Olympic 914 |
 Feb 11 2016, 12:04 PM Feb 11 2016, 12:04 PM
Post
#43
|
   Group: Members Posts: 1,725 Joined: 7-July 11 From: Pittsburgh PA Member No.: 13,287 Region Association: North East States 
|
Cold out this morning.... 15 deg. to cold to work in an unheated shed..
Good time to unbox and inspect my new parts from PMB. rebuilt 911 A front calipers, PMB repro 914 GT rear calipers. Sebro vented rotors front and back. rebuilt pressure regulator, new 19mm ATE master cylinder. Damn those A calipers sure are heavy.... 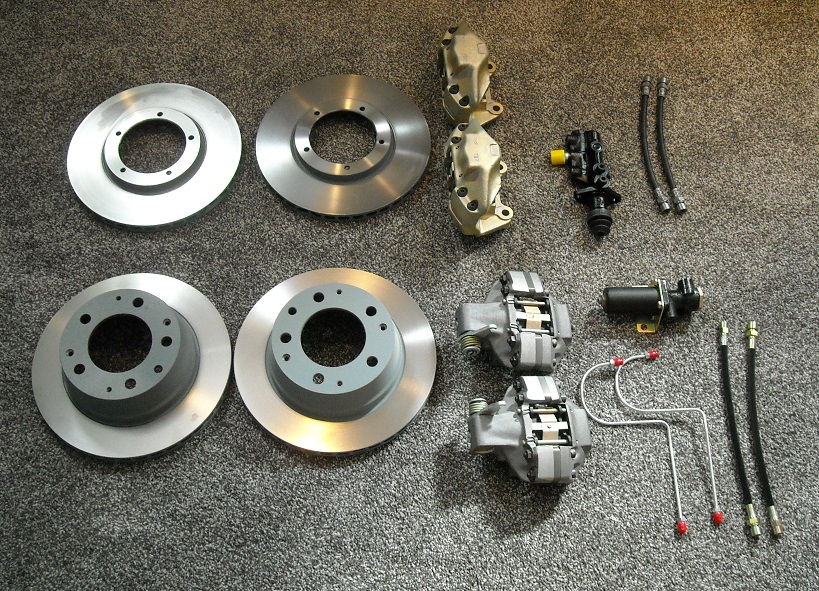 |
| Darren C |
 Feb 11 2016, 01:00 PM Feb 11 2016, 01:00 PM
Post
#44
|
|
Member   Group: Members Posts: 392 Joined: 26-December 14 From: Chichester UK Member No.: 18,255 Region Association: England |
Real nice Tom,
I'm very impressed with your quality of work, the cars going to be fabulous when it's done. |
| Olympic 914 |
 Feb 26 2016, 10:05 AM Feb 26 2016, 10:05 AM
Post
#45
|
   Group: Members Posts: 1,725 Joined: 7-July 11 From: Pittsburgh PA Member No.: 13,287 Region Association: North East States 
|
Continuing with some mechanical work.
I installed the new bearings into the rear control arms. also installed the Elephant racing Rubber bushings. 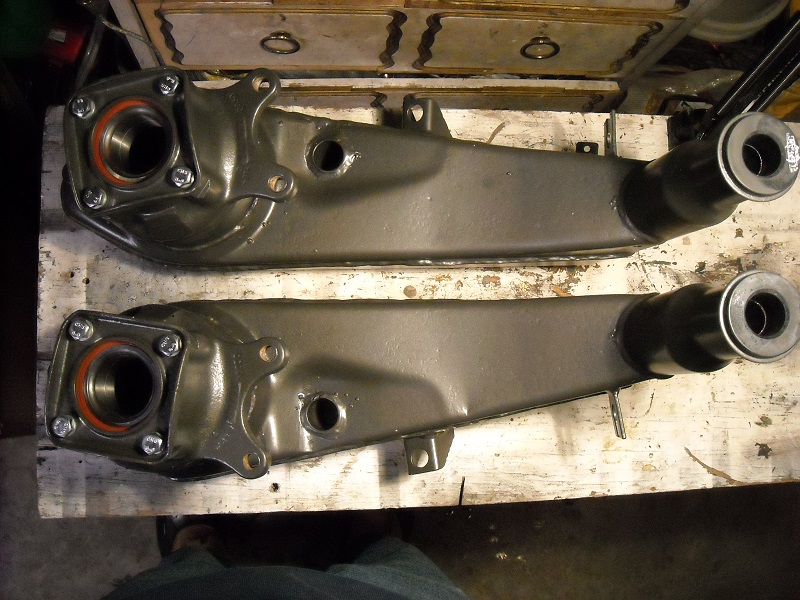 YES it is as big a PITA as others have said. No pictures of the installation.. But a good friend had just bought a HF 20 ton press and that gave me an excuse to go visit and spend a couple hours. No problem getting your hands clean after all the liquid soap we had slathered around. eventually we got the shafts pushed in nicely. I whipped up this tool out of plumbing supplies to support the rear of the wheel bearing when we pushed the hubs in with the press. 2" pipe with a floor flange. worked great , don't know how often I will use it again though.. 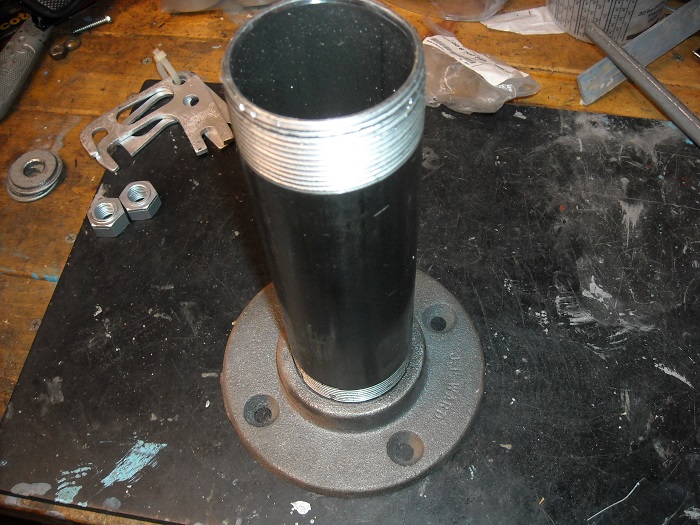 Installed the Tangerine shift rod bushing into the firewall and then installed the SS fuel lines. both operations went smoothly. 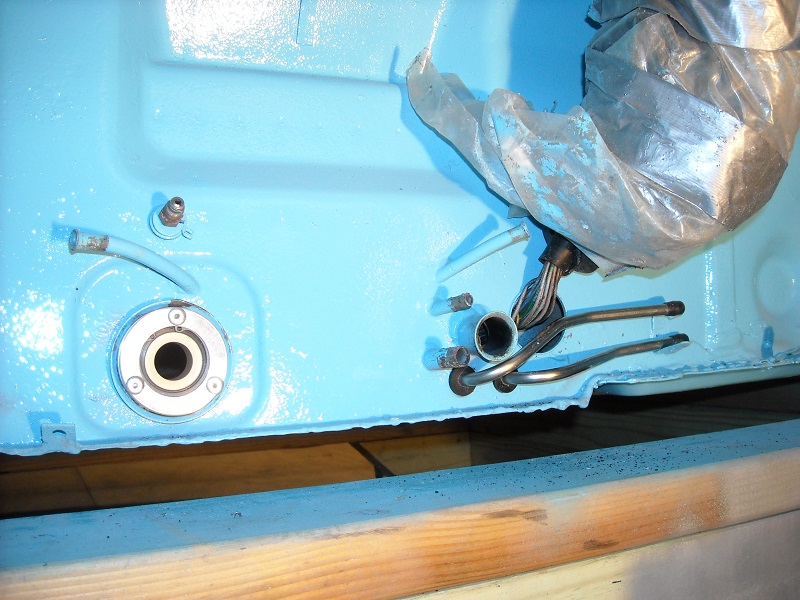 needed new nuts for the rear control arms and after an exhaustive internet search came up with a BMW part that I like more than the stock original parts. they are flanged all steel locking nuts. 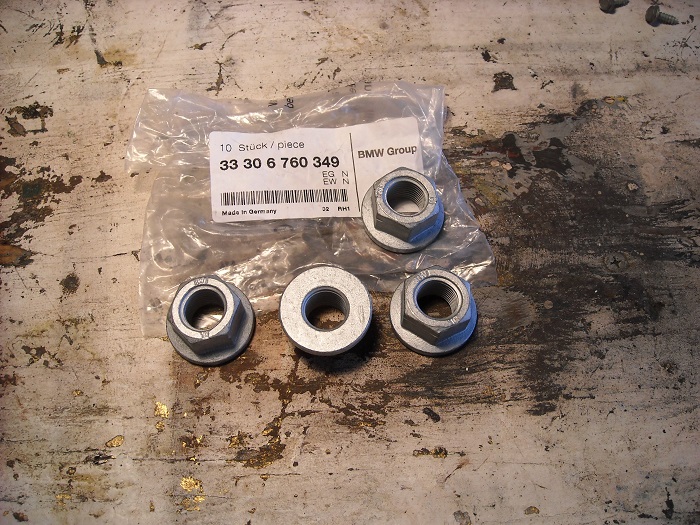 got the rear control arms bolted up and you can see the new flanged nuts in this pic. also the other tangerine SS lines. installed just so I don't lose them. Yes they are KYB shocks.... I know they are not the favored shock around here but I got a good deal on the set from a friend that only had them on a little while then upgraded to Konis all the way around... I figure they are an easily replaced item if I don't like them.. 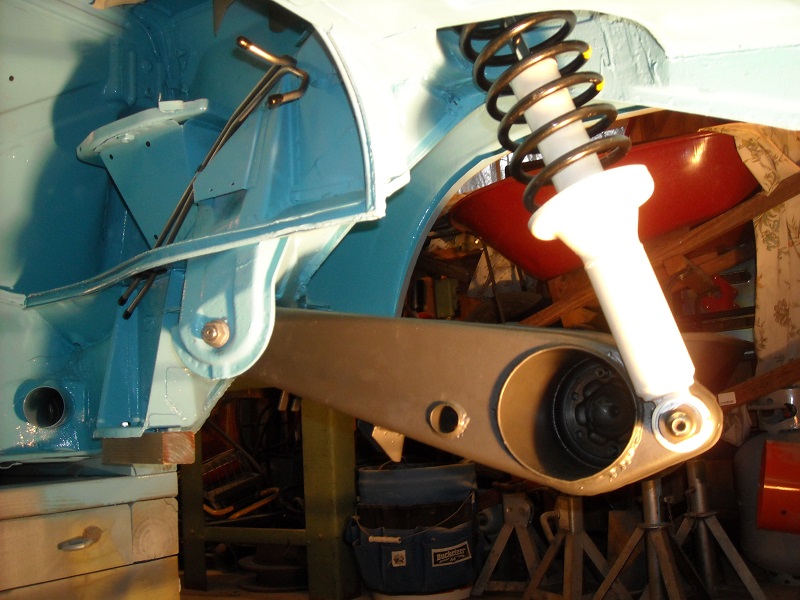 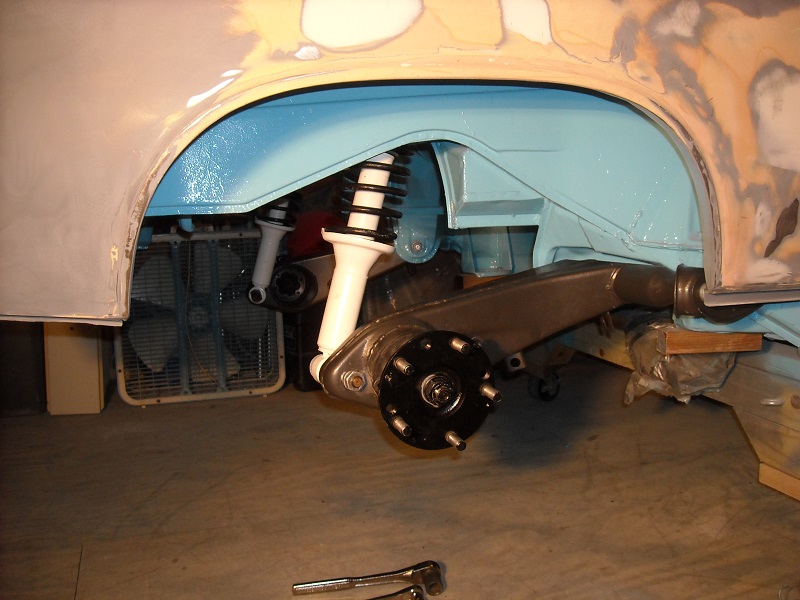 I think I will work on replacing the tunnel brake lines next and after I gather the rest of the lines up start to bend new ones. One of my first purchases when I started this project was a line set from AA, it is supposed to have all the lines precut to the correct length with ends already installed. we shall see how that works. Had I know earlier I would have gotten the prebent set from PMB and just been done with it. So now I have suspension. (IMG:style_emoticons/default/aktion035.gif) moving along... |
| ChrisFoley |
 Feb 26 2016, 11:34 AM Feb 26 2016, 11:34 AM
Post
#46
|
|
I am Tangerine Racing      Group: Members Posts: 7,980 Joined: 29-January 03 From: Bolton, CT Member No.: 209 Region Association: None 
|
When I saw your updated subtitle I thought you had been suspended from the build-off challenge. (IMG:style_emoticons/default/biggrin.gif)
|
| Cracker |
 Feb 26 2016, 11:51 AM Feb 26 2016, 11:51 AM
Post
#47
|
|
Advanced Member     Group: Members Posts: 2,148 Joined: 2-February 10 From: Atlanta (area) Member No.: 11,316 Region Association: South East States 
|
LOL! Me too...car looks GREAT!
Tony When I saw your updated subtitle I thought you had been suspended from the build-off challenge. (IMG:style_emoticons/default/biggrin.gif) |
| Olympic 914 |
 Feb 26 2016, 12:07 PM Feb 26 2016, 12:07 PM
Post
#48
|
   Group: Members Posts: 1,725 Joined: 7-July 11 From: Pittsburgh PA Member No.: 13,287 Region Association: North East States 
|
When I saw your updated subtitle I thought you had been suspended from the build-off challenge. (IMG:style_emoticons/default/biggrin.gif) Yeah.. I was going for that.. (IMG:style_emoticons/default/happy11.gif) |
| stevegm |
 Feb 26 2016, 12:23 PM Feb 26 2016, 12:23 PM
Post
#49
|
|
Advanced Member     Group: Members Posts: 2,111 Joined: 14-July 14 From: North Carolina Member No.: 17,633 Region Association: South East States 
|
When I saw your updated subtitle I thought you had been suspended from the build-off challenge. (IMG:style_emoticons/default/biggrin.gif) Yeah.. I was going for that.. (IMG:style_emoticons/default/happy11.gif) Nice subtitle. You got me. I thought you were throwing in the towel for a second. Then I thought - No, not Tom. |
| Olympic 914 |
 Mar 31 2016, 07:25 AM Mar 31 2016, 07:25 AM
Post
#50
|
   Group: Members Posts: 1,725 Joined: 7-July 11 From: Pittsburgh PA Member No.: 13,287 Region Association: North East States 
|
March 16 progress report.
Still doing body work. I have the pass side in good shape now, at least to my untrained eye. I have gone from the raw pieced together quarter panel, the result of flaring the fenders. 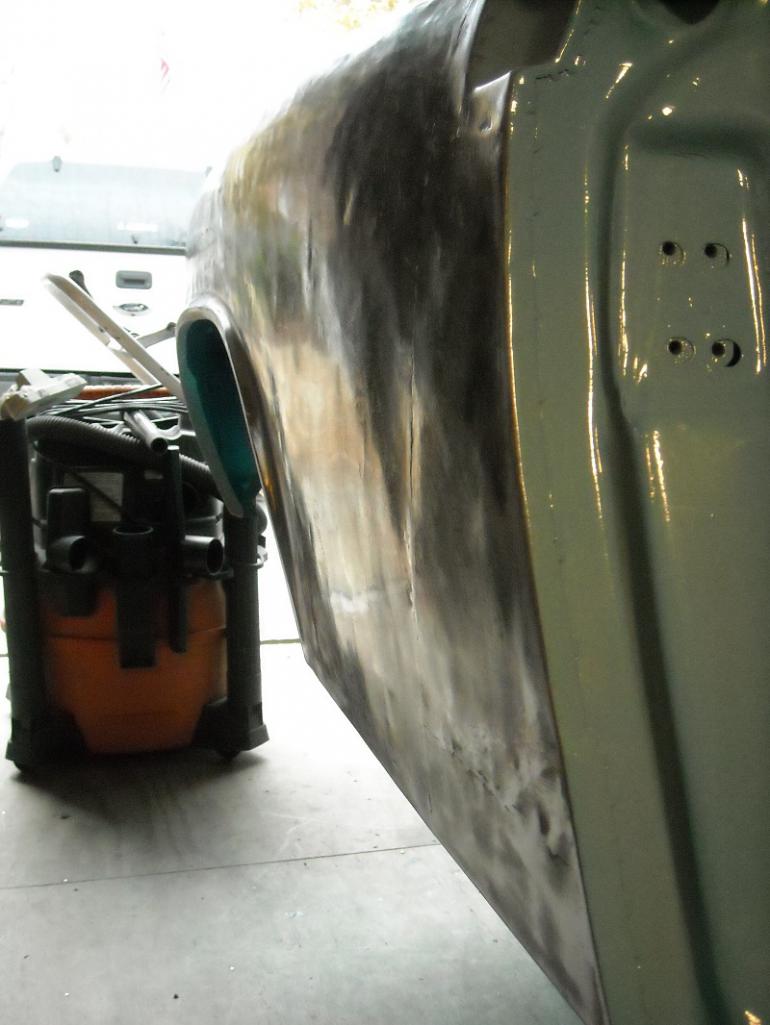 worked it to this mottled looking mess. 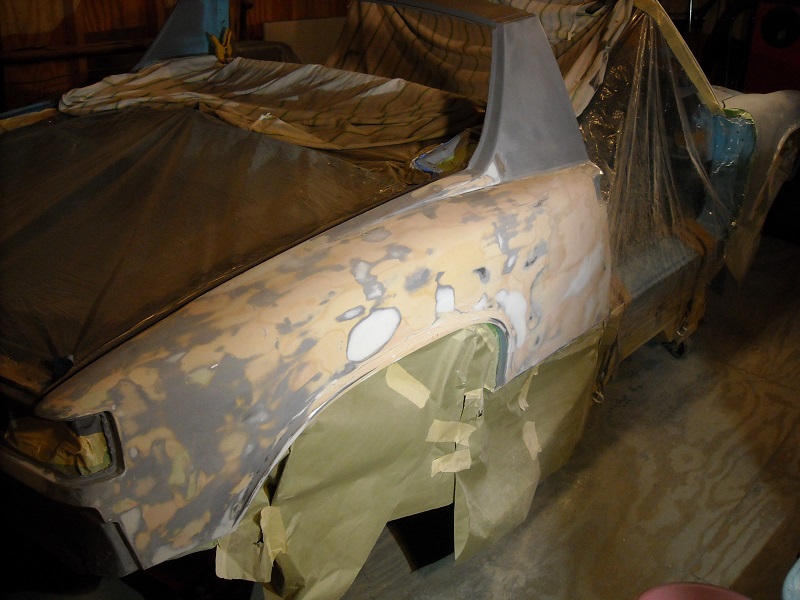 and finally to this much sexier looking shape. 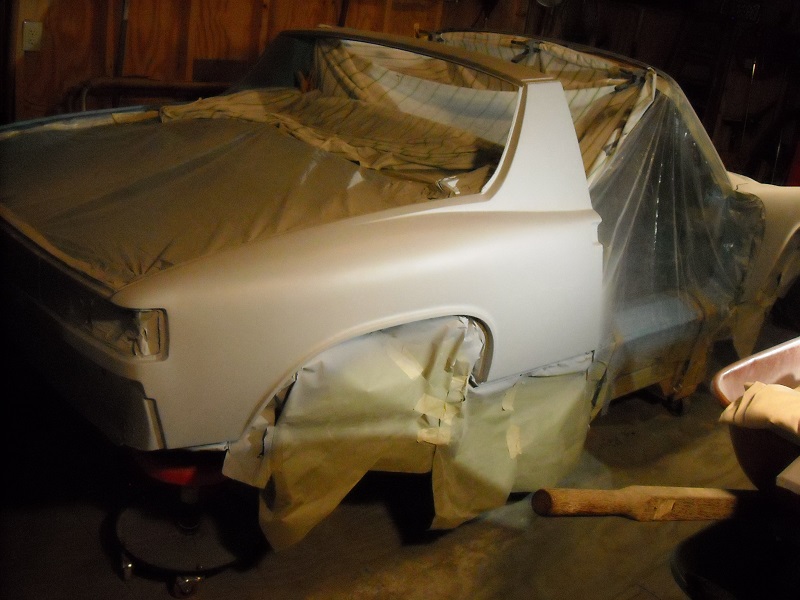 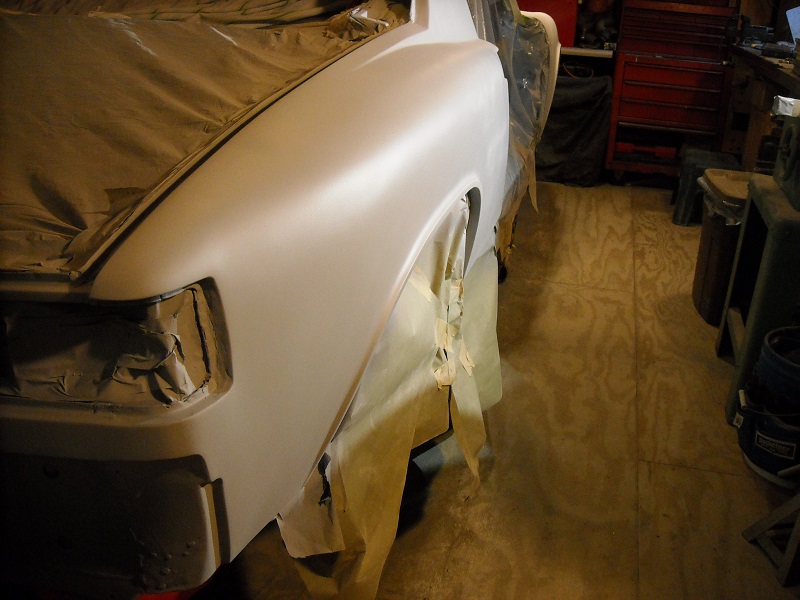 So body work on the pass side is pretty much done. hope it looks good when I get the final paint on it. I still need to revisit the drivers side and do a little more shaping on the fender lips. Many, many hours into this. 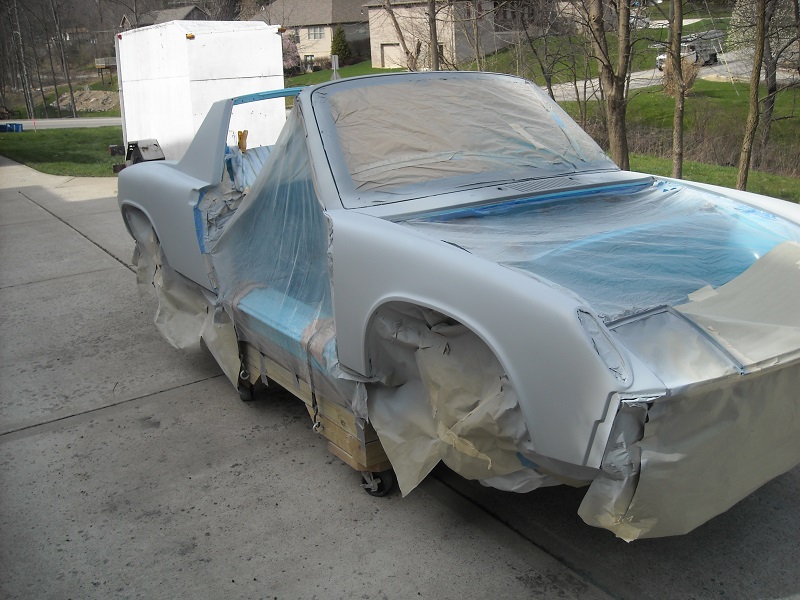 Stripped the 35 year old acrylic lacquer paint off of the rear trunk lid, it looks good underneath. only a little work needed here. 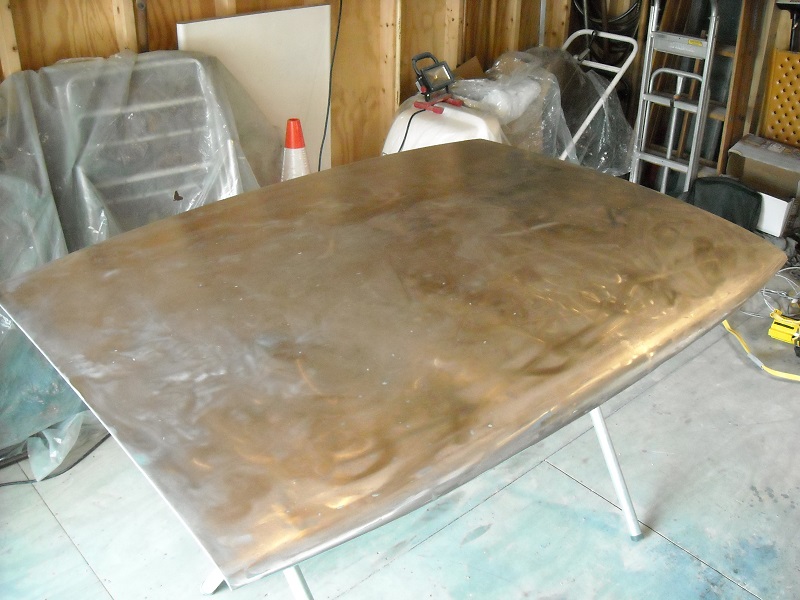 shot some epoxy on it before I start. 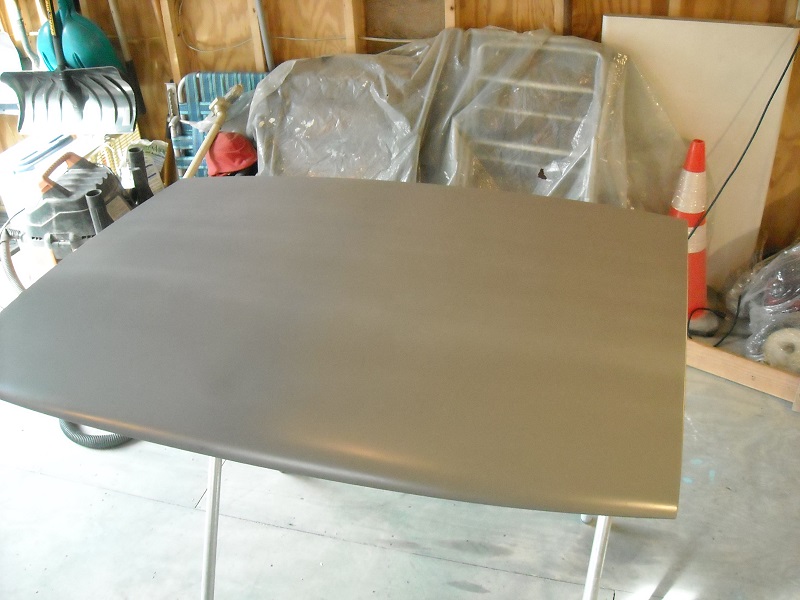 Have the doors stripped out and will be having them blasted, I know there is a bit of previous bodywork hiding under there, still have to scrap out the old sound deadener before blasting. 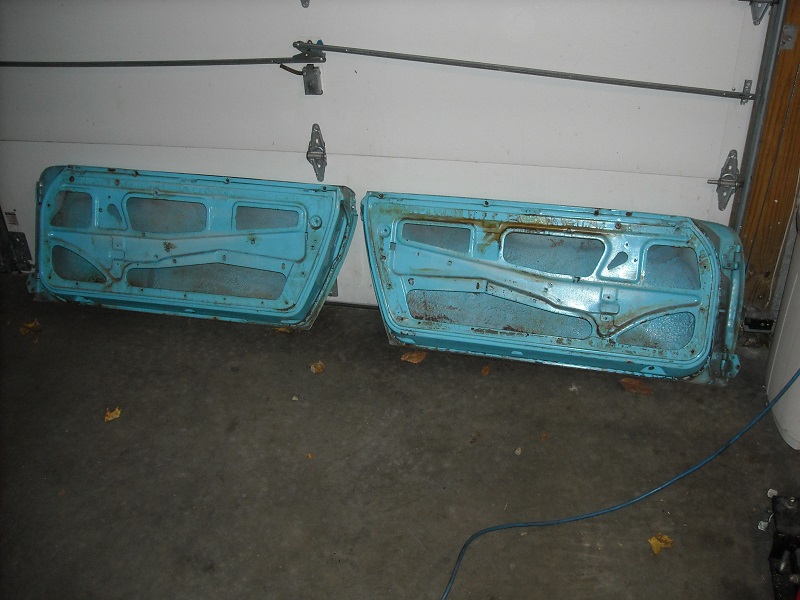 After much internal debate I finally decided on what type of paint I am going to use. I am going with PPG Concept, Single stage So I bit the bullet and purchased my paint. $$$ 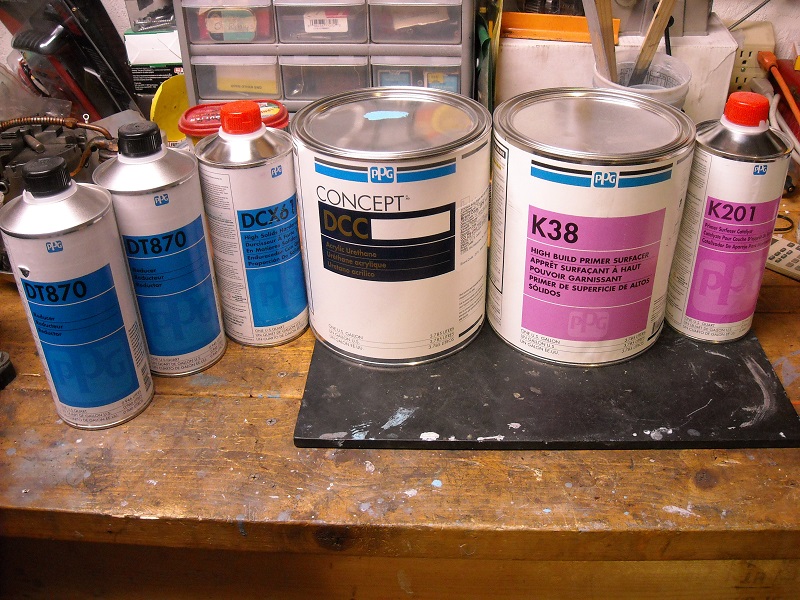 And decided on a big boy spray gun to go with it. DeVilbiss 670+. I don't want to shoot this paint with a HF gun. 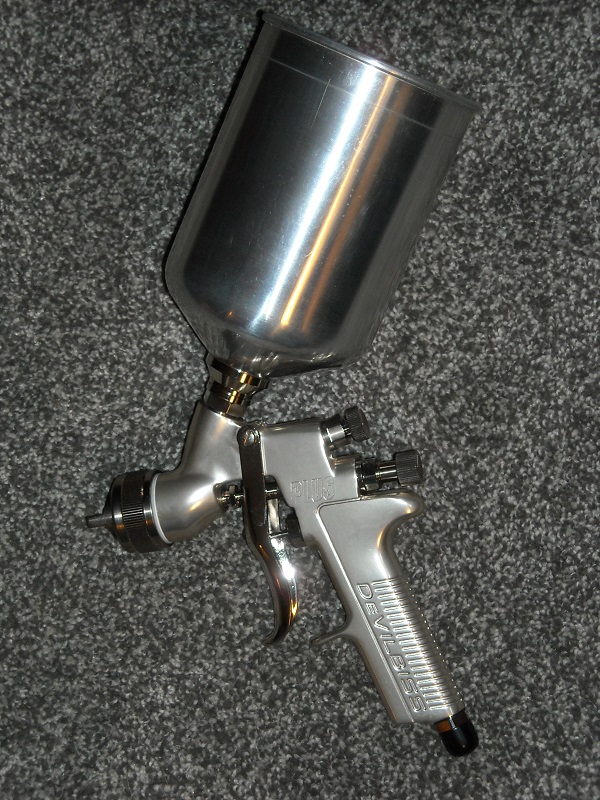 Vendors used. Spoke for the LED front and rear lights. Thanks Jerry. also refinished my turn signal buckets and bought new lens for them. and grabbed these LEDs for the reverse lights. 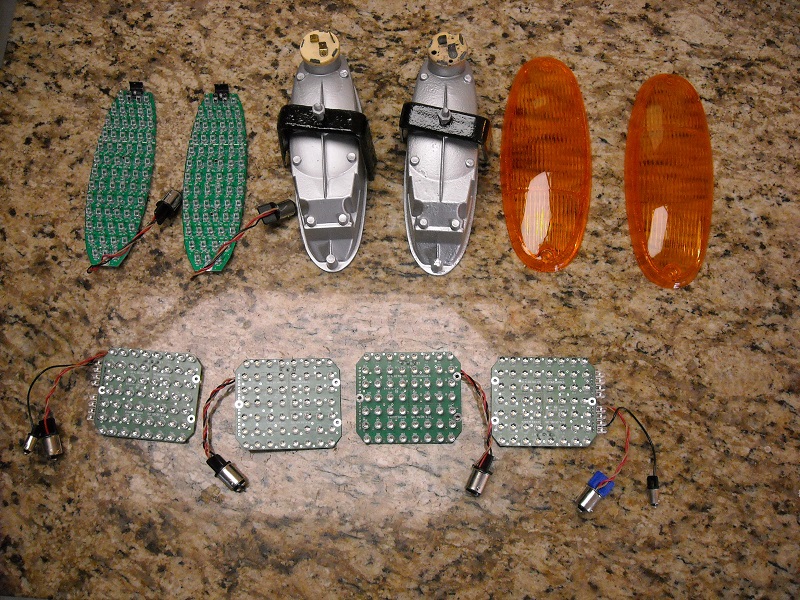 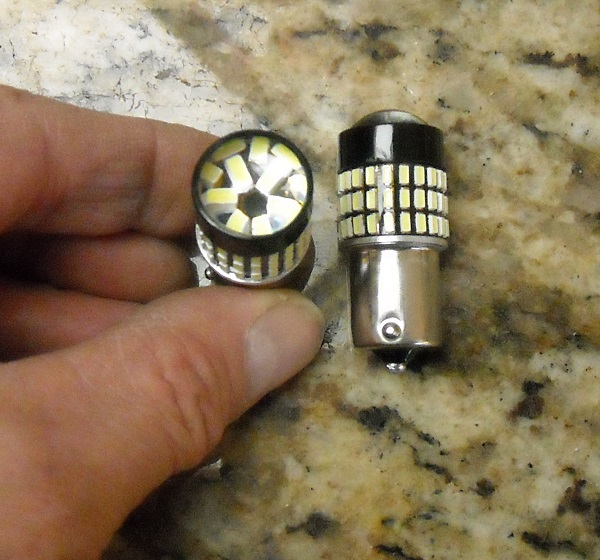 Had Bruce Stone redo my pedal set, and the turn around time was fantastic!! Thanks Bruce. 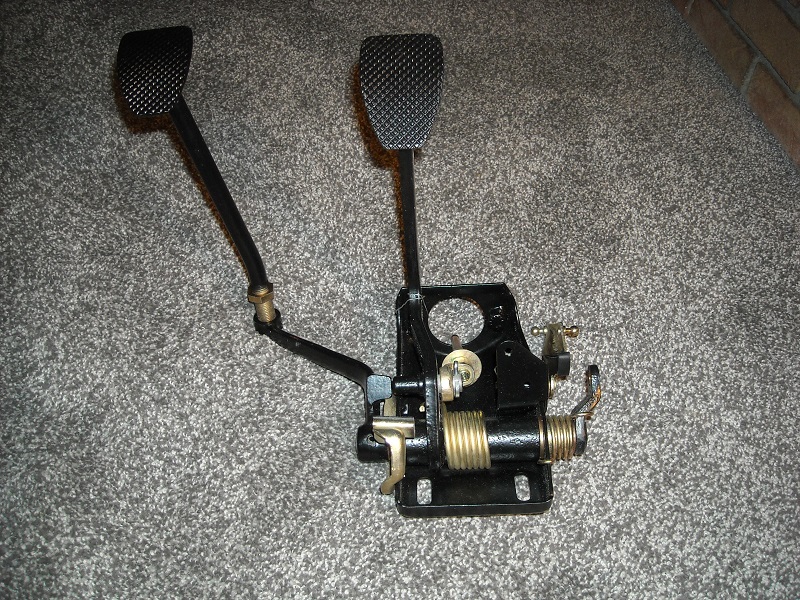 That's it for now... I am coming to Hershey for the first time and am looking forward to meeting all of Yinz, I am sure seeing all the running Teeners should be an inspiration. See you in two weeks. |
| whitetwinturbo |
 Mar 31 2016, 09:59 PM Mar 31 2016, 09:59 PM
Post
#51
|
|
Honey, does this wing make my ass look fat?    Group: Members Posts: 1,391 Joined: 22-October 11 From: Newport Beach/Kalefornya/USA Member No.: 13,704 Region Association: Southern California |
|
| Olympic 914 |
 Jun 26 2016, 04:14 PM Jun 26 2016, 04:14 PM
Post
#52
|
   Group: Members Posts: 1,725 Joined: 7-July 11 From: Pittsburgh PA Member No.: 13,287 Region Association: North East States 
|
April / May update
More work required on the trunk lid than I thought there would be. 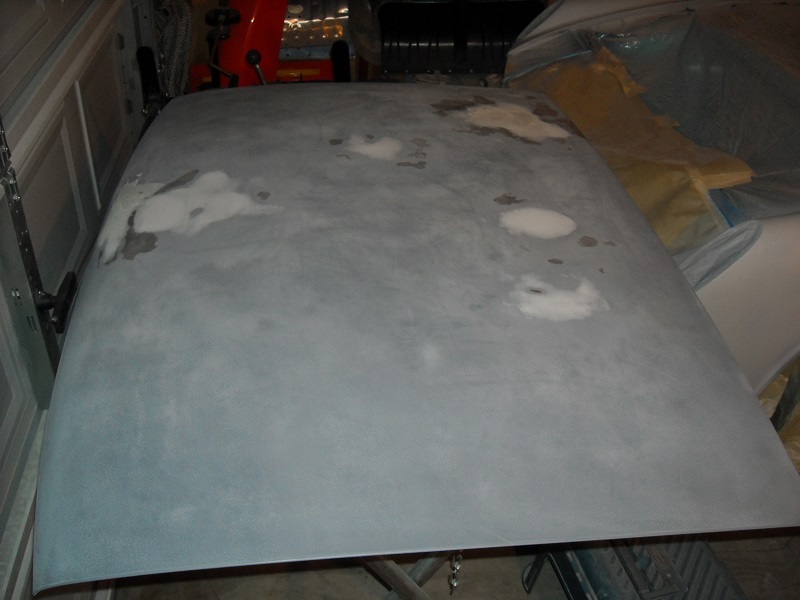 it turned out pretty good. 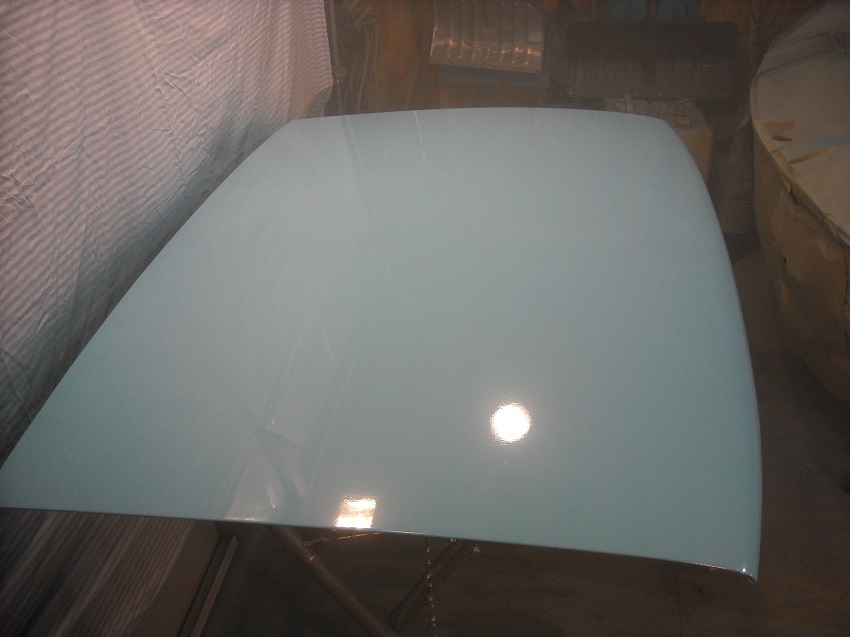 But I found that even with a bunch of clamp-on lights I still couldn’t see well enough. (the haze in the air is paint , need better ventilation, more on that later. ) 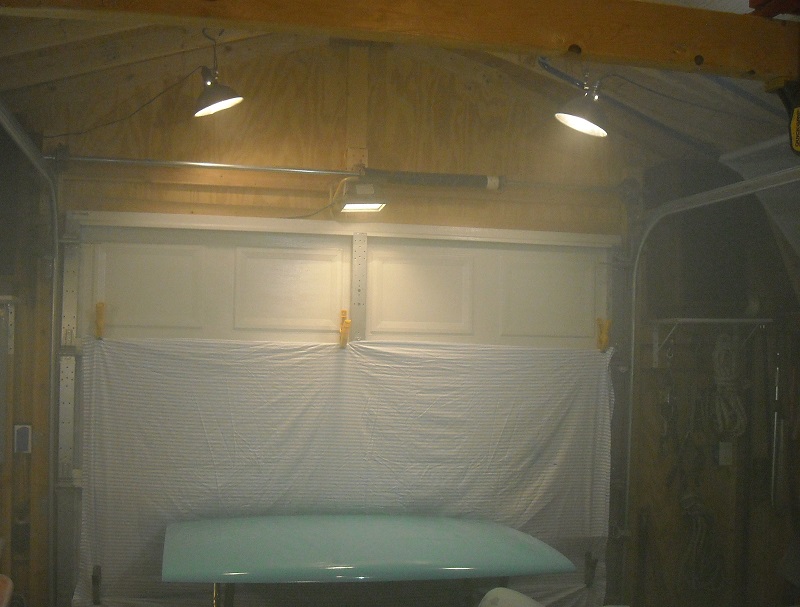 So I wired a few switched quad receptacles and put up a bunch of 4000 lumen LED shop lights, seven so far. And I can click them all on or off easily. Now with these and a couple more strategically placed clamp on lights I can see to paint without shadows 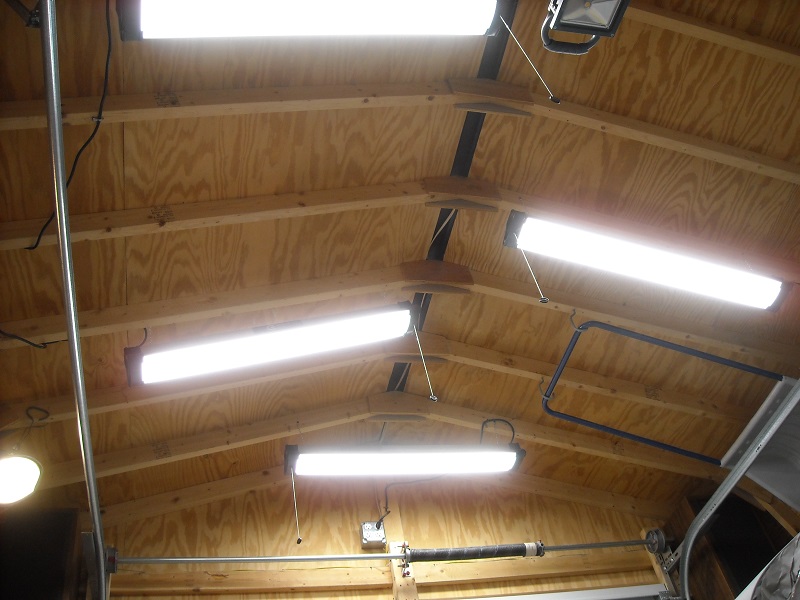 Next up was ventilation. Using a couple box fans in the doorway I put wooden/cardboard fillers on each side and attached a piece of heavy construction plastic sheeting across the top of the doorway, to keep dust from being sucked back in. 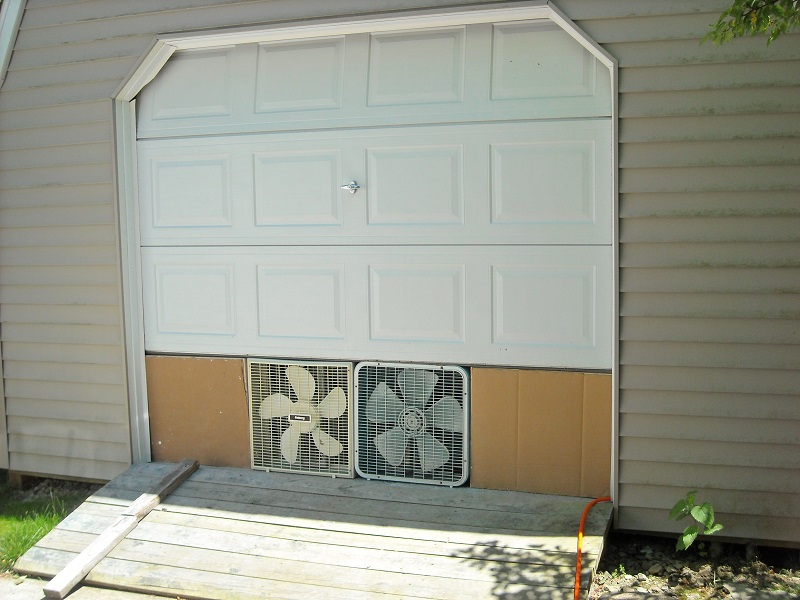 And put furnace filters into the windows, taped around the edges to give me some filtered fresh air. 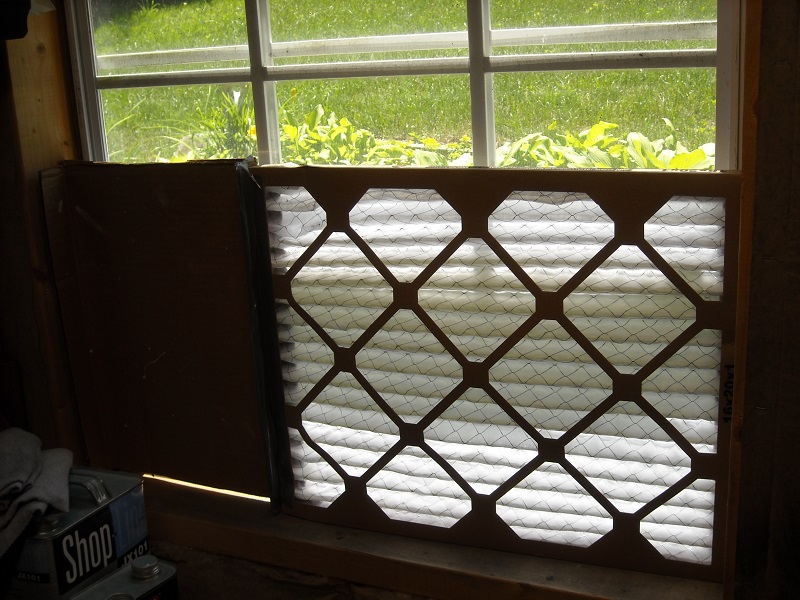 Now I am ready to do some painting in my Shed/Custom Paint Booth. |
| Olympic 914 |
 Jun 26 2016, 04:25 PM Jun 26 2016, 04:25 PM
Post
#53
|
   Group: Members Posts: 1,725 Joined: 7-July 11 From: Pittsburgh PA Member No.: 13,287 Region Association: North East States 
|
June 2016 update
Back to the drivers side to finalize the work on the fenders and lips. One last wet sanding with 600. 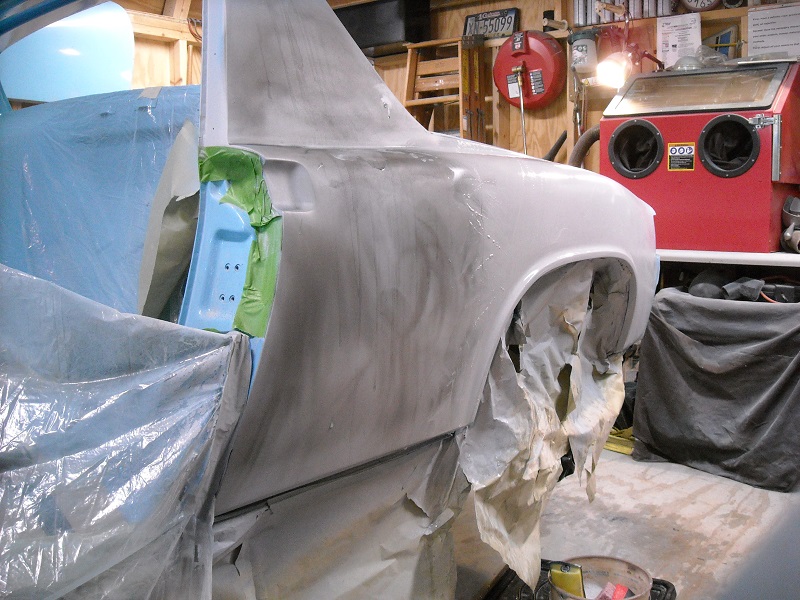 And I shot the cowl, windshield frame and top and inside of the Targa bar. The inside of the Targa bar sail panels were a real PITA to get with a HVLP spray gun, I had some bad runs here and painted one side twice and the other side three times. I finally got a good job after digging out an old siphon feed touch-up gun I hadn’t used for about ten years. I was able to get in there with it and lay down some nice paint. 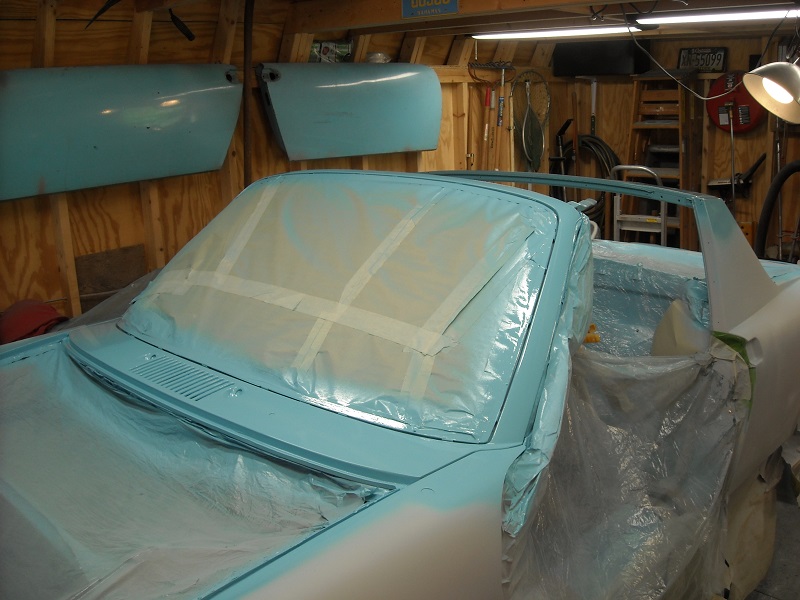 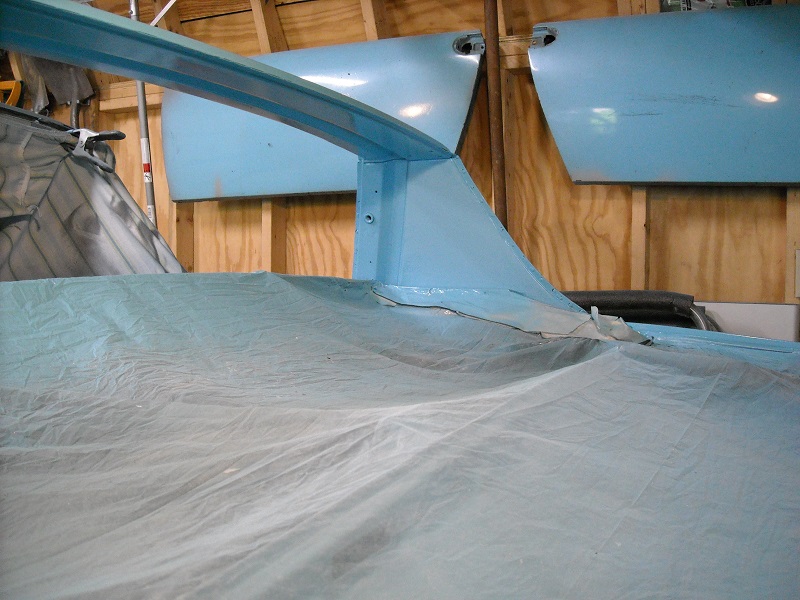 And FINALLY I get to put some color on the fenders. I have been working to this end for what seems like forever. 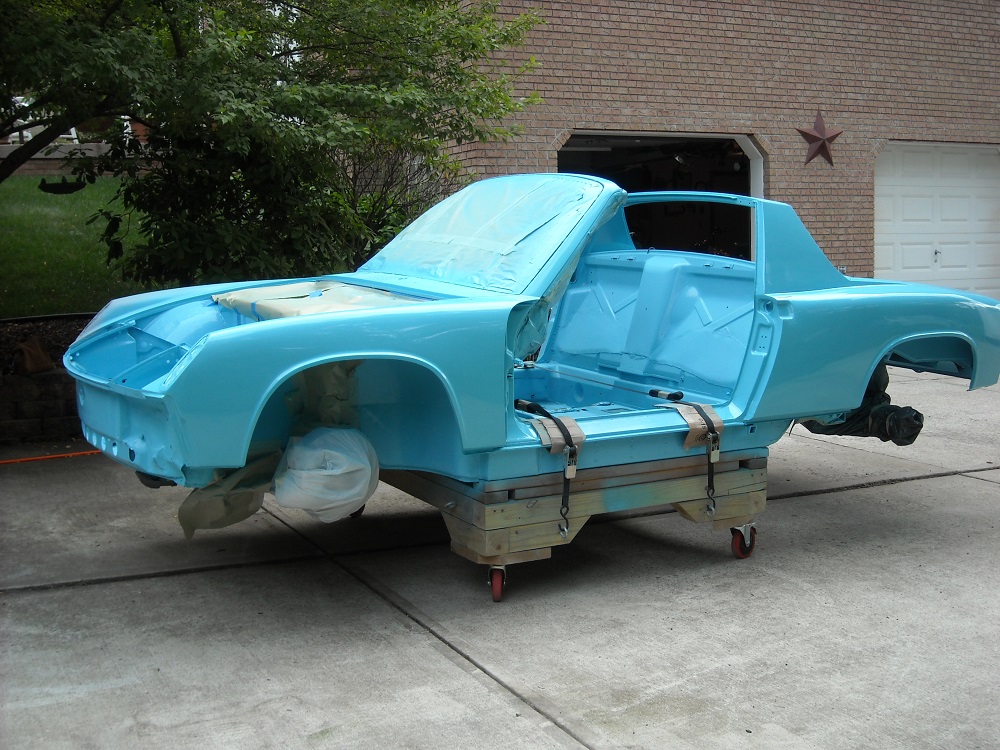 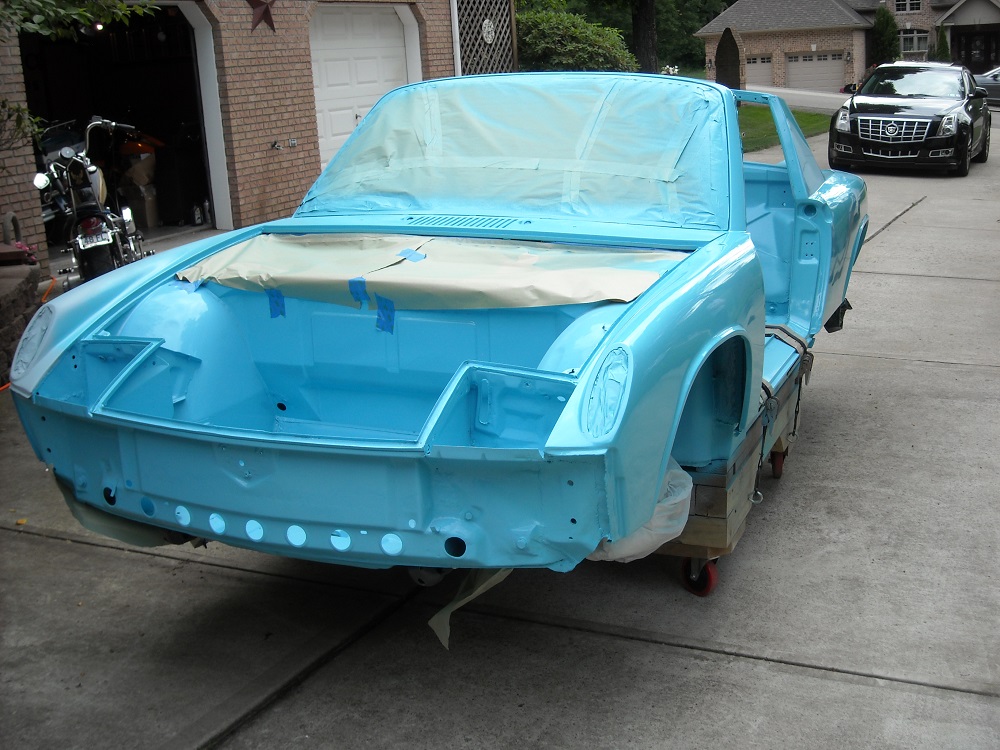 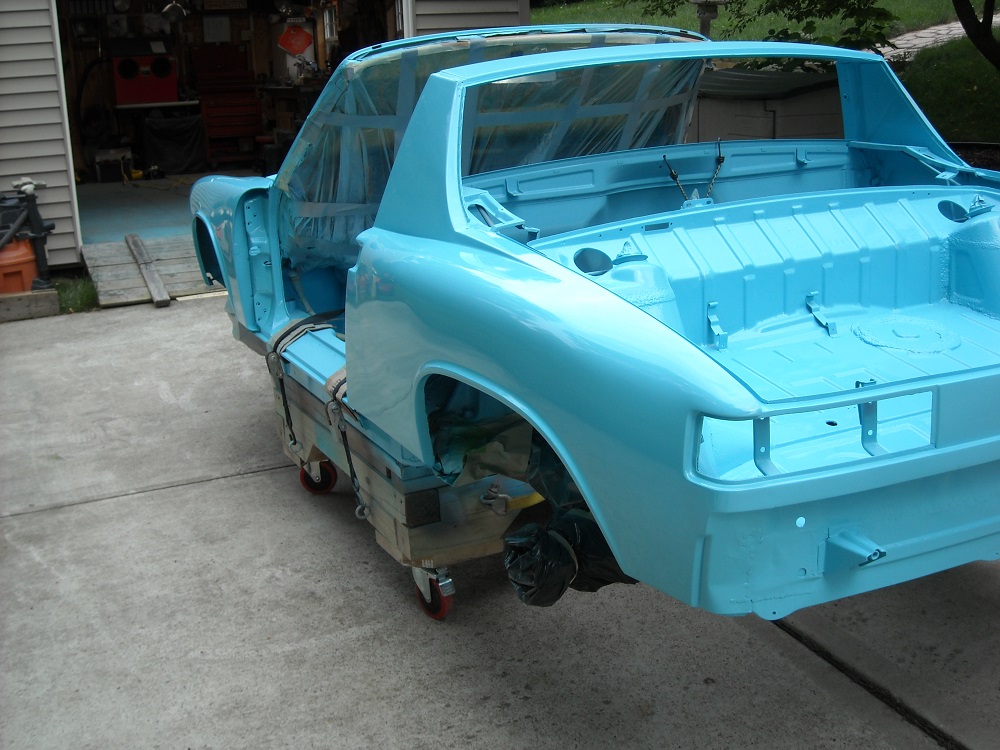 Still not done yet though. Since my shed workspace is kind of limited I can only work on or paint one side at a time. So now I have to finish the passenger side. Another round of wet sanding and fixing anything that pops up during that. With my new lights installed I have already found a couple, three spots that need some more attention. 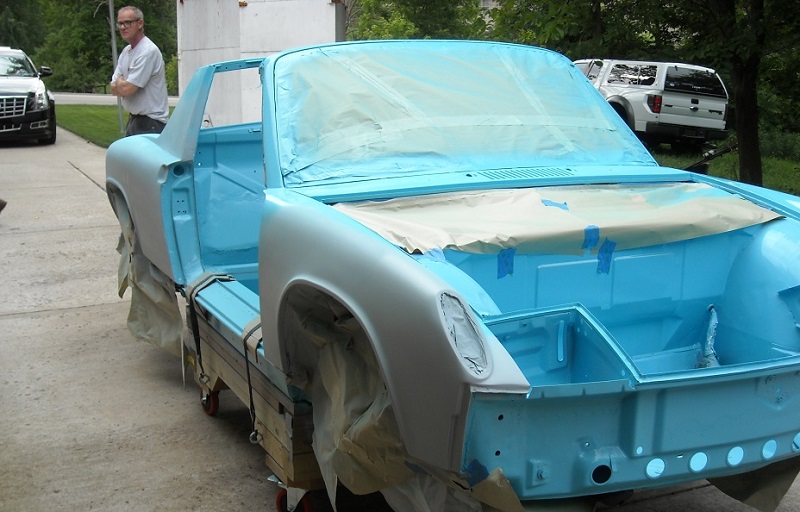 If you have a favorite bodyman that does good work for you, you should take time to go buy him a bottle of Crown. Cause this shit is hard, I would hate to have to do it for a living. Especially as picky a bunch as we are… |
| Andyrew |
 Jun 26 2016, 07:25 PM Jun 26 2016, 07:25 PM
Post
#54
|
|
Spooling.... Please wait           Group: Members Posts: 13,377 Joined: 20-January 03 From: Riverbank, Ca Member No.: 172 Region Association: Northern California 
|
Paint looks fantastic!! Congrats!
|
| 914forme |
 Jun 26 2016, 07:27 PM Jun 26 2016, 07:27 PM
Post
#55
|
|
Times a wastin', get wrenchin'!     Group: Members Posts: 3,896 Joined: 24-July 04 From: Dayton, Ohio Member No.: 2,388 Region Association: None 
|
Looking great
|
| jmitro |
 Jun 26 2016, 08:08 PM Jun 26 2016, 08:08 PM
Post
#56
|
|
Senior Member    Group: Members Posts: 713 Joined: 23-July 15 From: Oklahoma Member No.: 18,986 Region Association: None 
|
Really really nice work! Going to be a great looking car when done! (IMG:style_emoticons/default/beerchug.gif)
|
| 3d914 |
 Aug 1 2016, 01:25 PM Aug 1 2016, 01:25 PM
Post
#57
|
|
Senior Member    Group: Members Posts: 1,275 Joined: 24-September 03 From: Benson, AZ Member No.: 1,191 Region Association: Southwest Region |
Tom, Thanks for sharing all your painting details. It looks great. I'm curious how much difference the single stage makes in getting the results you're after? Not sure how much painting experience you have. I'd like to take on the painting myself (also using single stage), but with little experience at this I wouldn't want to do it twice.
Any insights you can offer? |
| Andyrew |
 Aug 1 2016, 02:45 PM Aug 1 2016, 02:45 PM
Post
#58
|
|
Spooling.... Please wait           Group: Members Posts: 13,377 Joined: 20-January 03 From: Riverbank, Ca Member No.: 172 Region Association: Northern California 
|
Tom, Thanks for sharing all your painting details. It looks great. I'm curious how much difference the single stage makes in getting the results you're after? Not sure how much painting experience you have. I'd like to take on the painting myself (also using single stage), but with little experience at this I wouldn't want to do it twice. Any insights you can offer? Single stage is a great step into painting. You can read the first part of my build thread for more details on painting with single stage, or my other paint thread in my signature for me painting Peters car as well as the issues we had with bad paint. Painting with single stage can easily be done in the garage for a nice driver quality paint job. |
| Olympic 914 |
 Aug 1 2016, 05:37 PM Aug 1 2016, 05:37 PM
Post
#59
|
   Group: Members Posts: 1,725 Joined: 7-July 11 From: Pittsburgh PA Member No.: 13,287 Region Association: North East States 
|
Tom, Thanks for sharing all your painting details. It looks great. I'm curious how much difference the single stage makes in getting the results you're after? Not sure how much painting experience you have. I'd like to take on the painting myself (also using single stage), but with little experience at this I wouldn't want to do it twice. Any insights you can offer? Single stage is a great step into painting. You can read the first part of my build thread for more details on painting with single stage, or my other paint thread in my signature for me painting Peters car as well as the issues we had with bad paint. Painting with single stage can easily be done in the garage for a nice driver quality paint job. Andyrew I just went back and looked at your body work.... Damn, I though I took a lot of pictures.. Ha-Ha. That's pretty much what I went through also. Your car turned out nice. I hope mine buffs out that good 3d914 This is the first car I have painted. I have done paint and moulding on a my motorcycles and some bodywork on an old Mustang but that was in my teen years. I chose the single stage PPG because I thought it would be easier to fix any flaws or mistakes. rather than having to go through a layer of clear coat. Also in the future I could shoot a clear coat or a single stage / clear coat mix. so I'm not locked into this. Same as Andyrew I used a combination of glass fiber, and polyester body filler, I used Rage Gold. and some evercoat glazing putty then sprayable body filler - Slick Sand. I shot the Slick Sand with a 2.5 tip spray gun. it really lays it on but get it out of the gun quick because it sets up fast and will plug up your spraygun. Same with the high build primer. I used a 1.8 tip with the PPG K38 High build primer, and you get 20-30 min at best before it quits spraying and you have to hurry to clean it out of your spraygun. Read the sheets on the paint and primers and keep very close to those times and mixes. Temperature is also very important, I used a digital IR HF thermometer to make sure of the body temp. and match the reducer temp range to that. Not being a bodyman I found it hard to determine what was good enough and probably did too much prep work, if you can. you really need kind of an artists eye to get the lines right. I struggled with this a lot. I think you have to accept that 99% of the people that look at your car. (bodymen excepted) will never see the little things you work so hard to get just right. Just try to keep yourself from pointing out to people the tiny flaws that you know are there. |
| Olympic 914 |
 Aug 1 2016, 06:48 PM Aug 1 2016, 06:48 PM
Post
#60
|
   Group: Members Posts: 1,725 Joined: 7-July 11 From: Pittsburgh PA Member No.: 13,287 Region Association: North East States 
|
July 2016 update.
Got the final paint on the passenger side. so the tub is painted. still have to do the doors and front hood. now I can start putting some parts back on. Also have to paint a bunch of little parts like the hinges, and the headlight covers. Here are some update pics. I'll post some more after I get it pushed outside, hard to get a good pic inside the shed. 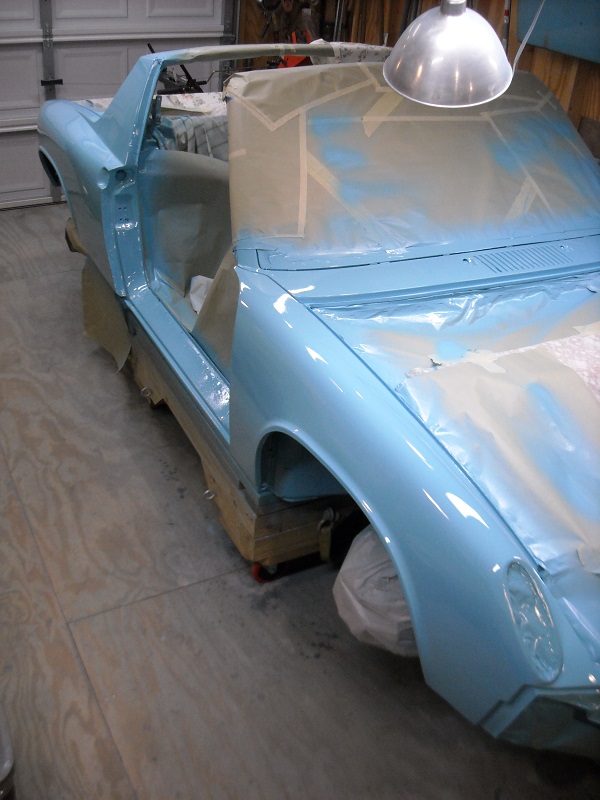 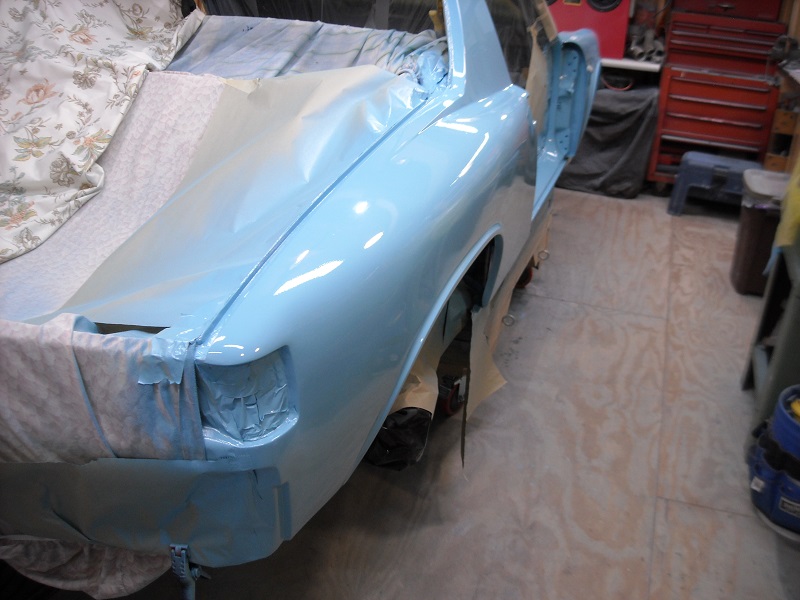 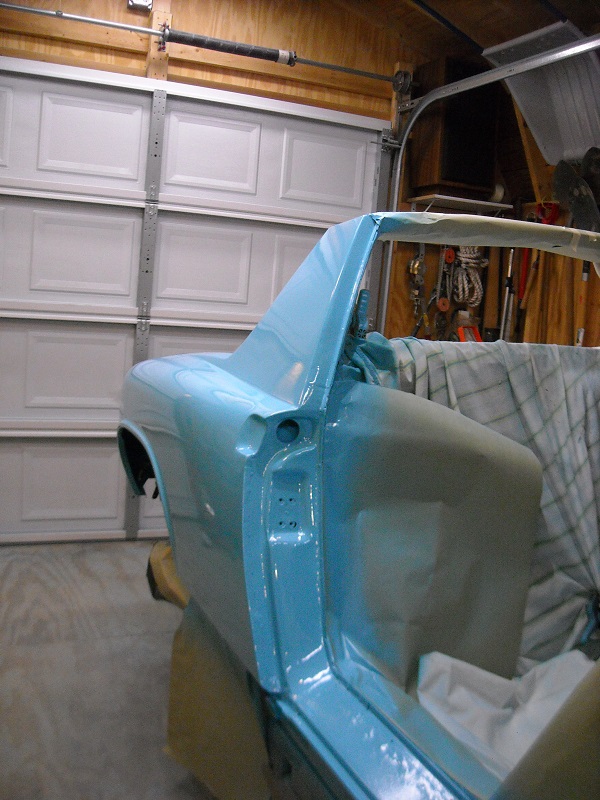 And this is my Happy Face at getting to this point. 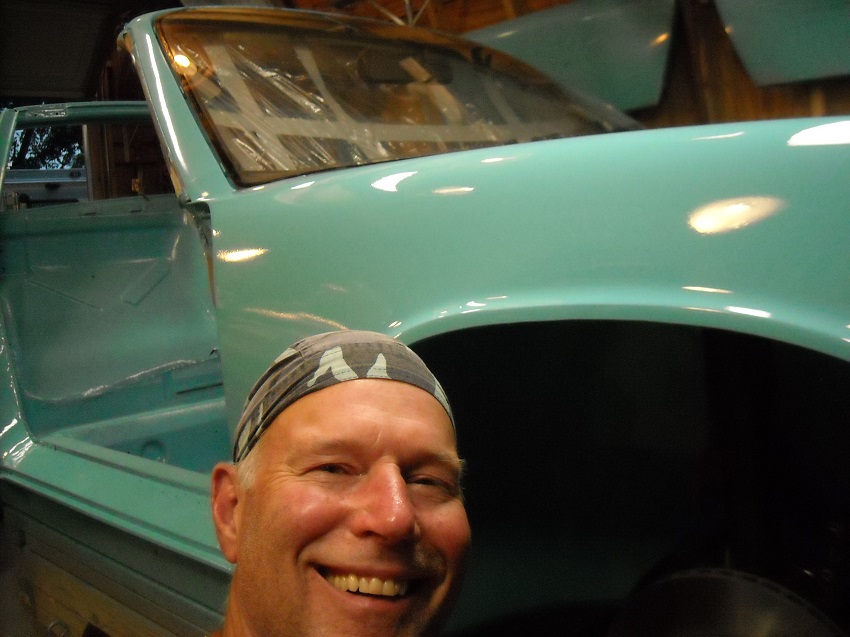 |
  |
1 User(s) are reading this topic (1 Guests and 0 Anonymous Users)
0 Members:

|
Lo-Fi Version | Time is now: 2nd April 2025 - 02:07 AM |
Invision Power Board
v9.1.4 © 2025 IPS, Inc.


