|
|
|
Porsche, and the Porsche crest are registered trademarks of Dr. Ing. h.c. F. Porsche AG.
This site is not affiliated with Porsche in any way. Its only purpose is to provide an online forum for car enthusiasts. All other trademarks are property of their respective owners. |
|
|


| MichiganMat |
 Oct 7 2015, 02:41 PM Oct 7 2015, 02:41 PM
Post
#1
|
|
Member  Group: Members Posts: 115 Joined: 14-June 06 From: San Jose, CA Member No.: 6,222 Region Association: Northern California |
Hey er'body, Im MichiganMat from San Jose and Im building a 914.
Backstory: This summer I had the pleasure of picking up a '75 914 chassis here in San Jose for a mere $300. It came with with virtually nothing: no driveline, no interior, no pedals, etc. Stripped, but solid, with minimal overhead and cost. I've been building 911s for many years now and had an extra set of wheels and 911 front struts in my shed, so I thought hey, lets do this. My brother and I are just finishing up putting an STi motor into our '67 912 too, so with that project wrapping up Im ready to jump into another. The Plan: Well, I got the car for cheap, and I've already got a perfectly good '75 911S to daily/rally/etc with, so the plan is to build a stripped down 914 racer for AX and track fun. The car will be getting: - Tangerine Racing rollcage, tied to 8pts, with nascar door-bars - Rennspeed fiberglass body (fenders f&r, hood, trunk, and both bumpers) - Mad Dog chassis reinforcement kit and hell-hole repair - Resto-Design floorpans, seat areas dropped by 2", with custom tunnel - Tilton pedals - 5 lug conversion - 16x7 Fuchs all the way around with 2nd option of 15x7ATE's with canti slicks - /likely/ wrx drivetrain, but Im exploring my options... Where sits today: I picked up the car in May and I've since then I've put it on a home-built rotisserie, cut the pans, tunnel, trunk, headlight buckets, and front fenders out of it, and fixed the hell-hole area. The pans were totally rotted, the battery tray was nonexistent, the fenders on all 4 corners had damage. Pretty easy to make the decision to start fresh, haha. Today, most of the chassis kit is installed but I can't finish it until the roll-cage is put in. Tangerine is almost done with the cage so it'll be another week or so until I see it. In the meantime, the plan is to clean up the wheel-wells, fix the rust in the longs, put in the trunk cross-sections, and primer the reinforcements. Then I'll get to work on the tunnel, mod'ing the pans, installing the fiberglass, etc. Anyways, hello, nice to meet you guys, and Im looking forward to the challenge! 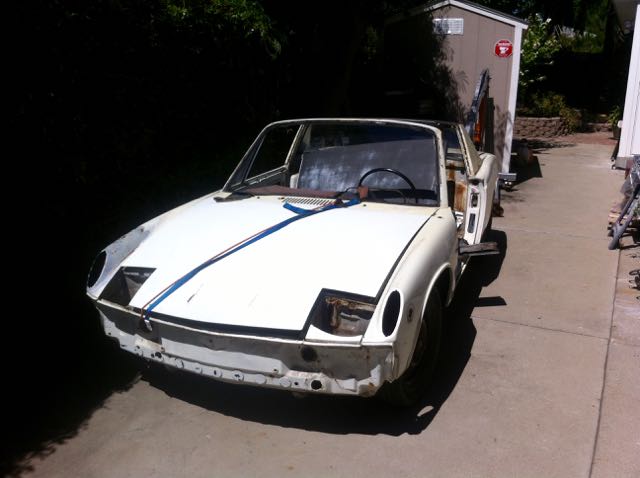 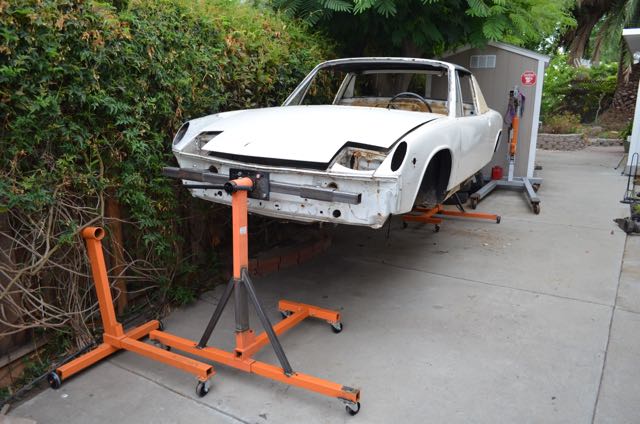 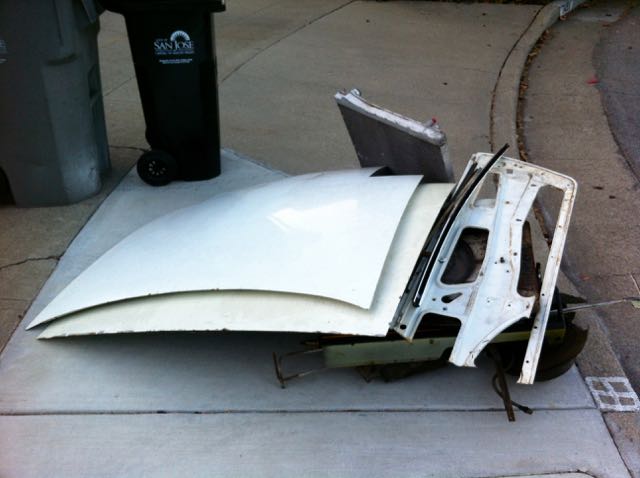 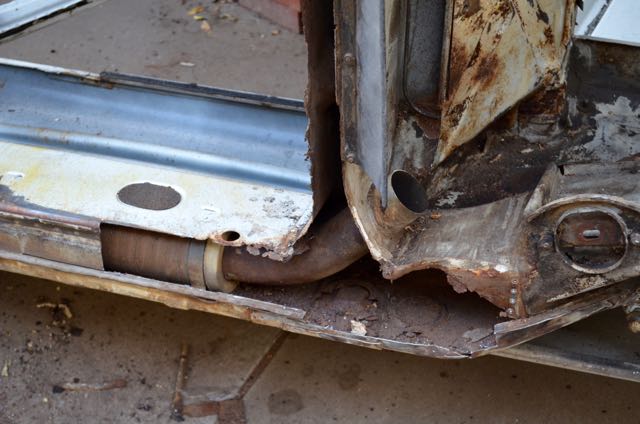 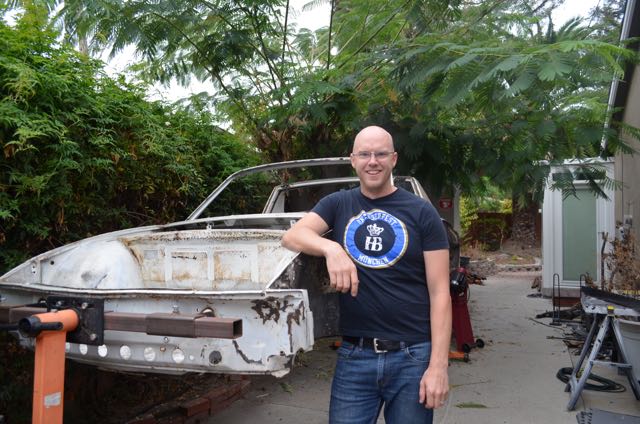 |
   |

 
|
  |
Replies(1 - 19)
| mikedsilva |
Oct 7 2015, 03:05 PM
Post
#2
|
|
Member Group: Members Posts: 90 Joined: 23-February 15 From: Australia Member No.: 18,462 Region Association: Australia and New Zealand |
awesome!
Now let's see that 912 with the sti motor!! |
|
|
|
| 914forme |
Oct 7 2015, 05:31 PM
Post
#4
|
|
Times a wastin', get wrenchin'! Group: Members Posts: 3,899 Joined: 24-July 04 From: Dayton, Ohio Member No.: 2,388 Region Association: None |
Wow (IMG:style_emoticons/default/welcome.png)
And I would add to your list if it was me. Get a set of 914LTD stiffeners, the Mad Dog is good stuff, 914LTD goes front to back. Pickups the rear suspension point, unless your moving the pickup points. Since you found tangerine racings website I am sure you noticed all of Chris trick suspension modifications. (IMG:style_emoticons/default/drooley.gif) Enjoy the ride, can't wait to watch the build (IMG:style_emoticons/default/popcorn[1].gif) |
|
|
|
| matthepcat |
Oct 7 2015, 05:51 PM
Post
#5
|
|
Meat Popsicle Group: Members Posts: 1,462 Joined: 13-December 09 From: Saratoga CA Member No.: 11,125 Region Association: Northern California |
That 912 is fuch'n awesome. I want to come see it in person!
Looking forward to seeing your 914 project....I am local to help. Matt |
|
|
|
| EdwardBlume |
Oct 8 2015, 01:01 AM
Post
#6
|
|
914 Wizard Group: Members Posts: 12,340 Joined: 2-January 03 From: SLO Member No.: 81 Region Association: Central California |
|
|
|
|
| MichiganMat |
Oct 15 2015, 09:25 PM
Post
#7
|
|
Member Group: Members Posts: 115 Joined: 14-June 06 From: San Jose, CA Member No.: 6,222 Region Association: Northern California |
Made some good progress recently:
- Welded in mounting plates for rear suspension trans-mount crossbar - Finished up rebuild of passenger side heater tube - Finished repairs to passenger long, lots of rot to replace - Finished up work on the chassis stiffening kit. The longs are burned in. - Received my roll cage kit from Tangerine today, started with mock-up Feels like good progress, though welding this stuff always seems to take longer than expected :/ Working hard to get the wheel-wells stripped and cleaned up, still thinking about paint. I would absolutely *love* to get this chassis acid-dipped or bead-blasted, but Id really rather put that cost towards speedy bits. Its a trade-off, need to think about it a bit more. Thanks for reading! 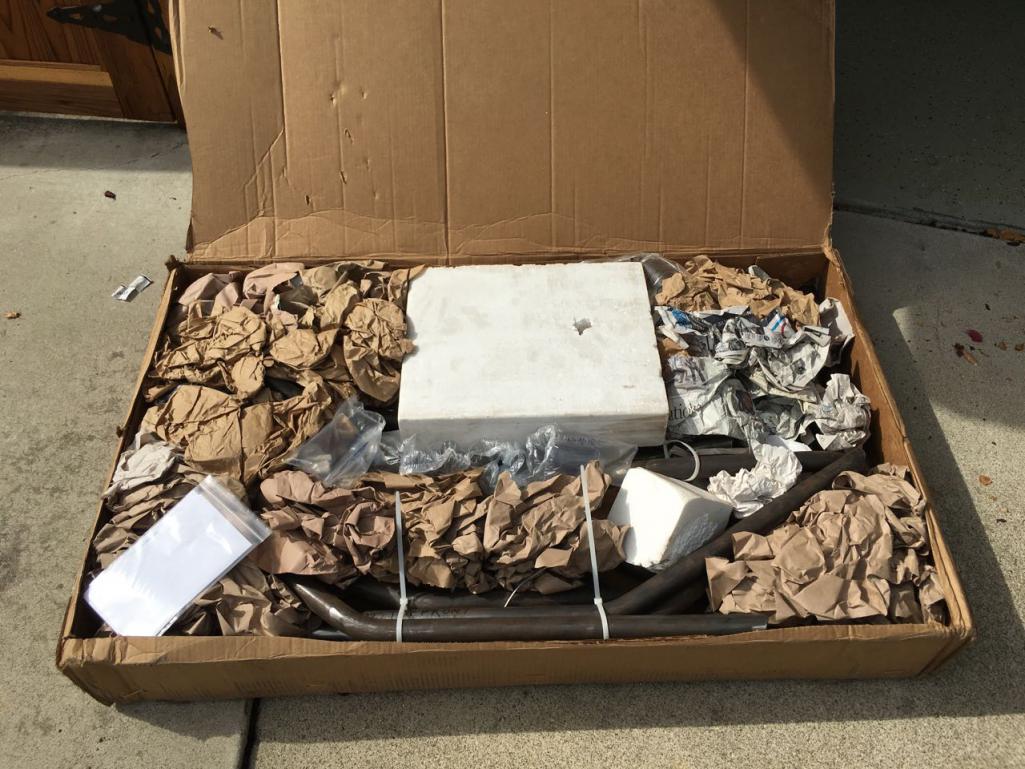  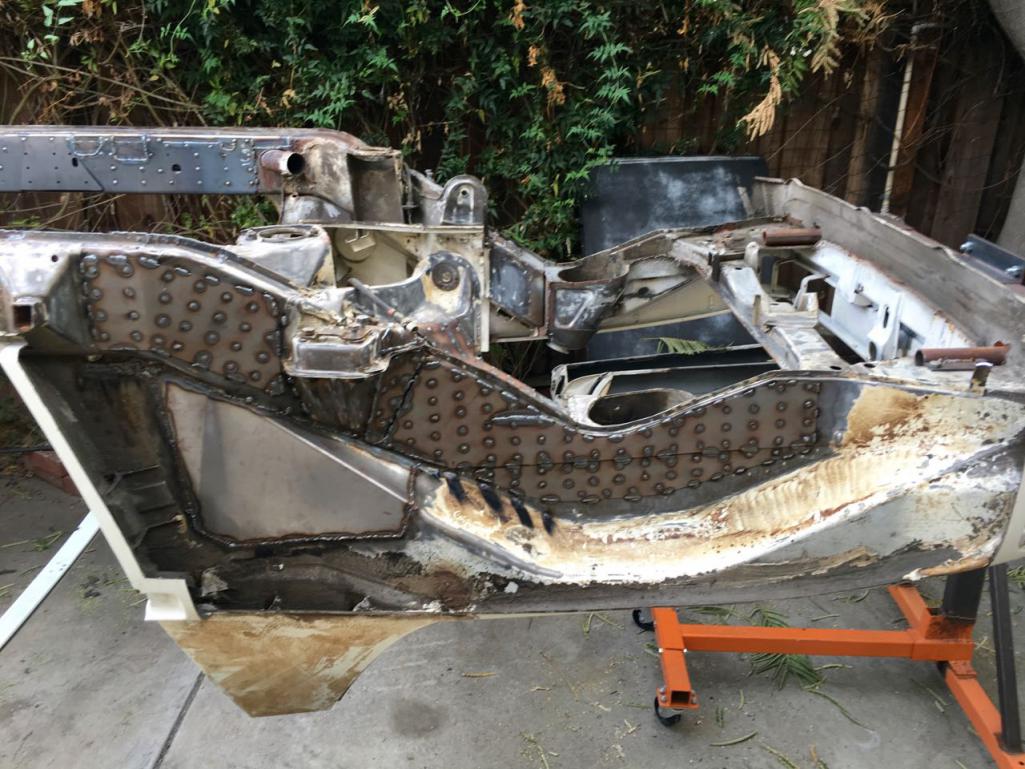 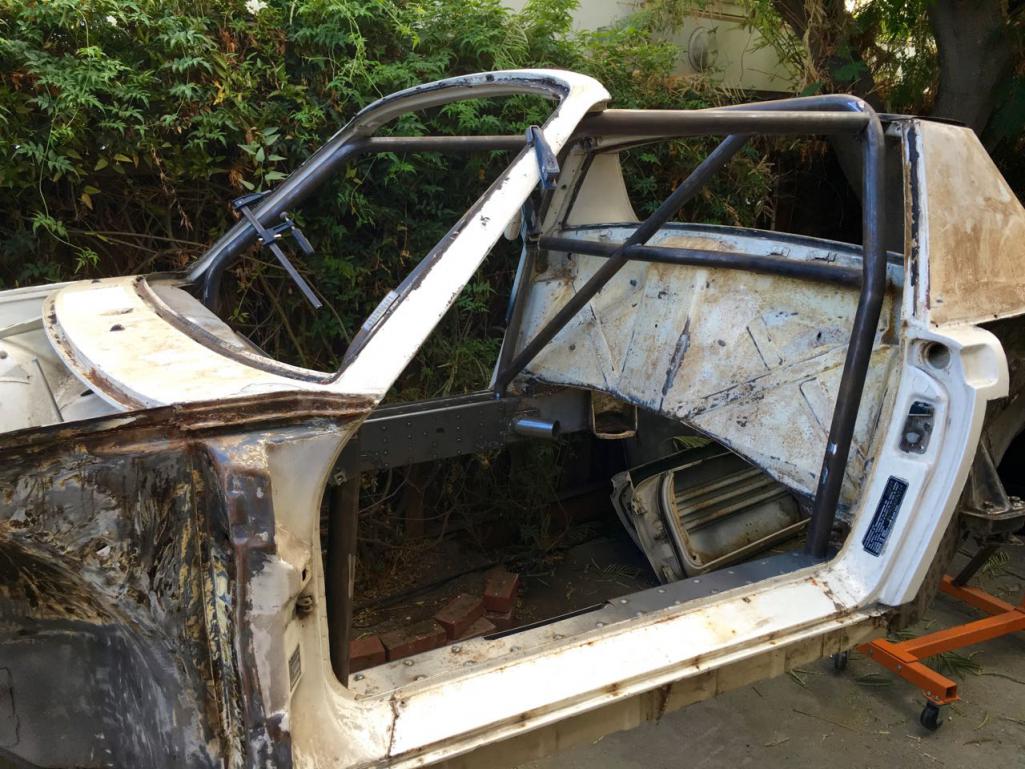 |
|
|
|
| ThePaintedMan |
Oct 15 2015, 09:41 PM
Post
#8
|
|
Advanced Member Group: Members Posts: 3,887 Joined: 6-September 11 From: St. Petersburg, FL Member No.: 13,527 Region Association: South East States |
Cool build(s). I know you're still in mock-up phase, but can I suggest, from experience, that you consider bracing the door gaps, checking dimensions and consulting with Racer Chris before you finalize the cage? Welding that cage in can REALLY change the dimensions from all the heat. I believe the common practice is to actually have the car on jackstands when welding it in. But Chris would know the best method for sure.
|
|
|
|
| MichiganMat |
Oct 15 2015, 10:58 PM
Post
#9
|
|
Member Group: Members Posts: 115 Joined: 14-June 06 From: San Jose, CA Member No.: 6,222 Region Association: Northern California |
QUOTE(ThePaintedMan @ Oct 15 2015, 08:41 PM)  Cool build(s). I know you're still in mock-up phase, but can I suggest, from experience, that you consider bracing the door gaps, checking dimensions and consulting with Racer Chris before you finalize the cage? Welding that cage in can REALLY change the dimensions from all the heat. I believe the common practice is to actually have the car on jackstands when welding it in. But Chris would know the best method for sure. Thanks, will do. I measured today and Im pleased to say my windshield-to-targa bar is perfect on both sides. I am sympathetic to the weight of the cage flexing the longs while its on the rotisserie, so Im going to keep a close eye on it. Tangerines instructions are pretty specific on the installation too, basically tack it all up, then burn in everything but the feet, then cut the tacks on the feet to relive tension, then finally burn in the feet. Seems logical, heh. Question for you: concerning the chassis kit, is it common to just stich-weld every few inches or should I be welding a solid bead around the entire outside the panels? Do you know? |
|
|
|
| ChrisFoley |
Oct 16 2015, 05:03 AM
Post
#10
|
|
I am Tangerine Racing Group: Members Posts: 8,021 Joined: 29-January 03 From: Bolton, CT Member No.: 209 Region Association: None |
QUOTE(MichiganMat @ Oct 16 2015, 12:58 AM) Question for you: concerning the chassis kit, is it common to just stich-weld every few inches or should I be welding a solid bead around the entire outside the panels? Do you know? Stitch is better. Use sealant if you want to keep moisture away from the space between. |
|
|
|
| mgp4591 |
Oct 22 2015, 02:47 AM
Post
#11
|
|
914 Guru Group: Members Posts: 5,932 Joined: 1-August 12 From: Salt Lake City Ut Member No.: 14,748 Region Association: Intermountain Region |
Looking forward to more of this build! You've obviously got the skill and the tools, your experience speaks for itself with the pics of your previous builds. I'm getting ready to tackle my floor and my car looks really similar to yours in the progress phase. You're ahead of me in a few areas but seeing someone else in the same general spot of their build is always intriguing! Keep up the good work while I hijack your ideas! (IMG:style_emoticons/default/sawzall-smiley.gif) (IMG:style_emoticons/default/welder.gif) (IMG:style_emoticons/default/aktion035.gif)
|
|
|
|
| 914forme |
Oct 22 2015, 02:55 PM
Post
#12
|
|
Times a wastin', get wrenchin'! Group: Members Posts: 3,899 Joined: 24-July 04 From: Dayton, Ohio Member No.: 2,388 Region Association: None |
Did not see it listed, what motor are you planning on stuffing into this 914?
Seeing how nice Chris' roll cage fits to the A pillars, I need to send him a note. Thank you for posting the pictures. |
|
|
|
| MichiganMat |
Nov 2 2015, 10:41 PM
Post
#13
|
|
Member Group: Members Posts: 115 Joined: 14-June 06 From: San Jose, CA Member No.: 6,222 Region Association: Northern California |
Finally was able to get some time on the project this weekend, and it was all dedicated to the roll cage. Was able to fit the driver door bars, the knee bar, and the windshield bar. These are just tacked in for now. The passenger door bars still need to be cut down and fitted.
I was also able to add the trans reinforcements, but I still need to add a cross bar between the towers. Finally, I was able to cut and burn in the backing plates to tie the main hoop of the cage to the rear shock towers. I also plan to tie in the front towers to the forward hoops but I haven't gotten around to making the plates yet. Soon. This chassis fab stuff just takes so long and its so tempting to cut corners for the sake of expediency. A day here, a day there, its just a matter of being patient and working hard. I got the sign-off from Chris @ Tangerine on the placements, so Im feeling pretty good about burning it all in once the passenger bars are fit. Onward! 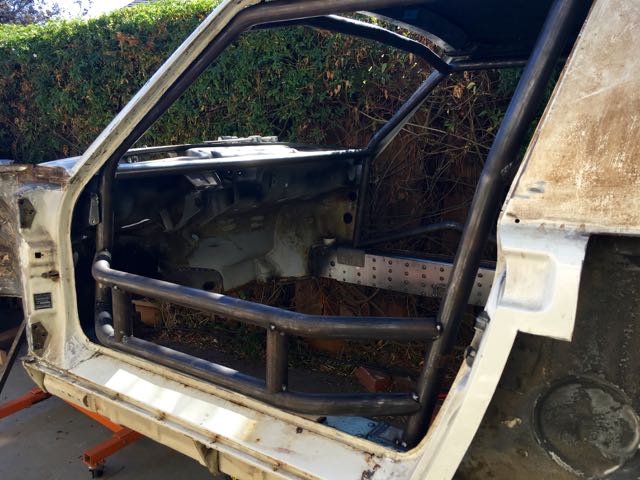 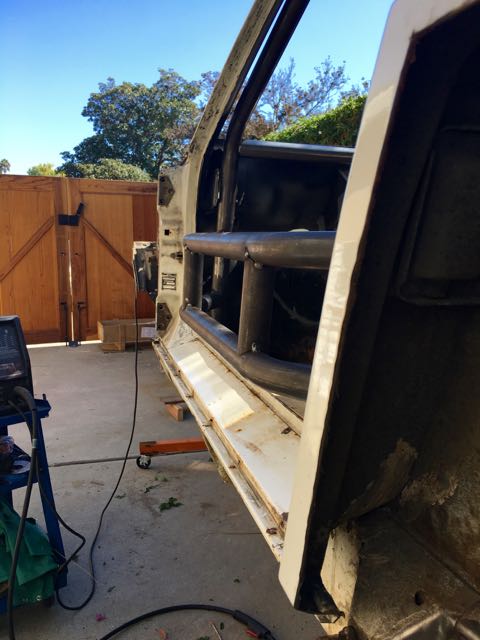 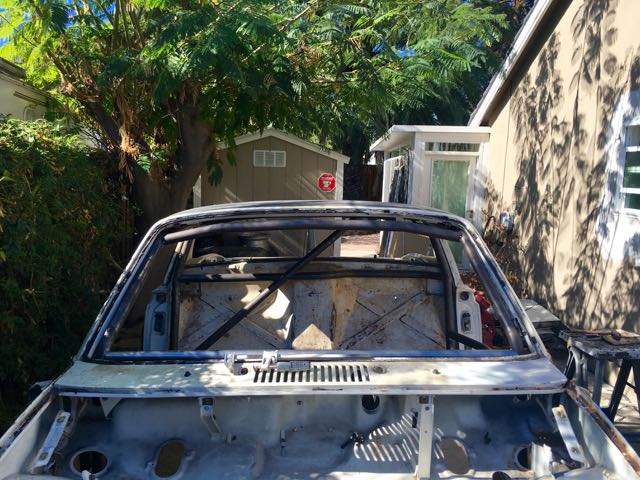 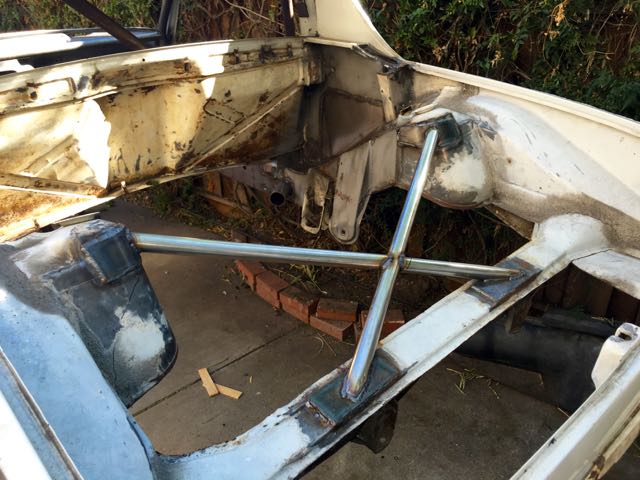 |
|
|
|
| Andyrew |
Nov 2 2015, 10:59 PM
Post
#14
|
|
Spooling.... Please wait Group: Members Posts: 13,380 Joined: 20-January 03 From: Riverbank, Ca Member No.: 172 Region Association: Northern California |
Great looking progress!
|
|
|
|
| 914forme |
Nov 3 2015, 08:39 PM
Post
#15
|
|
Times a wastin', get wrenchin'! Group: Members Posts: 3,899 Joined: 24-July 04 From: Dayton, Ohio Member No.: 2,388 Region Association: None |
Reason I asked what engine your running, if it was anything I could do a firewall mount with, I would cut out the -4 mounts. Get rid of the heater channel, and box this up to the rear shock towers that also ties in the rear suspension pickup.
Red Cut, blue add.  Keep up the great work (IMG:style_emoticons/default/popcorn[1].gif) |
|
|
|
| Mueller |
Nov 3 2015, 10:47 PM
Post
#16
|
|
914 Freak! Group: Members Posts: 17,155 Joined: 4-January 03 From: Antioch, CA Member No.: 87 Region Association: None |
Awesome progress....terrible use of the word "burn" (IMG:style_emoticons/default/smile.gif) (IMG:style_emoticons/default/welder.gif)
|
|
|
|
| MichiganMat |
Jan 16 2016, 03:37 PM
Post
#17
|
|
Member Group: Members Posts: 115 Joined: 14-June 06 From: San Jose, CA Member No.: 6,222 Region Association: Northern California |
Its been a long time since my last post, the holidays really sucked up all of our time. My brother and I were able to get his car out on the road and I was able to start finishing up projects on my 911. The 911 is just about wrapped up so the 914 will be coming into the garage shortly, so I get started on the 914 floorpans.
So the floorpans... The plan is to cut the bottom out of the driver side of the rear pan and drop the driver seat down by an inch or two. I've seen a few examples, Patrick Motorsports has a couple of cars that they've done this to, I think its smart: (IMG:http://www.914world.com/bbs2/uploads_offsite/patrickms.s3.amazonaws.com-6222-1452980232.1.jpg) I had to cut the entire floorpan and center tunnel out of the car to fix the longs, so before I can start putting in the pans I need to fit the seat. I've been hedging about what seat to buy for a few weeks now, but was lucky that a friend had the exact seat I was thinking of. I picked it up this morning and will start fitting it with a custom tunnel. 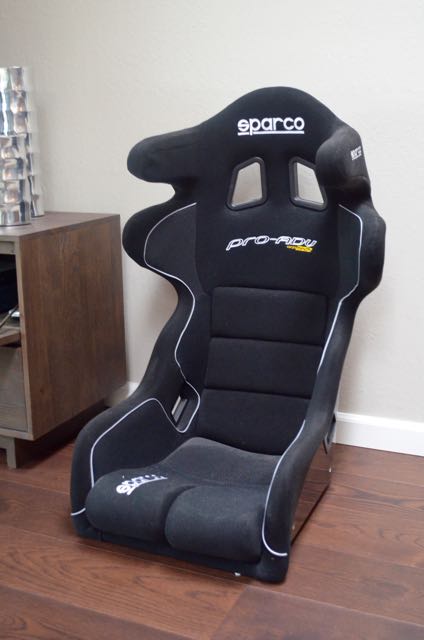 Progress is slow but it'll start ramping up in the coming weeks. |
|
|
|
| MichiganMat |
Jan 26 2016, 02:49 PM
Post
#18
|
|
Member Group: Members Posts: 115 Joined: 14-June 06 From: San Jose, CA Member No.: 6,222 Region Association: Northern California |
Brought the chassis into the garage, she's finally out of the elements and the real work can get started.
I've started test fitting the front and rear floor pans. Don't sweat that rear pan placement, I found out I was doing it wrong AFTER screwing it down. No worries, it's not permanent. Fitted the seat, looks like its going to work. Im still planning to drop the seat pan down by 2" and I need to get busy on the custom tunnel. Im investigating drivetrains (likely EJ205) and pedal clusters this week and will be picking up the Rennspd bodywork in February, excited to get my hands on it all. Also thinking about gusseting the front hoops of the cage to the A-pillars. Does anyone have an opinion on it? Thanks for looking!  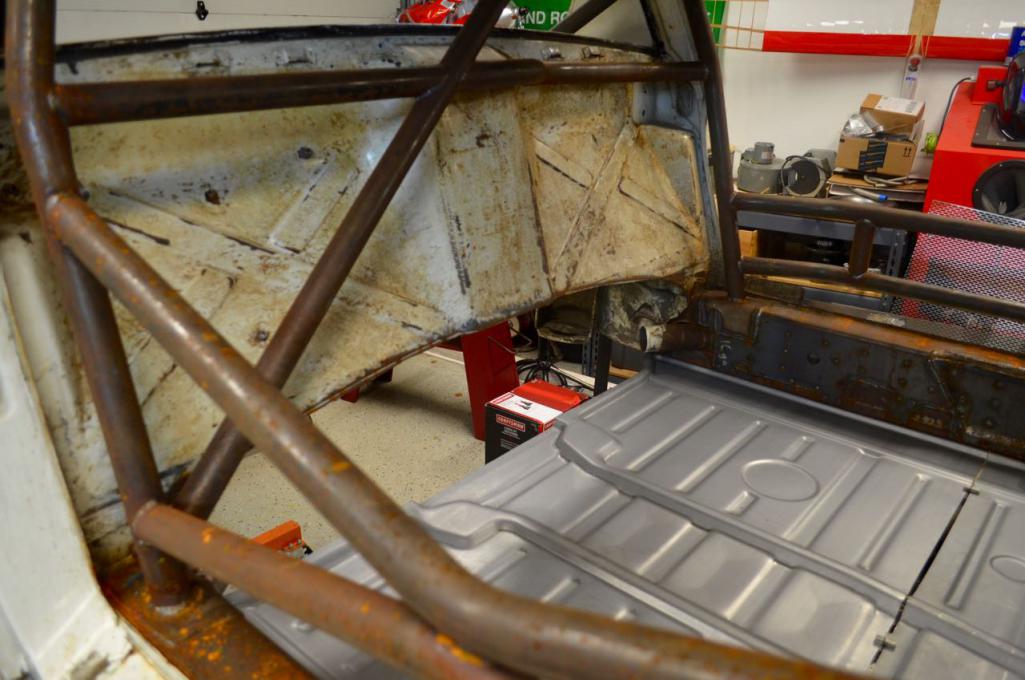 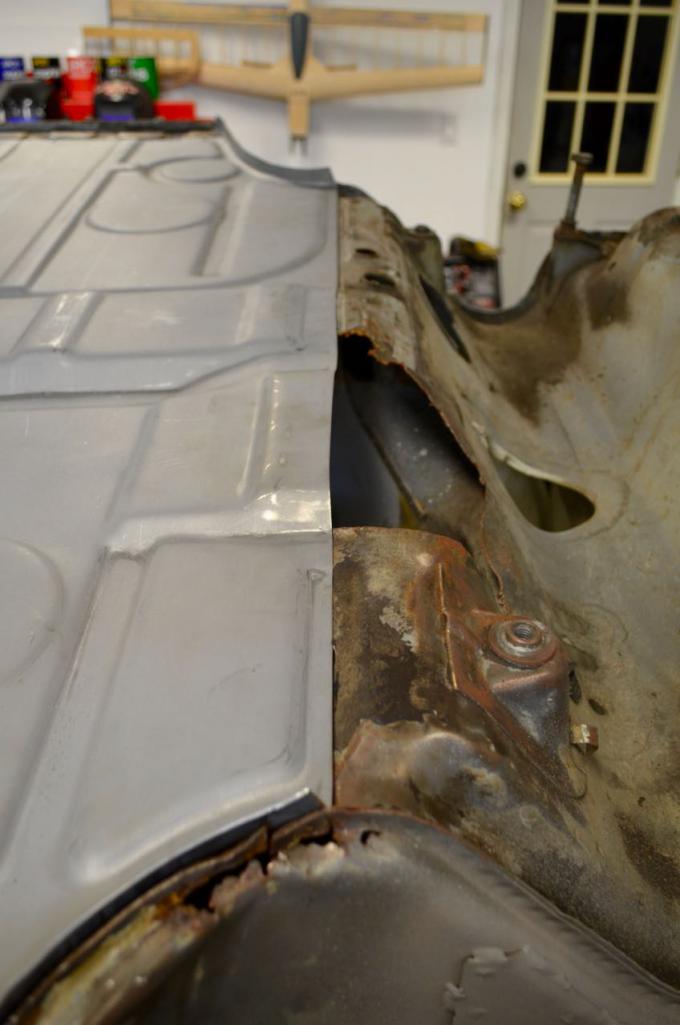 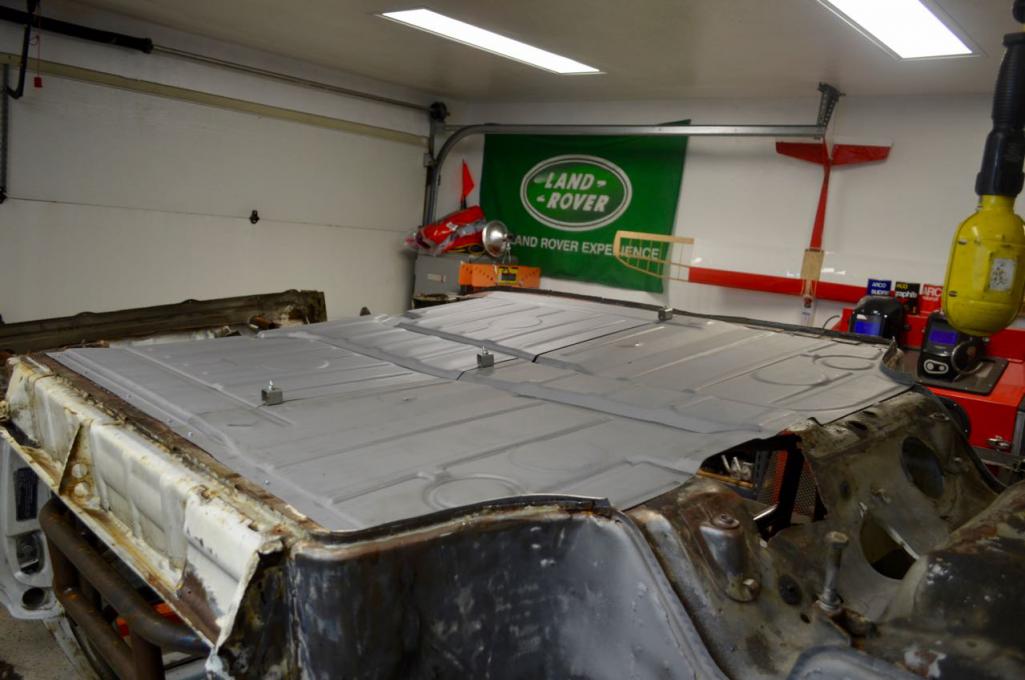 |
|
|
|
| 914forme |
Jan 27 2016, 06:33 AM
Post
#19
|
|
Times a wastin', get wrenchin'! Group: Members Posts: 3,899 Joined: 24-July 04 From: Dayton, Ohio Member No.: 2,388 Region Association: None |
Unless you tie in the roof, you are only gusseting 18 ga sheet metal. You are basically re-enforcing the A-pilar. Worth anything, maybe in a crash, for stiffening on an open car, not really. Now if your going 916 style roof, I would say go for it. But DOM always wins over sheet metal. And depending on the class if you ever get the racing bug, they count as another point of attachment. For attachment points I try to make them as big as I can and cover at least 3 planes of contact. But again, people have rules, so you have to read them carefully. In NASA we get points per attachment point of the cage beyond 6 "older rules when I built the car" have not read this years yet. So if I was taking points I would make sure it had a valid result. Also if I was gusseting a bar into the chassis it would be the cross bar at the front. And I would take the dash out, run it to the front fire wall and gusset it across the entire wall. That gets it away from your knees and adds a huge amount of chassis tie in. I also added a bar across the back behind my seat that went down picked up the center seatbelt points and back across. Any time you can make a complete hoop, and not rely on the chassis the better off you are. Next I would concentrate on the tie into the suspension points.
? how much of a street car do you want this to be (IMG:style_emoticons/default/huh.gif) |
|
|
|
| MichiganMat |
Jan 31 2016, 12:33 PM
Post
#20
|
|
Member Group: Members Posts: 115 Joined: 14-June 06 From: San Jose, CA Member No.: 6,222 Region Association: Northern California |
Bought the motor and trans this past week. EJ205T from eBay. Great deal, couldn't pass it up.
Also started work on replacing the firewall that rotted away. Its coming along nicely and will be a good foundation for a center tunnel, for tying in the dog-ears, and for mounting the engine. 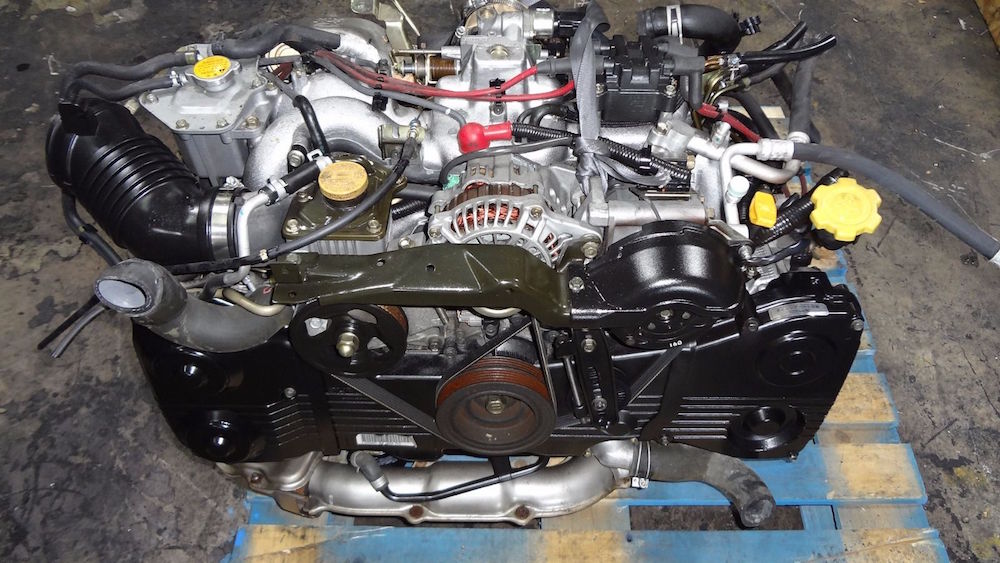 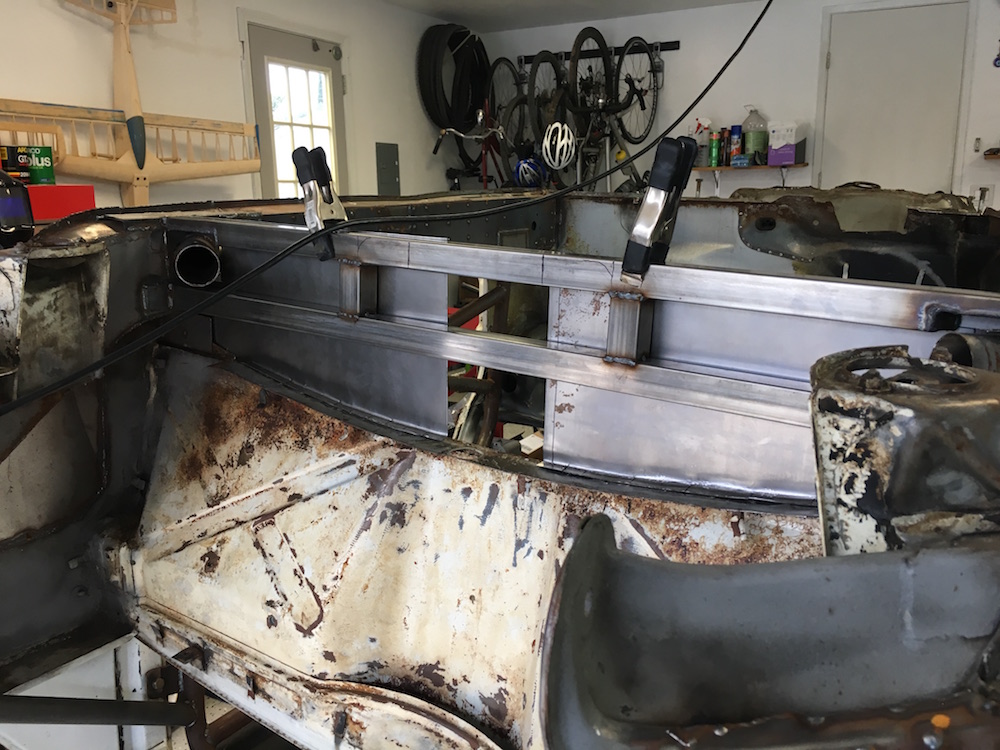 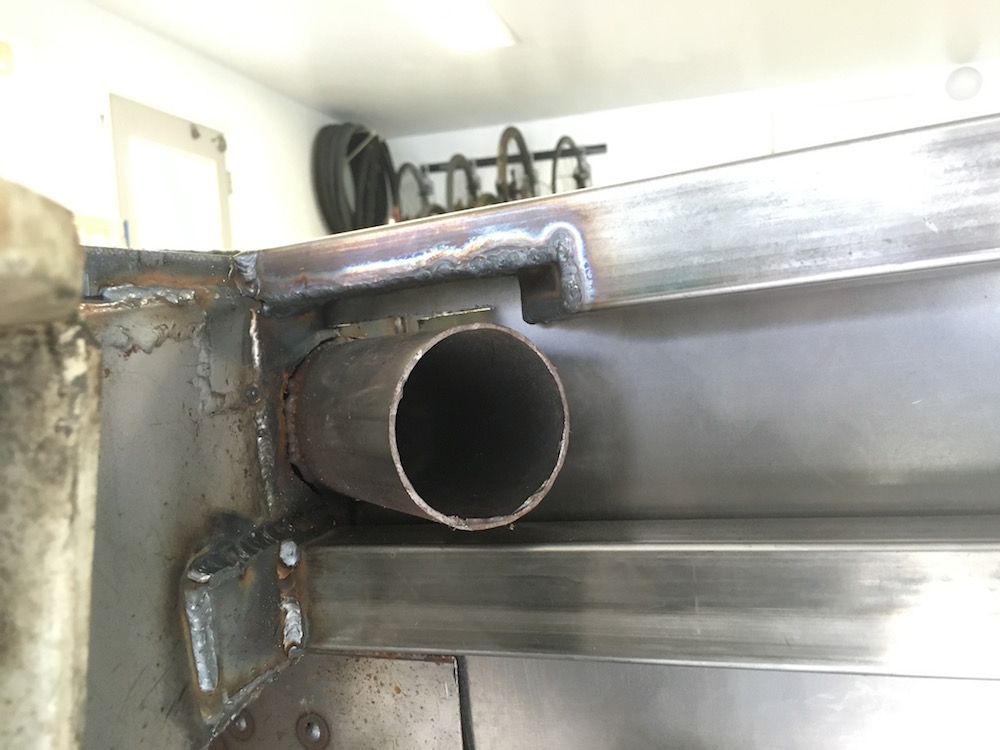 |
|
|
|
|
1 User(s) are reading this topic (1 Guests and 0 Anonymous Users)
0 Members:

|
Lo-Fi Version | Time is now: 11th May 2026 - 04:16 AM |
Invision Power Board
v9.1.4 © 2026 IPS, Inc.