|
|

|
Porsche, and the Porsche crest are registered trademarks of Dr. Ing. h.c. F. Porsche AG.
This site is not affiliated with Porsche in any way. Its only purpose is to provide an online forum for car enthusiasts. All other trademarks are property of their respective owners. |
|
|
  |
| 914forme |
 Apr 12 2016, 05:13 AM Apr 12 2016, 05:13 AM
Post
#41
|
|
Times a wastin', get wrenchin'!     Group: Members Posts: 3,896 Joined: 24-July 04 From: Dayton, Ohio Member No.: 2,388 Region Association: None 
|
That is looking very nice. Like the hood opening, BTW, you don't need that much of an inlet, and you might want to put a brace between the two front torsion bar mounts. Since they can move around a bit and you cut that vertical section out of the front of the trunk.
Other items I see that might need attention: Not to pick your build, just trying to save you future grief. Radiator mount should not be hard mounted. From the pictures it looks like you hard mounted at least the top. It needs to be floating, otherwise you have made it into a structural member, and it will over time crack. If your luck is like mine, it will happen at the least opportune time and make your day. Other than these two items get back to work, love the build. |
| falcor75 |
 Apr 12 2016, 06:22 AM Apr 12 2016, 06:22 AM
Post
#42
|
|
Senior Member    Group: Members Posts: 1,579 Joined: 22-November 12 From: Sweden Member No.: 15,176 Region Association: Scandinavia 
|
Be very carefull with those noname hood pins. A friend had his break at 100 mph on track causing broken hood, windshield dented roof and front spoiler damage. Needless to say the money "saved" by buying cheap parts were long gone...
|
| MichiganMat |
 Apr 12 2016, 09:25 AM Apr 12 2016, 09:25 AM
Post
#43
|
|
Member   Group: Members Posts: 114 Joined: 14-June 06 From: San Jose, CA Member No.: 6,222 Region Association: Northern California |
That is looking very nice. Like the hood opening, BTW, you don't need that much of an inlet, and you might want to put a brace between the two front torsion bar mounts. Since they can move around a bit and you cut that vertical section out of the front of the trunk. Other items I see that might need attention: Not to pick your build, just trying to save you future grief. Radiator mount should not be hard mounted. From the pictures it looks like you hard mounted at least the top. It needs to be floating, otherwise you have made it into a structural member, and it will over time crack. If your luck is like mine, it will happen at the least opportune time and make your day. Other than these two items get back to work, love the build. Thank you for the feedback, I really appreciate it. You know, I always get a little insecure when I post up pics of the build, there are so many amazing builders and lots of guys on here that have "done it all". Im really here to learn and to improve my skills, so the feedback is so valuable to me. Re: Inlet. - Yeah, I agree, its a bit over the top but its nice to have the accessibility. I need to clean up the cuts a bit and I do plan to reinforce it. Re: Radiator - Agreed. It will be rubber-isolated when its done. Chassis-flex actually cracked your radiator? Interesting... I didn't' think it would be much of an issue given the way the torsion-bar suspension is designed. Thanks again! |
| MichiganMat |
 Jun 2 2016, 05:16 PM Jun 2 2016, 05:16 PM
Post
#44
|
|
Member   Group: Members Posts: 114 Joined: 14-June 06 From: San Jose, CA Member No.: 6,222 Region Association: Northern California |
I know its been a bit of radio-silence on my end, but I've been busy!
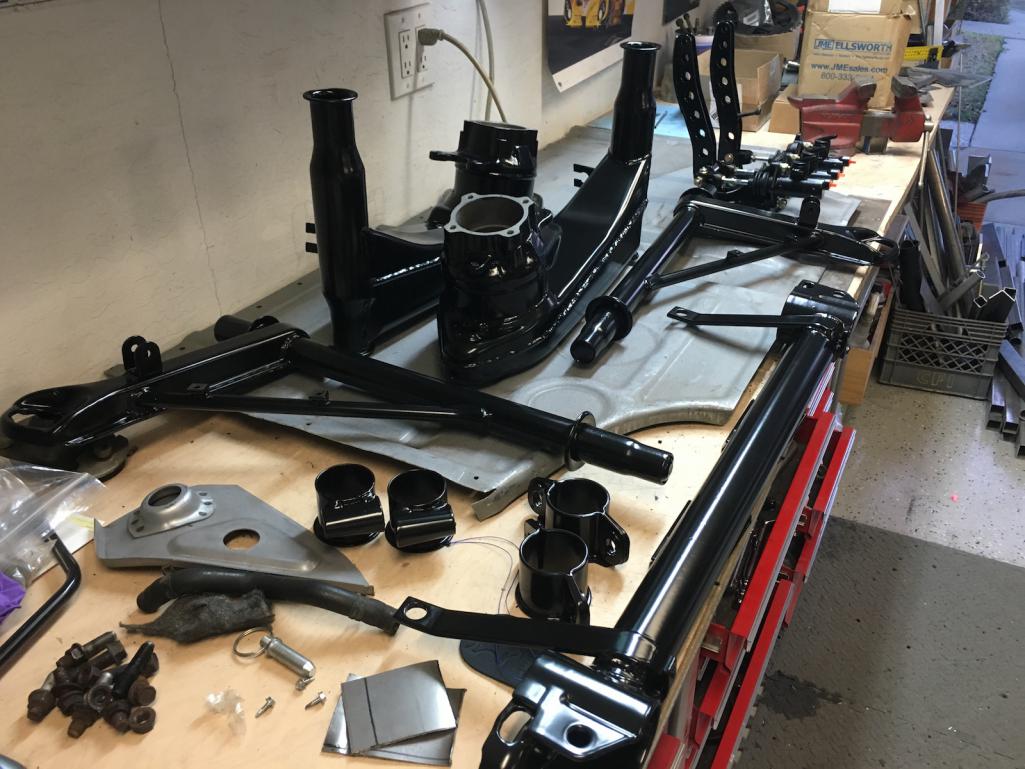
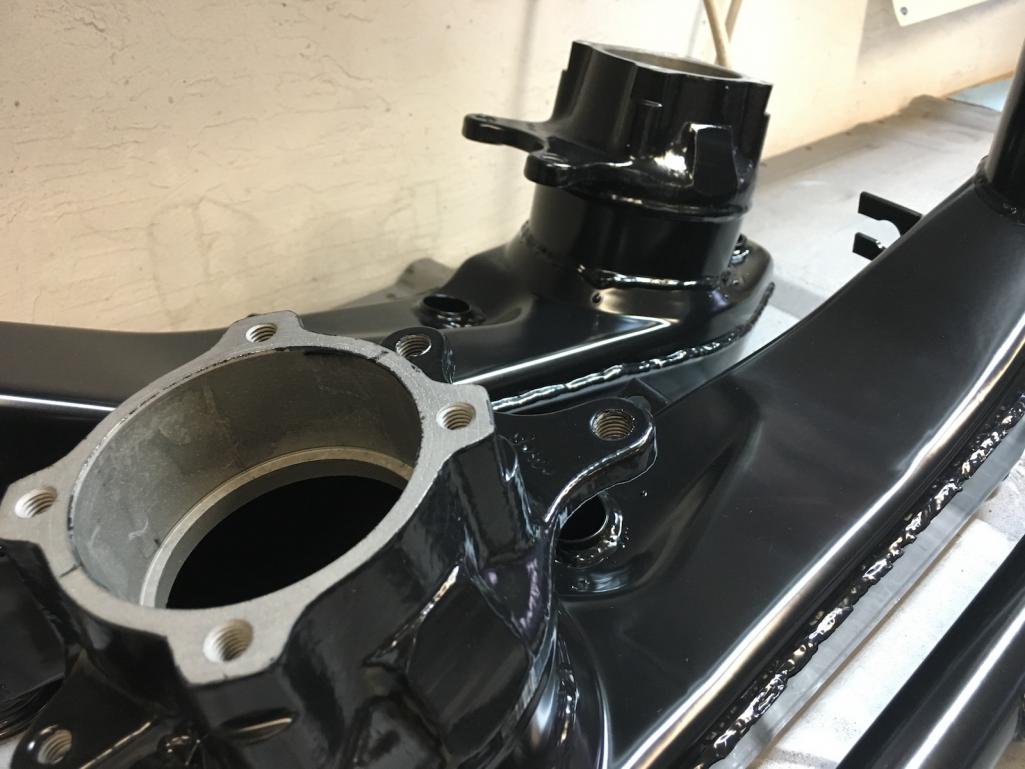
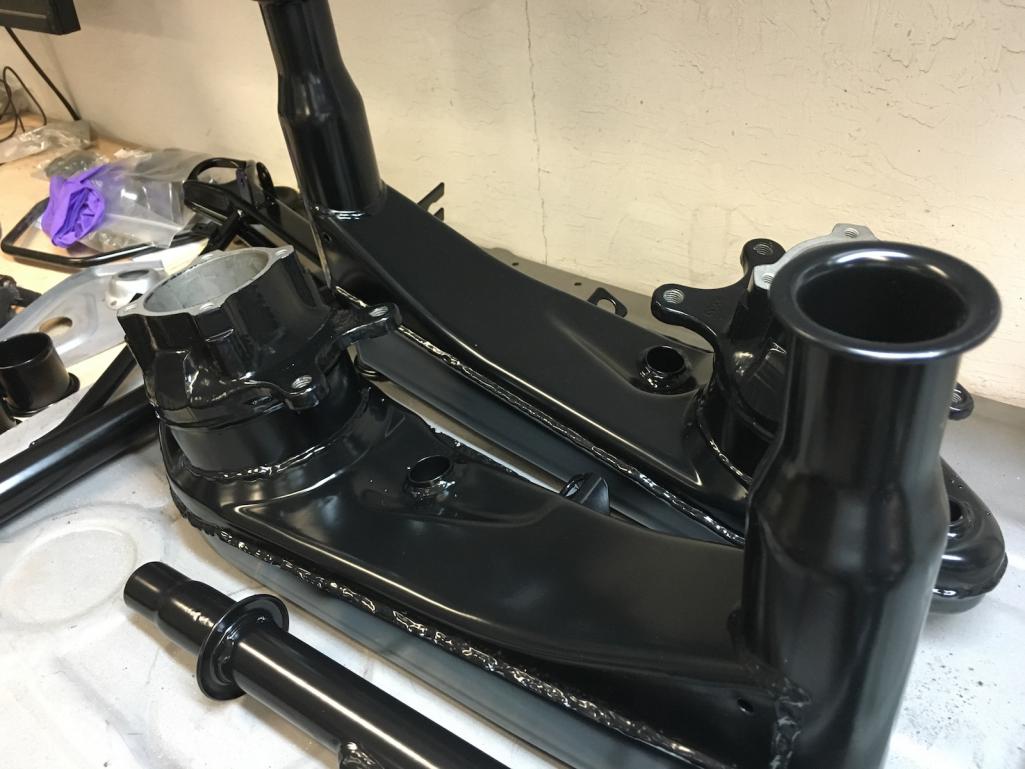
So what have I been up to: - pulled the wheel bearings out of the trailing arms, bought new bearings - discovered one of my front a-arms was bent, sourced new arms on eBay for cheap - bought new front turn signal lenses - bought dash gauge panel - researched and bought rear brake calipers - sourced a powder-coating shop, going to take all the suspension pieces in for coating - converted my subaru trans to 2wd (found some ugly bits in there, turned out be harmless) - installed my through-hood gas cap Its been a busy couple of weeks, no? I need to take more pictures! Every time I do one of these updates I realize how few pics I have to show, heh. Generic gas filler from some internet site: 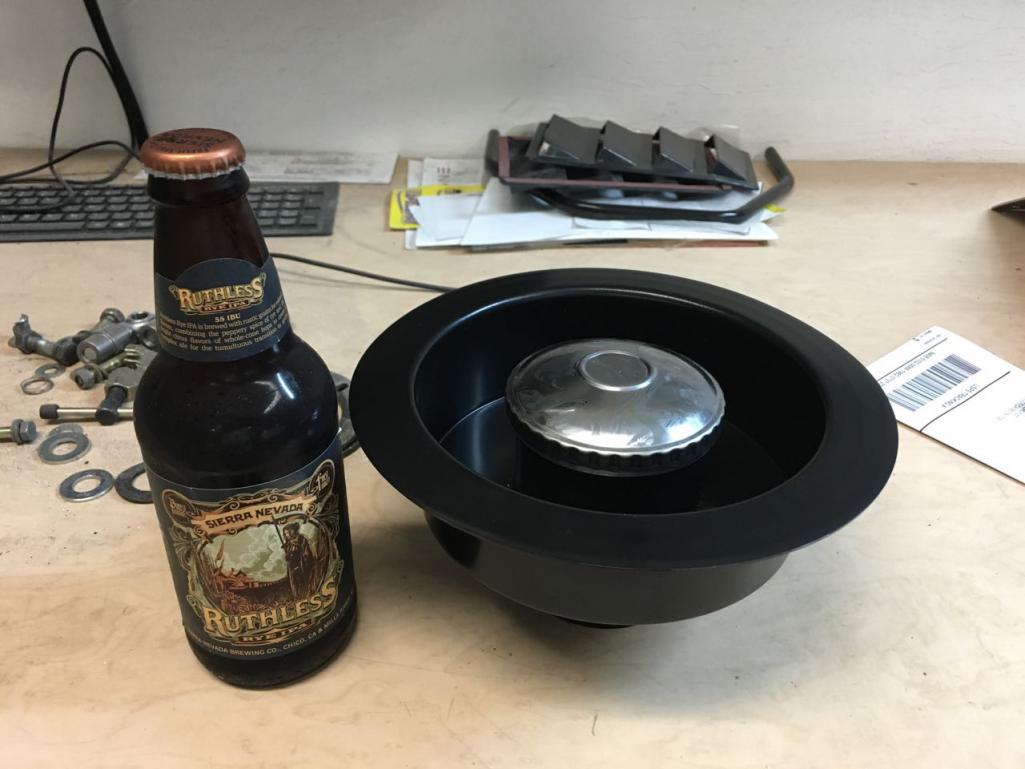 Installed. Separated the neck from the ring, welded in. Took off the bottom of the bowl and welded around the perimeter. Need to add a drain, but that ain't no biggie. Not a lot of room to work with in there! 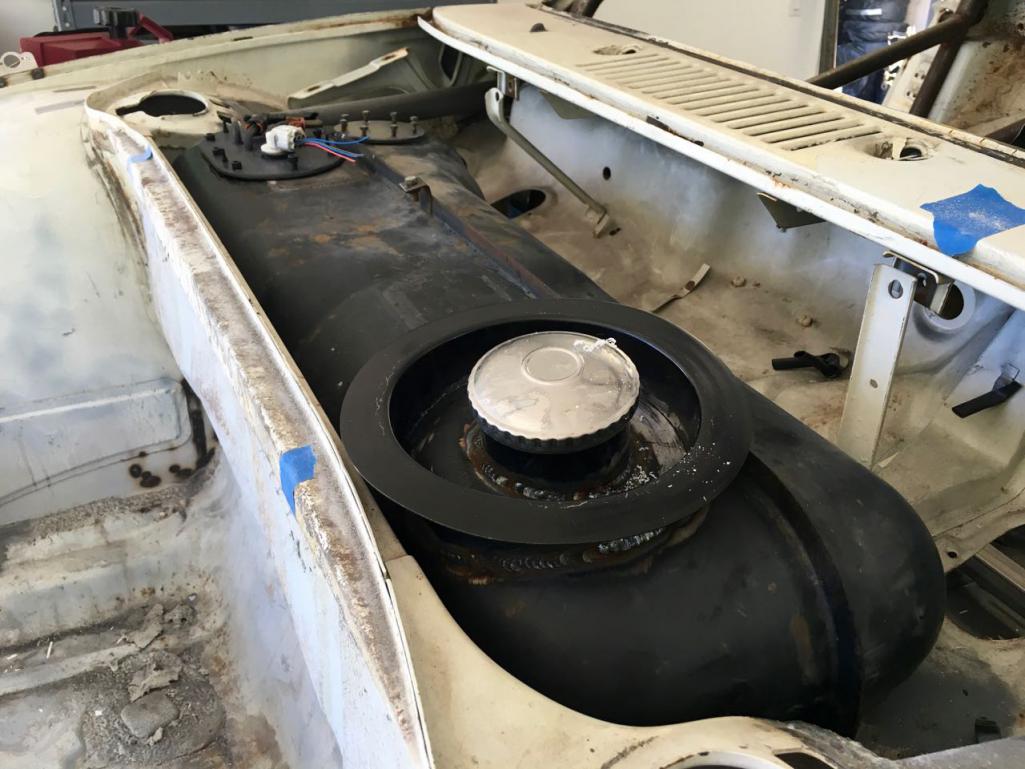 Not a bad look, no? 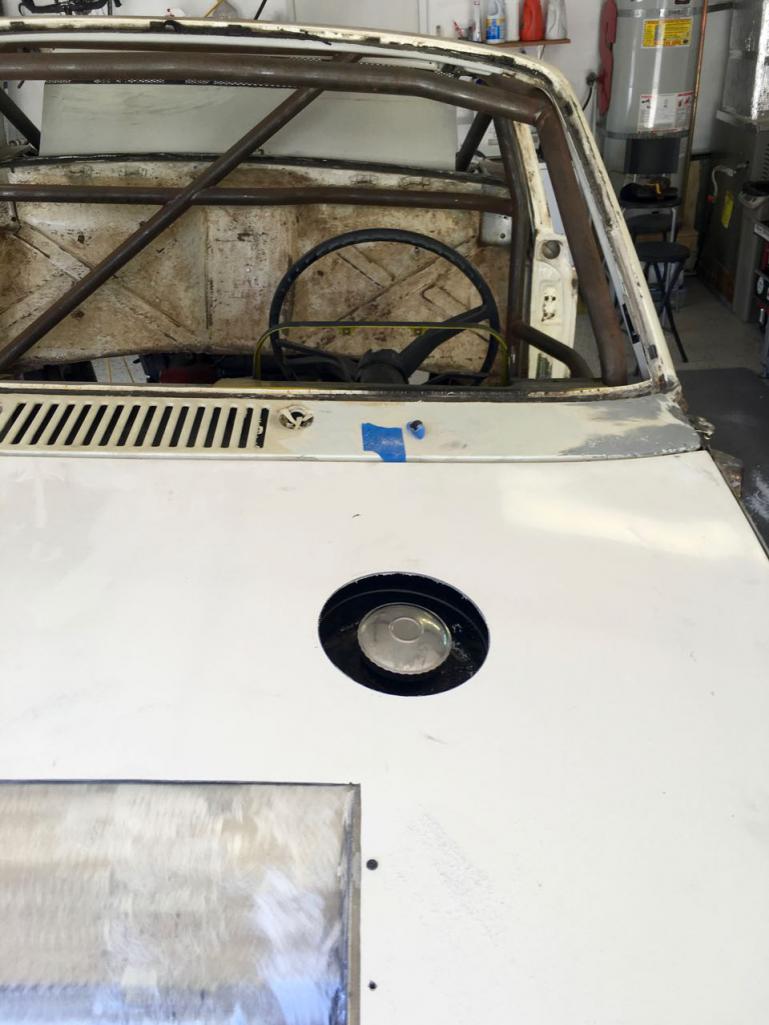 Bits of ground up center-diff c-clip. Had me worried! Turned out to be just fine. 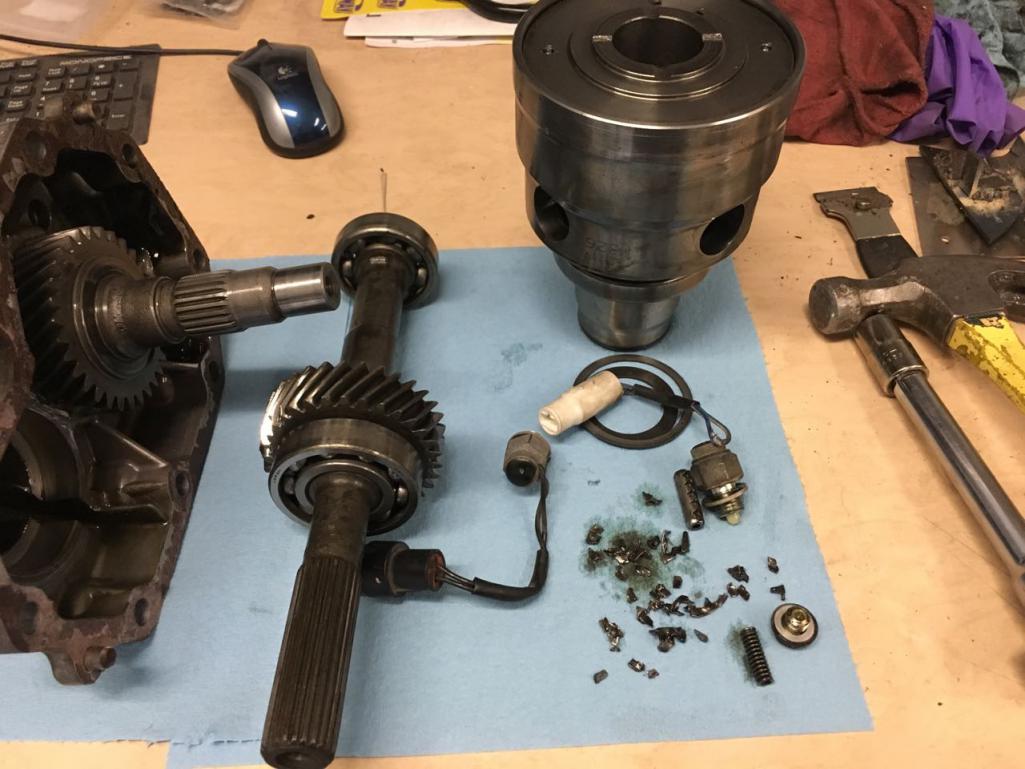 Tail panel bolted up after the conversion 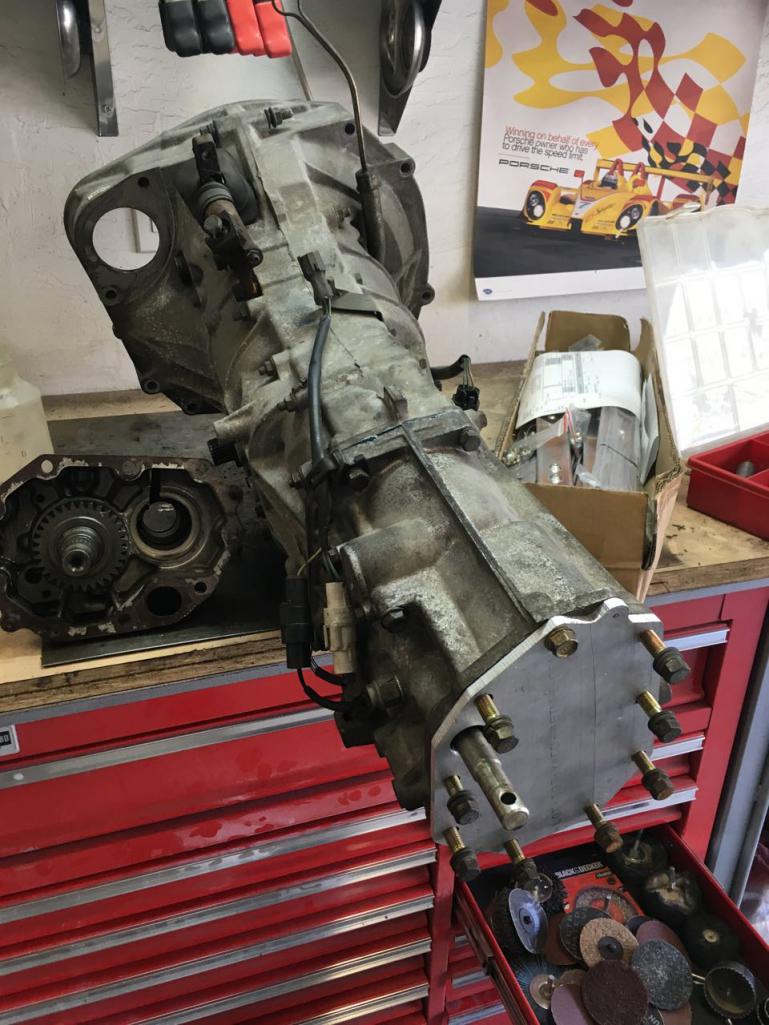 So making good progress I think. The next steps are: - Take the suspension bits off to the powder-coater - Strip down the gas tank and paint it - Buy a pedal cluster, fab into the floorpan, then the pans can go in permanently - Then take the chassis off to the blasting shop, strip and prime Easy peasy, right? |
| Mueller |
 Jun 2 2016, 06:05 PM Jun 2 2016, 06:05 PM
Post
#45
|
|
914 Freak!                Group: Members Posts: 17,150 Joined: 4-January 03 From: Antioch, CA Member No.: 87 Region Association: None 
|
Neat gas tank filler mod!
|
| MichiganMat |
 Aug 10 2016, 08:39 AM Aug 10 2016, 08:39 AM
Post
#46
|
|
Member   Group: Members Posts: 114 Joined: 14-June 06 From: San Jose, CA Member No.: 6,222 Region Association: Northern California |
Where have I been lately?
Weeellllll.... not working on the car nearly as much as Id hoped. But there has been progress! • Rebuilt a set of Carrera rear calipers to use instead of 914 calipers which will allow me to use vented disks in the rear. • Bought new front suspension arms (mine were damaged, grr), sent all the suspension pieces off to the powdercoater • Started mock-up of the lightweight custom LED (cheap) tail lights Im building • Welded in the lower rear firewall and rear pan section • Bought Wilwood pedals, MCs, and bias adjuster. Now I can start fab / install of the front pan section • Put a new header and oil pan on the WRX engine. The old header was rusty and the pan had a crack. • Bought a new Momo wheel and hub. Looks so good in the car, loving it. I spoke with the local blaster / powdercoater and he'll blast and prime the chassis for around $1400 so I may go that route. It'll be a real challenge to get the car over to him, but we'll see. Its going to be a busy couple of weeks coming up (dad in town, Monterey Car Week, work, etc), but ill find a way to get some work in. This weekend I'm aiming to: • Fab a plate to mount the pedals to the floorpan • Cut open the header tubes to run the coolant hose • Weld in the front section of the floorpan • Finish fab work on the rear pan and firewall 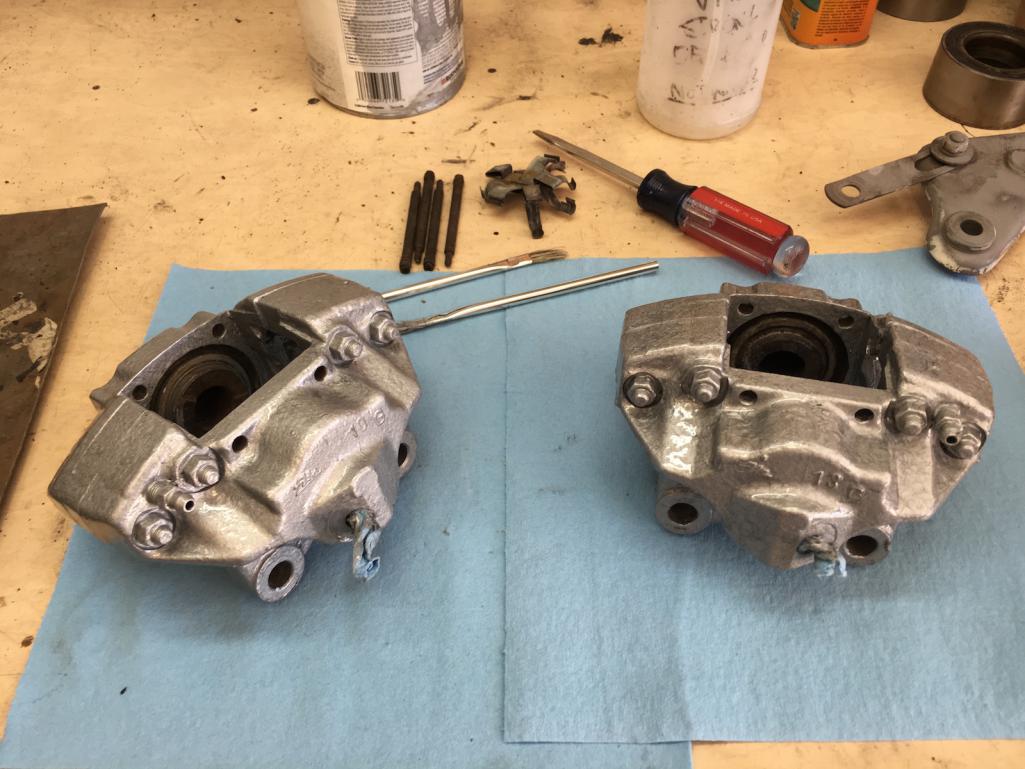 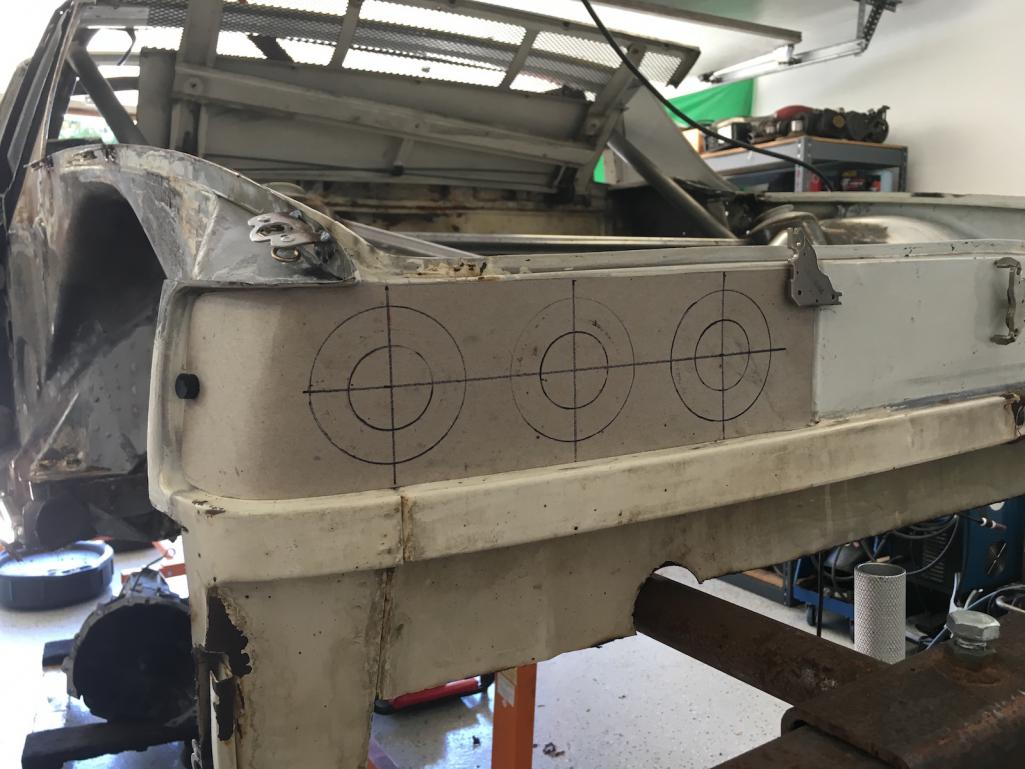 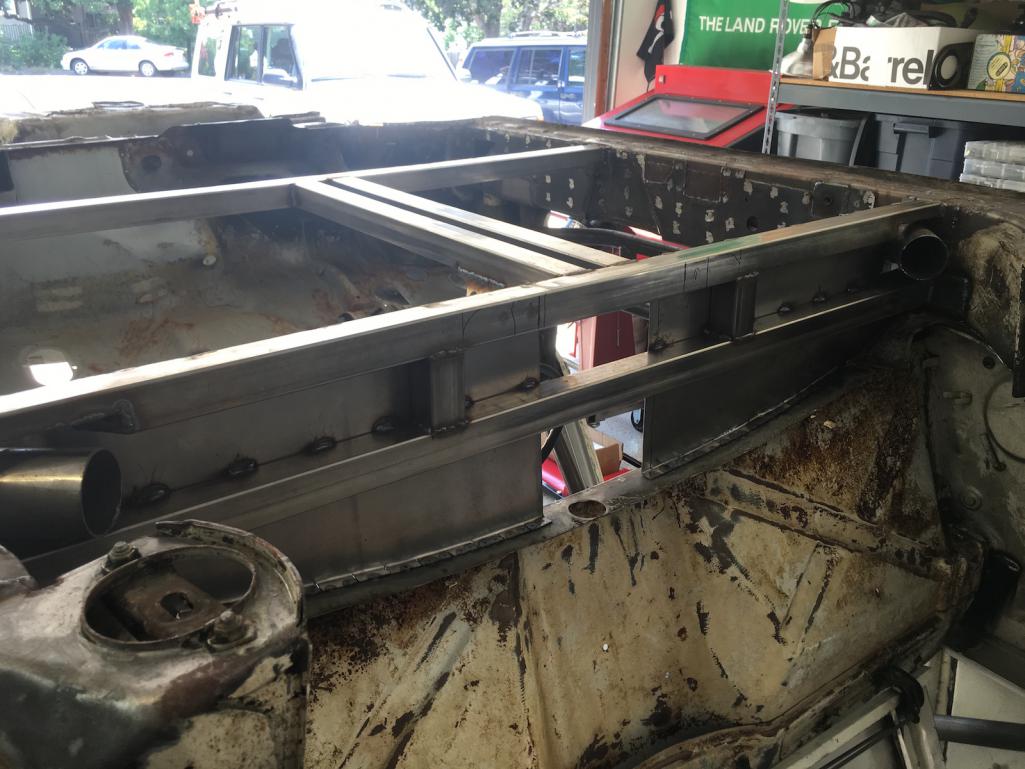 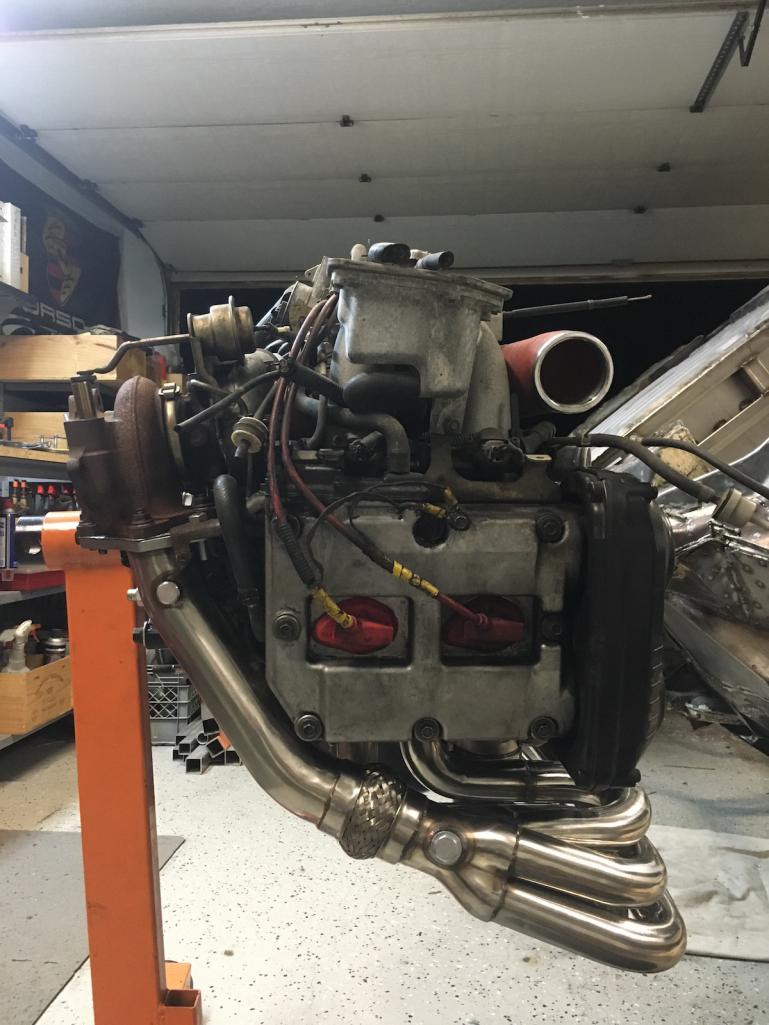 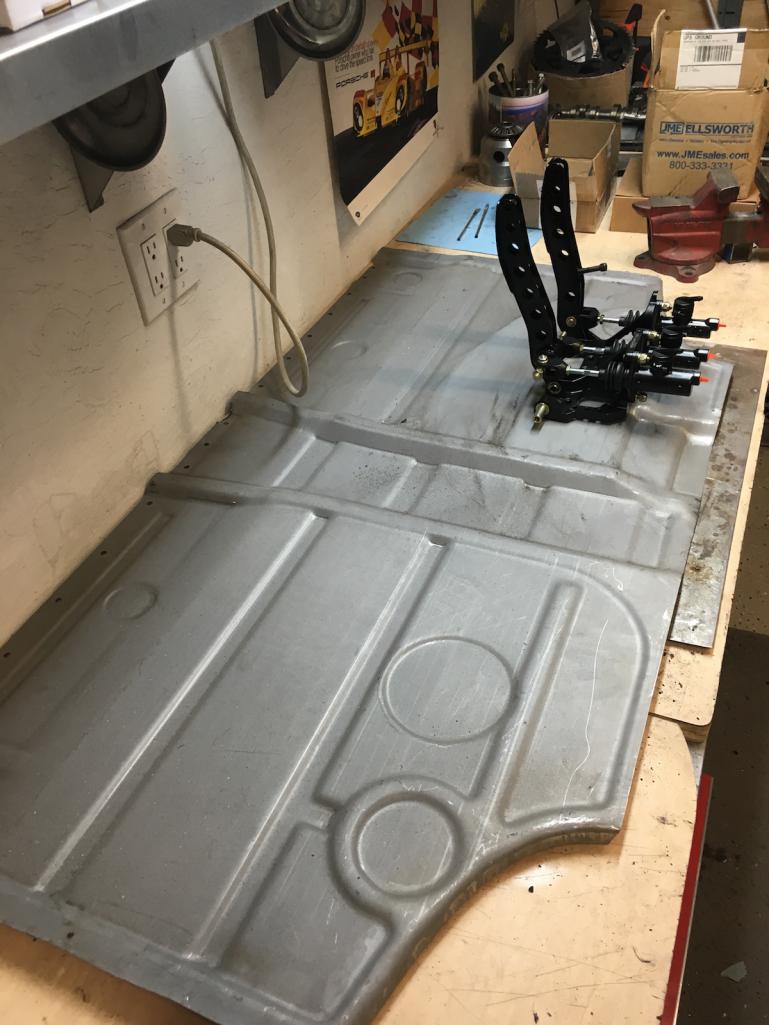 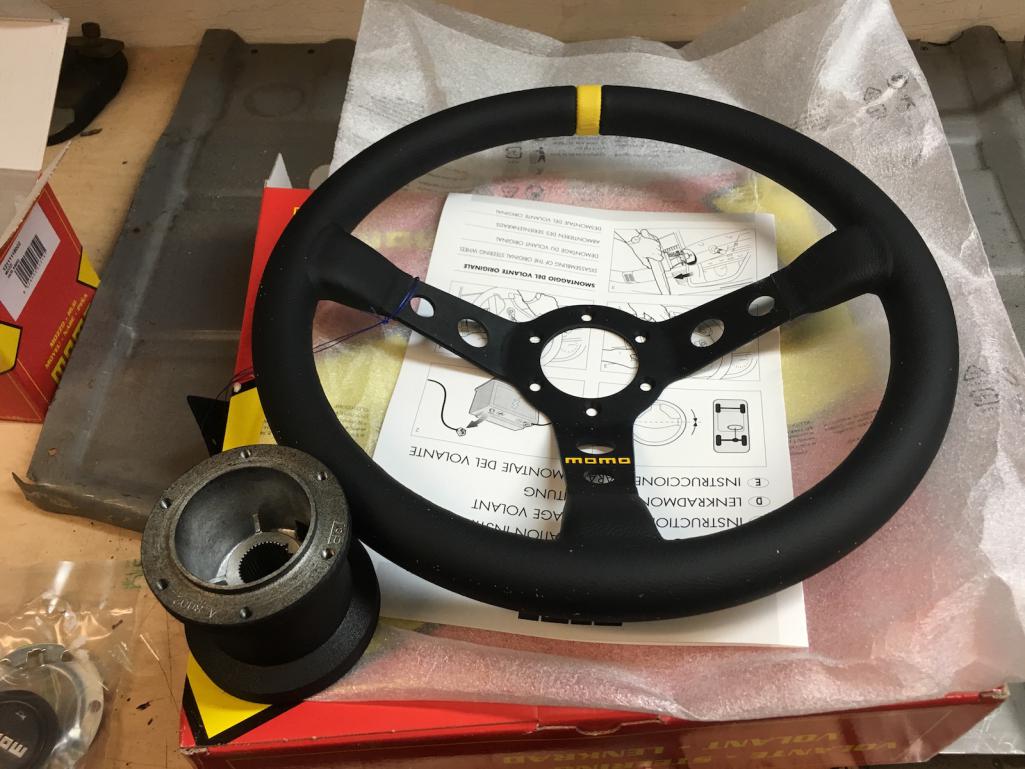 |
| MichiganMat |
 Aug 11 2016, 08:21 AM Aug 11 2016, 08:21 AM
Post
#47
|
|
Member   Group: Members Posts: 114 Joined: 14-June 06 From: San Jose, CA Member No.: 6,222 Region Association: Northern California |
|
| MichiganMat |
 Sep 13 2016, 08:49 AM Sep 13 2016, 08:49 AM
Post
#48
|
|
Member   Group: Members Posts: 114 Joined: 14-June 06 From: San Jose, CA Member No.: 6,222 Region Association: Northern California |
Some good progress lately, chassis is ready to go off to the blasting shop!
A few things of note since the last update: - mocked up the floors and Wilwood pedal cluster, looking good so far - reinforced the rear suspension consoles. its not the most /technical/ solution, but I think it'll work - rebuilt the rotisserie with a center connector and better wheels, should be able to get it onto a trailer now - finished up a bit more of the rear firewall Not a huge amount of progress, but trying to keep the ball rolling here. Took my 911 to the racetrack and beat the crap out of it, repairing it took a few extra days. Theres been a bunch of family events this summer too, so thats been taking up time. So whats next: - I've got a trailer scheduled, going to take the chassis to the blaster early next week - Going to put in a big order for the rest of the suspension bits (shocks, t-bar, ball joints) soon, get all that wrapped up and ready.. - Once the chassis is back from blasting & prime, Im going to install the floors and shifter console. - Once the shifter and floors are in, well, its probably ready for paint at that point! Feeling good, moving forward, getting closer.... sorta, haha. 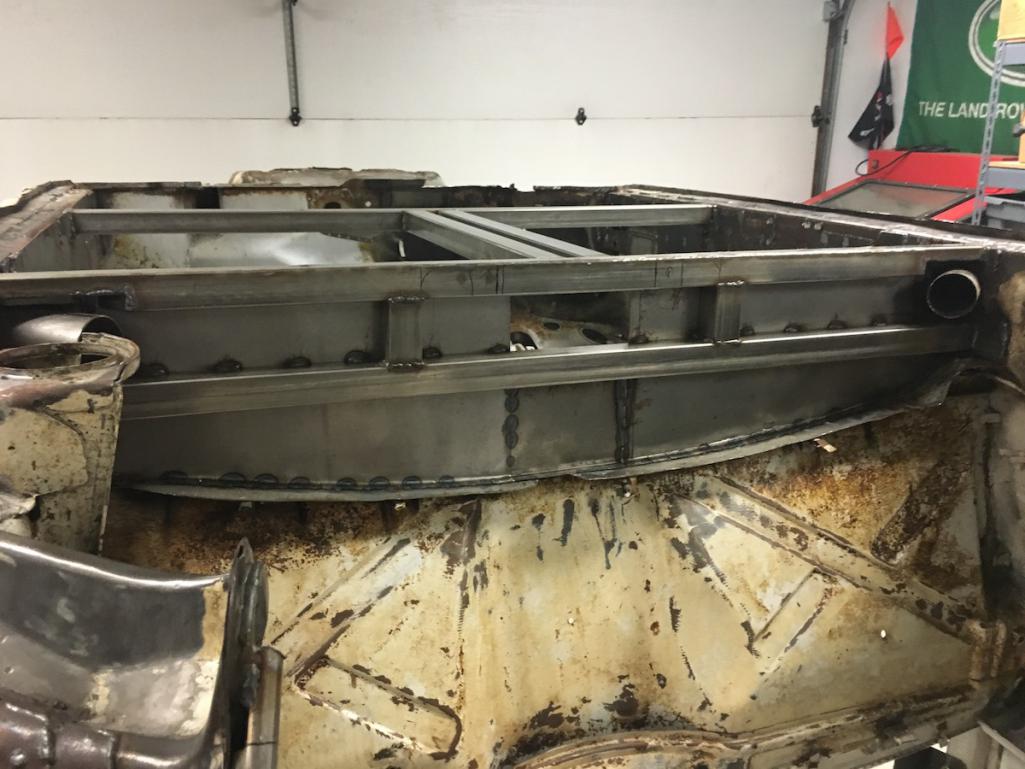 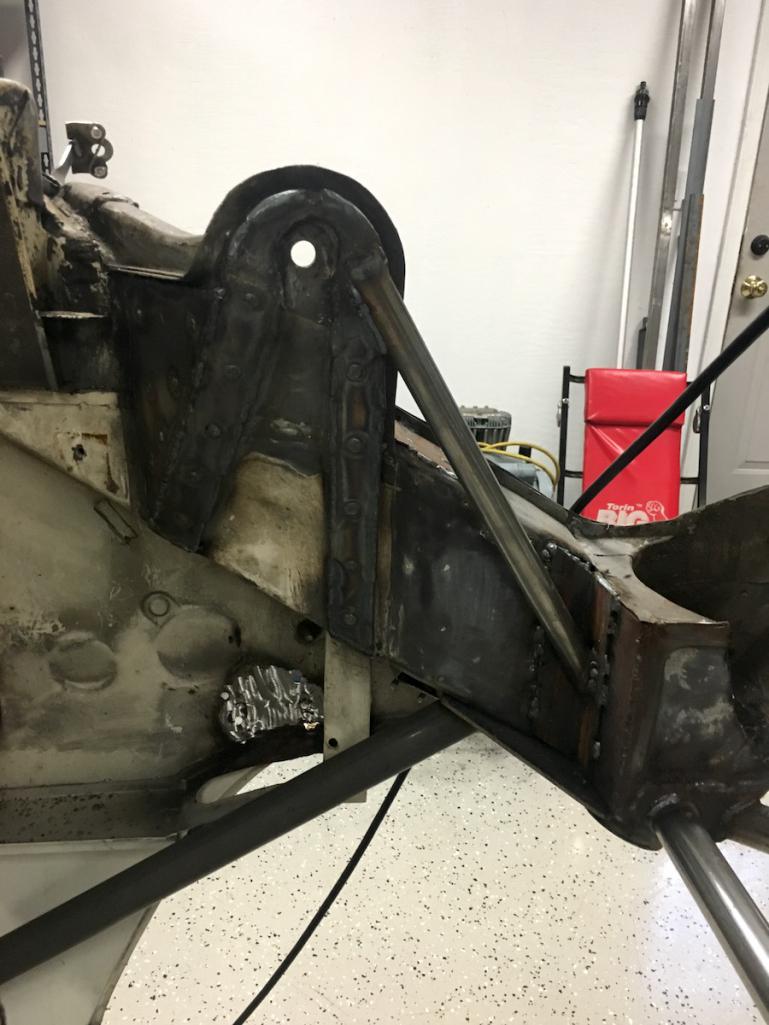 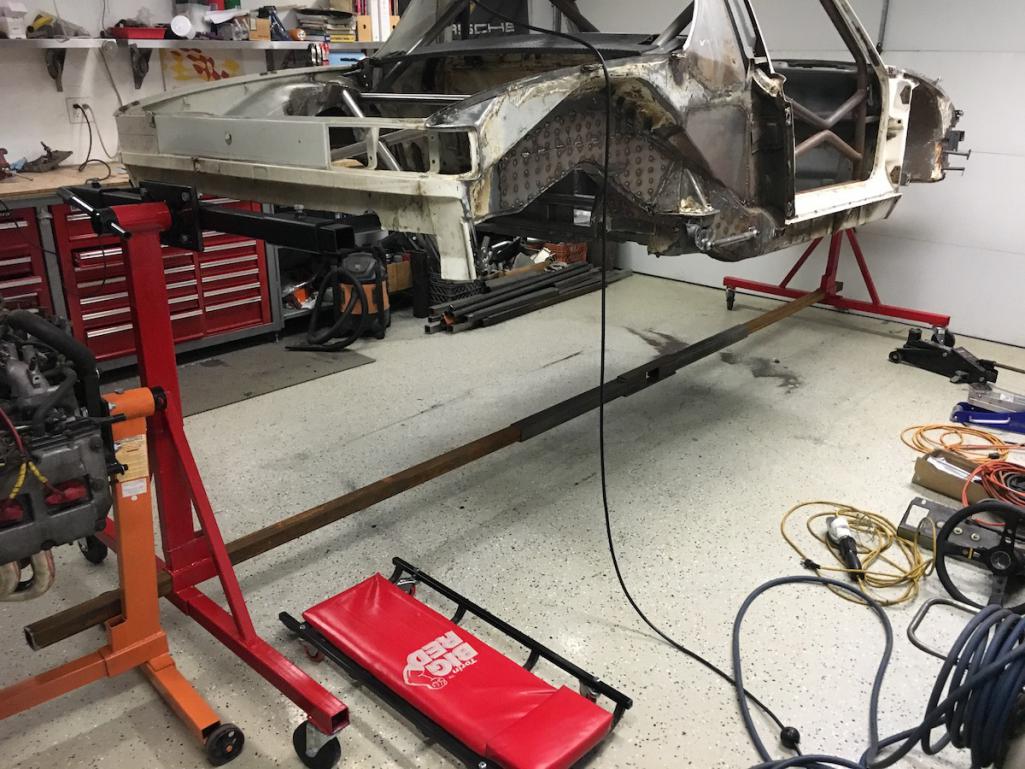 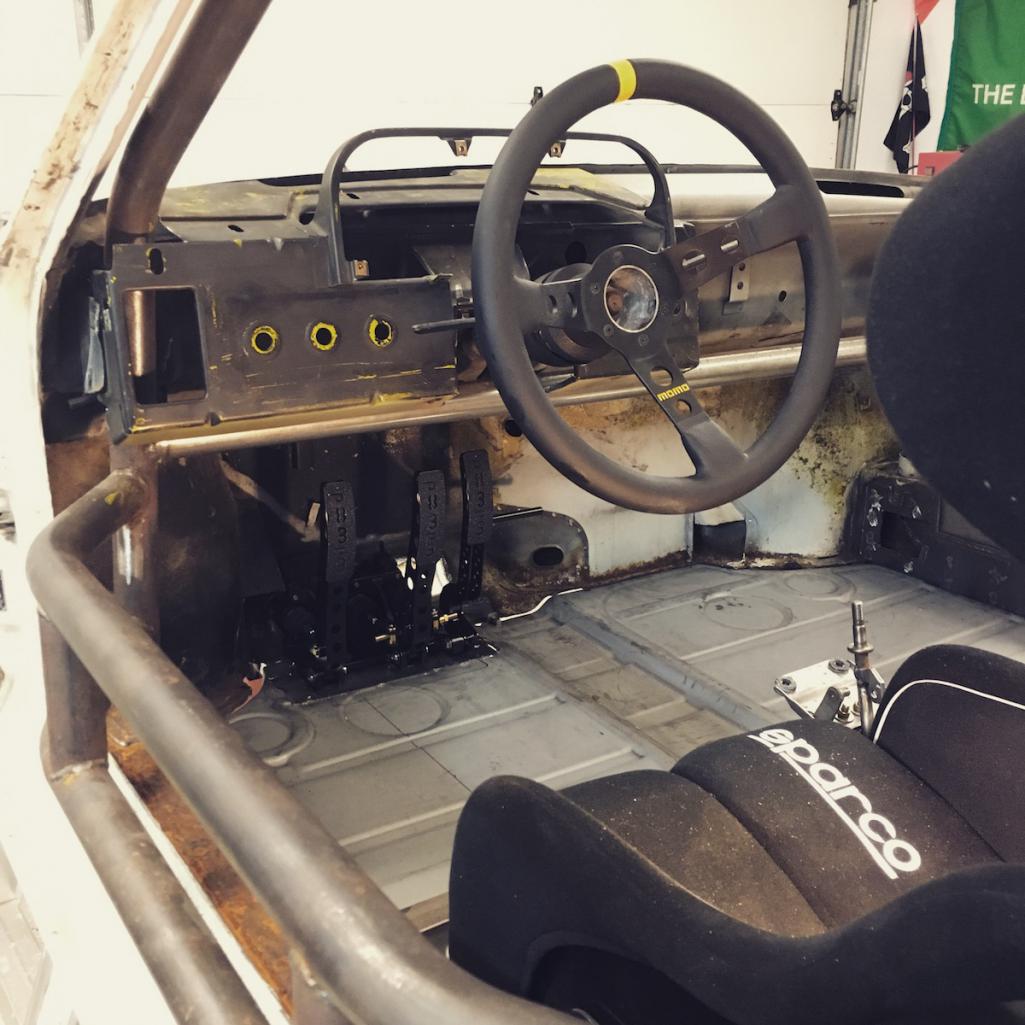 |
| MichiganMat |
 Sep 27 2016, 10:59 AM Sep 27 2016, 10:59 AM
Post
#49
|
|
Member   Group: Members Posts: 114 Joined: 14-June 06 From: San Jose, CA Member No.: 6,222 Region Association: Northern California |
Well, the Build-Off Challenge is over but work continues at the MichiganMat house.
So whats new: - Loaded up the trailer and took the car off to the blaster. Came back minty-fresh - Pretty happy with the result, not too much blow-through from the blaster, chassis is pretty much ready to take to paint - Fully welded in the floor pans and the shifter console - Liking the ergonomics, its coming along I waited to install the pans before blasting on purpose. I wanted to make sure all the shitty stuff under the dash got a good blast. The pics don't show it but I also tied the pan into the center "tunnel" structure, its nice and firm now, structurally sound. Next steps: - Friend who loaned me the trailer is moving, so I gotta get this thing off to paint ASAP. - I need weld in some tabs for the dash, weld in mounts for the passenger rocker, and seam-seal the driver compartment, and then I get off to paint. - I expect to be at painter in the next two weeks. 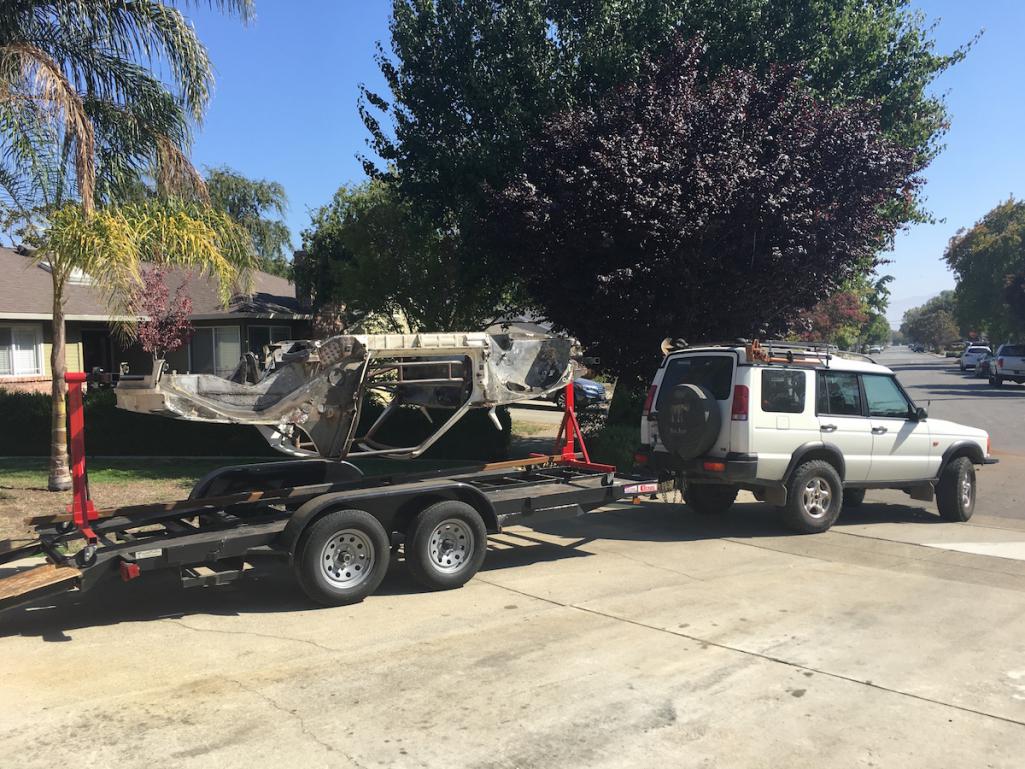 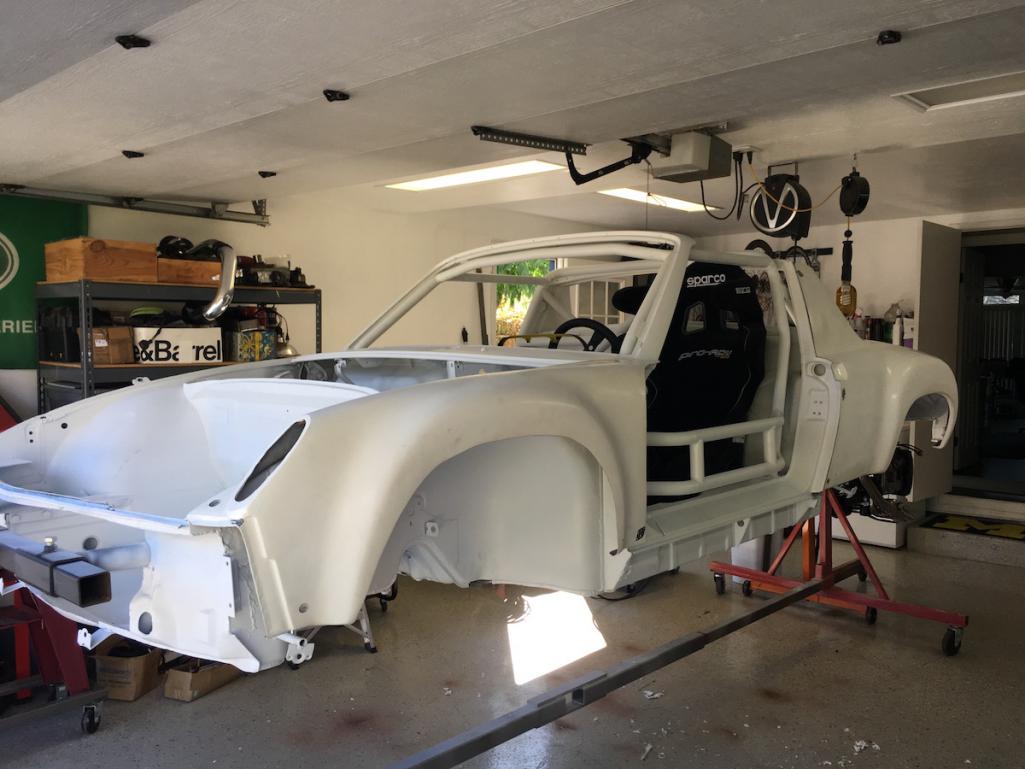 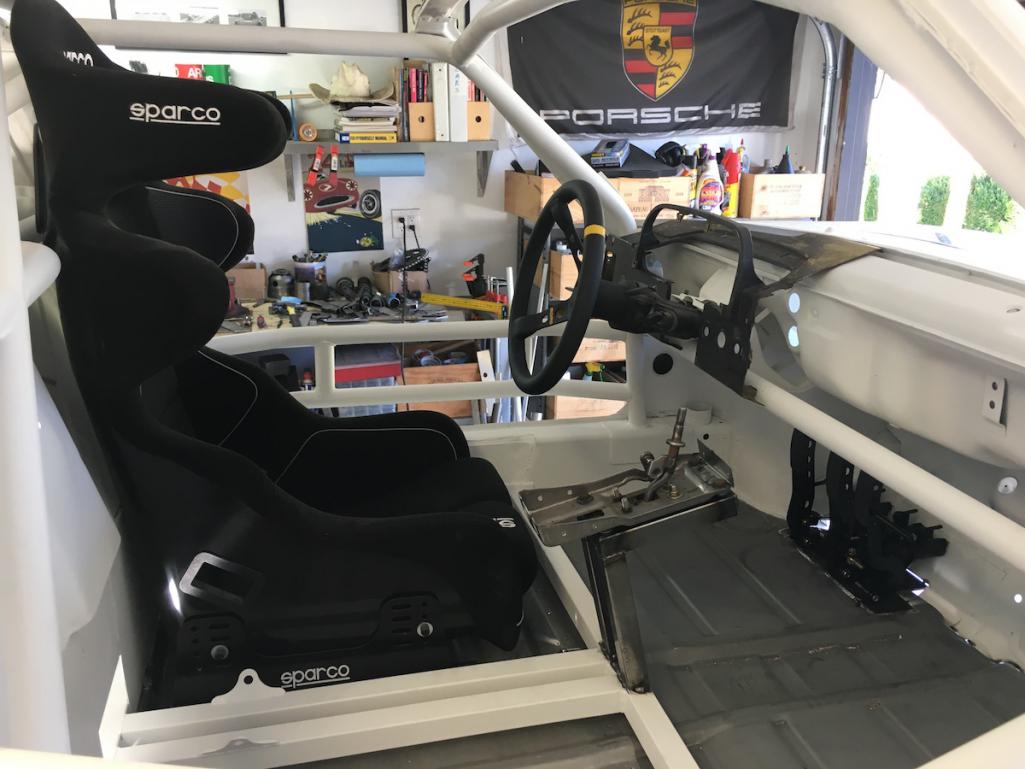 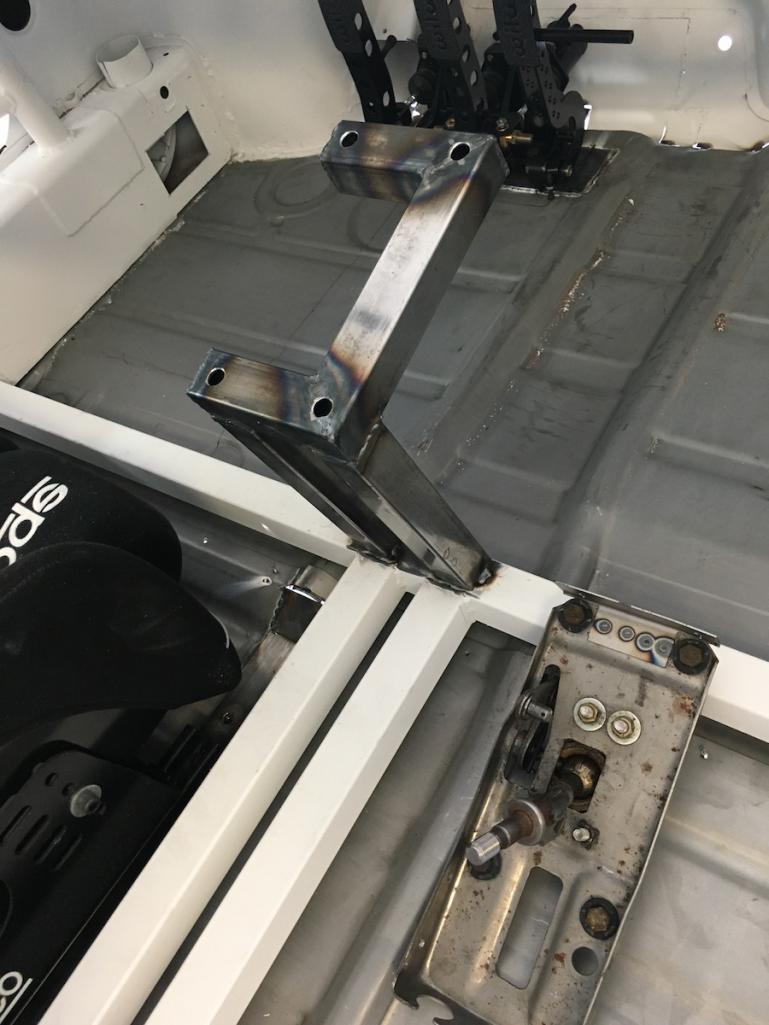 |
| trojanhorsepower |
 Sep 27 2016, 03:25 PM Sep 27 2016, 03:25 PM
Post
#50
|
|
Senior Member    Group: Members Posts: 867 Joined: 21-September 03 From: Marion, NC Member No.: 1,179 Region Association: None |
Looks good!
|
| MichiganMat |
 Oct 9 2016, 10:12 AM Oct 9 2016, 10:12 AM
Post
#51
|
|
Member   Group: Members Posts: 114 Joined: 14-June 06 From: San Jose, CA Member No.: 6,222 Region Association: Northern California |
So, I ordered the wrong color paint from TCPGlobal, but I have an idea for the paint scheme. This is just a photoshop of the idea, and the bumper is different from what I'm using, but I think the idea is there. Gray bumpers and greenhouse, bright white body, with blue rockers and front lip. I think the graphics (Shell, the number, and the script) really bring it all together.
Thoughts? 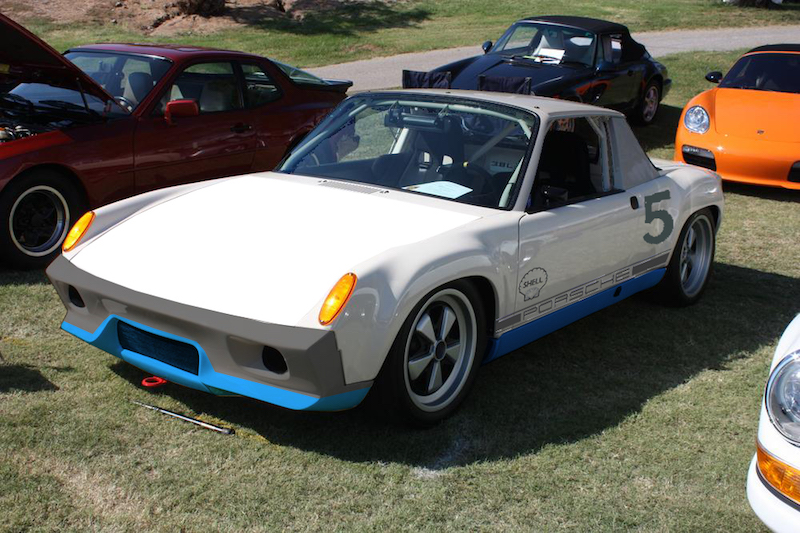 |
| altitude411 |
 Oct 9 2016, 10:50 AM Oct 9 2016, 10:50 AM
Post
#52
|
|
I drove my 6 into a tree    Group: Members Posts: 1,306 Joined: 21-September 14 From: montana Member No.: 17,932 Region Association: Rocky Mountains 
|
I like it! Nice work!
How was it loading the car on the trailer while on the rotisserie? |
| MichiganMat |
 Oct 9 2016, 01:05 PM Oct 9 2016, 01:05 PM
Post
#53
|
|
Member   Group: Members Posts: 114 Joined: 14-June 06 From: San Jose, CA Member No.: 6,222 Region Association: Northern California |
|
| MichiganMat |
 Oct 24 2016, 10:47 AM Oct 24 2016, 10:47 AM
Post
#54
|
|
Member   Group: Members Posts: 114 Joined: 14-June 06 From: San Jose, CA Member No.: 6,222 Region Association: Northern California |
Sometimes you just have to say "screw it", put on your big-boy pants, and get down to work.
I've been toying with the idea of painting the car myself and this past Saturday I got down to business and started spraying. Yes, I used a cheap HF gun (I've got a new Eastwood gun on order). Yes, the panels did not come out as perfect as they would if I had paid someone. Do I care? Well, yes and no. I figure, this is my project, for better or worse, and the only way Im going to learn is by making mistakes. Im precise all week long for my job, on the weekends I think Im entitled to a bit of /experimentation/ (IMG:style_emoticons/default/smile.gif) I've been using this HF gun for a few years now so Im not totally new to painting with it. The fenders all turned out great actually, while the hood has some pitting that Im not too happy about, but the white paint does a lot to hide the flaws. The color is Wimbledon White, its kinda creamy. Its the same paint we used on my brothers 912-STi project. The bumpers, rockers, roof, and sail panels will be finished in satin black. 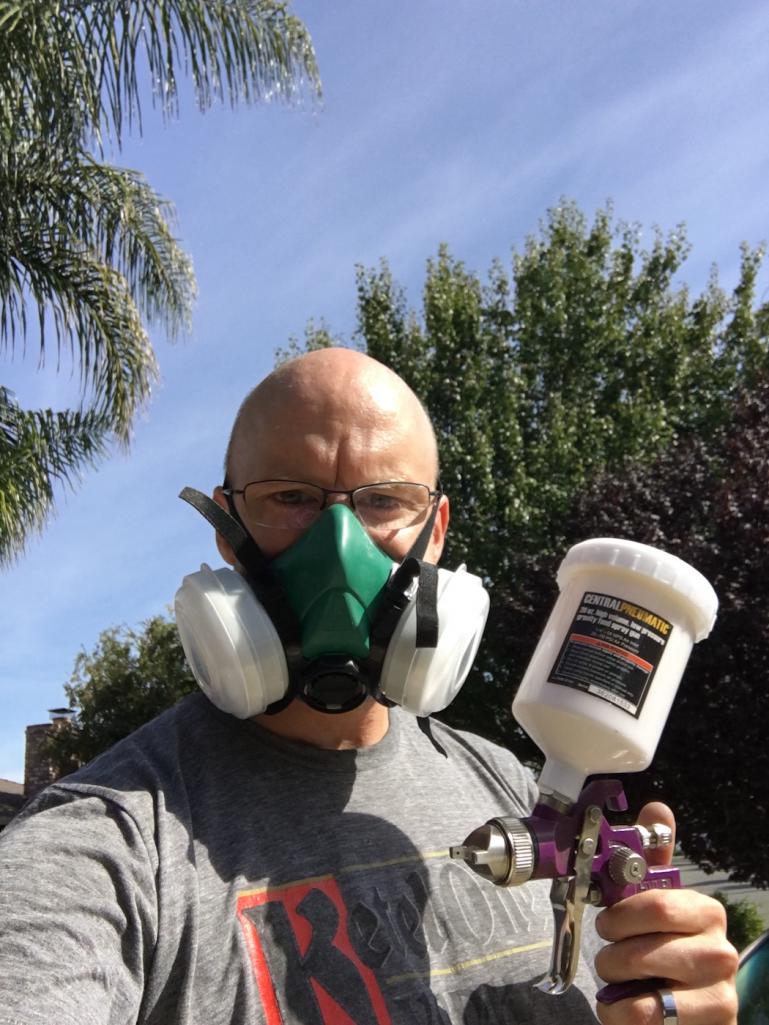 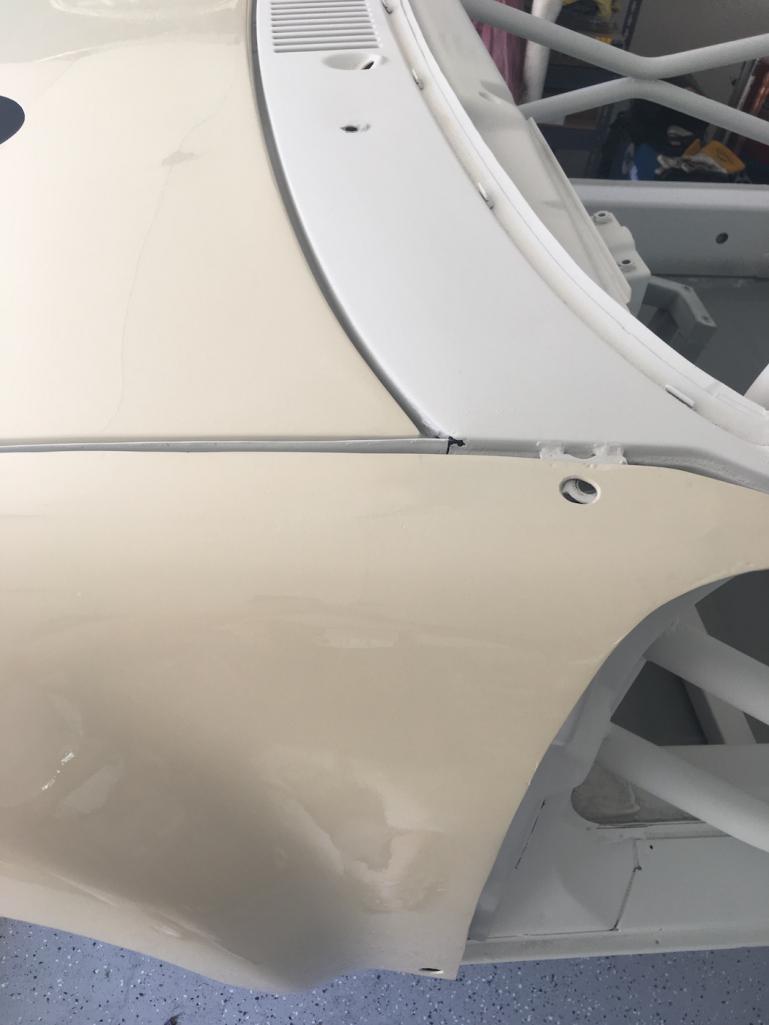 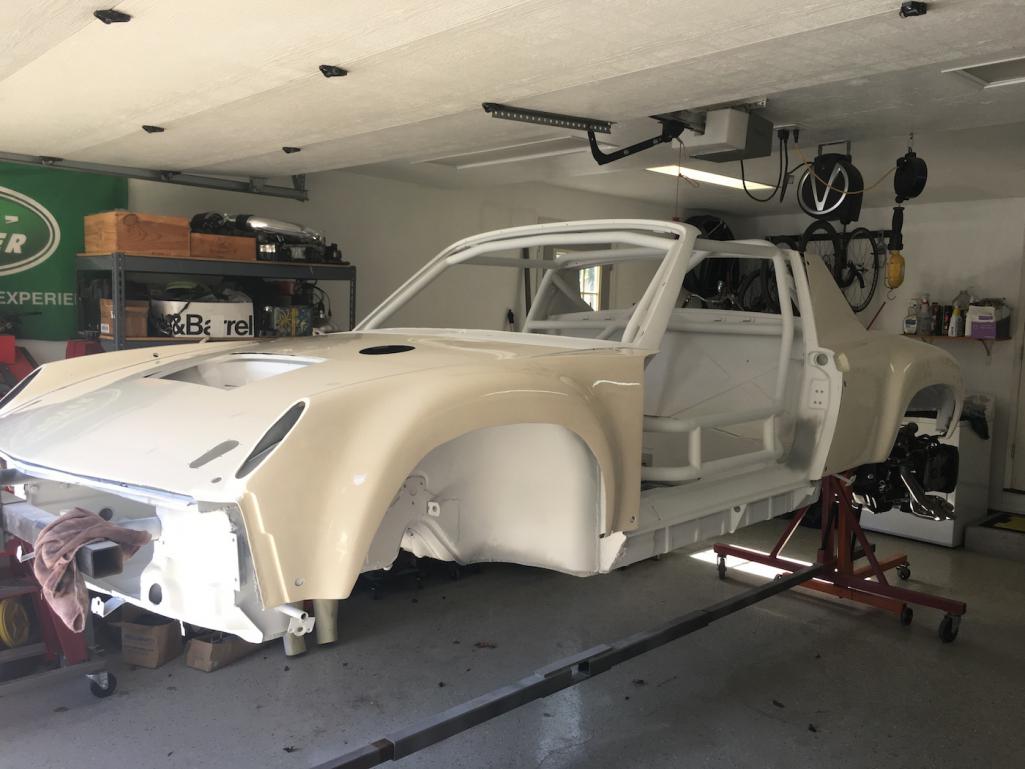 |
| matthepcat |
 Oct 25 2016, 12:39 AM Oct 25 2016, 12:39 AM
Post
#55
|
|
Meat Popsicle    Group: Members Posts: 1,462 Joined: 13-December 09 From: Saratoga CA Member No.: 11,125 Region Association: Northern California |
Will be worth the risk in the end for the learning experience and saved money.
I like this project. |
| mgp4591 |
 Oct 25 2016, 01:24 AM Oct 25 2016, 01:24 AM
Post
#56
|
|
914 Guru      Group: Members Posts: 5,596 Joined: 1-August 12 From: Salt Lake City Ut Member No.: 14,748 Region Association: Intermountain Region 
|
I love the Wimbledon White - I'm looking at doing that also but in a satin or possibly flat. I also love the chassis floor mods becuz extra strength isn't a bad thing. I may have to steal a knock off of that myself. Keep it coming - I look forward to your posts to see what's up next! (IMG:style_emoticons/default/welder.gif)
|
| MichiganMat |
 Nov 7 2016, 01:03 PM Nov 7 2016, 01:03 PM
Post
#57
|
|
Member   Group: Members Posts: 114 Joined: 14-June 06 From: San Jose, CA Member No.: 6,222 Region Association: Northern California |
Put some paint on the 914 chassis:
- front trunk - wheel wells - rockers - engine compartment Painted the black bits (satin black) too: - targa top - front bumper and lip - rear bumper - rocker panels Going to tape off the interior and shoot it probably next weekend. In the meantime I have about 50 dzus fasteners to rivet into place. did a bit of work on the doors, got them filled in but sanding them was PITA so I gave up until next weekend. started labeling and sorting through the wiring harness too. I've got 75% of a 2002 WRX harness, going to get the other 25% and wire up the whole car with a full modern harness. 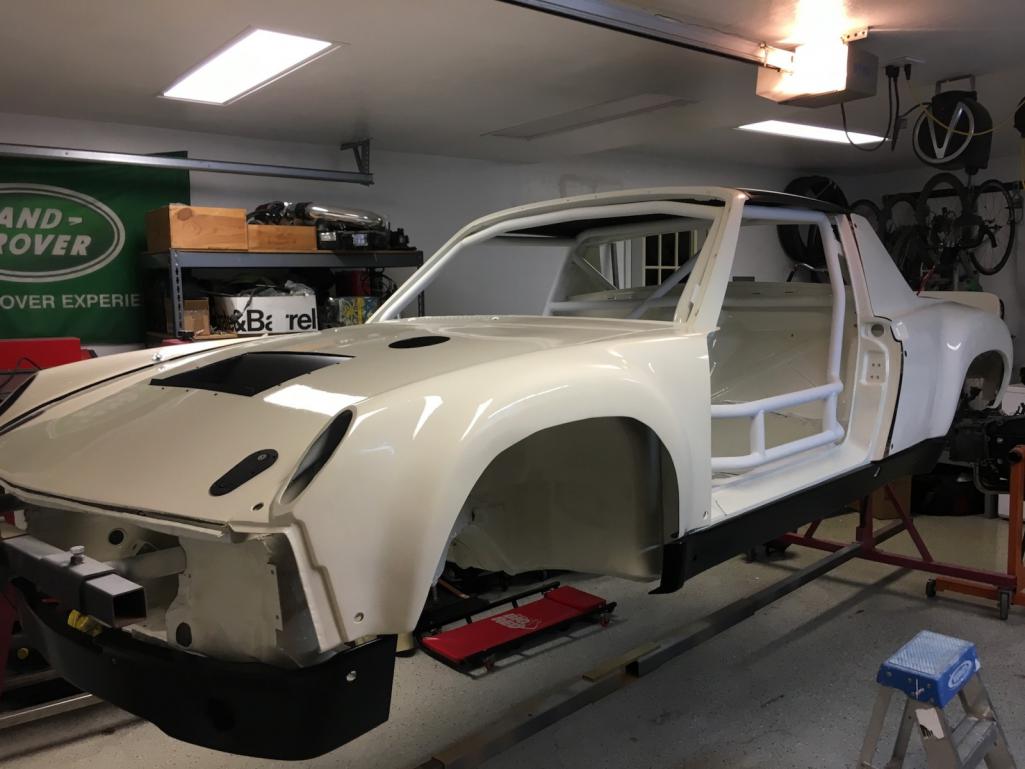 |
| Andyrew |
 Nov 7 2016, 01:24 PM Nov 7 2016, 01:24 PM
Post
#58
|
|
Spooling.... Please wait           Group: Members Posts: 13,377 Joined: 20-January 03 From: Riverbank, Ca Member No.: 172 Region Association: Northern California 
|
Paint looks good!!! Always happy with the quality of paint TCP puts out. I dont see any big runs so good job!
I think your making the right decision regarding the wire harness. Ive been happy with my full harness conversion. But I keep telling myself I'll pull the harness someday and strip it down to half the size when I finish all my wiring. |
| trojanhorsepower |
 Nov 7 2016, 08:04 PM Nov 7 2016, 08:04 PM
Post
#59
|
|
Senior Member    Group: Members Posts: 867 Joined: 21-September 03 From: Marion, NC Member No.: 1,179 Region Association: None |
Hi Matt, looks good!
Did you burn the bushings out or do you have another way? |
| Curbandgutter |
 Nov 8 2016, 03:12 PM Nov 8 2016, 03:12 PM
Post
#60
|
|
Senior Member    Group: Members Posts: 565 Joined: 8-March 13 From: Murrieta CA Member No.: 15,637 Region Association: Southern California 
|
Love what you did to your lower firewall. Good Job! Car is looking fantastic. These 914's sure are a great platform to modify. (IMG:style_emoticons/default/sawzall-smiley.gif) (IMG:style_emoticons/default/sawzall-smiley.gif) (IMG:style_emoticons/default/welder.gif)
|
  |
5 User(s) are reading this topic (5 Guests and 0 Anonymous Users)
0 Members:

|
Lo-Fi Version | Time is now: 2nd April 2025 - 02:07 AM |
Invision Power Board
v9.1.4 © 2025 IPS, Inc.


