|
|
|
Porsche, and the Porsche crest are registered trademarks of Dr. Ing. h.c. F. Porsche AG.
This site is not affiliated with Porsche in any way. Its only purpose is to provide an online forum for car enthusiasts. All other trademarks are property of their respective owners. |
|
|

  |

| tygaboy |
 Jan 11 2016, 09:52 AM Jan 11 2016, 09:52 AM
Post
#61
|
|
914 Guru  Group: Members Posts: 5,331 Joined: 6-October 15 From: Petaluma, CA Member No.: 19,241 Region Association: Northern California |
QUOTE(peteyd @ Jan 11 2016, 05:14 AM)  Looks good! Pete Well, after watching your YouTube floor panel install video about 100 times, I was hoping so! Seriously though, I can't say how much we all appreciate all the great things Restoration Design has done for our little cars. Great products, great people. What more could a consumer want? Keep up the great work! (IMG:style_emoticons/default/beerchug.gif) |
   |

 
|
| tygaboy |
Jan 16 2016, 06:42 PM
Post
#62
|
|
914 Guru Group: Members Posts: 5,331 Joined: 6-October 15 From: Petaluma, CA Member No.: 19,241 Region Association: Northern California |
Little bit of (IMG:style_emoticons/default/welder.gif) and the front floor half is in. I'm working to up my welding skills to metal finish on all my butt welds. And even though one side of this will be under sound proofing and carpet and the other side will be undercoated, it was great practice. I'm happy with how it turned out.
Attached thumbnail(s) 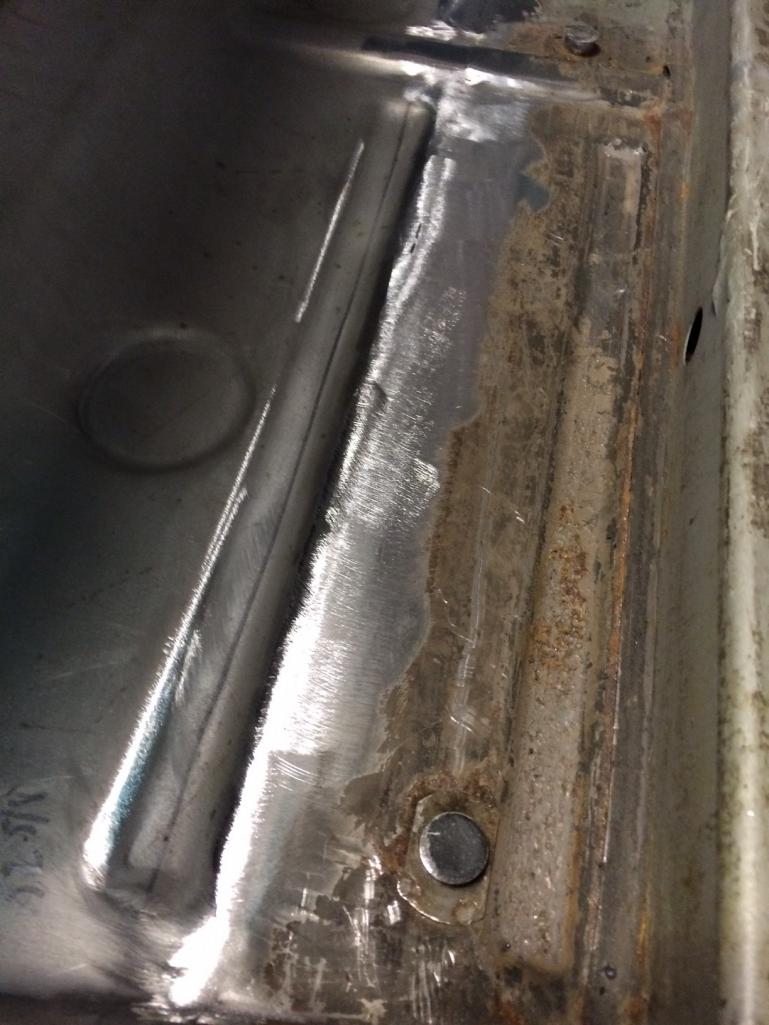
|
|
|
|
| tygaboy |
Jan 17 2016, 06:17 PM
Post
#63
|
|
914 Guru Group: Members Posts: 5,331 Joined: 6-October 15 From: Petaluma, CA Member No.: 19,241 Region Association: Northern California |
Part of the floor repair includes a fix to the tunnel. No idea what the PO was thinking/doing but there were some gaks that I had to fix. I decided that it would be far simpler if I did the repair with the tunnel, or at least part of it, out of the car.
With 1/2 the floor already out, I figured, why not. More welding practice ahead of tackling the flares. So, here's what I started with. Gotta get better at the entire "before" picture taking. Anyway... 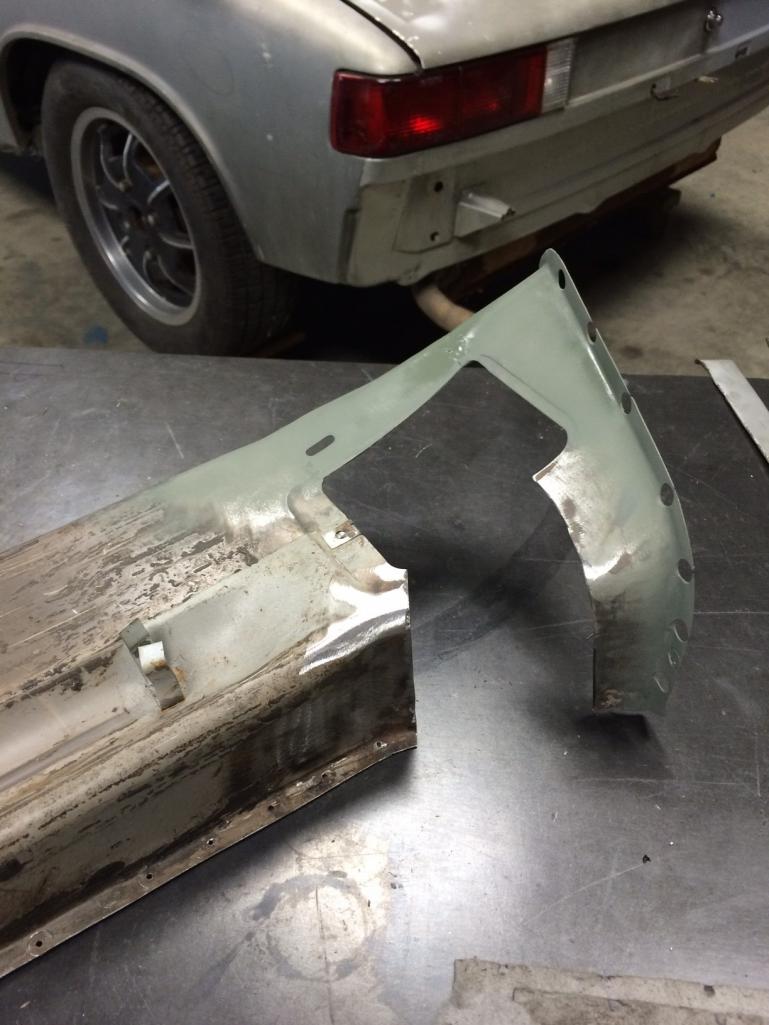 |
|
|
|
| tygaboy |
Jan 17 2016, 06:19 PM
Post
#64
|
|
914 Guru Group: Members Posts: 5,331 Joined: 6-October 15 From: Petaluma, CA Member No.: 19,241 Region Association: Northern California |
Next, I had to fab the patch. Different radius on each end of the patch... what to do?
I made a tool! Well, if you call two round things partly in a vice a tool. Attached thumbnail(s) 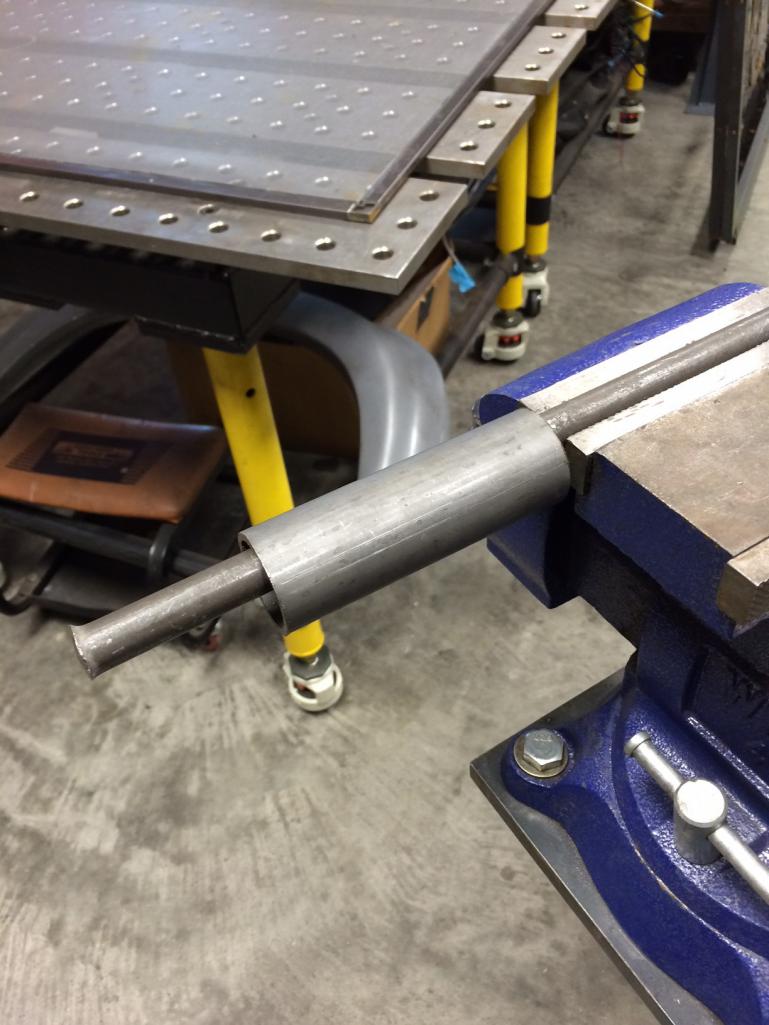
|
|
|
|
| tygaboy |
Jan 17 2016, 06:20 PM
Post
#65
|
|
914 Guru Group: Members Posts: 5,331 Joined: 6-October 15 From: Petaluma, CA Member No.: 19,241 Region Association: Northern California |
rough cut the patch, figure where the radius needs to be and wrap it round the tool to get the desired two radius part.
Attached thumbnail(s) 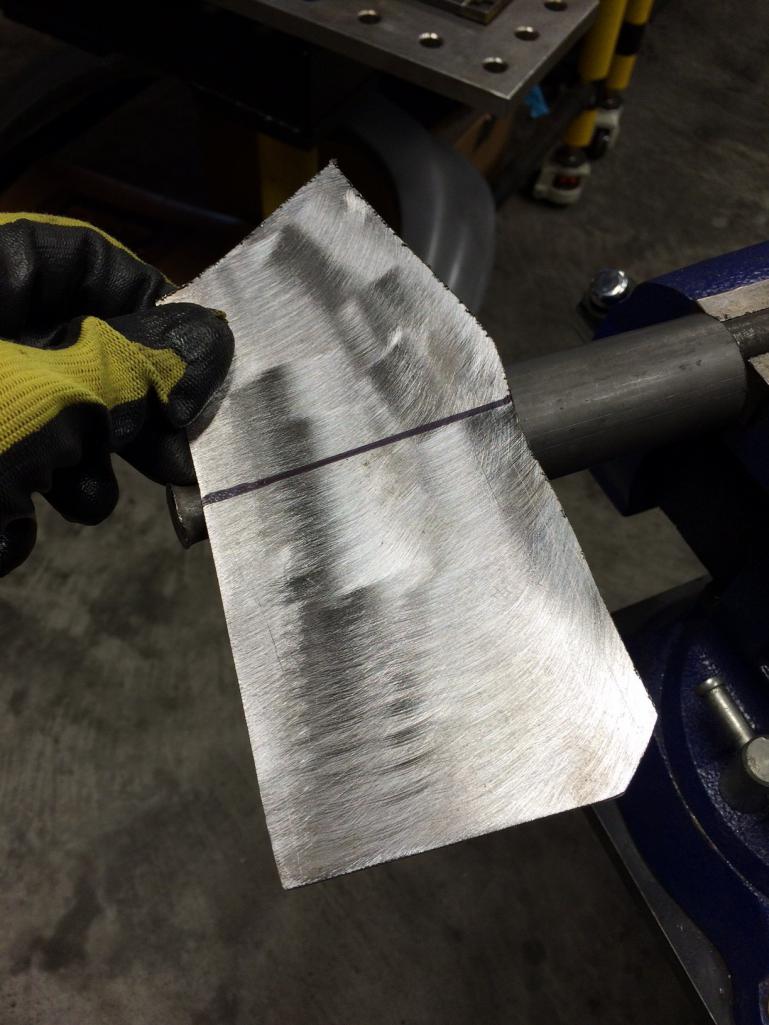
|
|
|
|
| tygaboy |
Jan 17 2016, 06:21 PM
Post
#66
|
|
914 Guru Group: Members Posts: 5,331 Joined: 6-October 15 From: Petaluma, CA Member No.: 19,241 Region Association: Northern California |
Ta da. Just like I'd hoped!
Attached thumbnail(s) 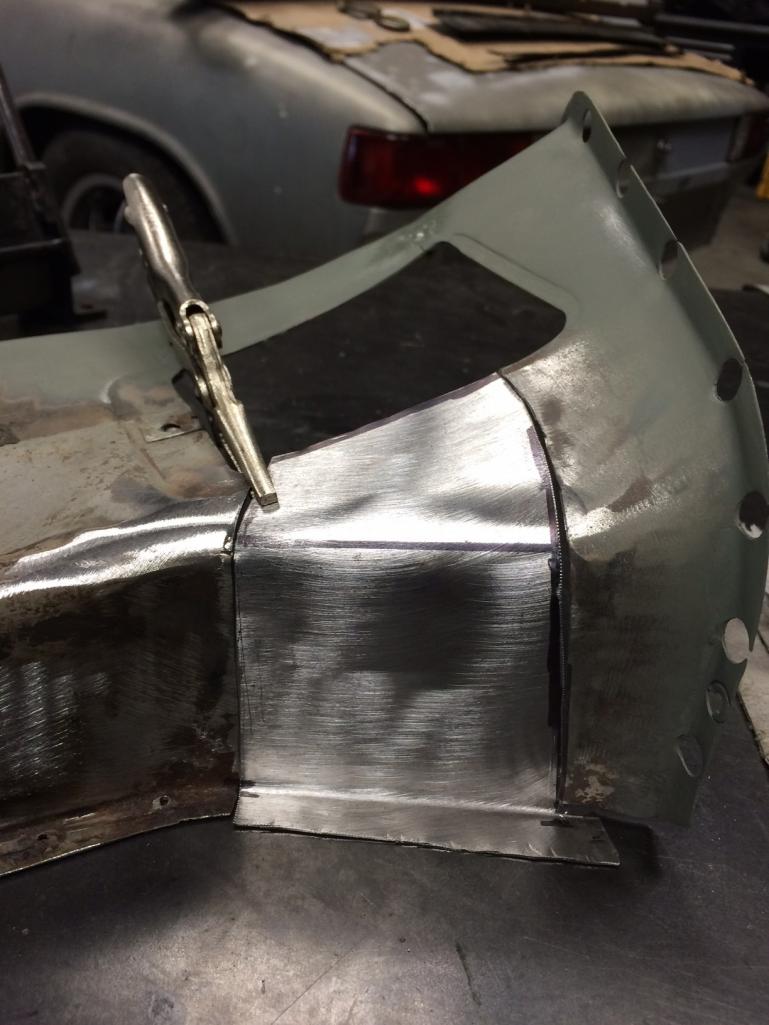
|
|
|
|
| tygaboy |
Jan 17 2016, 06:23 PM
Post
#67
|
|
914 Guru Group: Members Posts: 5,331 Joined: 6-October 15 From: Petaluma, CA Member No.: 19,241 Region Association: Northern California |
Trim, fit, trim, fit, trim, fit... then (IMG:style_emoticons/default/welder.gif) (IMG:style_emoticons/default/welder.gif) grind, grind
Almost done. Attached thumbnail(s) 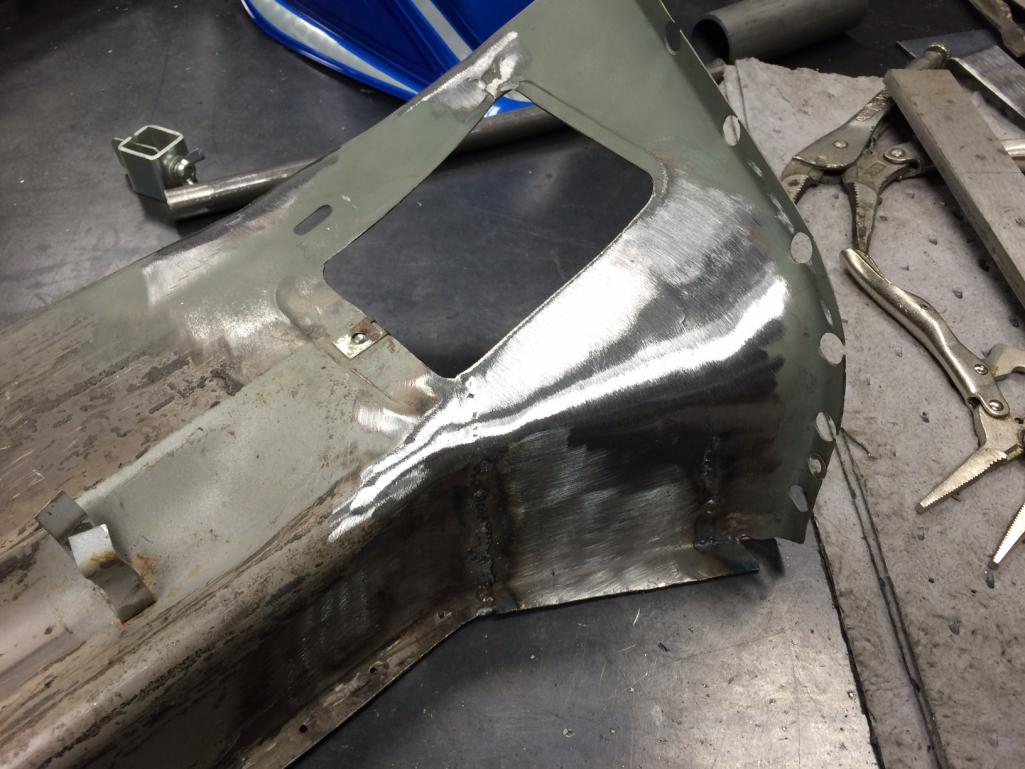
|
|
|
|
| Cracker |
Jan 17 2016, 06:26 PM
Post
#68
|
|
Advanced Member Group: Members Posts: 2,148 Joined: 2-February 10 From: Atlanta (area) Member No.: 11,316 Region Association: South East States |
(IMG:style_emoticons/default/smilie_pokal.gif) Great job!
Bummer about the "Club Race at RA"...darn GT-4 Cup! (IMG:style_emoticons/default/headbang.gif) Tony |
|
|
|
| tygaboy |
Jan 17 2016, 06:26 PM
Post
#69
|
|
914 Guru Group: Members Posts: 5,331 Joined: 6-October 15 From: Petaluma, CA Member No.: 19,241 Region Association: Northern California |
Then I decided to get fancy and I broke out the HF hole punch / flange tool and did my best to replicate the indent for the access cover. Not quite to the point that I'll be quitting my day job but I feel like I'm getting there re: the quality level I'm trying to achieve.
Still have a few touch ups but this was it for today. Attached thumbnail(s) 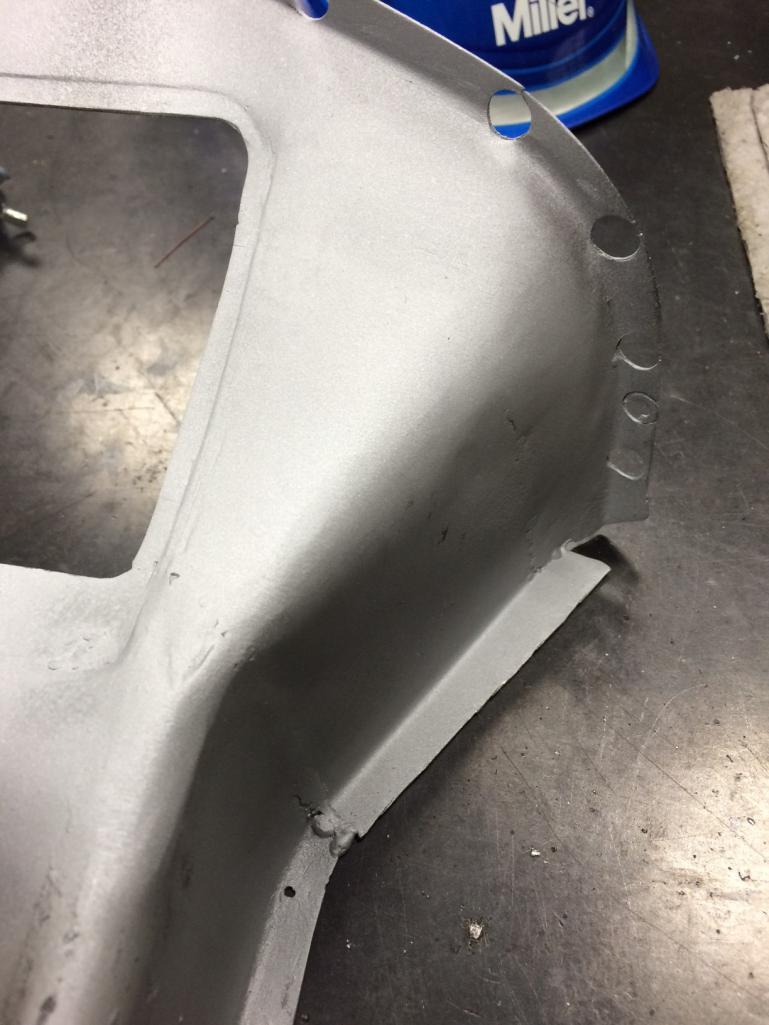
|
|
|
|
| mbseto |
Jan 18 2016, 10:02 AM
Post
#70
|
|
Senior Member Group: Members Posts: 1,255 Joined: 6-August 14 From: Cincy Member No.: 17,743 Region Association: North East States |
Nice fab work.
|
|
|
|
| bigkensteele |
Jan 18 2016, 07:19 PM
Post
#71
|
|
Major Member Group: Members Posts: 2,197 Joined: 30-August 04 From: Cincinnati, OH Member No.: 2,660 Region Association: South East States |
QUOTE(mbseto @ Jan 18 2016, 08:02 AM) Nice fab work. (IMG:style_emoticons/default/agree.gif) Great job! |
|
|
|
| tygaboy |
Feb 1 2016, 12:22 PM
Post
#72
|
|
914 Guru Group: Members Posts: 5,331 Joined: 6-October 15 From: Petaluma, CA Member No.: 19,241 Region Association: Northern California |
As mentioned, I'm working with Rich Johnson on a suspension package and it's almost done. So here's a little suspension porn to start the week!
Raised spindles, Koni yellows. Not pictured are the Boxster calipers. Can't hardly wait! (IMG:style_emoticons/default/piratenanner.gif) Attached image(s) 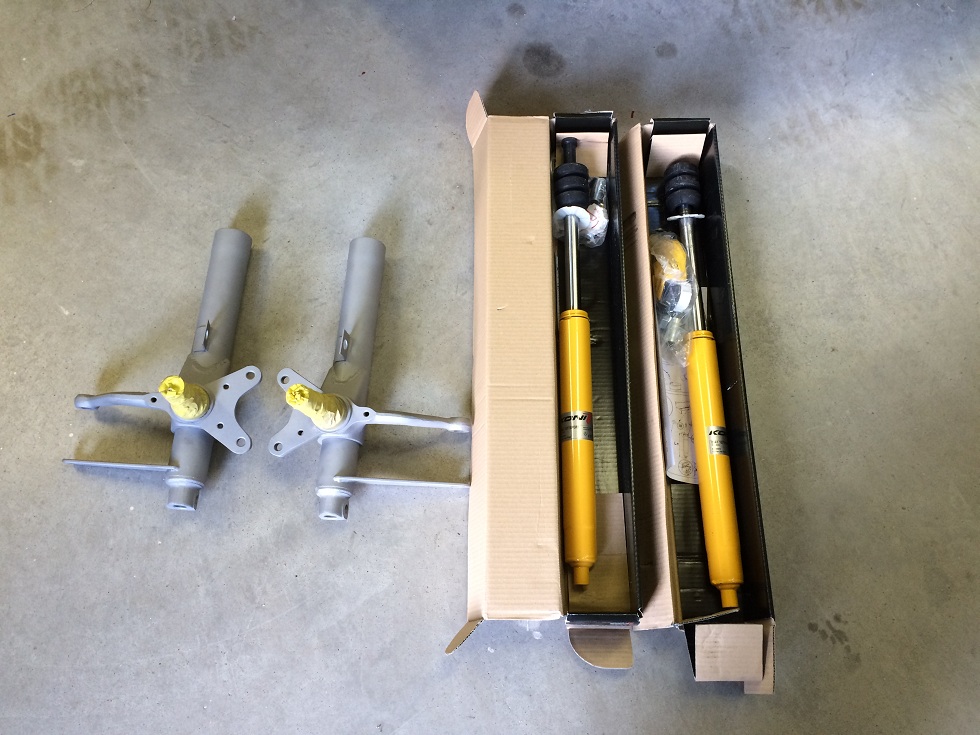
|
|
|
|
| tygaboy |
Feb 1 2016, 12:48 PM
Post
#73
|
|
914 Guru Group: Members Posts: 5,331 Joined: 6-October 15 From: Petaluma, CA Member No.: 19,241 Region Association: Northern California |
On the drive train front, I'm getting to know our friend Tony (Cracker) and his experiences with the LS3 and Boxster S transaxles, as well as other V8-in-your-914 info. Tony's a wealth of info and VERY willing to share. Great guy. That's a long way around to:
I'm about to pull the trigger on all the Renegade stuff And I may end up sourcing my engine from Tony as he may have an LS3 that suits my needs. But I'm still educating myself ahead of making that decision. Sorry, no pics on this one... yet! (IMG:style_emoticons/default/shades.gif) |
|
|
|
| tygaboy |
Feb 5 2016, 04:13 PM
Post
#74
|
|
914 Guru Group: Members Posts: 5,331 Joined: 6-October 15 From: Petaluma, CA Member No.: 19,241 Region Association: Northern California |
Struts are all done. Almost too pretty to hide under the car! Big thanks to Rich Johnson for all the boingy bits!
Attached image(s) 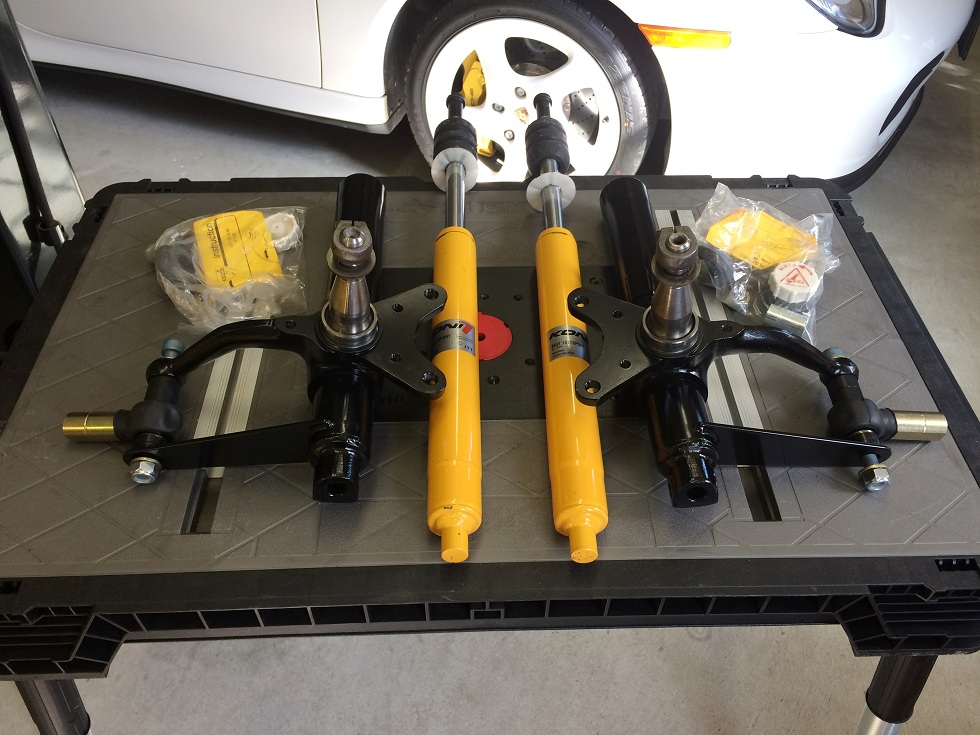
|
|
|
|
| tygaboy |
Feb 6 2016, 04:55 PM
Post
#75
|
|
914 Guru Group: Members Posts: 5,331 Joined: 6-October 15 From: Petaluma, CA Member No.: 19,241 Region Association: Northern California |
Fit the door sills. Learning that I get a better "spot weld" result when I sheet metal screw each hole. Coming along...
Attached thumbnail(s) 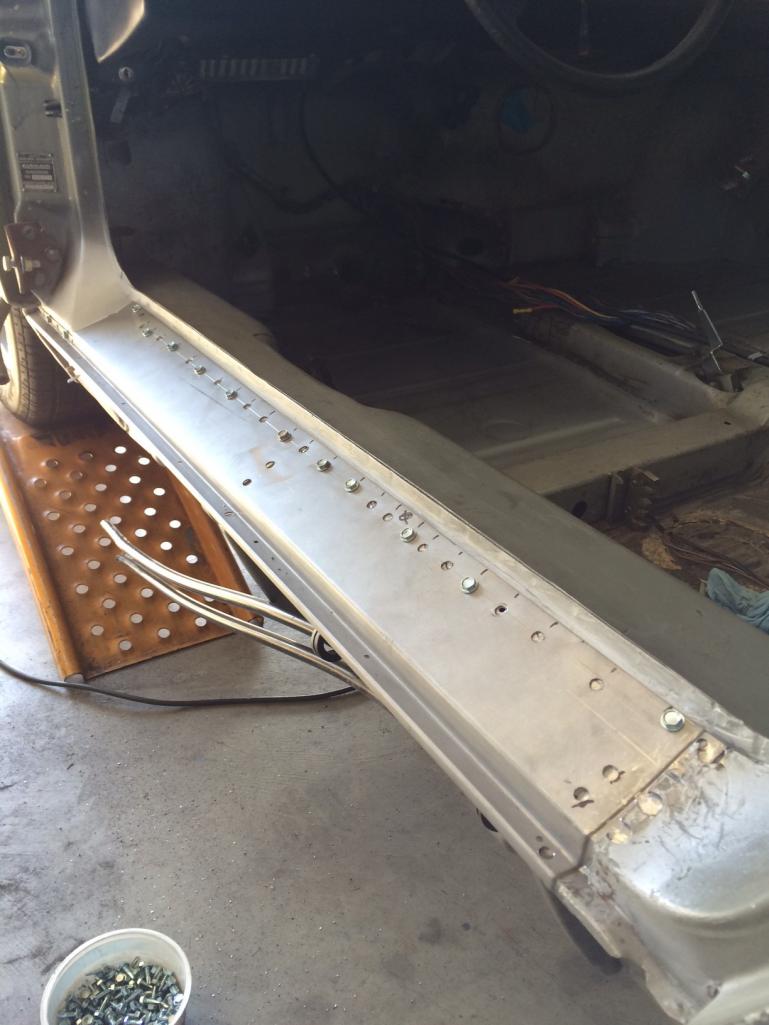
|
|
|
|
| tygaboy |
Feb 6 2016, 04:56 PM
Post
#76
|
|
914 Guru Group: Members Posts: 5,331 Joined: 6-October 15 From: Petaluma, CA Member No.: 19,241 Region Association: Northern California |
Welded, ground and primer on! On to seam sealing.
And I have to say, the Restoration Design parts are so nice to work with. I mock fit the outer rocker and the rivet holes align perfectly with the pre-drilled holes in the sills. So satisfying... Attached thumbnail(s) 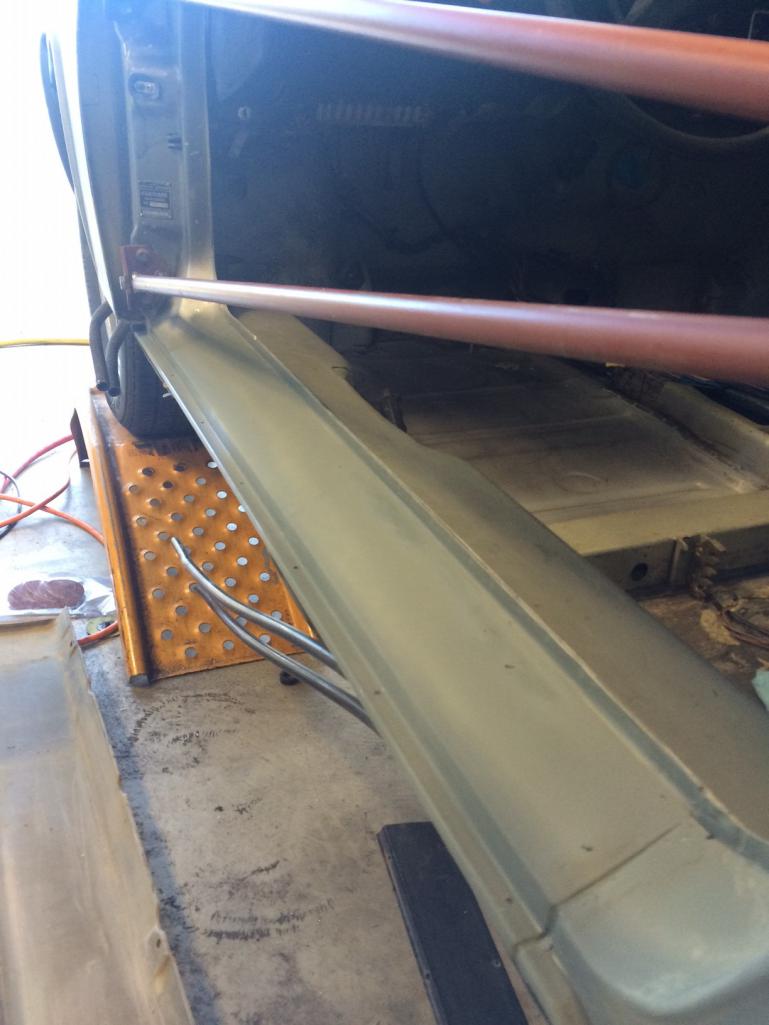
|
|
|
|
| tygaboy |
Feb 7 2016, 05:42 PM
Post
#77
|
|
914 Guru Group: Members Posts: 5,331 Joined: 6-October 15 From: Petaluma, CA Member No.: 19,241 Region Association: Northern California |
Did I say "on to seam sealer"? Maybe not so fast. After seeing mrfourteen's 74 Sunflower Yellow Build Off car's trunk, I decided that look was for me and it would be "OFF with the seam sealer in the rear trunk.
Again, shoulda taken some before pics. Short story is the factory tech who applied the seam sealer to my car's trunk was particularly enthusiastic in his application! There was A LOT of it and it was uneven, etc. No matter, it's all gone now. I just hit it with a wire wheel and, other than the "sealer storm" I created (respirator required!), it went pretty quickly. I may tape all the seams off and apply a tidy layer just at the seams. Still tbd on that. Attached thumbnail(s) 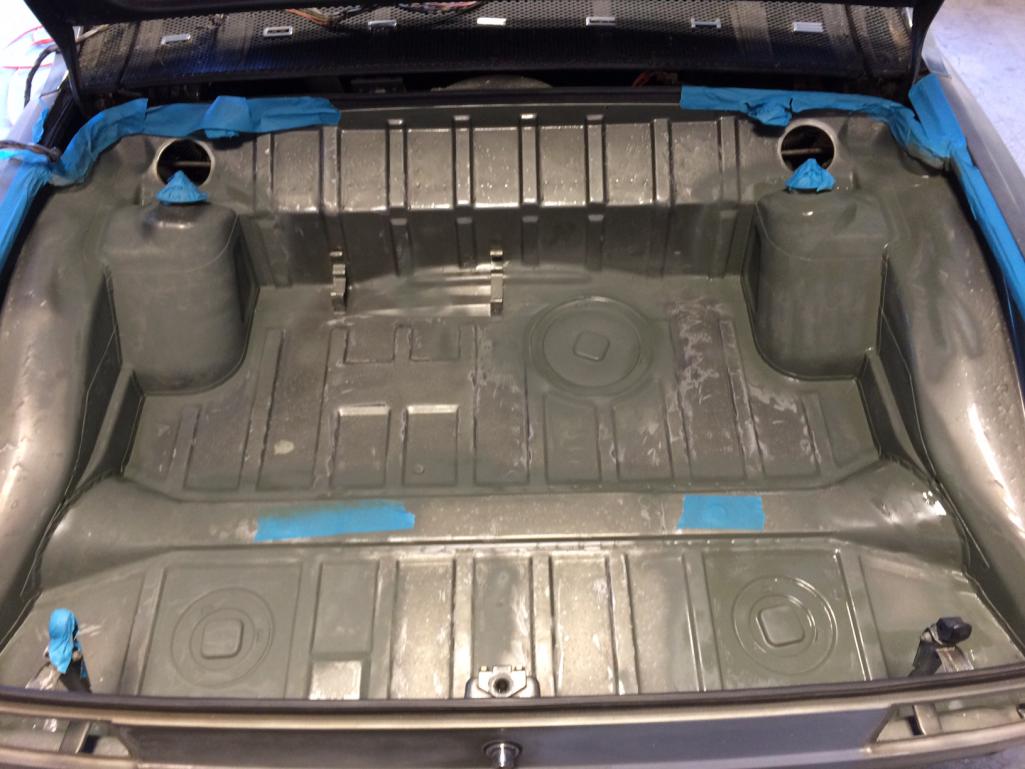
|
|
|
|
| Larmo63 |
Feb 7 2016, 06:48 PM
Post
#78
|
|
Advanced Member Group: Members Posts: 4,264 Joined: 3-March 14 From: San Clemente, Ca Member No.: 17,068 Region Association: Southern California |
That is a pretty clean trunk you have there.
Nice work!!! |
|
|
|
| tygaboy |
Feb 23 2016, 04:45 PM
Post
#79
|
|
914 Guru Group: Members Posts: 5,331 Joined: 6-October 15 From: Petaluma, CA Member No.: 19,241 Region Association: Northern California |
Another repair of PO hole drilling. There were some odd holes in the frunk bulkhead so I went after it. Whatever had happened, it appeared that there had also been some grinding / thinning of the material because I almost immediately blew holes in the holes! (My God, that's hideous! Look away!)
Attached thumbnail(s) 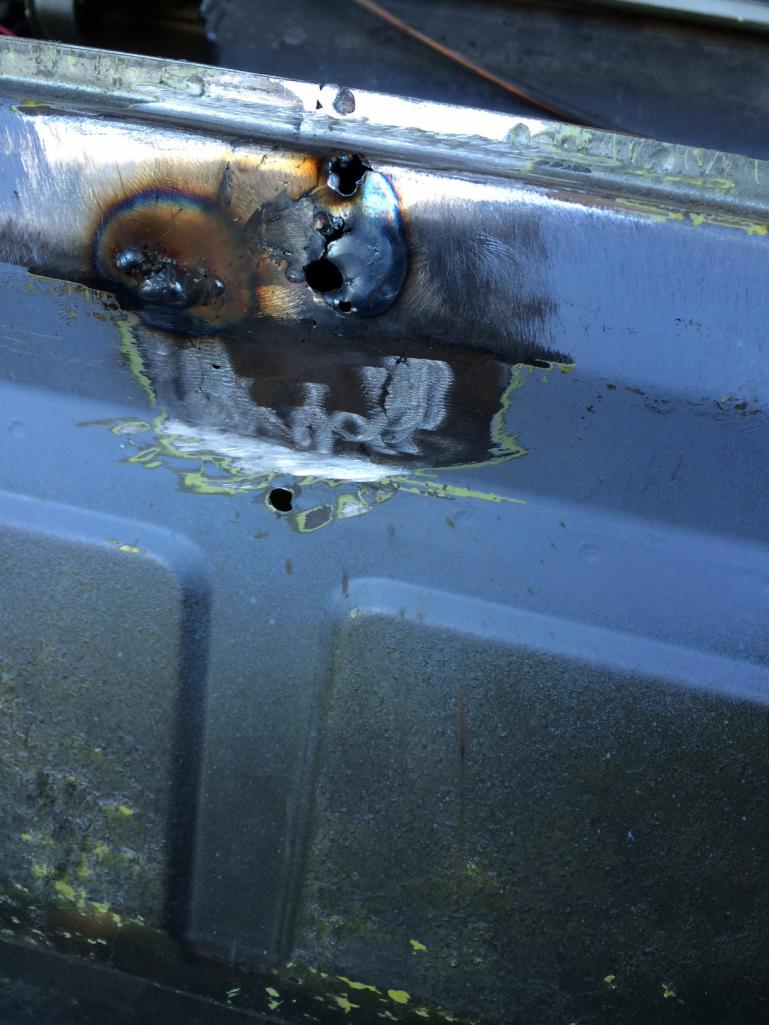
|
|
|
|
| tygaboy |
Feb 23 2016, 04:48 PM
Post
#80
|
|
914 Guru Group: Members Posts: 5,331 Joined: 6-October 15 From: Petaluma, CA Member No.: 19,241 Region Association: Northern California |
So, it's time to fab up a patch. Here's a good answer for Jeopardy:
"It" can be used to fabricate a 914 frunk bulkhead patch panel. The answer is: a 1 x 1 square tube! It's the exact same radius. Thankfully, I had some laying around. Attached thumbnail(s) 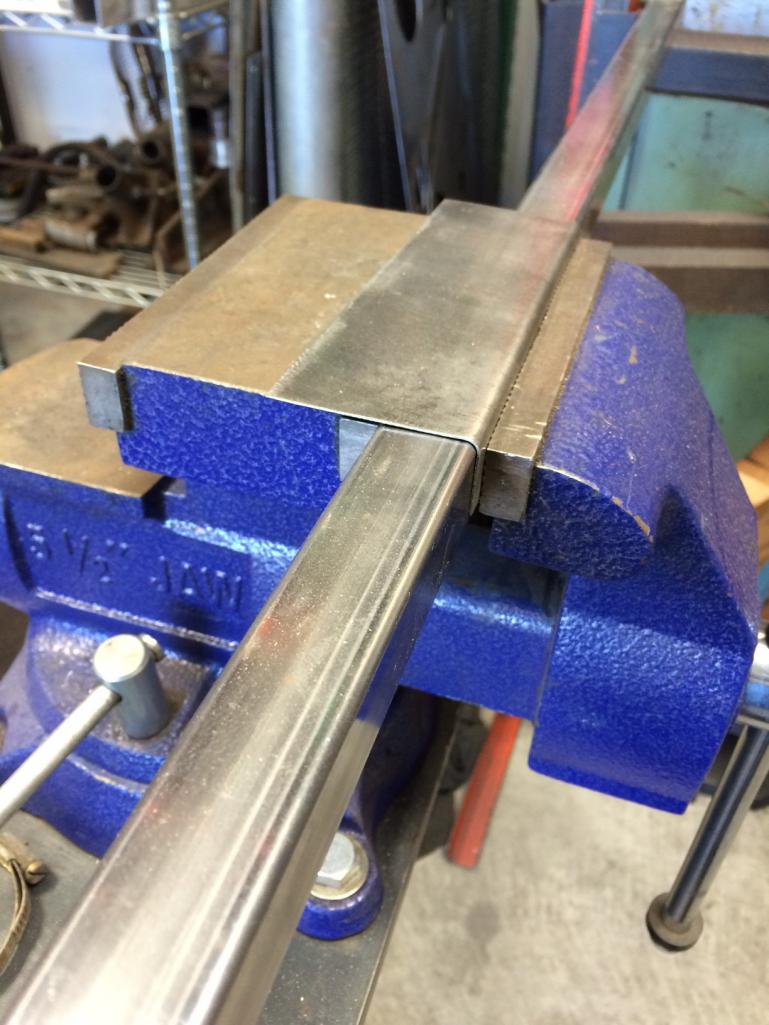
|
|
|
|
|
1 User(s) are reading this topic (1 Guests and 0 Anonymous Users)
0 Members:

|
Lo-Fi Version | Time is now: 24th June 2024 - 11:19 PM |
Invision Power Board
v9.1.4 © 2024 IPS, Inc.