|
|

|
Porsche, and the Porsche crest are registered trademarks of Dr. Ing. h.c. F. Porsche AG.
This site is not affiliated with Porsche in any way. Its only purpose is to provide an online forum for car enthusiasts. All other trademarks are property of their respective owners. |
|
|
  |
| cary |
 Mar 24 2016, 10:02 PM Mar 24 2016, 10:02 PM
Post
#121
|
|
Advanced Member     Group: Members Posts: 3,900 Joined: 26-January 04 From: Sherwood Oregon Member No.: 1,608 Region Association: Pacific Northwest 
|
Mark's pile of stuff ..................
Attached image(s) 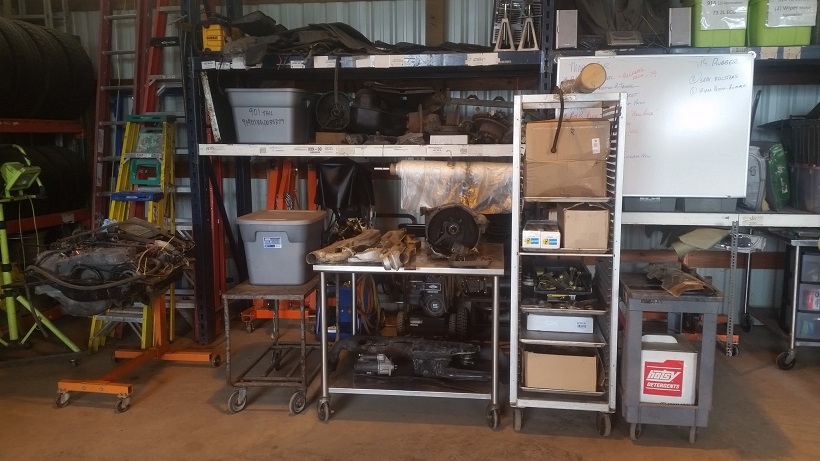
|
| Mikey914 |
 Mar 25 2016, 11:10 AM Mar 25 2016, 11:10 AM
Post
#122
|
|
The rubber man           Group: Members Posts: 12,742 Joined: 27-December 04 From: Hillsboro, OR Member No.: 3,348 Region Association: None 
|
Wow Cary,
Really making progress. I love that when I'm out of town for 5 days I can come back and see the progress. As far as the plugs in the trunk, I didn't expect you to actually cut the hole in the new metal and attach the plugs. I thought you would just glue the old ones onto the panel, but you went the extra mile to do it right. Thanks! Mark |
| cary |
 Mar 25 2016, 09:30 PM Mar 25 2016, 09:30 PM
Post
#123
|
|
Advanced Member     Group: Members Posts: 3,900 Joined: 26-January 04 From: Sherwood Oregon Member No.: 1,608 Region Association: Pacific Northwest 
|
I decided if we were going to return the hole plugs into the trunk. We should cut the holes into the transmission support cover. And weld the spare tire hold down nut back in.
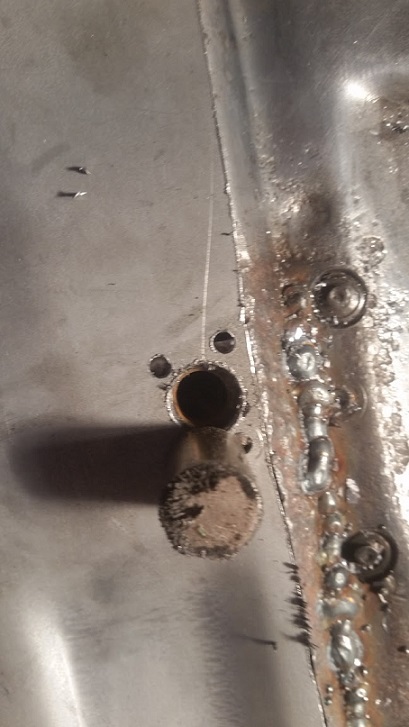 All dressed up and ready to go ................ 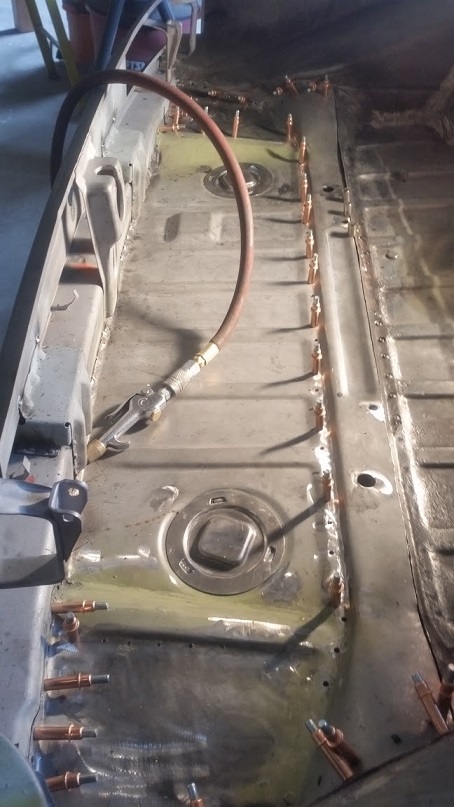 Whoa-la ............... 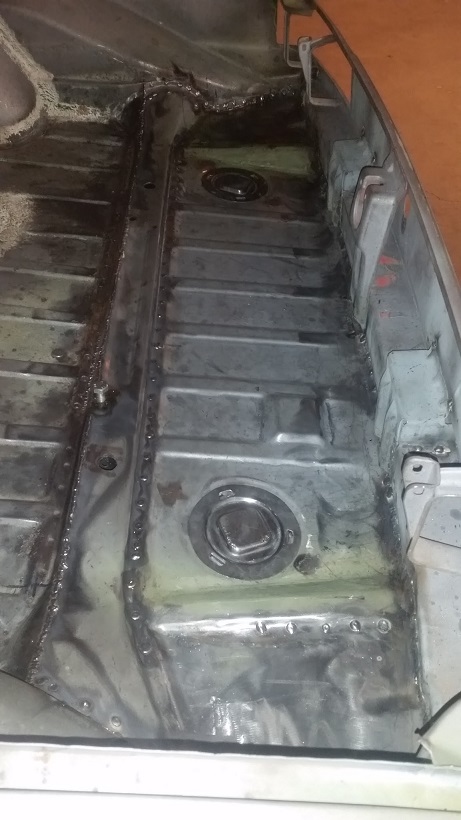 From there I went to the back panel and tidied up some of the pre drilled holes that didn't get reused or filled in because it was tack welded instead of rosette welded. When I got home my order from Zoro had arrived. I'd ordered some high quality belts for my 13" belt sander. Hopefully these will work on the tack welds on the back of the trunk. |
| cary |
 Mar 26 2016, 08:48 AM Mar 26 2016, 08:48 AM
Post
#124
|
|
Advanced Member     Group: Members Posts: 3,900 Joined: 26-January 04 From: Sherwood Oregon Member No.: 1,608 Region Association: Pacific Northwest 
|
Short Episode of Tool Whore :
As I weld in replacement panels and create tools. There is a need for magnets. Most everything I have and used are a POS. Until Now. These bitches work. How long they'll last will be the long term question. $29. 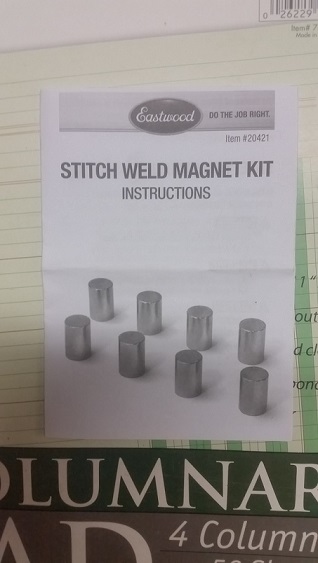 |
| cary |
 Mar 26 2016, 08:11 PM Mar 26 2016, 08:11 PM
Post
#125
|
|
Advanced Member     Group: Members Posts: 3,900 Joined: 26-January 04 From: Sherwood Oregon Member No.: 1,608 Region Association: Pacific Northwest 
|
Got the trunk support prepped and ready to be welded in.
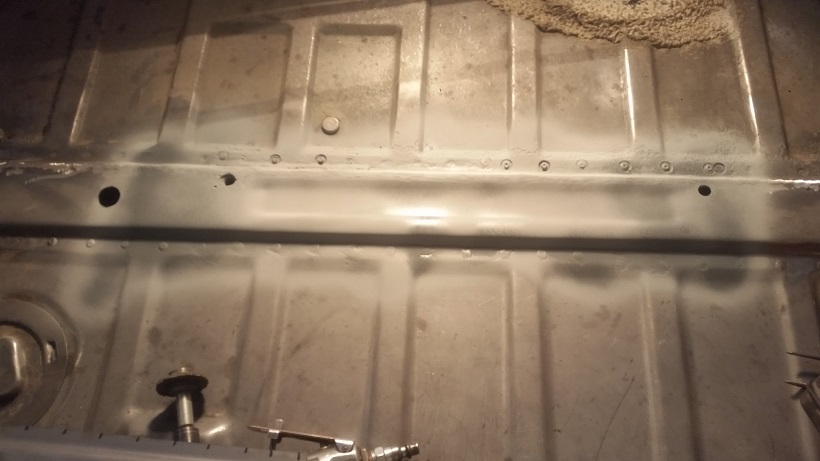 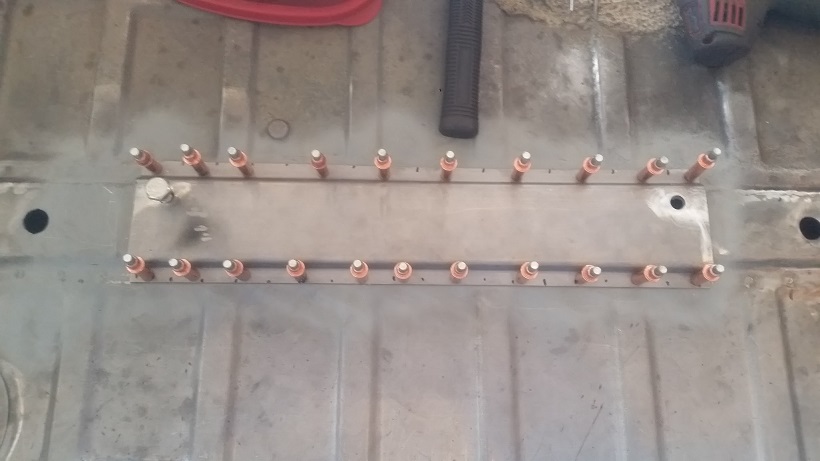 |
| cary |
 Mar 26 2016, 08:22 PM Mar 26 2016, 08:22 PM
Post
#126
|
|
Advanced Member     Group: Members Posts: 3,900 Joined: 26-January 04 From: Sherwood Oregon Member No.: 1,608 Region Association: Pacific Northwest 
|
Stuff :
Mark the 17mm MC is ready for pick up. 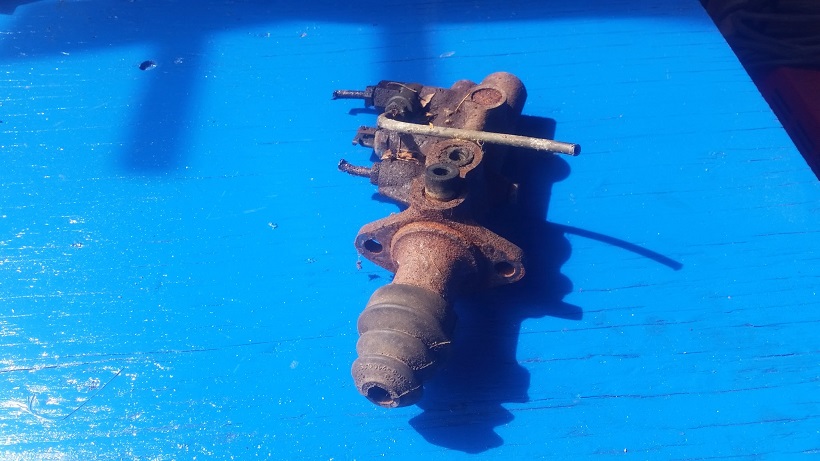 Ken the toe hook items are just about ready to go. I'll refurbish and paint them with weld thru primer. 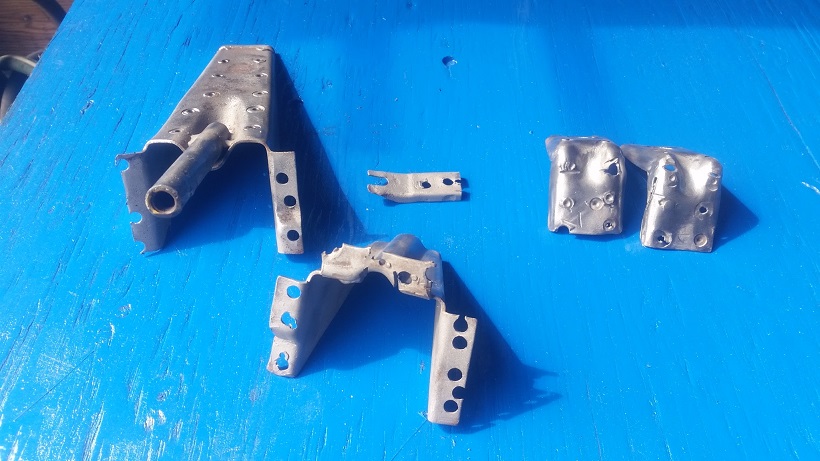 Kind of hillbilly. But a quick trip thru the wood stove removed the seam sealer in quick fashion. 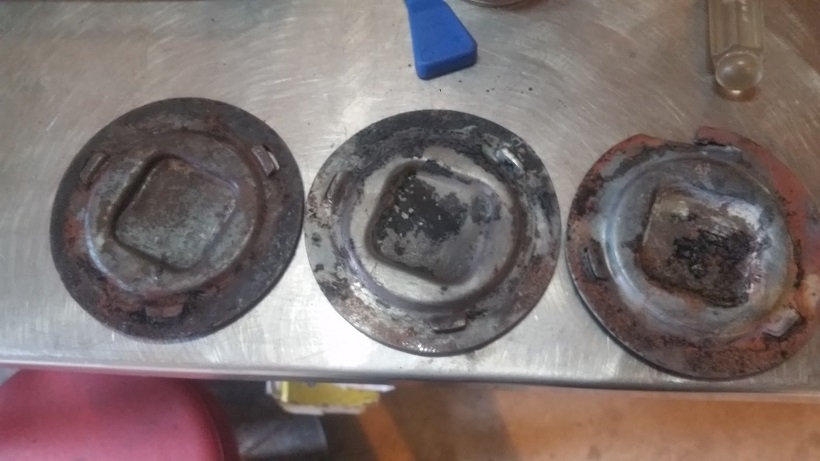 Super In Law pulled these out of the scraps in the scrap barrel. |
| cary |
 Mar 28 2016, 08:43 PM Mar 28 2016, 08:43 PM
Post
#127
|
|
Advanced Member     Group: Members Posts: 3,900 Joined: 26-January 04 From: Sherwood Oregon Member No.: 1,608 Region Association: Pacific Northwest 
|
Trunk support welded in ..................
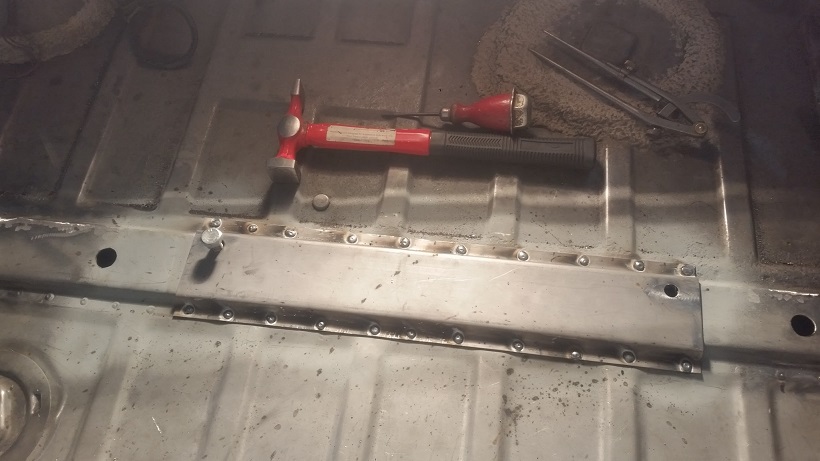 Trunk all finished up .................. 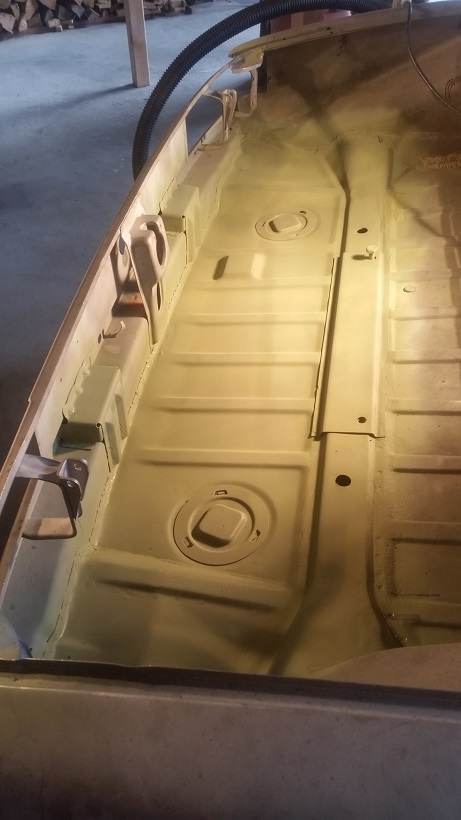 Came back from lunch and went on a pin hole hunt in the upper trunk and back panel. Using a flash light to back light, its amazing what you'll find. I'm real happy with the belts that I bought from Zoro for my 13" air belt sander. Here's a shot of the finish I'm getting. 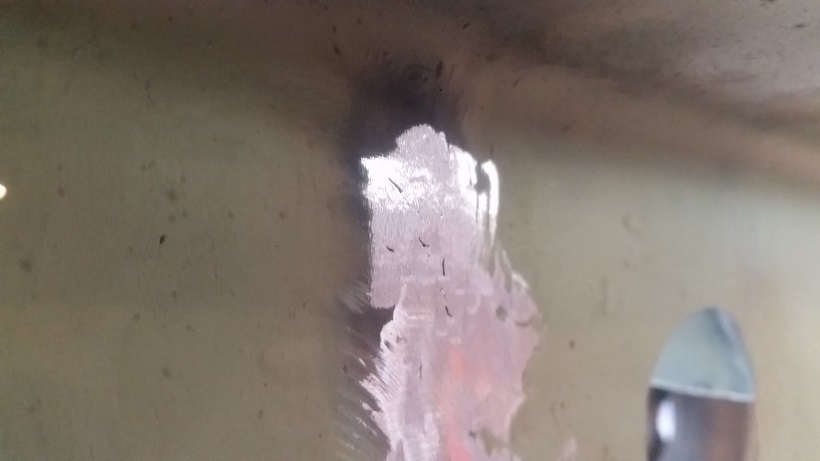 Every thing was going ok until I went after a pin hole the area that I called out in Post# &4. (IMG:style_emoticons/default/barf.gif) (IMG:style_emoticons/default/barf.gif) 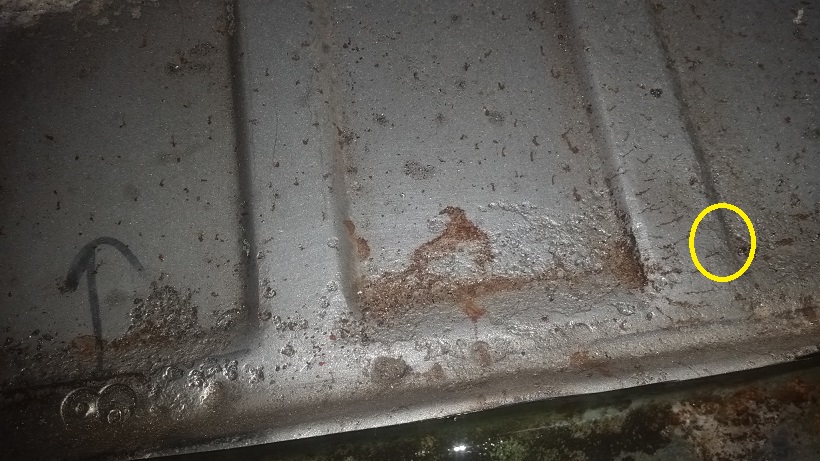 Dammit ............ blew a hole to start with. Then went underneath a did some work with a wire brush. Just started to disintegrate. (IMG:style_emoticons/default/mad.gif) 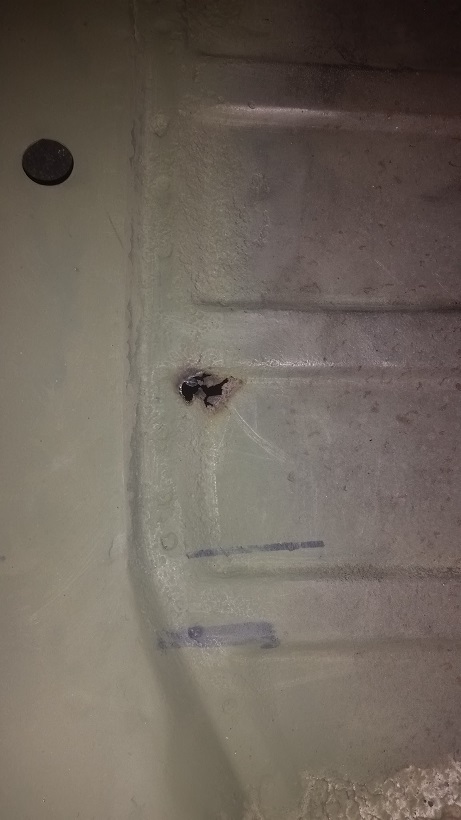 Haven't bought a seam roller yet. So I can't recreate a large area. Took a gander into trunk of the parts car. Might be usable. I'll cut the section out and see what I have ............ Super In Law refurbished the toe hook pieces that we're getting ready for Ken. Then he tidied up the stand offs on the exhaust heat shield. It's all ready to get bead blasted tomorrow. 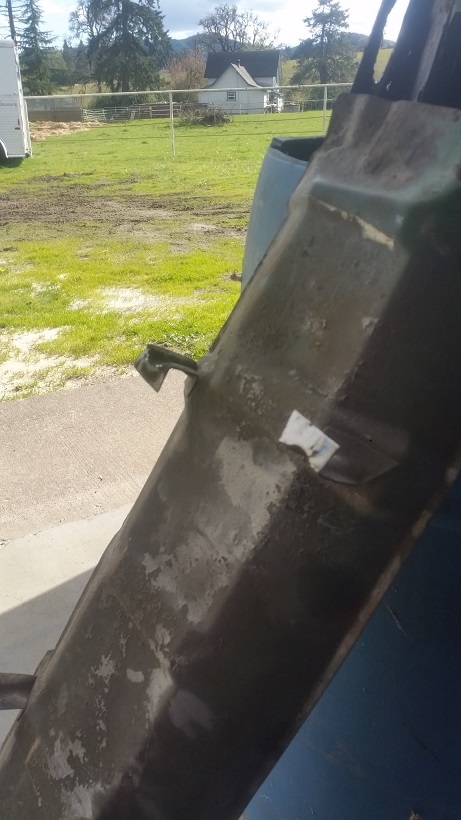 |
| bigkensteele |
 Mar 28 2016, 09:34 PM Mar 28 2016, 09:34 PM
Post
#128
|
|
Major Member     Group: Members Posts: 2,197 Joined: 30-August 04 From: Cincinnati, OH Member No.: 2,660 Region Association: South East States 
|
Ken the toe hook items are just about ready to go. I'll refurbish and paint them with weld thru primer.  (IMG:style_emoticons/default/beerchug.gif) Thanks Cary! That kit will be exactly what I need if I ever do track time and need to have the car safely towed! Please PM me with what I owe you for your efforts, and we can work out shipping with Mark. Beautiful work!!! |
| cary |
 Mar 29 2016, 08:15 PM Mar 29 2016, 08:15 PM
Post
#129
|
|
Advanced Member     Group: Members Posts: 3,900 Joined: 26-January 04 From: Sherwood Oregon Member No.: 1,608 Region Association: Pacific Northwest 
|
Ken the toe hook items are just about ready to go. I'll refurbish and paint them with weld thru primer.  (IMG:style_emoticons/default/beerchug.gif) Thanks Cary! That kit will be exactly what I need if I ever do track time and need to have the car safely towed! Please PM me with what I owe you for your efforts, and we can work out shipping with Mark. Beautiful work!!! Ready to go ................ I'll send you a PM. Not really yellow. Lights 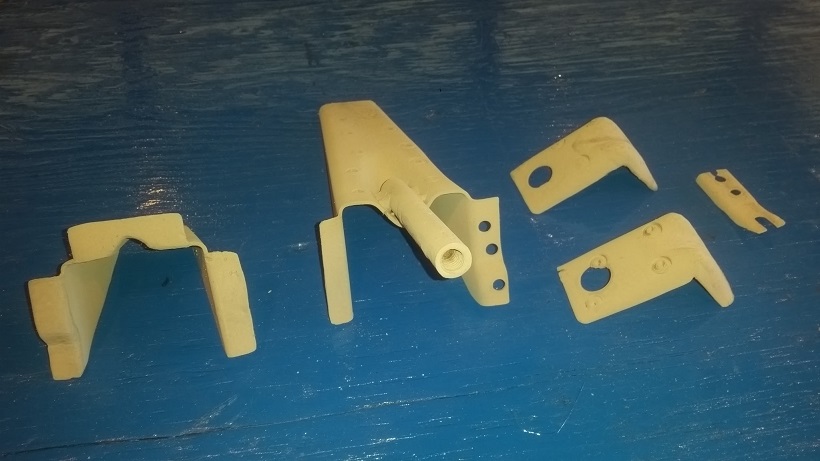 |
| cary |
 Mar 29 2016, 08:23 PM Mar 29 2016, 08:23 PM
Post
#130
|
|
Advanced Member     Group: Members Posts: 3,900 Joined: 26-January 04 From: Sherwood Oregon Member No.: 1,608 Region Association: Pacific Northwest 
|
Started the day pulling out the plasma cutter.
Cut this section out of the parts car. PLAN A : 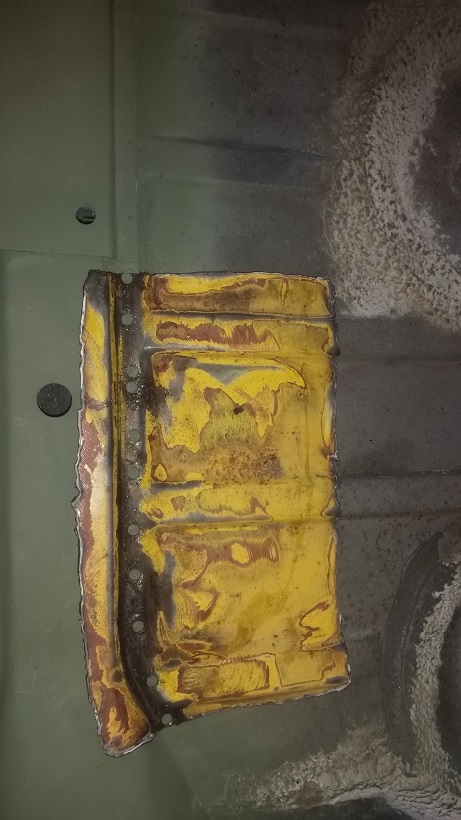 Went with smaller section. PLAN B : 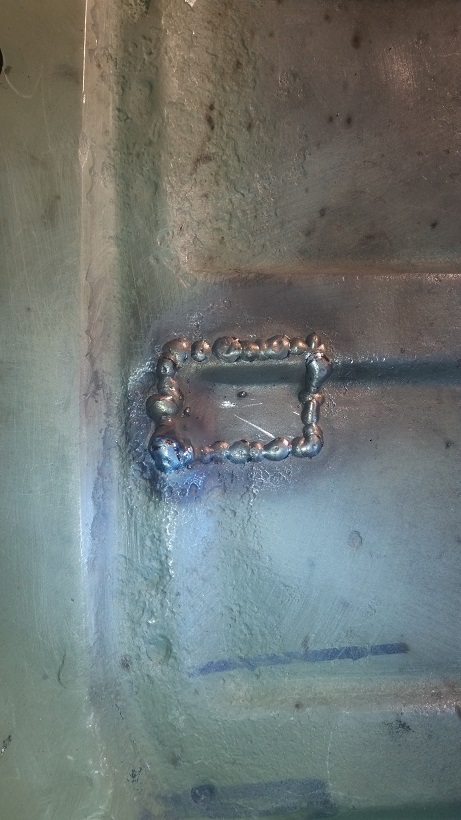 Saved PLAN A for the future. 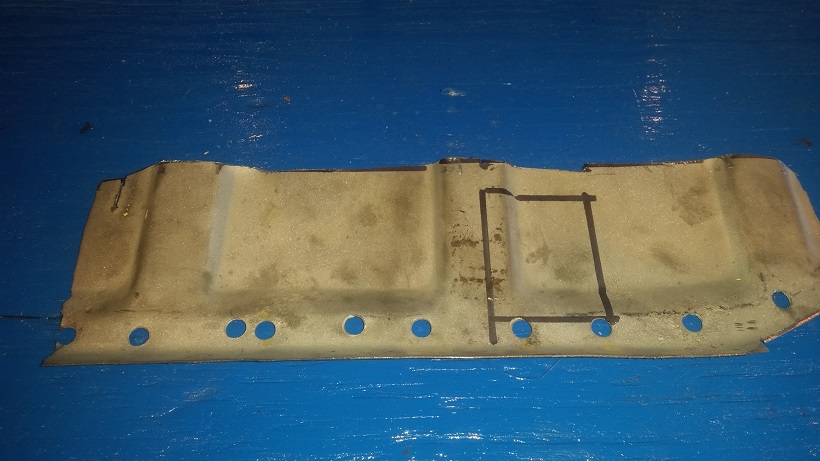 |
| cary |
 Mar 29 2016, 09:38 PM Mar 29 2016, 09:38 PM
Post
#131
|
|
Advanced Member     Group: Members Posts: 3,900 Joined: 26-January 04 From: Sherwood Oregon Member No.: 1,608 Region Association: Pacific Northwest 
|
We have a break in the weather here in PDX so we pulled out the refurbished HF blaster tank. Tore the whole thing apart and cleaned out all the hoses and valves. Then bought a new 5ft longer commercial grade hose. She ran like dream.
Blasted the exhaust shield and the left door sill I pulled out of my stash. 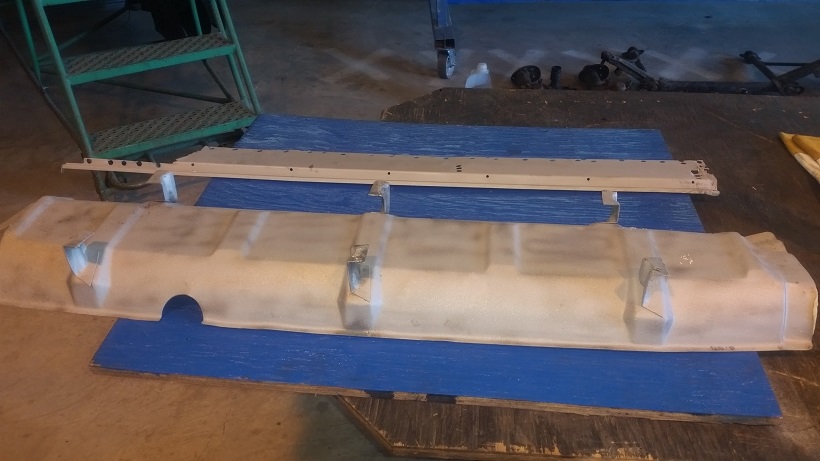 |
| cary |
 Mar 29 2016, 10:30 PM Mar 29 2016, 10:30 PM
Post
#132
|
|
Advanced Member     Group: Members Posts: 3,900 Joined: 26-January 04 From: Sherwood Oregon Member No.: 1,608 Region Association: Pacific Northwest 
|
Then onto finishing the removal of the floor pan under the firewall.
I start with those seam welds under the seat belt bolts. No real issues. Just cut them out with cut off wheel on the mandrel. Then peeled the remaining pan off with Rick's screwdriver spot weld removal method. Rolling the removed material with a pair of lineman's pliers like an old style sardine can. 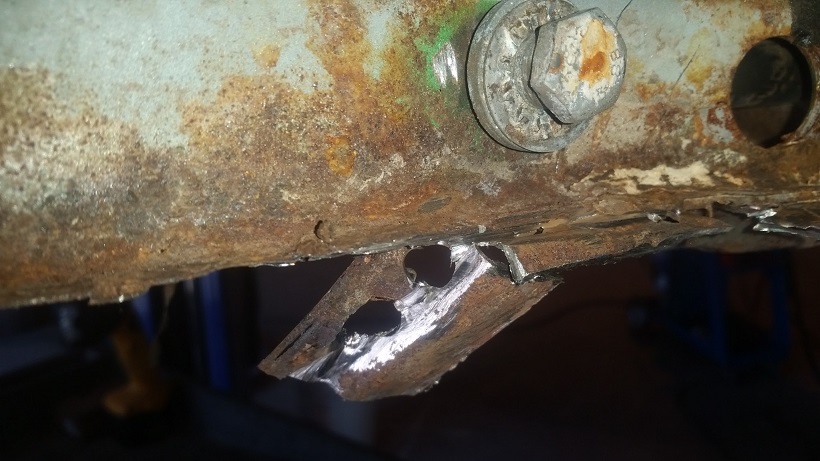 While systematically removing the hillbilly patch. I pulled out a couple holes in the long while locating and removing spot welds under the long seam welded patch. Area is nice and solid so a patch should be an easy deal. 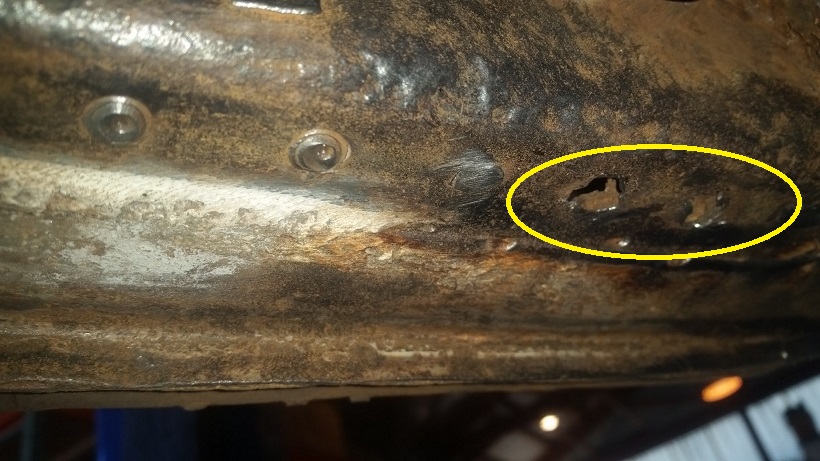 But I did find a rust degradation hole right on the bottom rolled edge of the long. We'll see if we can recreate that radius and make a long patch so we can remove most of the degradation. 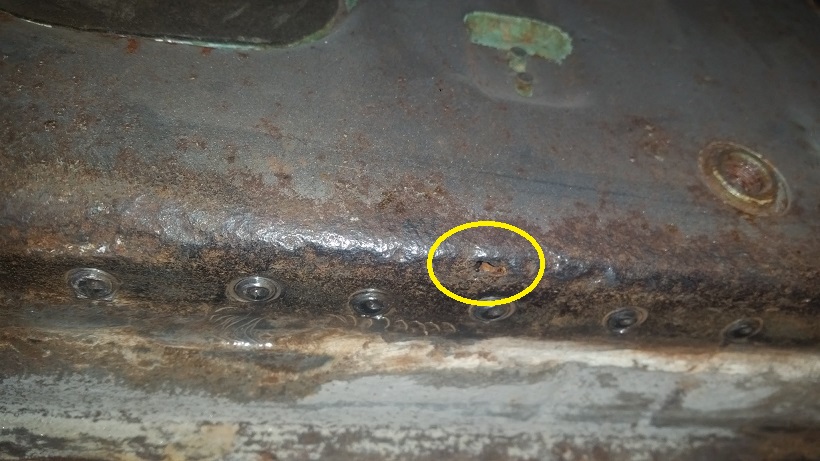 Here's a couple shots of other issues that I'll need to deal with. 1. About 1/2 the bottom edge is gone. 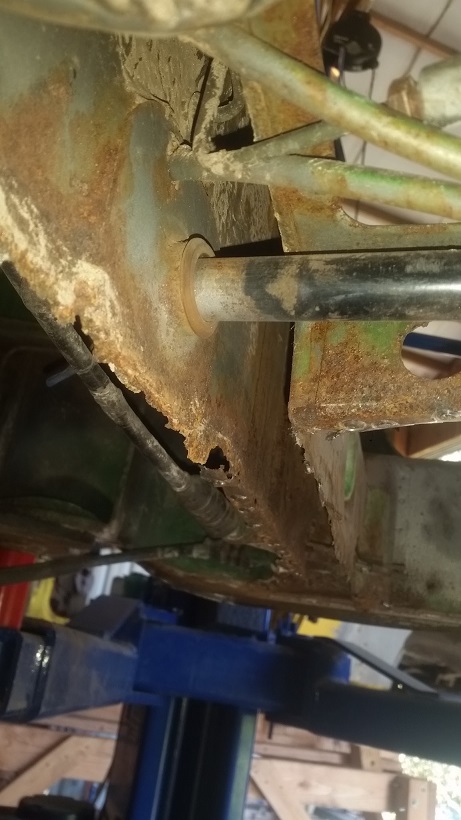 2. I don't get it. Just like the end of the hell hole. They left the old rusty portion of the lower firewall behind the patch. 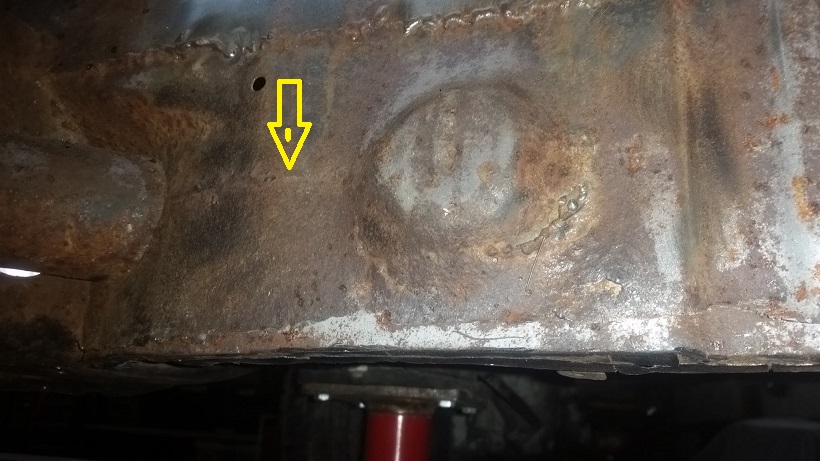 The yellow arrow indicates where they seamed the patch in two pieces. I might be able to peel back the rusty portion up to the seam |
| cary |
 Mar 29 2016, 10:38 PM Mar 29 2016, 10:38 PM
Post
#133
|
|
Advanced Member     Group: Members Posts: 3,900 Joined: 26-January 04 From: Sherwood Oregon Member No.: 1,608 Region Association: Pacific Northwest 
|
We'll be taking a couple day break so we can paint the frame bench I bought in January.
I'll add that update on my rustoration thread Then I'll dive into the wheelhouse rust. |
| Mikey914 |
 Mar 30 2016, 03:05 PM Mar 30 2016, 03:05 PM
Post
#134
|
|
The rubber man           Group: Members Posts: 12,742 Joined: 27-December 04 From: Hillsboro, OR Member No.: 3,348 Region Association: None 
|
Thanks Cary,
I'll be back in late Sunday and will come out to see you. Thanks for everything! |
| Steve |
 Mar 31 2016, 08:35 AM Mar 31 2016, 08:35 AM
Post
#135
|
|
914 Guru      Group: Members Posts: 5,784 Joined: 14-June 03 From: Orange County, CA Member No.: 822 Region Association: Southern California 
|
Bump
|
| cary |
 Apr 4 2016, 10:19 PM Apr 4 2016, 10:19 PM
Post
#136
|
|
Advanced Member     Group: Members Posts: 3,900 Joined: 26-January 04 From: Sherwood Oregon Member No.: 1,608 Region Association: Pacific Northwest 
|
Back to the task at hand ..................
After giving the wheelhouse a complete inspection you'll see the the white lines I drew out. These are the cut lines .................. Always keep in mind, less is more. Only remove what you absolutely have to. 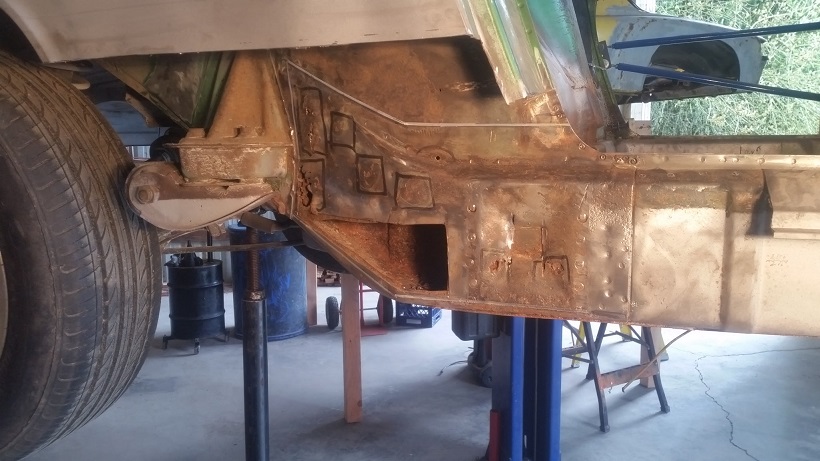 All cut away other than the double layer that sandwiches the tail end of the outer long. Interestingly when you look down into the long you can see clean steel. It seems the rust was caused by the moisture retained in the mouse nest. 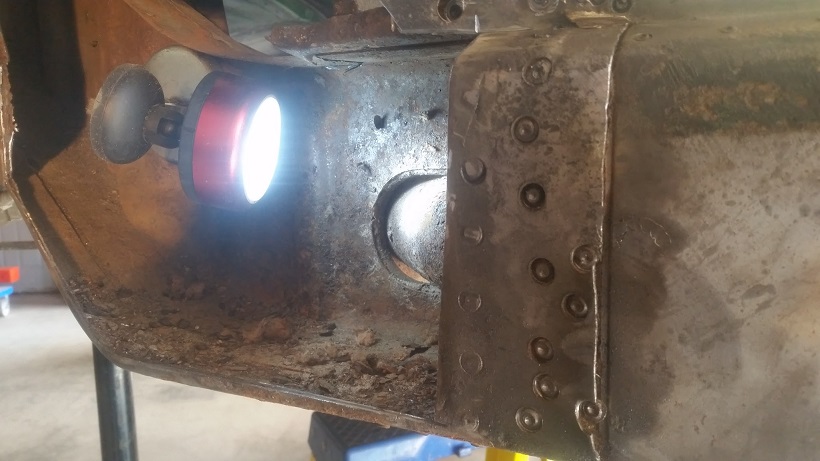 Off comes the outer layer. 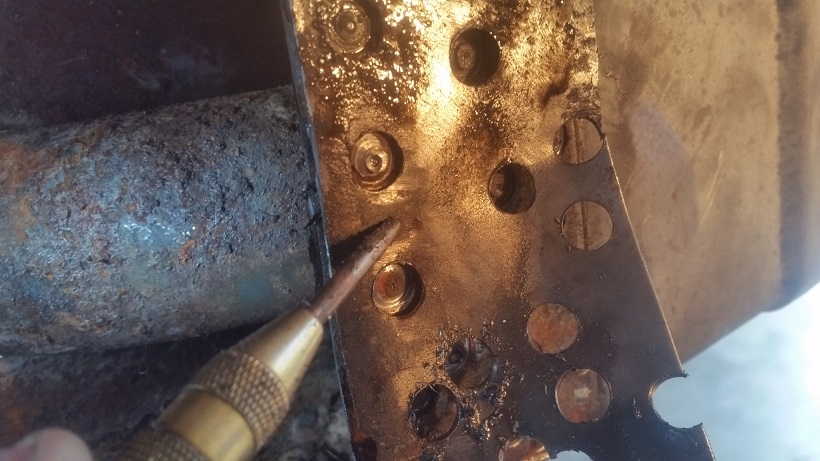 Then the inner box. 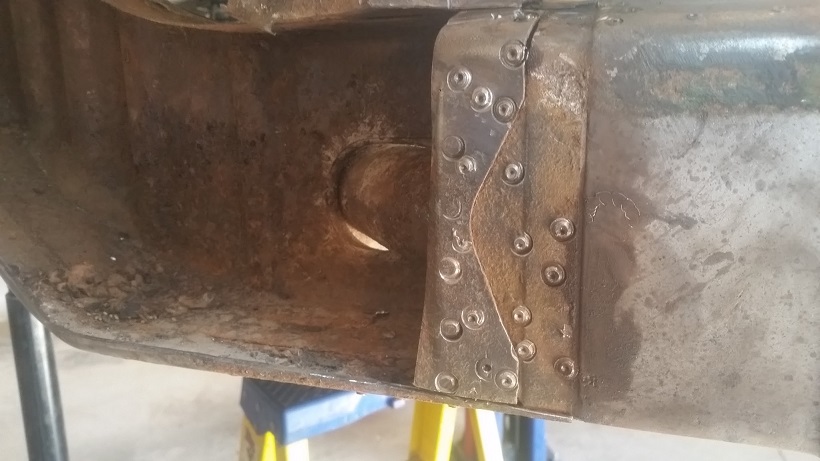 Here's the same area on the backside of the new piece. The long tucks into the rounded section and gets spot welded together. 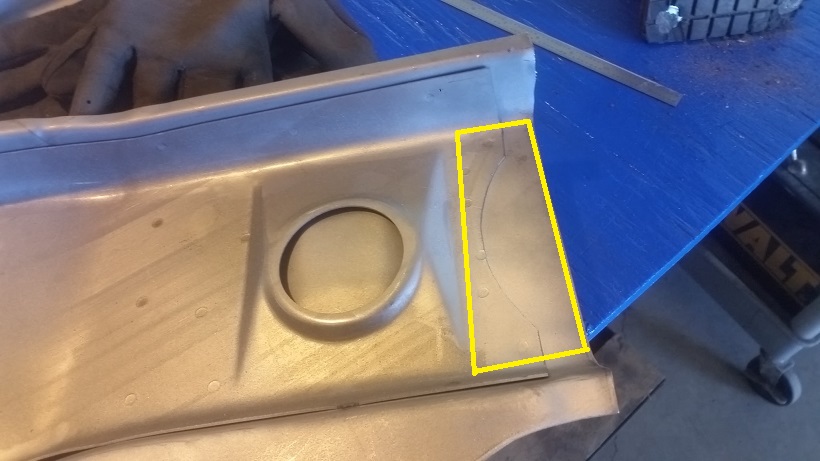 |
| cary |
 Apr 5 2016, 07:00 AM Apr 5 2016, 07:00 AM
Post
#137
|
|
Advanced Member     Group: Members Posts: 3,900 Joined: 26-January 04 From: Sherwood Oregon Member No.: 1,608 Region Association: Pacific Northwest 
|
I did not see the heat shield that attaches to the btm of the trunk panel. It seems that it would be easy to weld while the trunk panel is on the bench vs upside down when installed. I stand corrected on my original statement. What I needed to do was remove the stand offs from Mark's shield and mount them to the floor pan. I was too focused on the floor pan recreation. All I could think about was it being in the way every time I took the pan out for fitting. And making sure it wasn't in the way of getting a good shot epoxy at a later date. Yes, this would have been easier on the bench. I think I'll have Super In Law create 6 new stand offs, just a smidgen bigger to accommodate the blind nuts. I'll create a template for the stand offs off my car. |
| cary |
 Apr 5 2016, 07:56 AM Apr 5 2016, 07:56 AM
Post
#138
|
|
Advanced Member     Group: Members Posts: 3,900 Joined: 26-January 04 From: Sherwood Oregon Member No.: 1,608 Region Association: Pacific Northwest 
|
Now where was I ? I fell asleep with the computer on my lap.
With the wheelhouse opened up I have a better picture of the damage to the long. Not going crazy like I did on my car. LOL. The outside will need a bottom patch. Looks like I can keep it inside the floor pan seat. 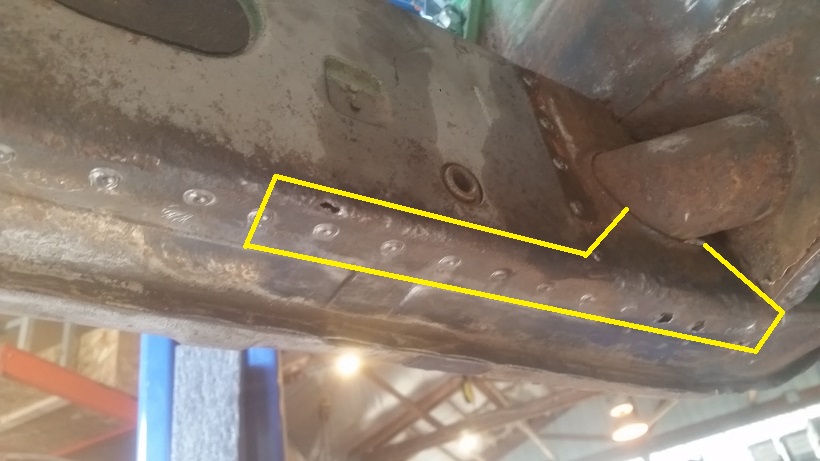 I'm cutting up to the heater tube because experience says I won't be able to weld the pitted metal. It's thick enough, but you cant get enough of the rust out of pits for a good weld. 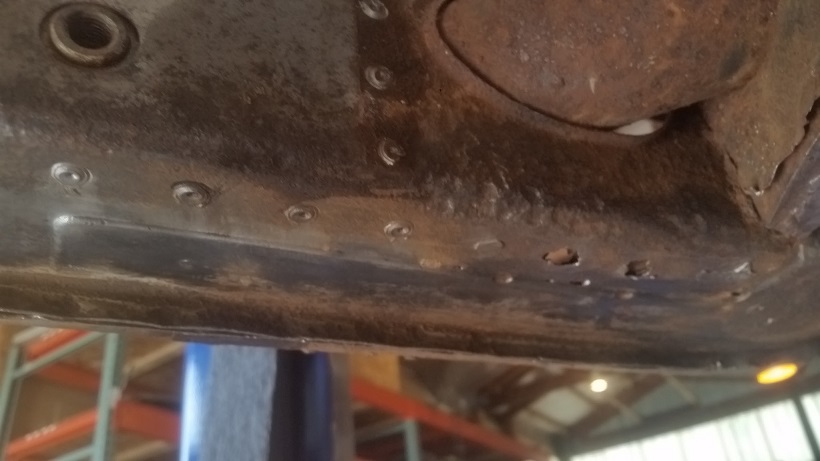 Now on to the inner box where all the damage started. This will take some delicate surgery to remove the inner box without damaging the outer long. I think this will take my entire pile of die grinders, cut off wheels and the Dremel to get the job done. 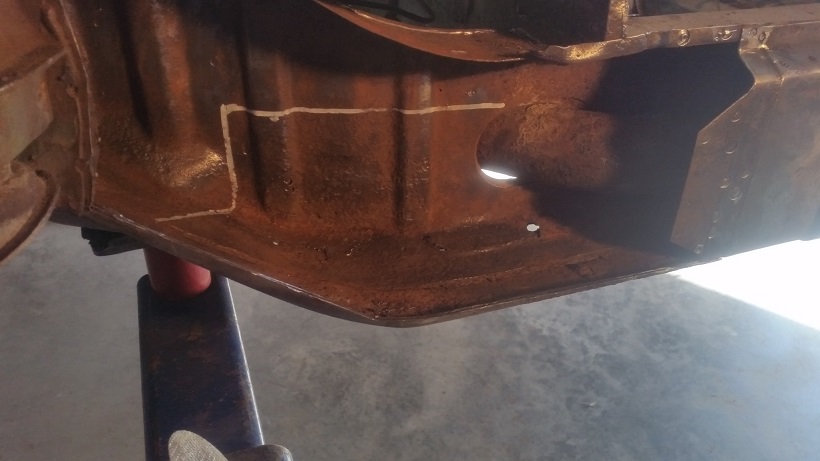 This piece will have to built in I'm thinking Tool Whore will have to dip into the saving account and order a bead roller. Looking at Woodward Fab at Summit and Eastwood. Leaning towards the Woodward. You can order the additional dies as you need them. The rear suspension was removed for better access for the wheelhouse repair. I was going ask for Rick's guidance on doing a trick repair of the wheelhouse. Trimming the outside off the new wheelhouse and sliding it behind the suspension mount. Just not confident I could get the welds that I'd be happy him. So the mount will be coming off. Suspension added to the cart. Mark stopped by to drop of a couple additional RD pieces and pick up Ken's toe hook. He added prepping his cars for WCR to the work list. One oil leak, one D-Jet tune up. 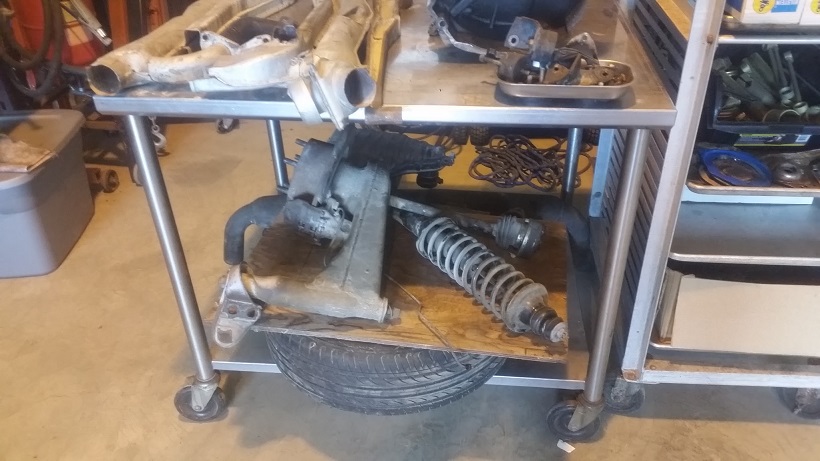 |
| cary |
 Apr 6 2016, 07:15 AM Apr 6 2016, 07:15 AM
Post
#139
|
|
Advanced Member     Group: Members Posts: 3,900 Joined: 26-January 04 From: Sherwood Oregon Member No.: 1,608 Region Association: Pacific Northwest 
|
Prepping for surgery................... Make pot of coffee
Step one, remove outer layer of long. Peeling off only the outer layer didn't work. Either too much rust or too much coffee. Measure the seat belt plate to best determine where the bottom edge might be. 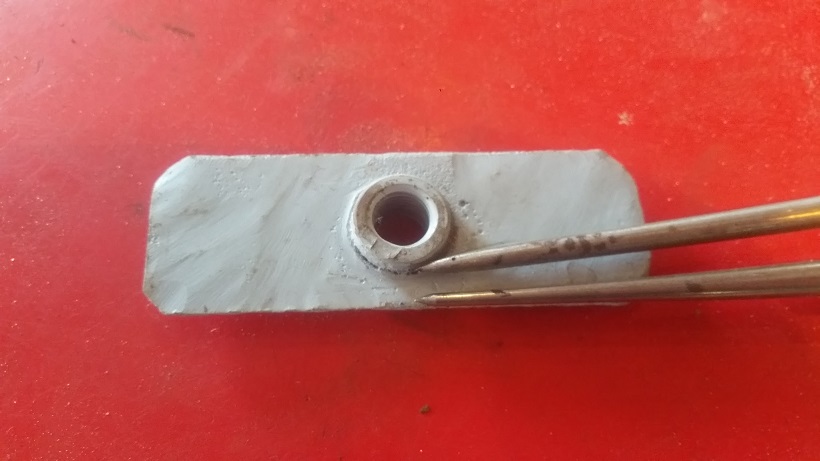 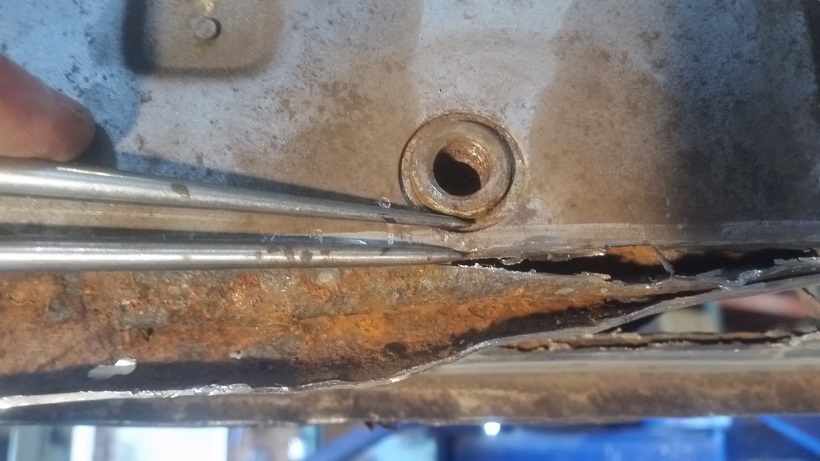 Like my dad used to say, Do As I Say, Not As I Do............ I cut first. Ran into the bottom edge of the plate............. Dah I wonder why. Two beer lunch ............ 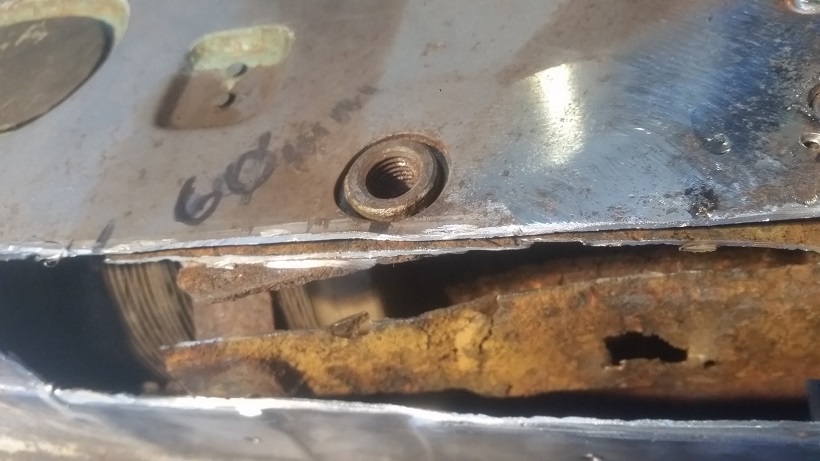 Here's where I ended up on the outer cuts. 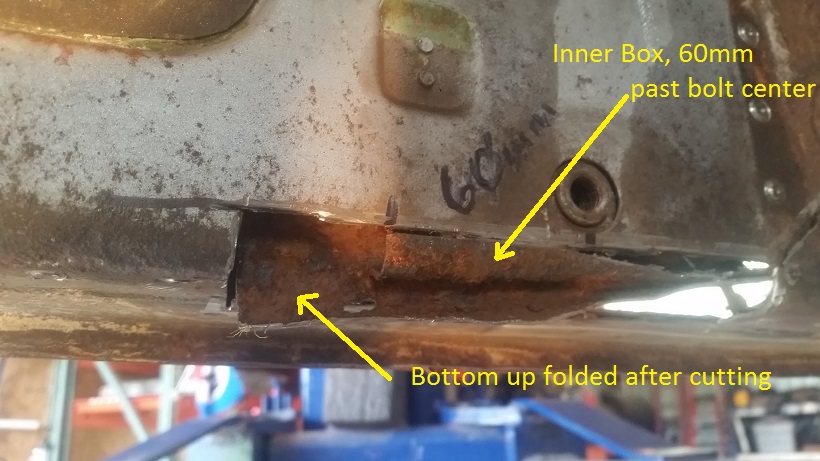 Inner box ends 60mm from center of seat belt bolt. I'll edit tonight and add a shot of after I cut the upper edge 3/4" higher as to not have the stacked seams. |
| cary |
 Apr 6 2016, 07:28 AM Apr 6 2016, 07:28 AM
Post
#140
|
|
Advanced Member     Group: Members Posts: 3,900 Joined: 26-January 04 From: Sherwood Oregon Member No.: 1,608 Region Association: Pacific Northwest 
|
Onto to the inside.
This is a bit more difficult because of the metal degradation, tough to find the spot welds. Just slow work with chisels. Peel up with chisel until you run into a spot weld. Grind down the weld from the top until it will pop free. 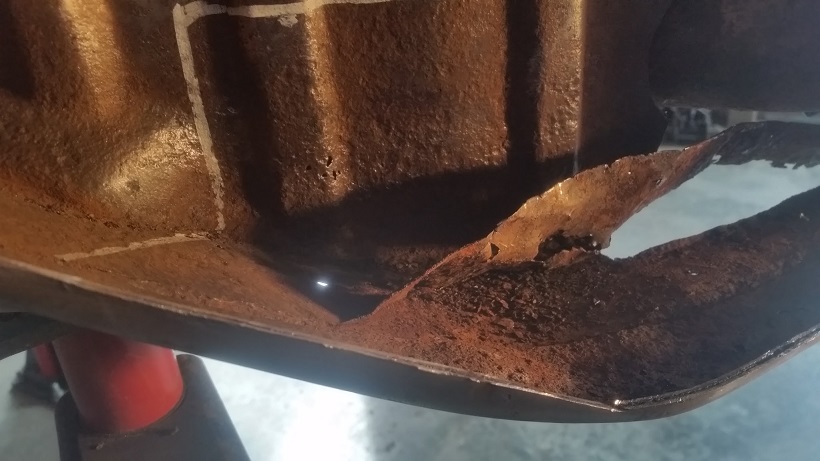 I took it out if two pieces. Bottom, then the wall. As you can see the outer long is in great condition. (IMG:style_emoticons/default/smile.gif) I went into the engine and ran an 1/8 bit thru the spot welds that were easy to locate on the shiny side. Then ran the Rotacut thru the inner box to weaken them enough to pop free. 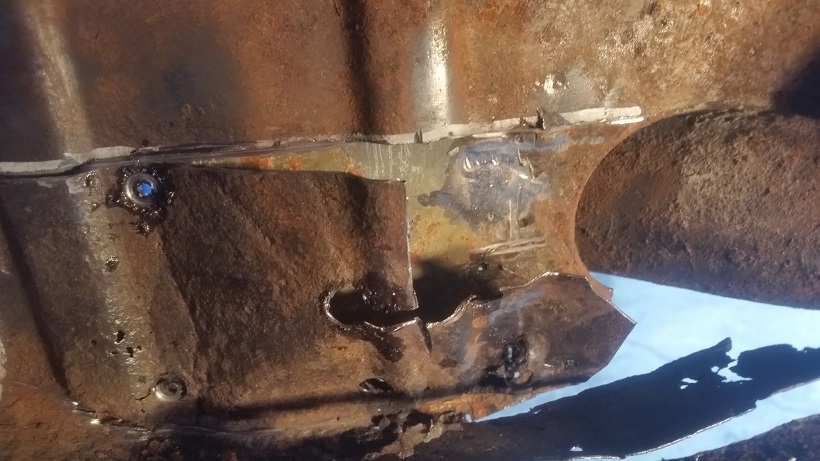 At the end of the day I gave it a good soaking of OSPHO to dry overnight. 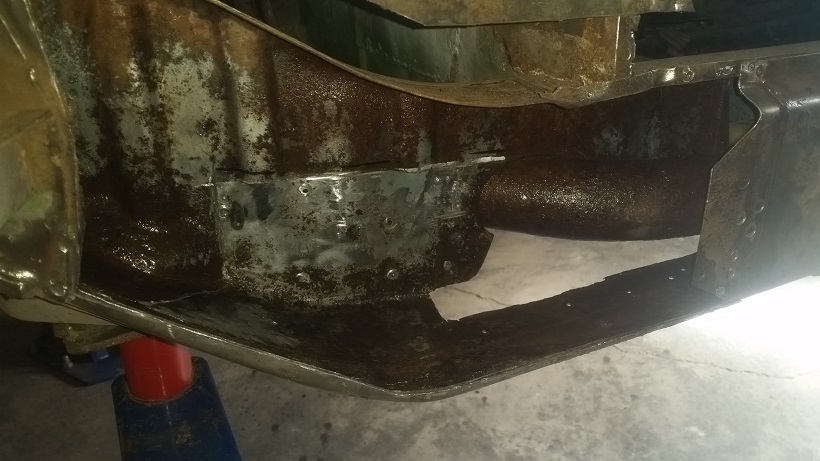 |
  |
2 User(s) are reading this topic (2 Guests and 0 Anonymous Users)
0 Members:

|
Lo-Fi Version | Time is now: 18th January 2025 - 08:25 PM |
Invision Power Board
v9.1.4 © 2025 IPS, Inc.


