|
|

|
Porsche, and the Porsche crest are registered trademarks of Dr. Ing. h.c. F. Porsche AG.
This site is not affiliated with Porsche in any way. Its only purpose is to provide an online forum for car enthusiasts. All other trademarks are property of their respective owners. |
|
|
  |
| cary |
 Apr 6 2016, 07:38 AM Apr 6 2016, 07:38 AM
Post
#141
|
|
Advanced Member     Group: Members Posts: 3,900 Joined: 26-January 04 From: Sherwood Oregon Member No.: 1,608 Region Association: Pacific Northwest 
|
I moved out of the way so Super In Law could finish the work on his patch patterns.
I moved on to removing the left door sill. Nothing to much to document. You do need a torch to loosen and remove the brazing. 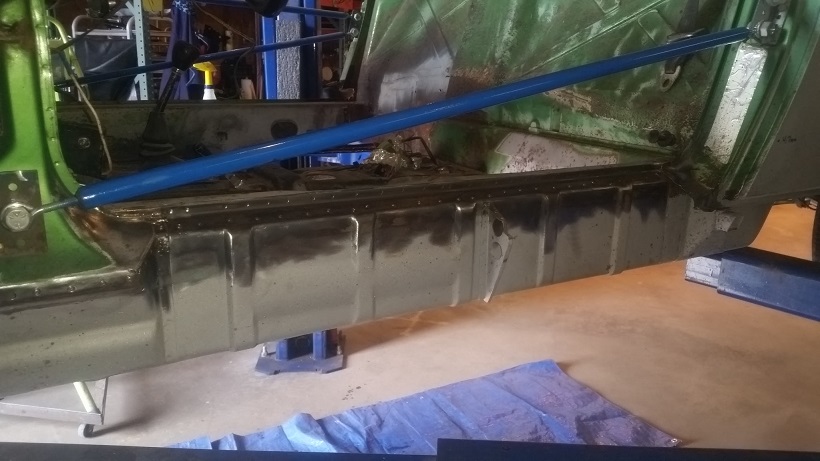 Only additional work I picked up on the sill removal was the rust between the sill flange and the door post brace/box. 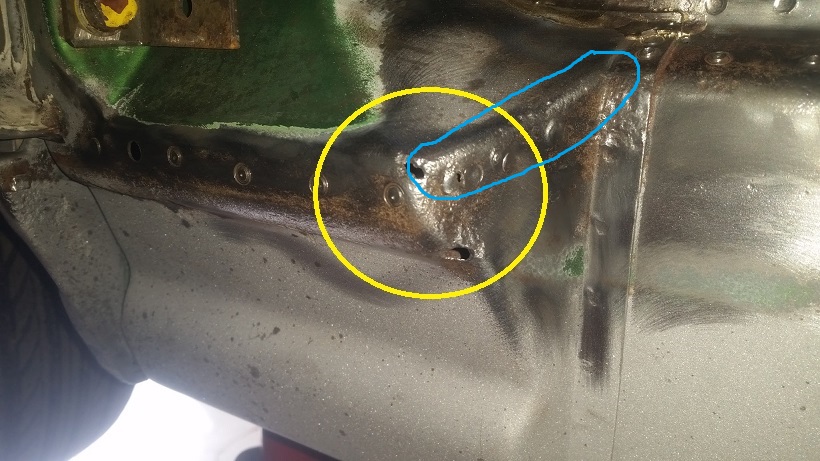 This is a tricky area to work on. On the couple I've worked on the metal has thinned and is pretty soft. Don't let this be the place you try out your new welder. You'll be in tears and your welder will be For Sale on Craigslist. (IMG:style_emoticons/default/welder.gif) |
| cary |
 Apr 6 2016, 07:42 AM Apr 6 2016, 07:42 AM
Post
#142
|
|
Advanced Member     Group: Members Posts: 3,900 Joined: 26-January 04 From: Sherwood Oregon Member No.: 1,608 Region Association: Pacific Northwest 
|
While I was working on the car MacGyver was working on his rib fabrication tooling.
First one was too big. Version #2 looks to be a nice fit. 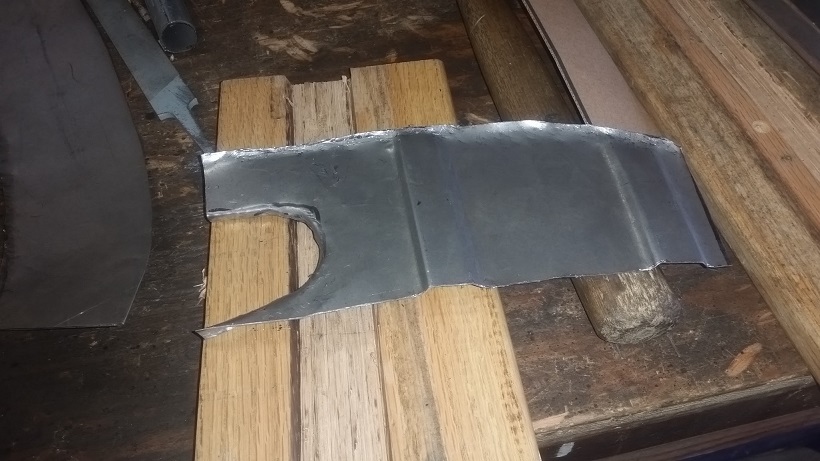 Basically he chiseled out a channel in a piece of oak from the scrap pile for the form. Then found a piece of solid stainless steel for the press. 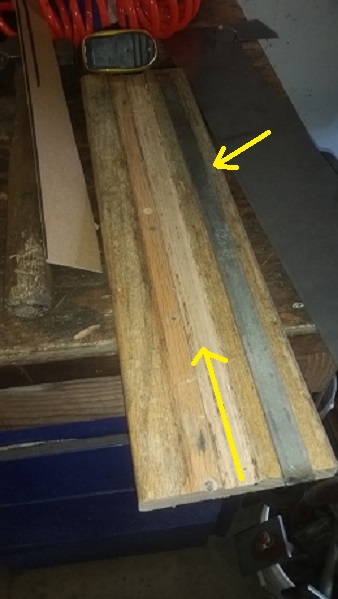 Then he squished them in the press. He says he can create about six inches with each pressing. (IMG:style_emoticons/default/beerchug.gif) No Bead Roller Yet ............. This tooling will be used many times in the future. 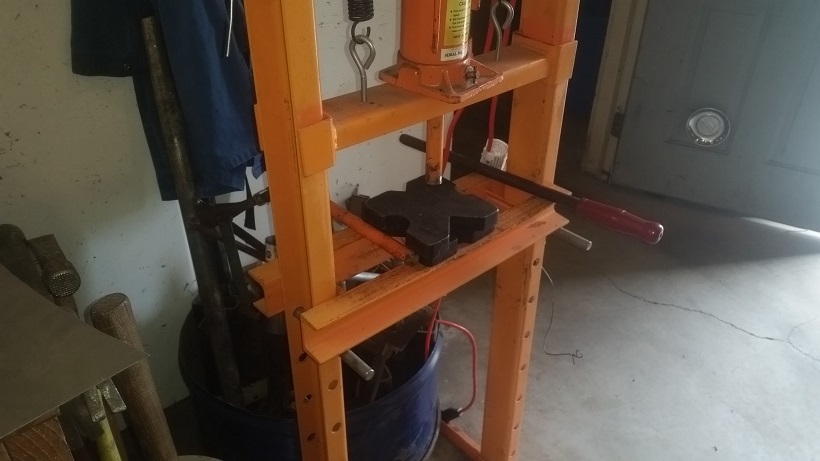 Piece one and piece two being aligned. This is where we ended the day. We'll start today with the third piece and welding it together. 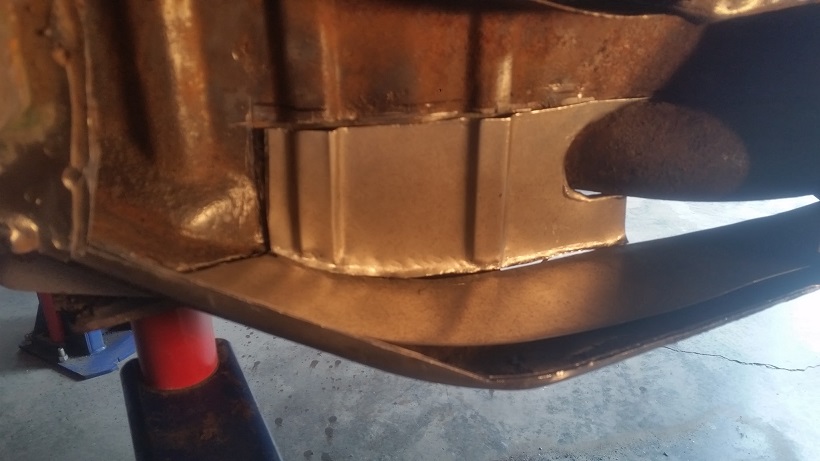 |
| cary |
 Apr 6 2016, 09:53 PM Apr 6 2016, 09:53 PM
Post
#143
|
|
Advanced Member     Group: Members Posts: 3,900 Joined: 26-January 04 From: Sherwood Oregon Member No.: 1,608 Region Association: Pacific Northwest 
|
Super In Law spent the day fitting, welding, trimming and grinding the inner box.
At the end of the day it's just about ready to go. 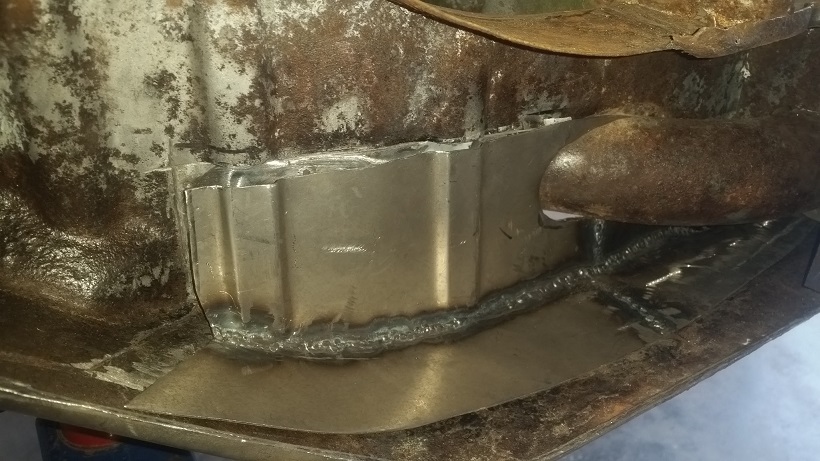 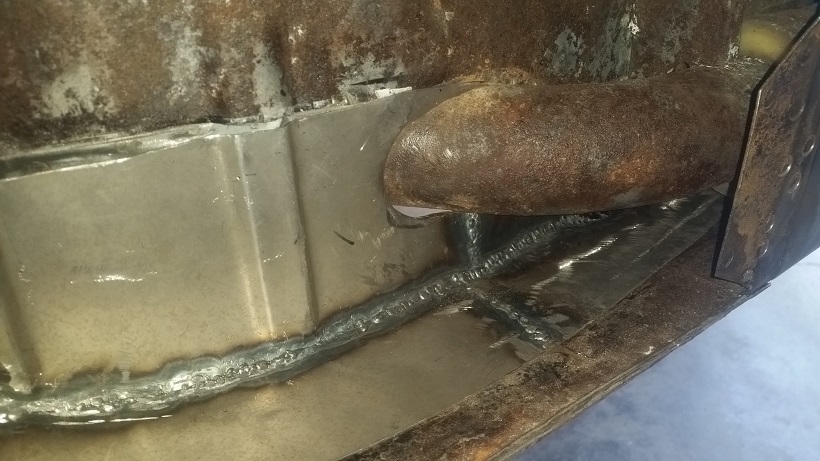 Looks like we'll be bringing the old 90 amp Craftsmen MIG from home. At times we need two welders. It will work fine on new metal to new metal. Not enough adjust-ability for the new to old welding. |
| cary |
 Apr 6 2016, 10:03 PM Apr 6 2016, 10:03 PM
Post
#144
|
|
Advanced Member     Group: Members Posts: 3,900 Joined: 26-January 04 From: Sherwood Oregon Member No.: 1,608 Region Association: Pacific Northwest 
|
Need to do a little refurbishing on the sill I pulled out of my stash.
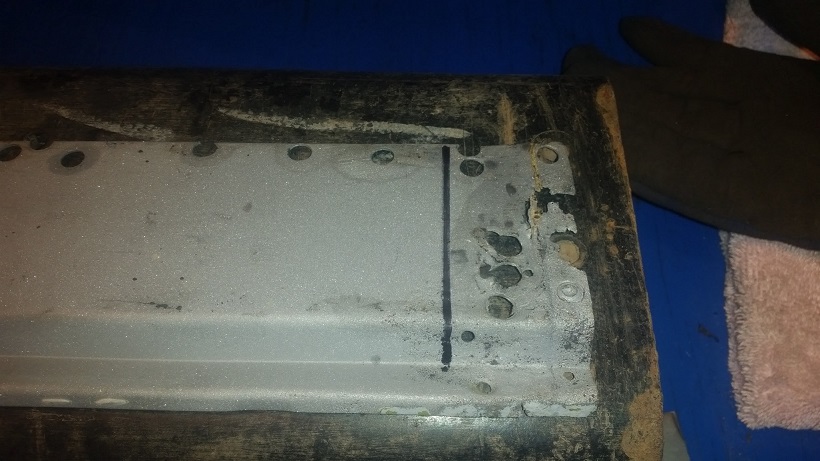 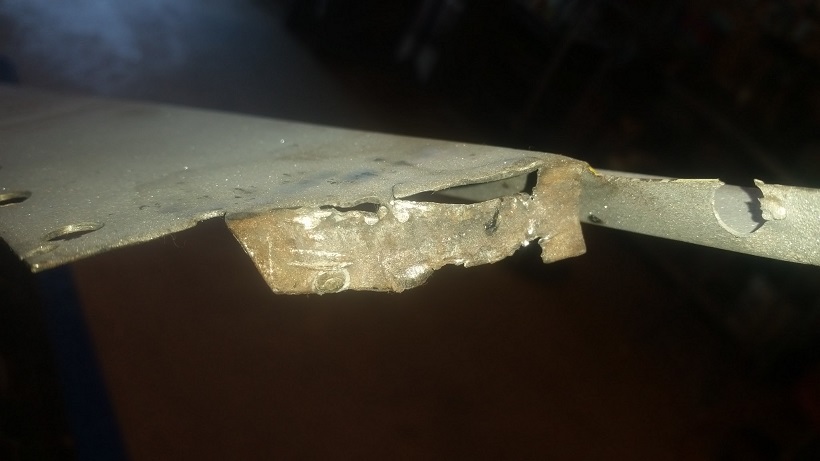 New magnets are almost to strong for welding ......... sitting on the solid u-channel, the MIG would studder when I got too close to the magnets. 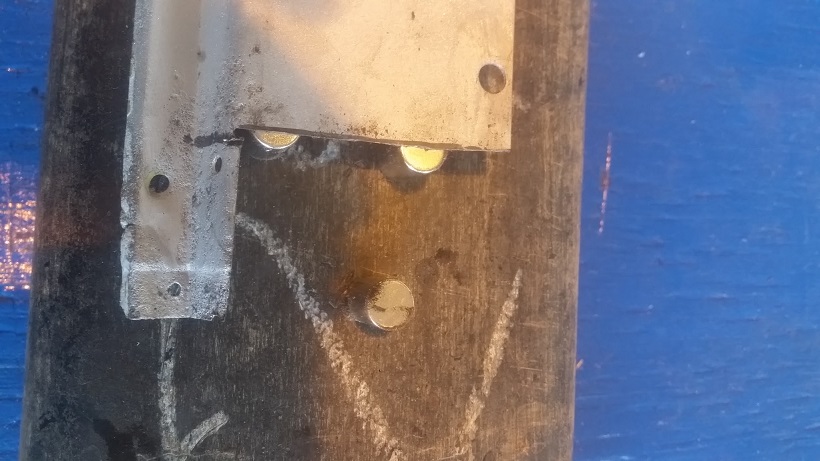 Yes I did refill the rosette holes. Once again it would have created gigantic rosettes. |
| cary |
 Apr 6 2016, 10:21 PM Apr 6 2016, 10:21 PM
Post
#145
|
|
Advanced Member     Group: Members Posts: 3,900 Joined: 26-January 04 From: Sherwood Oregon Member No.: 1,608 Region Association: Pacific Northwest 
|
Then I moved on to the holes in the door post support.
It must have been my lucky day. (IMG:style_emoticons/default/piratenanner.gif) (IMG:style_emoticons/default/piratenanner.gif) All three holes welded up without any issues. Being paranoid I did back off to only two blips, instead of my usual three. 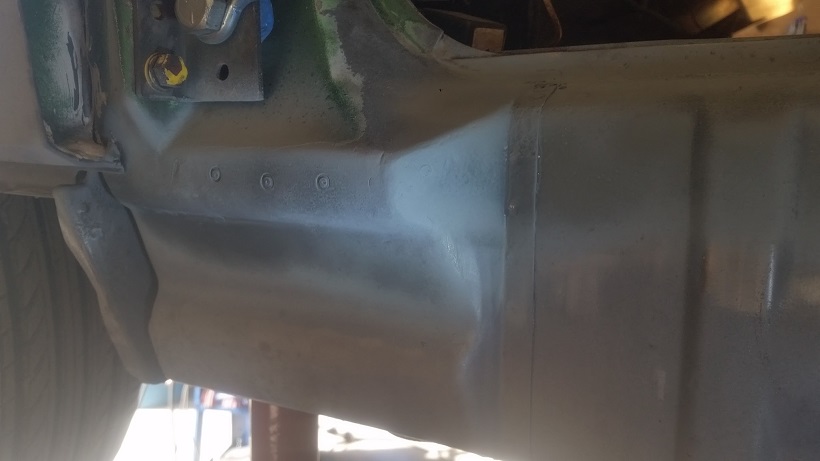 Along the way I did find one more little rust pin hole. 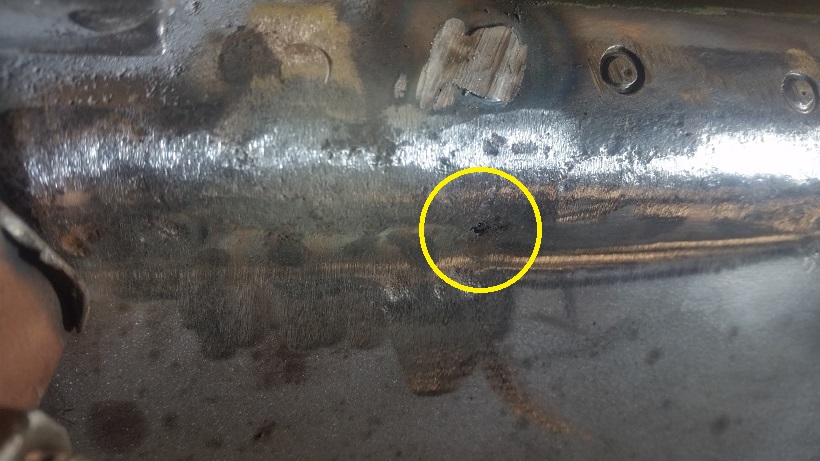 After some fiddling and fitting shes already to go ................. 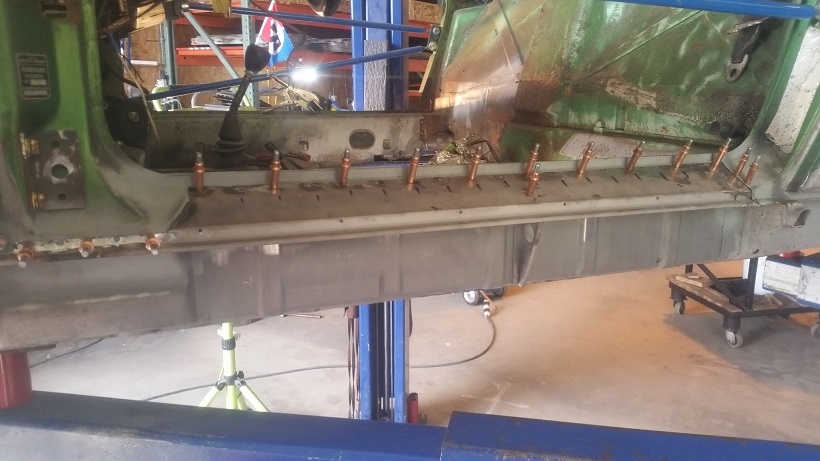 Left tail needs a little more polish. A couple spots could use a little more welding to level out. I'll get that finished up in am. Then I'll get out the torch and braze in the joints. 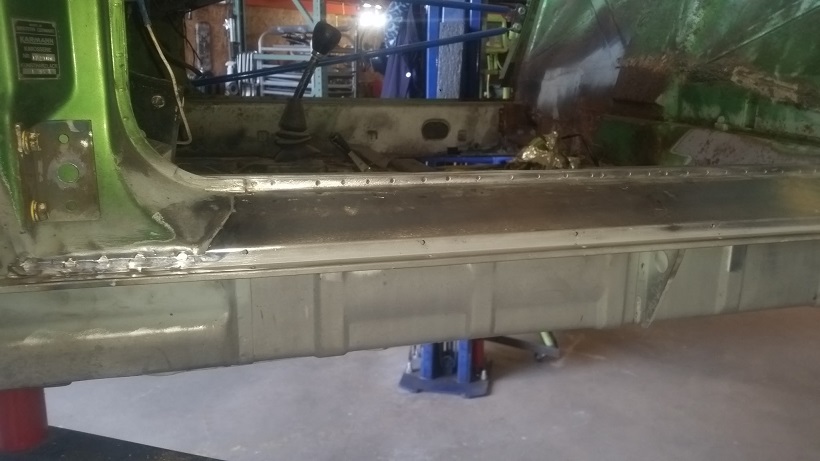 Attached image(s) 
|
| 914_teener |
 Apr 6 2016, 10:31 PM Apr 6 2016, 10:31 PM
Post
#146
|
|
914 Guru      Group: Members Posts: 5,250 Joined: 31-August 08 From: So. Cal Member No.: 9,489 Region Association: Southern California |
I love this thread.
Nice work Cary. Super in Law.......that is great soft tooling for the ribbing work. Lost art along with steel rule die making. |
| KELTY360 |
 Apr 6 2016, 10:31 PM Apr 6 2016, 10:31 PM
Post
#147
|
|
914 Neferati      Group: Members Posts: 5,102 Joined: 31-December 05 From: Pt. Townsend, WA Member No.: 5,344 Region Association: Pacific Northwest 
|
Quit your day job.
|
| Rand |
 Apr 6 2016, 10:55 PM Apr 6 2016, 10:55 PM
Post
#148
|
|
Cross Member      Group: Members Posts: 7,409 Joined: 8-February 05 From: OR Member No.: 3,573 Region Association: None |
At the risk of being the asshole... Dude, more heat, less wire. You seem to like grinding. (IMG:style_emoticons/default/biggrin.gif) Had to poke fun, but wouldn't if I didn't have huge respect for what you are doing. Seriously amazing project.
|
| cary |
 Apr 7 2016, 05:35 AM Apr 7 2016, 05:35 AM
Post
#149
|
|
Advanced Member     Group: Members Posts: 3,900 Joined: 26-January 04 From: Sherwood Oregon Member No.: 1,608 Region Association: Pacific Northwest 
|
At the risk of being the asshole... Dude, more heat, less wire. You seem to like grinding. Had to poke fun but yet serious... Way too much bead!!!! No harm, no foul. All input is good. I've had better luck the last couple years using the Millermatic mode. So the wire is on autofeed. I have a lot less blow thrus. So in order to go hotter. I need to weld faster. Less time in the same spot. I'll tinker with a little more of a 90 degree angle and a little more heat. But I forgot to mention that I'm always concerned about distortion that is caused by more heat. Especially if I'm trying to weld good metal to old metal that is a bit pitted. Like the above shot of the tail of the door sill. |
| rhodyguy |
 Apr 7 2016, 08:10 PM Apr 7 2016, 08:10 PM
Post
#150
|
|
Chimp Sanctuary NW. Check it out.                Group: Members Posts: 22,207 Joined: 2-March 03 From: Orion's Bell. The BELL! Member No.: 378 Region Association: Galt's Gulch |
Super work!
|
| cary |
 Apr 7 2016, 09:45 PM Apr 7 2016, 09:45 PM
Post
#151
|
|
Advanced Member     Group: Members Posts: 3,900 Joined: 26-January 04 From: Sherwood Oregon Member No.: 1,608 Region Association: Pacific Northwest 
|
April in Oregon .............
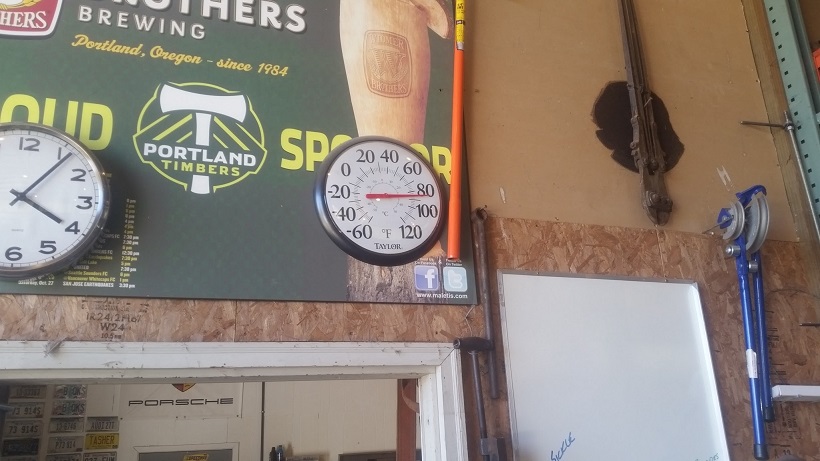 Damn it's hot ........ |
| cary |
 Apr 7 2016, 09:47 PM Apr 7 2016, 09:47 PM
Post
#152
|
|
Advanced Member     Group: Members Posts: 3,900 Joined: 26-January 04 From: Sherwood Oregon Member No.: 1,608 Region Association: Pacific Northwest 
|
Finished up the door sill.
Brazed the joints. 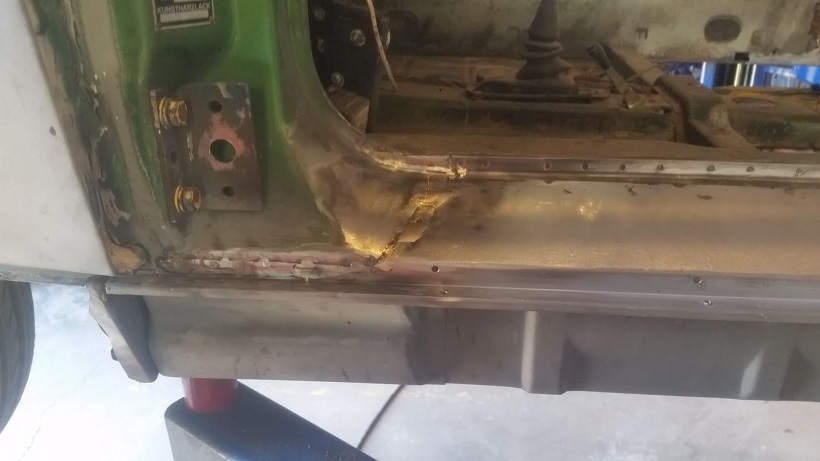 Gave it a covering of SE primer. 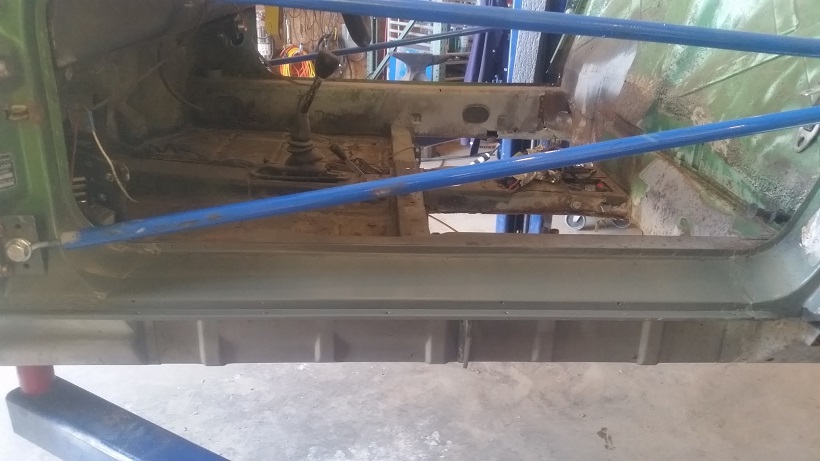 |
| cary |
 Apr 7 2016, 10:21 PM Apr 7 2016, 10:21 PM
Post
#153
|
|
Advanced Member     Group: Members Posts: 3,900 Joined: 26-January 04 From: Sherwood Oregon Member No.: 1,608 Region Association: Pacific Northwest 
|
Then on to the inner box patch.
Lots of fitting and hammer work. Used a ball-peen hammer with a blunt chisel and a squared off piece of r-bar to get things nice and tight. Using the Clecos I drill and 1/8 hole to install the pin. I then drill a 3/16 hole on then side I'm going do the rosette weld on. Tool Whore input: I've switched to Norsemen Made in the USA drill bits. Best I've ever used. A 1/8 pilot bit can last 3-4 days. HF, 3-4 minutes. 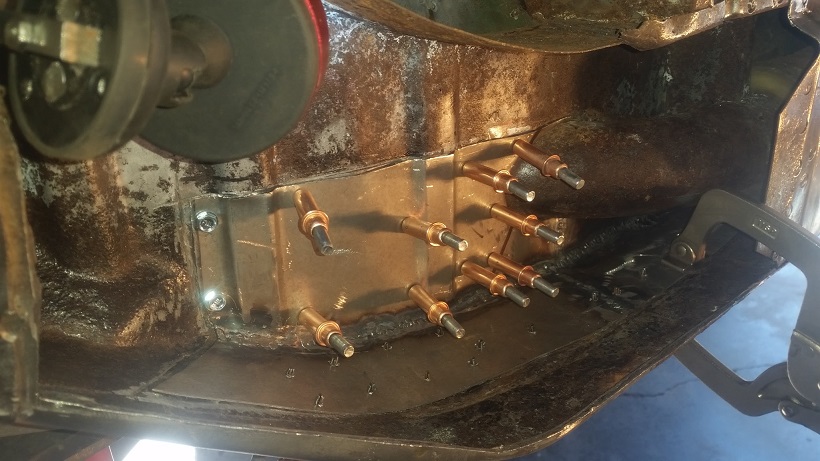 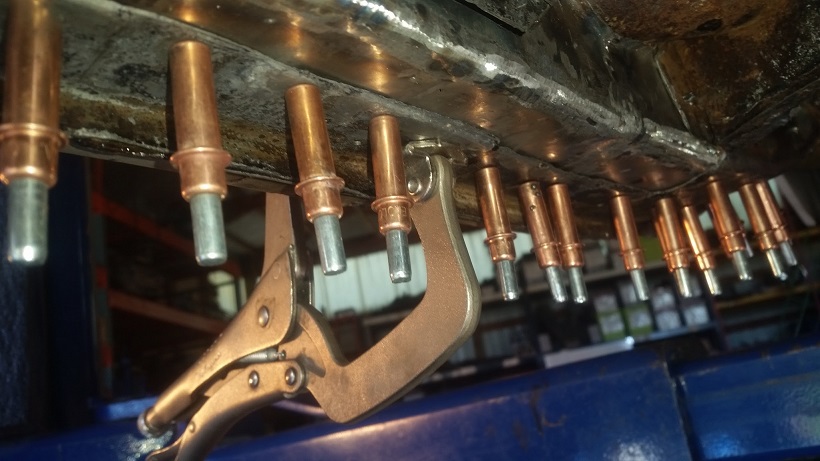 Pinned it into place, then got after my favorite welds, directly overhead. (IMG:style_emoticons/default/dry.gif) (IMG:style_emoticons/default/dry.gif) In actuality they went pretty well. That one on the edge got away from me. As soon I touched it, it popped up. 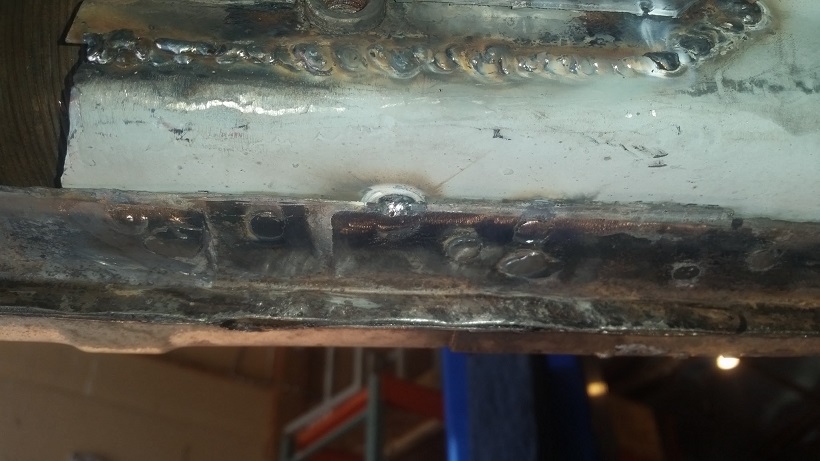 After everything got tidied up. 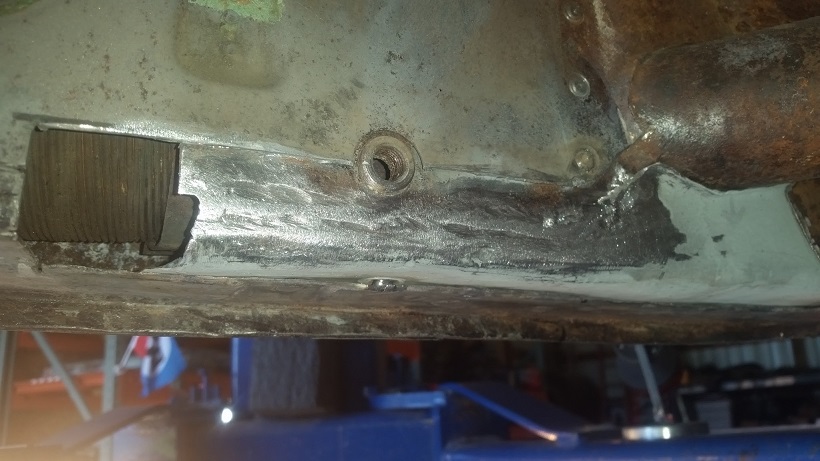 Then into the long and begin the slow and patient plug welding routine. I did turn up the heat a bit and let off the trigger a little sooner. Seemed to help. This shot is before any grinding on the plug welds. 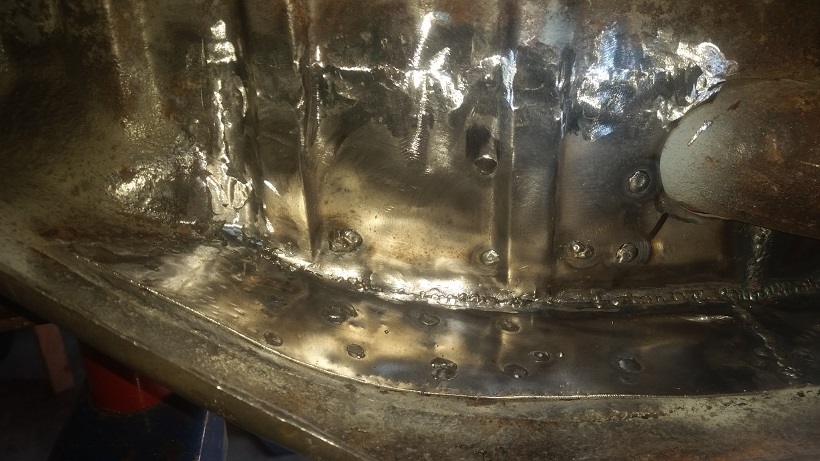 Outside patch is just about ready to go. Just a little trimming. 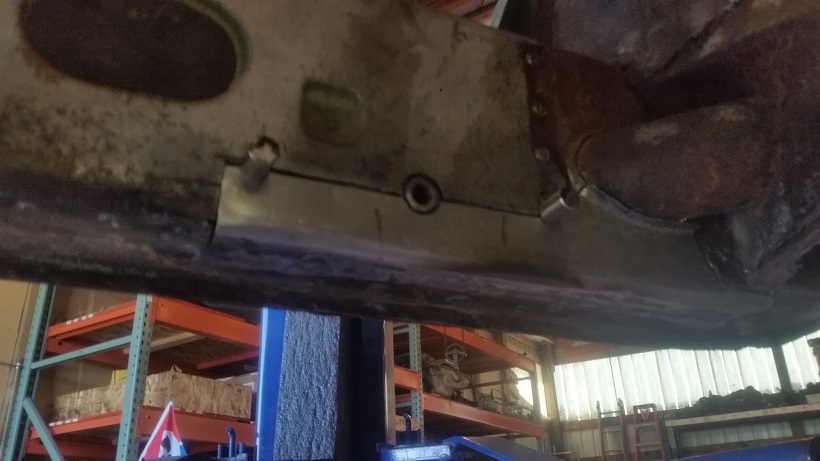 |
| cary |
 Apr 8 2016, 08:29 AM Apr 8 2016, 08:29 AM
Post
#154
|
|
Advanced Member     Group: Members Posts: 3,900 Joined: 26-January 04 From: Sherwood Oregon Member No.: 1,608 Region Association: Pacific Northwest 
|
I'm switching cameras today. I'm not digging the camera on the phone, bringing my point and shoot. Better close ups and hopefully better with the back light coming in from outside.
Matt (Mark's brother) from 914 Rubber brought a 1.7 D-Jet system over for me to bench test the components. I'll start with the MPS and see what he has. Might be calling Chris for a volume discount on MPS stop screws and diaphragm kits. |
| raynekat |
 Apr 8 2016, 12:44 PM Apr 8 2016, 12:44 PM
Post
#155
|
|
Advanced Member     Group: Members Posts: 2,167 Joined: 30-December 14 From: Coeur d'Alene, Idaho Member No.: 18,263 Region Association: Pacific Northwest 
|
|
| cary |
 Apr 8 2016, 02:19 PM Apr 8 2016, 02:19 PM
Post
#156
|
|
Advanced Member     Group: Members Posts: 3,900 Joined: 26-January 04 From: Sherwood Oregon Member No.: 1,608 Region Association: Pacific Northwest 
|
I'll drink a beer in your honor Thursday night.
(IMG:style_emoticons/default/beer3.gif) |
| cary |
 Apr 8 2016, 10:05 PM Apr 8 2016, 10:05 PM
Post
#157
|
|
Advanced Member     Group: Members Posts: 3,900 Joined: 26-January 04 From: Sherwood Oregon Member No.: 1,608 Region Association: Pacific Northwest 
|
Finished up the outer long patch before lunch. I'm trying the hotter faster plug welds. It seems to be working. Only thing to add, make sure you get the hole completely filled on the first shot. Coming back to fill them in leads to a pile up.
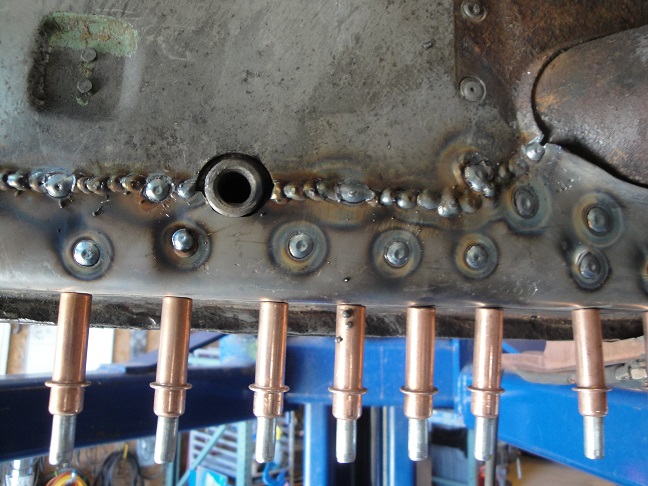 All finished up. Pushed it a little on the heat a couple times. One must remember, slow down the go fast. If you let the heat build up you blow nice big holes. (IMG:style_emoticons/default/sad.gif) 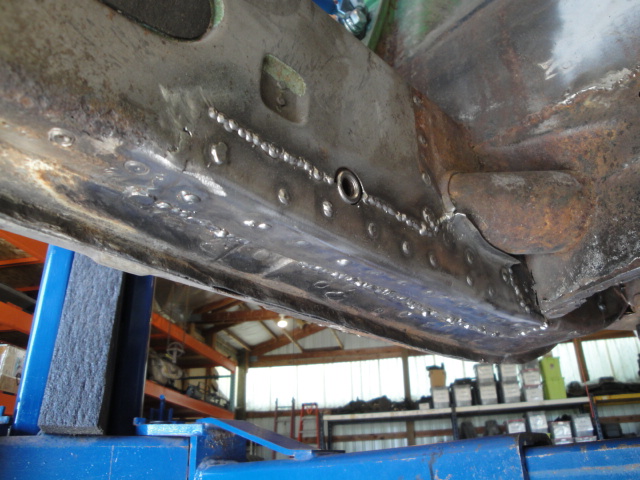 Ground down and brushed up ............. 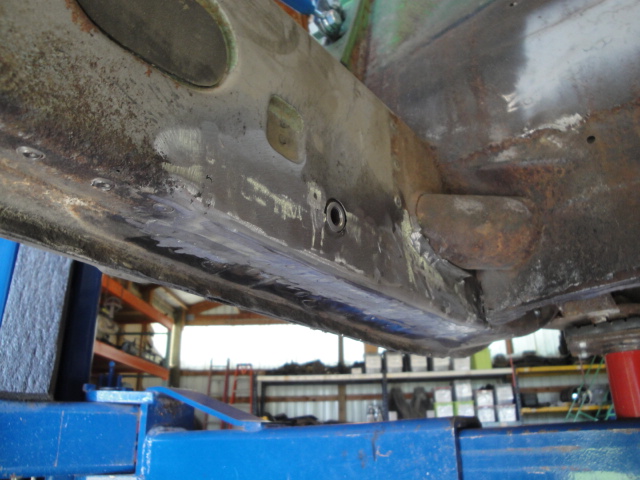 Paint job. SE Primer. 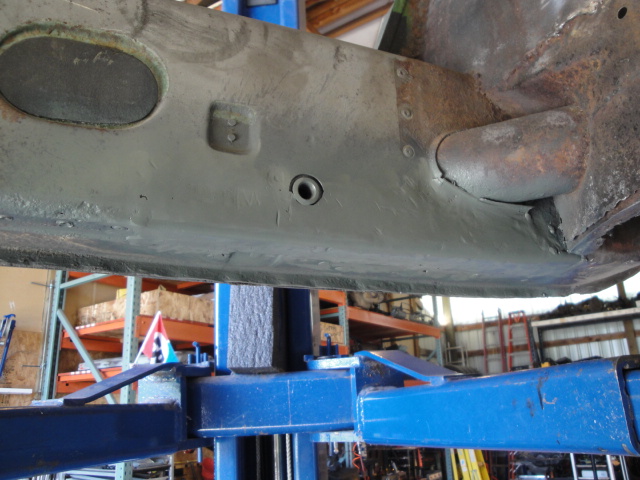 Note: right corner next to firewall not completely finished. That portion of the firewall might be coming off. Attached image(s) 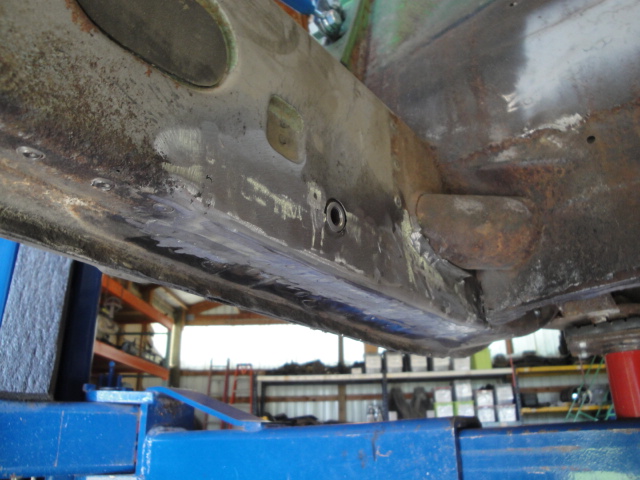
|
| cary |
 Apr 8 2016, 10:26 PM Apr 8 2016, 10:26 PM
Post
#158
|
|
Advanced Member     Group: Members Posts: 3,900 Joined: 26-January 04 From: Sherwood Oregon Member No.: 1,608 Region Association: Pacific Northwest 
|
Spent the afternoon putting Mark's car on the frame bench. Primarily so I can work on my 73 DD. But we're thinking we'll take a break and build some fixtures.
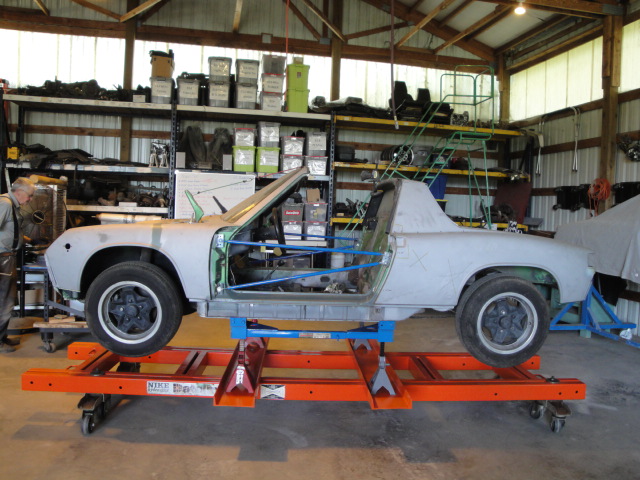 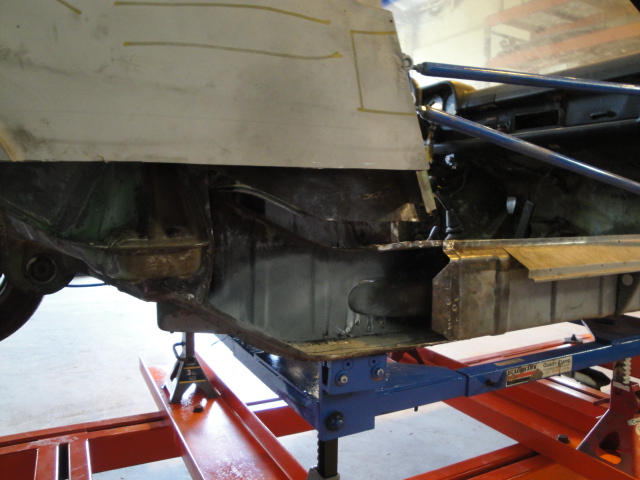 Primarily I'm thinking a pair for the transmission mounts. A left side 3/4 for the rear suspension. Mine won't need to be anywhere near as stout as the Celette. I'm not going to be doing any frame pulling. Just R & R rusty panels. 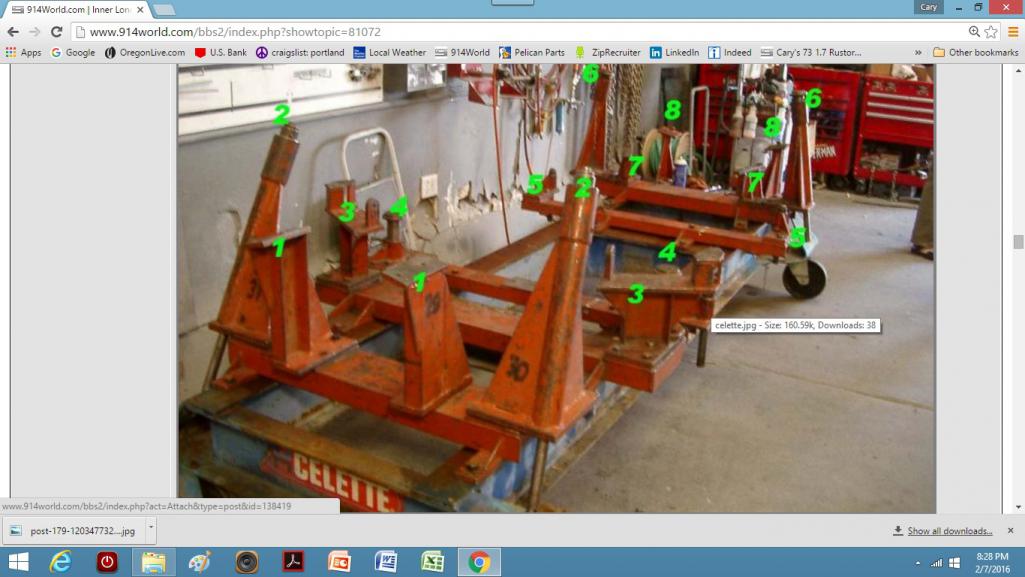 But I want to start with four of these to replace the jack stands and pinch weld frame. 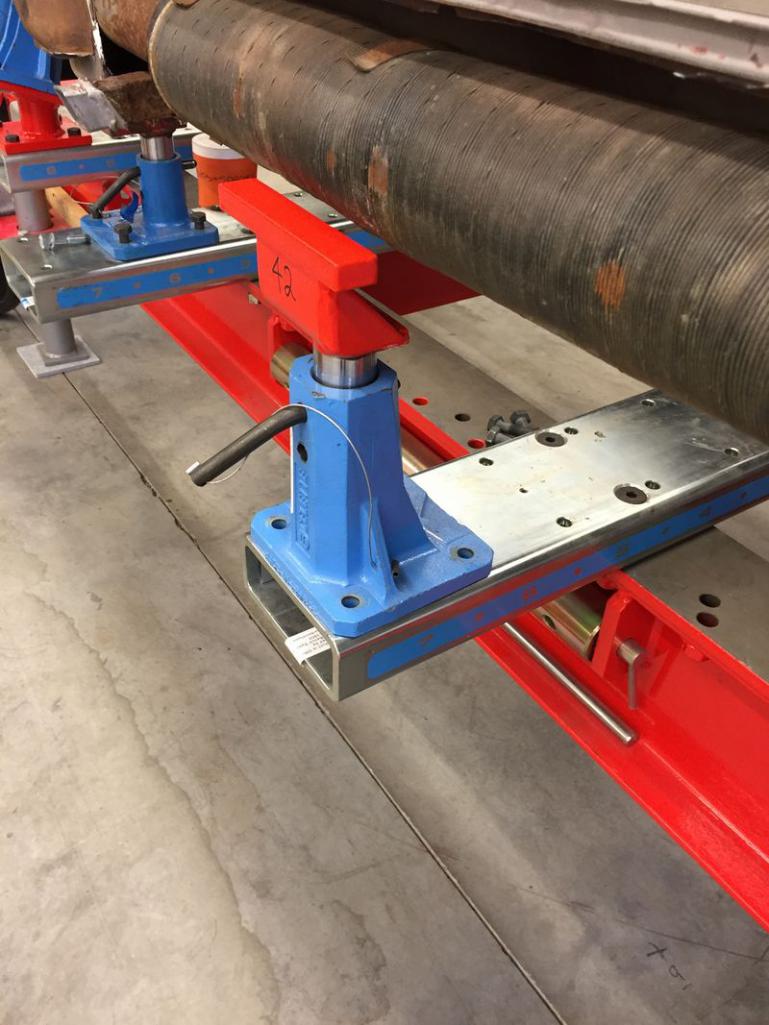 The fixture building will be documented on my rustoration thread. http://www.914world.com/bbs2/index.php?sho...7546&st=720 |
| mb911 |
 Apr 9 2016, 05:01 AM Apr 9 2016, 05:01 AM
Post
#159
|
|
914 Guru      Group: Members Posts: 7,426 Joined: 2-January 09 From: Burlington wi Member No.: 9,892 Region Association: Upper MidWest 
|
You guys are doing great work. One question regarding all your plug welds.. Are you making your patches to overlay the damaged/rusted area and then plug welding to that area or are you butt welding. I just noticed all of rosettes and was wandering if those are overlays?
I am doing my rusteration similar in quantity to you and doing all butt welds to avoid the potential for rust in the future. I am just curious..keep up the great work.. It keeps me motivated. |
| cary |
 Apr 9 2016, 05:22 AM Apr 9 2016, 05:22 AM
Post
#160
|
|
Advanced Member     Group: Members Posts: 3,900 Joined: 26-January 04 From: Sherwood Oregon Member No.: 1,608 Region Association: Pacific Northwest 
|
Patch panels are all butt/seam welded around the edges. The plug welds are for strength. Everything that is to be covered is painted with weld thru primer. Hopefully that will prevent future rust. Time will tell. These had nothing before. Just raw steel.
|
  |
1 User(s) are reading this topic (1 Guests and 0 Anonymous Users)
0 Members:

|
Lo-Fi Version | Time is now: 18th January 2025 - 11:13 PM |
Invision Power Board
v9.1.4 © 2025 IPS, Inc.


