|
|

|
Porsche, and the Porsche crest are registered trademarks of Dr. Ing. h.c. F. Porsche AG.
This site is not affiliated with Porsche in any way. Its only purpose is to provide an online forum for car enthusiasts. All other trademarks are property of their respective owners. |
|
|
  |
| cary |
 Apr 9 2016, 09:31 AM Apr 9 2016, 09:31 AM
Post
#161
|
|
Advanced Member     Group: Members Posts: 3,900 Joined: 26-January 04 From: Sherwood Oregon Member No.: 1,608 Region Association: Pacific Northwest 
|
Quit your day job. I've given it some thought. But is there enough work out there to keep me busy? Mark thinks so ............ Biggest thing is the additional tools/equipment that I'd like to have to make myself more efficient. And how many folks want to bring the car to a shop that doesn't paint? I do plan to make arrangements to spray the project with epoxy primer before they head home. Plus I'll have the ability to pick up and deliver. Open and enclosed trailer. * 22 cfm compressor (replacement) $2500, must have * additional air drying system components $1000 * additional lift $3000, multiple projects, plus Dad's garage has 24 HR service * * Texas blaster $800, step up from the Harbor Freight unit * TIG welder $1500 * Additional 140 amp Miller welder $1000 * 48" powder coating oven $3500, for suspension pieces * pallet stacker, for heavy lifting I'm having discussions this week with a couple different folks about Porsche restoration work. But both of these shops are way beyond the scope $$ of doing DD 914 work. I'm also looking at another job that could become a 3 1/2 day a week commission sales job. It feels like my sabbatical might be coming to an end. (IMG:style_emoticons/default/hissyfit.gif) |
| cary |
 Apr 9 2016, 05:28 PM Apr 9 2016, 05:28 PM
Post
#162
|
|
Advanced Member     Group: Members Posts: 3,900 Joined: 26-January 04 From: Sherwood Oregon Member No.: 1,608 Region Association: Pacific Northwest 
|
While I was working on my DD I thought I'd prep the right door sill portion for reattachment.
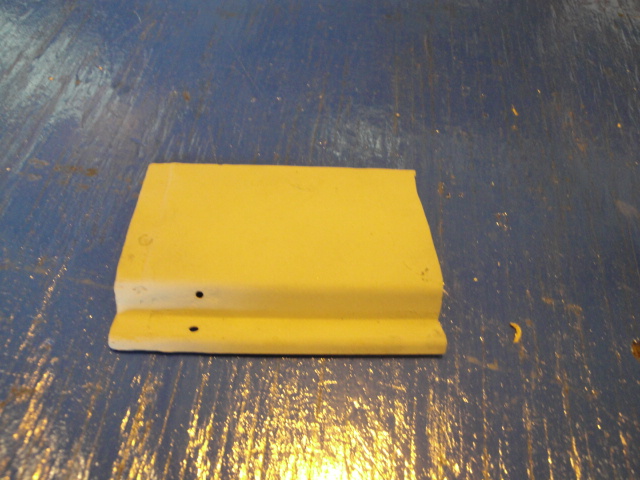 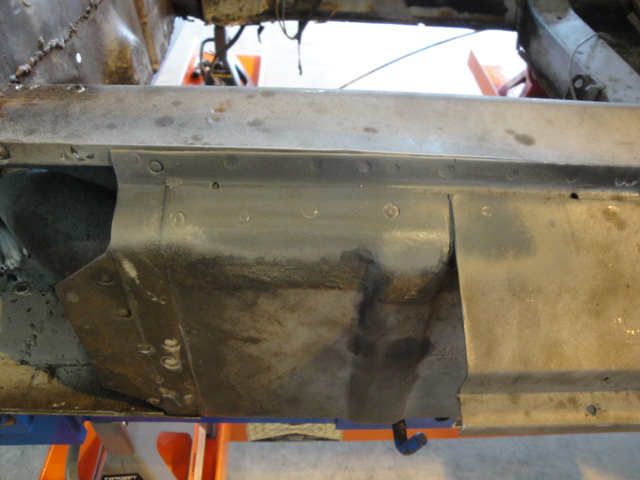 |
| cary |
 Apr 11 2016, 09:29 PM Apr 11 2016, 09:29 PM
Post
#163
|
|
Advanced Member     Group: Members Posts: 3,900 Joined: 26-January 04 From: Sherwood Oregon Member No.: 1,608 Region Association: Pacific Northwest 
|
Mark dropped his blue 2.0L off for a little TLC before WCR.
It's sitting under the yellow parts car I'll add a couple shots tomorrow. It kind of looks like a 914 workshop. 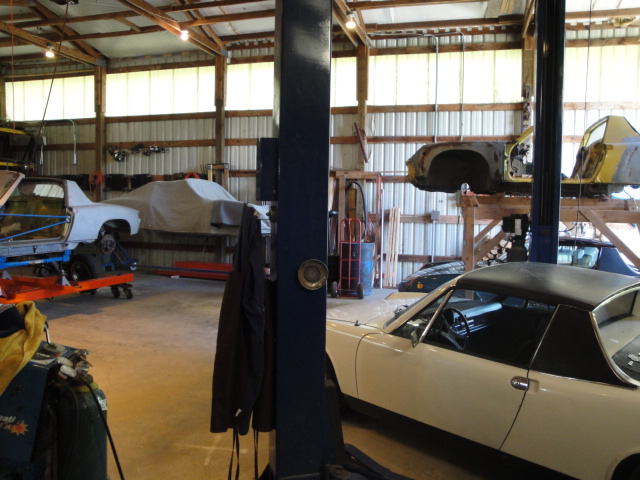 |
| cary |
 Apr 11 2016, 09:57 PM Apr 11 2016, 09:57 PM
Post
#164
|
|
Advanced Member     Group: Members Posts: 3,900 Joined: 26-January 04 From: Sherwood Oregon Member No.: 1,608 Region Association: Pacific Northwest 
|
Here's the original work-list.
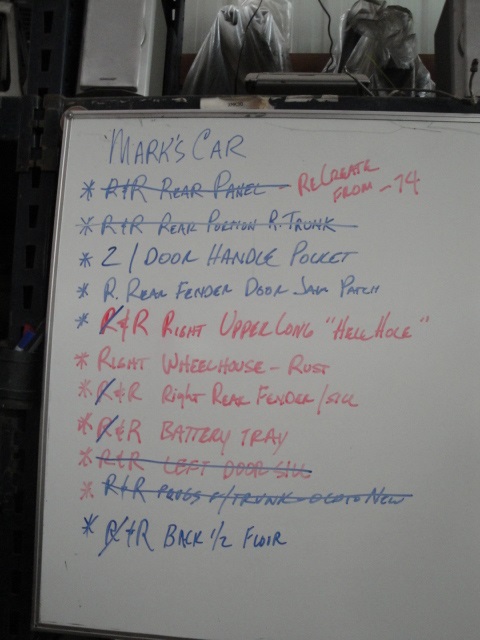 |
| cary |
 Apr 17 2016, 07:25 AM Apr 17 2016, 07:25 AM
Post
#165
|
|
Advanced Member     Group: Members Posts: 3,900 Joined: 26-January 04 From: Sherwood Oregon Member No.: 1,608 Region Association: Pacific Northwest 
|
I've given it some thought. But is there enough work out there to keep me busy? Mark thinks so ............ I'm having discussions this week with a couple different folks about Porsche restoration work. But both of these shops are way beyond the scope $$ of doing DD 914 work. Both conversations went well. Then I go to my own shop and the 914's. (IMG:style_emoticons/default/biggrin.gif) (IMG:style_emoticons/default/biggrin.gif) I really want to help keep/put as many of these cars on the road that I can. I thinking I'll see if three 10 hour days is an option at either one of these shops. That would leave me 2-3 for 914 Restoration. PM me if you might have some work that needs to be done. It will be a bit before I take on any more projects. Lock down business name, incorporate, insurance, etc............. |
| cary |
 Apr 17 2016, 08:11 AM Apr 17 2016, 08:11 AM
Post
#166
|
|
Advanced Member     Group: Members Posts: 3,900 Joined: 26-January 04 From: Sherwood Oregon Member No.: 1,608 Region Association: Pacific Northwest 
|
As work/design continues on the frame bench fixtures.
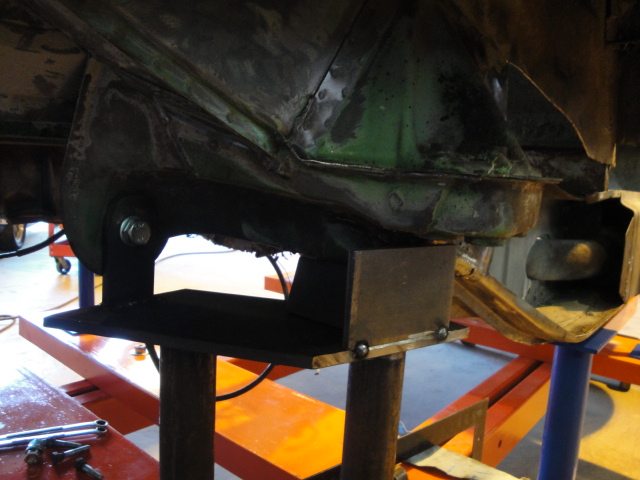 This is where we ended Saturday evening. I'll call this Version 1. Bought the longest 10mm bolts Ace had. But still an inch short of what would have been needed to build in the longer box end version, like Celette. I decided that I'd pull the outer suspension mount off of the remainder of the driver's long that I bought from Perry. 1. Remind myself where all the spots welds are. Tough duty when everything gets covered and welded over with the tie plates. I'll shoot pictures of the spot weld drill outs for future reference. 2. How to cut out/off the wheelhouse with the least amount of carnage. 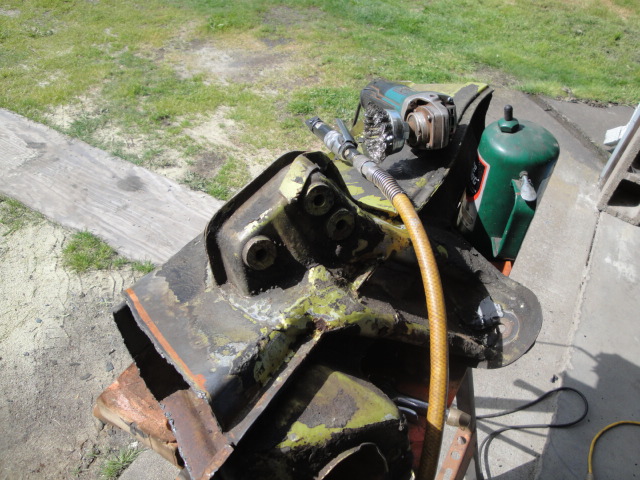 Lots of delicate cutting disk work to remove the ties without damaging the mount. Used both the 4 1/2" electric and the die grinder on the mandrel. You can see the mount under the cut out tie. 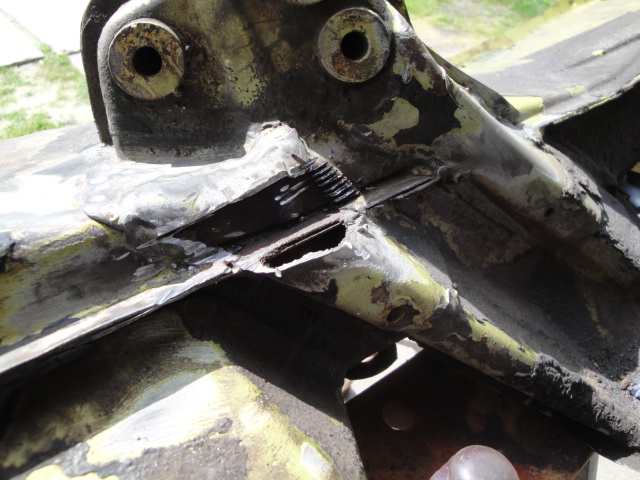 Here's the money cut on this job. Basically make a plunge cut to get the sawsall access. When going thru the ties. Let the tool do the work. Don't push too hard. All it will do is wear out the blade. Do as I say, not as I do. LOL. 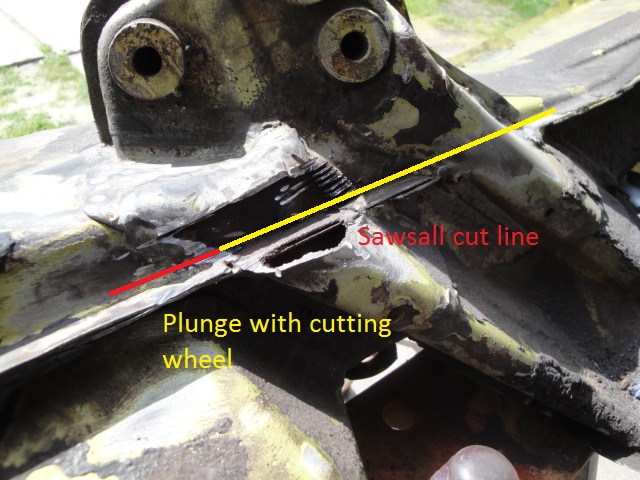 After a couple hours in the vice. 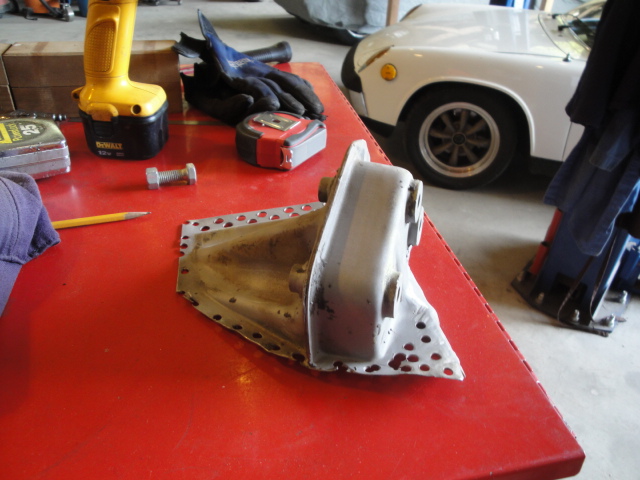 |
| cary |
 Apr 18 2016, 09:52 PM Apr 18 2016, 09:52 PM
Post
#167
|
|
Advanced Member     Group: Members Posts: 3,900 Joined: 26-January 04 From: Sherwood Oregon Member No.: 1,608 Region Association: Pacific Northwest 
|
So back to work ..................
Installed the trimmed portion of the right sill that needed to be removed to get the wheelhouse cut out. 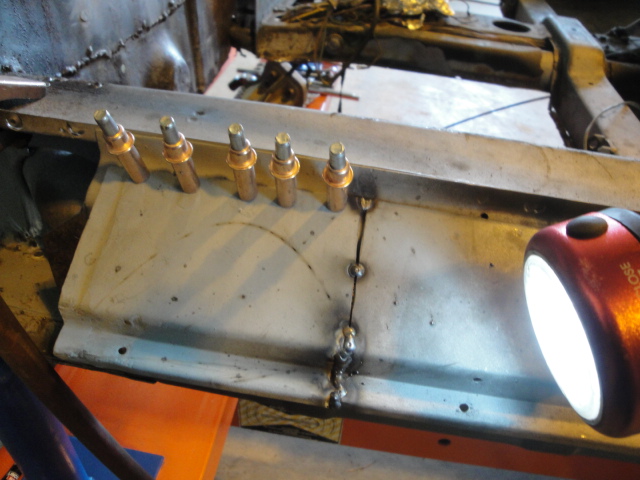 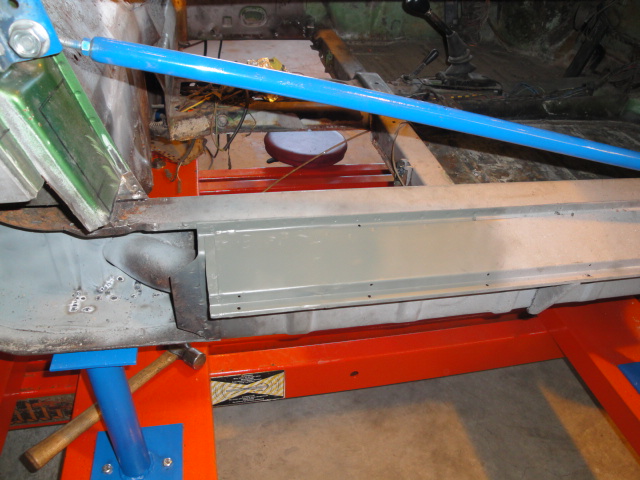 Then on to working on the crater under the right door handle. I looks like they pounded it in with a hammer. (IMG:style_emoticons/default/ar15.gif) Couldn't move it much with a hammer and dolly. (IMG:style_emoticons/default/sad.gif) It's tied into the firm edge of the door handle pocket. Broke out the stud weld gun. But it wouldn't work ............ Headed home ................... (IMG:style_emoticons/default/beer3.gif) (IMG:style_emoticons/default/beer3.gif) 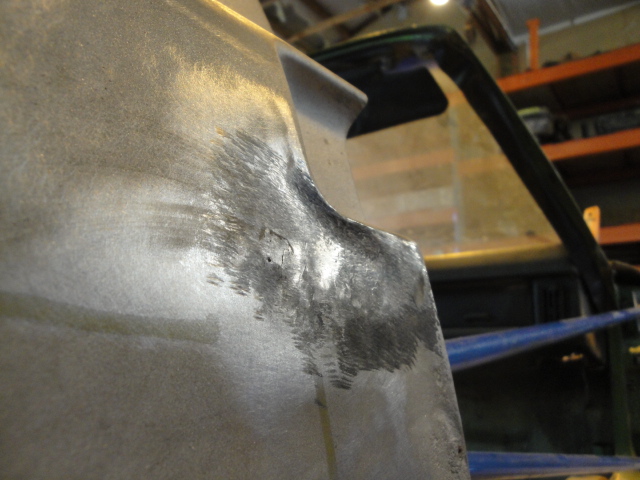 |
| cary |
 Apr 19 2016, 11:05 PM Apr 19 2016, 11:05 PM
Post
#168
|
|
Advanced Member     Group: Members Posts: 3,900 Joined: 26-January 04 From: Sherwood Oregon Member No.: 1,608 Region Association: Pacific Northwest 
|
So we stopped at HF and picked up a new stud welder. Took the extended warranty for $13.
Got right to work. This might become my new favorite tool. 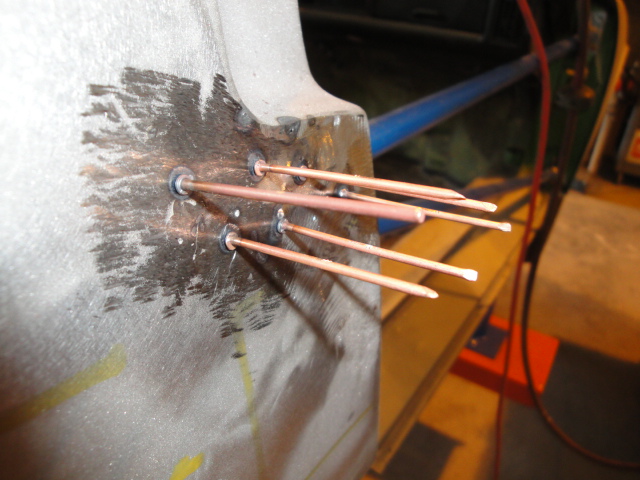 Went to the tail panel and pulled the little dent behind the latch brace that I couldn't get to with a hammer and dolly. 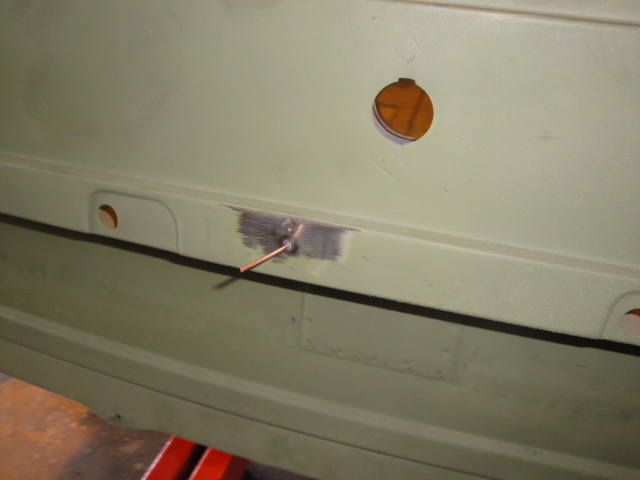 While I'm doing this on the project car. The blue car is running on the lift to warm/heat up and check for oil leaks. 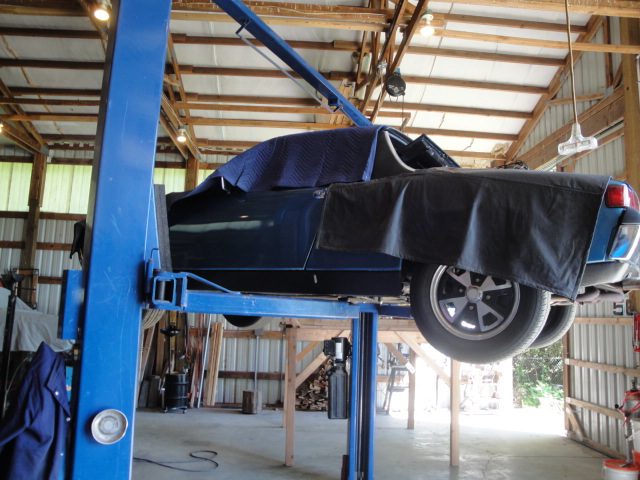 |
| cary |
 Apr 19 2016, 11:08 PM Apr 19 2016, 11:08 PM
Post
#169
|
|
Advanced Member     Group: Members Posts: 3,900 Joined: 26-January 04 From: Sherwood Oregon Member No.: 1,608 Region Association: Pacific Northwest 
|
Got the majority of the door handle crater pulled out. Then I moved on to the rotten section under the door handle.
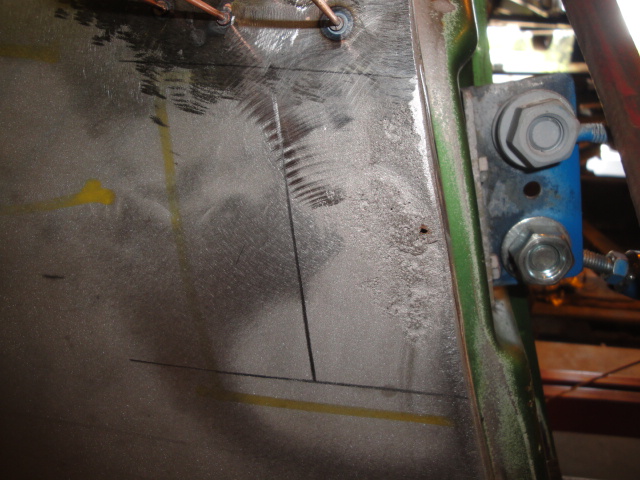 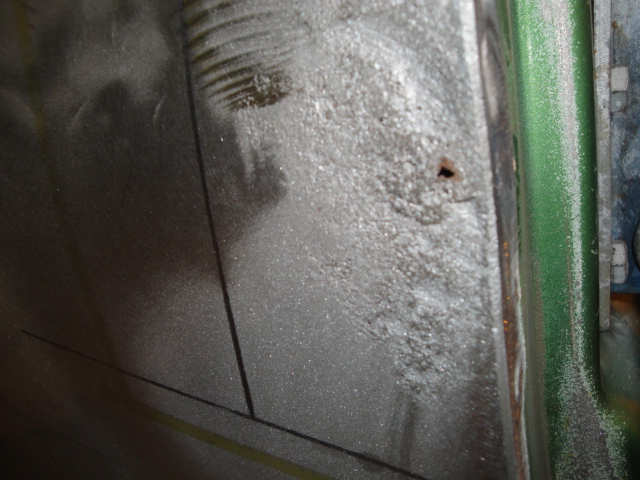 Here's what I found after I cut out the rotten section. 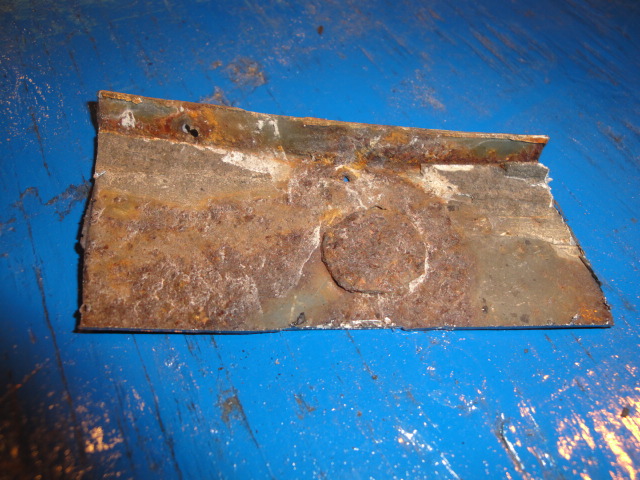 |
| cary |
 Apr 19 2016, 11:36 PM Apr 19 2016, 11:36 PM
Post
#170
|
|
Advanced Member     Group: Members Posts: 3,900 Joined: 26-January 04 From: Sherwood Oregon Member No.: 1,608 Region Association: Pacific Northwest 
|
Fitting the new piece ...............
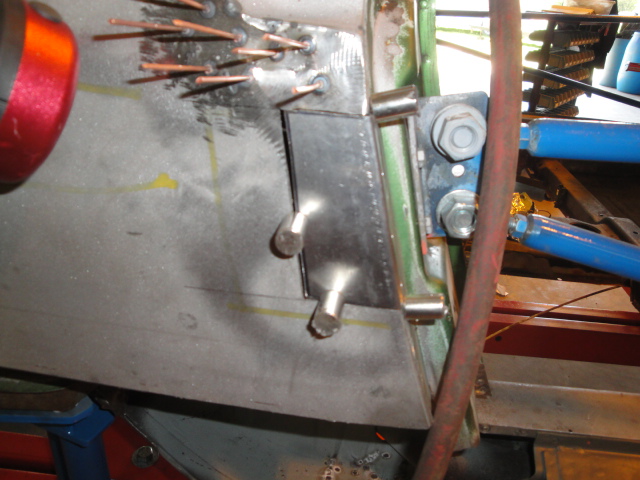 Then the fun began. Not only is the door jam arced/bowed. The qtr. panel has a bow/crown in it also. Both about this shape. 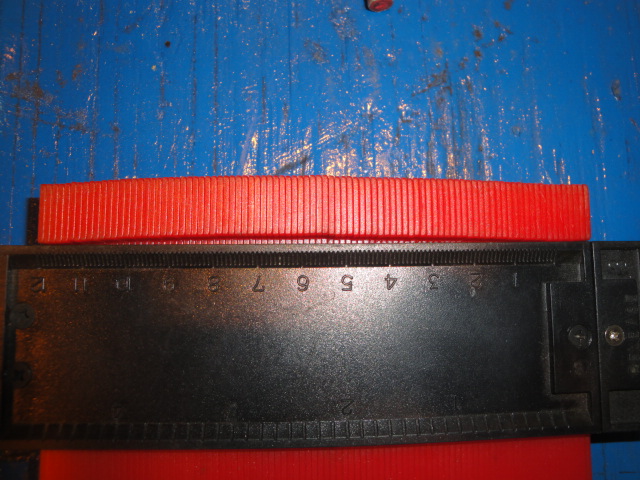 Here's the bow in the panel fitting to the needle gauge. 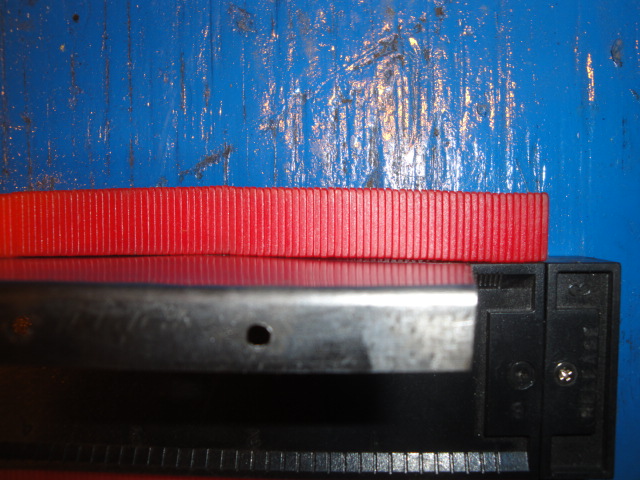 That was crudely done with the beater bag. I once asked myself why would I ever need an English wheel. Today was the day. In she goes ............... 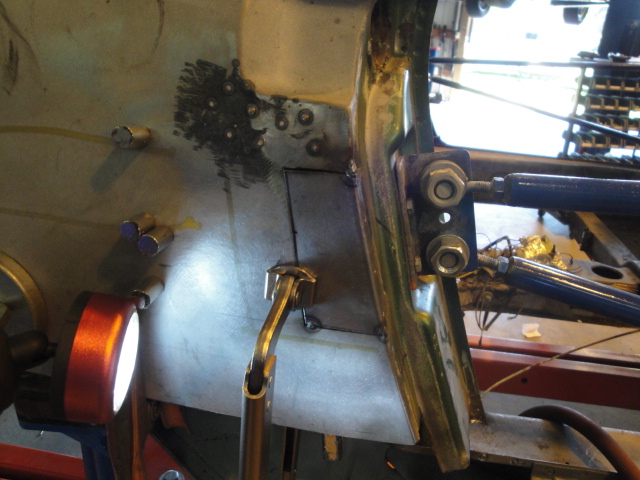 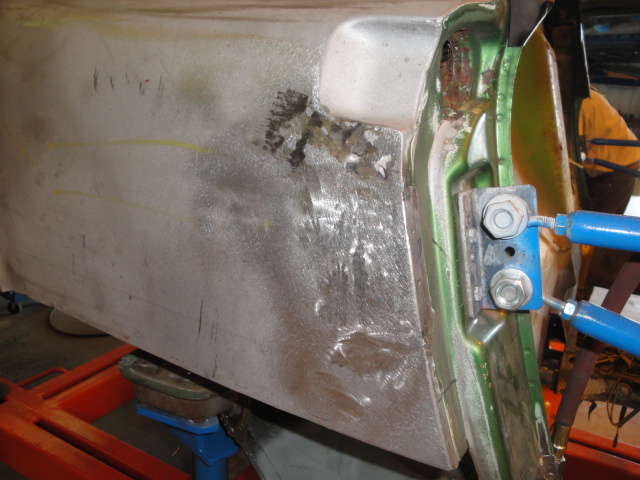 Door jam isn't welded in yet. Need to hammer in a little bit more bow. And there is a lot of metal yet to be moved on the qtr. panel. Tomorrow I'll be dropping the engine in the blue car and continue the research on the oil leaks. 1. Crank seal 2. Flywheel seal 3. Galley Plugs, hope not. 4. Push rod tube, one of #4's needs new seals. 5. Oil Cooler seals. I doubt it. But it is missing the side bolt that keeps it in place. I can see oil coming out between the halves of the fan housing. Not a lot. In two hours of idling on the rack nothing hit the ground. |
| cary |
 Apr 21 2016, 08:52 AM Apr 21 2016, 08:52 AM
Post
#171
|
|
Advanced Member     Group: Members Posts: 3,900 Joined: 26-January 04 From: Sherwood Oregon Member No.: 1,608 Region Association: Pacific Northwest 
|
When we returned to the shop I did have an oil spot under the engine/transmission union. So out she came.
Diagnosis : 1. No O-ring flywheel seal 2. Top of oil pressure switch leaking 3. Seal under oil filler/vent box So the question is, do we replace the crank seal behind the flywheel while we're in there? Looks to be Elring. I have a Sabo coming from GPR. The rear trunk will come off today. Right hinge bracket has come loose. We'll see if it can be reused. Engine lid needs some tension attention. 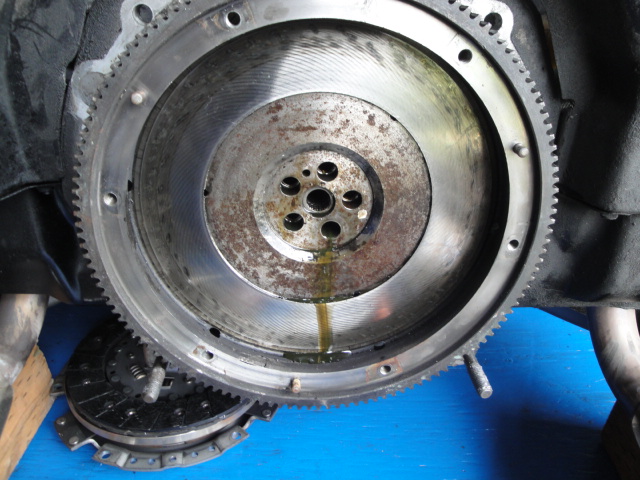 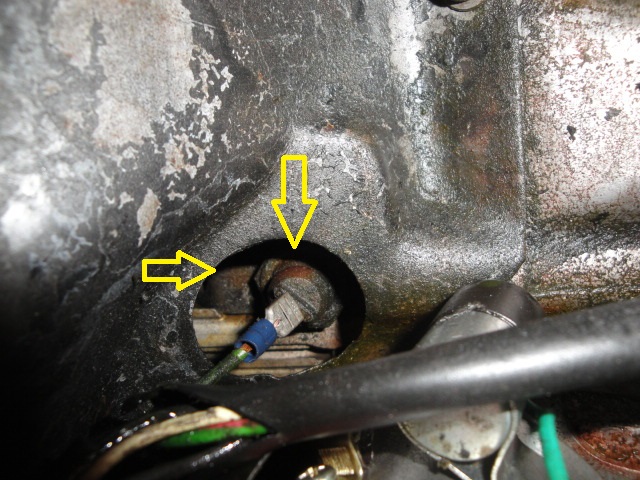 Arrows indicate the location of the oil dye. Flywheel is on its last turning. Shaved bolts. But clutch looks to be in good order. No sign of oil saturation. I'll put Super In Law on the clicking drivers door hinge. Everything in the door strap looks to be new. Hole on door side pin holder is wallered out. Our usual course of action is using the biggest bolt the new strap will take. And some mini bushing from something we dig up out of the little drawers at ACE hardware. I've yet to see a right angle adapter small enough that would let you weld in the holes and re-drill them. But its been a long time since I've looked. |
| Mikey914 |
 Apr 21 2016, 09:19 AM Apr 21 2016, 09:19 AM
Post
#172
|
|
The rubber man           Group: Members Posts: 12,742 Joined: 27-December 04 From: Hillsboro, OR Member No.: 3,348 Region Association: None 
|
Looks like I may have to make some pins for the door straps? One more part I haven't made yet.
|
| cary |
 Apr 21 2016, 09:32 AM Apr 21 2016, 09:32 AM
Post
#173
|
|
Advanced Member     Group: Members Posts: 3,900 Joined: 26-January 04 From: Sherwood Oregon Member No.: 1,608 Region Association: Pacific Northwest 
|
We need is someone with a NOS door hinge post to give us the original ID on the hole?
Or in MacGyver fashion. Because you've made the door strap so reasonably priced. You measure the hole. Make multiple sizes of the pins. Then re-drill the strap to fit the hole you have. Not CW, but it would get rid of the clicking. PET says Cotter Pin 1, 5 * 10. |
| cary |
 Apr 21 2016, 09:52 PM Apr 21 2016, 09:52 PM
Post
#174
|
|
Advanced Member     Group: Members Posts: 3,900 Joined: 26-January 04 From: Sherwood Oregon Member No.: 1,608 Region Association: Pacific Northwest 
|
We need is someone with a NOS door hinge post to give us the original ID on the hole? Or in MacGyver fashion. Because you've made the door strap so reasonably priced. You measure the hole. Make multiple sizes of the pins. Then re-drill the strap to fit the hole you have. Not CW, but it would get rid of the clicking. PET says Cotter Pin 1, 5 * 10. I used a new 6mm bolt and it's better. But I'll stop and ACE and get a 7mm and it will be perfect. |
| cary |
 Apr 21 2016, 10:06 PM Apr 21 2016, 10:06 PM
Post
#175
|
|
Advanced Member     Group: Members Posts: 3,900 Joined: 26-January 04 From: Sherwood Oregon Member No.: 1,608 Region Association: Pacific Northwest 
|
Decided the engine needed a bath before it gets its valve adjustment.
Steam cleaner came back to life without any issues after its long winters nap. 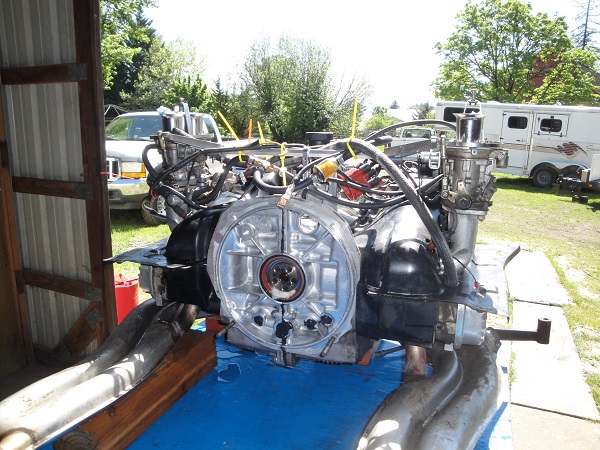 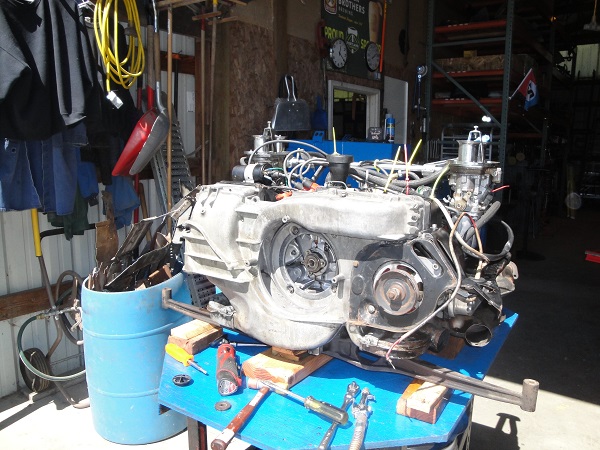 Having never worked on a carbed 914. I have a question about the plug wires. I'm not digging the way the plug wires line up with throttle linkage. Do they make a 914 plug wire set with an angled connector? Back in my youth I help build and maintain SCCA Pro Rally cars. This looks like a recipe for disaster. I'm firm believer of, whatever can go wrong, will go wrong. 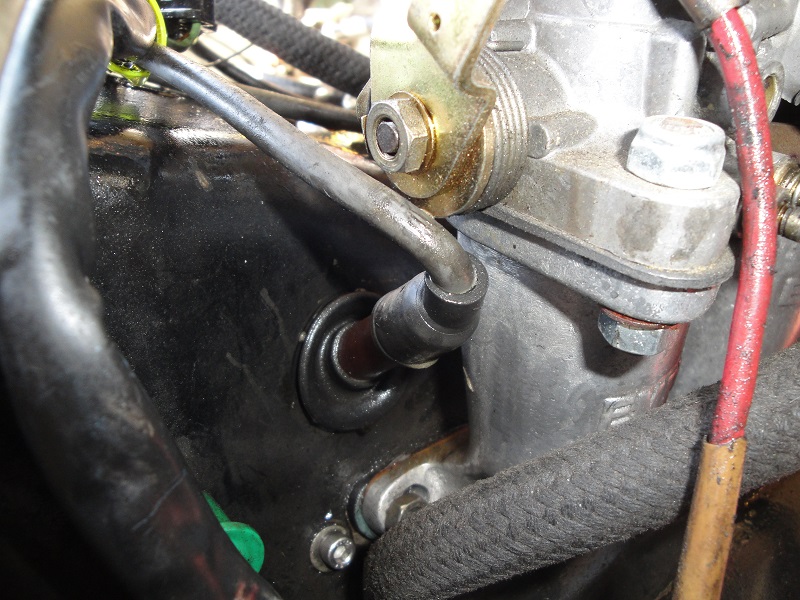 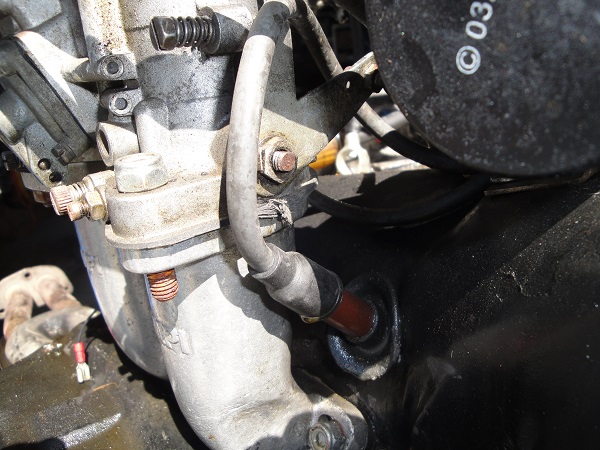 |
| cary |
 Apr 21 2016, 10:29 PM Apr 21 2016, 10:29 PM
Post
#176
|
|
Advanced Member     Group: Members Posts: 3,900 Joined: 26-January 04 From: Sherwood Oregon Member No.: 1,608 Region Association: Pacific Northwest 
|
Then on to the trunk hinge.
Not good. Needless to say, not reusable. 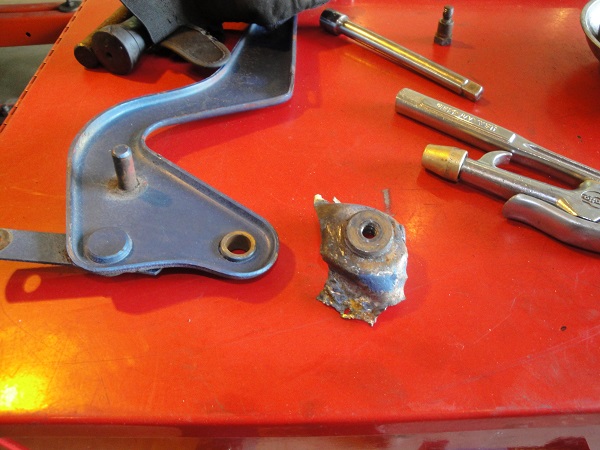 Based on what I see. This will be hinge #3. 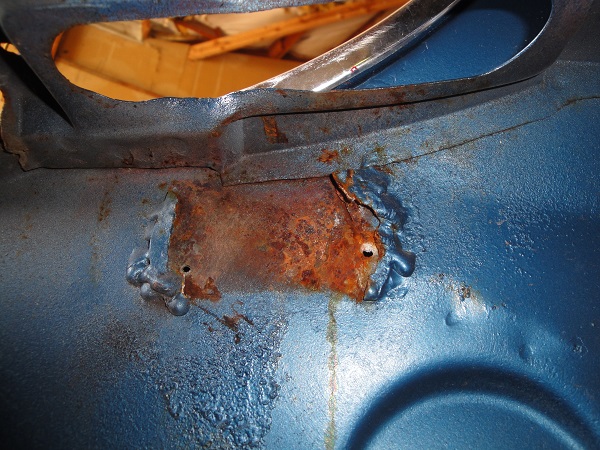 Old welds removed. But after the grinding was done I did a little poking around. Marked area will receive a patch on Monday. 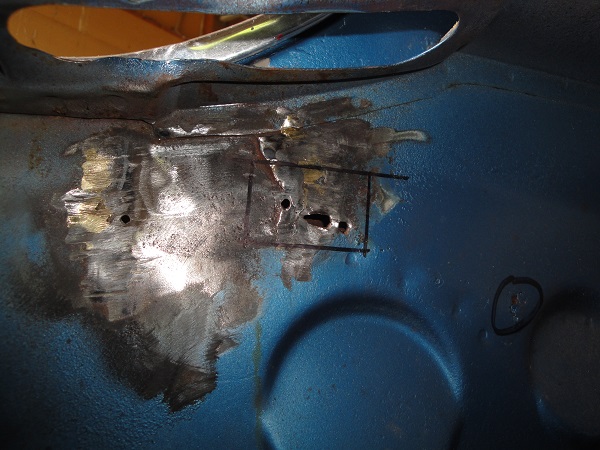 I was thinking with no visible rust under the sail panel vinyl it seems odd I would be rusting out here. So I decided to remove the tire and look up into the fender well. Looks like the end of the inner sail panel support got ate by the rust worm. 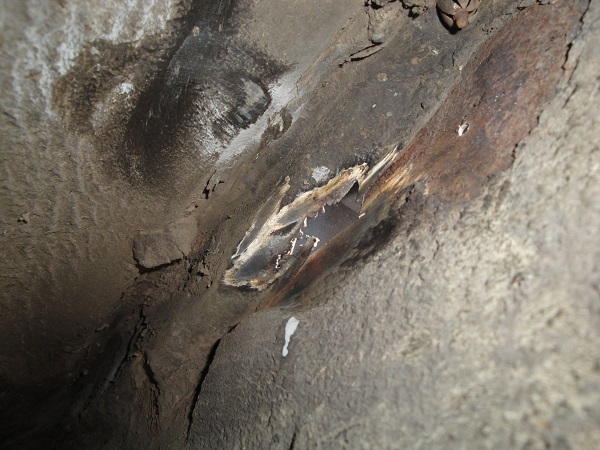 Not exactly part of the scope of work on this car. I'll patch the inner hole and aggressively seam seal the rotten section to keep water and debris out. Then Mark can install some of his fender liners for added protection. Edited : 4/21/16 I think its the tail end of the circled area. I'll flip over my rustoration to confirm. 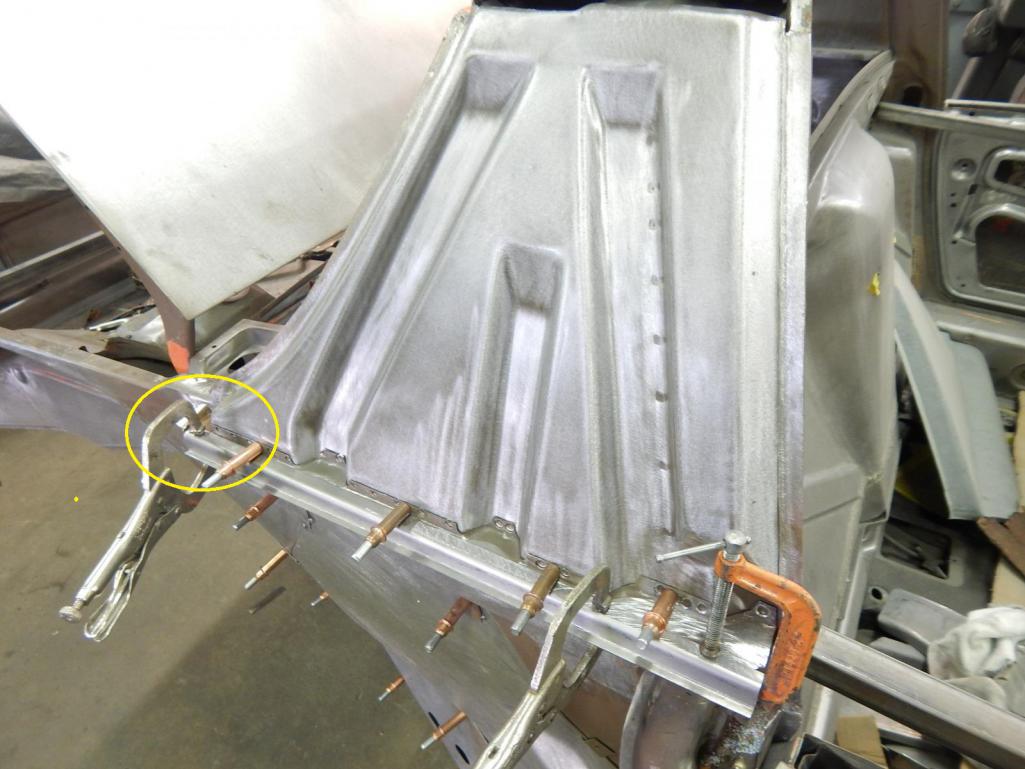 I love this picture. The craftsmanship is stunning. Hope to get close some day. The Metal Surgeon Lights out and heading home. Spending the weekend in The Dalles to watch the Oregon Trail Rally. I'll be driving my white 73 if anyone else is going. 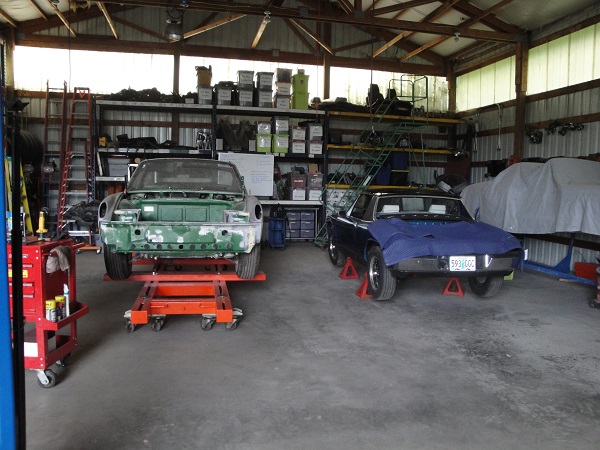 |
| 76-914 |
 Apr 22 2016, 08:48 AM Apr 22 2016, 08:48 AM
Post
#177
|
|
Repeat Offender & Resident Subaru Antagonist           Group: Members Posts: 13,657 Joined: 23-January 09 From: Temecula, CA Member No.: 9,964 Region Association: Southern California 
|
We need is someone with a NOS door hinge post to give us the original ID on the hole? Or in MacGyver fashion. Because you've made the door strap so reasonably priced. You measure the hole. Make multiple sizes of the pins. Then re-drill the strap to fit the hole you have. Not CW, but it would get rid of the clicking. PET says Cotter Pin 1, 5 * 10. I used a new 6mm bolt and it's better. But I'll stop and ACE and get a 7mm and it will be perfect. I'd like to see some pic's of this repair if you have them. (IMG:style_emoticons/default/beerchug.gif) Kent |
| cary |
 Apr 22 2016, 09:31 AM Apr 22 2016, 09:31 AM
Post
#178
|
|
Advanced Member     Group: Members Posts: 3,900 Joined: 26-January 04 From: Sherwood Oregon Member No.: 1,608 Region Association: Pacific Northwest 
|
I'll shoot a picture on Monday.
Nothing fancy. Just a 6mm * 20 bolt and a Nylock nut. With the door frame wallered out to 7mm I'll drill out the strap to match. Tension the nut just enough that it doesn't bind up. This will keep it from jumping up. |
| cary |
 Apr 22 2016, 02:29 PM Apr 22 2016, 02:29 PM
Post
#179
|
|
Advanced Member     Group: Members Posts: 3,900 Joined: 26-January 04 From: Sherwood Oregon Member No.: 1,608 Region Association: Pacific Northwest 
|
Forgot, I have bolts and nuts on both sides in my white car.
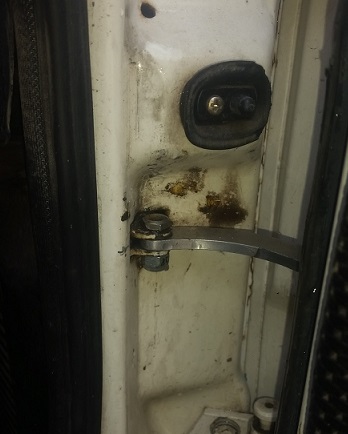 Not CW, but they look pretty sanitary. |
| injunmort |
 Apr 22 2016, 02:59 PM Apr 22 2016, 02:59 PM
Post
#180
|
|
Senior Member    Group: Members Posts: 1,024 Joined: 12-April 10 From: sugarloaf ny Member No.: 11,604 Region Association: North East States |
i got a set of beru plug wires from parts geek that have short caps that don't interfere with the carbs. they were pretty cheap too, i think like $25.00.
|
  |
4 User(s) are reading this topic (4 Guests and 0 Anonymous Users)
0 Members:

|
Lo-Fi Version | Time is now: 18th January 2025 - 08:42 PM |
Invision Power Board
v9.1.4 © 2025 IPS, Inc.


