|
|

|
Porsche, and the Porsche crest are registered trademarks of Dr. Ing. h.c. F. Porsche AG.
This site is not affiliated with Porsche in any way. Its only purpose is to provide an online forum for car enthusiasts. All other trademarks are property of their respective owners. |
|
|
  |
| cary |
 Apr 22 2016, 03:02 PM Apr 22 2016, 03:02 PM
Post
#181
|
|
Advanced Member     Group: Members Posts: 3,900 Joined: 26-January 04 From: Sherwood Oregon Member No.: 1,608 Region Association: Pacific Northwest 
|
I see Mark's on right now. I'll let him take look and make a decision.
|
| cary |
 Apr 22 2016, 03:18 PM Apr 22 2016, 03:18 PM
Post
#182
|
|
Advanced Member     Group: Members Posts: 3,900 Joined: 26-January 04 From: Sherwood Oregon Member No.: 1,608 Region Association: Pacific Northwest 
|
Nice catch ........... Those look great.
Gets rid of the two long/tall ones. 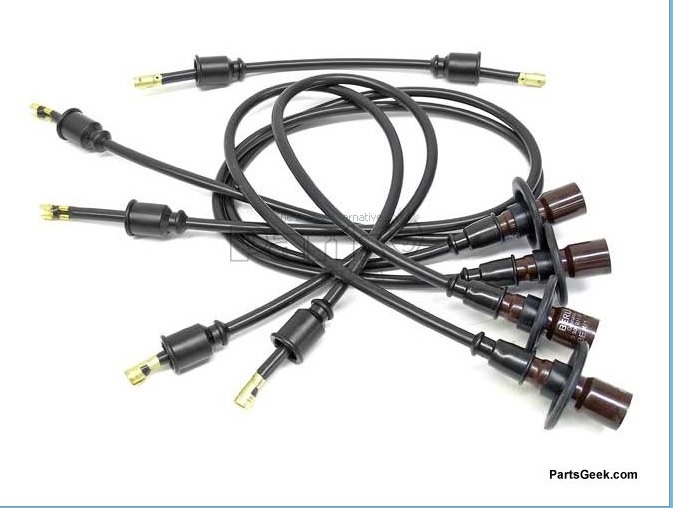 KUDO's to Brian at GPR. Box with seals and oil filter just showed up. Ordered on Wednesday, arrived Friday. (IMG:style_emoticons/default/biggrin.gif) |
| 76-914 |
 Apr 22 2016, 03:27 PM Apr 22 2016, 03:27 PM
Post
#183
|
|
Repeat Offender & Resident Subaru Antagonist           Group: Members Posts: 13,657 Joined: 23-January 09 From: Temecula, CA Member No.: 9,964 Region Association: Southern California 
|
Forgot, I have bolts and nuts on both sides in my white car. Not CW, but they look pretty sanitary. I got it. Wasn't paying enough attention. I thought you were talking about the door hinge pin where the door hangs from. They get wallered out too. BTW, your not going to like going back to an 8 to 5 after working on cars a couple of months. And that garage of yours; oy vey! It is sitting on a million dollars worth of real estate if it were in SoCal. (IMG:style_emoticons/default/drooley.gif) "Cary on". |
| cary |
 Apr 22 2016, 03:53 PM Apr 22 2016, 03:53 PM
Post
#184
|
|
Advanced Member     Group: Members Posts: 3,900 Joined: 26-January 04 From: Sherwood Oregon Member No.: 1,608 Region Association: Pacific Northwest 
|
Nice thing about the door is they can be totally removed. So we (Super In Law) could build a jig to hold the door under the drill press. So we could weld and re-drill.
Kent I'm only holding out for one 8-5 job. If it doesn't come to fruition in the next two weeks I'll be pursuing Porsche restoration as a career change. |
| cary |
 Apr 25 2016, 09:42 PM Apr 25 2016, 09:42 PM
Post
#185
|
|
Advanced Member     Group: Members Posts: 3,900 Joined: 26-January 04 From: Sherwood Oregon Member No.: 1,608 Region Association: Pacific Northwest 
|
Super In Law is working on the front end of the blue car.
1. Installed new trunk cable 2. Realigned hood 3. Reworked both headlights 4. Stopped at Ace on the way in and got the 4mm bolts for the trunk light Waiting for some eyebrow rubber before we shoot any pictures. Back to the green car while I'm waiting for parts. So I open up the sawzall and get to work. 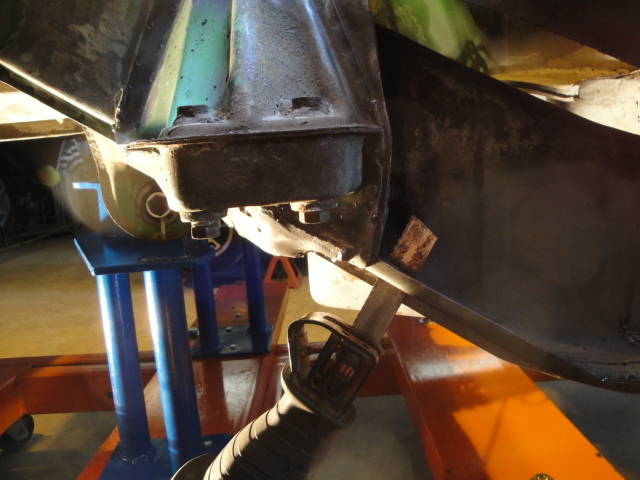 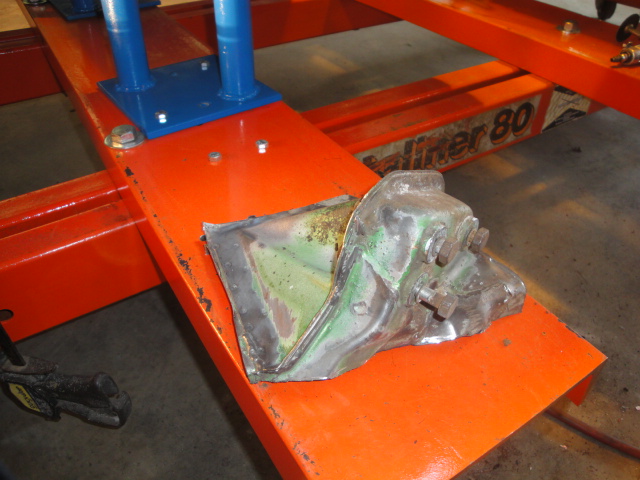 Wont go into detail on removing the suspension mount, covered that last week. But on a sour note I did find some rust worm work under the smaller tie. It will get a multiple piece patch. Another example of our cars rusting from the inside out. 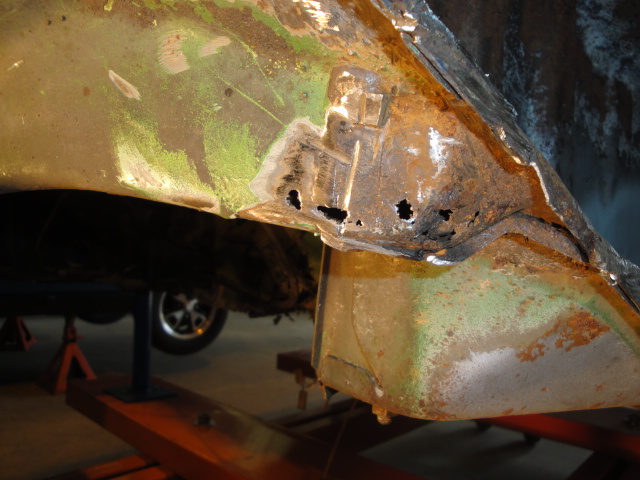 Getting ready for an application of OSPHO before we head home. 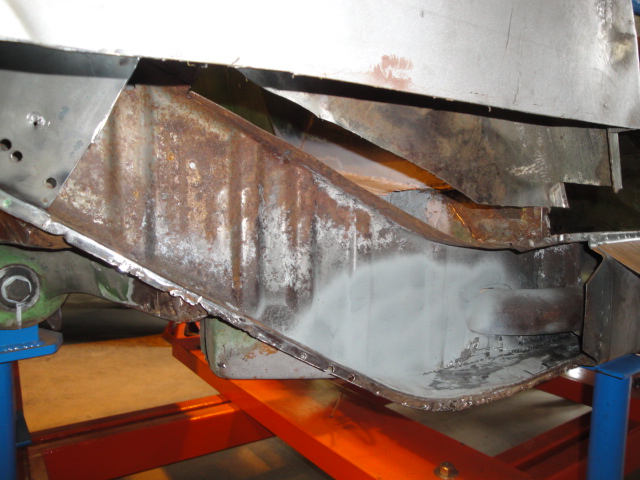 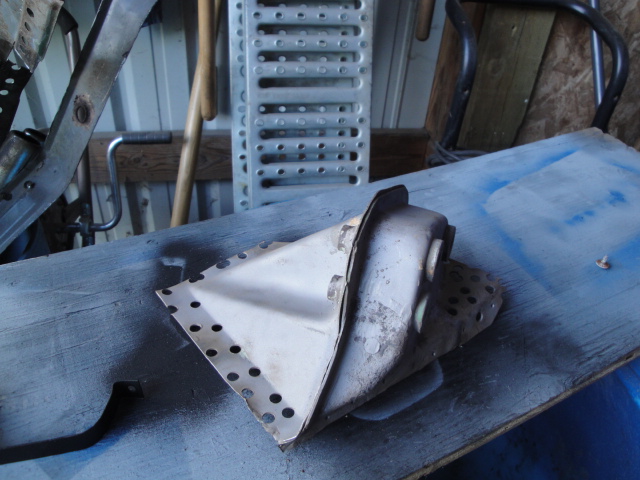 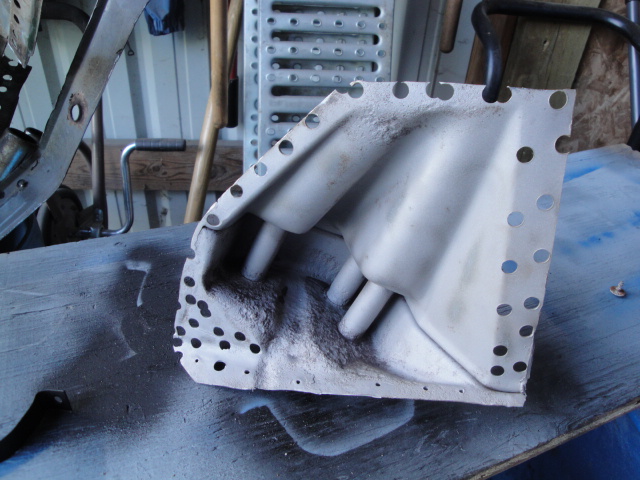 |
| cary |
 Apr 26 2016, 09:34 PM Apr 26 2016, 09:34 PM
Post
#186
|
|
Advanced Member     Group: Members Posts: 3,900 Joined: 26-January 04 From: Sherwood Oregon Member No.: 1,608 Region Association: Pacific Northwest 
|
Start the day with chemically prepping the wheelhouse/upper inner long for enclosure.
Step #1, application of cold galvanizing spray. No picture, just another picture of the area sprayed in gray. Let it dry 3 hours with shop lights keeping it nice an toasty. Step #2, application of Eastwood HD Anti Rust. 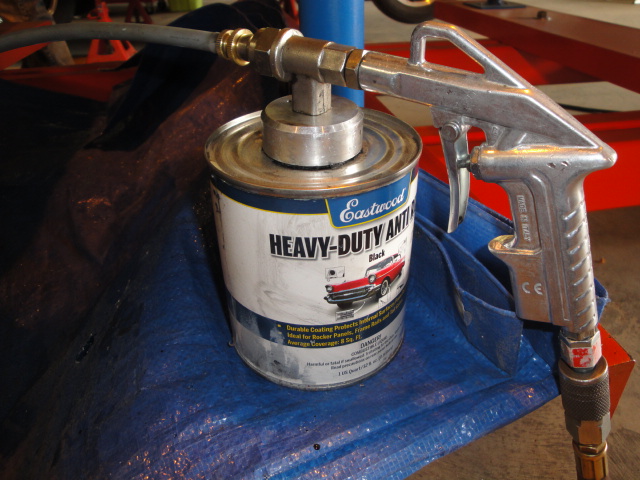 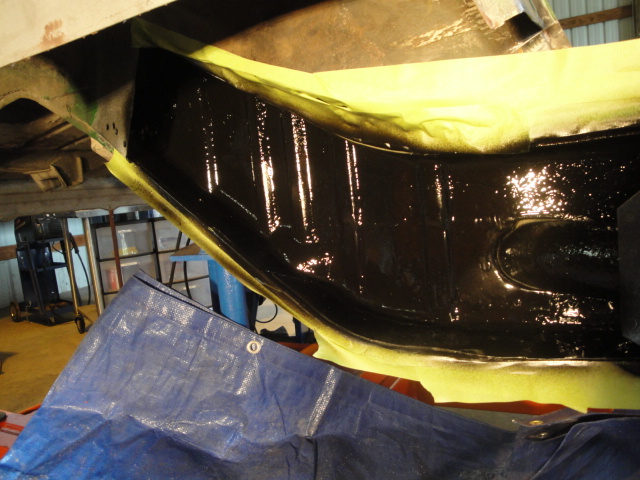 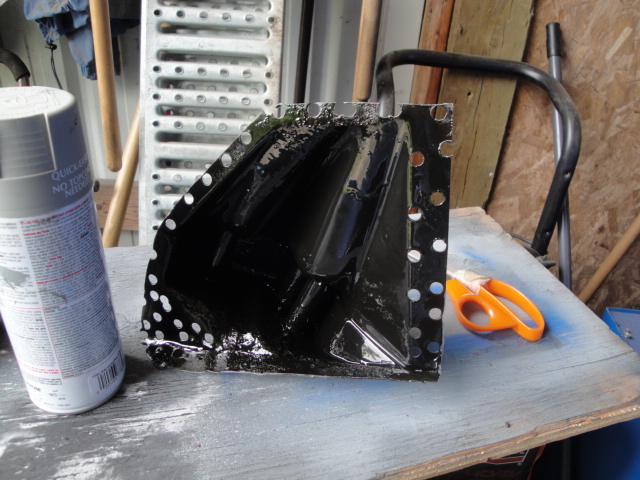 Long left baking with the stoplights over night. |
| rick 918-S |
 Apr 26 2016, 09:39 PM Apr 26 2016, 09:39 PM
Post
#187
|
|
Hey nice rack! -Celette                Group: Members Posts: 20,842 Joined: 30-December 02 From: Now in Superior WI Member No.: 43 Region Association: Northstar Region 

|
Looking good Cary. (IMG:style_emoticons/default/popcorn[1].gif)
|
| cary |
 Apr 26 2016, 10:10 PM Apr 26 2016, 10:10 PM
Post
#188
|
|
Advanced Member     Group: Members Posts: 3,900 Joined: 26-January 04 From: Sherwood Oregon Member No.: 1,608 Region Association: Pacific Northwest 
|
While the chemicals are drying I decide to tackle the removable exhaust shield project.
I changed my mind on the direction I was going to go. Blind nuts on the floor of the trunk. I decided to go with only the pan being removable. That way you go could work on paint and or undercoating under the pan. Took a while but turned out real nice. FROM 25,000 ft. Punched two 1/8 holes in each of the stand offs. Aligned the pan using the parts car as a reference. Held it in place using vice grips thru the mold release hole that I opened up earlier. Then used my long handle 90 degree pick to scratch the hole locations. Then drilled the matching 1/8" holes in the trunk floor pan. Held everything in pace with Cleco's. Removed the pan. Then removed two stand offs off the pan. Kitty corner from each other. Each stand off has three spot welds. From the backside, using the Rotacut spot weld cutter drilled the center one clear thru. It will be used for nut/bolt hole. Then drilled thru the pan layer on the other two spot welds to pop the stand off free. Then applied weld thru primer to the to be welded on surface with the two 1/8" holes. While that was drying I welded back in the two extra holes in the pan created with the Rotacut. Then welded a 6mm nut to the middle hole of the stand off. I did this two by two as to not get too far ahead and out of alignment. Note : I did enlarge the hole in the trunk floor to 3/16 ths for ease of alignment and weld penetration. 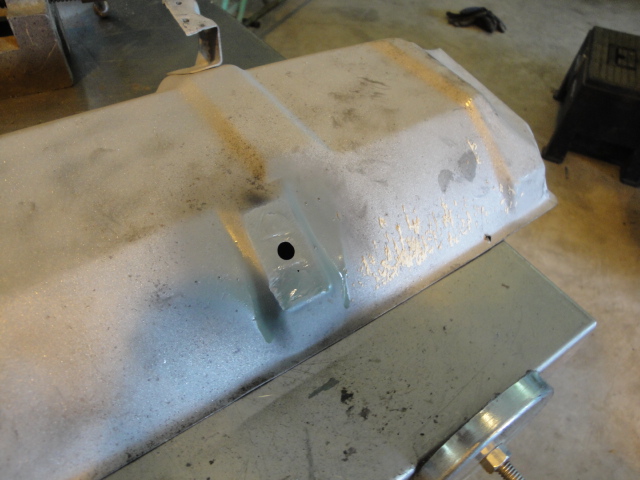 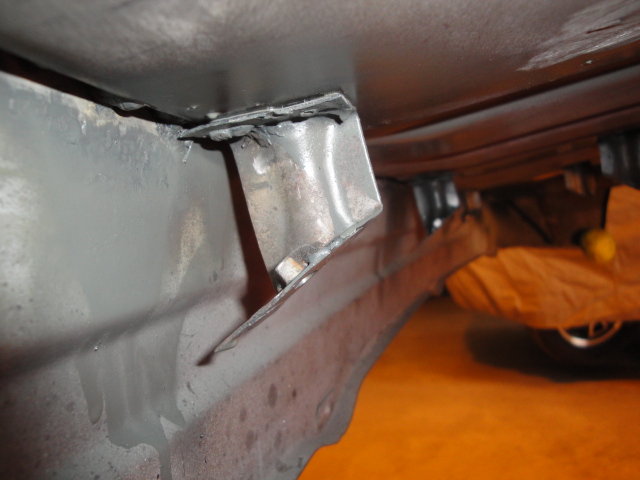 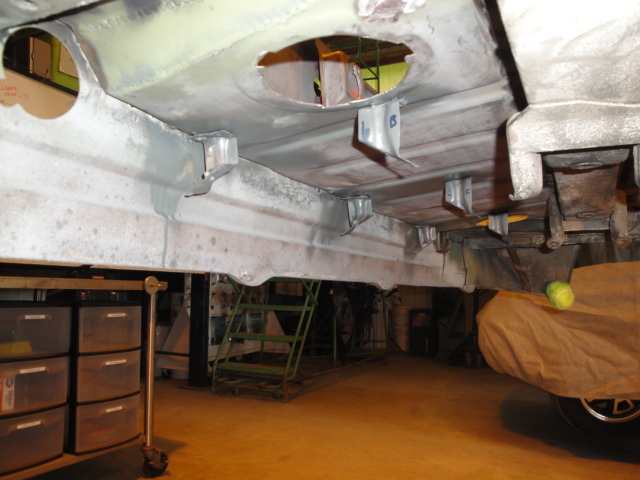 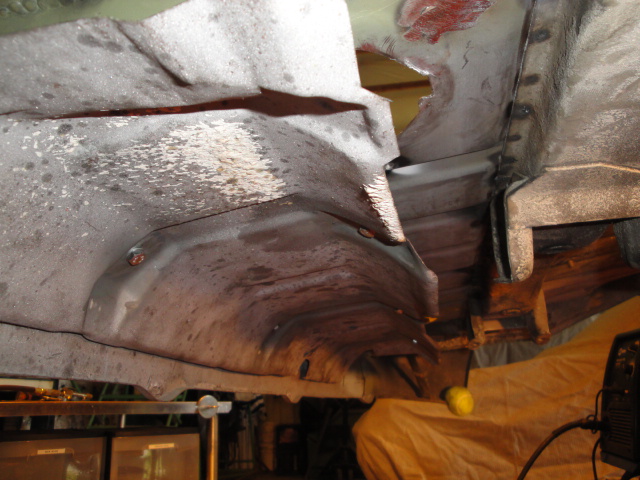 Nut tucks nicely out of the way .......... 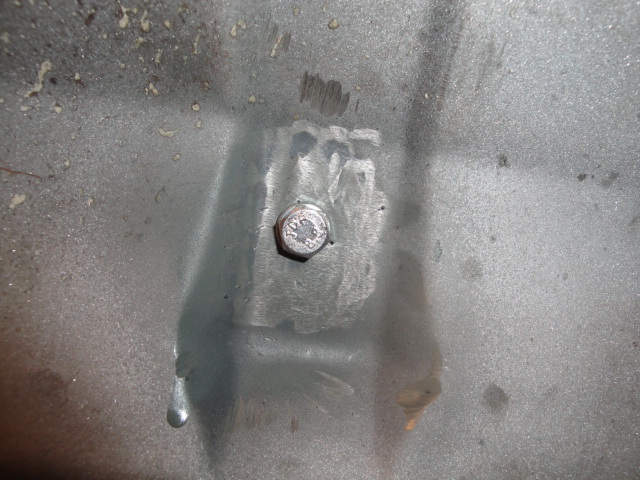 |
| djway |
 Apr 27 2016, 02:21 AM Apr 27 2016, 02:21 AM
Post
#189
|
|
Senior Member    Group: Members Posts: 787 Joined: 16-October 15 From: Riverside Member No.: 19,266 Region Association: Southern California |
When I was learning to tear apart panels and spot welds I found a couple of things that made it easier to find and separate the welds. First I bought a bunch of 1/4in drill bits. I also picked up a cheap paint scraper (like a really hard metal putty knife) at Harbor Freight. After the initial knock down of crud I would spray the area with a cheap black paint. I would then hit the area with a block sander and look for the spot weld low spots. I would drill through the first layer of metal with the bit. I would then wedge in the paint scraper, which is very thin, and start tapping it in between the metal sheets. It usually cuts right through the remaining portion of the spot weld. You can also tap the scraper between the metal to find the next spot weld as it will stop right at the edge of the weld. These scrapers are super tough and very cheap. I have done a TON of spot weld removal and still have not worn out a scraper. I hope this helps speed along the process for anyone out there trying to learn this skill. Great work (IMG:style_emoticons/default/smile.gif)
|
| cary |
 Apr 27 2016, 09:06 PM Apr 27 2016, 09:06 PM
Post
#190
|
|
Advanced Member     Group: Members Posts: 3,900 Joined: 26-January 04 From: Sherwood Oregon Member No.: 1,608 Region Association: Pacific Northwest 
|
Super In Law starts on the patch for the end of the suspension ear.
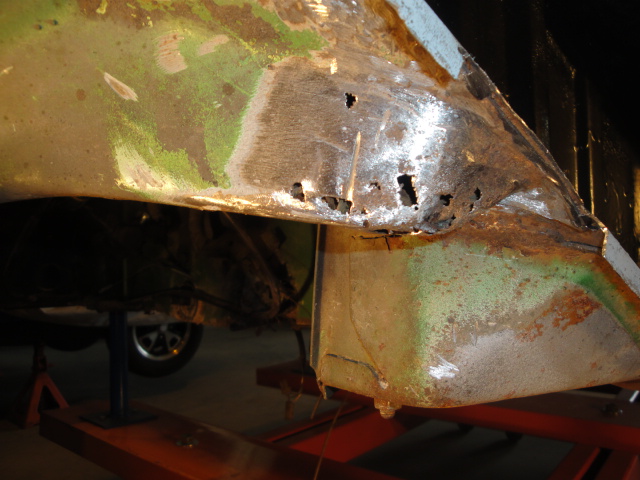 He built it in one piece. We should have brought over the forge. We'll use the forge when we fabricate the next set of tie plates. 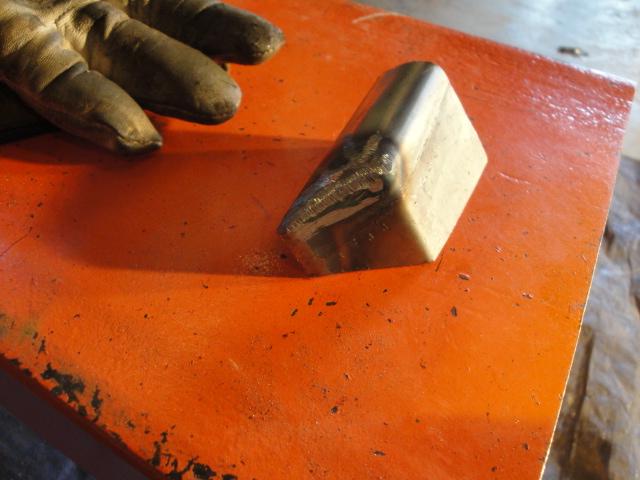 Tacked in. Forgot the shot of the backside all tidied up. Front side in the valley I just couldn't get a good angle with my welding helmet on. I'll finish it up when we put the car back on the lift. 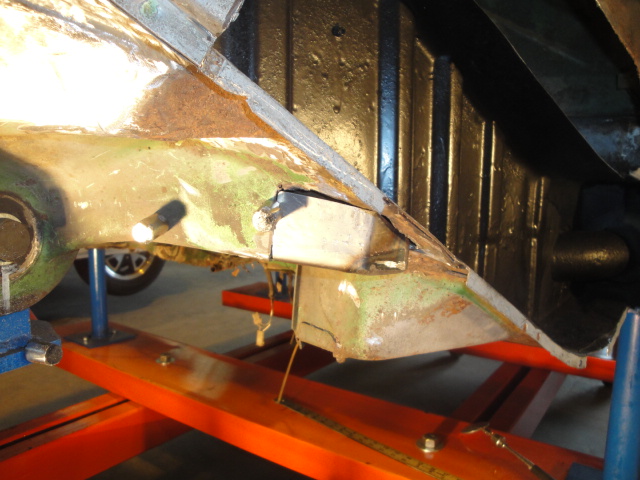 |
| cary |
 Apr 27 2016, 09:20 PM Apr 27 2016, 09:20 PM
Post
#191
|
|
Advanced Member     Group: Members Posts: 3,900 Joined: 26-January 04 From: Sherwood Oregon Member No.: 1,608 Region Association: Pacific Northwest 
|
I got after trimming the wheelhouse panel.
Started with marking the opening from inside the engine compartment. Then gave myself an additional inch for good measure. Used the HF power shears. They do a marvelous job. Even thru the wavy stuff. 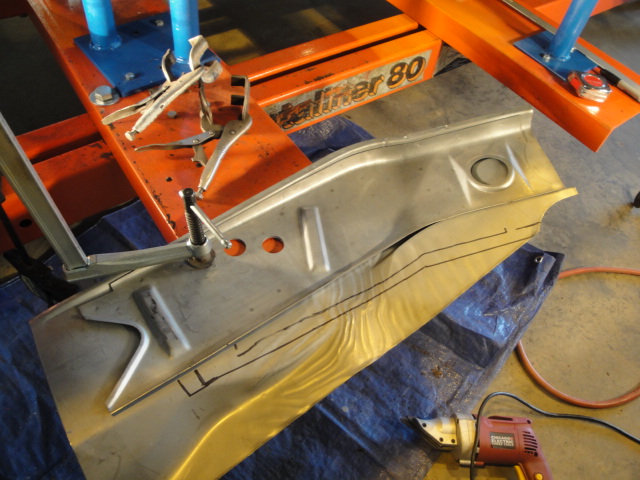 Trimmed off the excess and fitted it again. 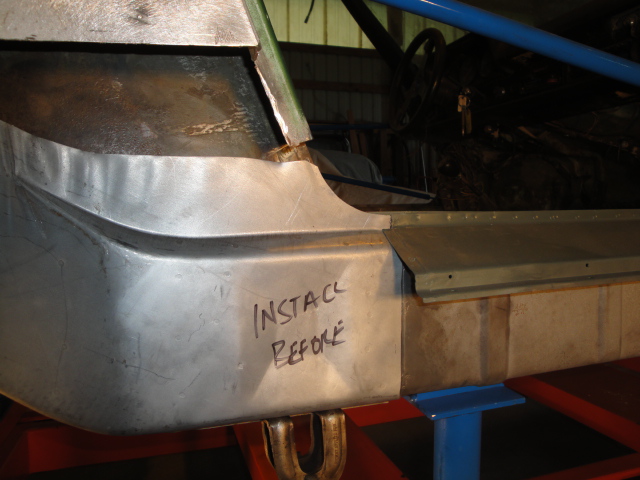 Then I trimmed off the portion over the remainder of the inner box. It will be rosette welded to the old wheelhouse outer wall. 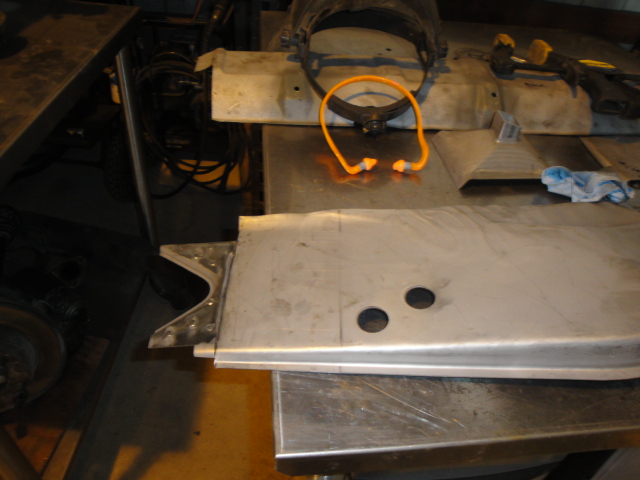 All trimmed up and ready to go. 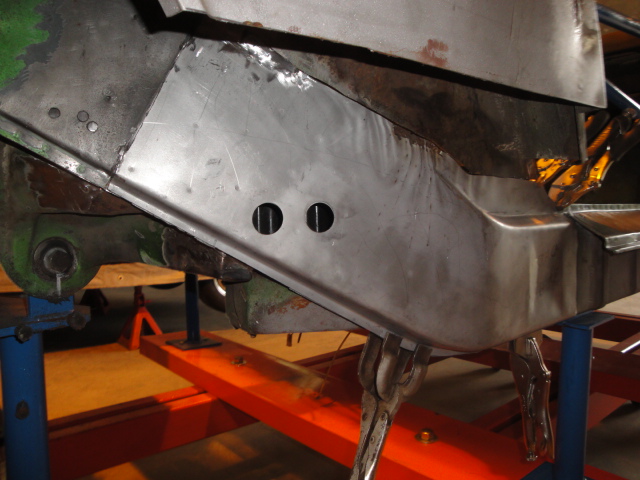 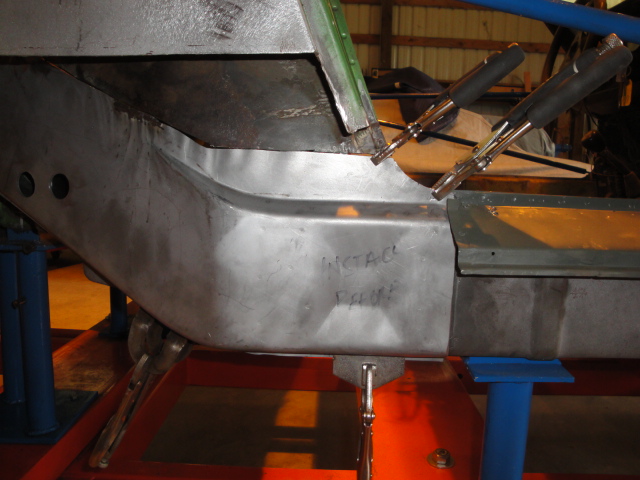 |
| cary |
 Apr 28 2016, 10:16 PM Apr 28 2016, 10:16 PM
Post
#192
|
|
Advanced Member     Group: Members Posts: 3,900 Joined: 26-January 04 From: Sherwood Oregon Member No.: 1,608 Region Association: Pacific Northwest 
|
Super In Law spent the day tinkering with the headlight covers and the eyebrows.
Alignment and leveling. Next we're going to get after getting the driving lights fired up. Found the white/yellow 75 additional headlamp wires. Now I just need to look up the wiring diagram for the Pilot 30 amp headlamp relay. The rosette portion of welding in the wheelhouse went great. Welds look great. The butt weld across the top is giving me fits. The old metal is shit. Should have made the cut a couple inches higher. Constantly blowing thru. Then welding in a big pile to fill the hole. Then over grinding to make it look nice. Grind thru. Then we start the process over again. 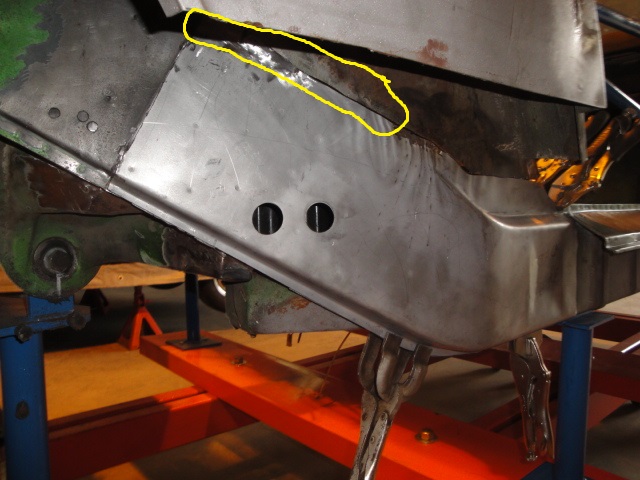 |
| Mikey914 |
 Apr 29 2016, 01:33 AM Apr 29 2016, 01:33 AM
Post
#193
|
|
The rubber man           Group: Members Posts: 12,742 Joined: 27-December 04 From: Hillsboro, OR Member No.: 3,348 Region Association: None 
|
Thanks guys,
This will be the 1st time in 4 years that I will have a fully functioning 914 ! I've been meaning to hook up the fog lights for 3 years now. Honestly, In our area there are few guys that can do what Cary is doing. He's been seriously looking into do this on a regular basis, I would think that he would make an excellent resource for our community. If you have any 914 work to get done I would recommend you contact him. I suspect he will become quite busy based on the quality of work I have seen. Again, a potential vendor I would highly recommend (IMG:style_emoticons/default/first.gif) . |
| cary |
 Apr 29 2016, 07:44 PM Apr 29 2016, 07:44 PM
Post
#194
|
|
Advanced Member     Group: Members Posts: 3,900 Joined: 26-January 04 From: Sherwood Oregon Member No.: 1,608 Region Association: Pacific Northwest 
|
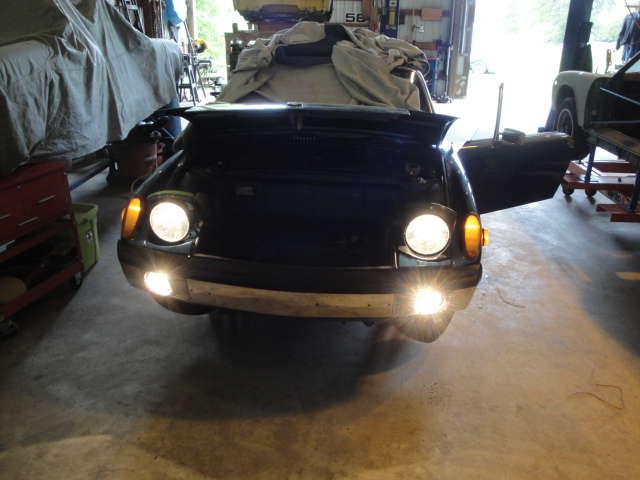 Took a bit of unraveling. The blue car is a backdated 75. But the wires to the J12 Additional Headlights Relay didn't match. The wires matched the 74 USA schematic. Hmmmmmmmmmmmm. The 85 leg (ground) should have been a brown wire looped to the fresh air blower relay right next to it. But no, it was a gray/red running up behind the dash switches. Hmmmmmmmmmm. Work around. Cut the gray/red about 2 inches from the relay socket. Labeled the wire coming down from the dash as 74 fog light switch. Added a brown wire and a wire connector to the 2" wire from the relay socket and added to the dash ground stud. Then there was issue with the power lead the Pilot headlamp relay. Made about 10 attempts on the fused side of the J West panel. Every time I pulled the headlight switch the headlight motor/dimmer switch blew its fuse. Damn ........... Finally used my retractable wiring lead and ran it from the battery. Viola ...... Finally wired it to the incoming side of of fuse #12. Working like champ. Runs like a 75-76, driving lights are on when ever the headlights are on. But we could wire it with a switch if desired. |
| cary |
 Apr 30 2016, 08:54 AM Apr 30 2016, 08:54 AM
Post
#195
|
|
Advanced Member     Group: Members Posts: 3,900 Joined: 26-January 04 From: Sherwood Oregon Member No.: 1,608 Region Association: Pacific Northwest 
|
After yesterday I think I'm going to draft a checklist, kind of like a PPI. So when some one brings me a car and asks me to make it road worthy I just go down the list and check them off.
From on my knees at the drivers door on the blue car. 1. No horn 2. No fresh air blower 3. Ignition key didn't go into the front trunk lock Heat and keys will have to wait for its next visit. We'll get a horn going before Mark picks up the car. It will be interesting to see which which schematic matches up. LOL. |
| JoeDees |
 May 1 2016, 06:30 PM May 1 2016, 06:30 PM
Post
#196
|
|
Senior Member    Group: Members Posts: 515 Joined: 10-November 14 From: Northern Kentucky Member No.: 18,106 Region Association: None |
I had the same problem welding in my upper wheelhouse patch today, that area is a total pita...
I also decided that I am totally going to steal your removable heat shield idea. |
| cary |
 May 2 2016, 09:59 PM May 2 2016, 09:59 PM
Post
#197
|
|
Advanced Member     Group: Members Posts: 3,900 Joined: 26-January 04 From: Sherwood Oregon Member No.: 1,608 Region Association: Pacific Northwest 
|
Super In Law is tearing into the front trunk seal channel. Not super bad, but every corner will need some work.
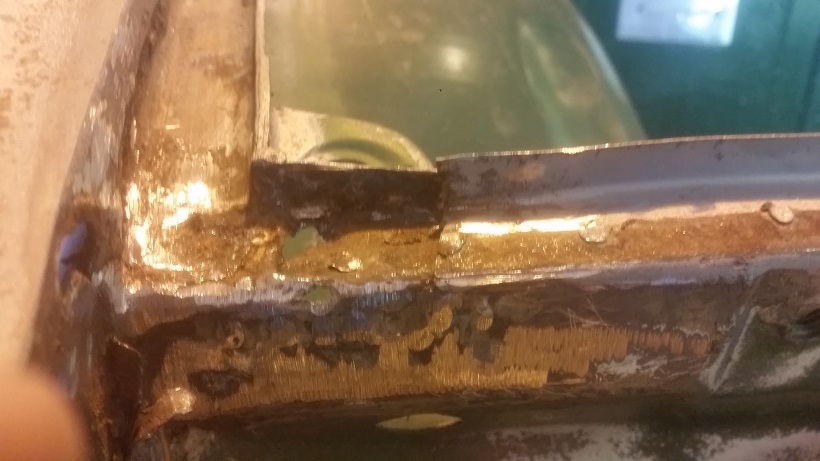 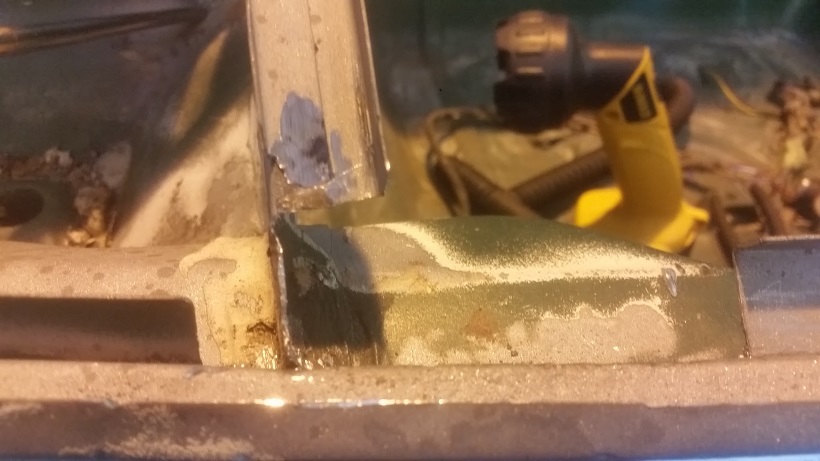 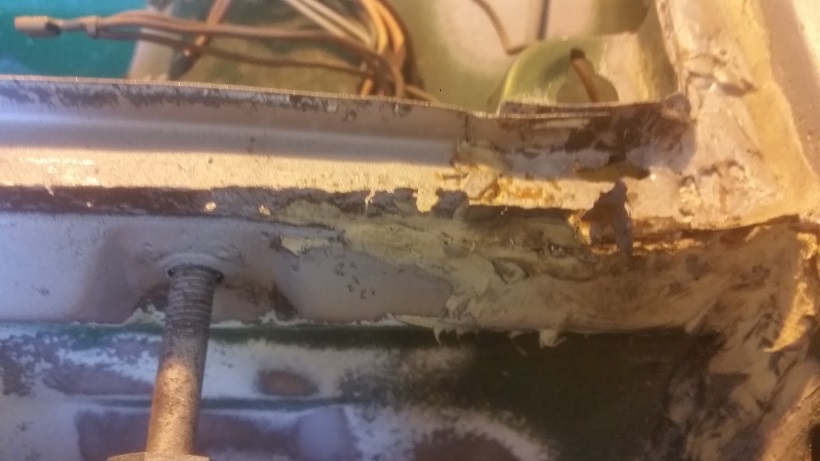 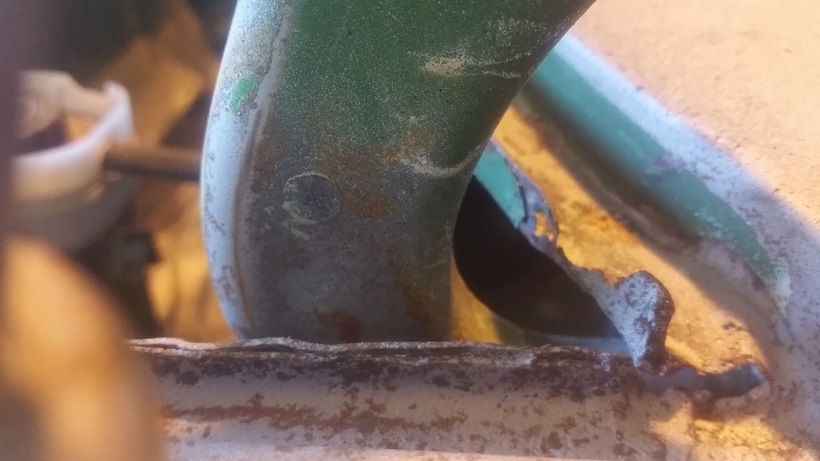 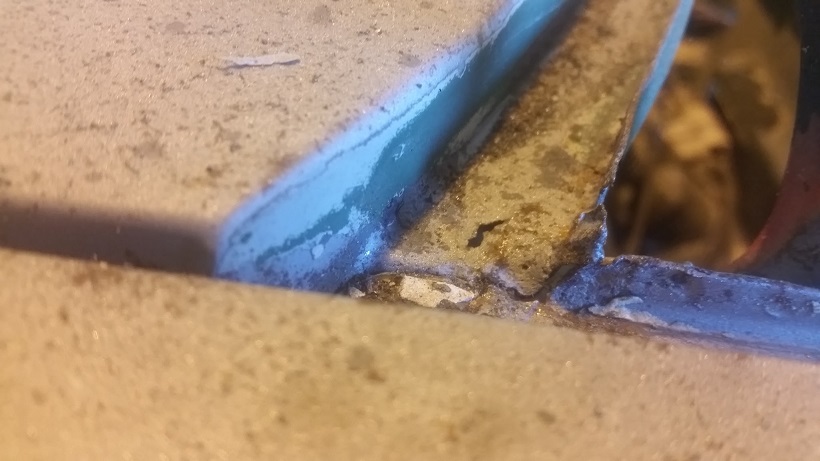 Looks like the front fender has been replaced. I"ll try and do some creative work with the brush on seam sealer to close up the gap. 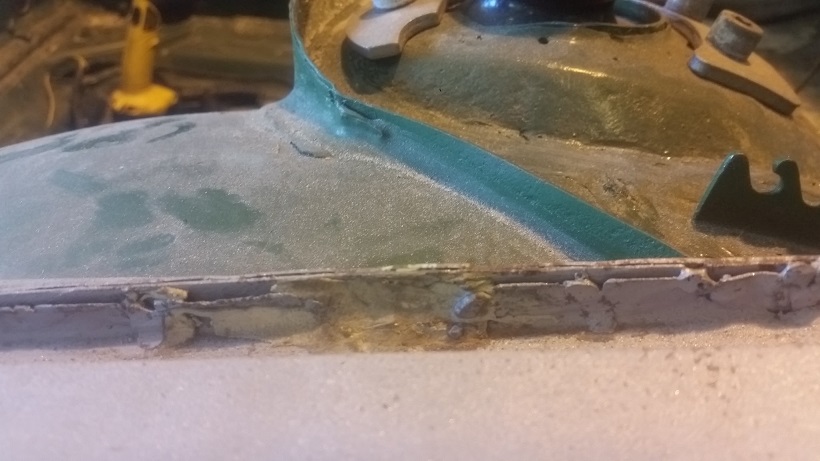 |
| cary |
 May 2 2016, 10:14 PM May 2 2016, 10:14 PM
Post
#198
|
|
Advanced Member     Group: Members Posts: 3,900 Joined: 26-January 04 From: Sherwood Oregon Member No.: 1,608 Region Association: Pacific Northwest 
|
Getting the wheelhouse all locked down for the welding to begin ...........
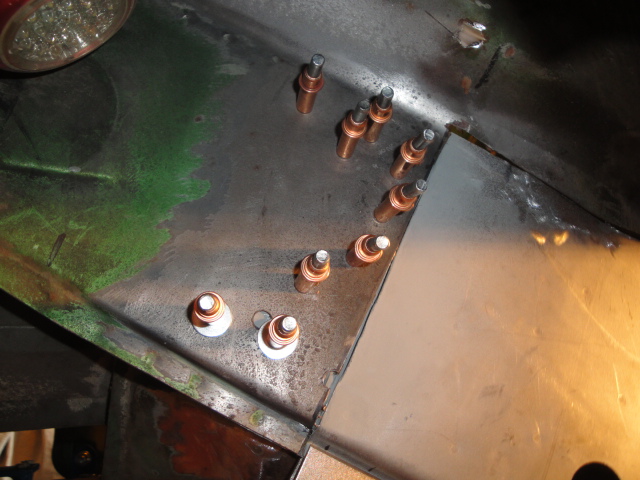 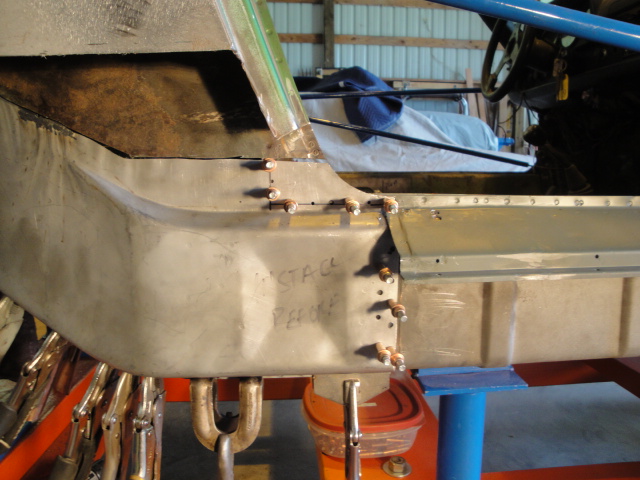 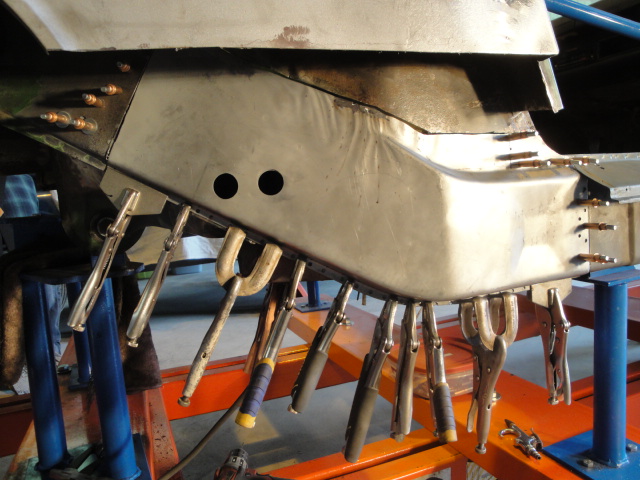 Finally got the wheelhouse completely welded in. 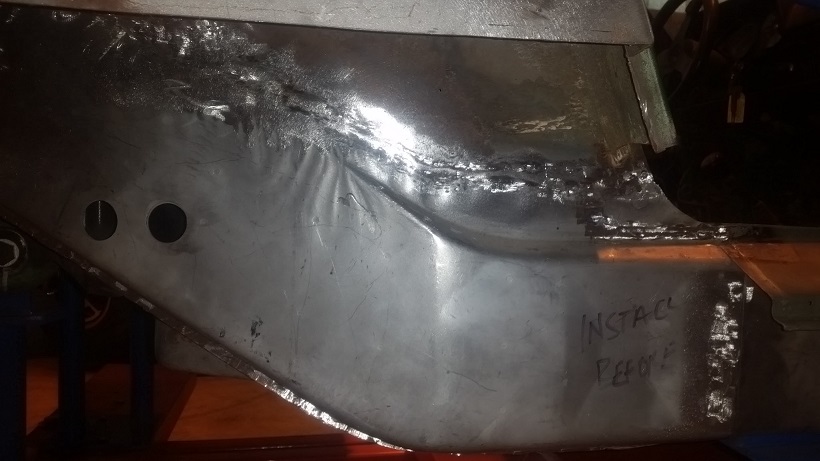 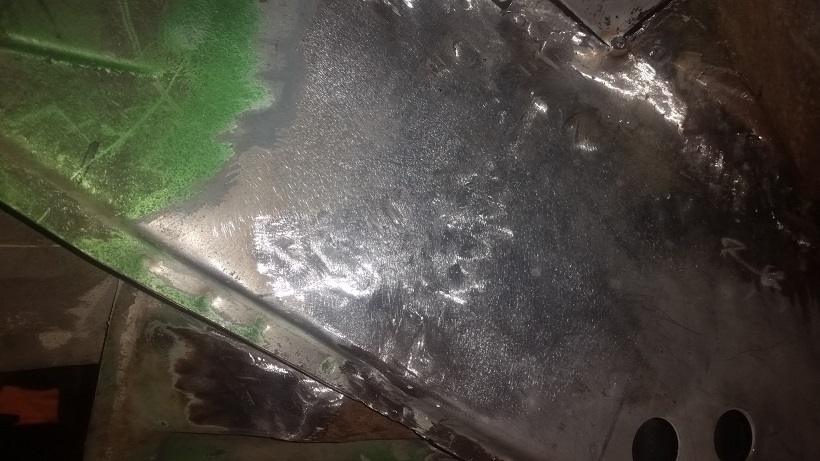 Then I find a big chunk of bondo right above where I was seam welding ........... So I cut it out. 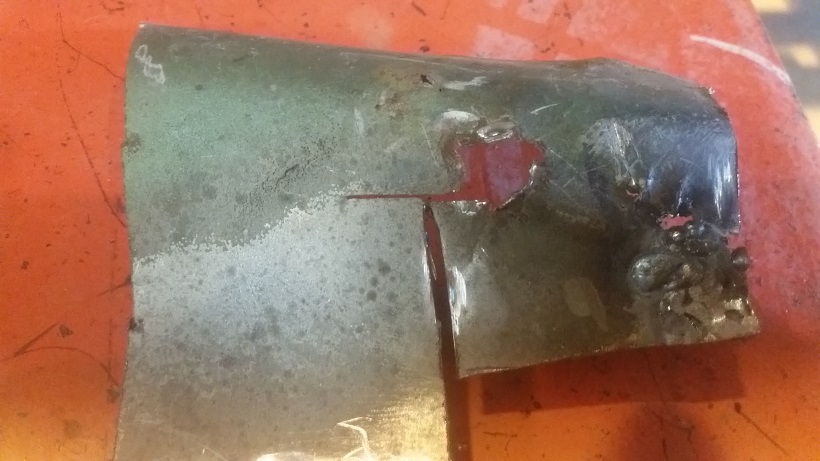 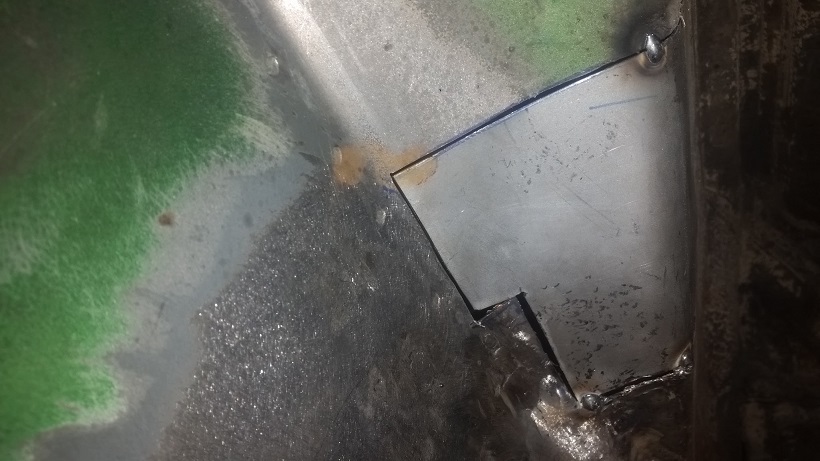 |
| Garland |
 May 2 2016, 10:38 PM May 2 2016, 10:38 PM
Post
#199
|
|
Restoration Fanatic    Group: Members Posts: 1,401 Joined: 8-January 04 From: ......Michigan...... Member No.: 1,535 Region Association: Upper MidWest 
|
Reference
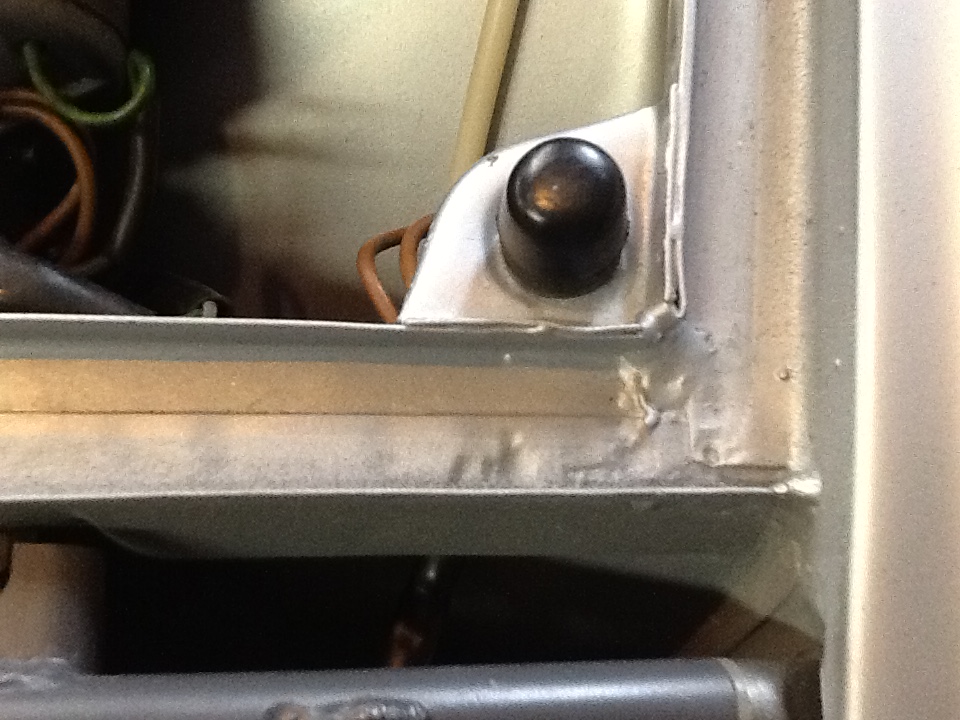 |
| cary |
 May 2 2016, 11:05 PM May 2 2016, 11:05 PM
Post
#200
|
|
Advanced Member     Group: Members Posts: 3,900 Joined: 26-January 04 From: Sherwood Oregon Member No.: 1,608 Region Association: Pacific Northwest 
|
Thank you for the reference photo. That's where we ended the day. I want to remove the bumper support so he can recreate the metal pieces. So we got out the torch to remove the brazing. But the little spot in the corner of the support is a weld not a braze. That's the only place I've seen gas welding on these cars. I found the same thing on the bumper support on the rear panel replacement.
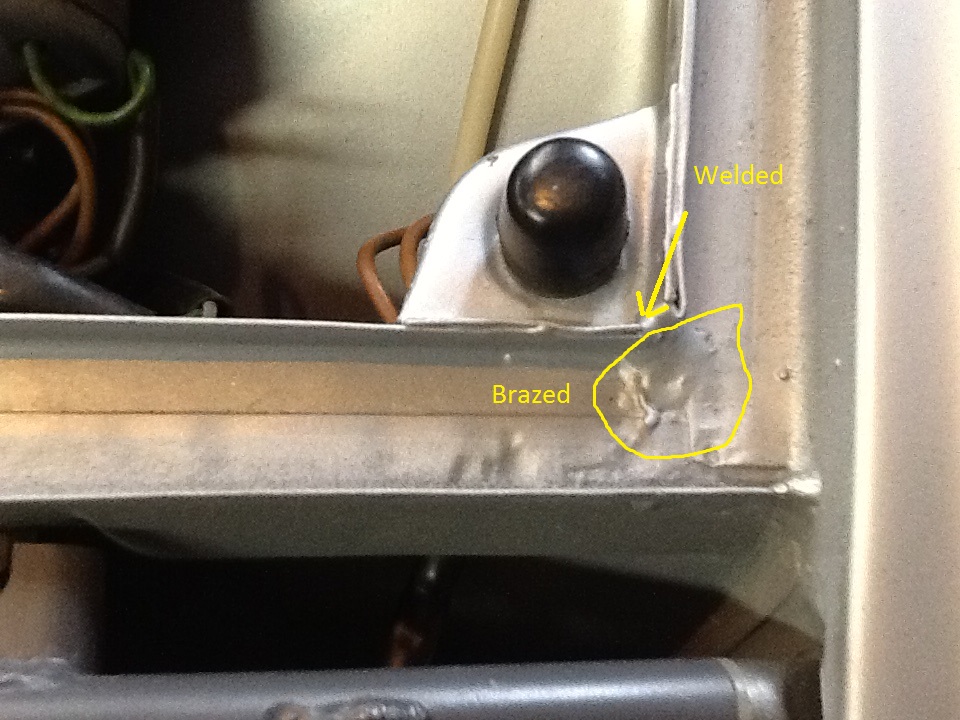 |
  |
1 User(s) are reading this topic (1 Guests and 0 Anonymous Users)
0 Members:

|
Lo-Fi Version | Time is now: 18th January 2025 - 08:24 PM |
Invision Power Board
v9.1.4 © 2025 IPS, Inc.


