|
|

|
Porsche, and the Porsche crest are registered trademarks of Dr. Ing. h.c. F. Porsche AG.
This site is not affiliated with Porsche in any way. Its only purpose is to provide an online forum for car enthusiasts. All other trademarks are property of their respective owners. |
|
|
  |
| Mikey914 |
 May 2 2016, 11:25 PM May 2 2016, 11:25 PM
Post
#201
|
|
The rubber man           Group: Members Posts: 12,742 Joined: 27-December 04 From: Hillsboro, OR Member No.: 3,348 Region Association: None 
|
Thanks for the pics.
Again, I'm blown away with the detail of work being done. It's a much larger project than planned, but I'm glad that I have Cary doing the work. (IMG:style_emoticons/default/sawzall-smiley.gif) (IMG:style_emoticons/default/welder.gif) (IMG:style_emoticons/default/sawzall-smiley.gif) (IMG:style_emoticons/default/welder.gif) (IMG:style_emoticons/default/driving.gif) |
| cary |
 May 4 2016, 09:34 AM May 4 2016, 09:34 AM
Post
#202
|
|
Advanced Member     Group: Members Posts: 3,900 Joined: 26-January 04 From: Sherwood Oregon Member No.: 1,608 Region Association: Pacific Northwest 
|
Got the horn functioning again on the blue car. Broken wire to the horn ring and a dead horn. Beep Beep.
Super In Law continues with the front trunk channel. I spent the remainder of the day getting the engine ready to reinstall. Siliconed up the new oil pressure sender. Did this when I walked in the door so it could dry while I was working on the blue car horn. Zip tying harness up nice and tidy Heat shrinking and tightening all open spade connectors Installed new oil pressure sender Torqued down impeller Install flywheel, new seals & bearing Install clutch and pressure plate Install transmission and starter Cut down the over length exhaust hanging studs on the back of the transmission mounts. Digging hole in muffler. Not completely thru, so I was pondering doing a small weld. But after hearing a little rust rattling around inside of the muffler I decided against it. Mark showed up about quitting time with the new/shorter plug wires and some heat components. Between what he brought and what I have we'll get some heat flowing to the passenger compartment. 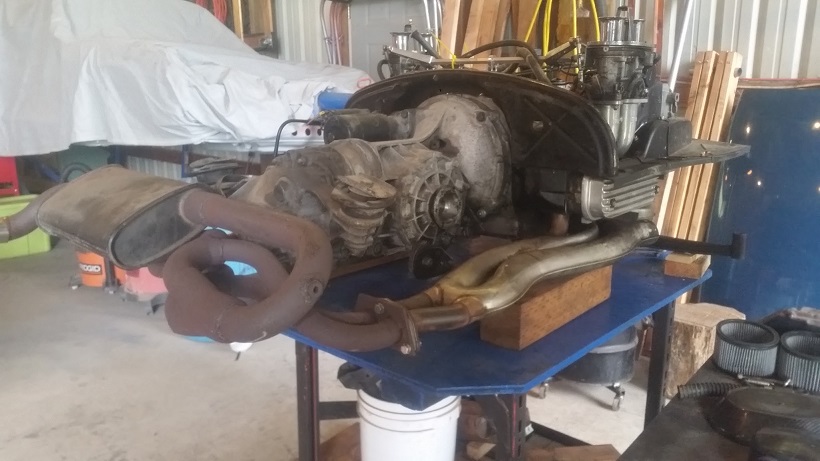 Start today with checking the plugs and installing the new BERU plug wires. Then the car goes back on the lift to install the new Bilsteins all the way around. I'll do the small patch under the pivot mount location. Then we wait for the trunk pivot from RD. |
| cary |
 May 4 2016, 10:20 PM May 4 2016, 10:20 PM
Post
#203
|
|
Advanced Member     Group: Members Posts: 3,900 Joined: 26-January 04 From: Sherwood Oregon Member No.: 1,608 Region Association: Pacific Northwest 
|
Putting the hammer down to get the blue car back to Mark first thing Monday am.
We start with applying 3m black snot to the top corners of the front trunk seal. We'll let them set up 24 hours before we open the hood again. 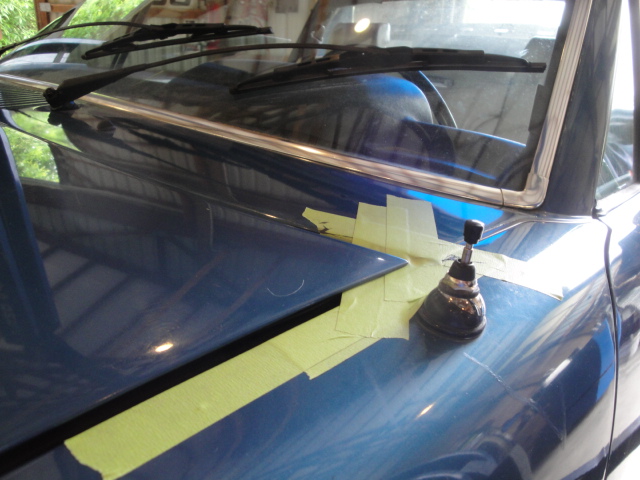 So while we wait for info and ETA on the rear trunk pivot I'll start welding in the patch pieces of the front trunk seal on the green car. 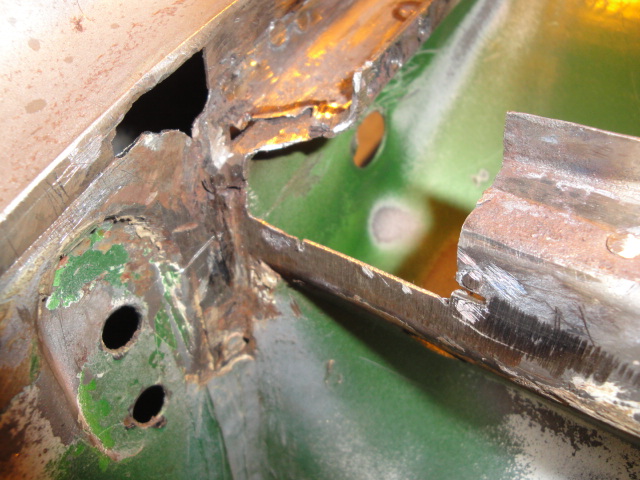 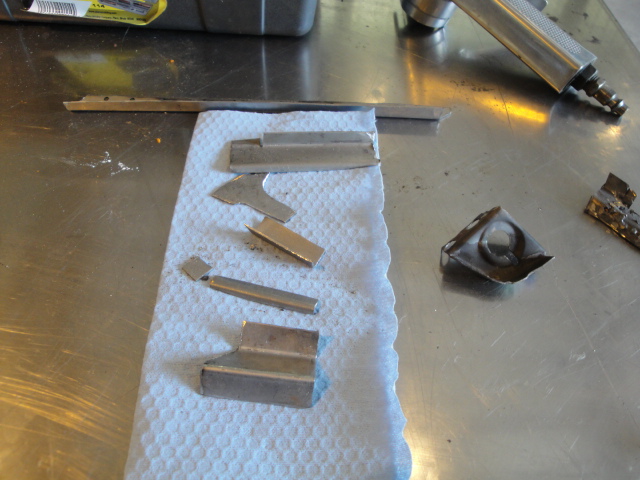 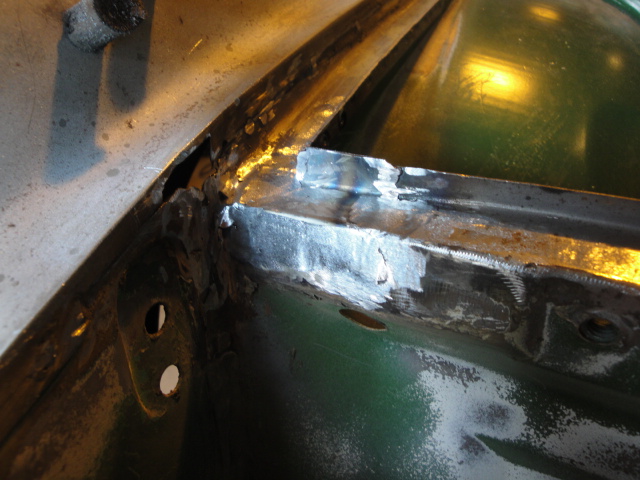 Then around 11:15 I get a weird phone message. I'm trying make a delivery and I don't know if I'm in the right place. I thought it was for a package at home. No, Mark sent the pivot and the blower tube via courier. 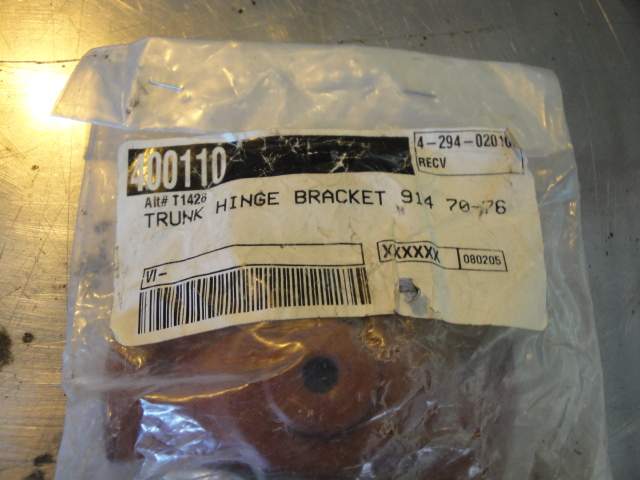 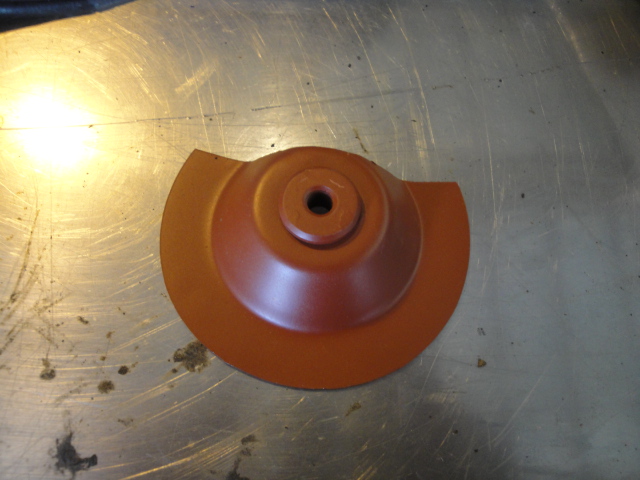 Whose part is this ? So the blue car gets put back on the lift ......... I start making the patch for the hole in the pivot area. I use the tape pattern technique that Ed from Wheeler Dealers uses. 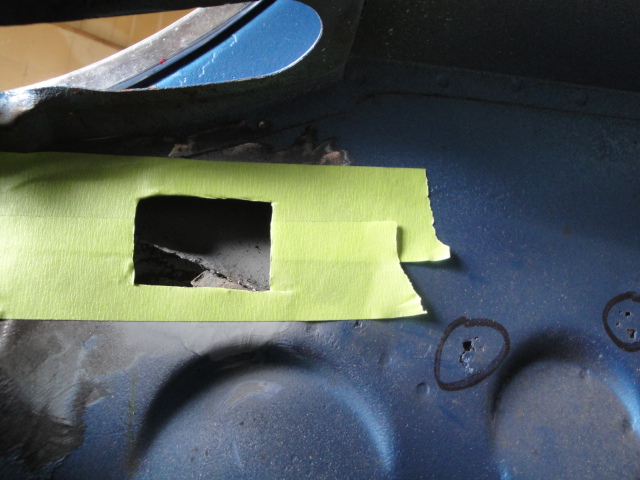 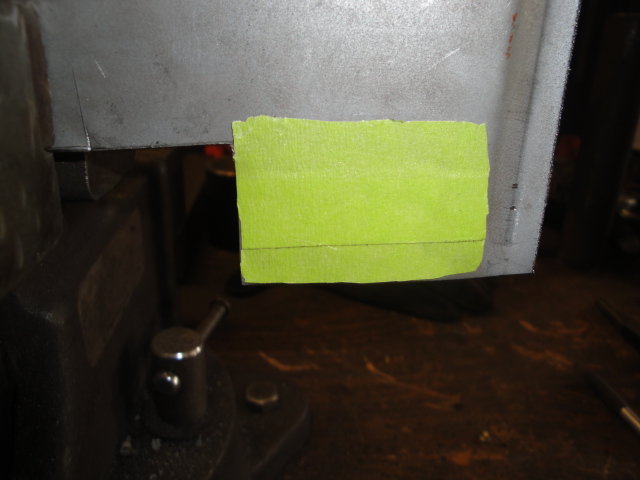 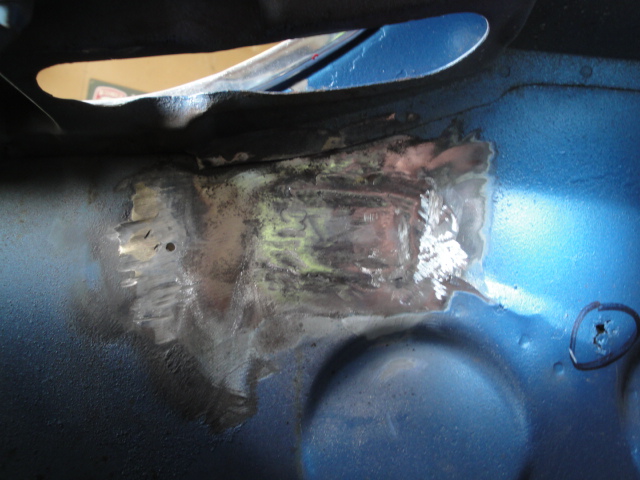 |
| cary |
 May 4 2016, 10:37 PM May 4 2016, 10:37 PM
Post
#204
|
|
Advanced Member     Group: Members Posts: 3,900 Joined: 26-January 04 From: Sherwood Oregon Member No.: 1,608 Region Association: Pacific Northwest 
|
Other than using way toooooooooooo much cold galvanizing spray. Which caused weld striking issues and tall ugly welds. Things were pretty uneventful.
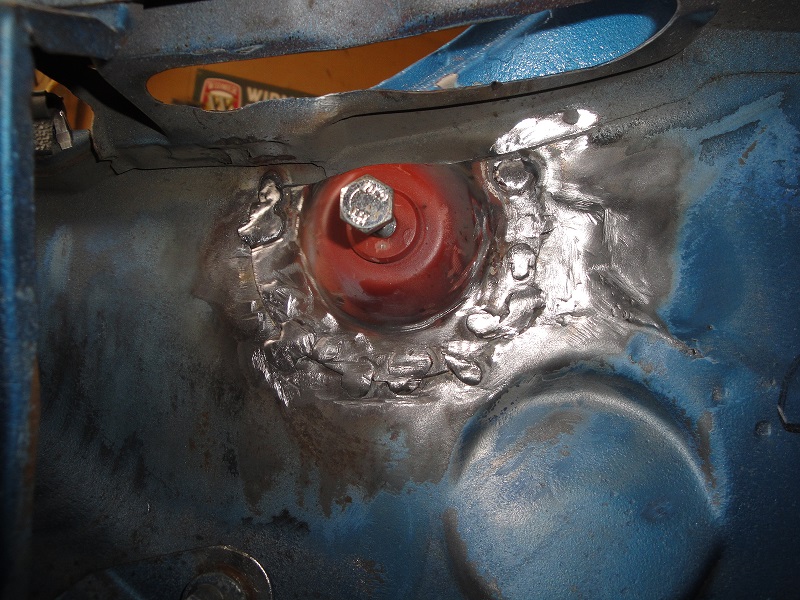 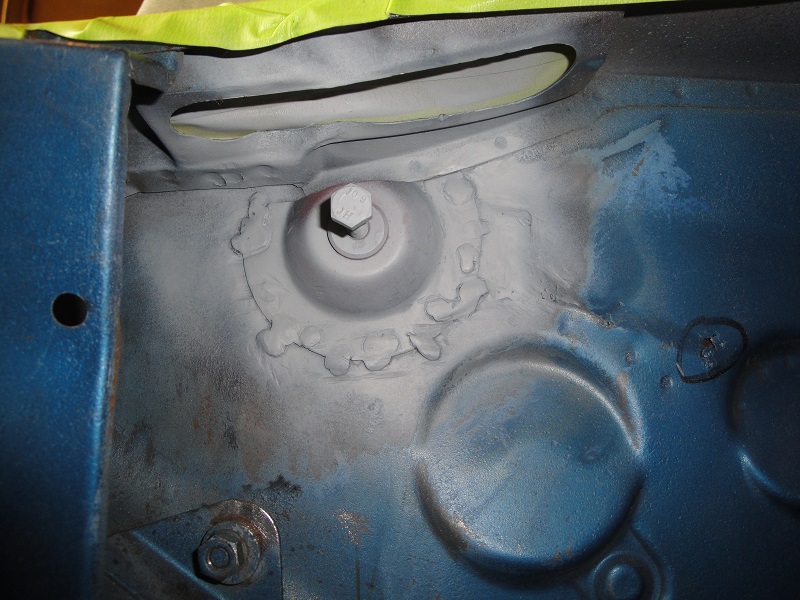 Then on to changing out the spark plug wires and getting them dressed out in a sanitary fashion. I'll do the same with the fuel line when we get everything all hooked up. 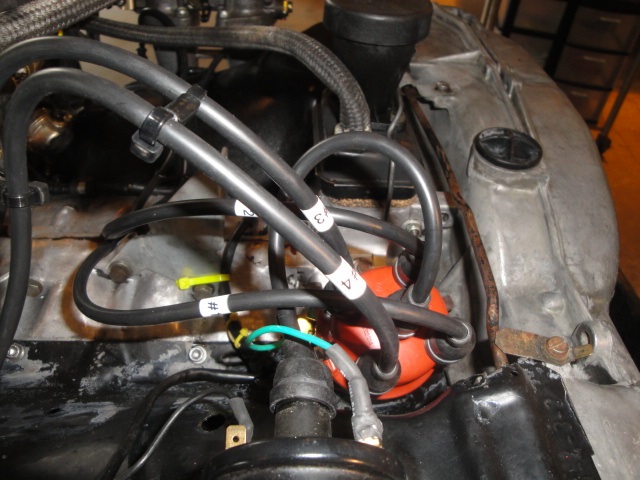 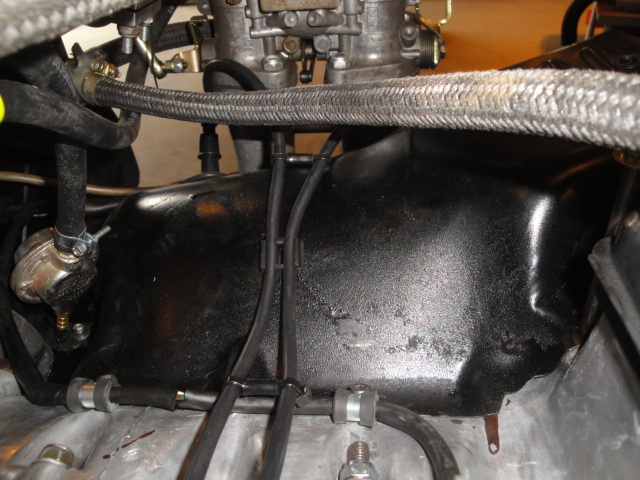 I'm a dyed in the wool fuel injection fan. But the carbs do make for a nice and tidy wiring and fuel line dress out. Rear shocks are out and ready for change out before engine reinstall. 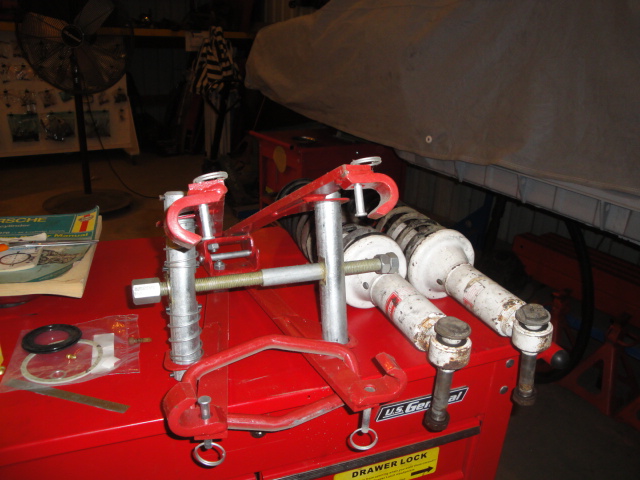 |
| 76-914 |
 May 5 2016, 07:38 AM May 5 2016, 07:38 AM
Post
#205
|
|
Repeat Offender & Resident Subaru Antagonist           Group: Members Posts: 13,656 Joined: 23-January 09 From: Temecula, CA Member No.: 9,964 Region Association: Southern California 
|
Cary, is that one of Marks' NEW front trunk seals? If so, is there a problem with how it lays or fits? Hope not as I have one on order. (IMG:style_emoticons/default/beerchug.gif)
|
| cary |
 May 5 2016, 07:54 AM May 5 2016, 07:54 AM
Post
#206
|
|
Advanced Member     Group: Members Posts: 3,900 Joined: 26-January 04 From: Sherwood Oregon Member No.: 1,608 Region Association: Pacific Northwest 
|
Yes its one of the new ones. It fits nice enough that we're not going to use any adhesive other than the top corners. Tape job is kind of over kill. Mostly for paint protection laying in the snot. Then I laid those three crosswise to make sure the corner stayed down.
The problem some will run into is PO work inside the channel. Most have globed up farmer welds when an attempt was made to repair rust out. The blue car has a little on the right side channel. |
| sixnotfour |
 May 5 2016, 02:15 PM May 5 2016, 02:15 PM
Post
#207
|
|
914 Wizard           Group: Members Posts: 10,709 Joined: 12-September 04 From: Life Elevated..planet UT. Member No.: 2,744 Region Association: Rocky Mountains 

|
Some food for thought for you and the in-law...
once you get through the brit's drivel.. (IMG:style_emoticons/default/beer3.gif) really cool frame bench/rotisserie; https://www.youtube.com/watch?v=NMT9Ykmneiw |
| cary |
 May 6 2016, 08:16 AM May 6 2016, 08:16 AM
Post
#208
|
|
Advanced Member     Group: Members Posts: 3,900 Joined: 26-January 04 From: Sherwood Oregon Member No.: 1,608 Region Association: Pacific Northwest 
|
That's pretty cool.
|
| cary |
 May 6 2016, 08:48 AM May 6 2016, 08:48 AM
Post
#209
|
|
Advanced Member     Group: Members Posts: 3,900 Joined: 26-January 04 From: Sherwood Oregon Member No.: 1,608 Region Association: Pacific Northwest 
|
Too tired last night to post .........
Started the day with another episode of Hillbillies Doing Shxx. Here's shot of the right pivot. 1. Front threads that would hold in the pivot bolt are gone. 2. So they retap it for a 3/8" bolt. Which after testing holds torque. 3. Then they go ahead a put an aluminum bushing in the hinge arm. Need less to say its gone. Hmm. I want to get this car back to Mark on Monday so he can add so trim pieces before he leaves for WCR. I don't have another pivot in my hand. If I get to do this for a living, pivots and rear trunk pans will be an inventoried item. So we move to Hillbilly version #2. I head to Ace to find a bronze bushing for the 3/8" bolt. Not a perfect fix, but will last quite a long time. I find one, but its a smidgen too big. So Super In Law turns it down on the lathe. Too pissed to take pictures. 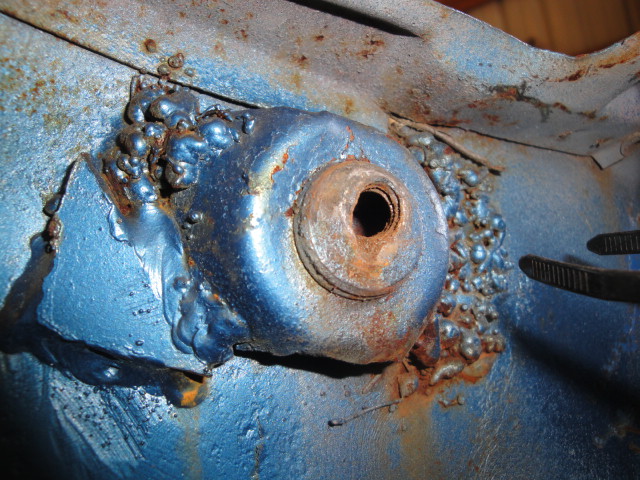 He spent some time polishing up all the moving pieces. Lubed every thing down with the Locktite anti-seize stick. We had the usual tag team confrontation with the spring bars. I'm going to to come up with a better way. Too much time touching the paint. Too much time spent taping every thing up. But the hood went in nice and flat. Might be off a mm or two left to right. Too much memory pressed into the hood under the hinge mount. With Mark's new paint I didn't want to grind it flat. Something to remember for future projects. 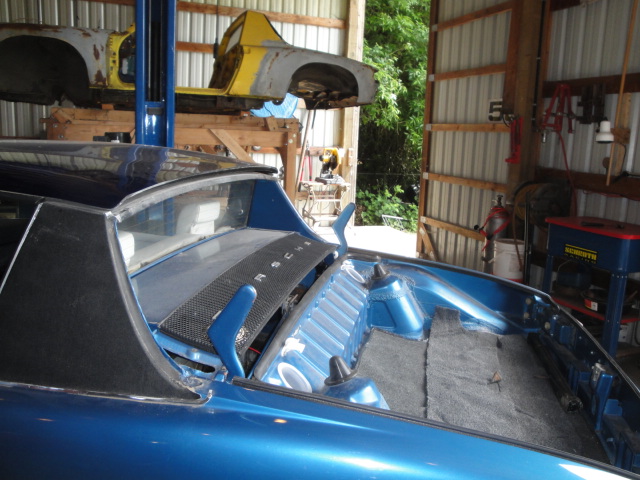 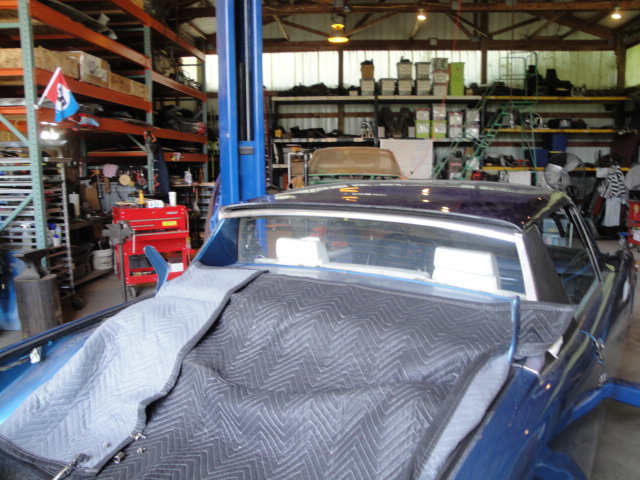 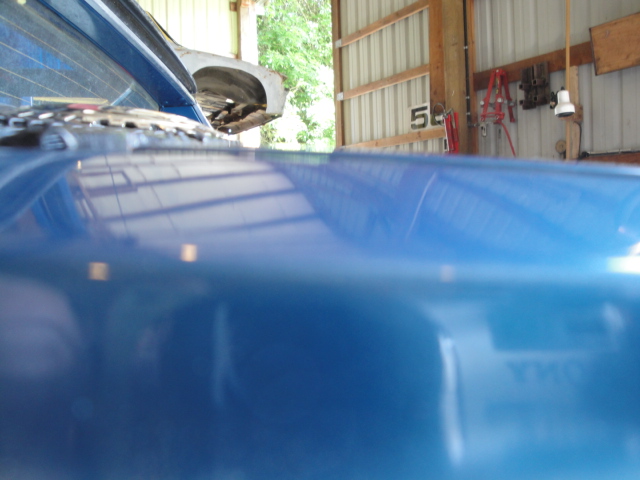 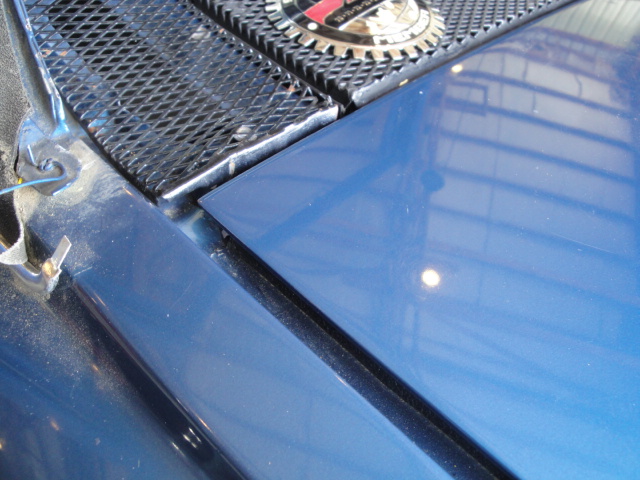 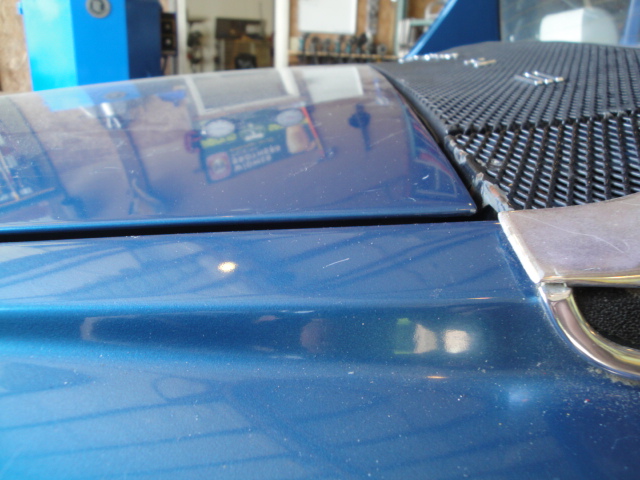 Then we had a little trim issue to tidy up. Some one one only used one clip to hold it on. Probably not going to work. 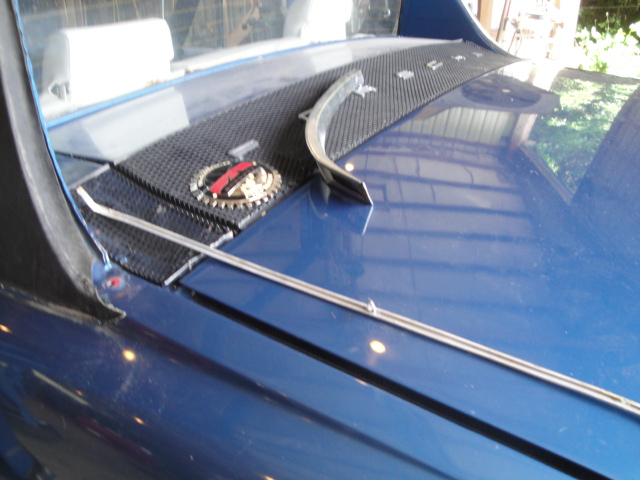 Taped off the area and laid down a little trim adhesive. 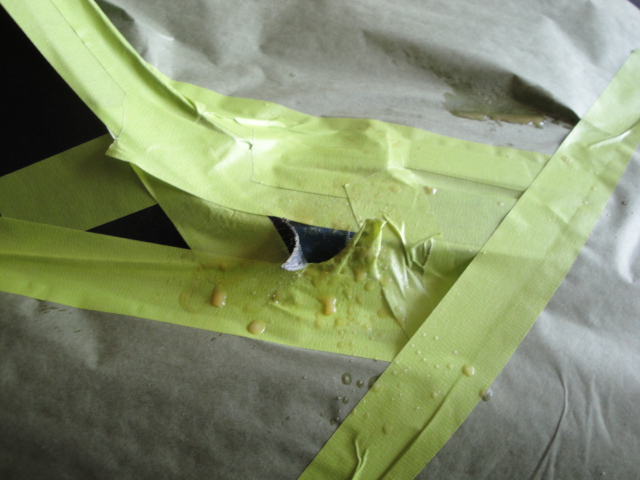 Nice and tight n tidy. 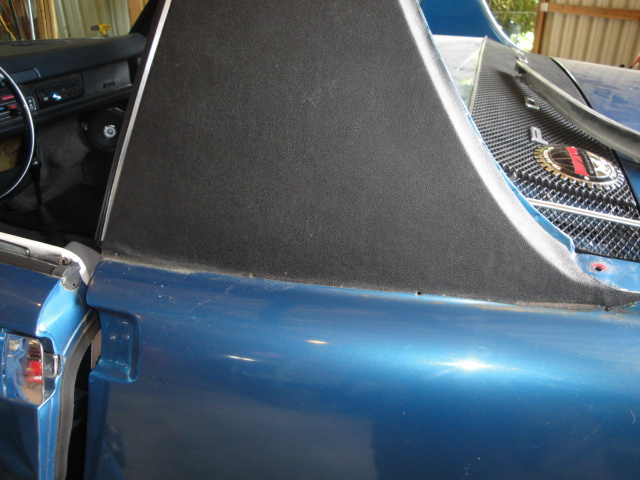 |
| cary |
 May 6 2016, 08:54 AM May 6 2016, 08:54 AM
Post
#210
|
|
Advanced Member     Group: Members Posts: 3,900 Joined: 26-January 04 From: Sherwood Oregon Member No.: 1,608 Region Association: Pacific Northwest 
|
Don't ask ..................
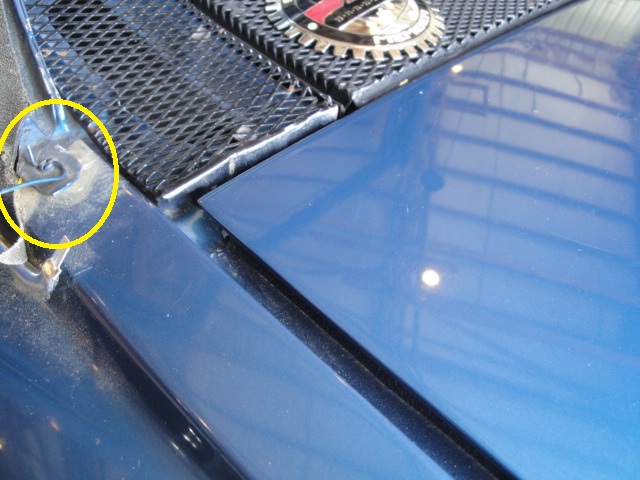 While I was in the rear trunk I used Mark's new harness tape to tidy up the rear tail light harness. 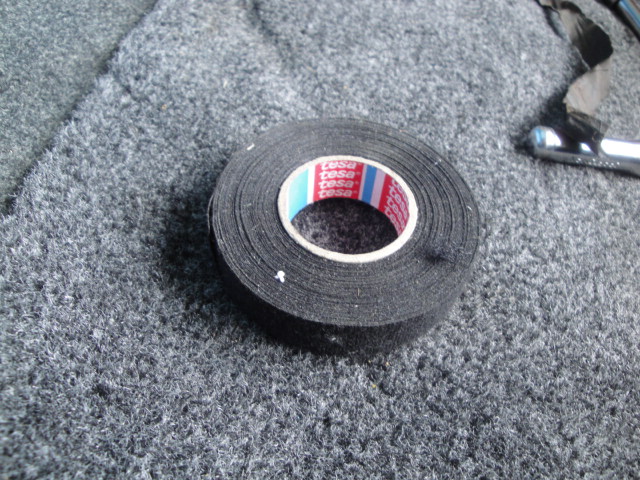 Installed the new rear Bilsteins. 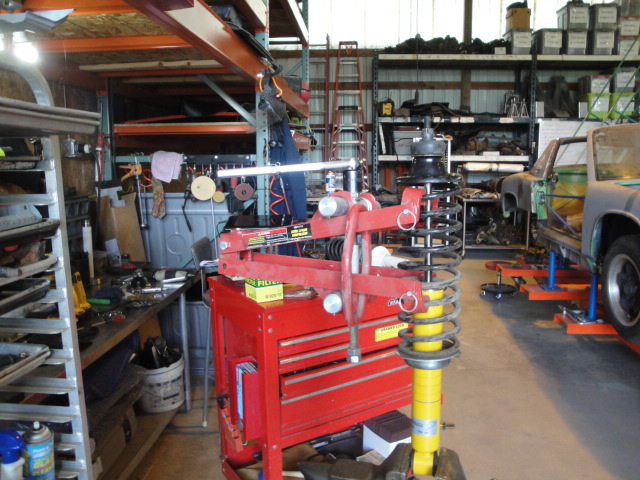 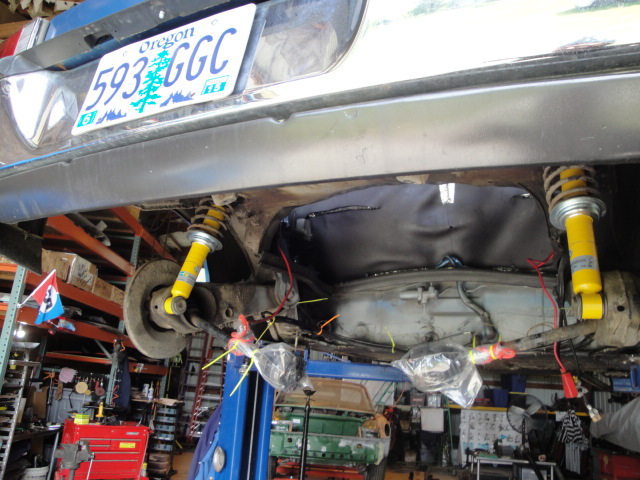 The day starts with a stop at Ace for some 1/4 by 1/4 barbed fittings. Pressure side of the fuel pressure regulator was hanging on with one barb. Not leaving that way ......... Need to add a fuel filter (Mark I have a couple in stock) and fresh fuel hoses. Then on to the front struts. But the front calipers need to be rebuilt. Pistons are hanging up. Hmmmmmmmmm. |
| 914fahrer |
 May 6 2016, 10:20 AM May 6 2016, 10:20 AM
Post
#211
|
|
Member   Group: Members Posts: 103 Joined: 12-November 14 From: Berlin/Germany Member No.: 18,115 Region Association: Germany |
Very nice Job Cary ,but I think you you have made a mistake with the Bilstein .The
big washer is up side down .Or this picture is wrong . (IMG:style_emoticons/default/idea.gif) 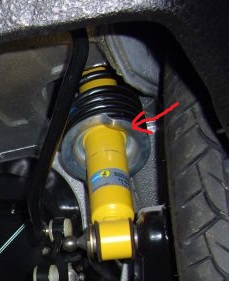 Ralf |
| Mikey914 |
 May 6 2016, 11:04 AM May 6 2016, 11:04 AM
Post
#212
|
|
The rubber man           Group: Members Posts: 12,742 Joined: 27-December 04 From: Hillsboro, OR Member No.: 3,348 Region Association: None 
|
I have the hoses in stock so let me know what I need. My last trip wound up getting pretty screwed up and as most of it was through LA and the southern part of our system got a few extra days off as they subbed out another crew for us. I'm in town and will get a hold of you.
Thanks |
| cary |
 May 6 2016, 09:44 PM May 6 2016, 09:44 PM
Post
#213
|
|
Advanced Member     Group: Members Posts: 3,900 Joined: 26-January 04 From: Sherwood Oregon Member No.: 1,608 Region Association: Pacific Northwest 
|
Very nice Job Cary ,but I think you you have made a mistake with the Bilstein .The big washer is up side down .Or this picture is wrong . (IMG:style_emoticons/default/idea.gif)  Ralf Ralf, here's what I went with. 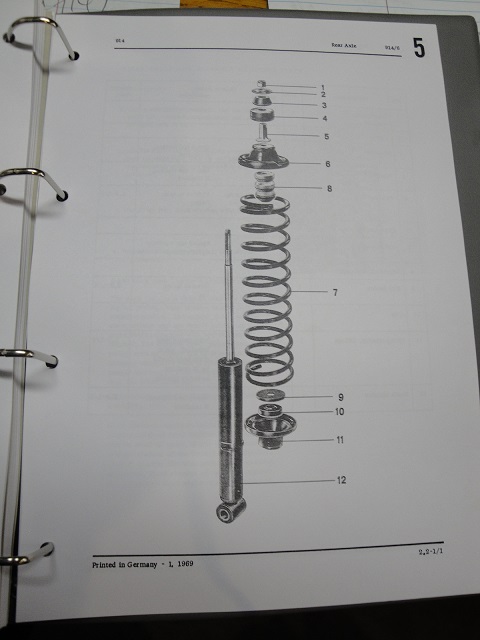 Factory service manual 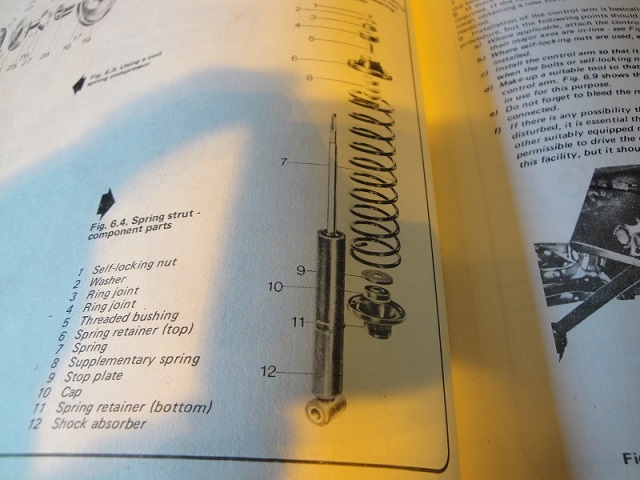 Haynes 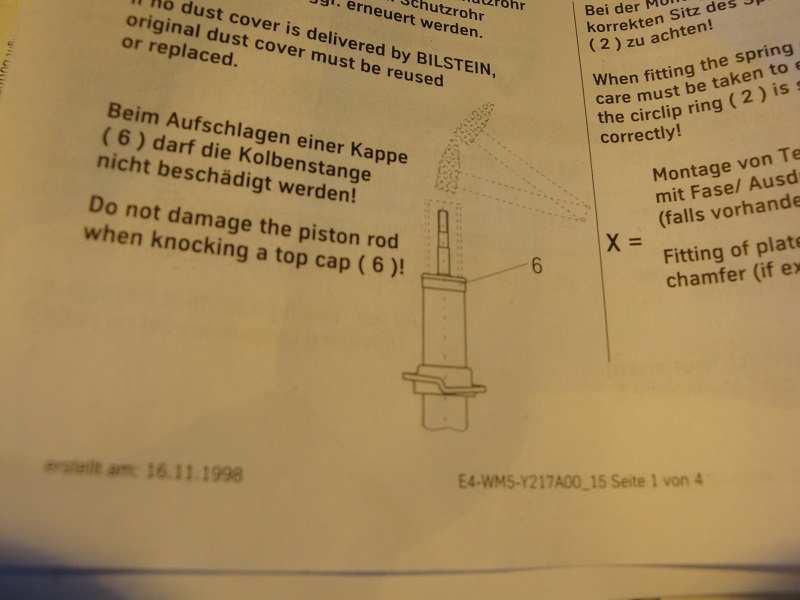 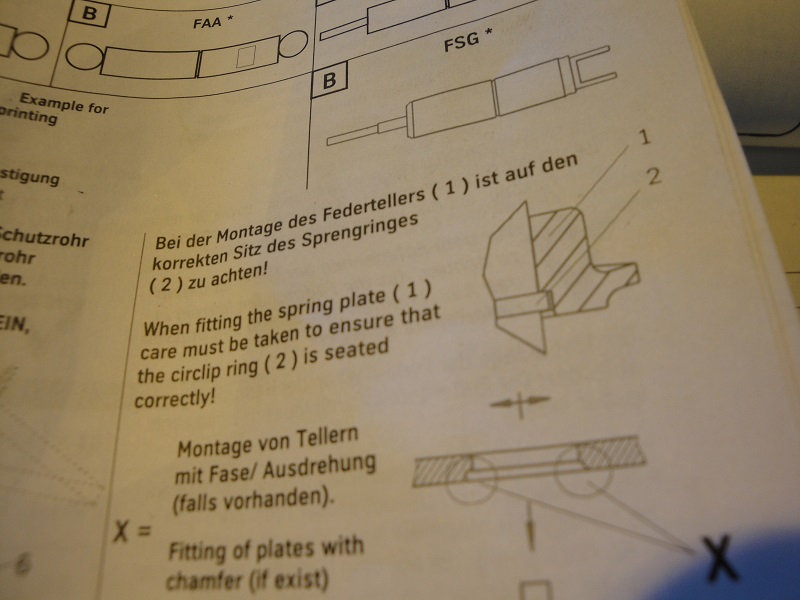 Bilstein inserts that came with shocks. The shocks on my DD are assembled the same way. Though be it, my DD is quite a bit lower. I set these at the same level as the KYB's that came off it. We'll know were I'm at when its back on the ground. |
| cary |
 May 6 2016, 10:14 PM May 6 2016, 10:14 PM
Post
#214
|
|
Advanced Member     Group: Members Posts: 3,900 Joined: 26-January 04 From: Sherwood Oregon Member No.: 1,608 Region Association: Pacific Northwest 
|
The first order of business was getting those barbs inserted in to the old plastic fuel lines.
Plan A was to heat up the plastic line in a cup of hot water. That did nothing. Same result that I originally saw. Barely getting one barb inserted. Well that just isn't going to work. Plan B. So lets heat up the barb. Hot water did absolutely nothing. Barely one barb. Hmm. Plan C. How the hell did Porsche do it back in the day? Then it came to me. More heat. So I fired up the Mapp torch. First attempt was too much. Melted the plastic pipe. Then I slowly passed the barb 10 times thru the blue flame tip of the Mapp torch. Here is the result. 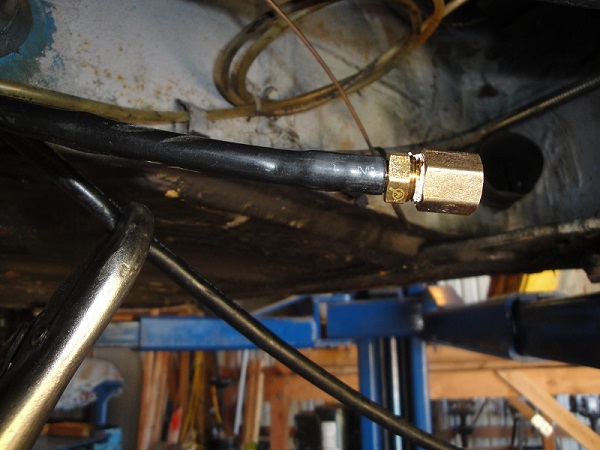 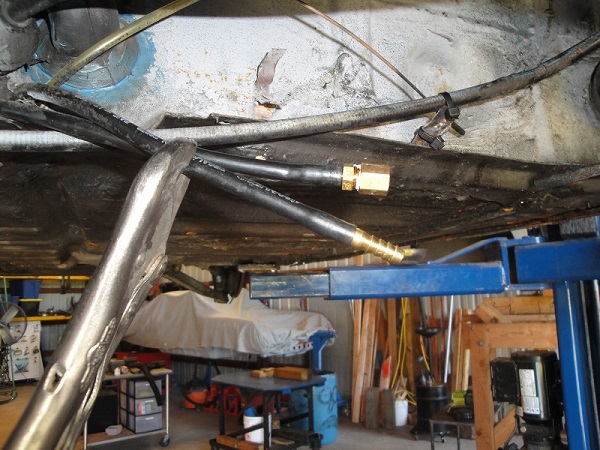 Yet to be pressure tested. But they are nice and tight and don't turn. We'll see tomorrow. Tool Whore Note: The vice grip fuel line clamp is the only tool that would cut off the fuel flow on the plastic fuel lines. 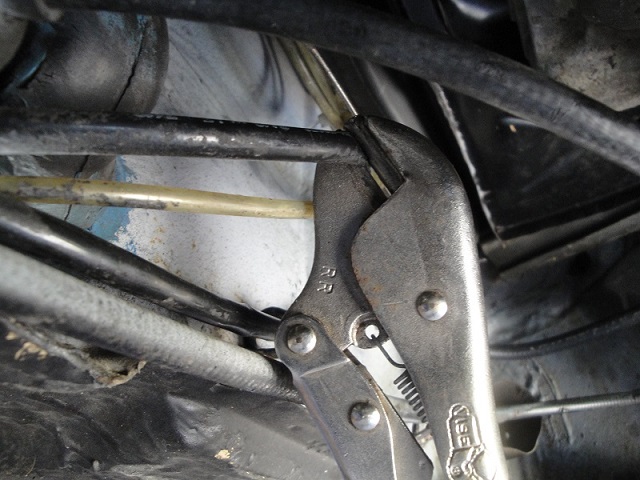 |
| cary |
 May 6 2016, 10:24 PM May 6 2016, 10:24 PM
Post
#215
|
|
Advanced Member     Group: Members Posts: 3,900 Joined: 26-January 04 From: Sherwood Oregon Member No.: 1,608 Region Association: Pacific Northwest 
|
While I was working on the fuel lines on the engine. Super In Law got after adding heat to the car. First task was to test the blower motor.
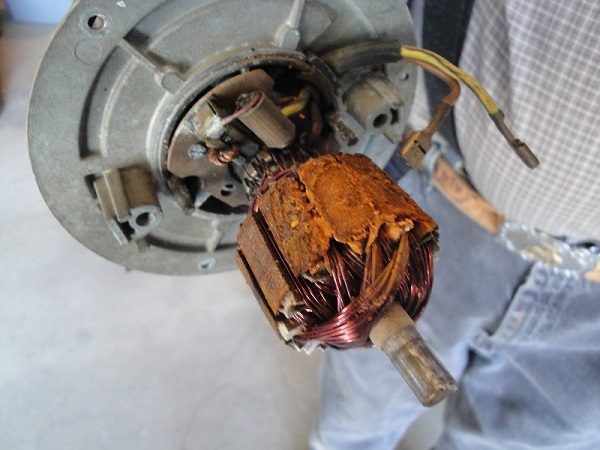 Looks like the blower motor had been submerged in water. Super In Law did his electric motor magic and had it up and running in about an hour. Then we blasted and painted the missing tubes. 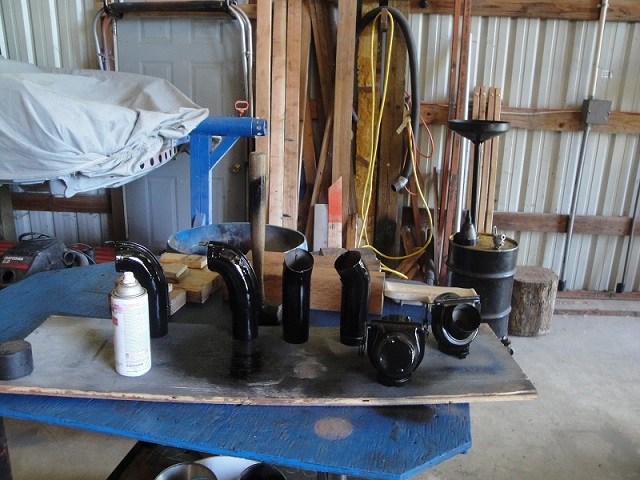 Then I started putting the pieces in. 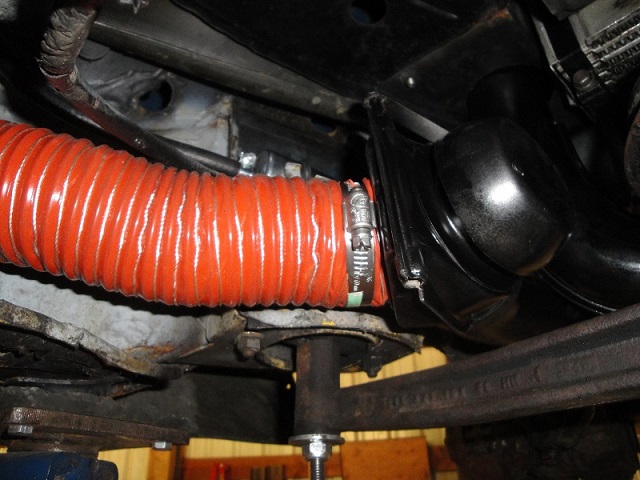 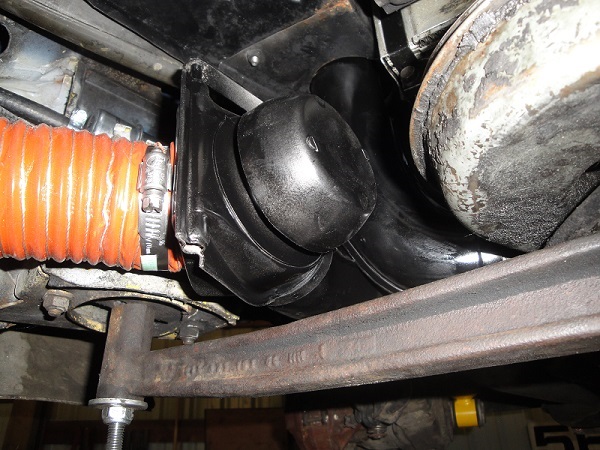 |
| cary |
 May 6 2016, 10:34 PM May 6 2016, 10:34 PM
Post
#216
|
|
Advanced Member     Group: Members Posts: 3,900 Joined: 26-January 04 From: Sherwood Oregon Member No.: 1,608 Region Association: Pacific Northwest 
|
Then Mark stopped by with more stuff.
Front brake caliper rebuild kits. Two sets of front wheel bearing. A couple more clutch cable nuts. And he dropped off the fender liners that we'll install on Monday. |
| falcor75 |
 May 7 2016, 01:00 AM May 7 2016, 01:00 AM
Post
#217
|
|
Senior Member    Group: Members Posts: 1,579 Joined: 22-November 12 From: Sweden Member No.: 15,176 Region Association: Scandinavia 
|
Whats the spec on the orange heater hose? I had some silicone hose laying around that I used but its way too stiff.
|
| cary |
 May 7 2016, 07:43 AM May 7 2016, 07:43 AM
Post
#218
|
|
Advanced Member     Group: Members Posts: 3,900 Joined: 26-January 04 From: Sherwood Oregon Member No.: 1,608 Region Association: Pacific Northwest 
|
Mats, I'll let Mark comment on the specs. But it is very easy to use and install. Just the right ID.
|
| 914fahrer |
 May 7 2016, 09:20 AM May 7 2016, 09:20 AM
Post
#219
|
|
Member   Group: Members Posts: 103 Joined: 12-November 14 From: Berlin/Germany Member No.: 18,115 Region Association: Germany |
Very nice Job Cary ,but I think you you have made a mistake with the Bilstein .The big washer is up side down .Or this picture is wrong . (IMG:style_emoticons/default/idea.gif)  Ralf Ralf, here's what I went with.  Factory service manual  Haynes   Bilstein inserts that came with shocks. The shocks on my DD are assembled the same way. Though be it, my DD is quite a bit lower. I set these at the same level as the KYB's that came off it. We'll know were I'm at when its back on the ground. Hello Cary , yes Koni and Boge look different. The manuel shows Boge . Please read this thread about Bilstein http://www.914world.com/bbs2/index.php?sho...217914&st=0 Ralf |
| Mikey914 |
 May 7 2016, 09:23 AM May 7 2016, 09:23 AM
Post
#220
|
|
The rubber man           Group: Members Posts: 12,742 Joined: 27-December 04 From: Hillsboro, OR Member No.: 3,348 Region Association: None 
|
Whats the spec on the orange heater hose? I had some silicone hose laying around that I used but its way too stiff. The hose is actually a little easier to install than the OEM. http://shop.914rubber.com/914-High-temp-He...m?categoryId=-1 |
  |
57 User(s) are reading this topic (57 Guests and 0 Anonymous Users)
0 Members:

|
Lo-Fi Version | Time is now: 18th January 2025 - 05:13 PM |
Invision Power Board
v9.1.4 © 2025 IPS, Inc.


