|
|

|
Porsche, and the Porsche crest are registered trademarks of Dr. Ing. h.c. F. Porsche AG.
This site is not affiliated with Porsche in any way. Its only purpose is to provide an online forum for car enthusiasts. All other trademarks are property of their respective owners. |
|
|
  |
| mbseto |
 Jul 6 2016, 01:13 PM Jul 6 2016, 01:13 PM
Post
#321
|
|
Senior Member    Group: Members Posts: 1,257 Joined: 6-August 14 From: Cincy Member No.: 17,743 Region Association: North East States |
I know I can't be the only one who'd be up to purchase a "Super In Law" t shirt! (IMG:style_emoticons/default/piratenanner.gif) Cary - you need to get a pic of him to one of our t-shirt making members and we should have a contest for the caption. Winner gets a first run t-shirt for free. Super In Law says "Give it here, young man... I'll have that fixed in no time." OK, so I won't win but I want a t-shirt!!  "And here, of course, is the new weapon you ordered." |
| Andyrew |
 Jul 6 2016, 01:40 PM Jul 6 2016, 01:40 PM
Post
#322
|
|
Spooling.... Please wait           Group: Members Posts: 13,377 Joined: 20-January 03 From: Riverbank, Ca Member No.: 172 Region Association: Northern California 
|
Top notch work there Cary!
|
| cary |
 Jul 29 2016, 08:59 PM Jul 29 2016, 08:59 PM
Post
#323
|
|
Advanced Member     Group: Members Posts: 3,900 Joined: 26-January 04 From: Sherwood Oregon Member No.: 1,608 Region Association: Pacific Northwest 
|
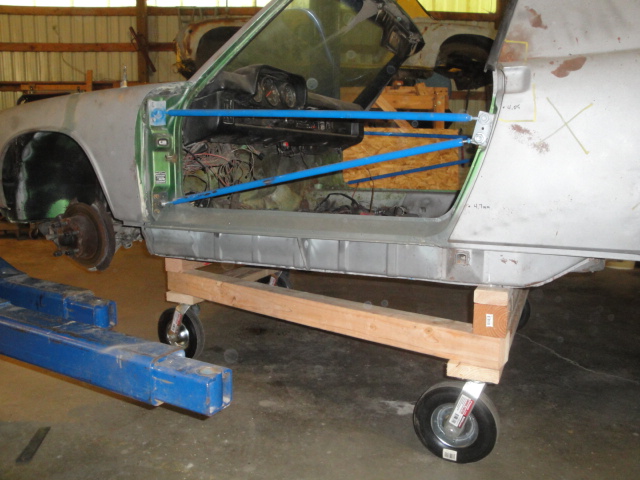
Mark's car on the new car dolly. This car is going on the back burner for a bit. Mark has another car moving ahead of it.
 |
| cary |
 Aug 4 2016, 11:50 PM Aug 4 2016, 11:50 PM
Post
#324
|
|
Advanced Member     Group: Members Posts: 3,900 Joined: 26-January 04 From: Sherwood Oregon Member No.: 1,608 Region Association: Pacific Northwest 
|
Mark stopped by this afternoon with some hoses for the engine swap I'm going to be doing for him starting next week.
While I was organizing my new to me tool box (Cary (Tool Whore) play day). He and Super In Law dropped the old engine out of the new project car. They did a marvelous job. No blood, no bad words and they didn't even get too dirty. |
| cary |
 Aug 6 2016, 10:09 AM Aug 6 2016, 10:09 AM
Post
#325
|
|
Advanced Member     Group: Members Posts: 3,900 Joined: 26-January 04 From: Sherwood Oregon Member No.: 1,608 Region Association: Pacific Northwest 
|
I brought the engine from Mark's primary project car home. That will allow me work on it a bit at night after everyone else goes to bed. Beats watching TV ...............
Nothing major. Tune up. New hoses and clamps . Paint the tins and pipes. Inspect and clean up FI harness. Brighten up FI ground lug. While the engine is out of the way Mark will give the engine bay a fresh coat of paint. The engine bay and fender wells will get a good steam cleaning first. |
| cary |
 Aug 18 2016, 09:20 PM Aug 18 2016, 09:20 PM
Post
#326
|
|
Advanced Member     Group: Members Posts: 3,900 Joined: 26-January 04 From: Sherwood Oregon Member No.: 1,608 Region Association: Pacific Northwest 
|
Here's the before and after shot of tearing down the engine.
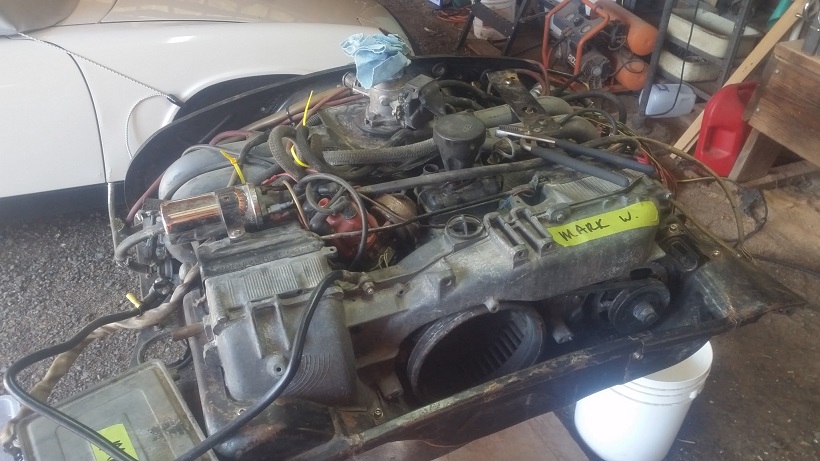 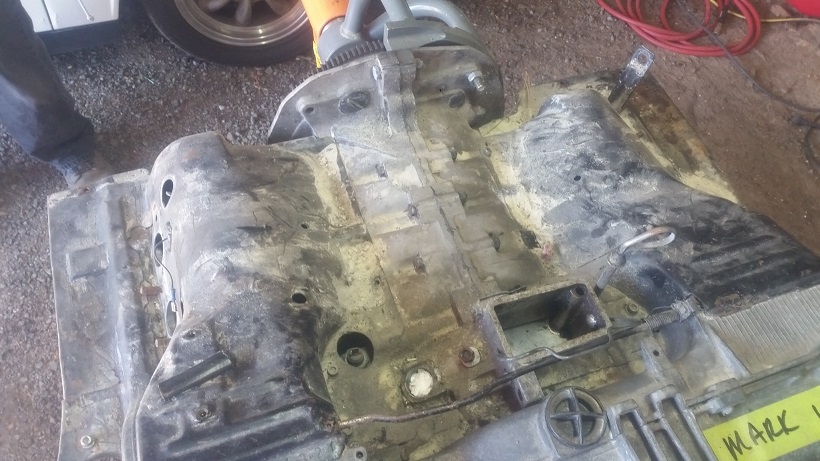 Quite a bit of Dustless Blaster residue under the engine tin. (IMG:style_emoticons/default/sad.gif) After some very detailed blasting in the cabinet. Everything gets a good spray down with OSPHO and left outside to dry overnight. 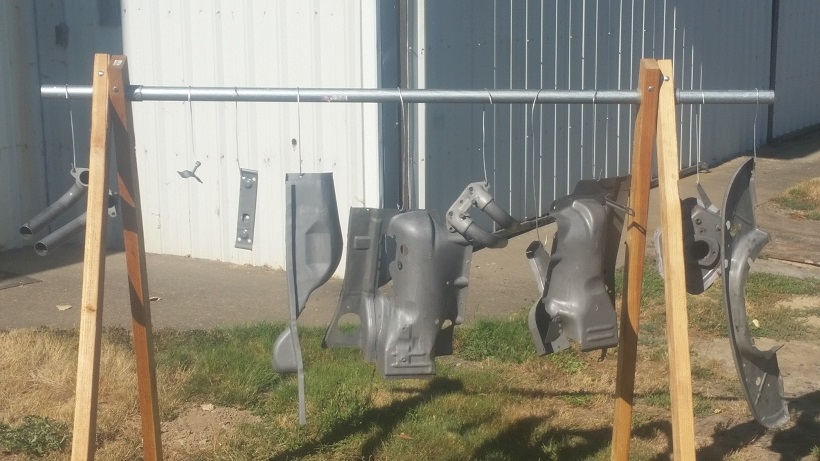 Left the shop at 4:45. Inside temp 98 degrees with doors closed and no lights. Damn hot . Tomorrow will be worse. Over 100. |
| cary |
 Aug 30 2016, 08:29 AM Aug 30 2016, 08:29 AM
Post
#327
|
|
Advanced Member     Group: Members Posts: 3,900 Joined: 26-January 04 From: Sherwood Oregon Member No.: 1,608 Region Association: Pacific Northwest 
|
Temps have dropped. Time to get back to work ................
Left Super In Law at home so he could lay low before his doctor appointment tomorrow. Pulled out the hot washer pressure washer and cleaned up the engine compartment in the car Mark will be putting for sale. Two green 75 cars. One I call the Project Car. The other is the For Sale Car. Mark's going to do some touch up paint work in the engine compartment of the For Sale Car. 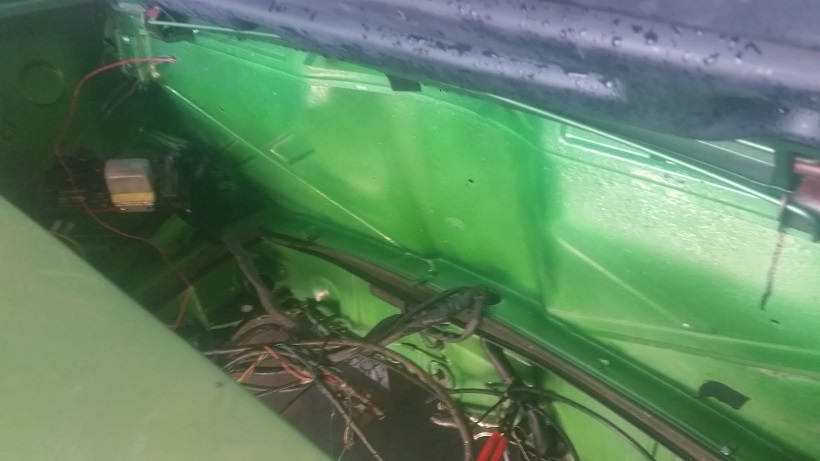 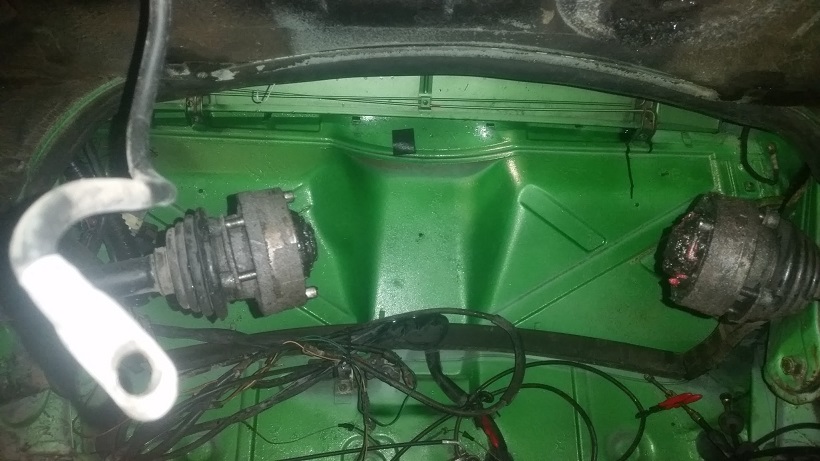 Pressure washing on the lift is kind of messy. But the only way to get a complete job. 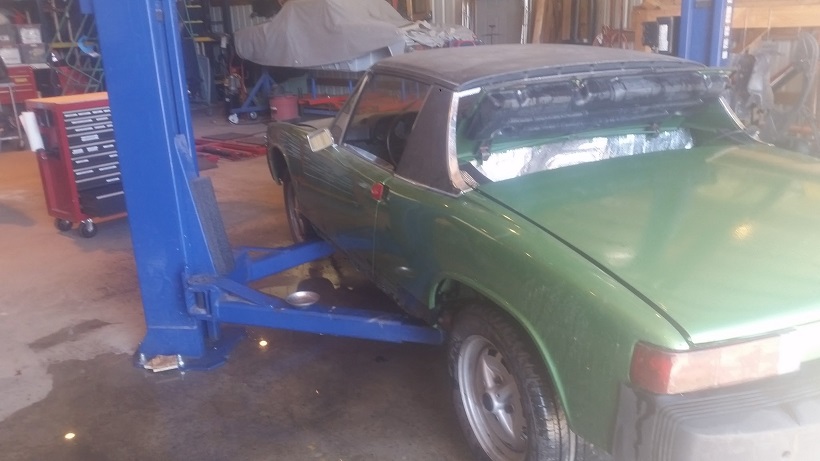 After that I scrubbed down the all OSPHO'd tin with a red scotchbrite. The priming and painting has begun. Started with the intake tubes. Mark provided the factory gray paint. Left the castings raw/natural. 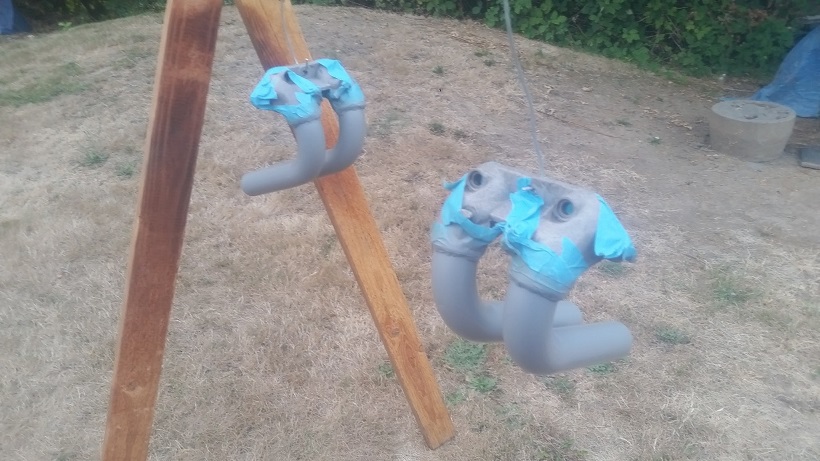 |
| cary |
 Aug 31 2016, 10:29 PM Aug 31 2016, 10:29 PM
Post
#328
|
|
Advanced Member     Group: Members Posts: 3,900 Joined: 26-January 04 From: Sherwood Oregon Member No.: 1,608 Region Association: Pacific Northwest 
|
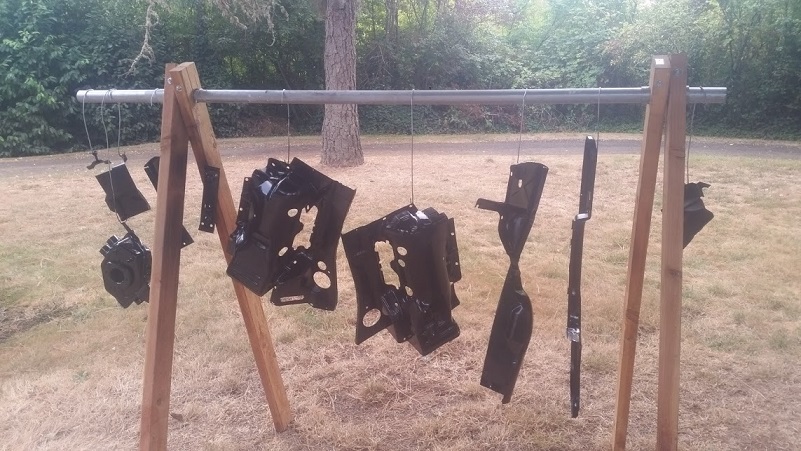
First coat of semi-gloss black applied.
 |
| cary |
 Sep 2 2016, 07:27 AM Sep 2 2016, 07:27 AM
Post
#329
|
|
Advanced Member     Group: Members Posts: 3,900 Joined: 26-January 04 From: Sherwood Oregon Member No.: 1,608 Region Association: Pacific Northwest 
|
Up early .................. Super In Law is chomping at the bit to get back to work.
Plan to day is to totally examine the For Sale car and create the work list. Then I'll move on to replacing the left jack point. It will probably involve cutting an access hole in the door jam. Which is even more tricky with the birthday/serial number sticker on that door jam. A little set back on the engine tin. If you don't paint wet on wet after a 1/2 hour, it's a 48 hour cure window. (IMG:style_emoticons/default/sad.gif) . I thought it was 24 hours. Rustoleum Semi Gloss. So that portion of the project gets moved to Sunday or Monday. |
| Mikey914 |
 Sep 3 2016, 12:34 AM Sep 3 2016, 12:34 AM
Post
#330
|
|
The rubber man           Group: Members Posts: 12,742 Joined: 27-December 04 From: Hillsboro, OR Member No.: 3,348 Region Association: None 
|
Thanks Cary,
I need to catch up with you this next week. Mark |
| cary |
 Sep 3 2016, 08:09 AM Sep 3 2016, 08:09 AM
Post
#331
|
|
Advanced Member     Group: Members Posts: 3,900 Joined: 26-January 04 From: Sherwood Oregon Member No.: 1,608 Region Association: Pacific Northwest 
|
We'll be out there today (Sat. 3rd.)
Next weeks schedule, Monday and Friday. Doing the Hood River Fly In on Saturday with some tail draggers. |
| cary |
 Sep 3 2016, 09:32 AM Sep 3 2016, 09:32 AM
Post
#332
|
|
Advanced Member     Group: Members Posts: 3,900 Joined: 26-January 04 From: Sherwood Oregon Member No.: 1,608 Region Association: Pacific Northwest 
|
Friday's work ...................
Doing the jack point replacement going in from the cut out door jam. 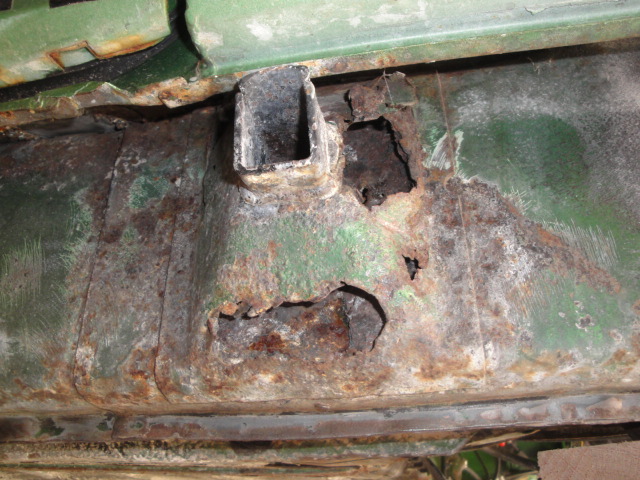 Covered up the birthdate/vin sticker for protection. 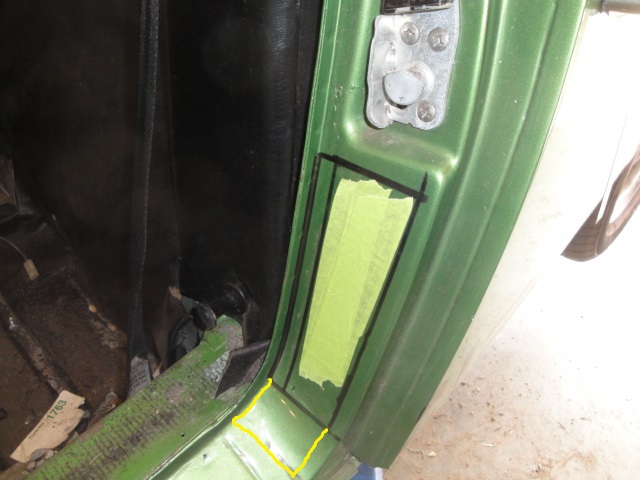 Should have cut down another inch for better access. But it worked. Needed extension marked in yellow. 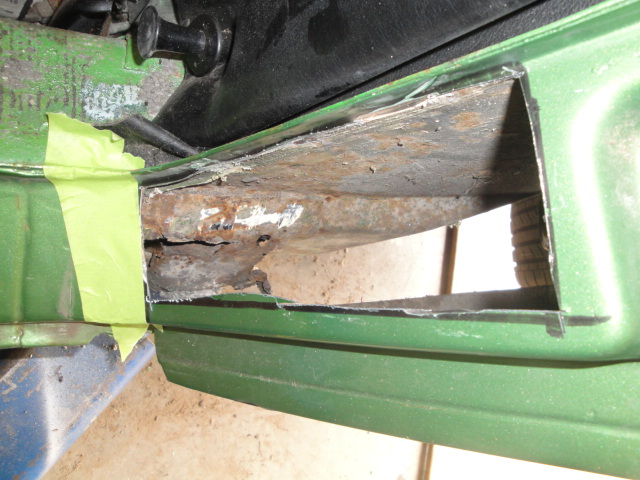 This is what you get if you don't remove your rocker panels and remove the road debris. (IMG:style_emoticons/default/sad.gif) 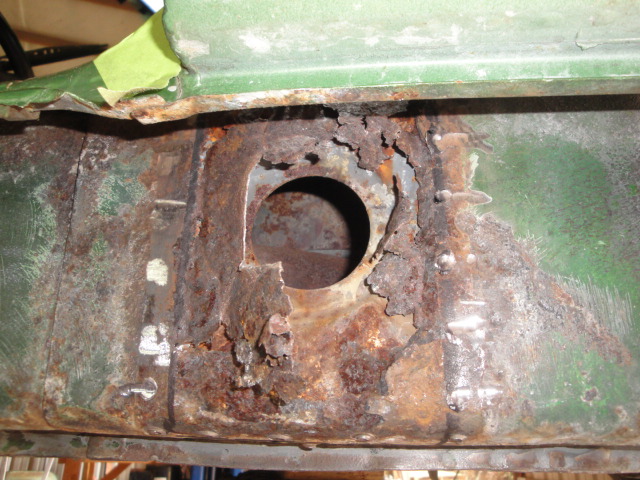 Inner layer of the long seems ok. I didn't shoot a picture at the end of the day. But the rusty portion is cut back and ready for a patch. A little more tinkering and she'll get a hose down with OSPHO. Then onto to cutting and dimpling the patch for the post. |
| Mikey914 |
 Sep 3 2016, 10:09 PM Sep 3 2016, 10:09 PM
Post
#333
|
|
The rubber man           Group: Members Posts: 12,742 Joined: 27-December 04 From: Hillsboro, OR Member No.: 3,348 Region Association: None 
|
Thanks Cary
|
| cary |
 Sep 3 2016, 11:19 PM Sep 3 2016, 11:19 PM
Post
#334
|
|
Advanced Member     Group: Members Posts: 3,900 Joined: 26-January 04 From: Sherwood Oregon Member No.: 1,608 Region Association: Pacific Northwest 
|
Saturday's work.
Cut out the remaining rusty portions behind the jack point. After that I soaked it down with OSPHO to let dry for a couple days. 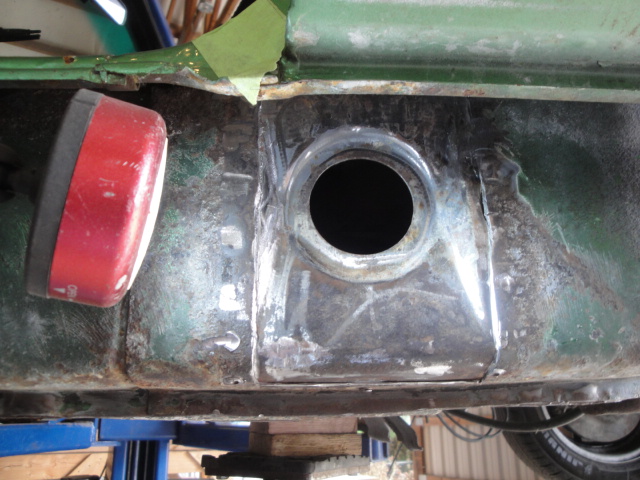 While I was doing the surgery. Super In Law was creating the patch piece. 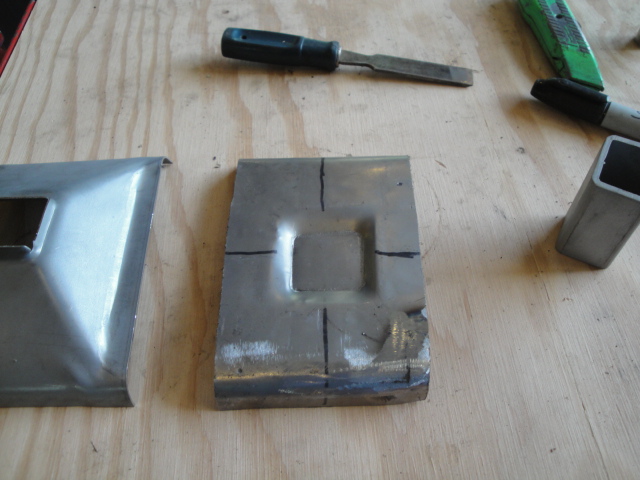 Mark stopped by after lunch to catch up on the progress and go over the plan. After that we dug into the issues with the rear trunk. At the end of the day its all about the fit and finish. Well, we found a bent/crushed in pivot on the left. Which turns the hood clockwise. Then the right has some sort of hardware store sleeve in place of the threaded pivot bushing. Which makes it an 1/8" too wide. So we ended the day by cutting a pivot out of my parts car. A little rusty so we're letting it soak till Monday. Then the mad scientists will light the PB Blaster on fire with the torch. That will break it loose. 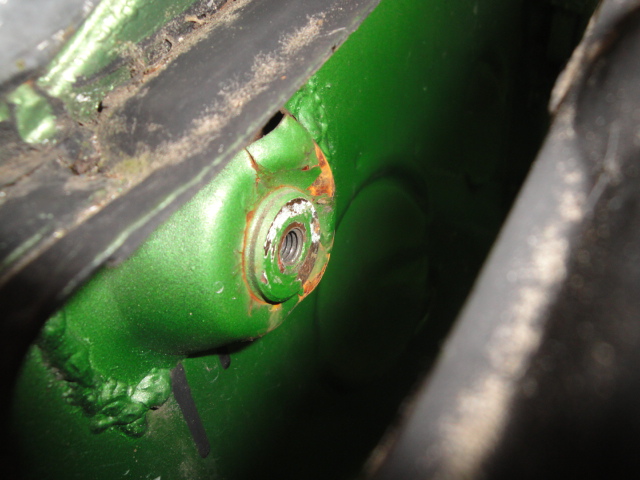 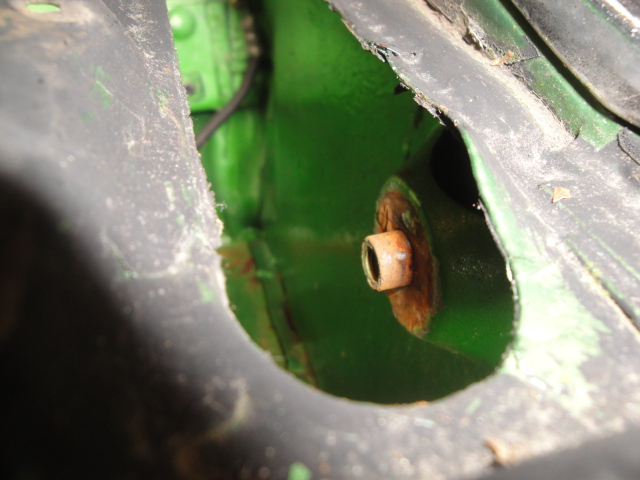 Taking a good portion of tomorrow off. Church and lunch with the wife and Super In Law. Then the wife and I will head downtown to look at work shoes. After returning home I'll do a little sanding and touch up on the engine tin. I'll be back on Monday night ............. |
| EdwardBlume |
 Sep 4 2016, 07:27 AM Sep 4 2016, 07:27 AM
Post
#335
|
|
914 Wizard           Group: Members Posts: 12,338 Joined: 2-January 03 From: SLO Member No.: 81 Region Association: Central California 
|
You can thank God for your skills. Nice work! (IMG:style_emoticons/default/smilie_pokal.gif)
|
| cary |
 Sep 5 2016, 09:37 PM Sep 5 2016, 09:37 PM
Post
#336
|
|
Advanced Member     Group: Members Posts: 3,900 Joined: 26-January 04 From: Sherwood Oregon Member No.: 1,608 Region Association: Pacific Northwest 
|
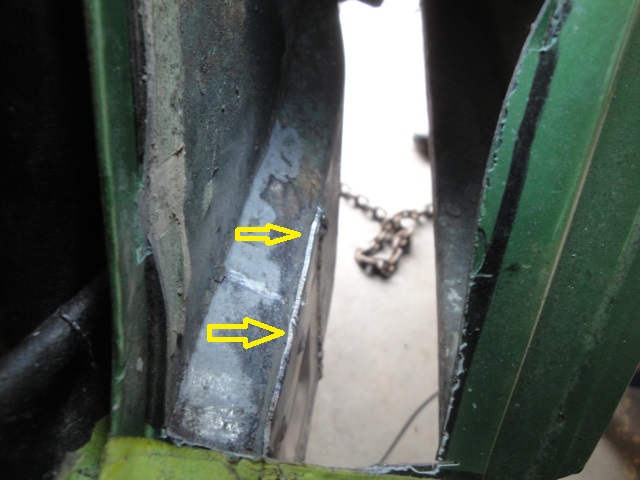
Start the day with installing the patch plate. This is a picture of the patch plate matching up to the radius of the long.
 Then onto locating the jack tube. I hold it in place with one of my Eastwood earth magnets. Then locate it with the outer rocker panel. 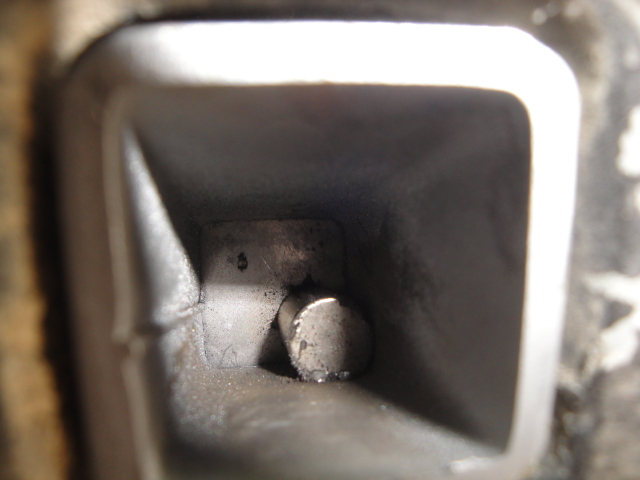 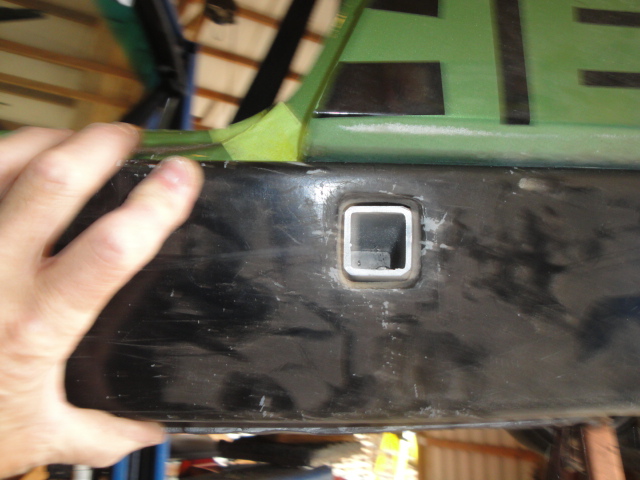 The patch and my weld in was off just a smidgen. But it gets covered up when welded in. 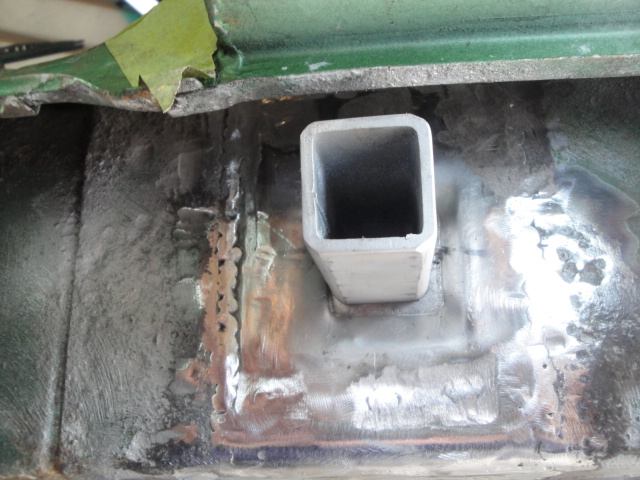 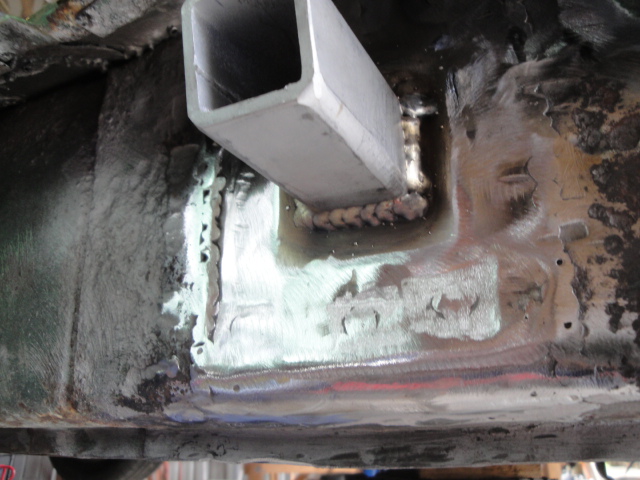 Then I weld on the jack plate cover. Hold it tight and in place with self tapping screws. 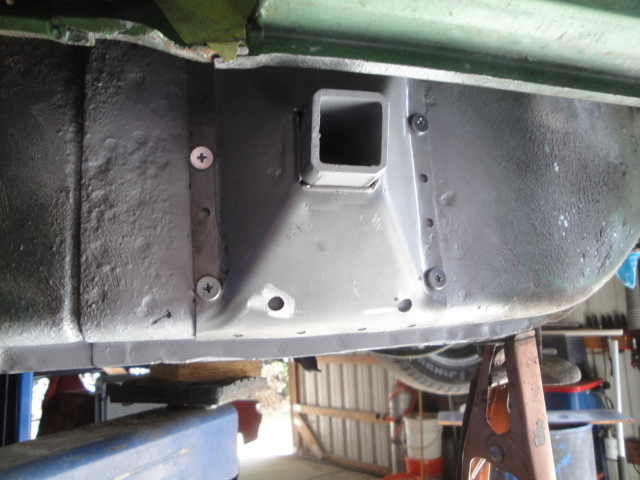 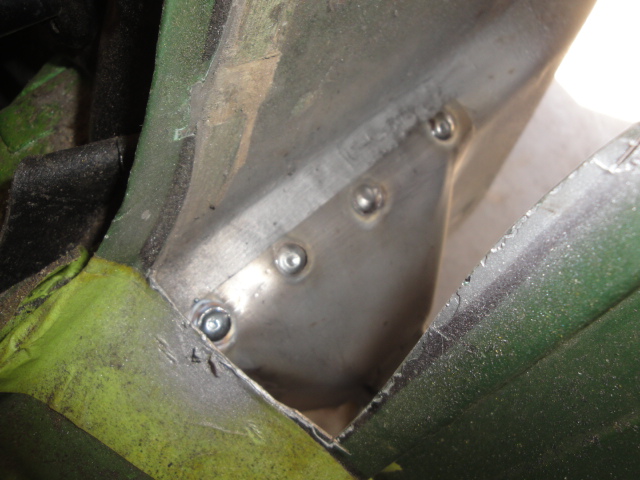 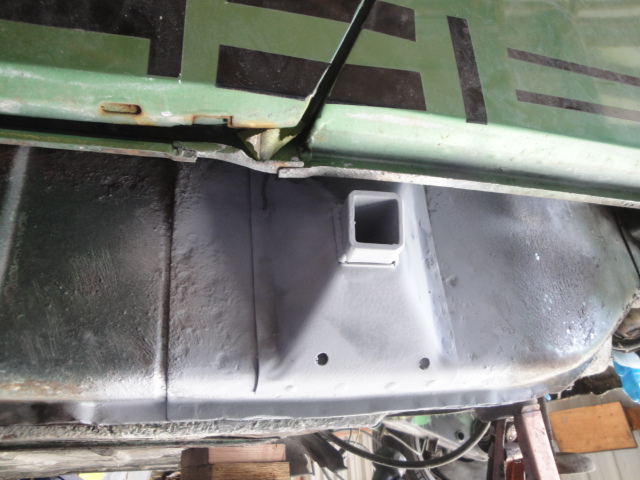 We do add a couple drain holes in the cover to allow for drainage. Then on to analyzing the issues with the rear trunk. We start with the bent left pivot. Then the correction of the right pivot. It was installed backwards. We'll make a few modifications and add a few shims to make it look correct. Took a bit, but we found 4 hinge rod brackets to strip, primer and paint to match the car. 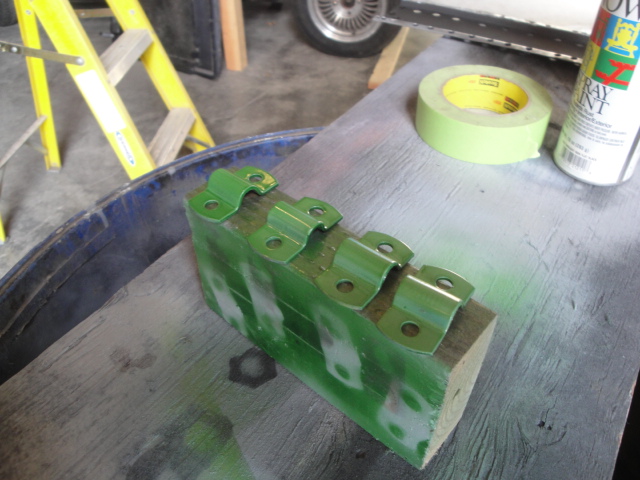 |
| cary |
 Sep 9 2016, 08:54 AM Sep 9 2016, 08:54 AM
Post
#337
|
|
Advanced Member     Group: Members Posts: 3,900 Joined: 26-January 04 From: Sherwood Oregon Member No.: 1,608 Region Association: Pacific Northwest 
|
Three days at Rothsport. Now back to work at our place. Super In Law is chomping at the bit.
Time for a little show and tell. I asked Jeff if we had any 10*50 mm bolts or Allen heads with a 1.0 pitch to plug some air pump ports on a 75 2.0L cylinder head, showing him the pipe cap arrangement that was on the car. He said that 10mm by 1.0 pitch is almost the same at 1/8" pipe so they use a 1/8" pipe plug when they need to plug the ports on air pump heads. 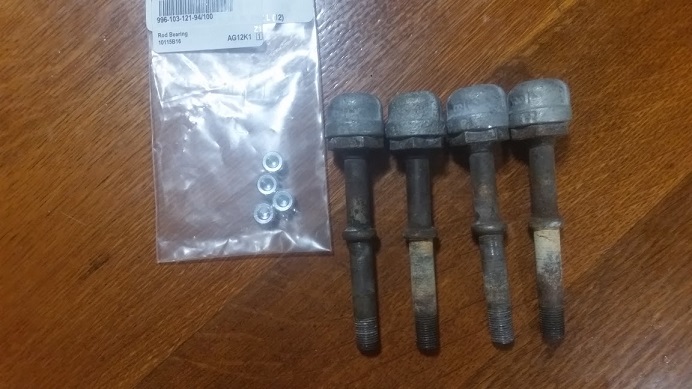 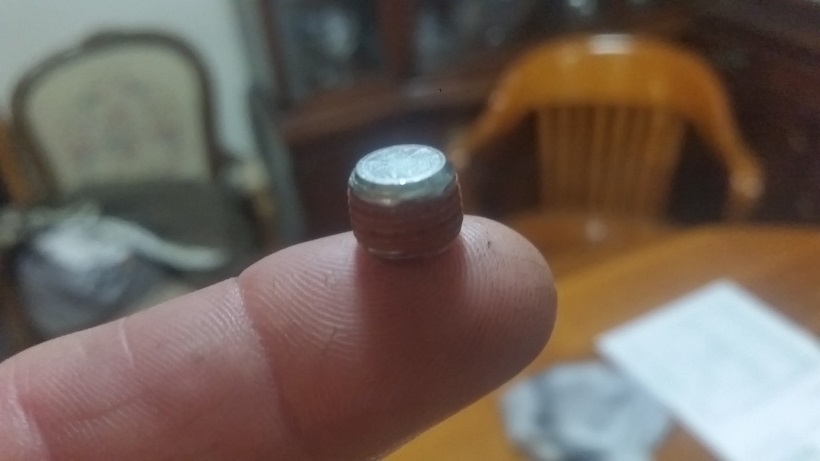 We'll go back to work on the rear trunk alignment and hinges this am. I'll go do some measurements on the couple 74's that are in the other building that haven't been touched in 15-20 years. Both of these have rear trunk lids on them. |
| cary |
 Sep 11 2016, 10:32 AM Sep 11 2016, 10:32 AM
Post
#338
|
|
Advanced Member     Group: Members Posts: 3,900 Joined: 26-January 04 From: Sherwood Oregon Member No.: 1,608 Region Association: Pacific Northwest 
|
Getting the rear trunk hood installed to my liking will take some creativity.
Taillight panel bowed out. Left qtr. panel bowed in. Be it not much, enough to bug the crap out of me. Qtr panel bowed in : something for the next owner. 1/8 " 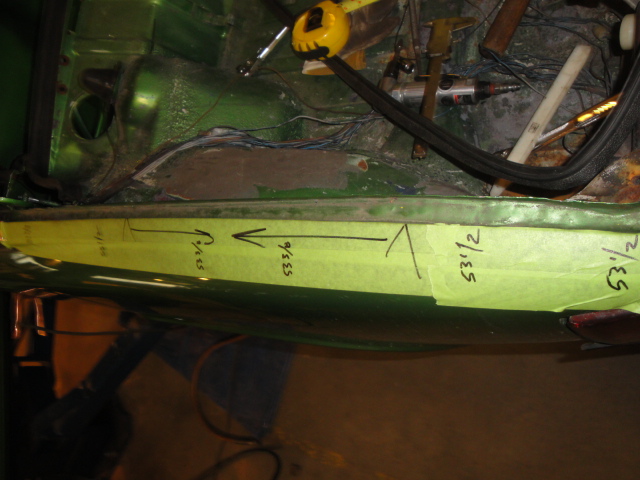 Dug out our hood spring tools to install the springs. 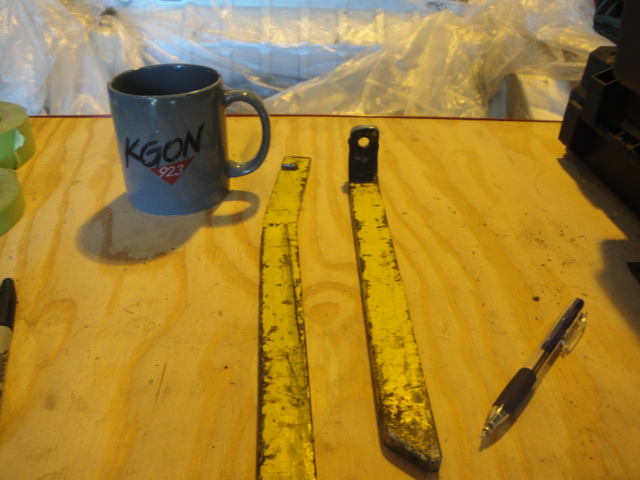 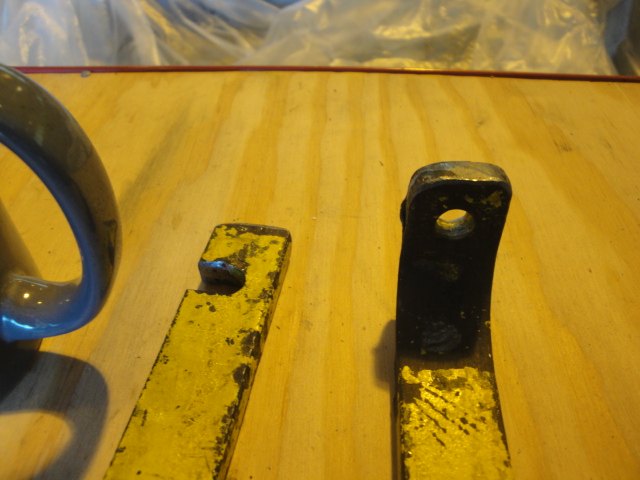 I'll go into latch catch support on the next episode. I'll take measurements off my DD this afternoon. Paying close attention to the depth of the closed hood. |
| cary |
 Sep 12 2016, 08:04 AM Sep 12 2016, 08:04 AM
Post
#339
|
|
Advanced Member     Group: Members Posts: 3,900 Joined: 26-January 04 From: Sherwood Oregon Member No.: 1,608 Region Association: Pacific Northwest 
|
Had a couple minutes before bedtime so I drilled out the broken off wire in the CHT.
Took a little persuasion with the 15 amp soldering iron to get the wire soldered in, but I got it. I have continuity from the tip of the wire to the base of the sensor. I'll have to read the manual to figure how to measure the resistance. Getting 6.6 or something like that. Doesn't look right. 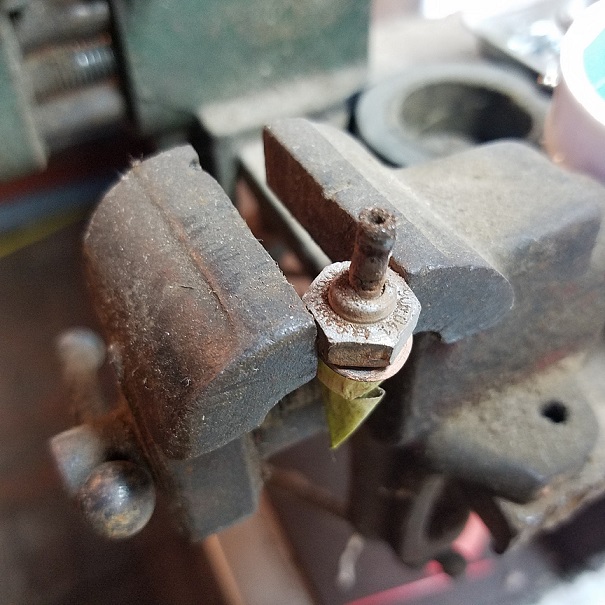 Got a new phone yesterday. Much more better. |
| Mikey914 |
 Sep 12 2016, 11:16 AM Sep 12 2016, 11:16 AM
Post
#340
|
|
The rubber man           Group: Members Posts: 12,742 Joined: 27-December 04 From: Hillsboro, OR Member No.: 3,348 Region Association: None 
|
Thanks Cary,
Seems like every time I bring you a car, I find a bigger project. At least I'm getting this all dealt with! |
  |
1 User(s) are reading this topic (1 Guests and 0 Anonymous Users)
0 Members:

|
Lo-Fi Version | Time is now: 18th January 2025 - 01:51 AM |
Invision Power Board
v9.1.4 © 2025 IPS, Inc.


