|
|

|
Porsche, and the Porsche crest are registered trademarks of Dr. Ing. h.c. F. Porsche AG.
This site is not affiliated with Porsche in any way. Its only purpose is to provide an online forum for car enthusiasts. All other trademarks are property of their respective owners. |
|
|
  |
| cary |
 Mar 7 2016, 10:39 PM Mar 7 2016, 10:39 PM
Post
#61
|
|
Advanced Member     Group: Members Posts: 3,900 Joined: 26-January 04 From: Sherwood Oregon Member No.: 1,608 Region Association: Pacific Northwest 
|
Now's it time to create a 75-76 rear panel from a pre 74 rear panel.
First ........... remove the tow hook. Not an easy task when trying not to damage the sheet metal underneath. 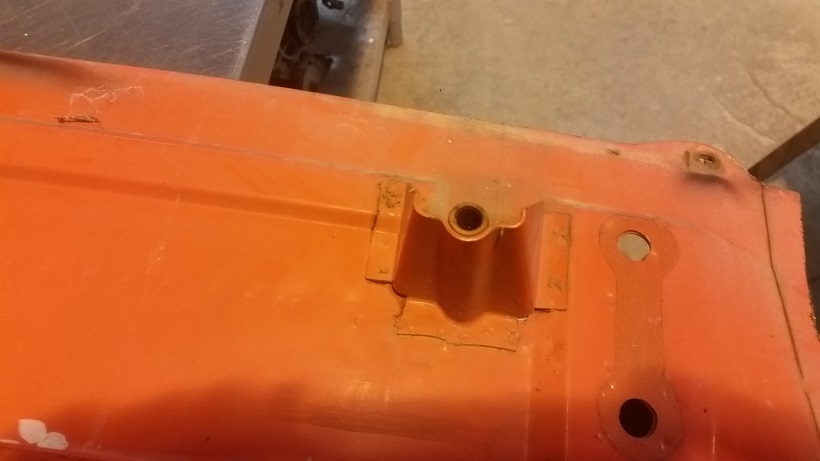 See post above for removed pieces Next remove the spot welded flange of the rear trunk floor pan. Probably 50 spot welds. 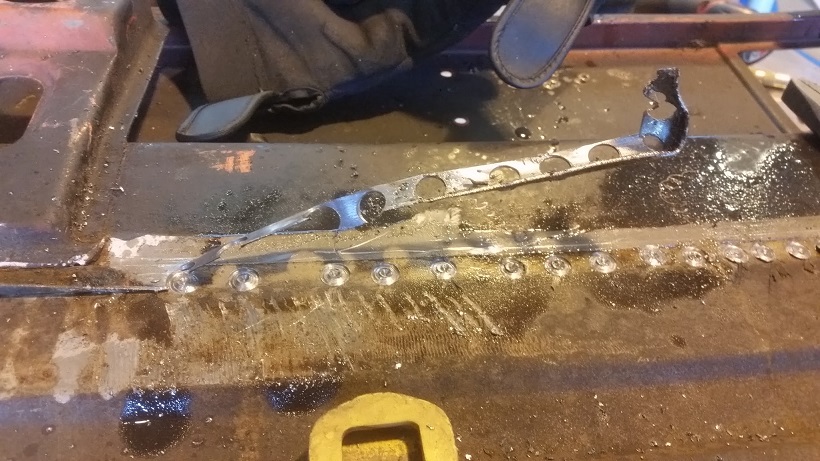 Next peel back the flange of the qtr. panel where it ties to the rear panel. Delicate work. Used the Rick's method. Ground it down with die grinder them peeled it back with the small wood chisel. 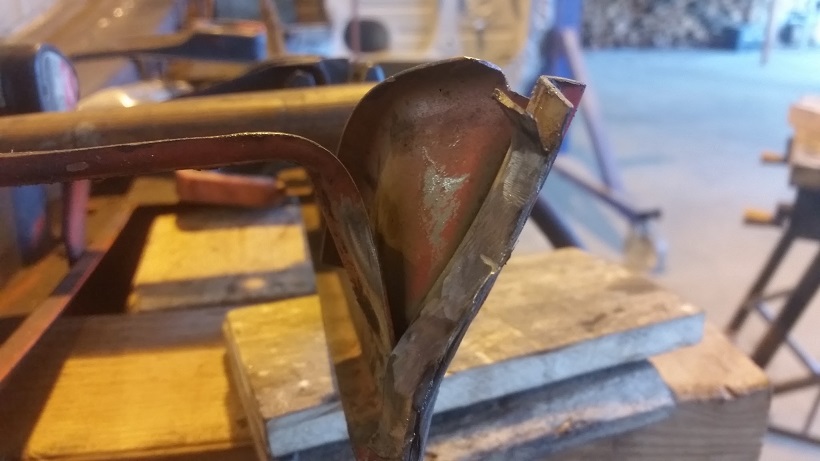 Tow hook removed (yellow) and qtr. panel (blue) that came with the cut out removed. 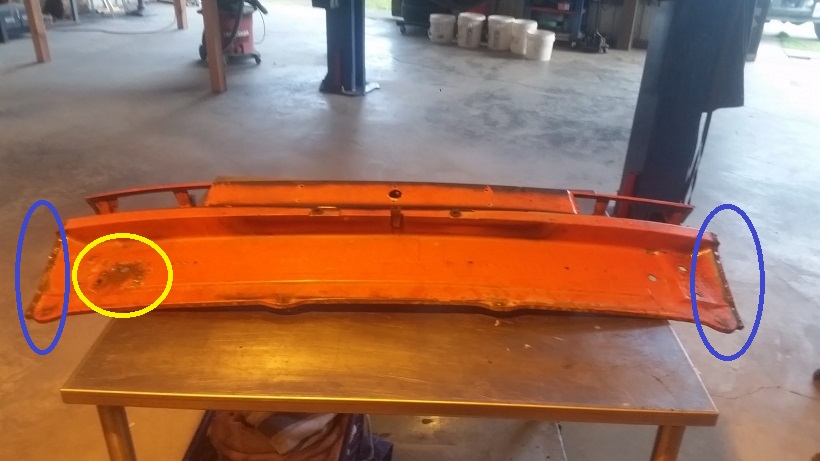 Braces will still need to be removed. 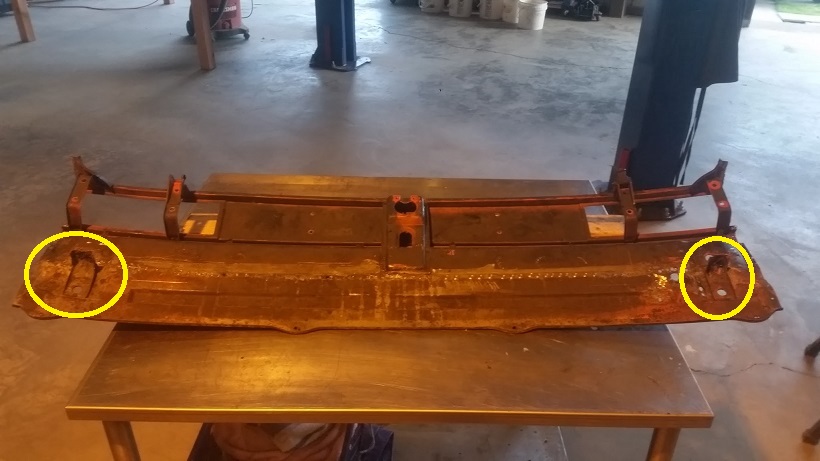 And these braces will need to be transferred from the old rear panel. 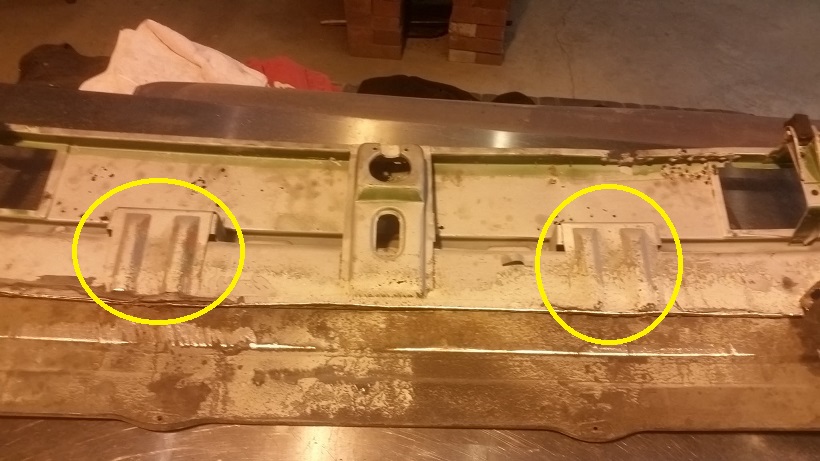 |
| cary |
 Mar 7 2016, 10:40 PM Mar 7 2016, 10:40 PM
Post
#62
|
|
Advanced Member     Group: Members Posts: 3,900 Joined: 26-January 04 From: Sherwood Oregon Member No.: 1,608 Region Association: Pacific Northwest 
|
Super In Law finished up the engine shelf.
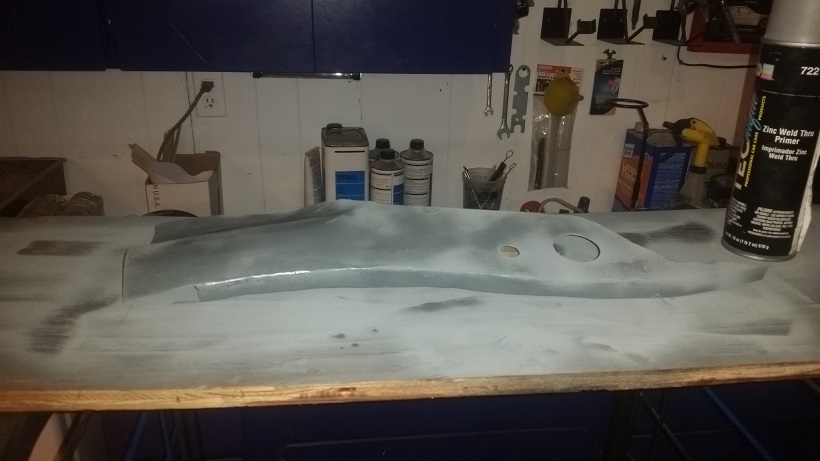 |
| Mikey914 |
 Mar 8 2016, 01:06 AM Mar 8 2016, 01:06 AM
Post
#63
|
|
The rubber man           Group: Members Posts: 12,742 Joined: 27-December 04 From: Hillsboro, OR Member No.: 3,348 Region Association: None 
|
WOW Cary,
I was not around for a few days and you really kept the project moving. Saw Peter at Design Restoration this weekend and we should have some metal on the way tomorrow. I just need to drop them another call tomorrow. If Ken needs anything we are not using he can have it. Just let me know and I'll get it out next week for him. |
| Mikey914 |
 Mar 8 2016, 01:11 AM Mar 8 2016, 01:11 AM
Post
#64
|
|
The rubber man           Group: Members Posts: 12,742 Joined: 27-December 04 From: Hillsboro, OR Member No.: 3,348 Region Association: None 
|
Looks like I'm in the market for some ss fuel lines now too. I did start the rubber for the firewall on these.
Attached image(s) 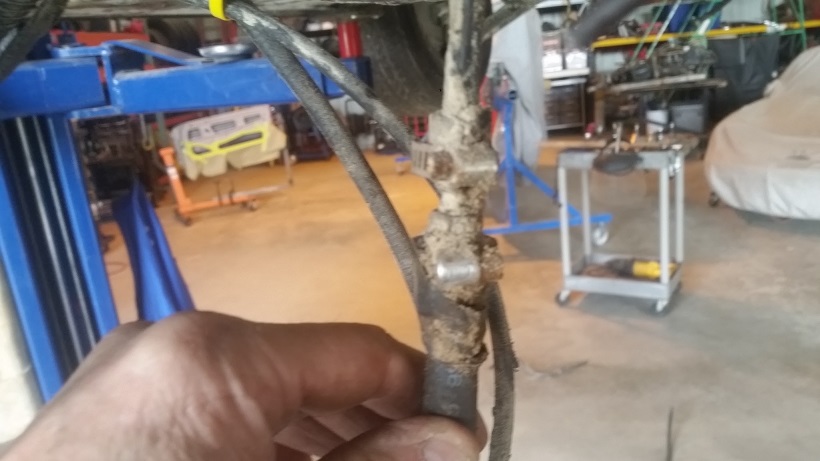
|
| cary |
 Mar 8 2016, 11:26 PM Mar 8 2016, 11:26 PM
Post
#65
|
|
Advanced Member     Group: Members Posts: 3,900 Joined: 26-January 04 From: Sherwood Oregon Member No.: 1,608 Region Association: Pacific Northwest 
|
Start the day with a break in the rain so I make an attempt to bead blast the rear panel.
Only got the outside completed before the rain came and stayed all day. (IMG:style_emoticons/default/sad.gif) 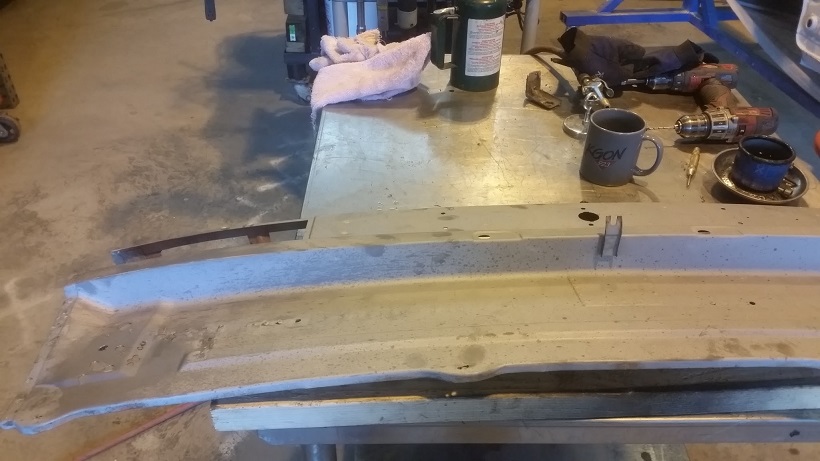 Get my six shooters ready for spot weld drilling .............. 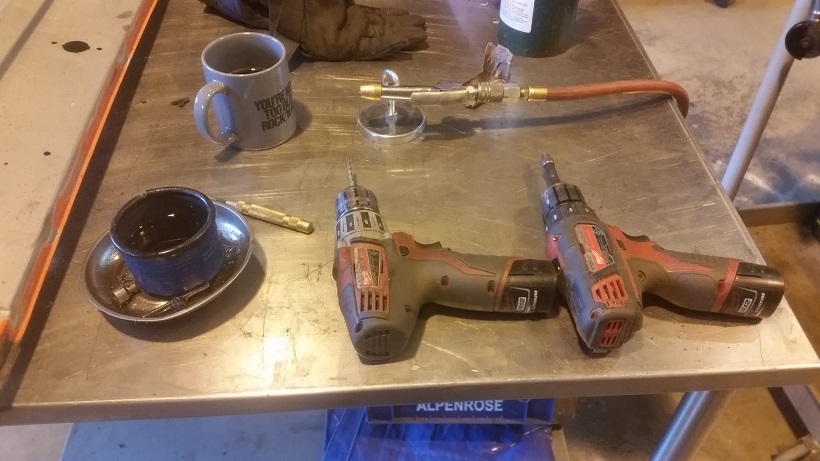 Off comes the braces. 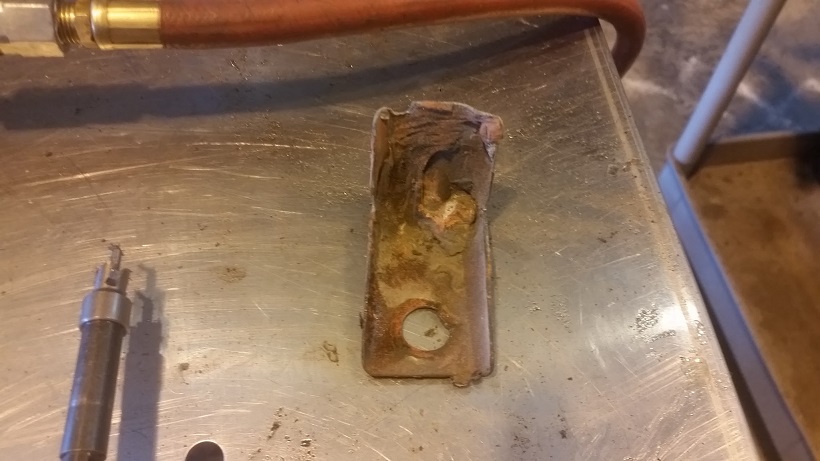 Then I cut the larger braces off the old 75-76 rear panel. They have to be cut out because you can't get a pry tool into the area called out with the yellow arrow. 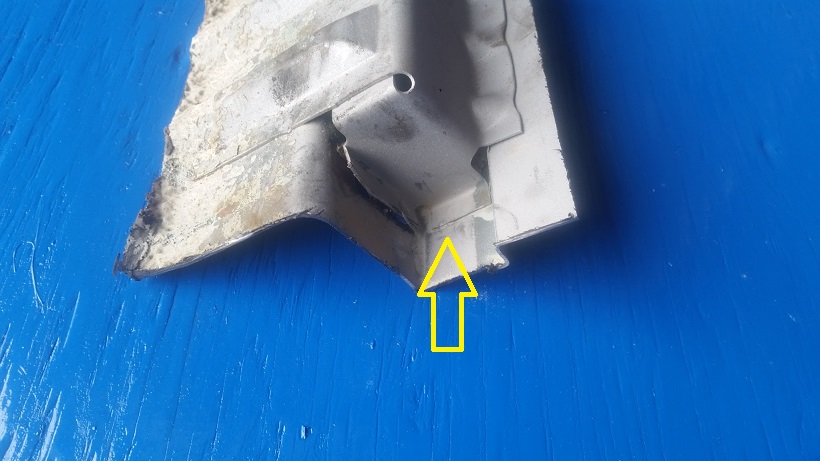 Now you can get at all the flanges when it's in the vice. 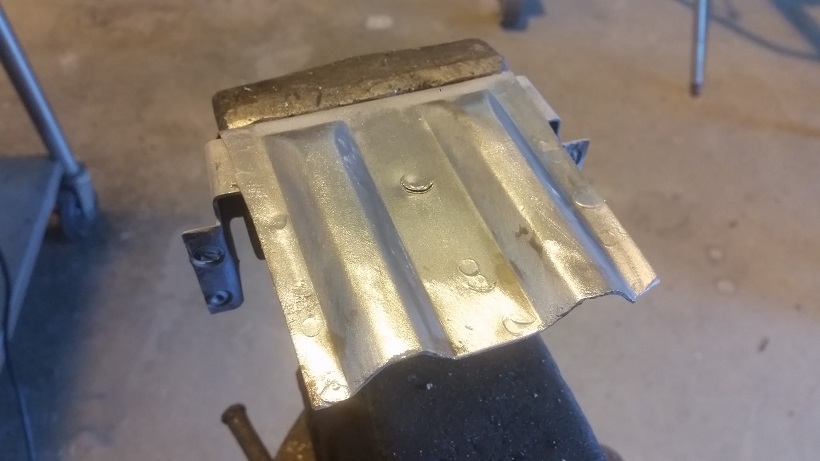 Now all prepped with rosette holes and ready for installation. But it will get a spray down with OSPHO and dry over night. 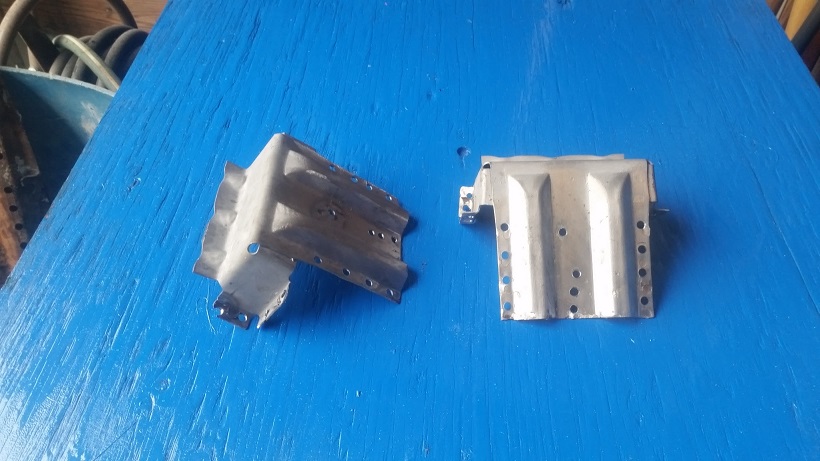 |
| cary |
 Mar 8 2016, 11:37 PM Mar 8 2016, 11:37 PM
Post
#66
|
|
Advanced Member     Group: Members Posts: 3,900 Joined: 26-January 04 From: Sherwood Oregon Member No.: 1,608 Region Association: Pacific Northwest 
|
Now on to filling the holes on the early rear panel we're converting to a 75-76 rear panel.
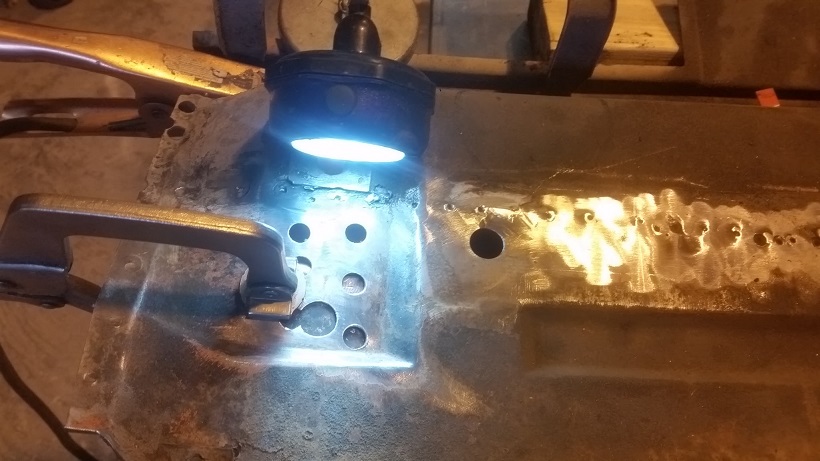 Dog bone and brace holes filled and ground down. 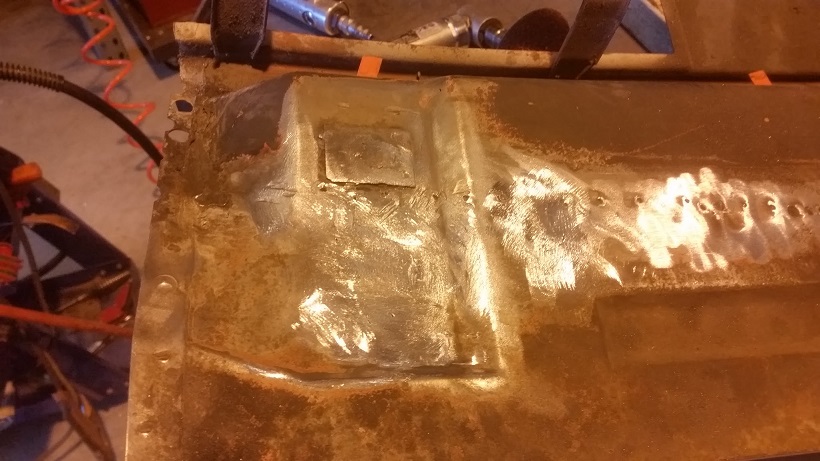 After bead blasting I find that this rear panel has had a rear PORSCHE refelector at one time. It had quite a bit of filler. 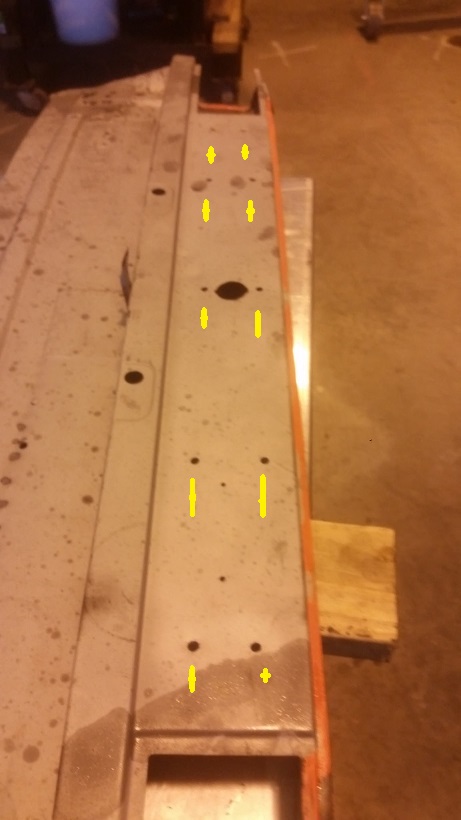 Early bumper hanger has to be removed. 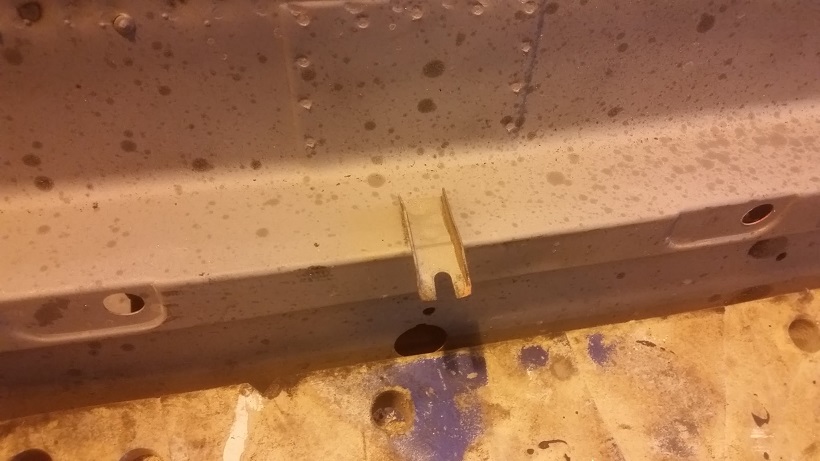 On to filling the left side. Dog bone, brace and toe hook. 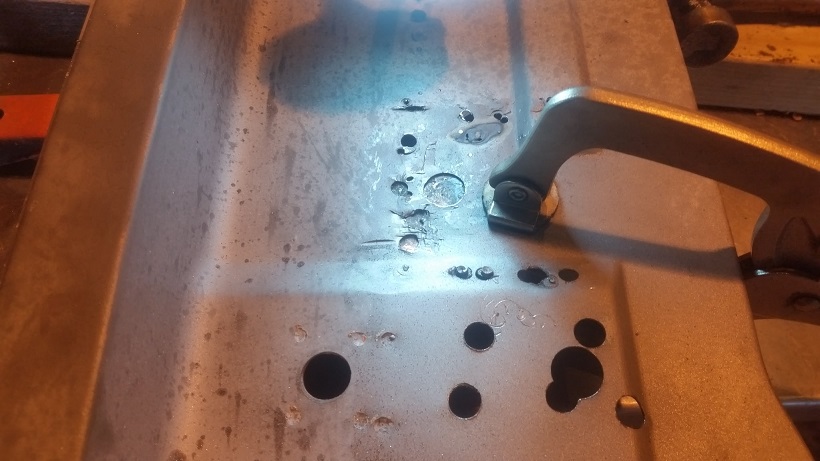 |
| Mikey914 |
 Mar 9 2016, 12:11 AM Mar 9 2016, 12:11 AM
Post
#67
|
|
The rubber man           Group: Members Posts: 12,742 Joined: 27-December 04 From: Hillsboro, OR Member No.: 3,348 Region Association: None 
|
I'm not a big fan of the rear lenst due to the issues with holes as you can see here.
Attached image(s) 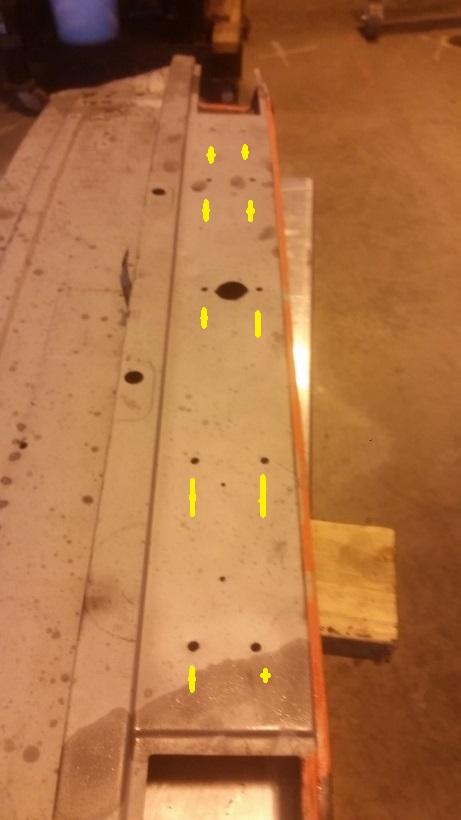
|
| Mikey914 |
 Mar 9 2016, 12:12 AM Mar 9 2016, 12:12 AM
Post
#68
|
|
The rubber man           Group: Members Posts: 12,742 Joined: 27-December 04 From: Hillsboro, OR Member No.: 3,348 Region Association: None 
|
One of the reasons it looked like this
Attached image(s) 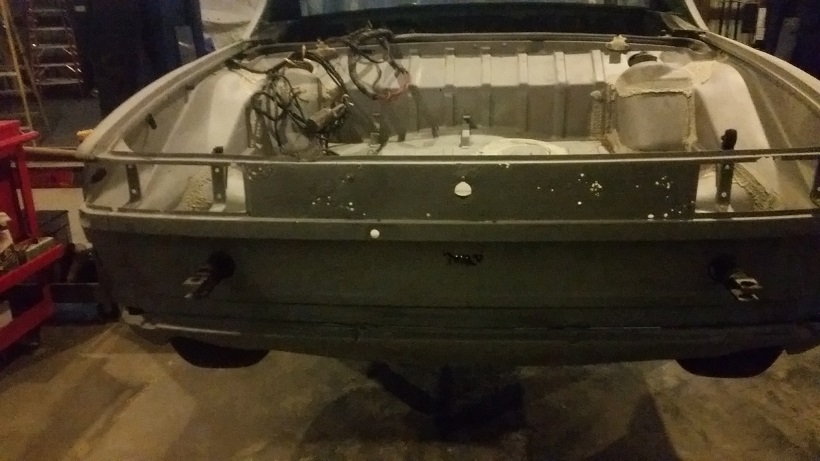
|
| cary |
 Mar 10 2016, 08:47 AM Mar 10 2016, 08:47 AM
Post
#69
|
|
Advanced Member     Group: Members Posts: 3,900 Joined: 26-January 04 From: Sherwood Oregon Member No.: 1,608 Region Association: Pacific Northwest 
|
Work continues on the rear panel. Cut up the old to use as patterns for the 75-76 brace hole and rosette holes. They'll be saved for future use. Continued working on the left side of the rear panel. A little tougher work with all those extra holes. I still might cut it out and put in a patch. The metal gets kind of goofy with all those different welds.
This is no charge research time. 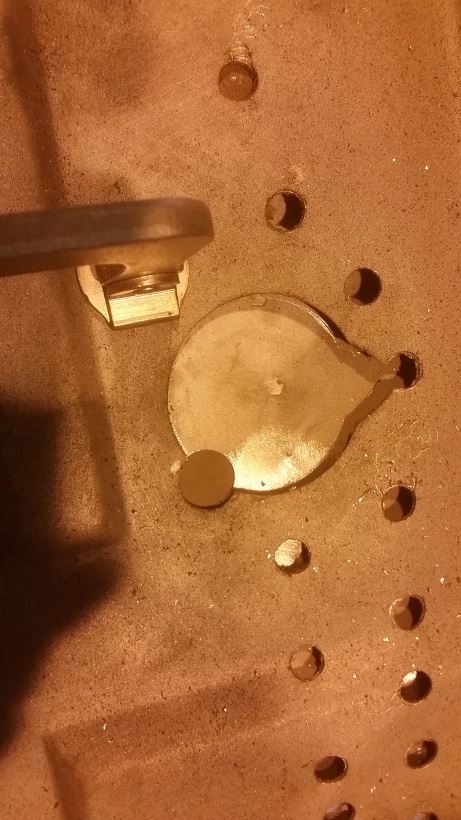 Used the larger hole cutter in the Rotacut kit to make the smaller hole. 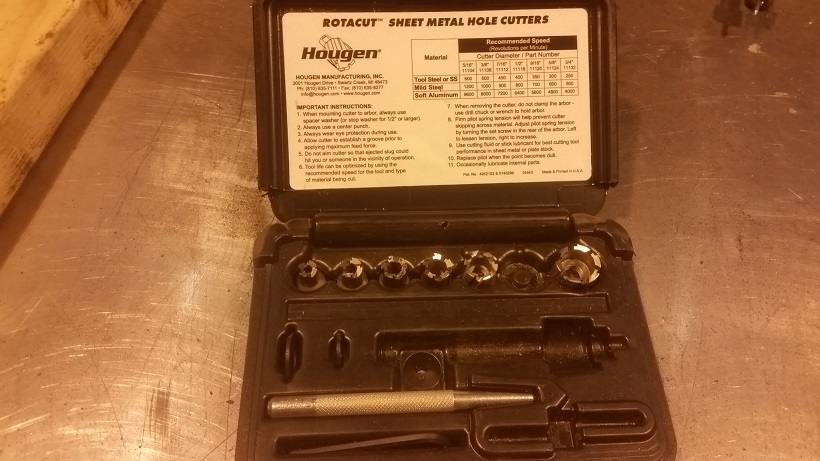 More on Mark's comment. I'm going to fill that cavity with OSPHO and let it do it's thing. 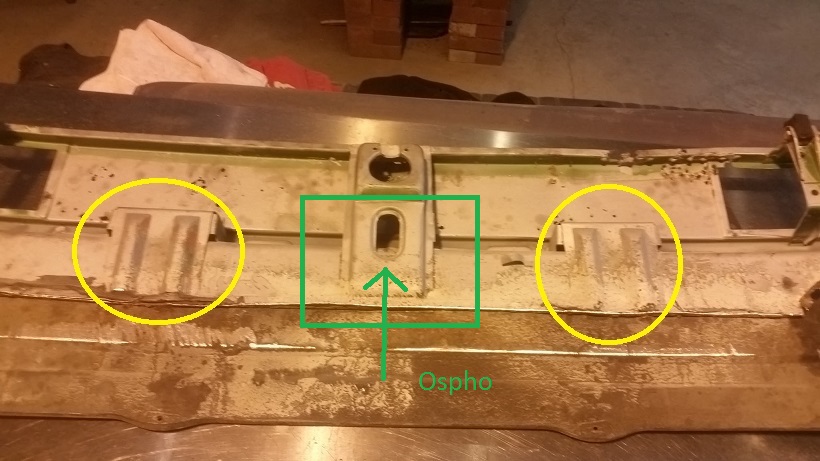 Nothing new till Monday night. A couple job interviews today. Monthly Pelican Burgers and Beer at the Taproom tonight starting around 4:30. Autocross prep and 2 day auto cross this weekend. Weather forecast Saturday 90% chance of rain, Sunday 100%. Might be time for me to get TTOD. LOL. |
| cary |
 Mar 14 2016, 10:07 PM Mar 14 2016, 10:07 PM
Post
#70
|
|
Advanced Member     Group: Members Posts: 3,900 Joined: 26-January 04 From: Sherwood Oregon Member No.: 1,608 Region Association: Pacific Northwest 
|
Started the day with more liquid sunshine. (IMG:style_emoticons/default/mad.gif)
So I needed to set up the pop up to shoot some more glass beads. I still needed to get the back side blasted. 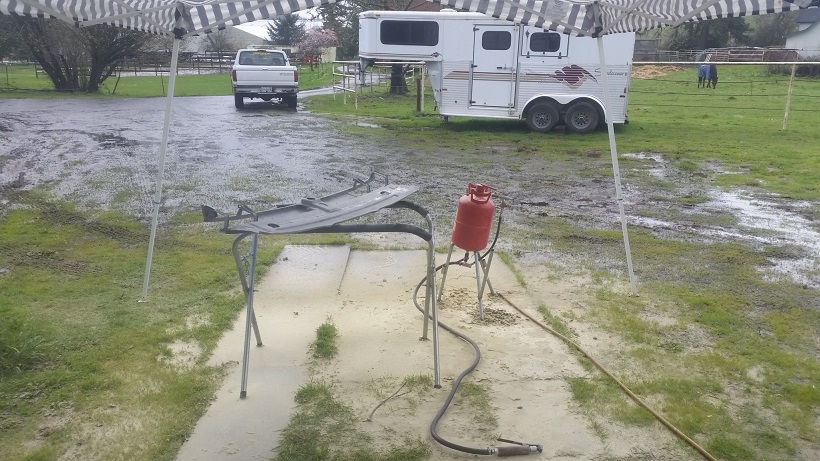 Then I decided to cut out the left side holes I filled. Too many holes, waste of time. It would have taken to much All Metal to get smoothed out. 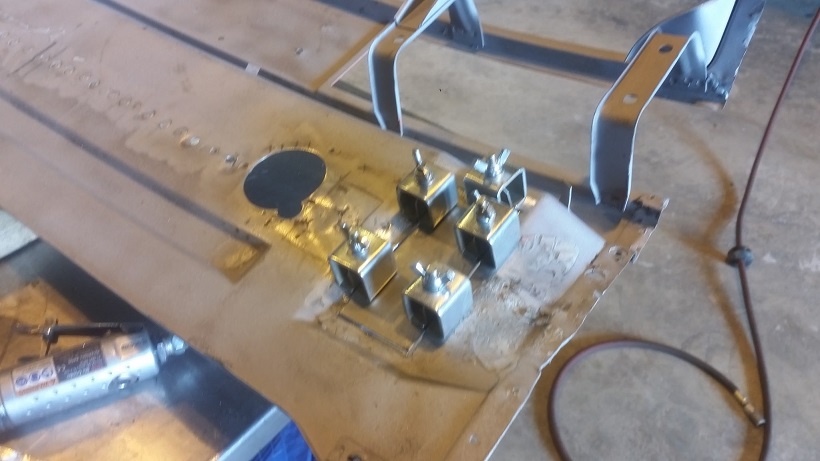 Sorry, a little blurry. Front side and back side. 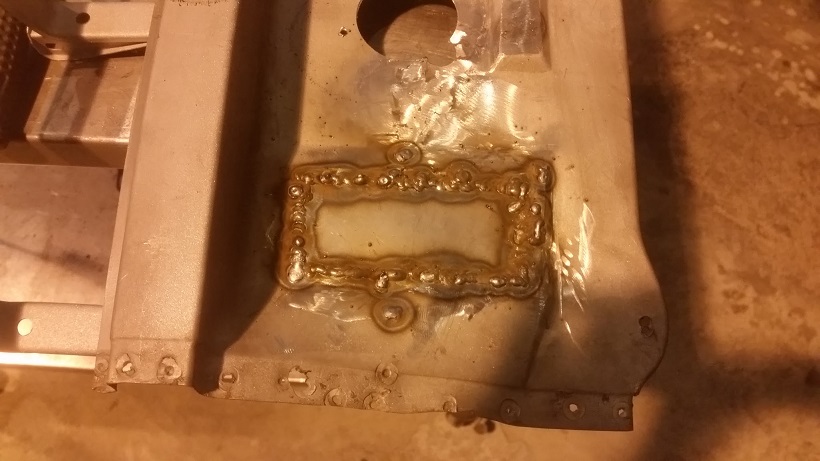 The smoky spot is me hitting seam sealer. 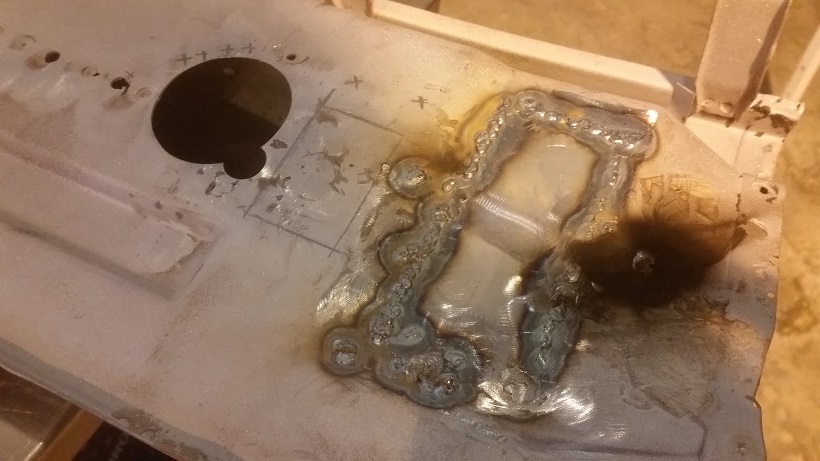 Tomorrows cut out .............. 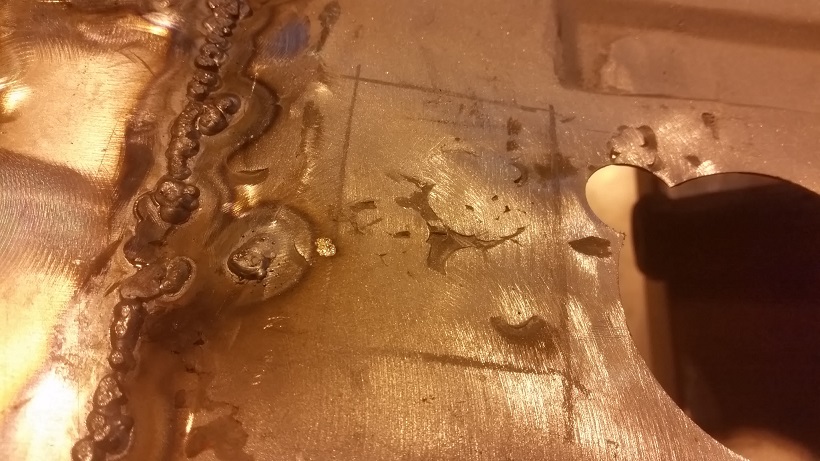 Mark stopped by to drop off the RD order. Then we started to jabber ...... Then it was time to head home for the Trailblazer game. 5pm start. |
| cary |
 Mar 15 2016, 10:32 PM Mar 15 2016, 10:32 PM
Post
#71
|
|
Advanced Member     Group: Members Posts: 3,900 Joined: 26-January 04 From: Sherwood Oregon Member No.: 1,608 Region Association: Pacific Northwest 
|
The RD stuff ...............
I love new metal .................... 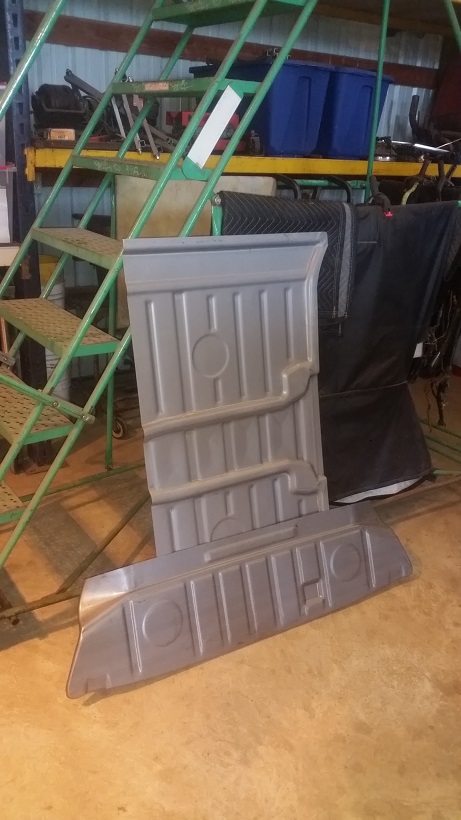 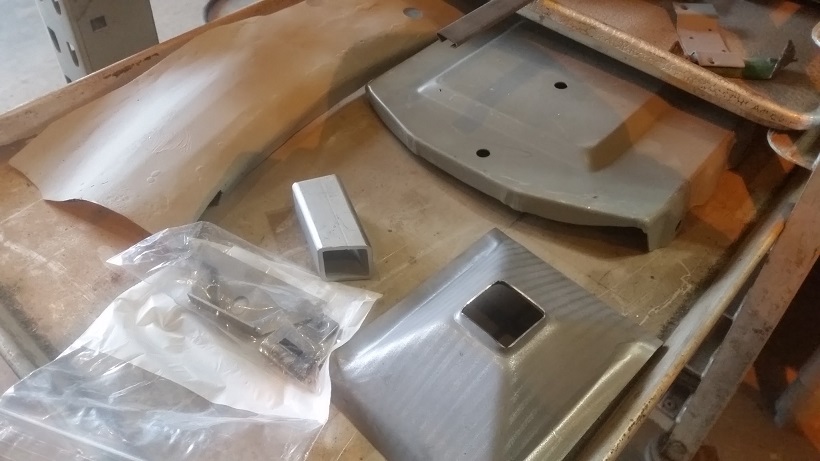 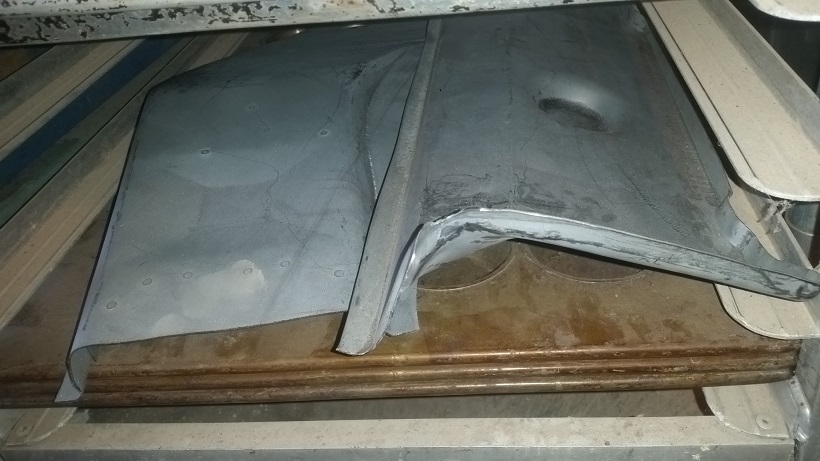 I'll add in a left over door sill left over from the long I bought from Perry. And a battery tray support that I have that I over ordered. Looks like we'll need an e-brake pivot too. I'll look at the one on my parts car tomorrow. But I have my doubts its any better than one I already have. |
| cary |
 Mar 15 2016, 10:42 PM Mar 15 2016, 10:42 PM
Post
#72
|
|
Advanced Member     Group: Members Posts: 3,900 Joined: 26-January 04 From: Sherwood Oregon Member No.: 1,608 Region Association: Pacific Northwest 
|
Finally finished up creating the 75-76 rear panel this morning. I'll finish up the final hammer and dolly work after its attached.
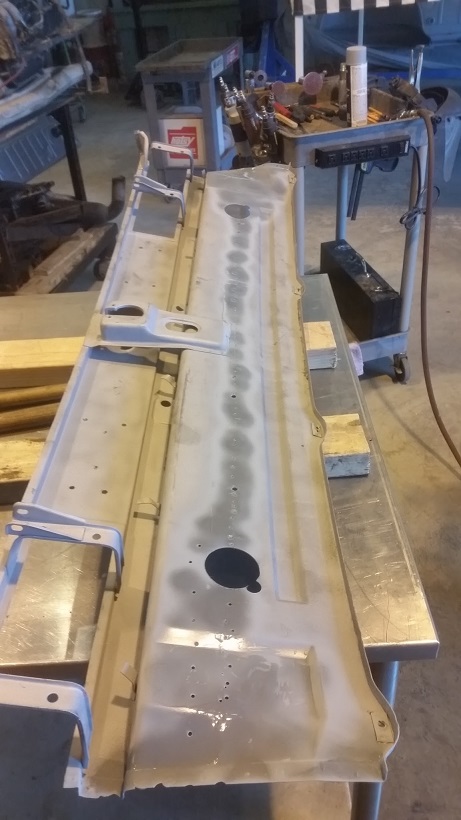 Filled in the old PORSCHE reflector holes. 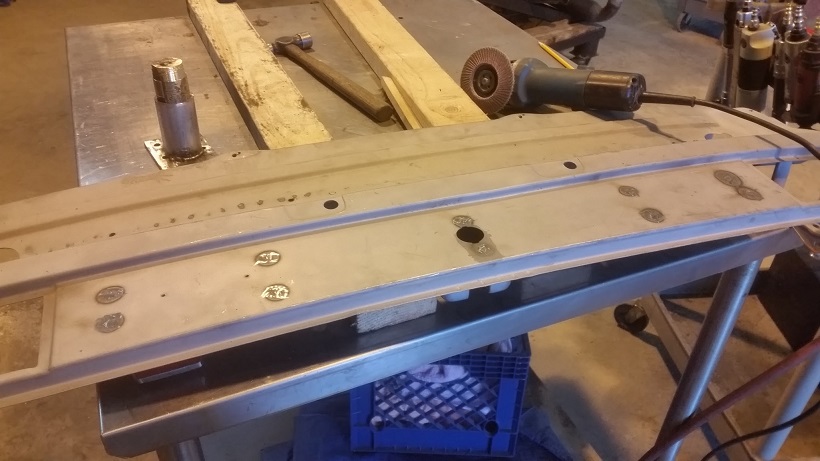 Now in lies the $1,000,000 question. How does one get that bitch in without cutting off the flanges? Hmmmm. With the quarter panels firmly welded in there isn't any slack to slide the rear panel flanges into the quarter panel sandwich. 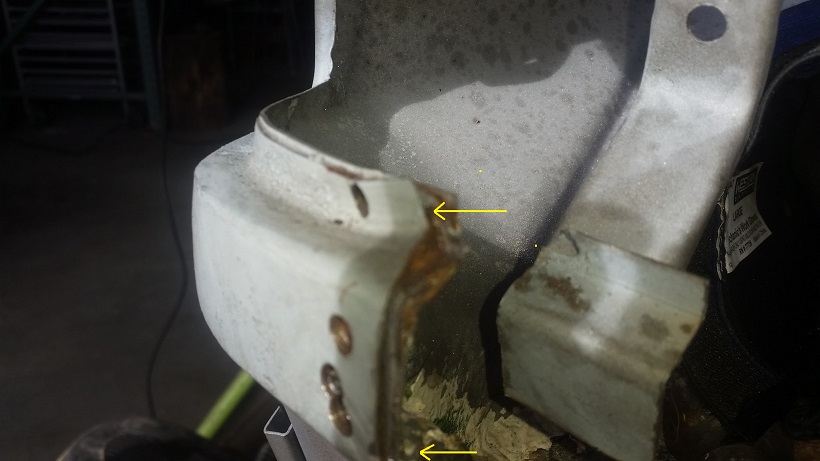 |
| cary |
 Mar 15 2016, 11:13 PM Mar 15 2016, 11:13 PM
Post
#73
|
|
Advanced Member     Group: Members Posts: 3,900 Joined: 26-January 04 From: Sherwood Oregon Member No.: 1,608 Region Association: Pacific Northwest 
|
Now that I have some new replacement panels we'll start with cutting out the remainder of the trunk.
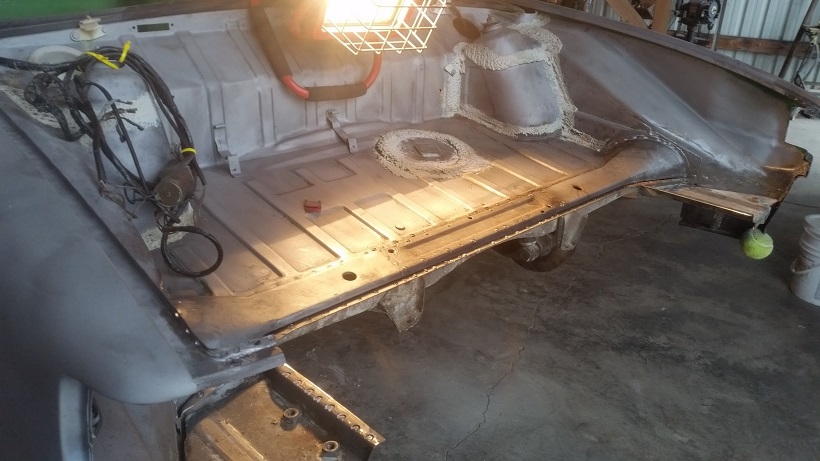 New part laid in for tracing it out. 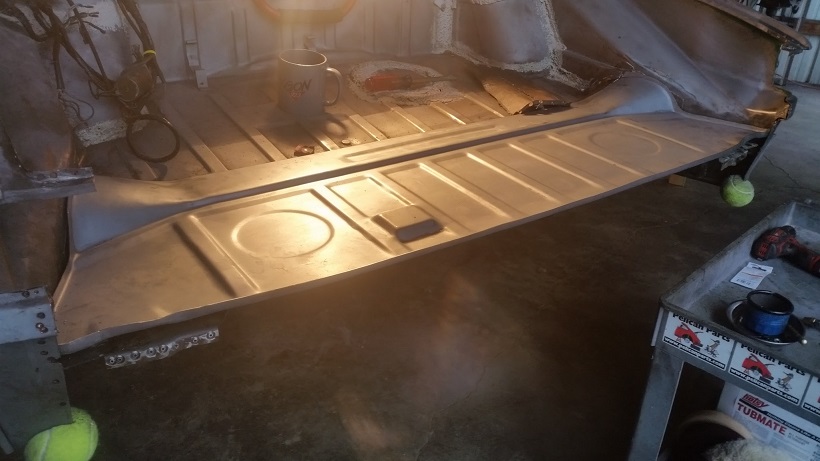 The replacement piece only goes a portion of the way up the rounded support portion. 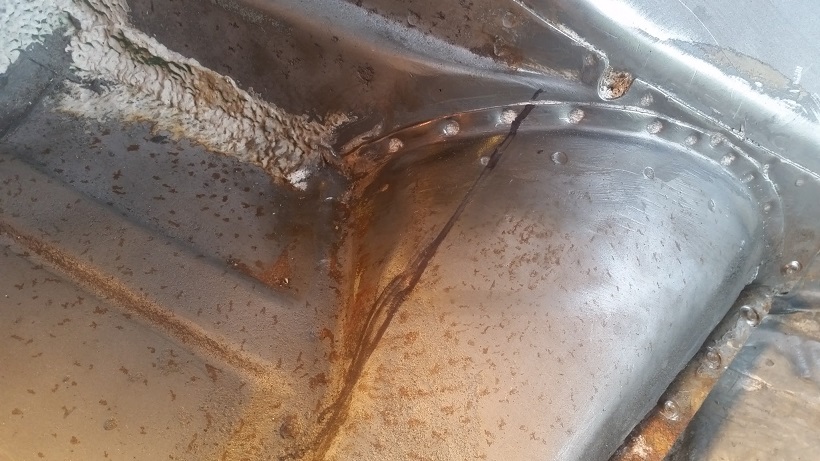 It is a pretty tight cut up against the trunk side panel. So I always keep a few stubby discs for just this occasion. 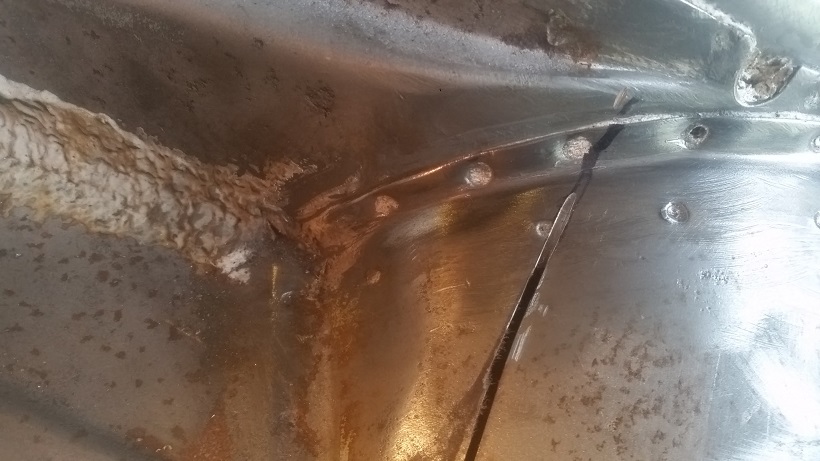 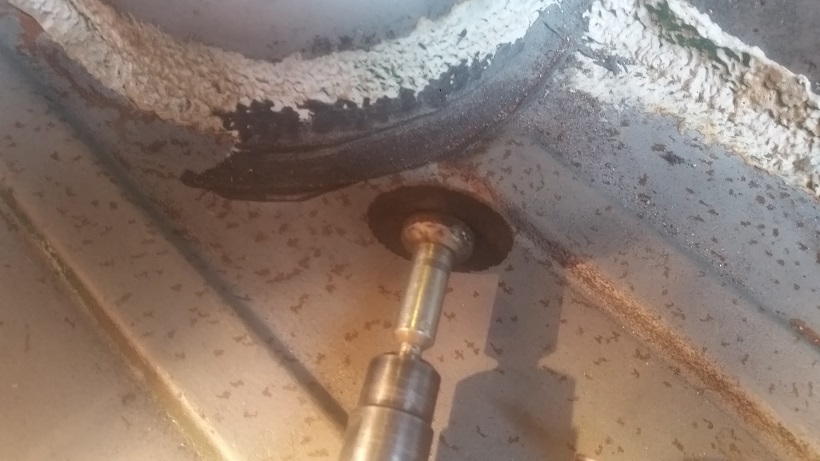 Whoa-law ................. Presently surprised that there was little to no rust inside the transmission support. Just a smidgen of surface rust on the right side. 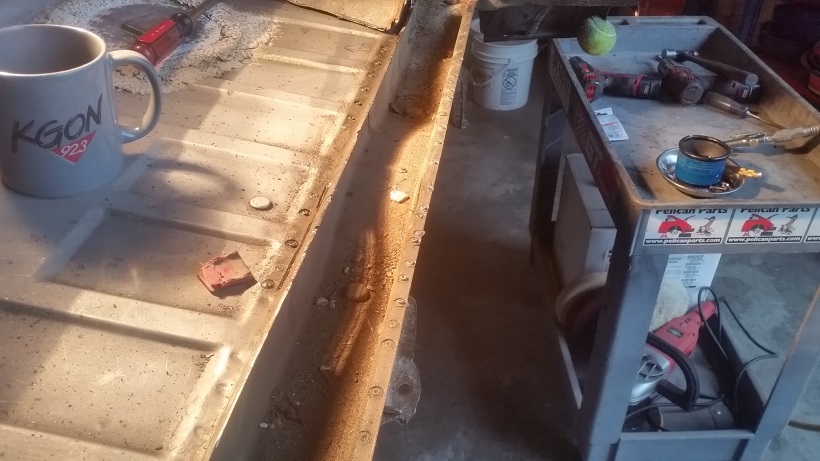 Not feeling the love on the 75-76 modification to the floor pan, looks to be pretty different. Won't really won't know until it lines up with the rear panel. The sides and the bumper mount pans look Ok. But will the spot weld holes line up? 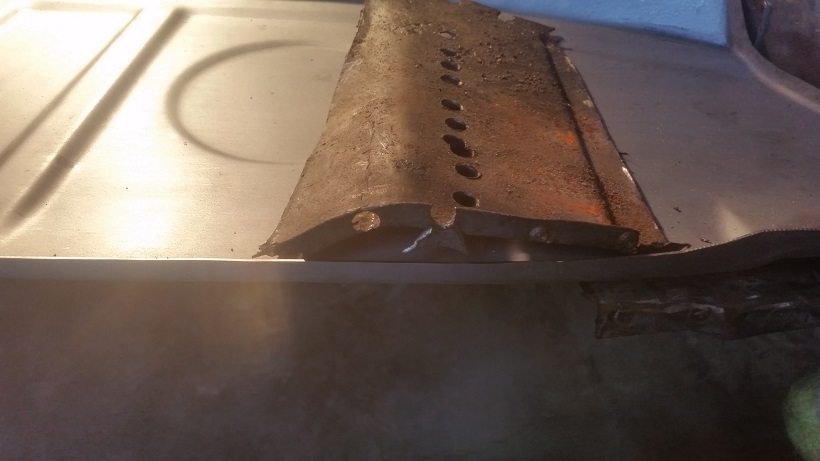 All cleaned out and ready for it's overnight application of OSPHO. The inside will get an application of POR15. I have 4 cans that I haven't been using, but this is great spot for it. 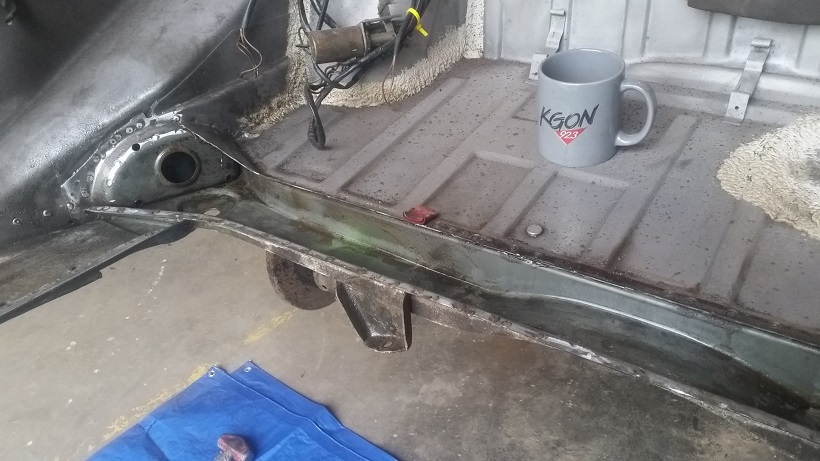 |
| cary |
 Mar 15 2016, 11:18 PM Mar 15 2016, 11:18 PM
Post
#74
|
|
Advanced Member     Group: Members Posts: 3,900 Joined: 26-January 04 From: Sherwood Oregon Member No.: 1,608 Region Association: Pacific Northwest 
|
I wish the replacement panel was just a bit longer so I could have replaced this too.
I'll see if I can do some grinding and wire cup work make it look more presentable and last another 40 years. 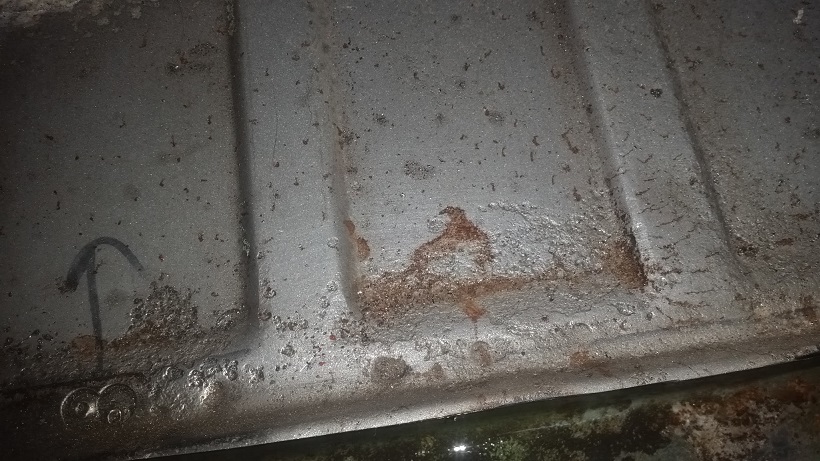 |
| cary |
 Mar 17 2016, 09:49 AM Mar 17 2016, 09:49 AM
Post
#75
|
|
Advanced Member     Group: Members Posts: 3,900 Joined: 26-January 04 From: Sherwood Oregon Member No.: 1,608 Region Association: Pacific Northwest 
|
Rear Taillight Panel Install
Ready to go .............  So we start with trimming both the qtr. panels and the refurbished taillight panel. I've kind of been dreading this. The bottom and the middle are easy. The top channel is pretty small and thin. I've determined that I'll split the double layer inside the trunk channel for my welding points. Top layer is the qtr. panel. Bottom is the tub. Cut#1 is removing the tail left on the taillight panel 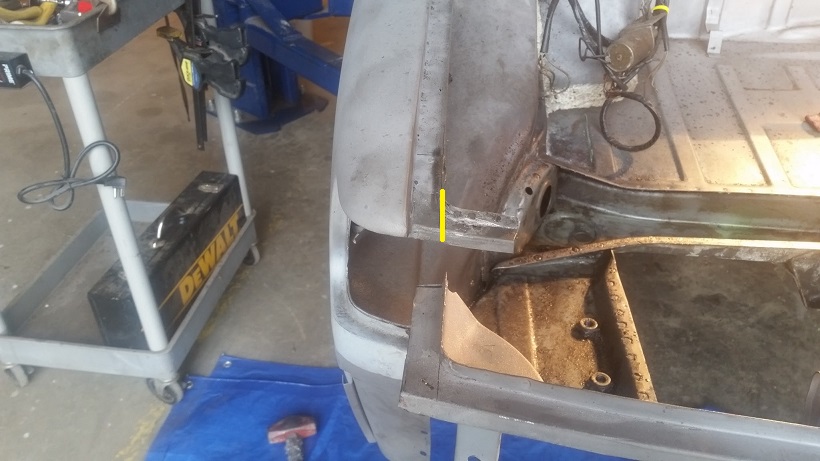 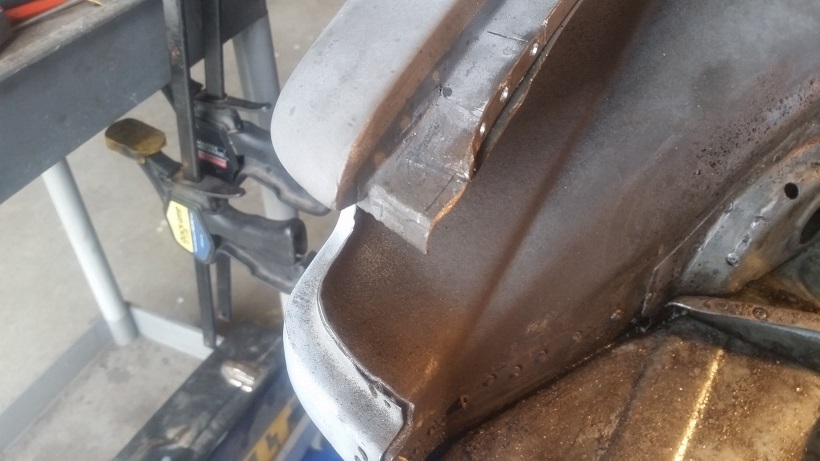 Cut#2 - Removing the channel flange 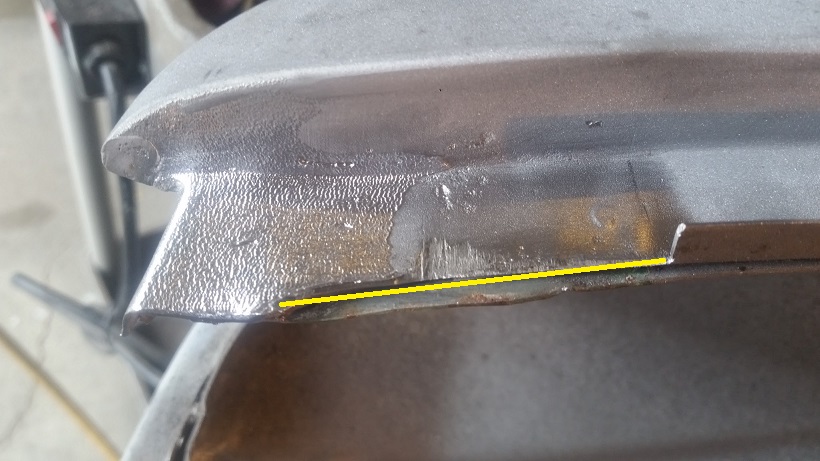 Next task is To Get The Lead Out ............ Super In Law handles it .......... Old School torch it and pull it out with a wire brush. 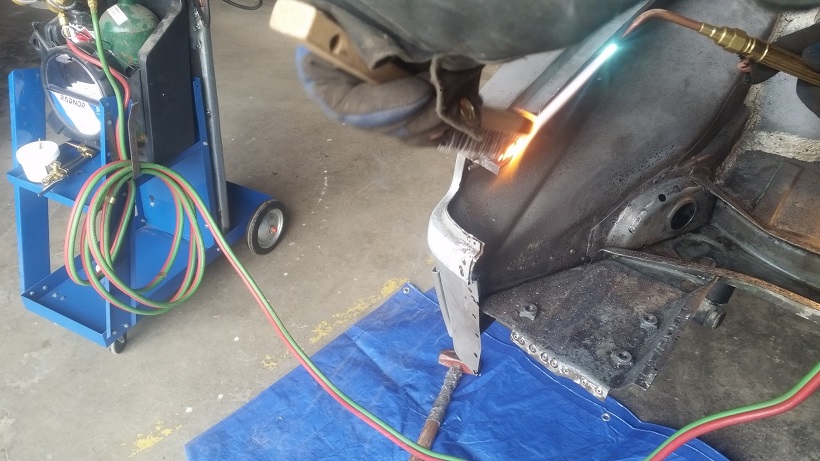 This what you see under the pretty lead finish. I'm thinking I'll get the new fake lead kit from Eastwood and try to replicate it. Leaving it would create a low spot for water to collect under the seal. 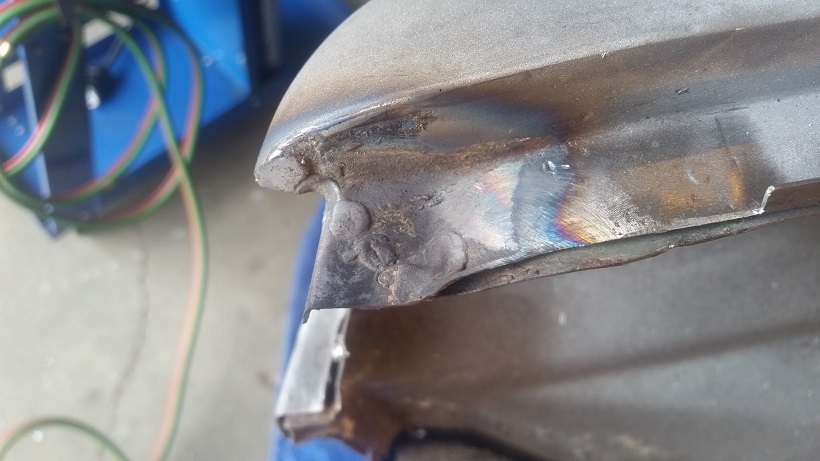 Then I went about cleaning (the best I could) the insides of the panel sandwich with the air saw. Pulled out lots of seam sealer. I didn't get it all, had some come thru on my welding and contaminant the weld (pin holes). 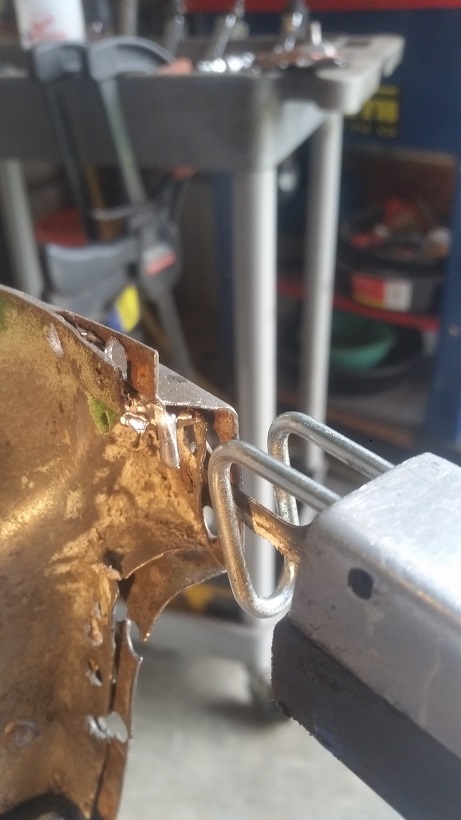 With both qtr. panels trimmed up I could now lay the taillight panel into it's new home and take measurements for the cut out of the channel. Prior to the test fit I had cut the channel portion in half with the cut off wheel. 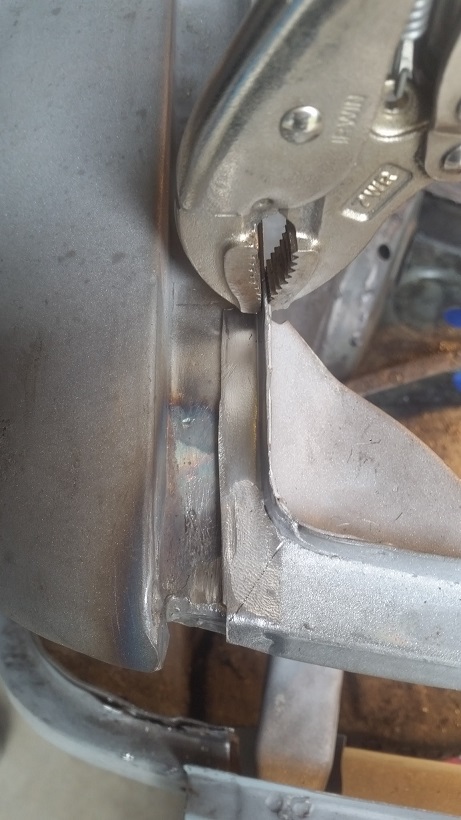 The pencil line is were the factory spliced them together under the lead. So they would have torch welded in the diagonal cut, then spot welded in the support corner. If they had been a little more precise with the spot welder, removing the support corner would have been a better route. But because these were hand built cars, they on occasion lay one spot weld on top of another. Which makes a big frikking ass mess trying to drill out the spot welds. Leaving you with just about nothing when your done. Here's a couple shots of the channel cut out. Just lightly make the cut on the scribed line. Then peel if back with the wood chisel or small screw driver. 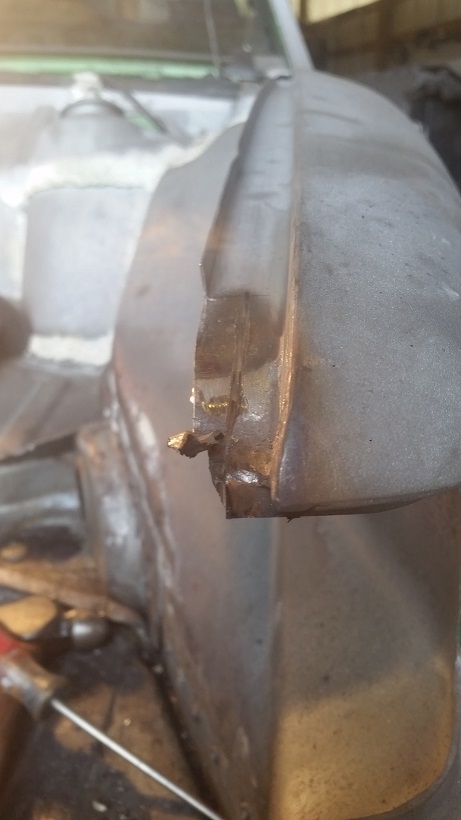 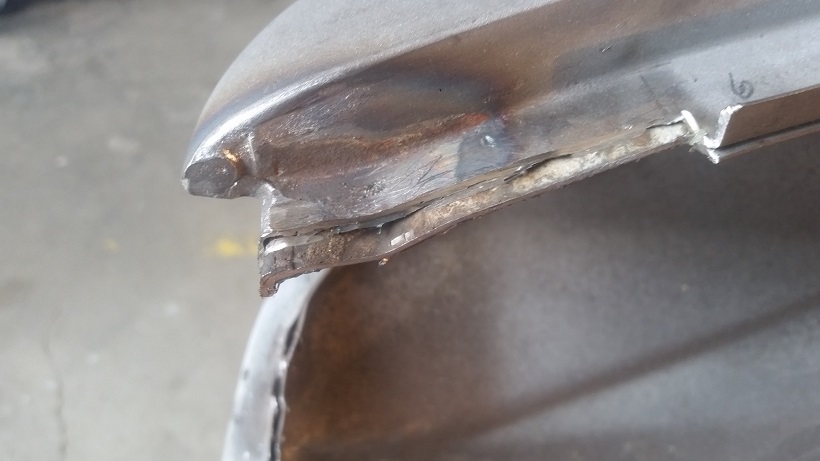 Once again being of the IE mind set. I have multiple die grinders all with different size wheels. So I can jump to different sizes as I'm cutting up against different angles. |
| cary |
 Mar 17 2016, 08:19 PM Mar 17 2016, 08:19 PM
Post
#76
|
|
Advanced Member     Group: Members Posts: 3,900 Joined: 26-January 04 From: Sherwood Oregon Member No.: 1,608 Region Association: Pacific Northwest 
|
Ok, now back to documenting Wednesday's work.
Now we move to positioning the rear panel ............. 1st., I opt to spread open the middle channel on the left side. No particular reason. 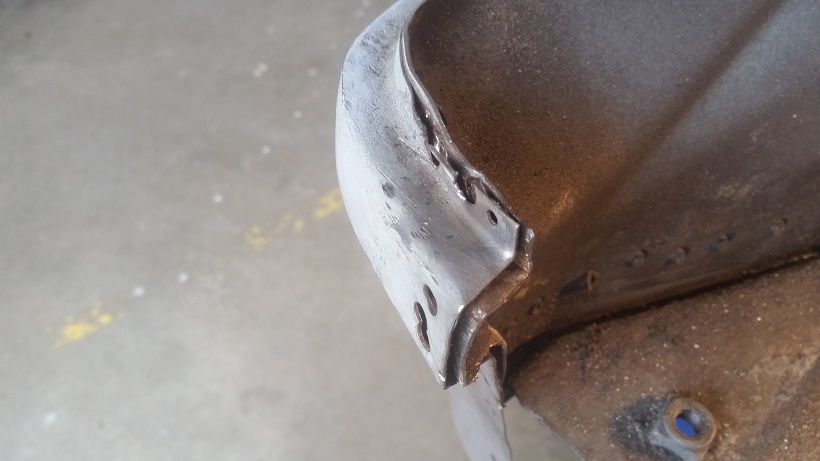 After a test fit I decide I'll need to trim a bit off the right side. 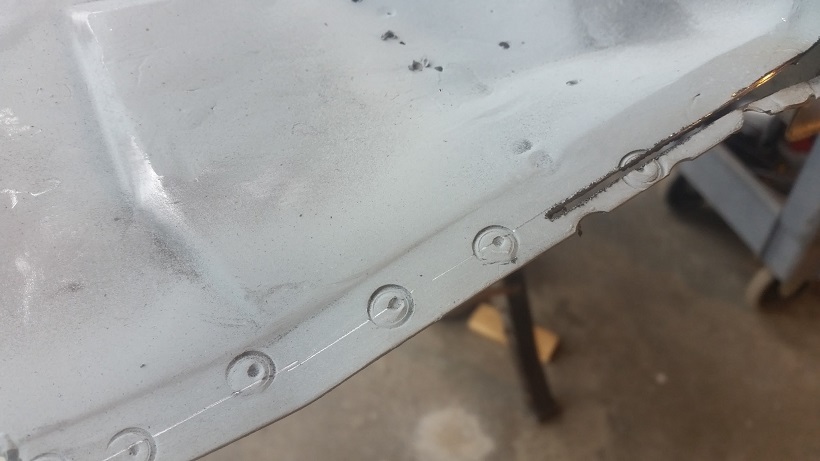 I proceed to slide the left side in as much as I could. 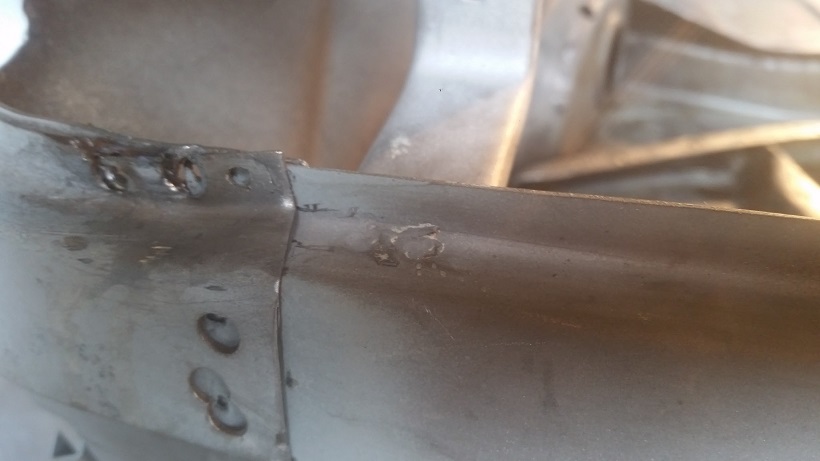 I did need to trim a bit of the excess off the tub flange under the trunk seal channel. This allowed me additional movement to the left. 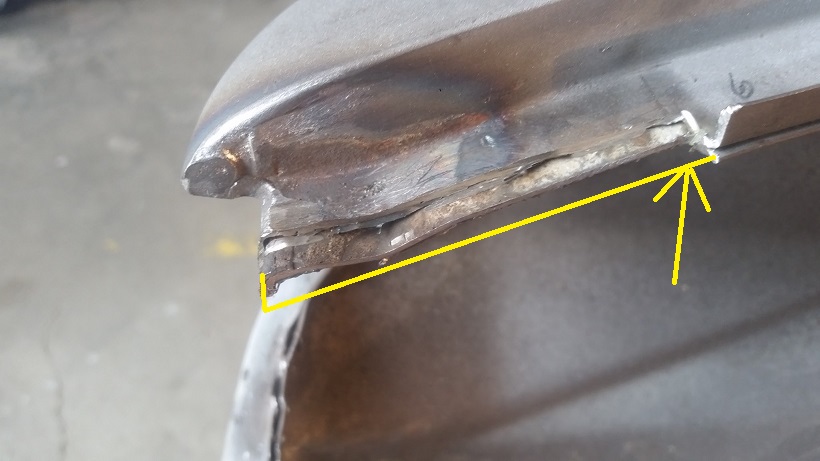 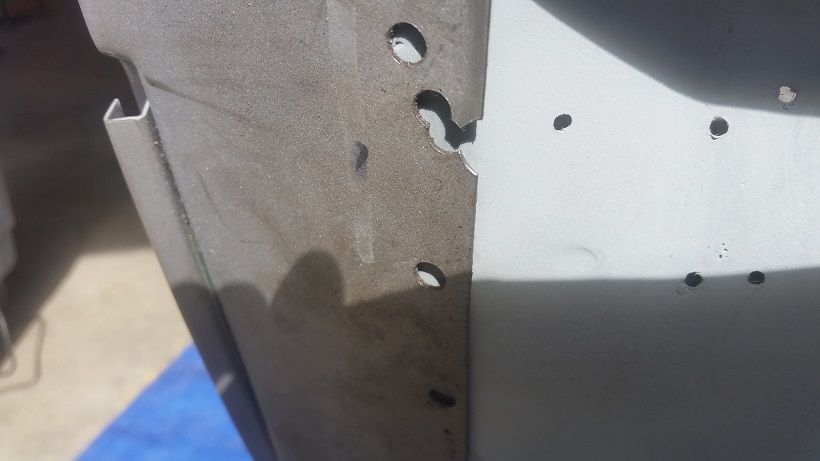 There she is. A little persuasion with a wood block against the latch support and she slid into place. (IMG:style_emoticons/default/cheer.gif) (IMG:style_emoticons/default/cheer.gif) 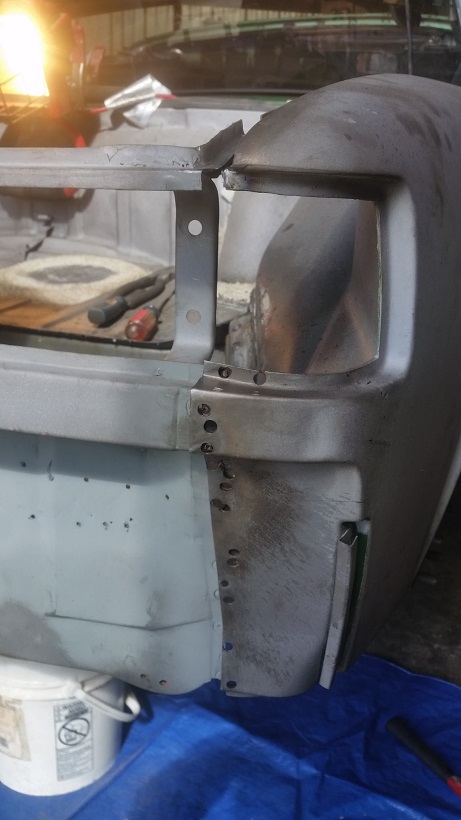 Here's a shot of the right side channel. Looks like I cut on the wrong side of the line. (IMG:style_emoticons/default/sad.gif) 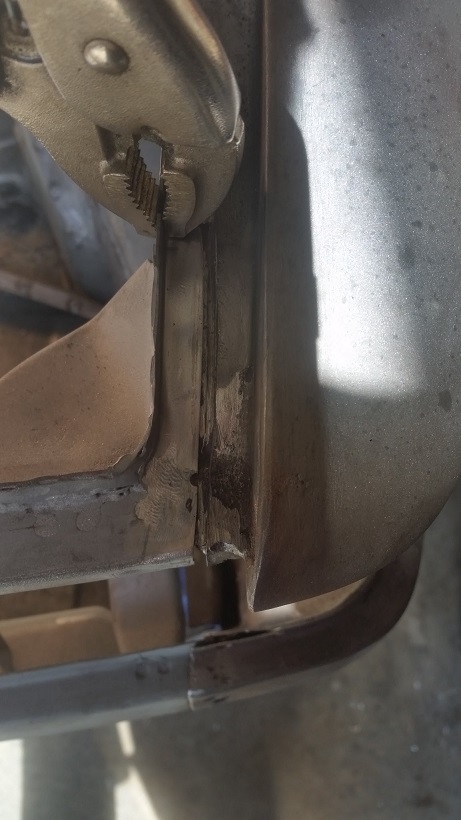 All Clecoed in and ready to start welding. 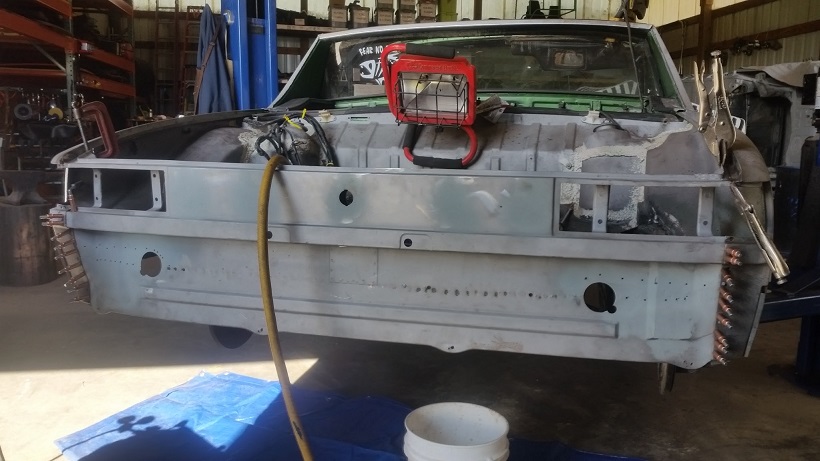 |
| Cairo94507 |
 Mar 17 2016, 09:01 PM Mar 17 2016, 09:01 PM
Post
#77
|
|
Michael           Group: Members Posts: 10,176 Joined: 1-November 08 From: Auburn, CA Member No.: 9,712 Region Association: Northern California 
|
Wow, that is some really nice work. (IMG:style_emoticons/default/smilie_pokal.gif)
|
| cary |
 Mar 17 2016, 09:05 PM Mar 17 2016, 09:05 PM
Post
#78
|
|
Advanced Member     Group: Members Posts: 3,900 Joined: 26-January 04 From: Sherwood Oregon Member No.: 1,608 Region Association: Pacific Northwest 
|
Thank You ................ |
| cary |
 Mar 17 2016, 09:21 PM Mar 17 2016, 09:21 PM
Post
#79
|
|
Advanced Member     Group: Members Posts: 3,900 Joined: 26-January 04 From: Sherwood Oregon Member No.: 1,608 Region Association: Pacific Northwest 
|
Now its time to fire up the electric glue gun ................
Right and Left side trunk channel tack in welds. 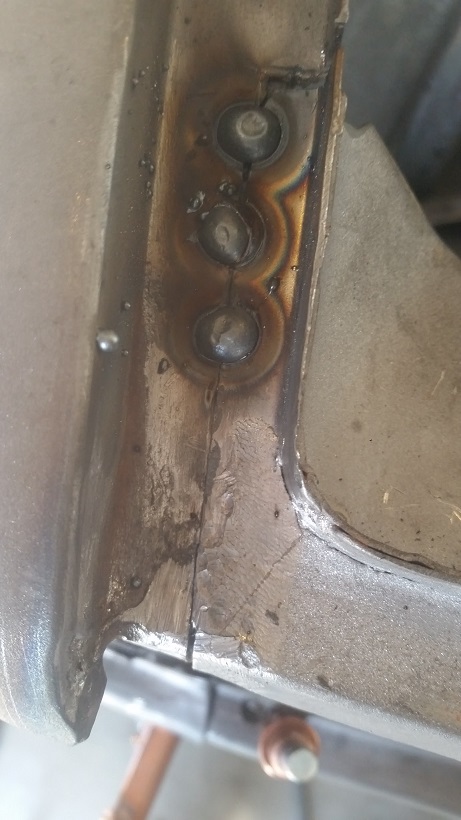 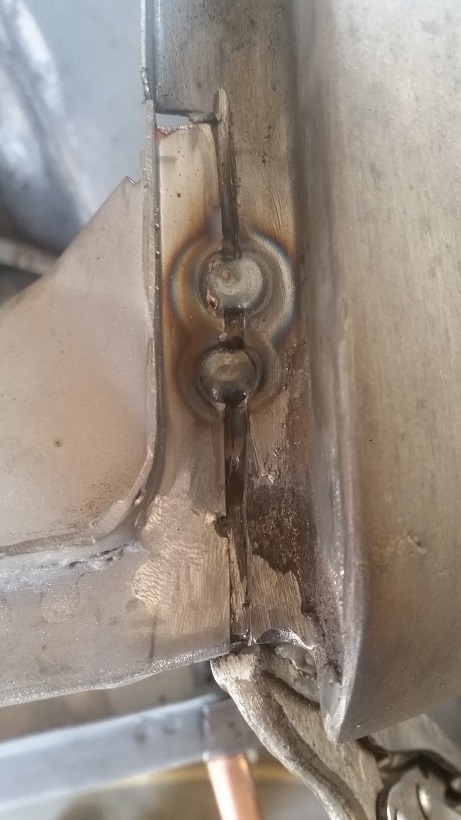 We did have to fire up the torch to remove that lead still on the tail light panel. Blip, blip, blip .......... 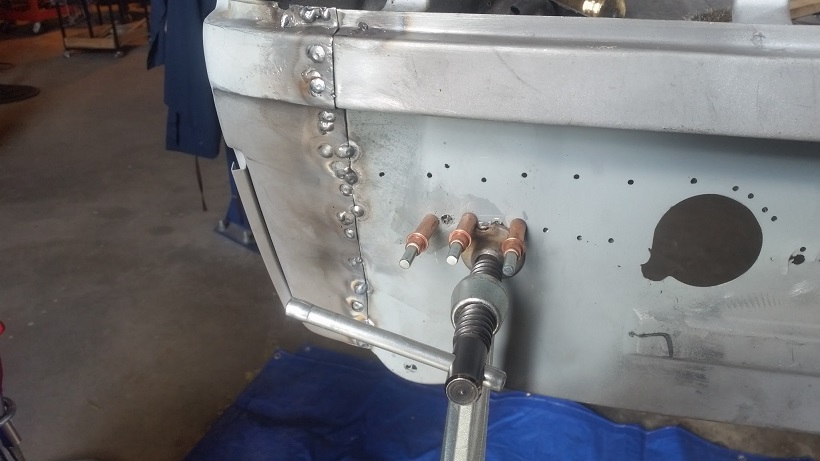 Trunk channels all ground down and ready for leading ......... 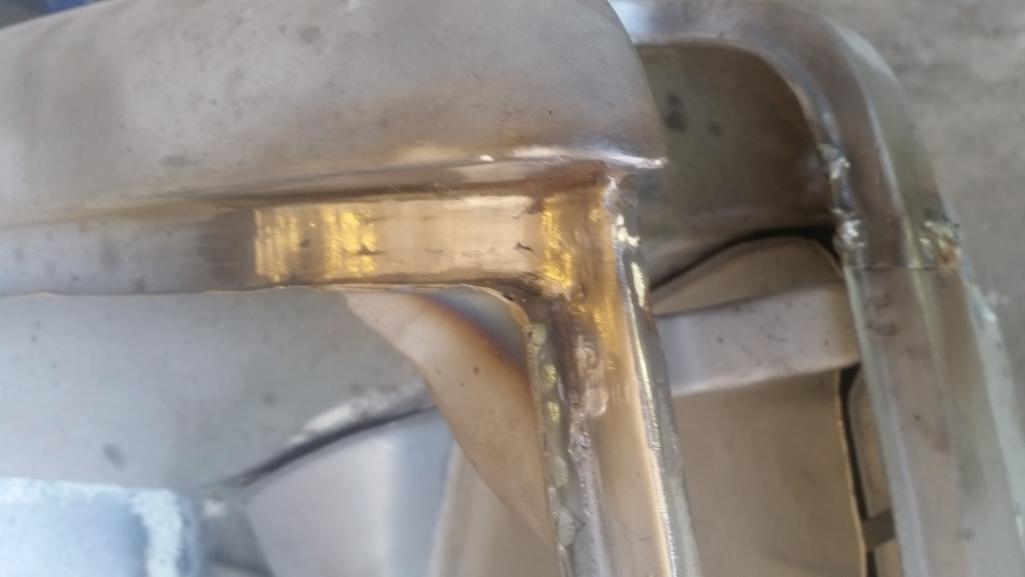 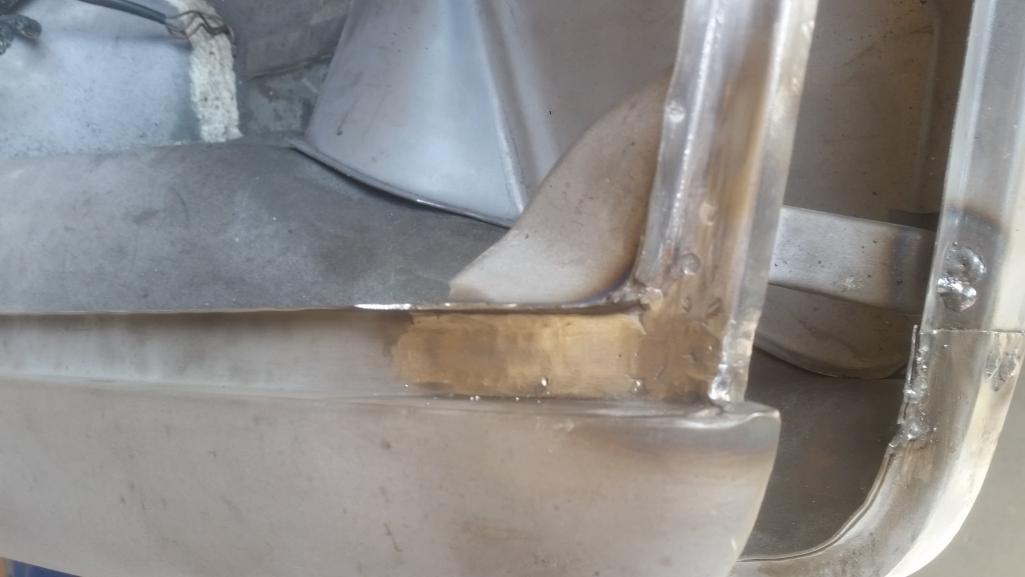 Here's a shot of one of the welds that has a little contamination from the seam sealer. 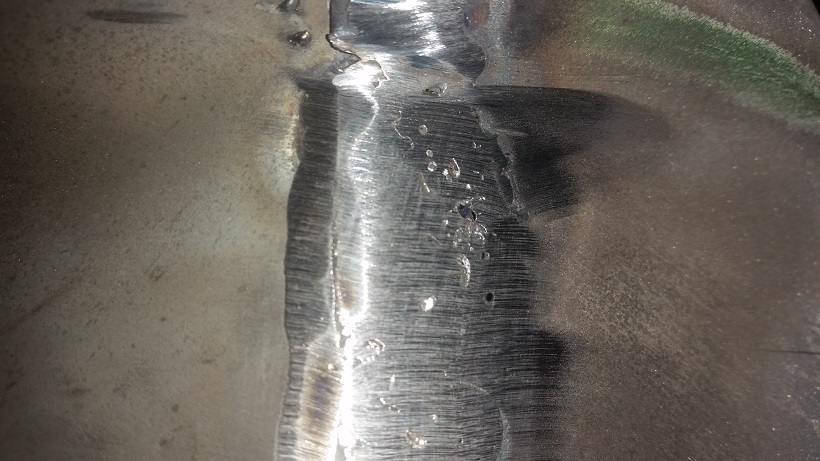 I'll come back and add a beauty shot. All finished ................ |
| cary |
 Mar 17 2016, 09:32 PM Mar 17 2016, 09:32 PM
Post
#80
|
|
Advanced Member     Group: Members Posts: 3,900 Joined: 26-January 04 From: Sherwood Oregon Member No.: 1,608 Region Association: Pacific Northwest 
|
While welding I find another problem. The right side tail light frame is bent. (IMG:style_emoticons/default/sad.gif)
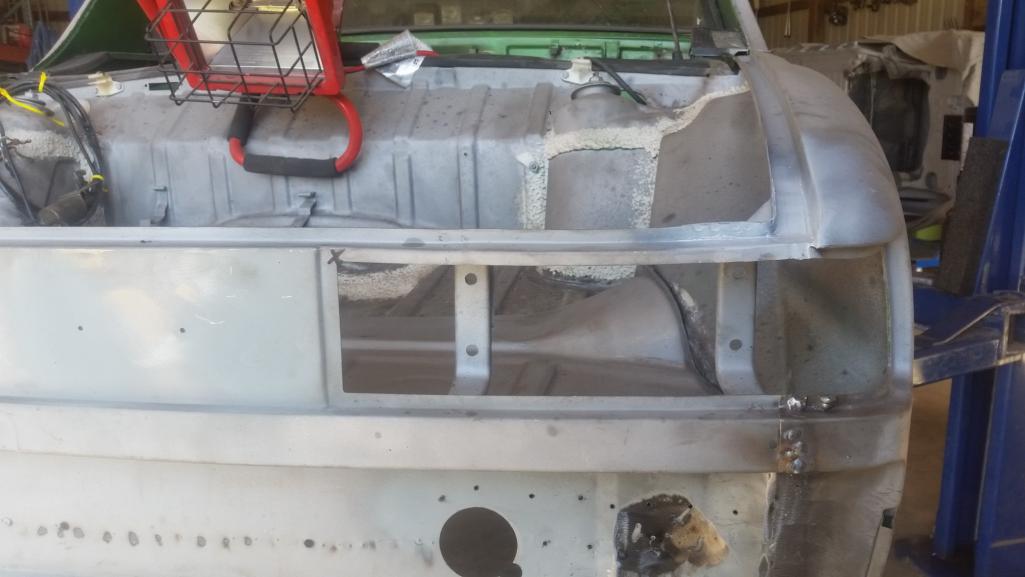 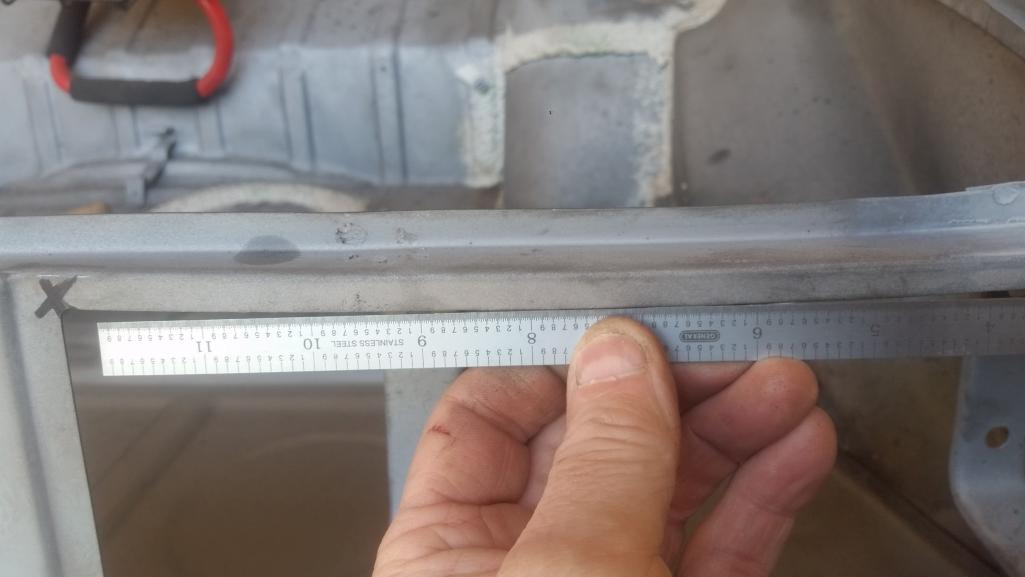 Left side .............. 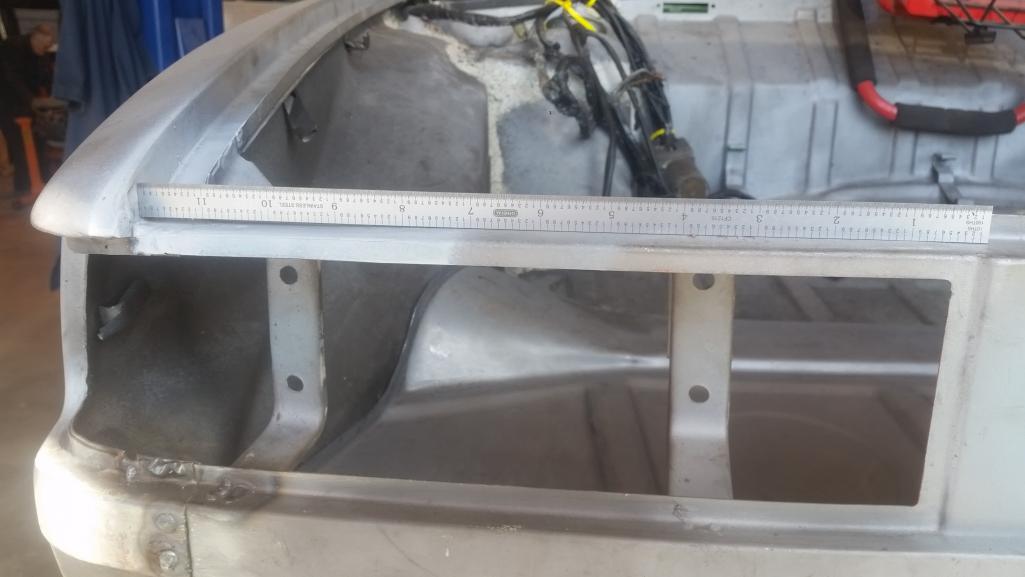 After a little Tool Whore adjustment ............ 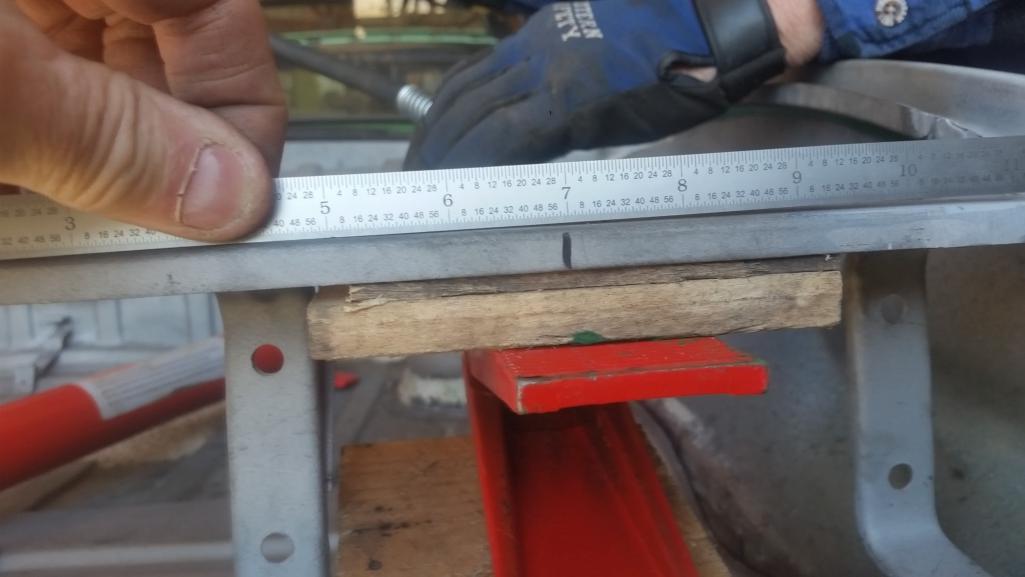 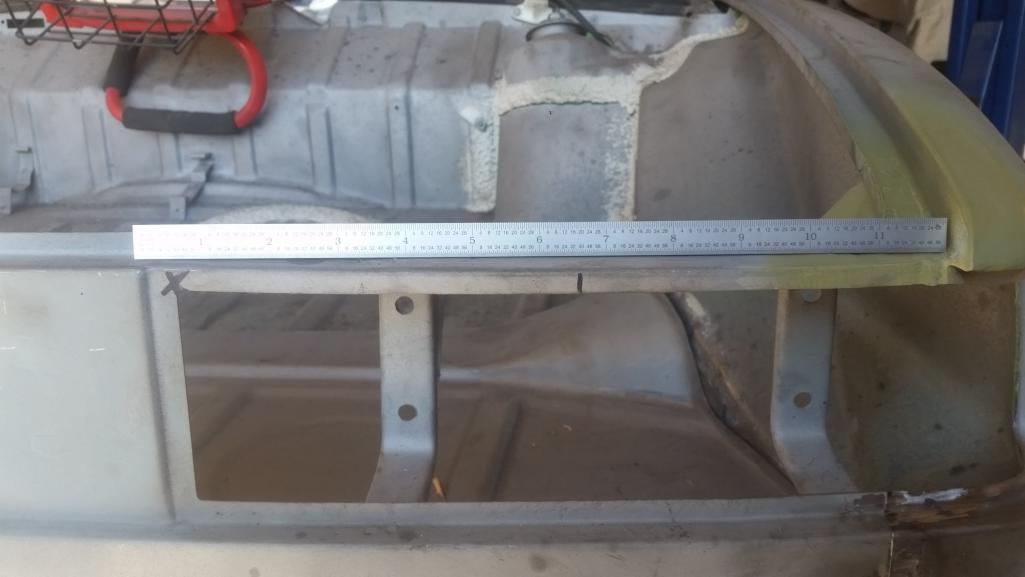 |
  |
19 User(s) are reading this topic (19 Guests and 0 Anonymous Users)
0 Members:

|
Lo-Fi Version | Time is now: 18th January 2025 - 04:59 PM |
Invision Power Board
v9.1.4 © 2025 IPS, Inc.


