|
|
|
Porsche, and the Porsche crest are registered trademarks of Dr. Ing. h.c. F. Porsche AG.
This site is not affiliated with Porsche in any way. Its only purpose is to provide an online forum for car enthusiasts. All other trademarks are property of their respective owners. |
|
|

  |

| TargaToy |
 Sep 29 2016, 07:38 PM Sep 29 2016, 07:38 PM
Post
#1
|
|
-NONSOLIS RADIOS SEDIOUIS FULMINA MITTO-  Group: Members Posts: 692 Joined: 26-March 10 From: DelMarVa Peninsula Member No.: 11,509 Region Association: MidAtlantic Region |
What is the correct name for the front panel between the headlights? I've tried several searches and can't really turn this up.
My question is: Can someone point me to a link where the removal of this entire piece is detailed? I'm replacing one headlight bucket and the entire nose panel if needed and I'd like to see how that comes apart if possible. Thanks! |
   |

 
|
| Mikey914 |
Sep 30 2016, 12:57 AM
Post
#2
|
|
The rubber man Group: Members Posts: 12,638 Joined: 27-December 04 From: Hillsboro, OR Member No.: 3,348 Region Association: None |
This may help
Attached thumbnail(s) 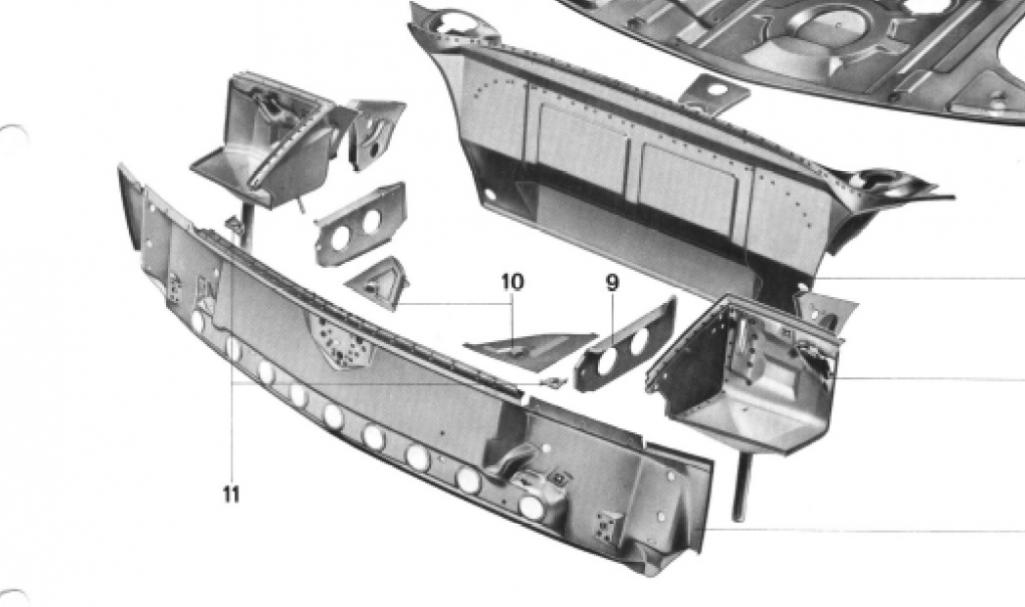
|
|
|
|
| bdstone914 |
Sep 30 2016, 07:32 AM
Post
#3
|
|
bdstone914 Group: Members Posts: 4,512 Joined: 8-November 03 From: Riverside CA Member No.: 1,319 |
QUOTE(TargaToy @ Sep 29 2016, 06:38 PM)  What is the correct name for the front panel between the headlights? I've tried several searches and can't really turn this up. My question is: Can someone point me to a link where the removal of this entire piece is detailed? I'm replacing one headlight bucket and the entire nose panel if needed and I'd like to see how that comes apart if possible. Thanks! Drill out all the spot welds. Just takes time. |
|
|
|
| rick 918-S |
Sep 30 2016, 09:24 AM
Post
#4
|
|
Hey nice rack! -Celette Group: Members Posts: 20,422 Joined: 30-December 02 From: Now in Superior WI Member No.: 43 Region Association: Northstar Region |
There is some photos here. I think start on page 2.
(IMG:style_emoticons/default/assimilate.gif) 7 of 9. http://www.914world.com/bbs2/index.php?sho...=104128&hl= FYI> The easiest way is to leave the bucket including the drain tube attached to the front panel. Otherwise your aligning too many parts without factory jigs to hold the pieces. |
|
|
|
| altitude411 |
Sep 30 2016, 09:38 AM
Post
#5
|
|
I drove my 6 into a tree Group: Members Posts: 1,306 Joined: 21-September 14 From: montana Member No.: 17,932 Region Association: Rocky Mountains |
Can someone explain or show the difference between the early and late front panels?
|
|
|
|
| Mikey914 |
Sep 30 2016, 09:57 AM
Post
#6
|
|
The rubber man Group: Members Posts: 12,638 Joined: 27-December 04 From: Hillsboro, OR Member No.: 3,348 Region Association: None |
76 doesn't have the holes in the front
|
|
|
|
| SirAndy |
Sep 30 2016, 11:22 AM
Post
#7
|
|
Resident German Group: Admin Posts: 41,606 Joined: 21-January 03 From: Oakland, Kalifornia Member No.: 179 Region Association: Northern California |
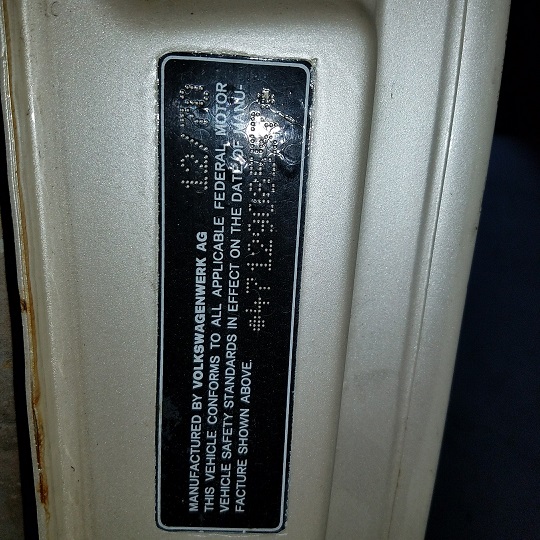
QUOTE(Mikey914 @ Sep 30 2016, 08:57 AM) 76 doesn't have the holes in the front Plus, early panels don't have the bumper shock holes/dimples ... (IMG:style_emoticons/default/shades.gif) |
|
|
|
| altitude411 |
Sep 30 2016, 11:23 AM
Post
#8
|
|
I drove my 6 into a tree Group: Members Posts: 1,306 Joined: 21-September 14 From: montana Member No.: 17,932 Region Association: Rocky Mountains |
Thanks Mark, I was also under the impression that there is a change after '72
but I'm not finding anything that substantiates that. (IMG:style_emoticons/default/confused24.gif) Thanks Andy, I was typing when you answered... much appreciated. |
|
|
|
| gms |
Sep 30 2016, 12:45 PM
Post
#9
|
|
Advanced Member Group: Members Posts: 2,694 Joined: 12-March 04 From: Chicagoland Member No.: 1,785 Region Association: Upper MidWest |
Schloßquerwand vorn a link to all 4 types I have seen
|
|
|
|
| Dave_Darling |
Sep 30 2016, 01:37 PM
Post
#10
|
|
914 Idiot Group: Members Posts: 14,981 Joined: 9-January 03 From: Silicon Valley / Kailua-Kona Member No.: 121 Region Association: Northern California |
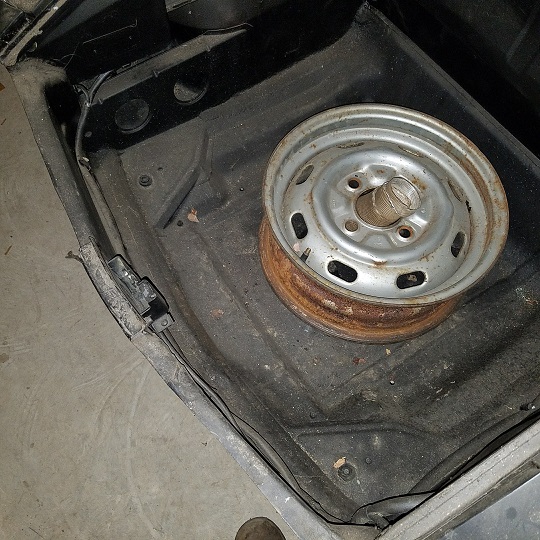
QUOTE(altitude411 @ Sep 30 2016, 10:23 AM) Thanks Mark, I was also under the impression that there is a change after '72 Earlier cars did not have the semi-circle that goes around the front of the spare tire. In 72 or so, they added that. --DD |
|
|
|
| cary |
Sep 30 2016, 01:44 PM
Post
#11
|
|
Advanced Member Group: Members Posts: 3,900 Joined: 26-January 04 From: Sherwood Oregon Member No.: 1,608 Region Association: Pacific Northwest |
Thanks for the reminder. In some dialouge with Rich a couple weeks ago I determined that there are 3-4 different variants.
Right now I have one of every year from 70 - 75 in the shop. I'll shoot some pictures and post tonight. |
|
|
|
| cary |
Sep 30 2016, 04:58 PM
Post
#12
|
|
Advanced Member Group: Members Posts: 3,900 Joined: 26-January 04 From: Sherwood Oregon Member No.: 1,608 Region Association: Pacific Northwest |
      70 and 71 are the same ................ 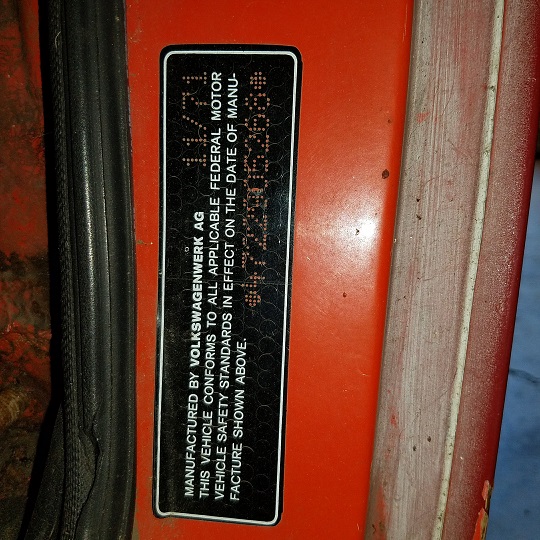 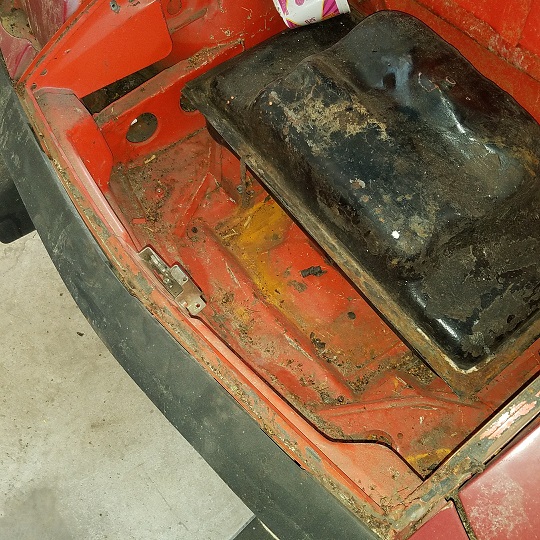 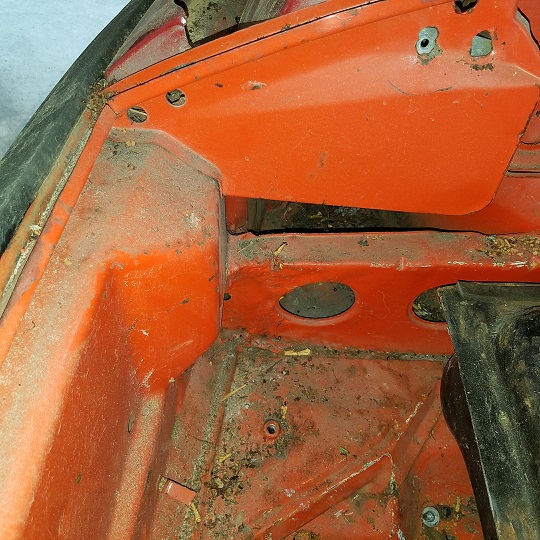 72 looks to be one of a kind ..................... |
|
|
|
| cary |
Sep 30 2016, 05:04 PM
Post
#13
|
|
Advanced Member Group: Members Posts: 3,900 Joined: 26-January 04 From: Sherwood Oregon Member No.: 1,608 Region Association: Pacific Northwest |
     73 and 74 look to be the same  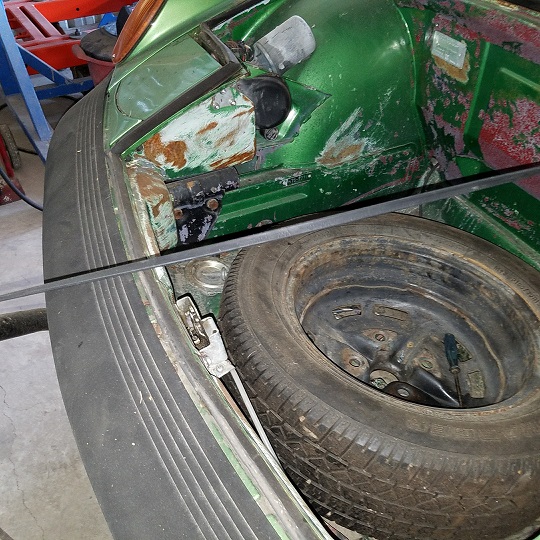 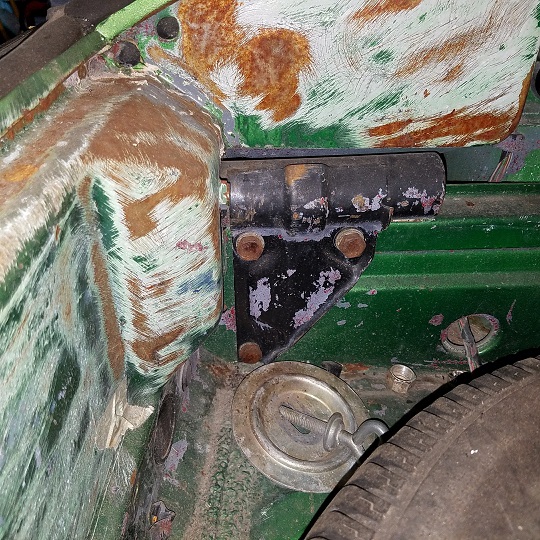 Here's one of Mark's 75's. |
|
|
|
| TargaToy |
Oct 1 2016, 08:08 AM
Post
#14
|
|
-NONSOLIS RADIOS SEDIOUIS FULMINA MITTO- Group: Members Posts: 692 Joined: 26-March 10 From: DelMarVa Peninsula Member No.: 11,509 Region Association: MidAtlantic Region |
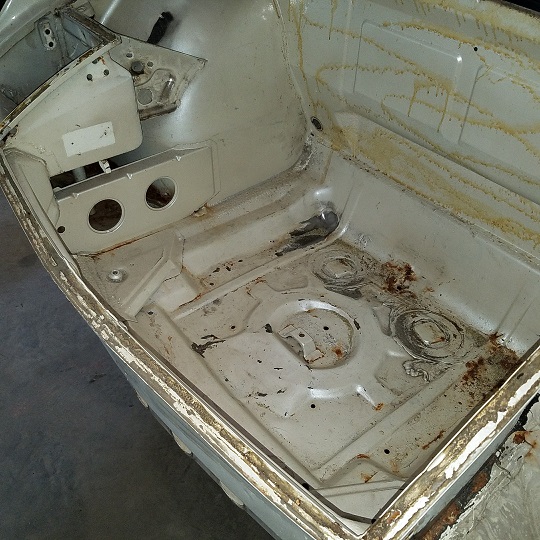
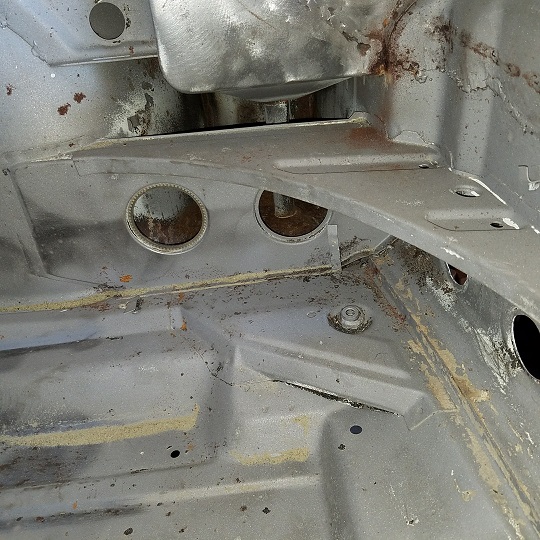
First of all, thank all of you guys for your responses and info. I'm about to fix concealed crash damage that I knew had been lurking...waiting for me. Virtually all of the rust repair is finished on the car now and I'm going to attack the front end.
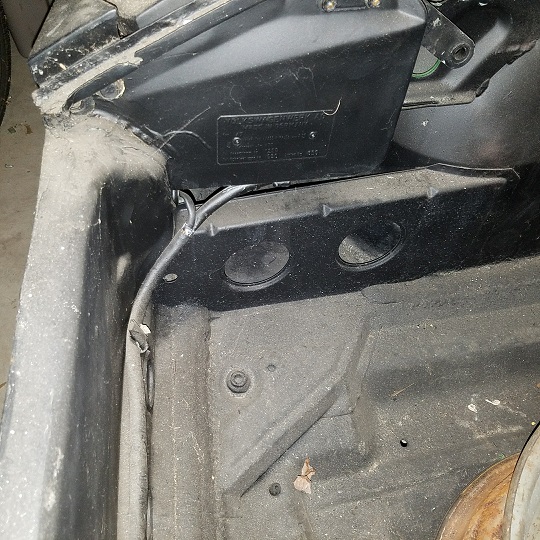
QUOTE(rick 918-S @ Sep 30 2016, 11:24 AM) There is some photos here. I think start on page 2. (IMG:style_emoticons/default/assimilate.gif) 7 of 9. http://www.914world.com/bbs2/index.php?sho...=104128&hl= FYI> The easiest way is to leave the bucket including the drain tube attached to the front panel. Otherwise your aligning too many parts without factory jigs to hold the pieces. This car has damage that reminds me of the Alien Baby of Rick's. Maybe not so extensive but the PS fender is bent outwards. There's a very defined bend in the weather stripping channel which I'll show in the pics below. Also, the hit seems to have been at the PS headlight bucket. You can see somebody pounded it back out to usable shape but there are kinks and tears in the area...Oh, and a ton of filler on the outside of the fender. Rick, I know you said it's best to leave the bucket in place but this one is pretty damaged. Is the drain tube welded into the trunk floor where it passes through? Am I OK to cut the nose out so It's easier to remove the remnants attached by spot welds? I guess what I'm asking is will the fenders "stay put" without the front panel connecting them? 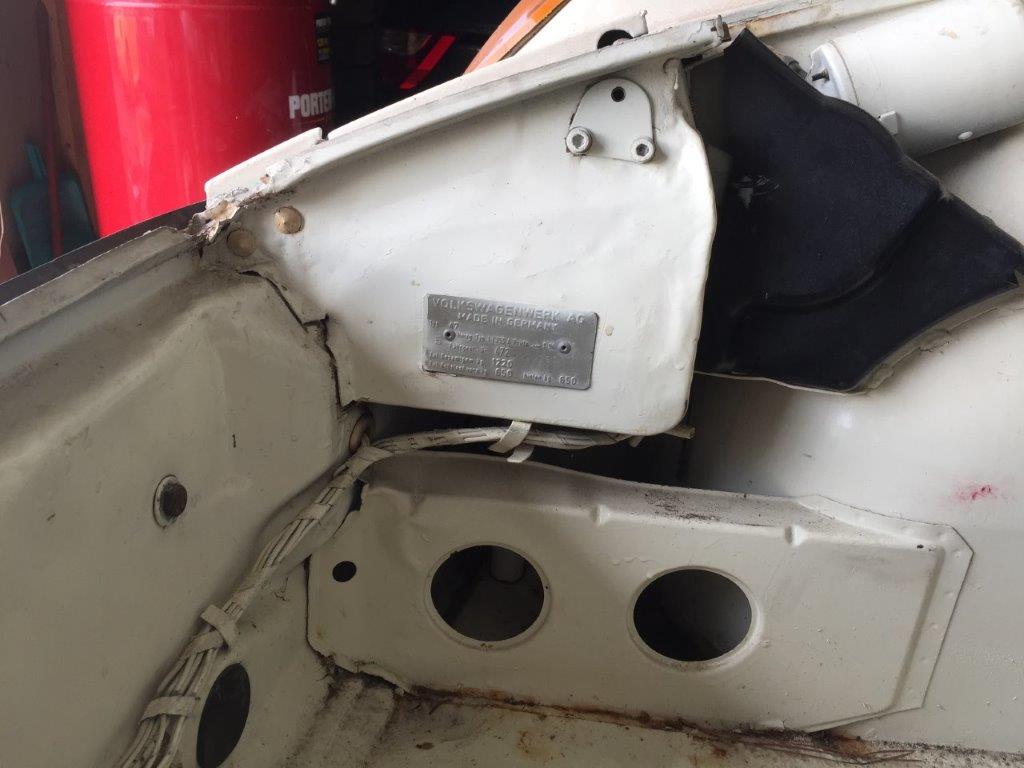 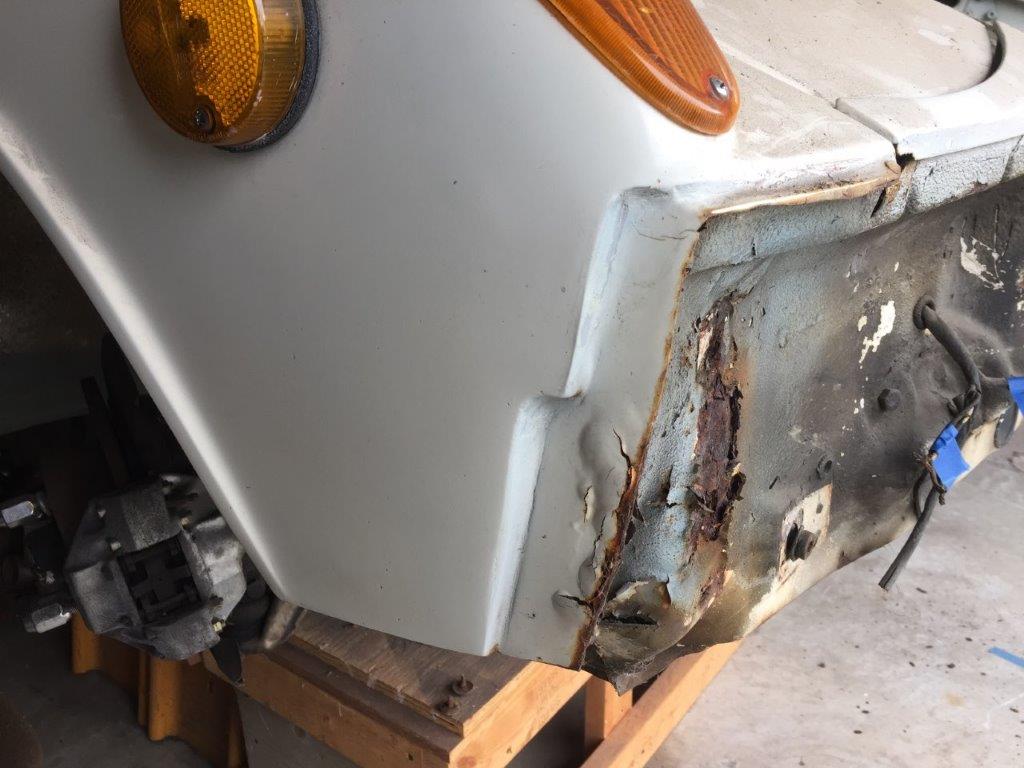 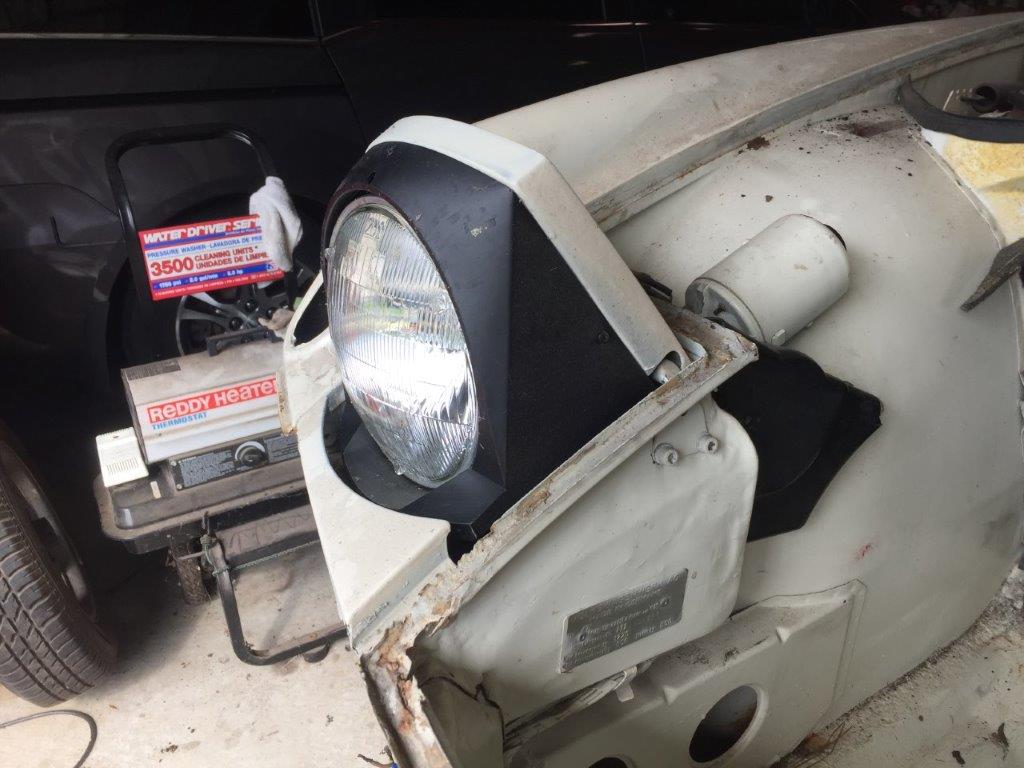 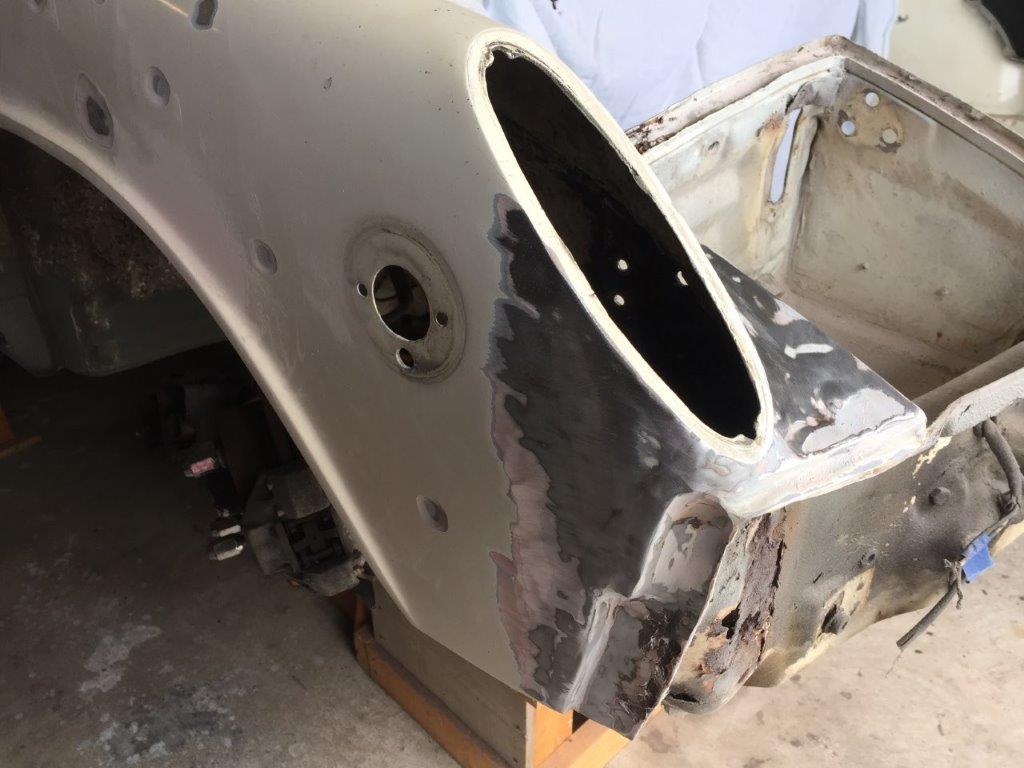  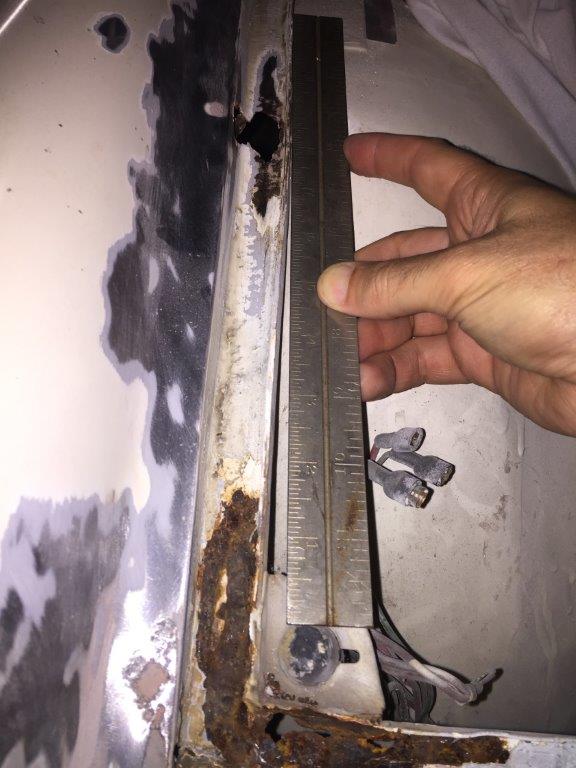 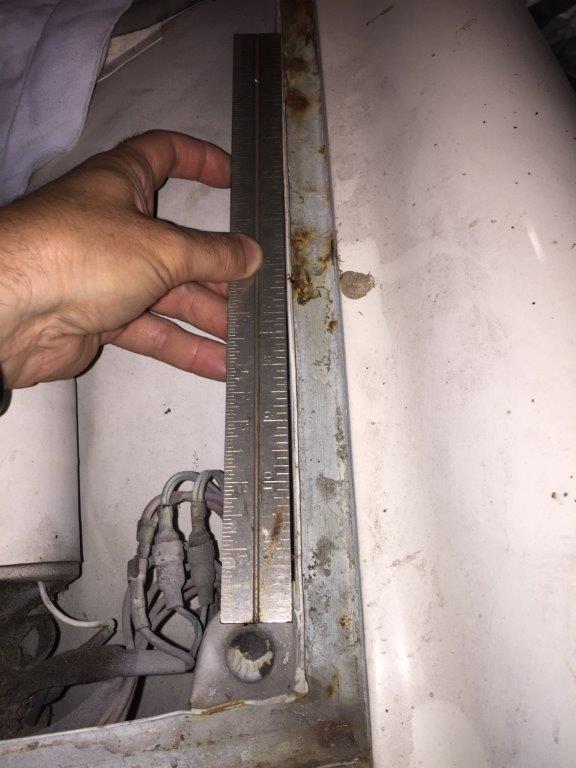 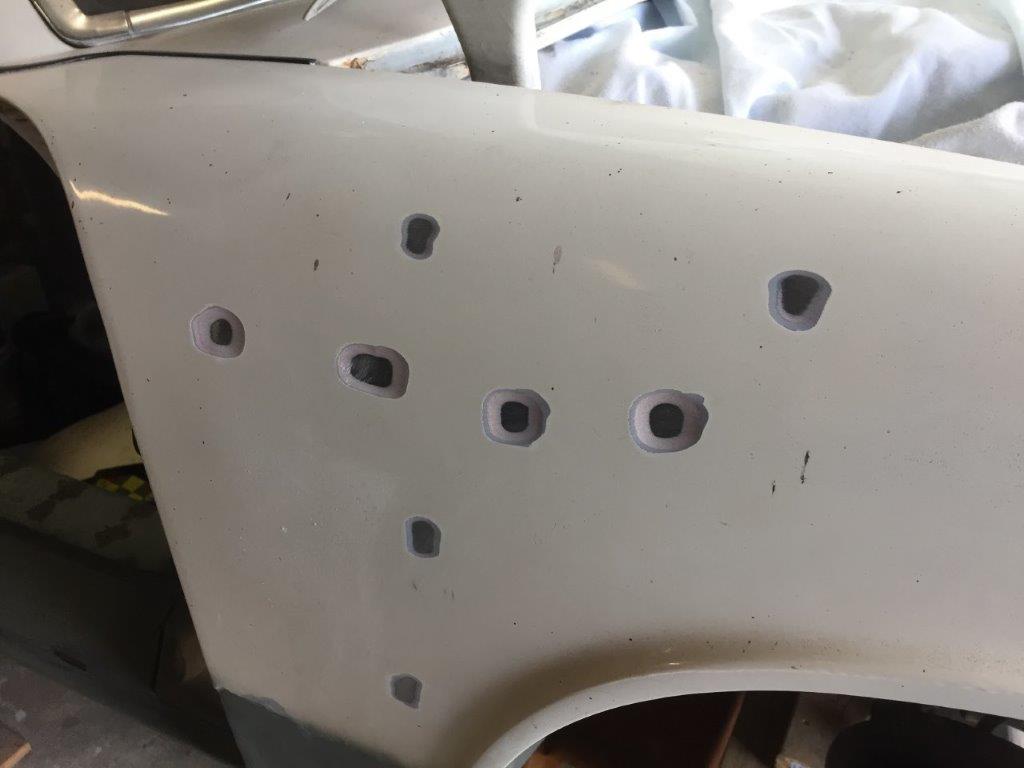 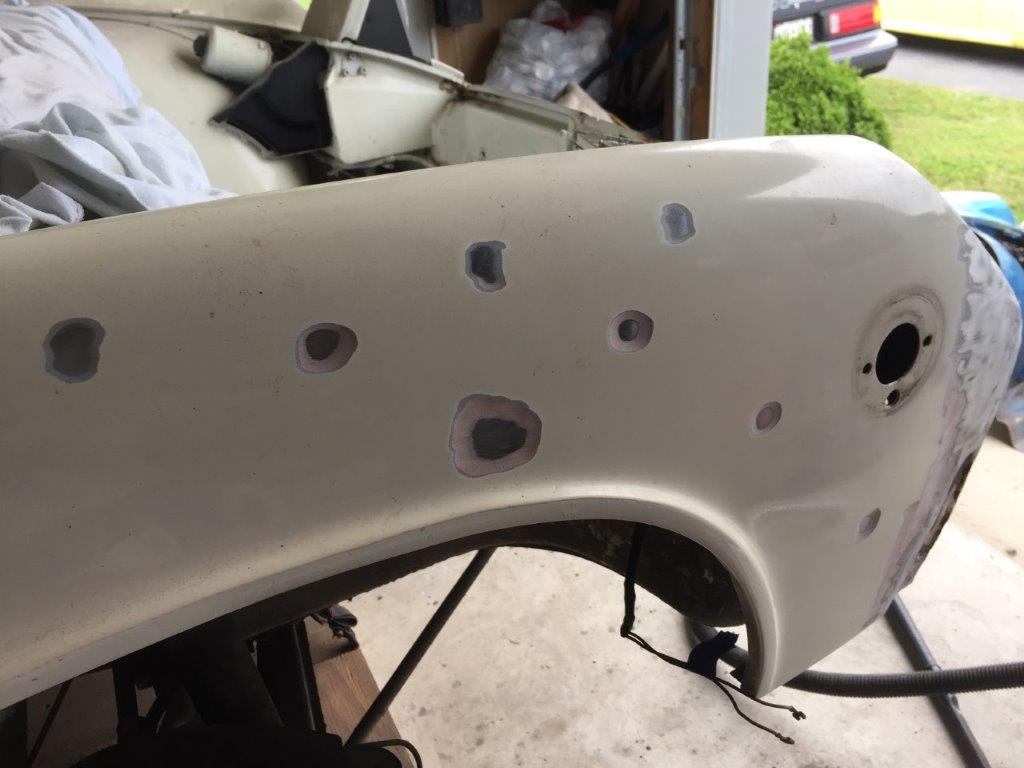 |
|
|
|
| shane |
Oct 1 2016, 07:10 PM
Post
#15
|
|
Member Group: Members Posts: 355 Joined: 12-February 13 Member No.: 15,518 Region Association: None |
QUOTE(Mikey914 @ Sep 29 2016, 11:57 PM) This may help What is piece #9 and can you get it aftermaket? |
|
|
|
| altitude411 |
Oct 1 2016, 09:16 PM
Post
#16
|
|
I drove my 6 into a tree Group: Members Posts: 1,306 Joined: 21-September 14 From: montana Member No.: 17,932 Region Association: Rocky Mountains |
...
|
|
|
|
| rick 918-S |
Oct 1 2016, 09:20 PM
Post
#17
|
|
Hey nice rack! -Celette Group: Members Posts: 20,422 Joined: 30-December 02 From: Now in Superior WI Member No.: 43 Region Association: Northstar Region |
That's kinda bad but not really. I meant to leave the headlight bucket attached to the front panel. As in Replace the bucket and front panel as one piece. It's much harder to replace the bucket then the front panel and get everything aligned. Check out post # 22 in the thread I posted. The right side is not trimmed yet. Look at the left side and you can see where I have it trimmed to replace the front panel. I included the reinforcement as well as the bucket. It goes together very nicely this way.I would also remove that fender and get a used one. There is far too much damage under all that filler. You will have a lot of time trimming used parts but sometimes it takes what it takes.
My advise, Buy a parts car for the front clip. Lots of cars out there with hell holes that are gone but good clips yet for parts. I don't have any spare fenders. I committed to a repair of a factory 6 that needs the only spares I have left. |
|
|
|
| rick 918-S |
Oct 1 2016, 09:22 PM
Post
#18
|
|
Hey nice rack! -Celette Group: Members Posts: 20,422 Joined: 30-December 02 From: Now in Superior WI Member No.: 43 Region Association: Northstar Region |
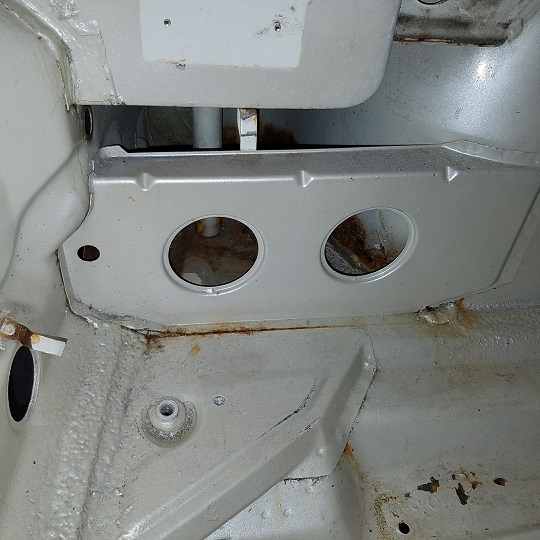
QUOTE(shane @ Oct 1 2016, 08:10 PM) QUOTE(Mikey914 @ Sep 29 2016, 11:57 PM) This may help What is piece #9 and can you get it aftermaket? #9 is the front trunk floor corner directly under the headlight bucket. The bucket drain tube is tack welded to the floor corner. |
|
|
|
| TargaToy |
Oct 2 2016, 01:50 PM
Post
#19
|
|
-NONSOLIS RADIOS SEDIOUIS FULMINA MITTO- Group: Members Posts: 692 Joined: 26-March 10 From: DelMarVa Peninsula Member No.: 11,509 Region Association: MidAtlantic Region |
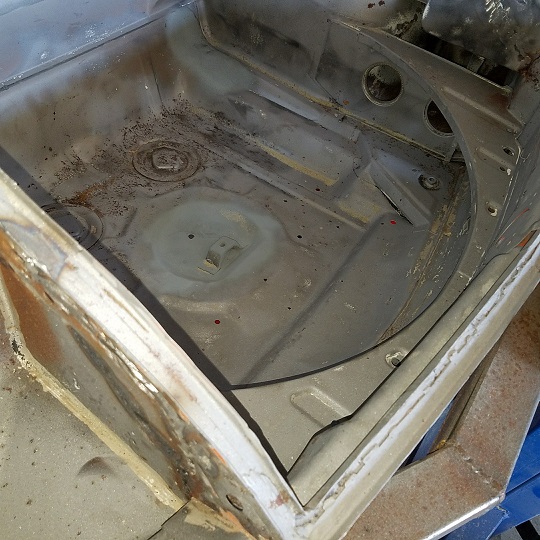
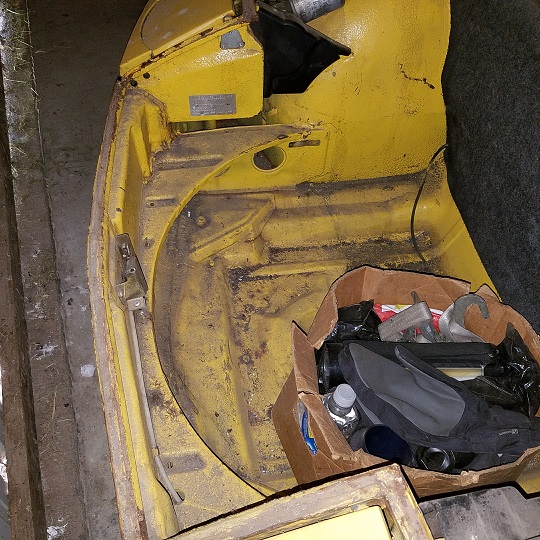
QUOTE(rick 918-S @ Oct 1 2016, 11:20 PM) That's kinda bad but not really. I meant to leave the headlight bucket attached to the front panel. As in Replace the bucket and front panel as one piece. It's much harder to replace the bucket then the front panel and get everything aligned. Check out post # 22 in the thread I posted. The right side is not trimmed yet. Look at the left side and you can see where I have it trimmed to replace the front panel. I included the reinforcement as well as the bucket. It goes together very nicely this way.I would also remove that fender and get a used one. There is far too much damage under all that filler. You will have a lot of time trimming used parts but sometimes it takes what it takes. My advise, Buy a parts car for the front clip. Lots of cars out there with hell holes that are gone but good clips yet for parts. I don't have any spare fenders. I committed to a repair of a factory 6 that needs the only spares I have left. Yesterday I removed the passenger side bucket. Check out the inner fender. More bondo. I didn't have time to strip it to see just how large the repair area was. This shouldn't surprise me. There was bondo on the longs INSIDE the passenger compartment. I do have a front clip I've been saving for this repair. Will leave the bucket attached to the front panel as you suggested. The down side is that this new clip is a 73 so it has the extra trunk reinforcements that I'll need to remove. The same donor provided a straight hood. My stock hood had been part of the accident. It has a cracked rib and the front edge wasn't true. When I put the blue hood on with a consistent gap at the cowl, it rubs the inside of the driver side headlight (headlight up). This makes me think that both fenders lean towards the passenger side. I plan to use the dimensions of the blue hood to make the two fenders parallel to each other and I figure it'll be a lot easier with the nose panel removed. Would you leave the existing driver's side bucket in place? 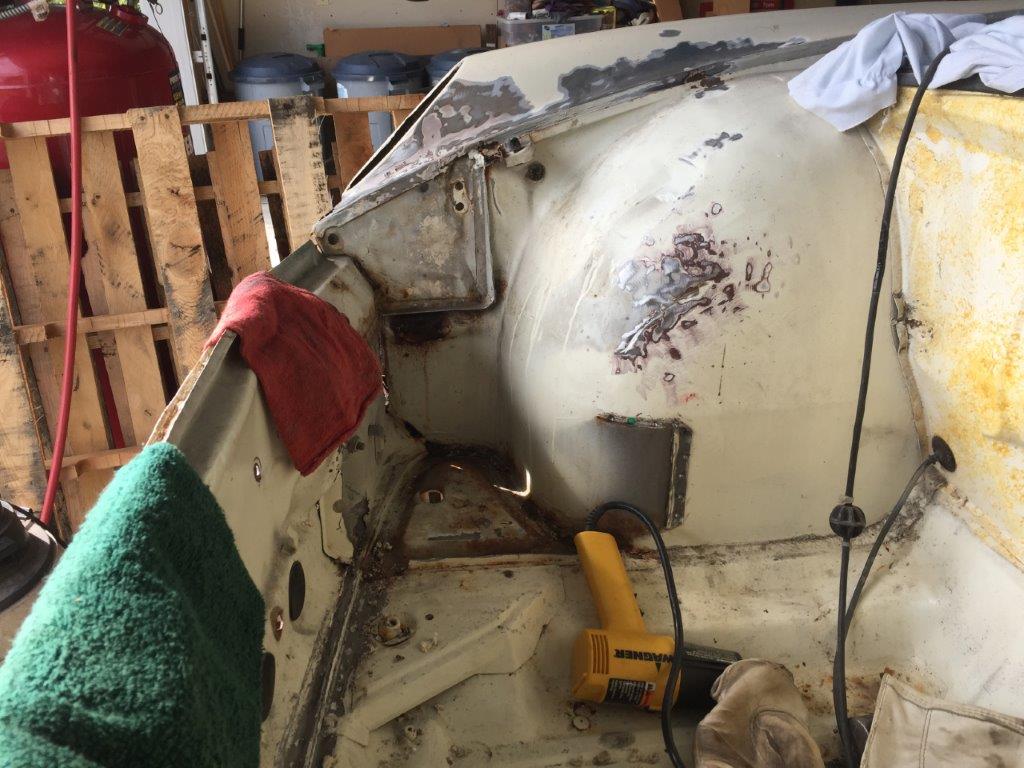 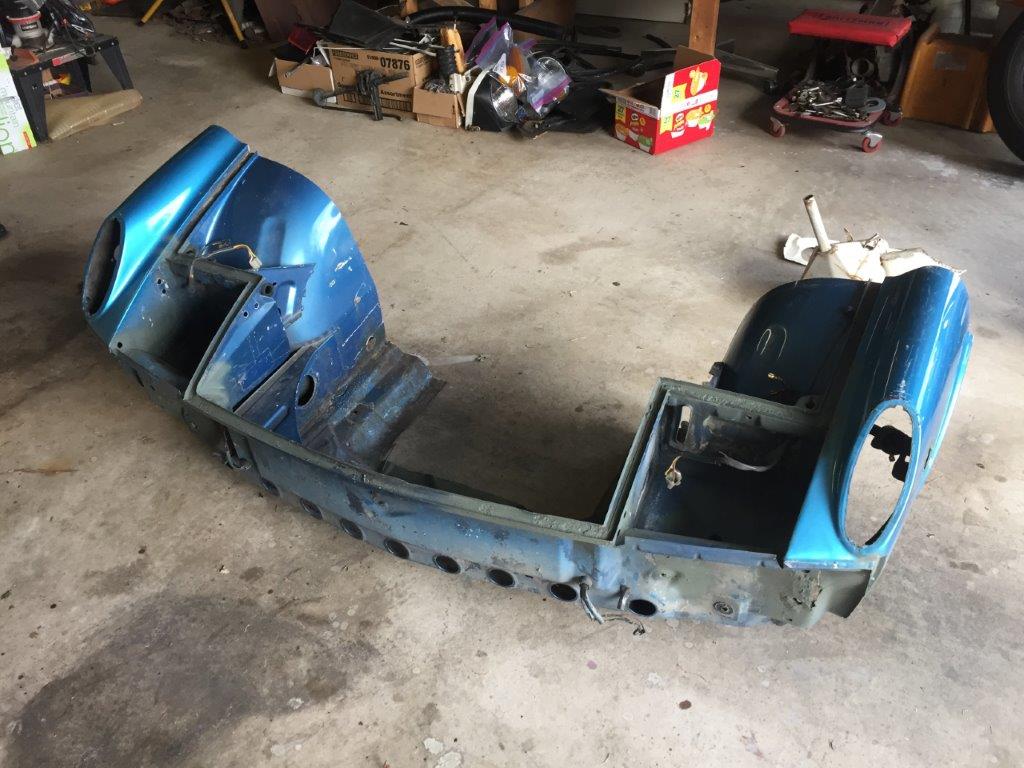 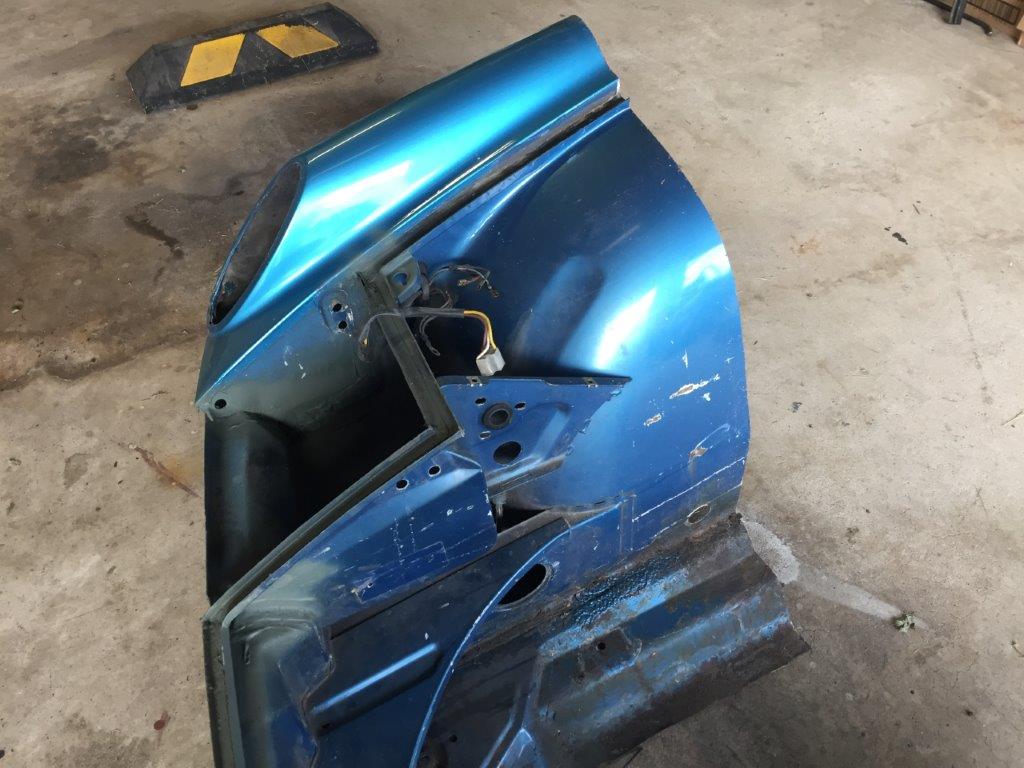 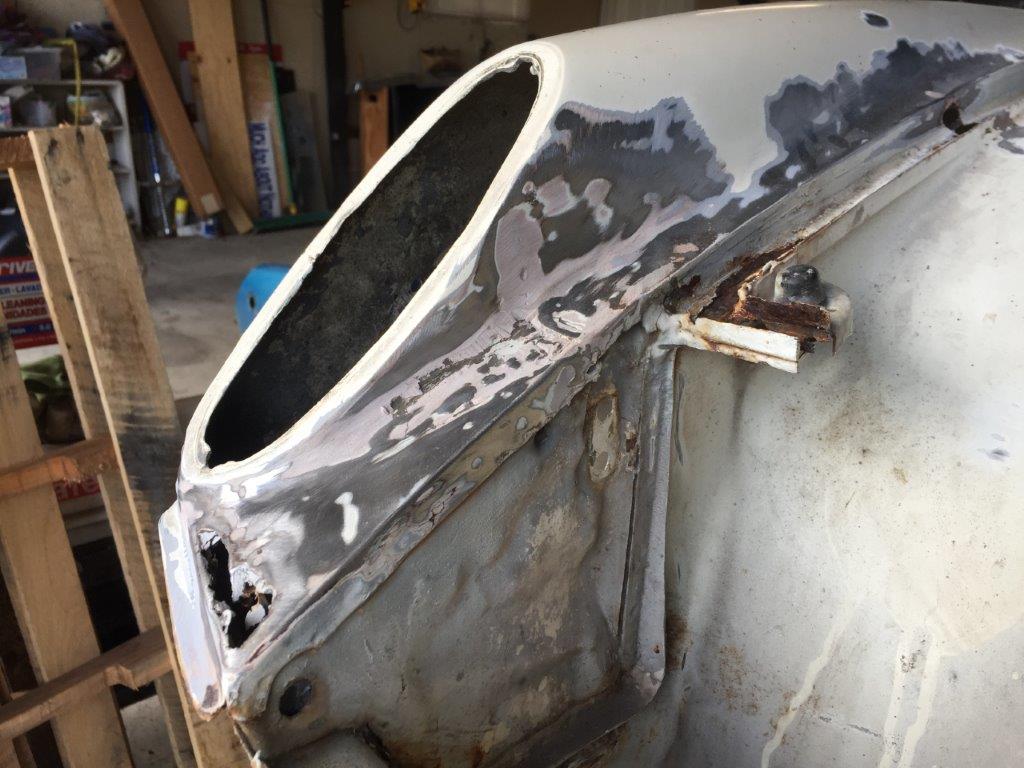 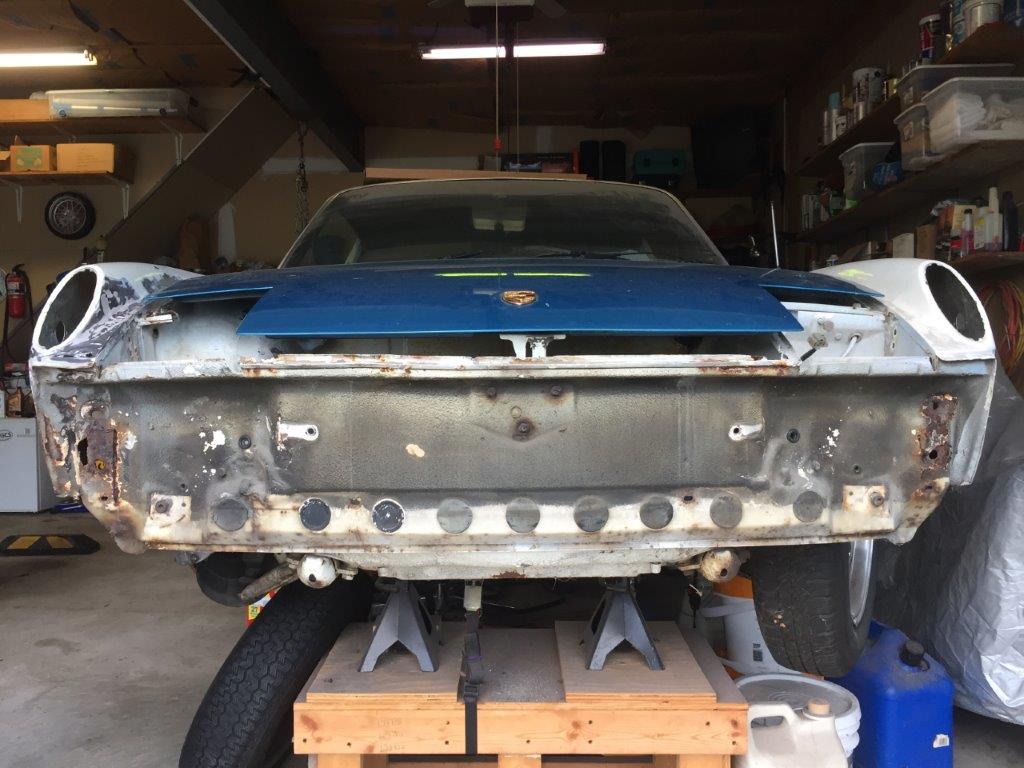 |
|
|
|
| rick 918-S |
Oct 19 2016, 08:52 AM
Post
#20
|
|
Hey nice rack! -Celette Group: Members Posts: 20,422 Joined: 30-December 02 From: Now in Superior WI Member No.: 43 Region Association: Northstar Region |
Here's my thought on the subject. I would change the whole thing. If you have some deflection in the front clip. (Sway) you would be better off using a known good part to help better align the front clip. Use the cowl to hood as a gauge, Be sure to use the measurements as well, and the whole nose with buckets will help put everything in place. Hope that makes sense.
|
|
|
|
|
1 User(s) are reading this topic (1 Guests and 0 Anonymous Users)
0 Members:

|
Lo-Fi Version | Time is now: 26th April 2024 - 05:08 AM |
Invision Power Board
v9.1.4 © 2024 IPS, Inc.