|
|

|
Porsche, and the Porsche crest are registered trademarks of Dr. Ing. h.c. F. Porsche AG.
This site is not affiliated with Porsche in any way. Its only purpose is to provide an online forum for car enthusiasts. All other trademarks are property of their respective owners. |
|
|
  |
| Porschef |
 Oct 4 2016, 07:06 PM Oct 4 2016, 07:06 PM
Post
#1
|
|
How you doin'     Group: Members Posts: 2,180 Joined: 7-September 10 From: LawnGuyland Member No.: 12,152 Region Association: North East States 
|
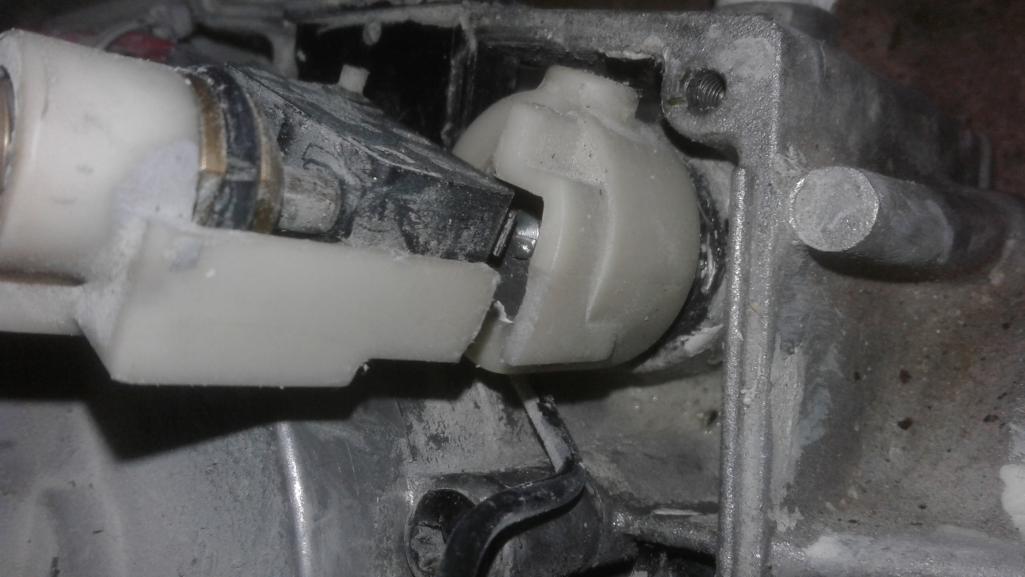
So the tool abusers have handed off another patient, a Wagner 91460s
(does that count as Porsche topic? (IMG:style_emoticons/default/rolleyes.gif) )...anyway, I opened it up to find that the pressure switch housing has broken, thus not allowing the unit to shut off, and build too much pressure. I think that may have affected the prime valve, but that's not for certain. Anyway, has anyone got a solid suggestion for an (unknown) plastic glue? The back of the adjustment stem does get captured in the rear housing, so I think that takes most of the stress. I've got epoxy, model glue, JB Weld kicking around but I'd like to get a one and some thing going. TIA, Joe |
| Valy |
 Oct 4 2016, 07:23 PM Oct 4 2016, 07:23 PM
Post
#2
|
|
Senior Member    Group: Members Posts: 1,677 Joined: 6-April 10 From: Sunnyvale, CA Member No.: 11,573 Region Association: Northern California |
Epoxy is not good for plastic. The model glue is good only for certain plastics.
What I recommend is the following: 1. Use some steel wire to secure the pieces if possible. 2. Use superglue (the instant glue that glues everything in 5sec) and baking soda. You build a support structure around what's broken to increase the contact surface. Put a bit of glue and then add some powder. Then remove the excess powder and add more glue and more powder unitl you're.satisfied. The result is a very hard polymer that you can file and paint if needed. |
| Porschef |
 Oct 4 2016, 07:47 PM Oct 4 2016, 07:47 PM
Post
#3
|
|
How you doin'     Group: Members Posts: 2,180 Joined: 7-September 10 From: LawnGuyland Member No.: 12,152 Region Association: North East States 
|
|
| Valy |
 Oct 4 2016, 07:59 PM Oct 4 2016, 07:59 PM
Post
#4
|
|
Senior Member    Group: Members Posts: 1,677 Joined: 6-April 10 From: Sunnyvale, CA Member No.: 11,573 Region Association: Northern California |
In this case I would just make 2 wire stitches. I guess that the other part looks the same so more stitches there.
Drill 1mm holes and use 1mm security wire to stitch. |
| Mike Bellis |
 Oct 4 2016, 09:41 PM Oct 4 2016, 09:41 PM
Post
#5
|
|
Resident Electrician      Group: Members Posts: 8,346 Joined: 22-June 09 From: Midlothian TX Member No.: 10,496 Region Association: None 

|
This stuff is awesome and will bond almost any plastic.
https://www.amazon.com/gp/product/B003HNFLM...=UTF8&psc=1 |
| Chris914n6 |
 Oct 4 2016, 09:50 PM Oct 4 2016, 09:50 PM
Post
#6
|
|
Jackstands are my life.     Group: Members Posts: 3,424 Joined: 14-March 03 From: Las Vegas, NV Member No.: 431 Region Association: Southwest Region |
White plastic... that's bad, specially if it's slippery. Probably Vinyl based like pvc. If you can't order a replacement part then a mechanical fastener is needed. The glue bond won't hold with a strong force against it, like it seems that part does.
|
| Valy |
 Oct 4 2016, 10:11 PM Oct 4 2016, 10:11 PM
Post
#7
|
|
Senior Member    Group: Members Posts: 1,677 Joined: 6-April 10 From: Sunnyvale, CA Member No.: 11,573 Region Association: Northern California |
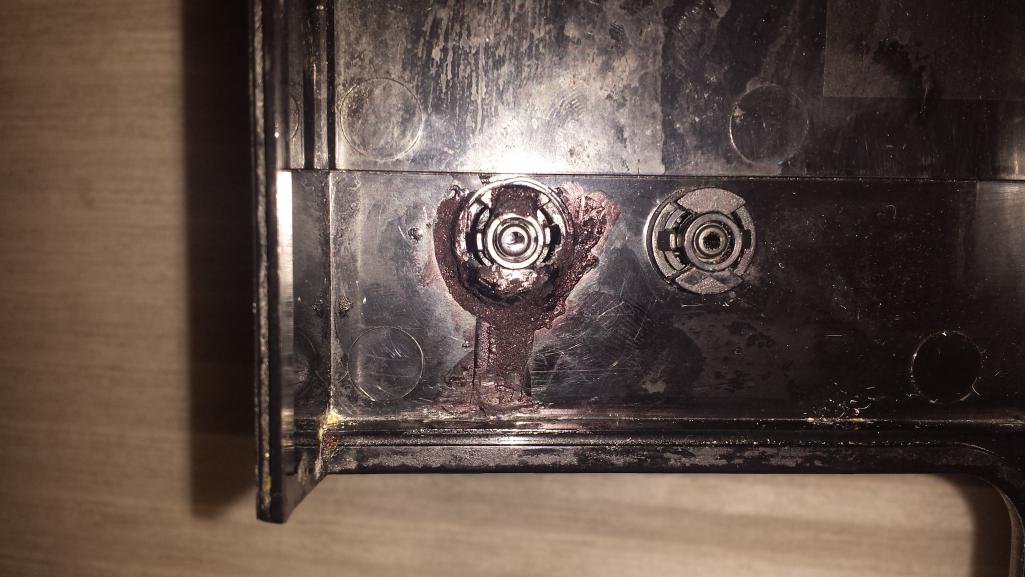
Here is an example of something similar. The left was the same as the right bump before it broke. It is constantly under load as there is a spring and button on the other side.
In this case I couldn't stitch it due to the size. I did make a wire crown around it to help stabilize everything and then built the crown up with superglue and baking soda. It looks a bit messy since it is vertical surface and the glue kept leaking down but the repair is pretty hidden so I painted it black and don't care much about aesthetics there.  |
  |
1 User(s) are reading this topic (1 Guests and 0 Anonymous Users)
0 Members:

|
Lo-Fi Version | Time is now: 2nd January 2025 - 02:38 PM |
Invision Power Board
v9.1.4 © 2025 IPS, Inc.


