|
|

|
Porsche, and the Porsche crest are registered trademarks of Dr. Ing. h.c. F. Porsche AG.
This site is not affiliated with Porsche in any way. Its only purpose is to provide an online forum for car enthusiasts. All other trademarks are property of their respective owners. |
|
|
  |
| bbrock |
 Jul 4 2018, 04:02 PM Jul 4 2018, 04:02 PM
Post
#1121
|
|
914 Guru      Group: Members Posts: 5,269 Joined: 17-February 17 From: Montana Member No.: 20,845 Region Association: Rocky Mountains 
|
I needed a break from the fire wall. The chassis has a few more spots that need rust repair so I figured I'd get after the frunk seal channels. Time for my best effort at an impersonation of Brent, Cary and Kent... You'll be able to do that with your eyes closed. Looking great so far. (IMG:style_emoticons/default/beer.gif) |
| tygaboy |
 Jul 6 2018, 11:53 AM Jul 6 2018, 11:53 AM
Post
#1122
|
|
914 Guru      Group: Members Posts: 5,550 Joined: 6-October 15 From: Petaluma, CA Member No.: 19,241 Region Association: Northern California 
|
Typical. It's always worse than you think it'll be.
With all the other things I've been doing, I hadn't really looked that closely at this part of the car. As I did, it was clear that I had more to do than I'd originally thought. This is a BUB car so it has that model's frunk seal channel that's a bit different as it runs across the front of the car. Upon closer inspection, I figured it'd just be easier to lop the whole thing off and fab a channel repair part that was more like the earlier cars'. Let's start with what hides between spot welded seams. Looks like my plan was more than just a good idea... it was sort of a requirement. Attached thumbnail(s) 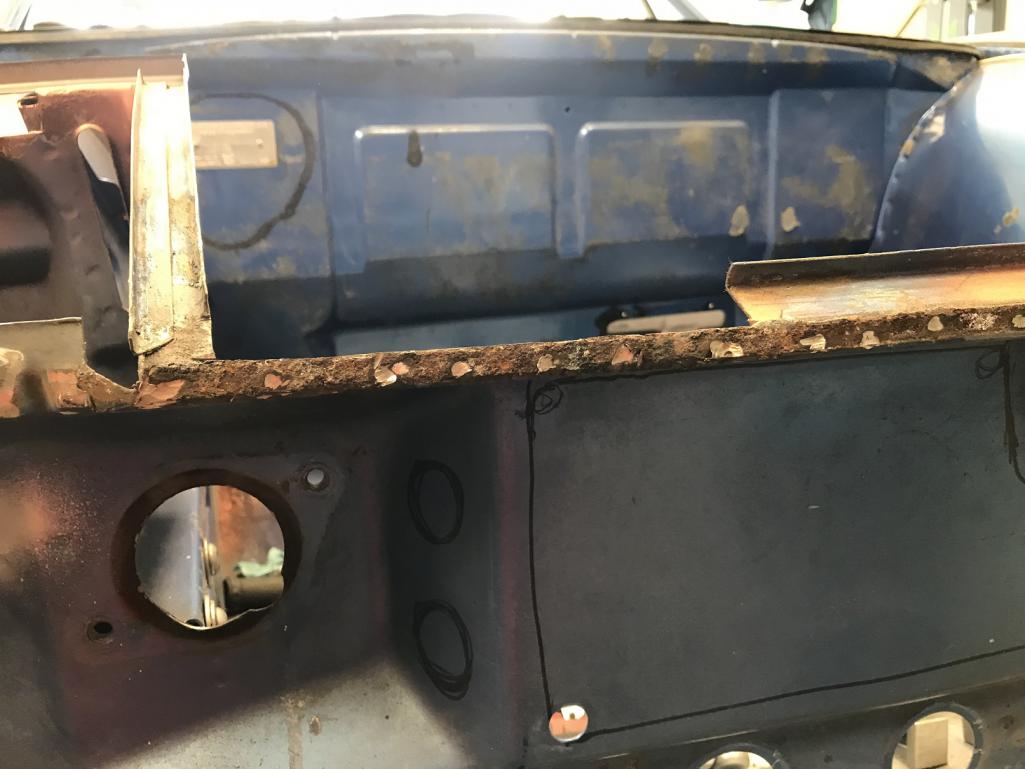
|
| tygaboy |
 Jul 6 2018, 11:53 AM Jul 6 2018, 11:53 AM
Post
#1123
|
|
914 Guru      Group: Members Posts: 5,550 Joined: 6-October 15 From: Petaluma, CA Member No.: 19,241 Region Association: Northern California 
|
Then I used my trusty curve template thingy to get an idea of the curve I'd need.
It always amazes me just how much curve there is in some parts of these little "square" cars. Attached thumbnail(s) 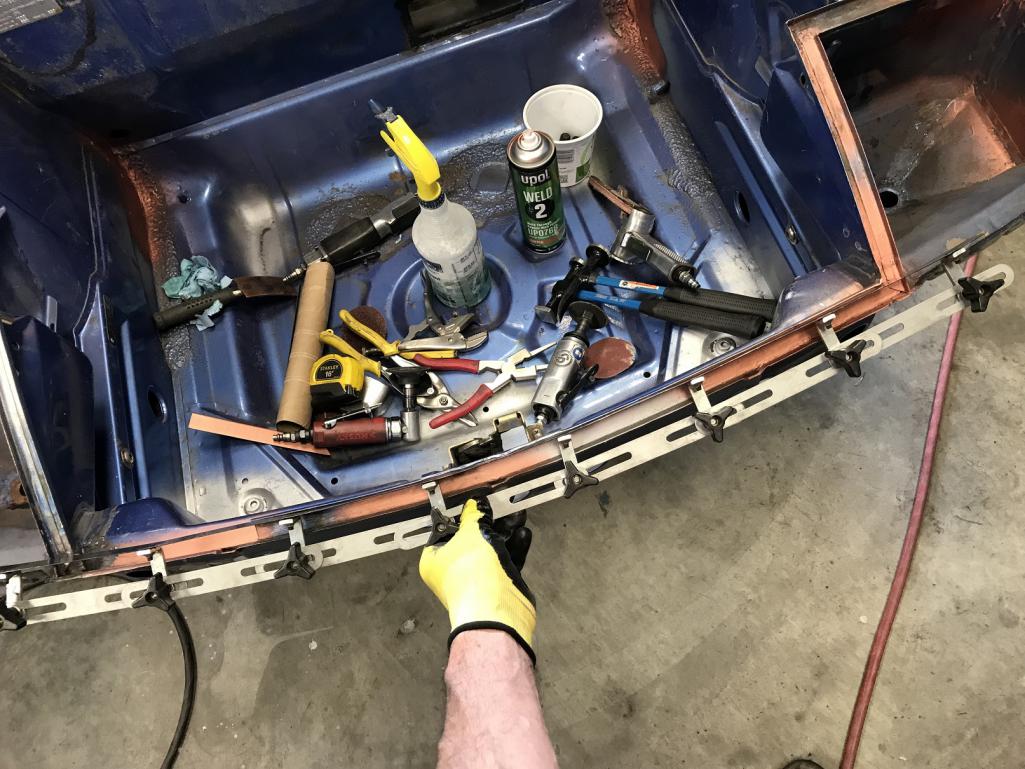 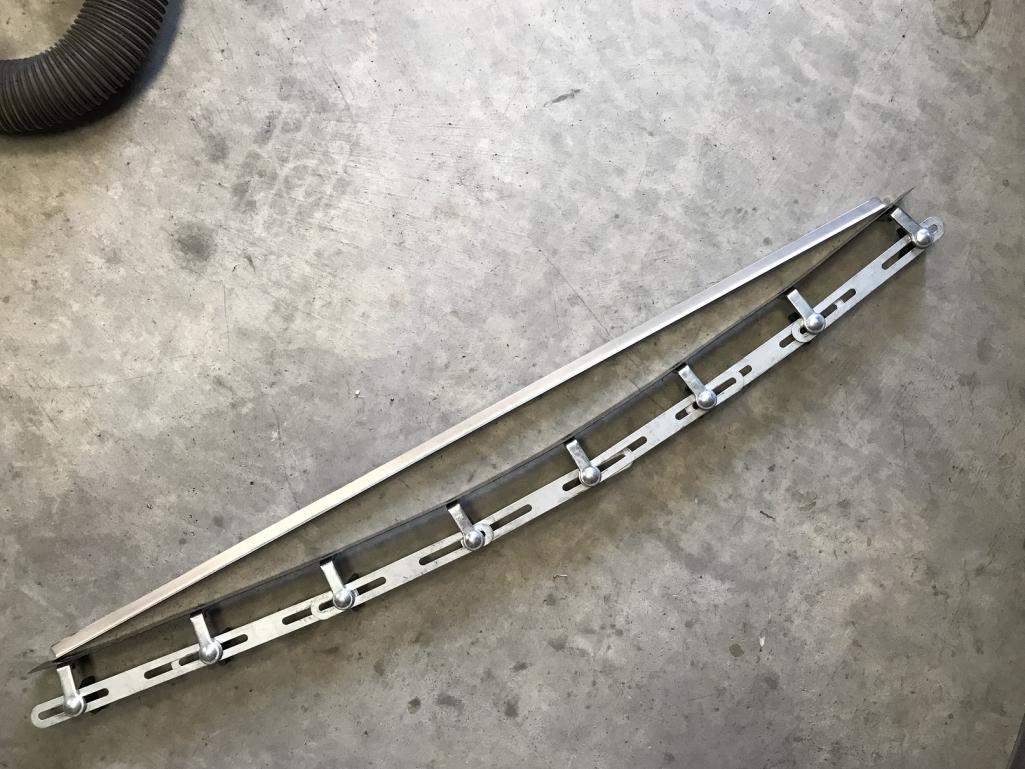
|
| tygaboy |
 Jul 6 2018, 11:55 AM Jul 6 2018, 11:55 AM
Post
#1124
|
|
914 Guru      Group: Members Posts: 5,550 Joined: 6-October 15 From: Petaluma, CA Member No.: 19,241 Region Association: Northern California 
|
Cut and bend some 20 ga.
Attached thumbnail(s) 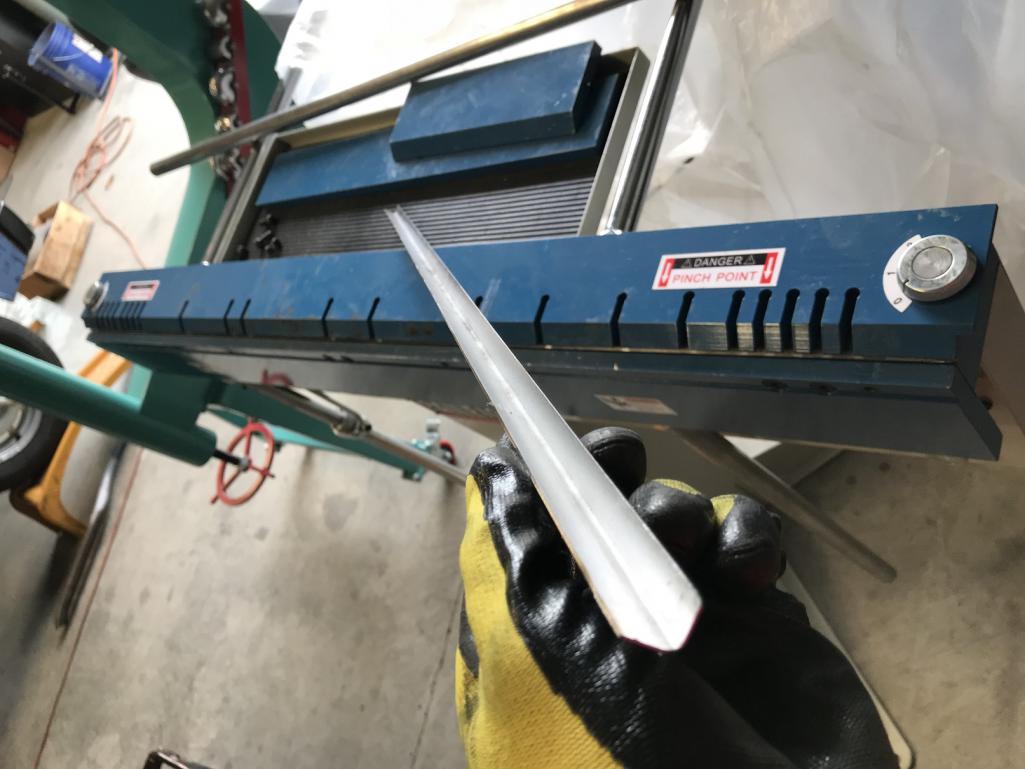
|
| tygaboy |
 Jul 6 2018, 11:57 AM Jul 6 2018, 11:57 AM
Post
#1125
|
|
914 Guru      Group: Members Posts: 5,550 Joined: 6-October 15 From: Petaluma, CA Member No.: 19,241 Region Association: Northern California 
|
Then it's off to the shrinker, test fit, shrink, test fit...
Oops, too much! Stretch, test fit, shrink. I'm calling this my cardio workout for the day. (IMG:style_emoticons/default/laugh.gif) OK, that's getting there. Attached thumbnail(s) 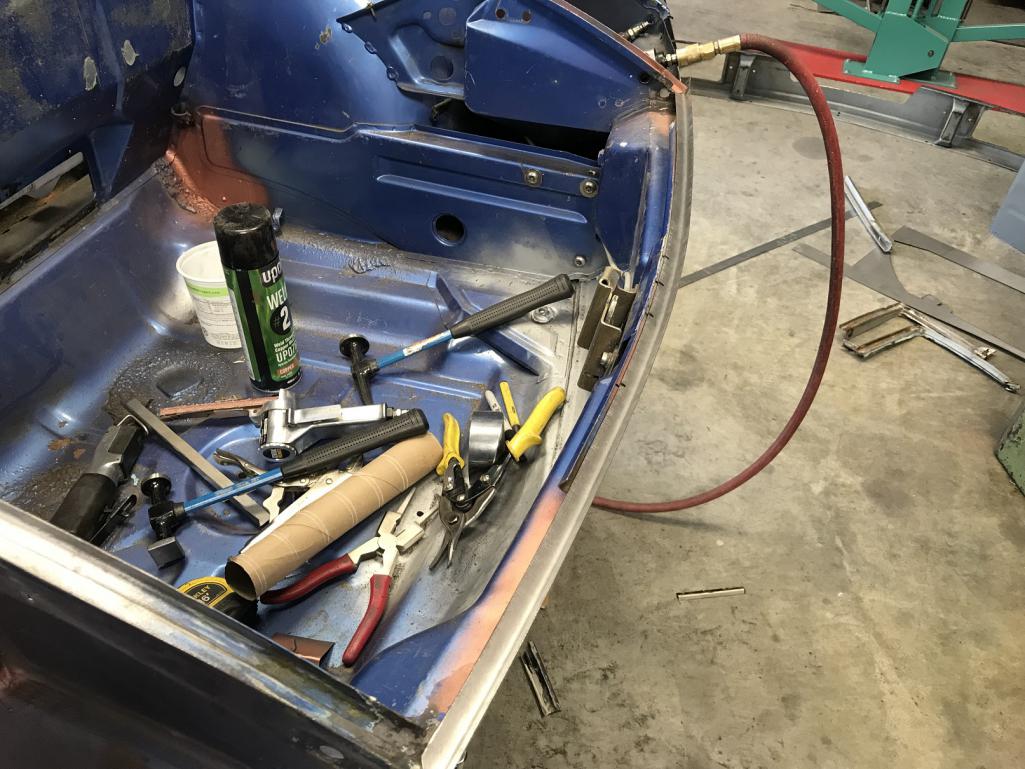
|
| tygaboy |
 Jul 6 2018, 11:59 AM Jul 6 2018, 11:59 AM
Post
#1126
|
|
914 Guru      Group: Members Posts: 5,550 Joined: 6-October 15 From: Petaluma, CA Member No.: 19,241 Region Association: Northern California 
|
"Hmmm"
"Well" and "Oh, boy!" It curves both ways... Of course it does. Attached thumbnail(s) 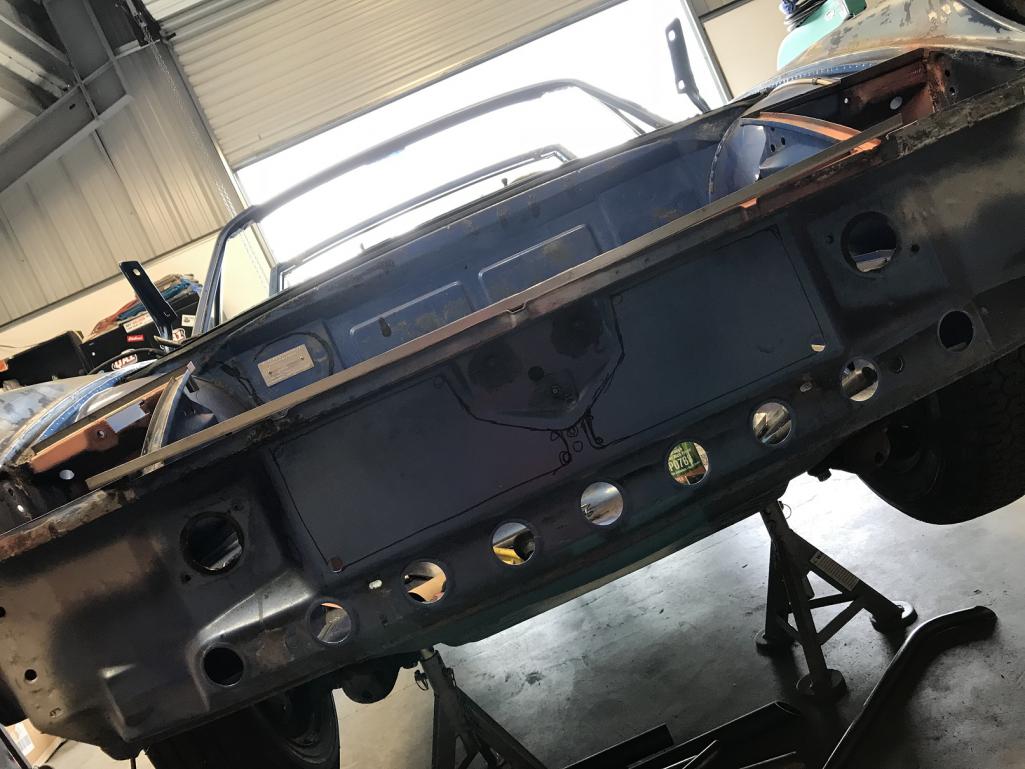
|
| tygaboy |
 Jul 6 2018, 12:01 PM Jul 6 2018, 12:01 PM
Post
#1127
|
|
914 Guru      Group: Members Posts: 5,550 Joined: 6-October 15 From: Petaluma, CA Member No.: 19,241 Region Association: Northern California 
|
Off to the stretcher! Repeat of the earlier process. Fit, adjust, fit adjust...
There we go. A bit more fine tuning, but you get the idea. Just more fiddly stuff. Attached thumbnail(s) 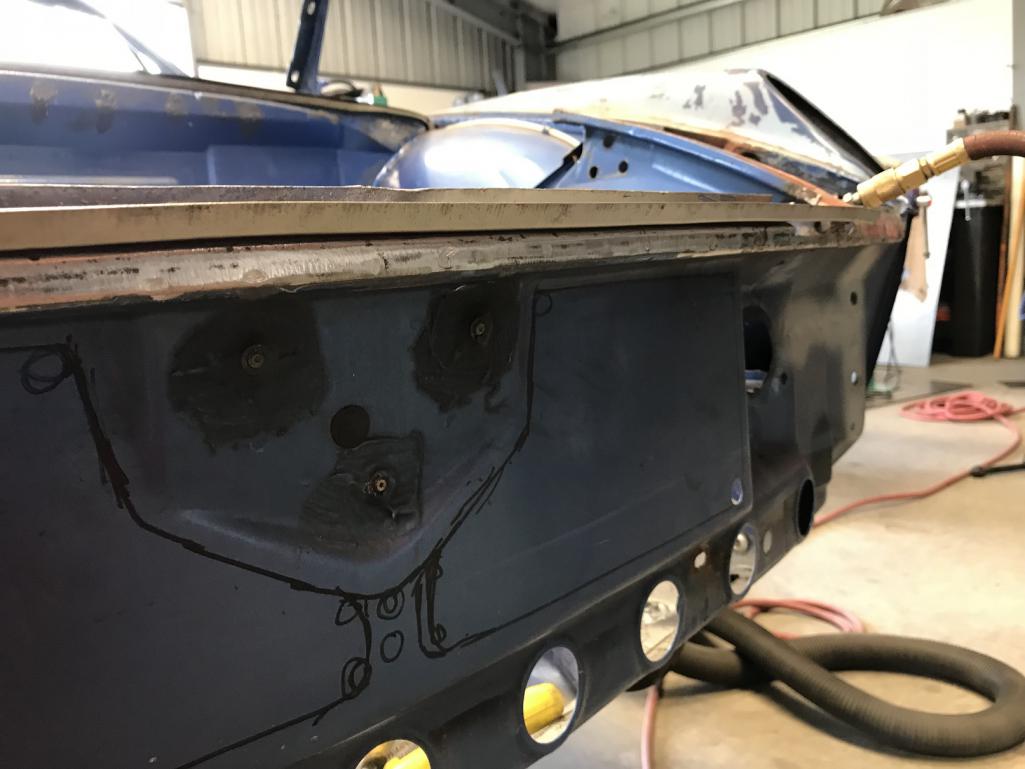
|
| bbrock |
 Jul 6 2018, 12:32 PM Jul 6 2018, 12:32 PM
Post
#1128
|
|
914 Guru      Group: Members Posts: 5,269 Joined: 17-February 17 From: Montana Member No.: 20,845 Region Association: Rocky Mountains 
|
Well done! (IMG:style_emoticons/default/smash.gif) (IMG:style_emoticons/default/smilie_pokal.gif) I love that curved template thingy and had no idea the BUB channels were different. Interesting to watch.
|
| Dion |
 Jul 6 2018, 12:37 PM Jul 6 2018, 12:37 PM
Post
#1129
|
|
RN     Group: Members Posts: 2,839 Joined: 16-September 04 From: Audubon,PA Member No.: 2,766 Region Association: MidAtlantic Region 

|
Chris it’s always fun to watch your skills at work. Nice channel building.
I didn’t realize the ID plates were mounted in different locales. Mine is mounted on my passenger side headlite “box”. Attached image(s) 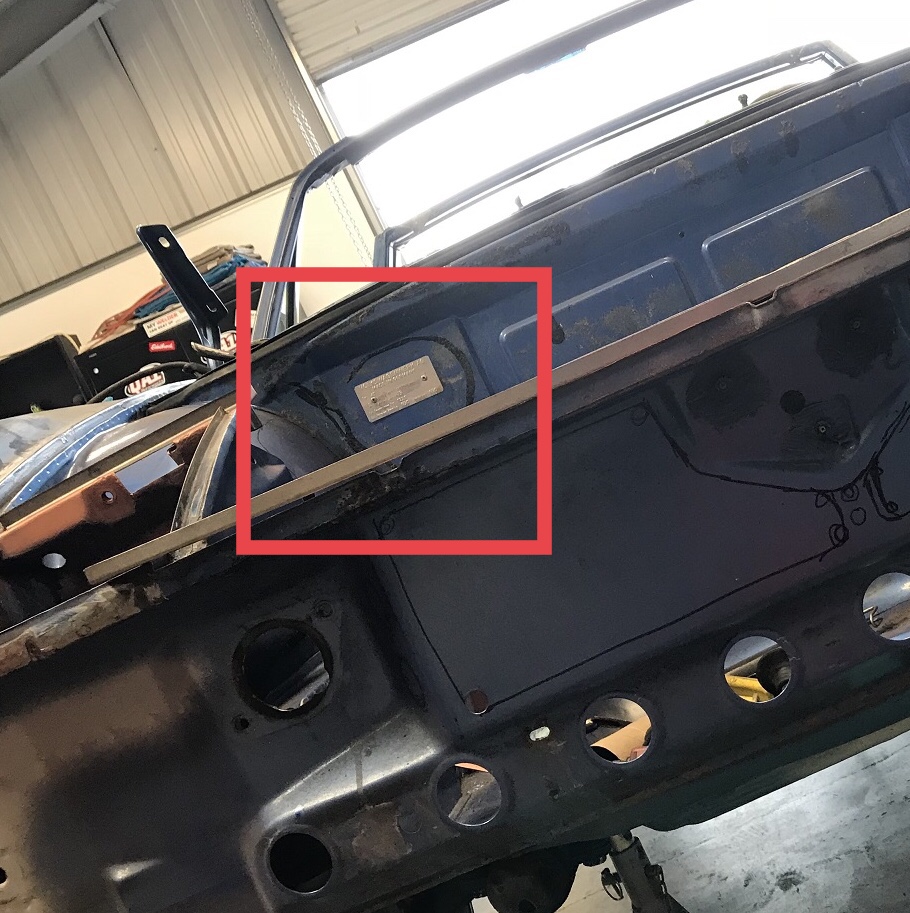
|
| tygaboy |
 Jul 6 2018, 12:52 PM Jul 6 2018, 12:52 PM
Post
#1130
|
|
914 Guru      Group: Members Posts: 5,550 Joined: 6-October 15 From: Petaluma, CA Member No.: 19,241 Region Association: Northern California 
|
Chris it’s always fun to watch your skills at work. Nice channel building. I didn’t realize the ID plates were mounted in different locales. Mine is mounted on my passenger side headlite “box”. Thanks Dion - Yep, earlier cars had the ID on the headlight box, the '75/'76 had the ID plates on the front firewall. |
| Mueller |
 Jul 6 2018, 01:22 PM Jul 6 2018, 01:22 PM
Post
#1131
|
|
914 Freak!                Group: Members Posts: 17,150 Joined: 4-January 03 From: Antioch, CA Member No.: 87 Region Association: None 
|
Looks like real work, I am starting to embrace my rust (IMG:style_emoticons/default/smile.gif)
|
| Andyrew |
 Jul 6 2018, 01:56 PM Jul 6 2018, 01:56 PM
Post
#1132
|
|
Spooling.... Please wait           Group: Members Posts: 13,377 Joined: 20-January 03 From: Riverbank, Ca Member No.: 172 Region Association: Northern California 
|
That template tool is one of the simplest and coolest tools I've seen! Great work with the stretcher! Its like it was made to do this type of work (IMG:style_emoticons/default/biggrin.gif)!
|
| burton73 |
 Jul 6 2018, 03:00 PM Jul 6 2018, 03:00 PM
Post
#1133
|
|
Senior member, and old dude     Group: Members Posts: 3,801 Joined: 2-January 07 From: Los Angeles Member No.: 7,414 Region Association: Southern California 
|
I have told you before but you have mad skills.
Keep it going. Thanks for taking us with you on this reworking of this unreal car. Bob B |
| tygaboy |
 Jul 6 2018, 05:07 PM Jul 6 2018, 05:07 PM
Post
#1134
|
|
914 Guru      Group: Members Posts: 5,550 Joined: 6-October 15 From: Petaluma, CA Member No.: 19,241 Region Association: Northern California 
|
Thanks again! I really appreciate all the nice comments.
Back to it, then. A quick reminder: use up your consumables! I mean really! (IMG:style_emoticons/default/happy11.gif) Attached thumbnail(s) 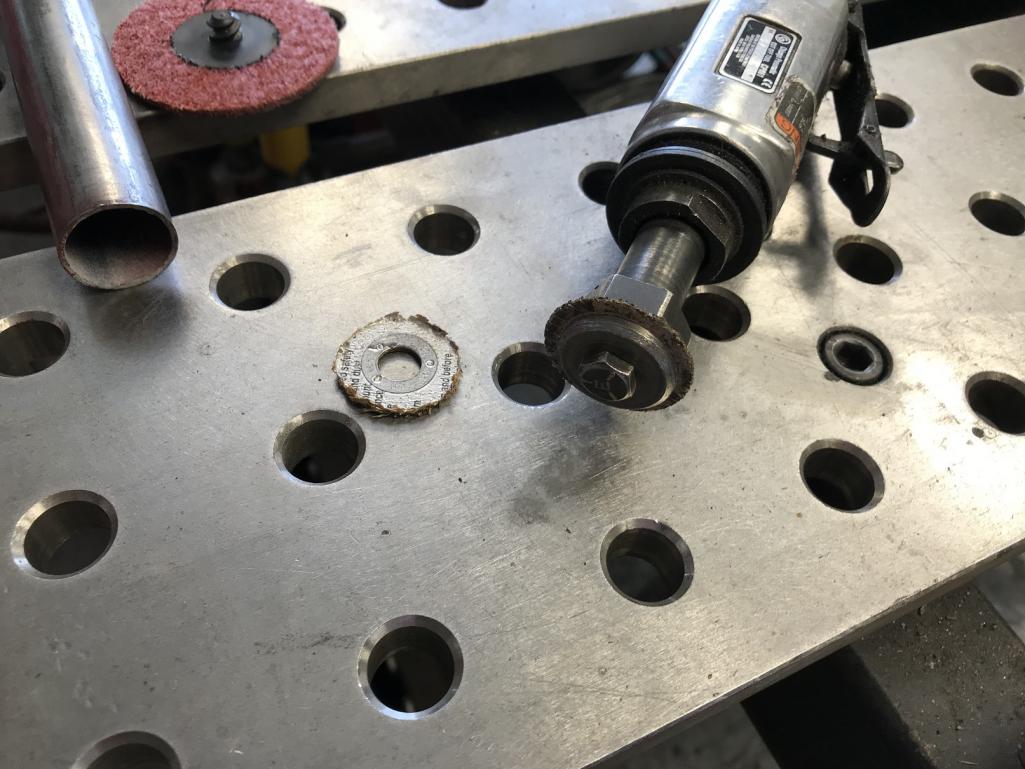
|
| tygaboy |
 Jul 6 2018, 05:12 PM Jul 6 2018, 05:12 PM
Post
#1135
|
|
914 Guru      Group: Members Posts: 5,550 Joined: 6-October 15 From: Petaluma, CA Member No.: 19,241 Region Association: Northern California 
|
As I was looking at what else I'd have to fab, I remembered I'd saved some of the needed pieces when I cut up that '72 parts car last year. So it seems I did notice this area but forgot! (Well, I am turning 60 this month... (IMG:style_emoticons/default/idea.gif) )
So, a bit of fitting and I don't have to fab these complex little pieces. Nice. Attached thumbnail(s) 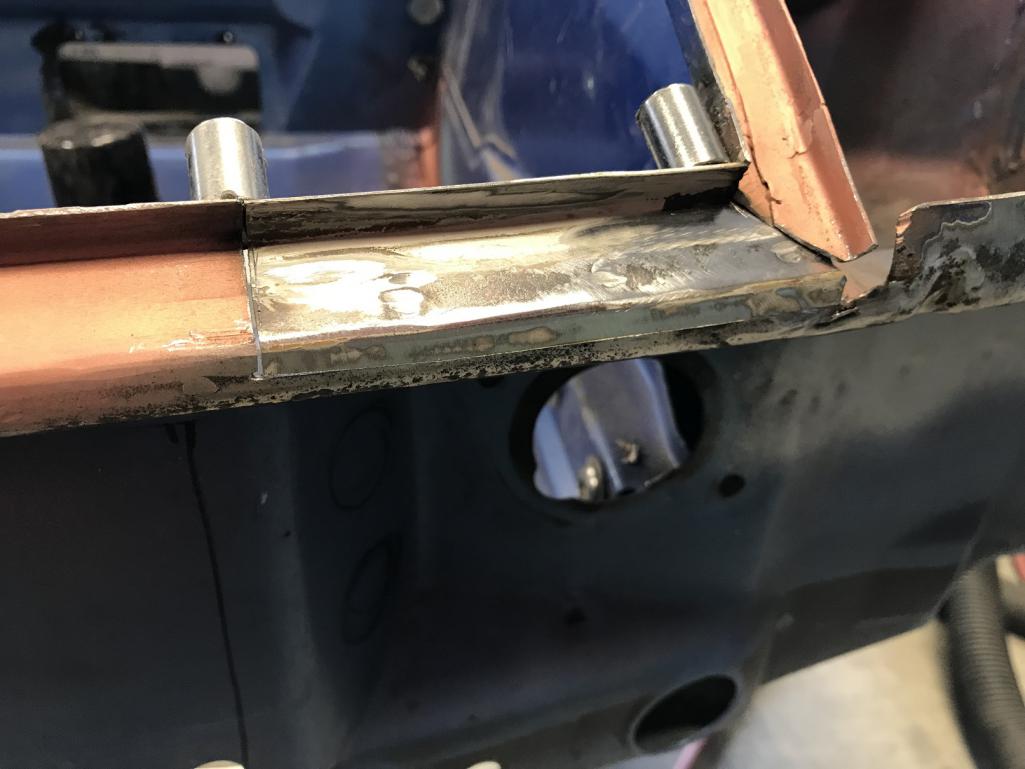 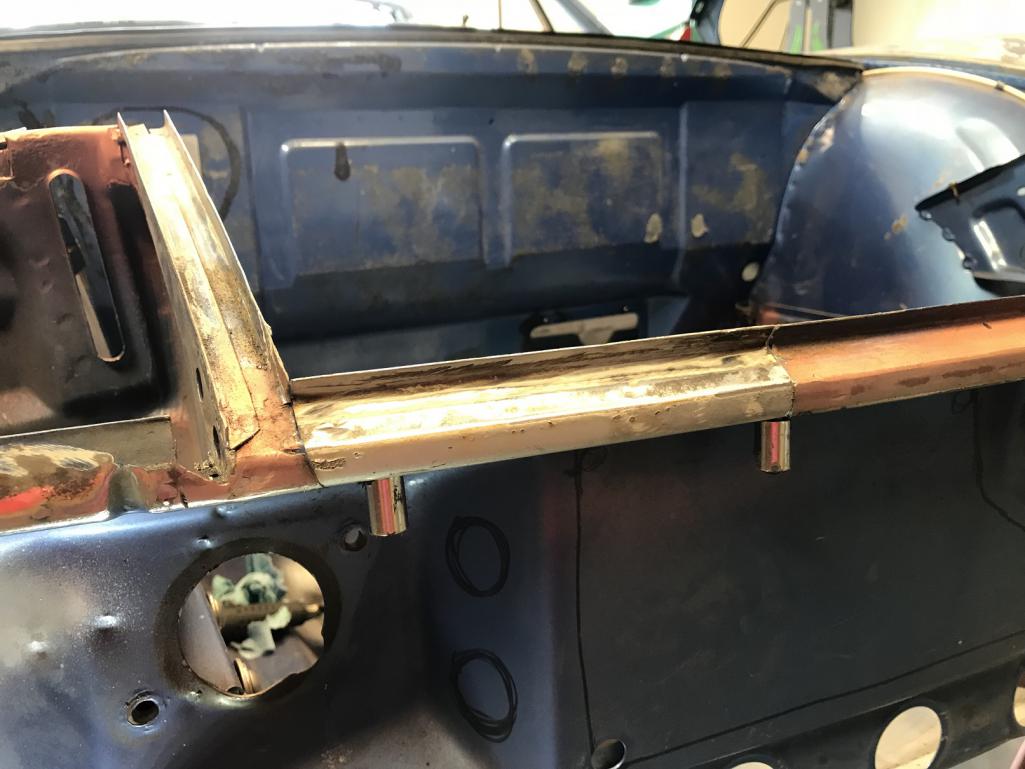
|
| tygaboy |
 Jul 6 2018, 05:15 PM Jul 6 2018, 05:15 PM
Post
#1136
|
|
914 Guru      Group: Members Posts: 5,550 Joined: 6-October 15 From: Petaluma, CA Member No.: 19,241 Region Association: Northern California 
|
And with those pieces in place, I could finalize the front channel.
It really does fit pretty nicely. Happy, happy, joy, joy! Attached thumbnail(s) 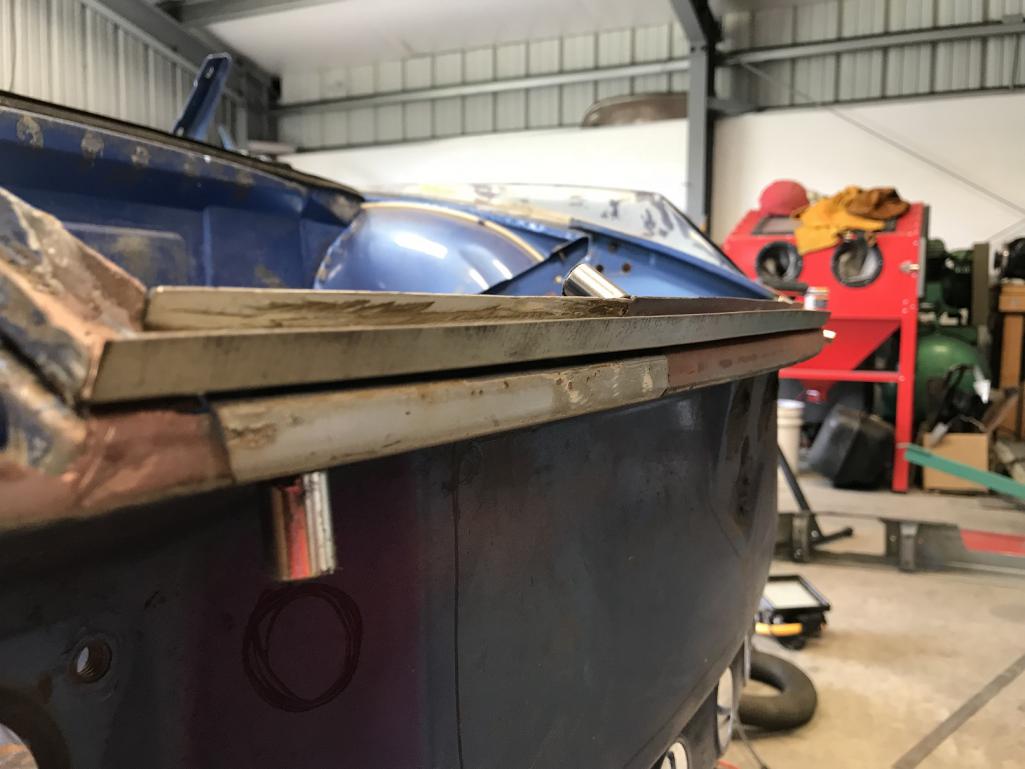
|
| tygaboy |
 Jul 7 2018, 10:27 PM Jul 7 2018, 10:27 PM
Post
#1137
|
|
914 Guru      Group: Members Posts: 5,550 Joined: 6-October 15 From: Petaluma, CA Member No.: 19,241 Region Association: Northern California 
|
Fabbed up and welded in the underside portion of the headlight bucket channel. I still need to trim the vertical edge to the appropriate height.
Then I moved on and fabbed the lower edge that spot welds on. Here it is ready for final fitment. Attached thumbnail(s) 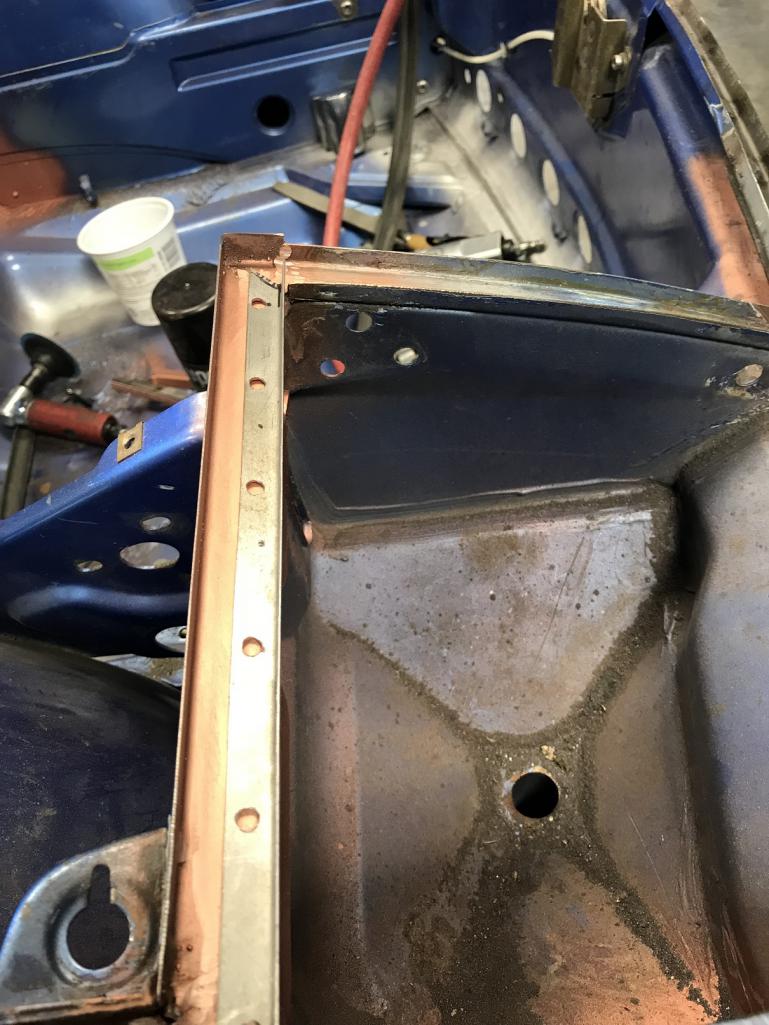
|
| tygaboy |
 Jul 7 2018, 10:29 PM Jul 7 2018, 10:29 PM
Post
#1138
|
|
914 Guru      Group: Members Posts: 5,550 Joined: 6-October 15 From: Petaluma, CA Member No.: 19,241 Region Association: Northern California 
|
A little more shrinking/stretching to get the front edge channel width where it needed to be and it was time to spot weld it in. It turned out just like I'd hoped it would.
(IMG:style_emoticons/default/welder.gif) and (IMG:style_emoticons/default/welder.gif) and it's all done! Attached thumbnail(s) 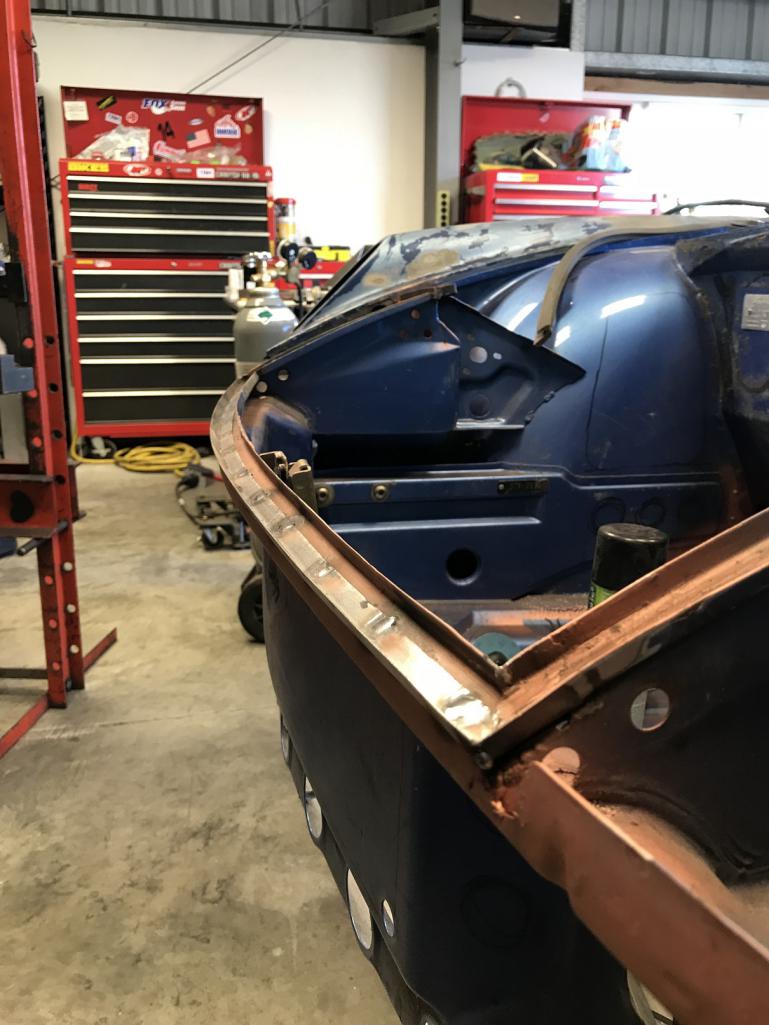
|
| tygaboy |
 Jul 7 2018, 10:31 PM Jul 7 2018, 10:31 PM
Post
#1139
|
|
914 Guru      Group: Members Posts: 5,550 Joined: 6-October 15 From: Petaluma, CA Member No.: 19,241 Region Association: Northern California 
|
And it's funny, all the hard work and it gets totally covered by the seal. Ah well, I know it's well de-rustified. And this is just the old seal used as a test fit. All new rubber will be used for the reassembly.
With the channel repairs complete, it's back to all the other stuff... Attached thumbnail(s) 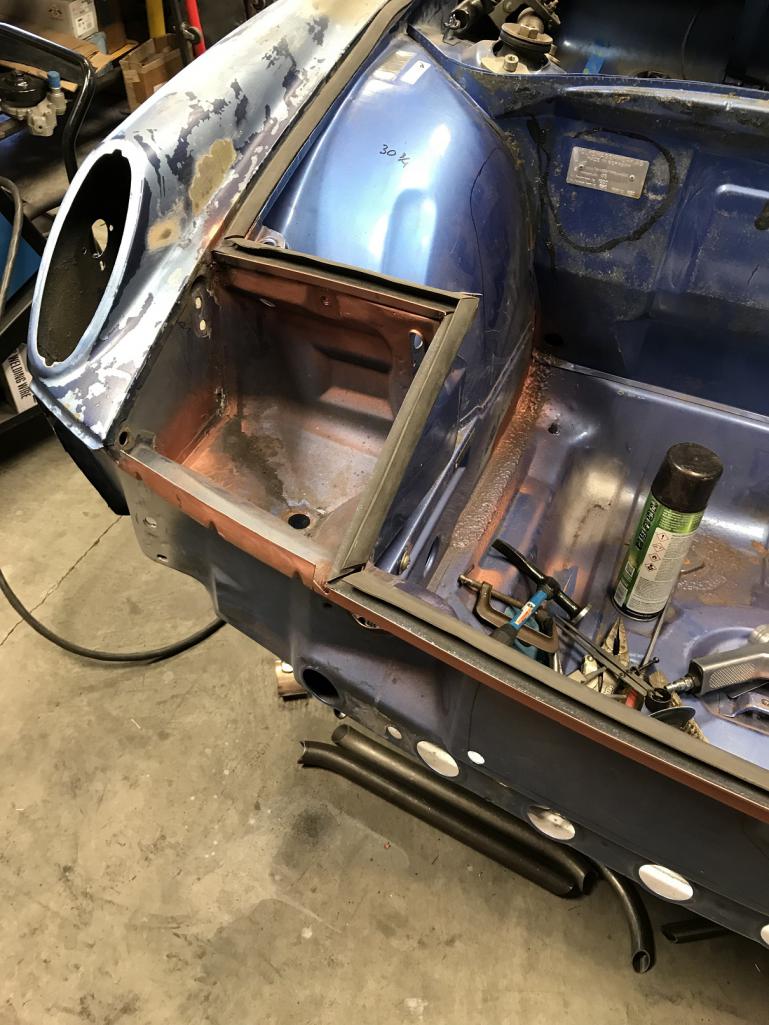 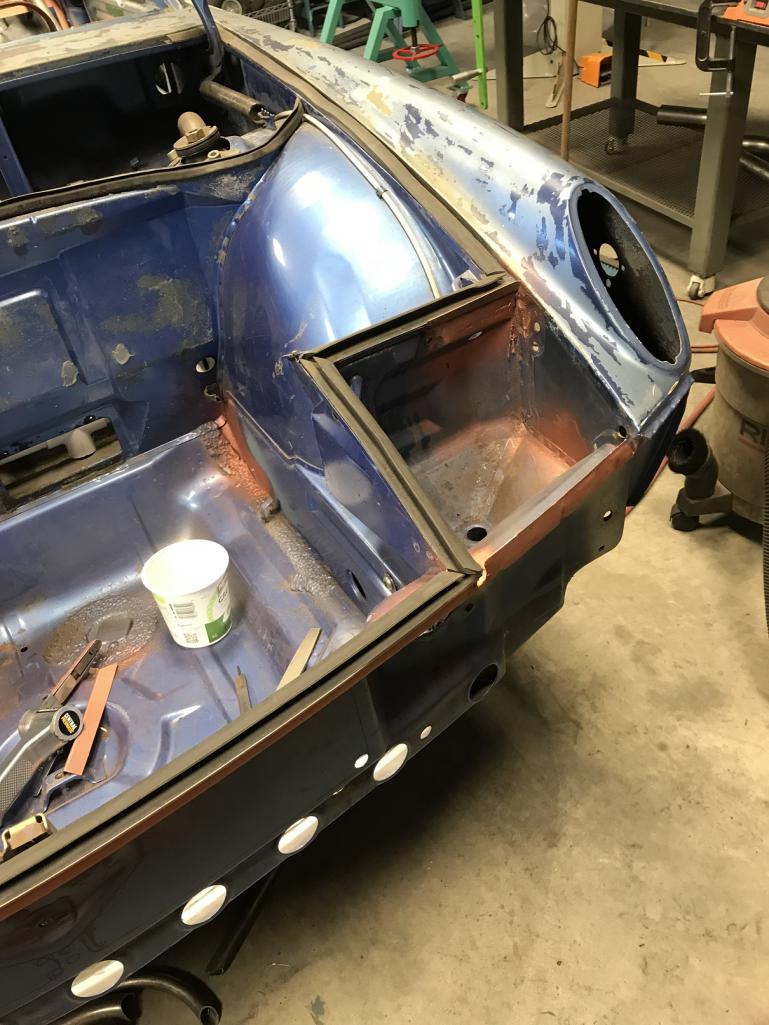
|
| tygaboy |
 Jul 8 2018, 08:28 AM Jul 8 2018, 08:28 AM
Post
#1140
|
|
914 Guru      Group: Members Posts: 5,550 Joined: 6-October 15 From: Petaluma, CA Member No.: 19,241 Region Association: Northern California 
|
Finishing the channel repairs was a nice break from the "how do I want to do this" work I'd been doing. Feeling a bit re-engergized, it's back to the fire wall.
Both upper frame tubes are fabbed and fitted. Now to work out how to close everything off/up. And that's just copper-rich weld through primer on the frames. Some areas will be welded, some riveted but I wanted to get some protection on the bare metal. Attached thumbnail(s) 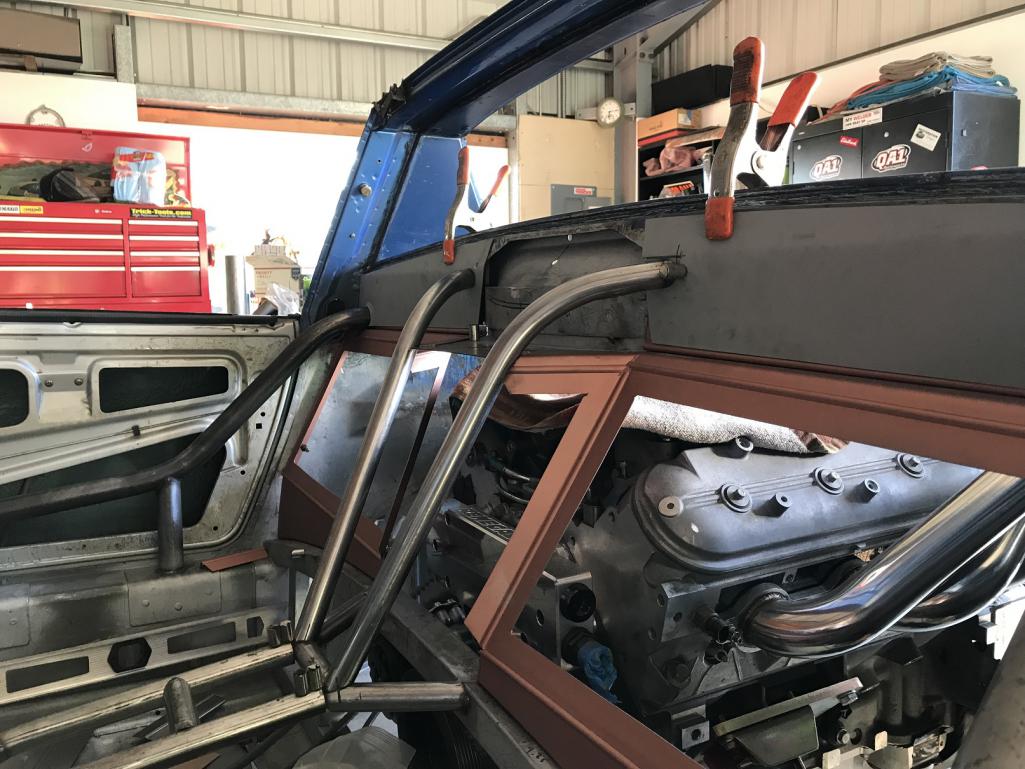 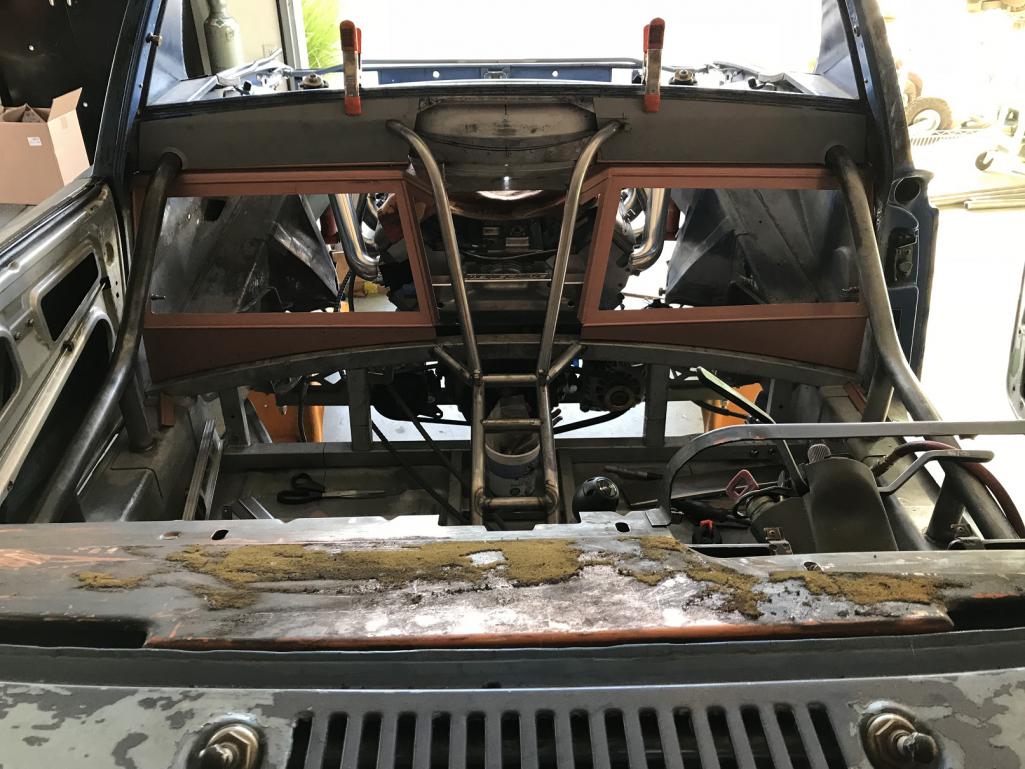 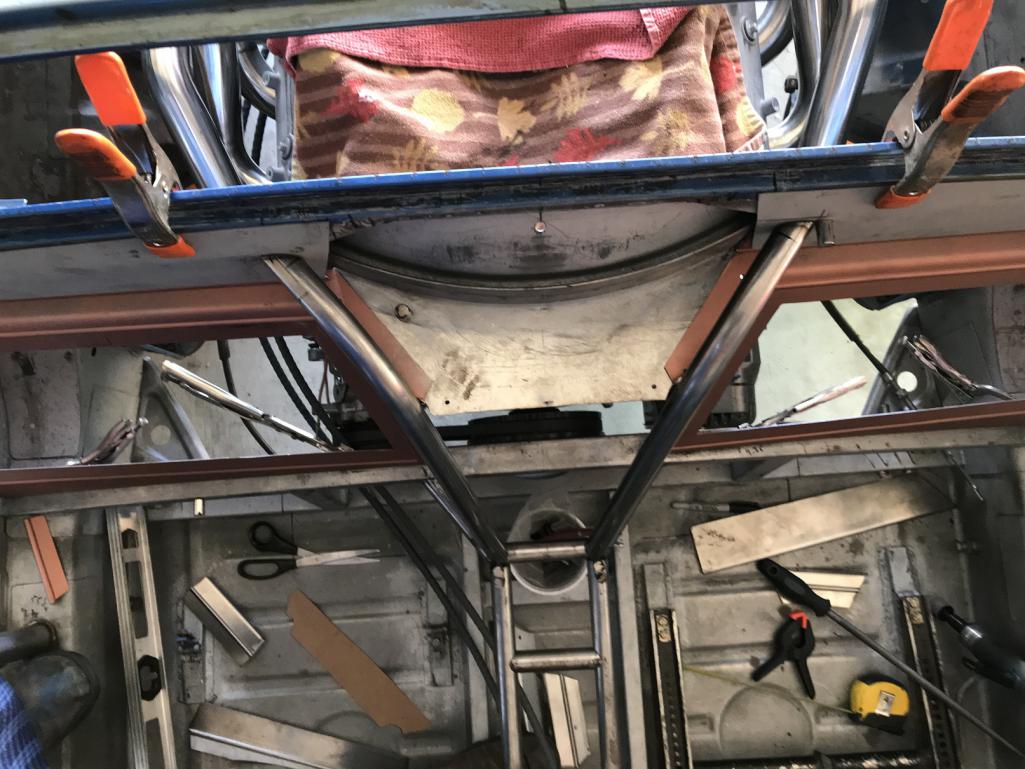
|
  |
1 User(s) are reading this topic (1 Guests and 0 Anonymous Users)
0 Members:

|
Lo-Fi Version | Time is now: 21st April 2025 - 10:03 PM |
Invision Power Board
v9.1.4 © 2025 IPS, Inc.


