|
|

|
Porsche, and the Porsche crest are registered trademarks of Dr. Ing. h.c. F. Porsche AG.
This site is not affiliated with Porsche in any way. Its only purpose is to provide an online forum for car enthusiasts. All other trademarks are property of their respective owners. |
|
|
  |
| tygaboy |
 Nov 2 2018, 06:32 PM Nov 2 2018, 06:32 PM
Post
#1301
|
|
914 Guru      Group: Members Posts: 5,551 Joined: 6-October 15 From: Petaluma, CA Member No.: 19,241 Region Association: Northern California 
|
So I removed EVERYTHING I'd previously done. It really is back to "Square 1"... or in my case, "Square Zero"? Are there negative squares? (IMG:style_emoticons/default/blink.gif)
Attached thumbnail(s) 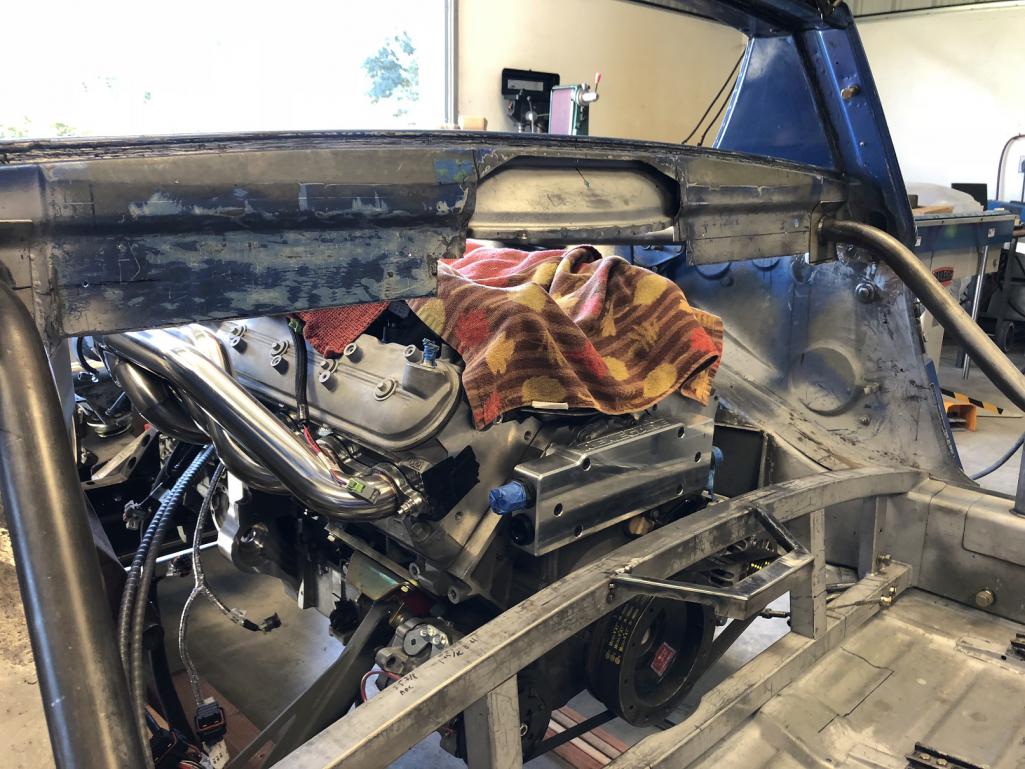
|
| tygaboy |
 Nov 2 2018, 06:34 PM Nov 2 2018, 06:34 PM
Post
#1302
|
|
914 Guru      Group: Members Posts: 5,551 Joined: 6-October 15 From: Petaluma, CA Member No.: 19,241 Region Association: Northern California 
|
Then I redesigned and fabbed a new base panel. This now sits flush against the rear of the arched support. Plus, overall, it's lower. This will give me more room behind the seats.
Attached thumbnail(s) 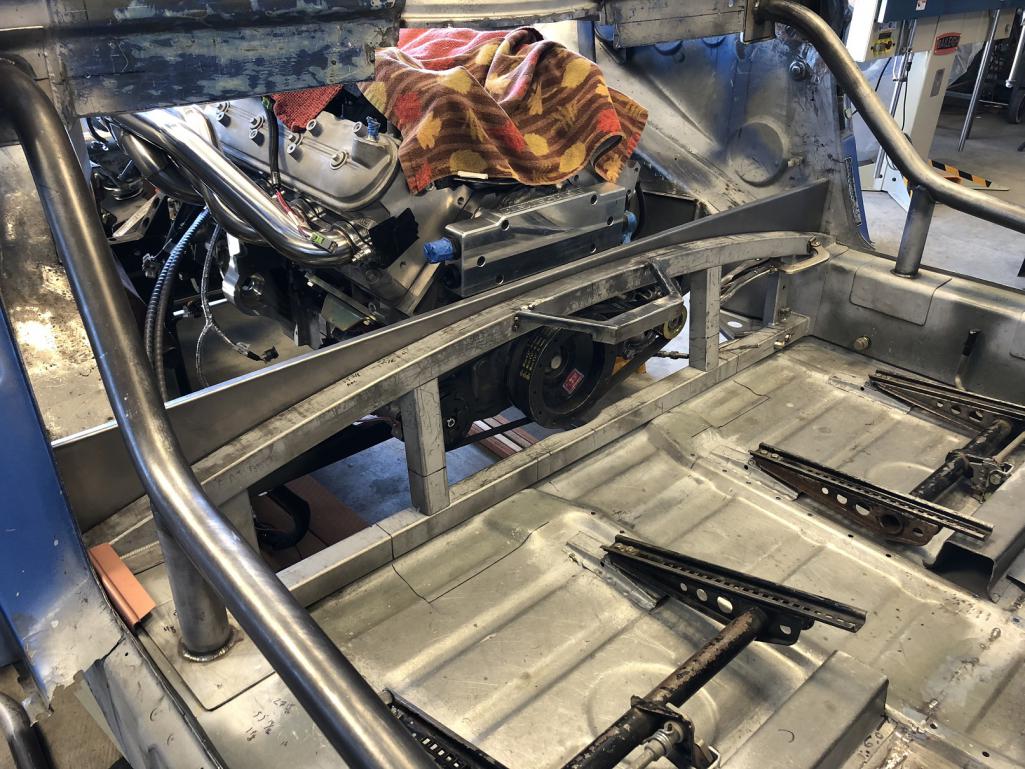
|
| tygaboy |
 Nov 2 2018, 06:35 PM Nov 2 2018, 06:35 PM
Post
#1303
|
|
914 Guru      Group: Members Posts: 5,551 Joined: 6-October 15 From: Petaluma, CA Member No.: 19,241 Region Association: Northern California 
|
Rough mock-up of the driver side main panel. Compared with the previous design, this also sits further back. It reduces the number of parts (and weight), is easier to install and again, creates more room in the cockpit.
Yes, I'll add something to prevent oil-canning. Attached thumbnail(s) 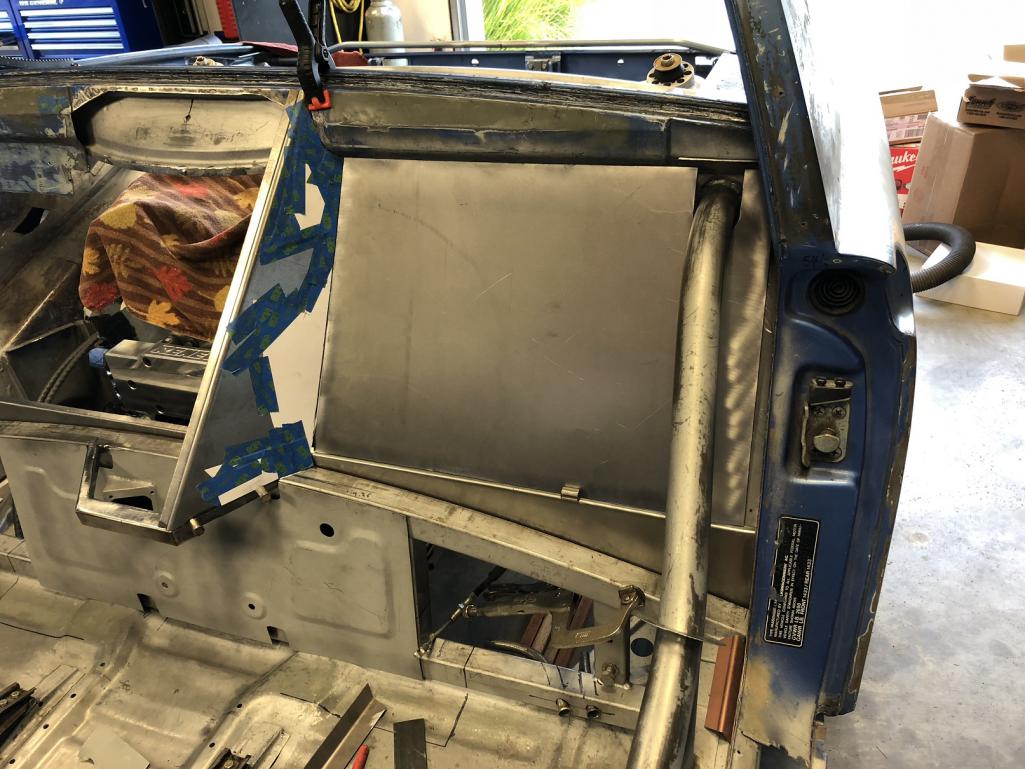
|
| tygaboy |
 Nov 2 2018, 06:38 PM Nov 2 2018, 06:38 PM
Post
#1304
|
|
914 Guru      Group: Members Posts: 5,551 Joined: 6-October 15 From: Petaluma, CA Member No.: 19,241 Region Association: Northern California 
|
Playing around with designs to close off around the door bars.
Attached thumbnail(s) 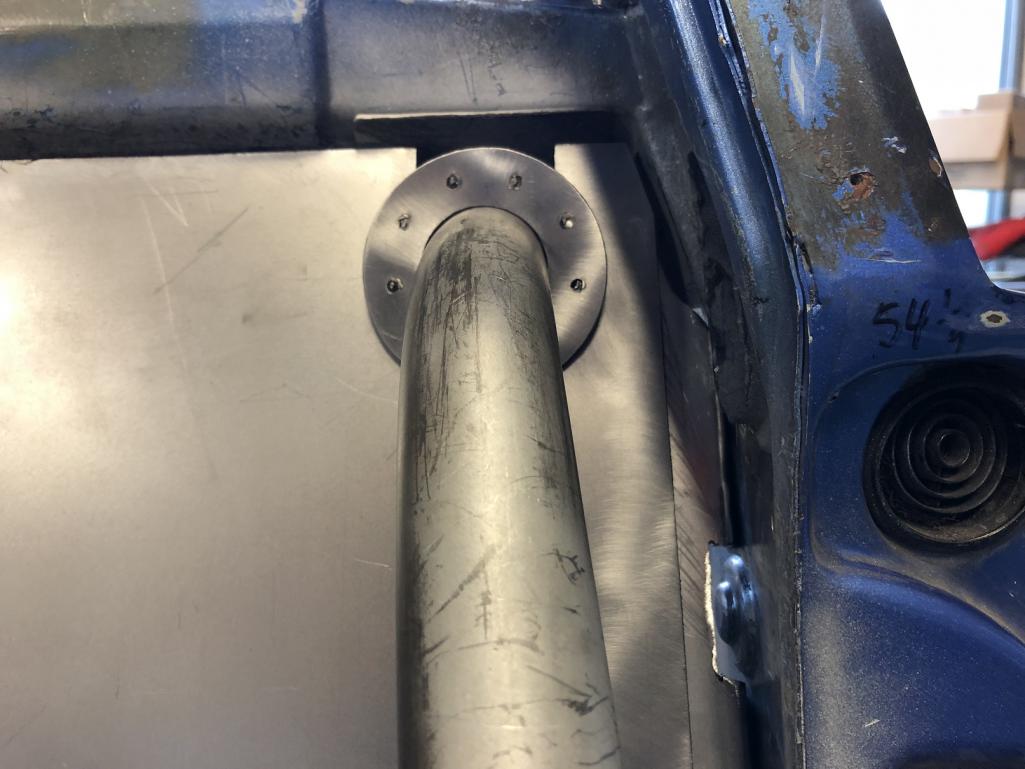
|
| tygaboy |
 Nov 4 2018, 05:41 PM Nov 4 2018, 05:41 PM
Post
#1305
|
|
914 Guru      Group: Members Posts: 5,551 Joined: 6-October 15 From: Petaluma, CA Member No.: 19,241 Region Association: Northern California 
|
I'm not (yet?) skilled enough that a paper template transfers to directly to metal so after approximately 8,347 trips back and forth from test fitting to the angle grinder I have a nice fit!
And a special "Thanks!" to @Cary , @bbrock and others who turned me on to the 3M abrasive products. SOOO much nicer to work with. Faster, cleaner cutting and they last what seems to be 10x over the "bargain" brands. Highly recommended! Attached thumbnail(s) 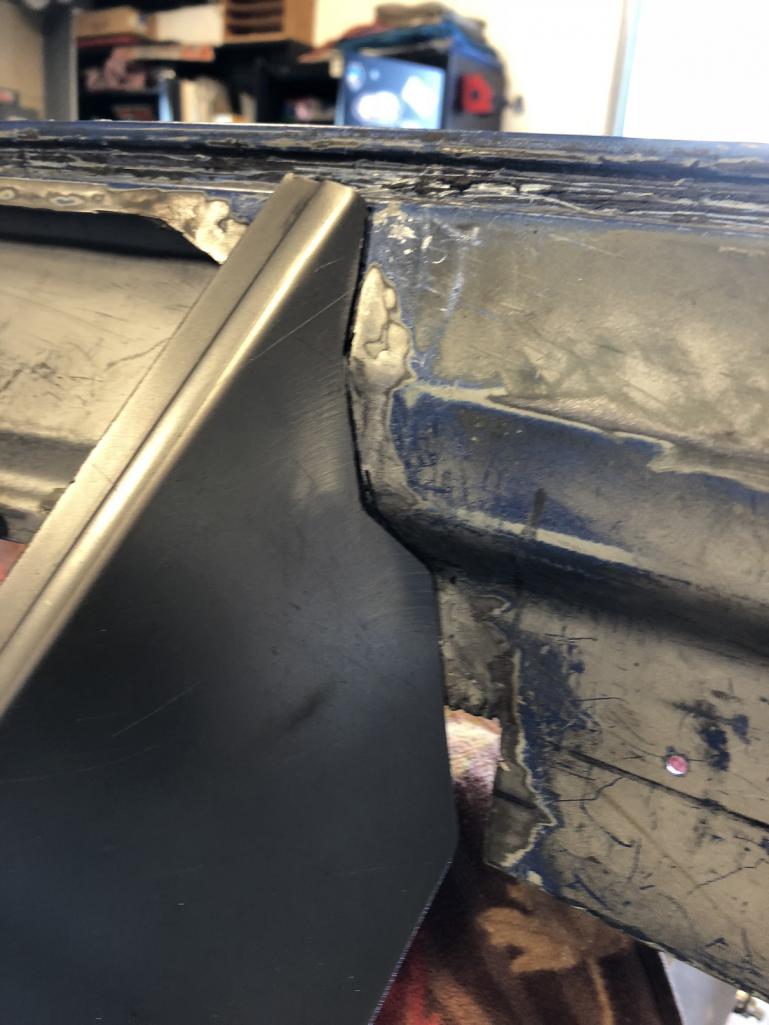
|
| tygaboy |
 Nov 4 2018, 05:42 PM Nov 4 2018, 05:42 PM
Post
#1306
|
|
914 Guru      Group: Members Posts: 5,551 Joined: 6-October 15 From: Petaluma, CA Member No.: 19,241 Region Association: Northern California 
|
Sorta like this. Still a ways to go but I like this design a lot more.
Now onto fabbing that same panel for the other side and adding a section across the top. Attached thumbnail(s) 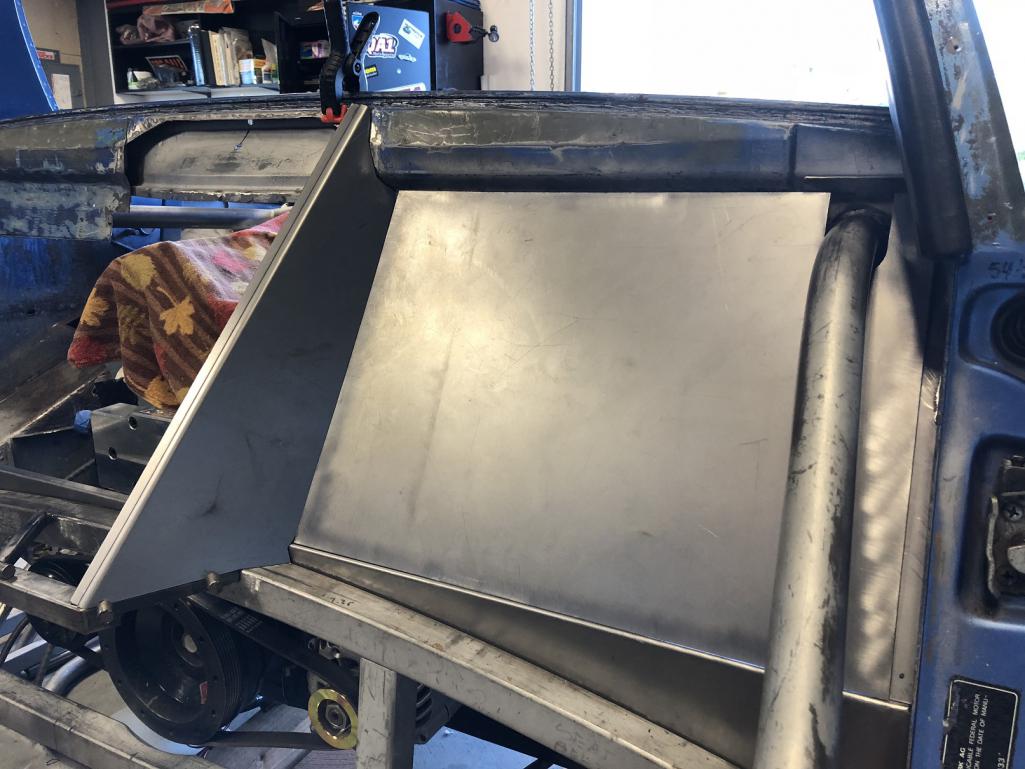
|
| bbrock |
 Nov 4 2018, 05:58 PM Nov 4 2018, 05:58 PM
Post
#1307
|
|
914 Guru      Group: Members Posts: 5,269 Joined: 17-February 17 From: Montana Member No.: 20,845 Region Association: Rocky Mountains 
|
Do you have on of these in your toy barn?
(IMG:http://www.914world.com/bbs2/uploads_offsite/i.ebayimg.com-20845-1541376007.1.jpg) Might cut down your trips from test fit to angle grinder to approximately 4218.5. I do like that design but will need to see it with the seat in position. Assuming you will do some fancy bead work on that back panel? Yes, those 3M abrasives wind up quite a bit cheaper than the bargain brands, although I posted on Cary's channel repair thread about my dissatisfaction with the 36g Cubitron belts. Will be interesting to hear his experience with those. I still wonder if I just got a bad batch because it is hard to imagine they would have made it past QC. Keep on fabbing man!!! (IMG:style_emoticons/default/smash.gif) |
| 914forme |
 Nov 4 2018, 06:48 PM Nov 4 2018, 06:48 PM
Post
#1308
|
|
Times a wastin', get wrenchin'!     Group: Members Posts: 3,896 Joined: 24-July 04 From: Dayton, Ohio Member No.: 2,388 Region Association: None 
|
Since you have a plasma table, just cut out the pattern you want to put in the panel, tack it up, and smash it with that nice press.
(IMG:style_emoticons/default/idea.gif) I am thinking you could match the factory panel. (IMG:style_emoticons/default/poke.gif) Nah what's the fun in that (IMG:style_emoticons/default/aktion035.gif) |
| Dion |
 Nov 4 2018, 07:14 PM Nov 4 2018, 07:14 PM
Post
#1309
|
|
RN     Group: Members Posts: 2,839 Joined: 16-September 04 From: Audubon,PA Member No.: 2,766 Region Association: MidAtlantic Region 

|
(IMG:style_emoticons/default/popcorn[1].gif) (IMG:style_emoticons/default/welder.gif) (IMG:style_emoticons/default/beerchug.gif)
Watching & learning. Amazing the arsenal of tools Chris has. |
| Andyrew |
 Nov 5 2018, 12:07 AM Nov 5 2018, 12:07 AM
Post
#1310
|
|
Spooling.... Please wait           Group: Members Posts: 13,377 Joined: 20-January 03 From: Riverbank, Ca Member No.: 172 Region Association: Northern California 
|
I'm not (yet?) skilled enough that a paper template transfers to directly to metal so after approximately 8,347 trips back and forth from test fitting to the angle grinder I have a nice fit! And a special "Thanks!" to @Cary , @bbrock and others who turned me on to the 3M abrasive products. SOOO much nicer to work with. Faster, cleaner cutting and they last what seems to be 10x over the "bargain" brands. Highly recommended! Very big fan of the good abrasives.. I've always got more than their cost increase out of them compared to cheaper brands. Big fan of the good flap wheels for smooth grinding for those without an incredibly smooth "pull" required for a disk. |
| Maltese Falcon |
 Nov 5 2018, 12:39 AM Nov 5 2018, 12:39 AM
Post
#1311
|
|
914 Guru      Group: Members Posts: 5,044 Joined: 14-September 04 From: Mulholland SoCal Member No.: 2,755 Region Association: None  |
My shop has been using Klingspor Abrasives (mfg. in Germany) forever...tried the less expensive and NO bueno
|
| andrewb |
 Nov 5 2018, 01:04 AM Nov 5 2018, 01:04 AM
Post
#1312
|
|
Member   Group: Members Posts: 114 Joined: 25-May 10 From: UK Member No.: 11,762 Region Association: None |
Do you have on of these in your toy barn? (IMG:http://www.914world.com/bbs2/uploads_offsite/i.ebayimg.com-20845-1541376007.1.jpg) I don't - but I will have very soon now I know that they exist. Thanks Brent - awesome tip. |
| Curbandgutter |
 Nov 5 2018, 01:12 PM Nov 5 2018, 01:12 PM
Post
#1313
|
|
Senior Member    Group: Members Posts: 565 Joined: 8-March 13 From: Murrieta CA Member No.: 15,637 Region Association: Southern California 
|
Playing around with designs to close off around the door bars. Chris love your work! It seems that you are really enjoying this project. I have a question, Ok now, how did you get that flange around the bar without cutting the bar or the flanget? Did you cut the flange in half, place , weld and grind? How did you do that? Inquiring minds want to know, since I have the same issue. |
| Curbandgutter |
 Nov 5 2018, 01:18 PM Nov 5 2018, 01:18 PM
Post
#1314
|
|
Senior Member    Group: Members Posts: 565 Joined: 8-March 13 From: Murrieta CA Member No.: 15,637 Region Association: Southern California 
|
Sorta like this. Still a ways to go but I like this design a lot more. Now onto fabbing that same panel for the other side and adding a section across the top. I know that you are going to bead roll the panel for stiffness. However, you might want to use this flat unmolested panel as your template instead of bead rolling it. I would cut the panel that you are going to bead roll bigger than the template. Once you bead roll you will shrink and expand the steel, then use the template to place on your bead rolled panel to outline the shape and then cut the bead rolled panel. This may be what you were going to do, and if so, then disregard. |
| tygaboy |
 Nov 7 2018, 10:49 AM Nov 7 2018, 10:49 AM
Post
#1315
|
|
914 Guru      Group: Members Posts: 5,551 Joined: 6-October 15 From: Petaluma, CA Member No.: 19,241 Region Association: Northern California 
|
For those who may enjoy a bit more detail, here are a couple vids of the fab process for the Infinity Box brain tray.
1. plasma cut the panel 2. add 90 degree bend to the edges 3. use the knock out punch to cut the hole for the dimple die 4. press the dimple https://www.youtube.com/watch?v=aE49K950CLo https://www.youtube.com/watch?v=j8Wfd5SDCnY |
| tygaboy |
 Nov 7 2018, 11:27 AM Nov 7 2018, 11:27 AM
Post
#1316
|
|
914 Guru      Group: Members Posts: 5,551 Joined: 6-October 15 From: Petaluma, CA Member No.: 19,241 Region Association: Northern California 
|
Do you have on of these in your toy barn? (IMG:http://www.914world.com/bbs2/uploads_offsite/i.ebayimg.com-20845-1541376007.1.jpg) I don't - but I will have very soon now I know that they exist. Thanks Brent - awesome tip. @bbrock Brent- I used to have one of those but couldn't find it. Lost, loaned? Can't recall. I ordered a replacement today so thanks for the reminder! |
| tygaboy |
 Nov 7 2018, 11:41 AM Nov 7 2018, 11:41 AM
Post
#1317
|
|
914 Guru      Group: Members Posts: 5,551 Joined: 6-October 15 From: Petaluma, CA Member No.: 19,241 Region Association: Northern California 
|
Playing around with designs to close off around the door bars. Chris love your work! It seems that you are really enjoying this project. I have a question, Ok now, how did you get that flange around the bar without cutting the bar or the flanget? Did you cut the flange in half, place , weld and grind? How did you do that? Inquiring minds want to know, since I have the same issue. @Curbandgutter Rudy - Thanks. I snipped through the flange and just hid the slice under the bar. This is just a test piece to see what something like this might look like... https://www.youtube.com/watch?v=SghyoTa3Zf4 Attached thumbnail(s) 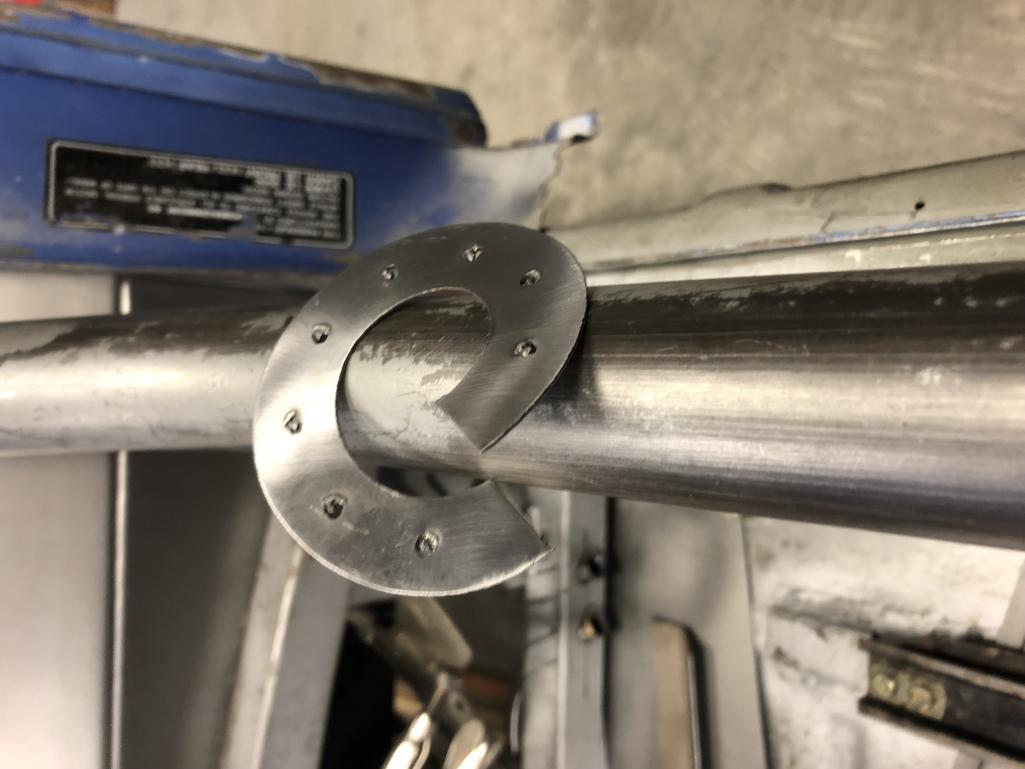
|
| tygaboy |
 Nov 7 2018, 06:17 PM Nov 7 2018, 06:17 PM
Post
#1318
|
|
914 Guru      Group: Members Posts: 5,551 Joined: 6-October 15 From: Petaluma, CA Member No.: 19,241 Region Association: Northern California 
|
First attempt at the one-piece top section. I find it difficult to determine all the measurements ahead of trial fitting, what with all the different angles and stuff that gets in the way.
So I approach things like this with a "get as close as possible and if it ends up a practice piece, oh well..." This first effort fit well in most areas - but not all - so: practice piece it is! I chalk these sorts of things up to simply being a cost associated with learning. Attached thumbnail(s) 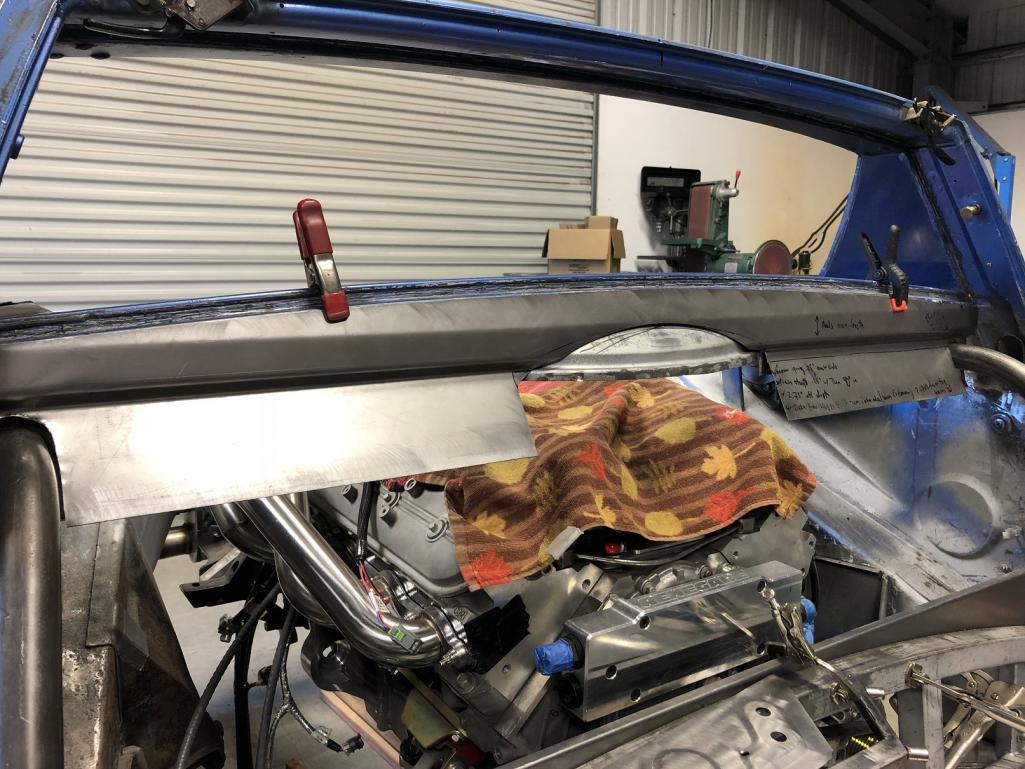
|
| tygaboy |
 Nov 8 2018, 06:41 PM Nov 8 2018, 06:41 PM
Post
#1319
|
|
914 Guru      Group: Members Posts: 5,551 Joined: 6-October 15 From: Petaluma, CA Member No.: 19,241 Region Association: Northern California 
|
I updated the upper panel design with the lessons learned from Version 1. There are still a couple imperfections but I think I can live with them.
With that done, I moved on to fine tuning the fit of the driver's side panels. Then I started playing with the "rivet strip". I think I'm going to have these run only on the vertical edges of the panels behing the seats. Again, we'll see as all the pieces get fabbed and fit. So far, so good with this design. Attached thumbnail(s) 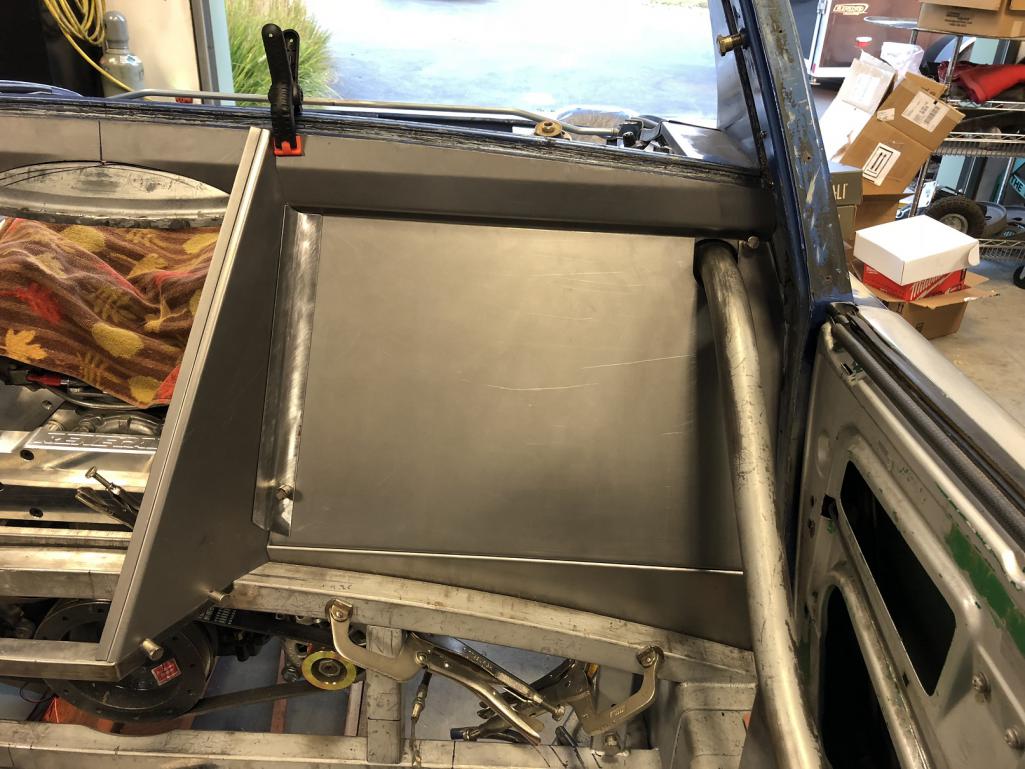 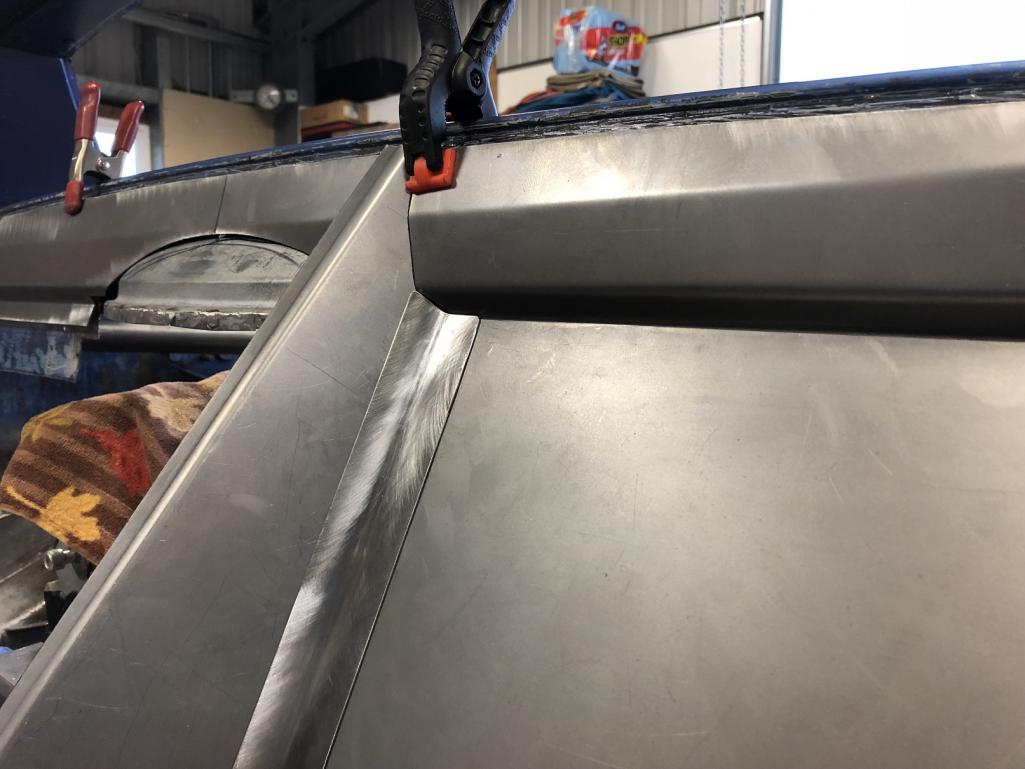
|
| tygaboy |
 Nov 11 2018, 06:22 PM Nov 11 2018, 06:22 PM
Post
#1320
|
|
914 Guru      Group: Members Posts: 5,551 Joined: 6-October 15 From: Petaluma, CA Member No.: 19,241 Region Association: Northern California 
|
Mock up of the current plan for the top of the doghouse.
914s really are about the corners! (IMG:style_emoticons/default/laugh.gif) Attached thumbnail(s) 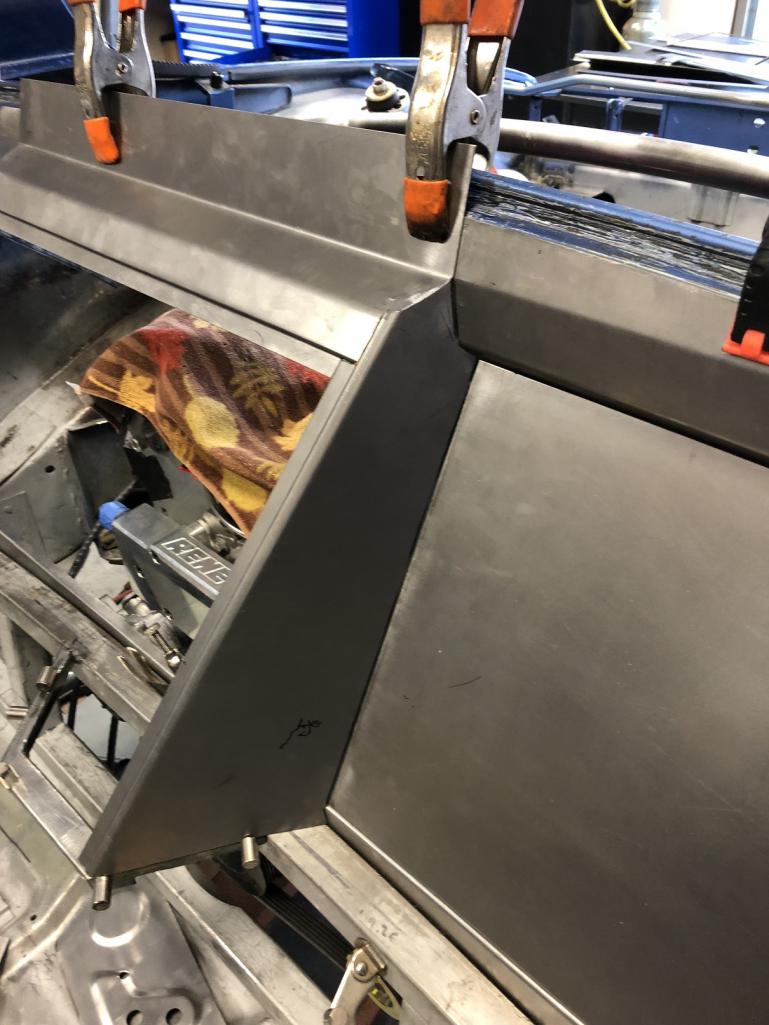
|
  |

|
Lo-Fi Version | Time is now: 22nd April 2025 - 10:44 AM |
Invision Power Board
v9.1.4 © 2025 IPS, Inc.


