|
|

|
Porsche, and the Porsche crest are registered trademarks of Dr. Ing. h.c. F. Porsche AG.
This site is not affiliated with Porsche in any way. Its only purpose is to provide an online forum for car enthusiasts. All other trademarks are property of their respective owners. |
|
|
  |
| tygaboy |
 Mar 23 2019, 06:15 PM Mar 23 2019, 06:15 PM
Post
#1461
|
|
914 Guru      Group: Members Posts: 5,551 Joined: 6-October 15 From: Petaluma, CA Member No.: 19,241 Region Association: Northern California 
|
I then used the bead roller to tip the other flange. I'll trim it to size later.
Attached thumbnail(s) 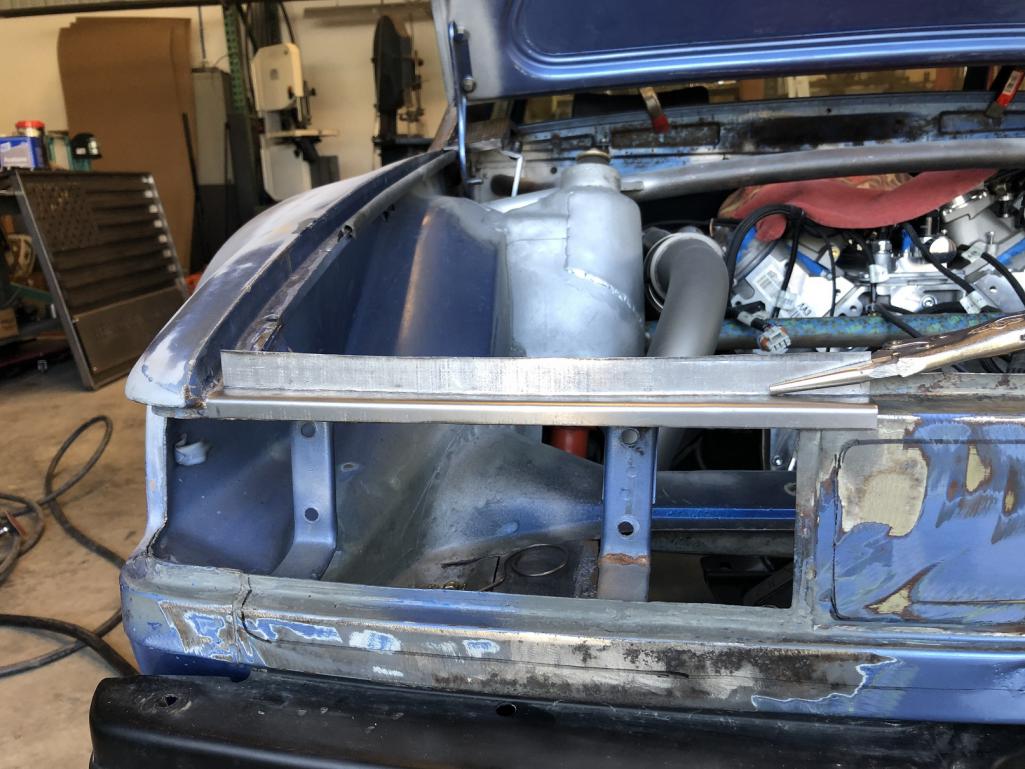 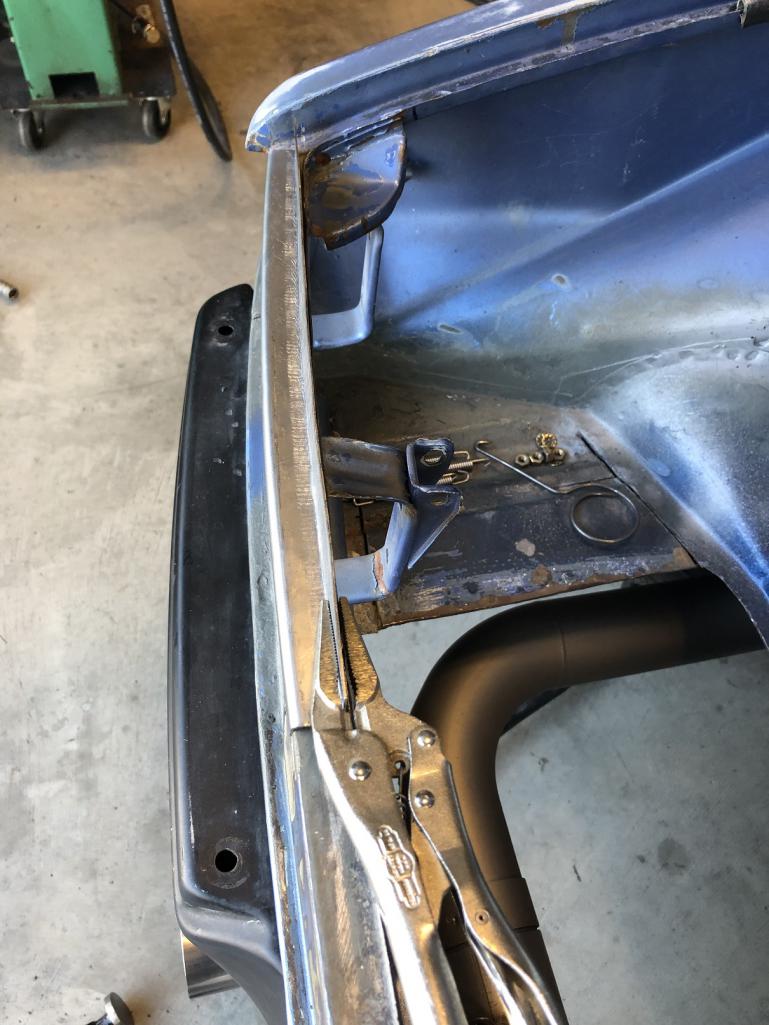
|
| tygaboy |
 Mar 25 2019, 06:00 PM Mar 25 2019, 06:00 PM
Post
#1462
|
|
914 Guru      Group: Members Posts: 5,551 Joined: 6-October 15 From: Petaluma, CA Member No.: 19,241 Region Association: Northern California 
|
Cut out the bad...
Attached thumbnail(s) 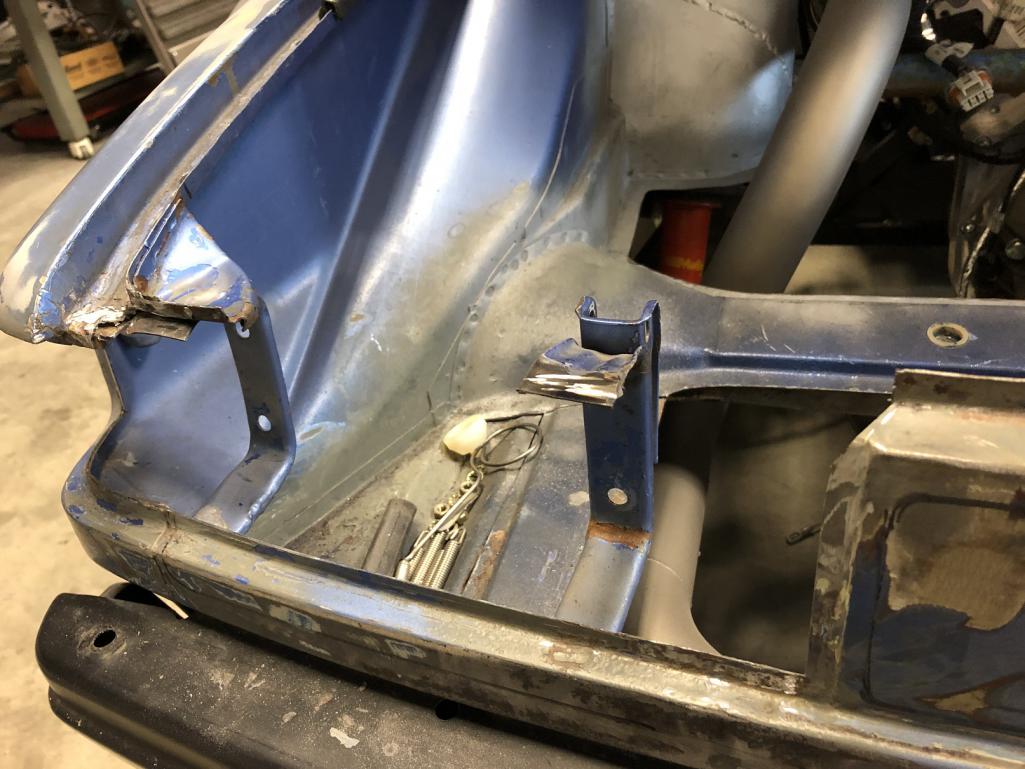
|
| tygaboy |
 Mar 25 2019, 06:03 PM Mar 25 2019, 06:03 PM
Post
#1463
|
|
914 Guru      Group: Members Posts: 5,551 Joined: 6-October 15 From: Petaluma, CA Member No.: 19,241 Region Association: Northern California 
|
I understand fitting the tail lights in a Singer car takes them something like 40 hours.
Clearly not remotely close to Singer level but I must have done the "in/out" with the tail light 25 times. I still have some hammer and dolly work and a bit more welding but it's only about 100 times better than it was. Attached thumbnail(s) 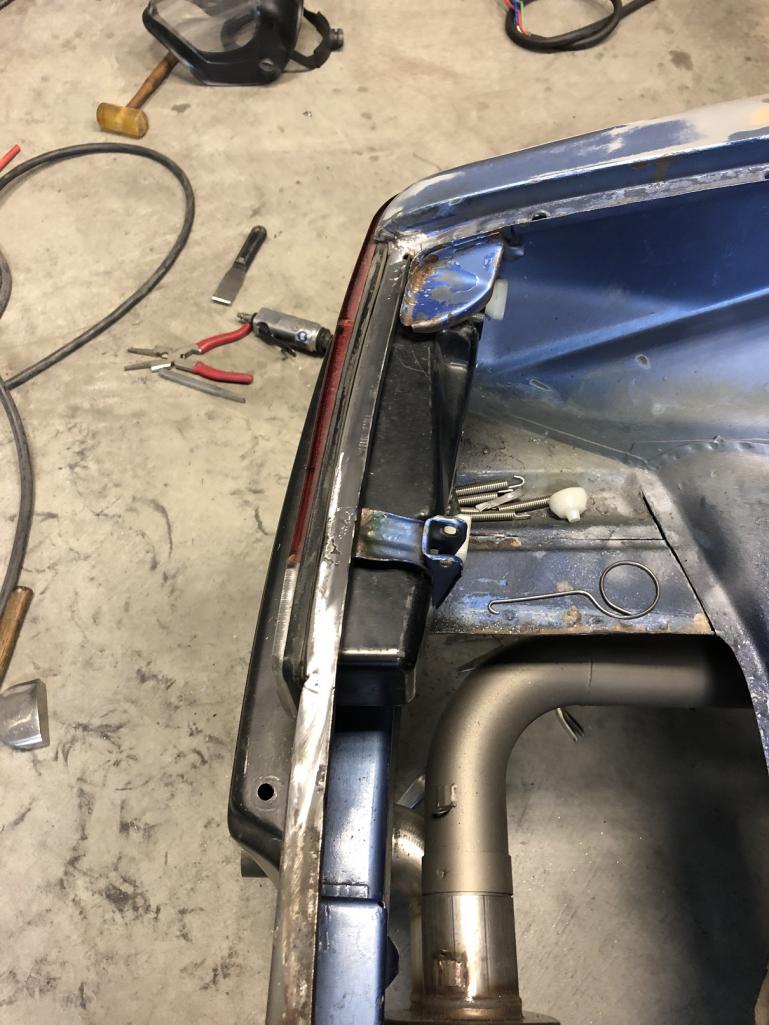
|
| tygaboy |
 Mar 25 2019, 06:06 PM Mar 25 2019, 06:06 PM
Post
#1464
|
|
914 Guru      Group: Members Posts: 5,551 Joined: 6-October 15 From: Petaluma, CA Member No.: 19,241 Region Association: Northern California 
|
And the misalignment? She is fixed!
I was able to get the angle corrected as well as scooting the whole tail light inboard, back to where it's supposed to be. I'm happy with how this came out. Attached thumbnail(s) 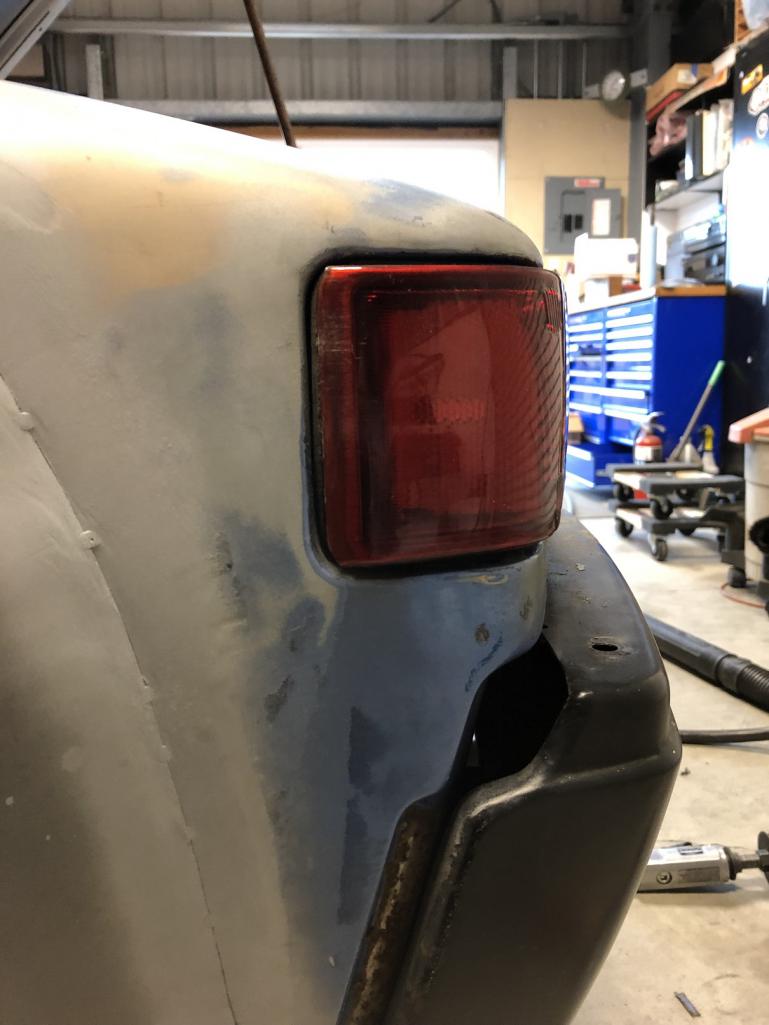 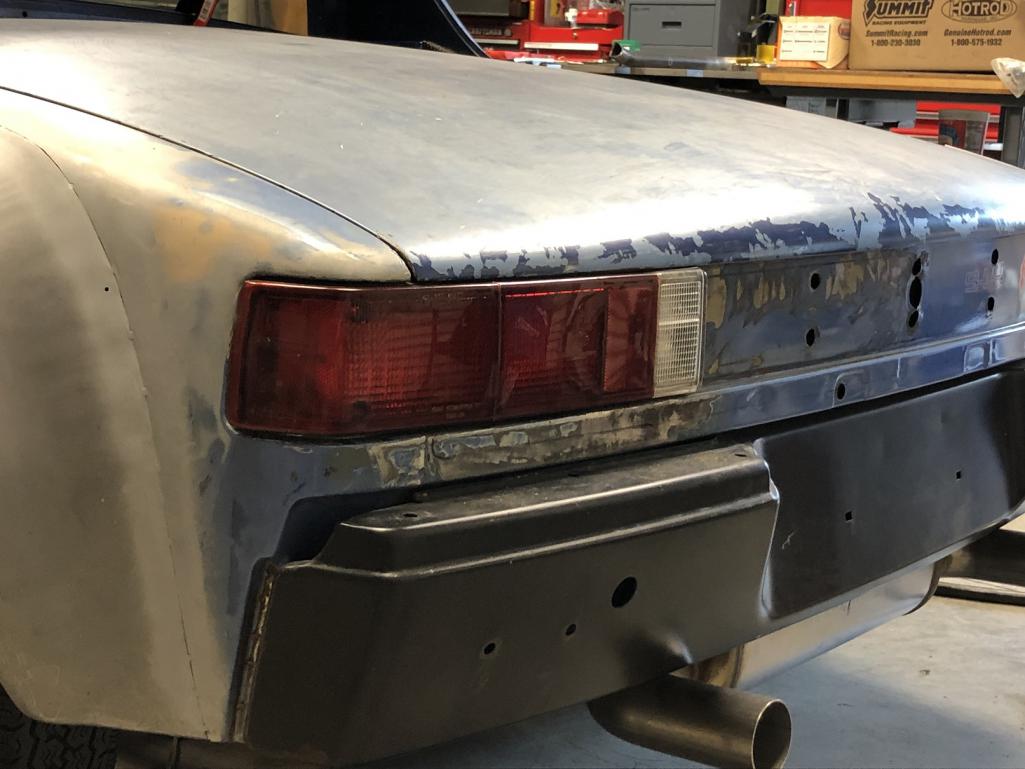
|
| tygaboy |
 Mar 27 2019, 04:50 PM Mar 27 2019, 04:50 PM
Post
#1465
|
|
914 Guru      Group: Members Posts: 5,551 Joined: 6-October 15 From: Petaluma, CA Member No.: 19,241 Region Association: Northern California 
|
Today was getting the fender foam rust patch installed.
Fit it, check all the alignment, tack in place then fully weld it in. Attached thumbnail(s) 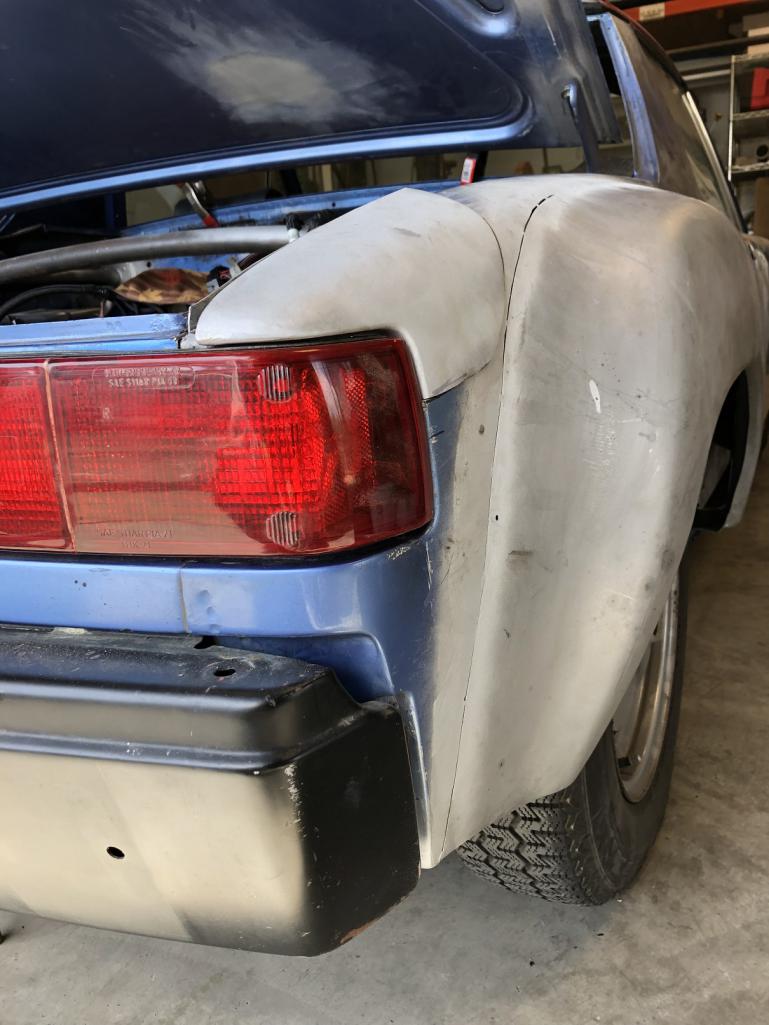 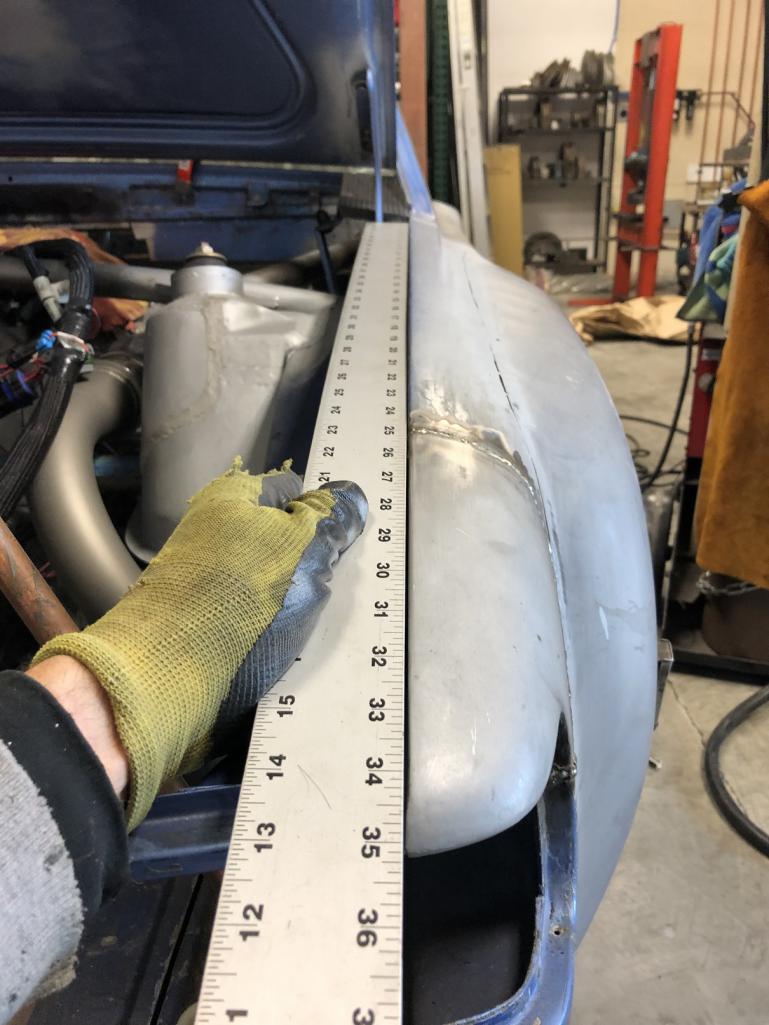 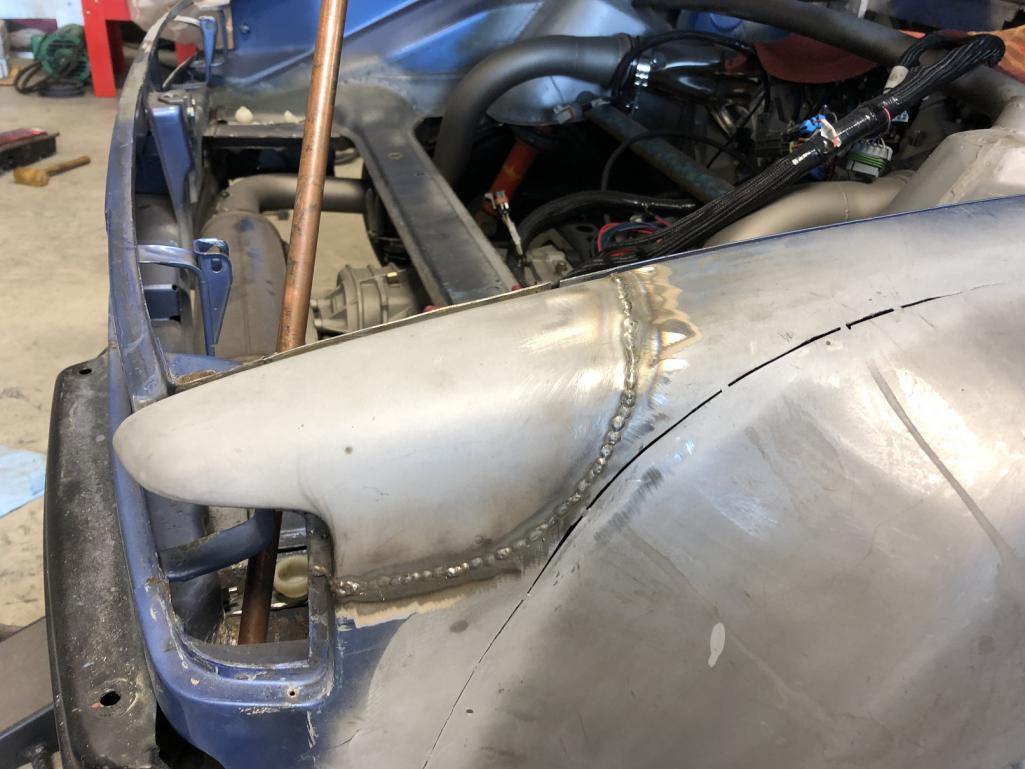
|
| tygaboy |
 Mar 27 2019, 04:51 PM Mar 27 2019, 04:51 PM
Post
#1466
|
|
914 Guru      Group: Members Posts: 5,551 Joined: 6-October 15 From: Petaluma, CA Member No.: 19,241 Region Association: Northern California 
|
Then I went after the weld with 36 grit on a 3" air angle grinder.
Next, it's 80 grit on that same grinder. Attached thumbnail(s) 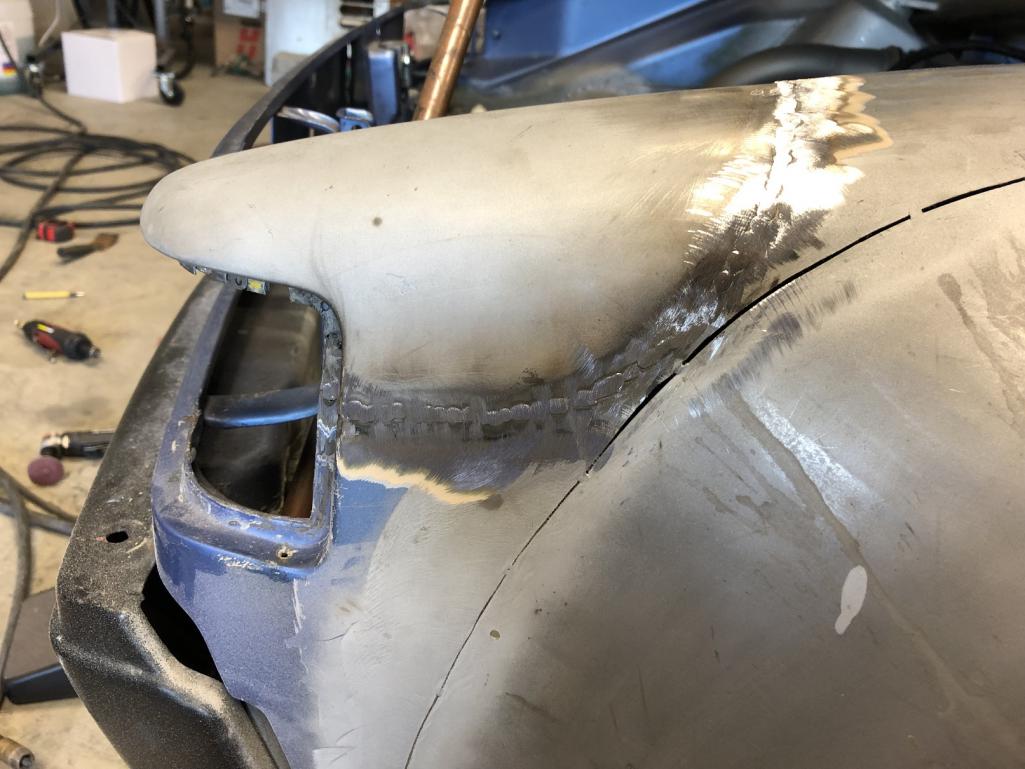 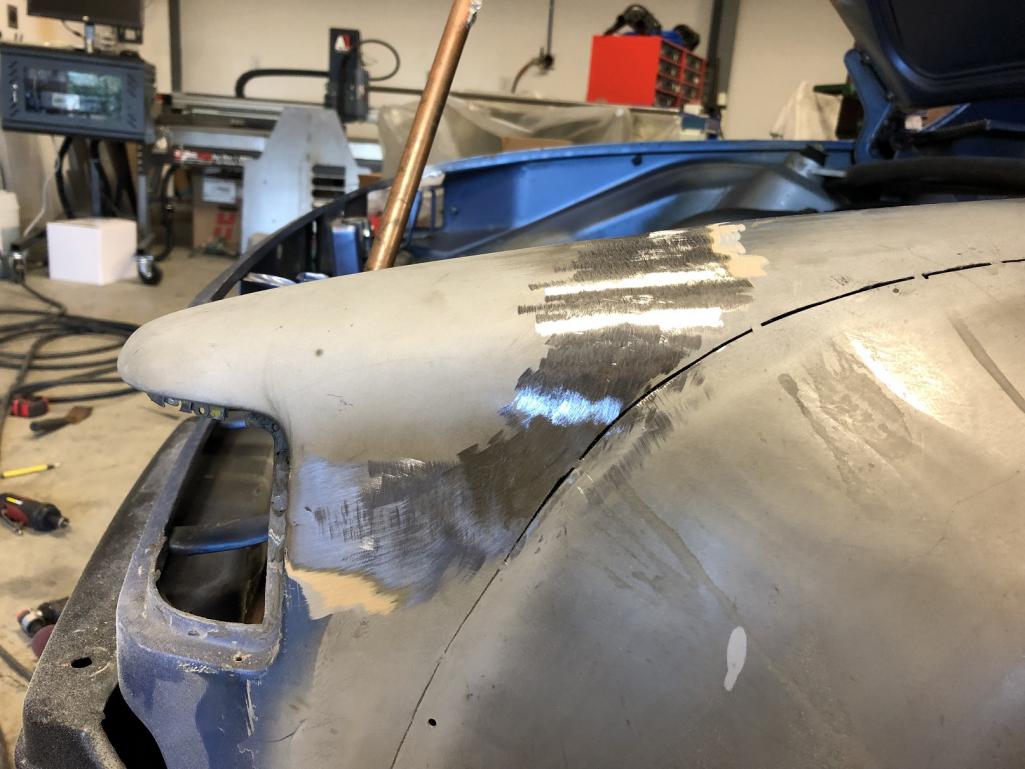
|
| tygaboy |
 Mar 27 2019, 04:53 PM Mar 27 2019, 04:53 PM
Post
#1467
|
|
914 Guru      Group: Members Posts: 5,551 Joined: 6-October 15 From: Petaluma, CA Member No.: 19,241 Region Association: Northern California 
|
Finally, it's 80 grit on a DA sander with a soft-ish pad.
Attached thumbnail(s) 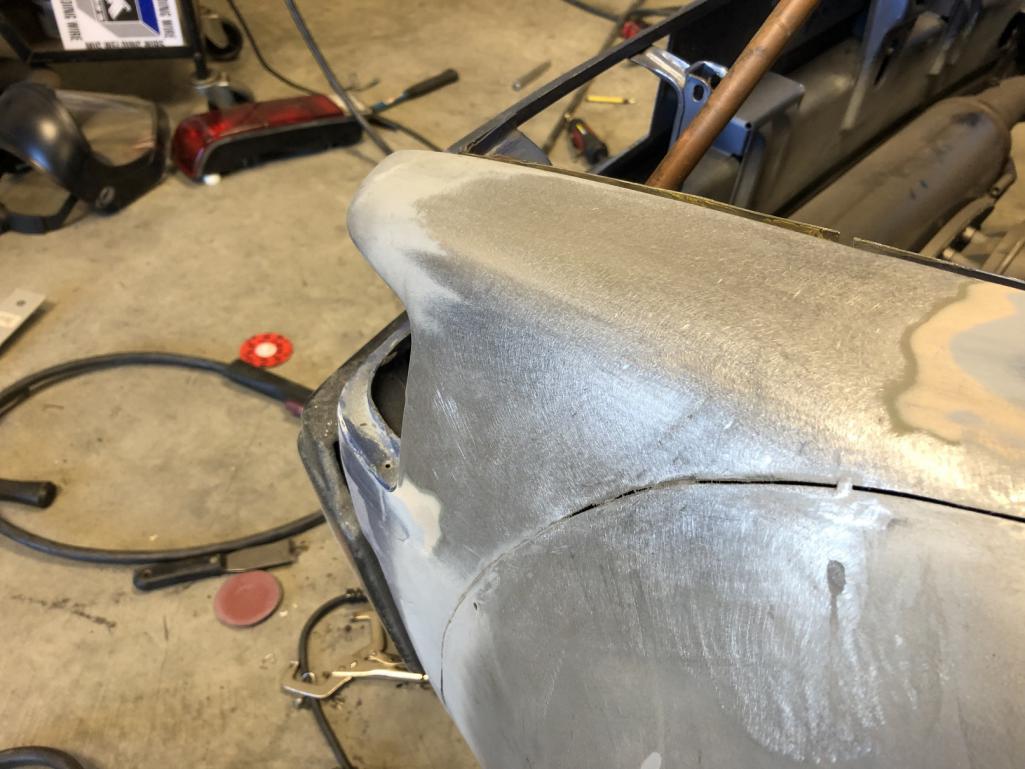
|
| tygaboy |
 Mar 27 2019, 04:54 PM Mar 27 2019, 04:54 PM
Post
#1468
|
|
914 Guru      Group: Members Posts: 5,551 Joined: 6-October 15 From: Petaluma, CA Member No.: 19,241 Region Association: Northern California 
|
Alignment final check. The trunk isn't fully adjusted, side to side but I'm happy with how this repair turned out.
Hopefully, @Krieger will be, too! (IMG:style_emoticons/default/happy11.gif) Attached thumbnail(s) 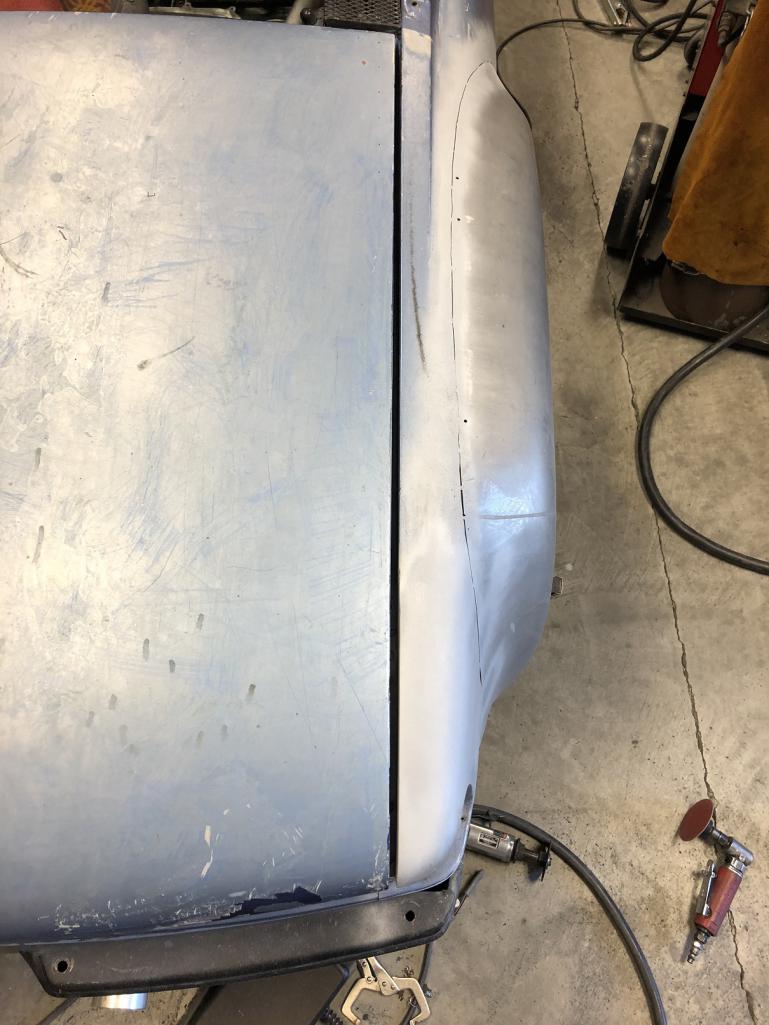
|
| Andyrew |
 Mar 27 2019, 05:00 PM Mar 27 2019, 05:00 PM
Post
#1469
|
|
Spooling.... Please wait           Group: Members Posts: 13,377 Joined: 20-January 03 From: Riverbank, Ca Member No.: 172 Region Association: Northern California 
|
Very very nice!!!
|
| Krieger |
 Mar 27 2019, 05:36 PM Mar 27 2019, 05:36 PM
Post
#1470
|
|
Advanced Member     Group: Members Posts: 4,800 Joined: 24-May 04 From: Santa Rosa CA Member No.: 2,104 Region Association: None 
|
Wow! What repair? Very nice work Chris!
|
| Dion |
 Mar 27 2019, 08:36 PM Mar 27 2019, 08:36 PM
Post
#1471
|
|
RN     Group: Members Posts: 2,839 Joined: 16-September 04 From: Audubon,PA Member No.: 2,766 Region Association: MidAtlantic Region 

|
Fantastic (IMG:style_emoticons/default/welder.gif) Thanks for giving the type of sanding disc #’s. That’s very helpful.
This newb is taking lots of notes. I know the weatherstrip is not in yet, even so.. looking at the one set of trunk/tail lite pics, the shut lines look great! (IMG:style_emoticons/default/cheer.gif) |
| tygaboy |
 Mar 28 2019, 08:29 AM Mar 28 2019, 08:29 AM
Post
#1472
|
|
914 Guru      Group: Members Posts: 5,551 Joined: 6-October 15 From: Petaluma, CA Member No.: 19,241 Region Association: Northern California 
|
Fantastic (IMG:style_emoticons/default/welder.gif) Thanks for giving the type of sanding disc #’s. That’s very helpful. This newb is taking lots of notes. I know the weatherstrip is not in yet, even so.. looking at the one set of trunk/tail lite pics, the shut lines look great! (IMG:style_emoticons/default/cheer.gif) Thanks for the kind words, guys. @Dion - I think, even more importantly than the grit info is that I've moved to using only "high end" abrasives on the air angle grinder. I use the 3M Cubitron II product. They are not cheap to purchase but they last far longer than the bargain brands. But the best part is the way they work. SUPER controllable cutting! I've also realized I get the best results by being WAY more patient during the grinding process. I've moved to using a slow / blip, blip approach and a pretty high angle of attack to try and be sure the disc is only contacting the weld bead. All that said, I confess that the 80 grit on the DA sander is from Harbor Freight! But it seems to work well. My next upgrade is to get some 3M product for the DA. I'll report back on how that goes. |
| bbrock |
 Mar 28 2019, 08:50 AM Mar 28 2019, 08:50 AM
Post
#1473
|
|
914 Guru      Group: Members Posts: 5,269 Joined: 17-February 17 From: Montana Member No.: 20,845 Region Association: Rocky Mountains 
|
+1 on the 3M Cubitron discs. There is no comparison with anything else I've used and when you factor how much longer they last, not that much more expensive. They cut fast and cool.
I also switched to their 3/8" belts for the narrow belt sander. 80g Cubitron belts were fantastic, 36g were worthless. The coarse grit just flew off the belts in the first few seconds of use. |
| mb911 |
 Mar 28 2019, 11:16 AM Mar 28 2019, 11:16 AM
Post
#1474
|
|
914 Guru      Group: Members Posts: 7,546 Joined: 2-January 09 From: Burlington wi Member No.: 9,892 Region Association: Upper MidWest 
|
+1 on the 3M Cubitron discs. There is no comparison with anything else I've used and when you factor how much longer they last, not that much more expensive. They cut fast and cool. I also switched to their 3/8" belts for the narrow belt sander. 80g Cubitron belts were fantastic, 36g were worthless. The coarse grit just flew off the belts in the first few seconds of use. A little known fact but 3m developed the cubitron after looking at the design of reflectors that they make in another division.. |
| tygaboy |
 Mar 31 2019, 06:15 PM Mar 31 2019, 06:15 PM
Post
#1475
|
|
914 Guru      Group: Members Posts: 5,551 Joined: 6-October 15 From: Petaluma, CA Member No.: 19,241 Region Association: Northern California 
|
More repair work on the rear panel. This car had a 911 reflector added at some point and the installer "made openings" in the panel to affix the reflector. Notice I didn't say "drilled holes". Holes are round. These? Not so much.
So, I need to patch these but they we so not close to round it would have been ridiculous to try and shape the patches. A cool little knock-out punch set to the rescue. It makes quick work turning the "opening" into a round hole. Note the before and after... Now to cut some circles and close things up. Attached thumbnail(s) 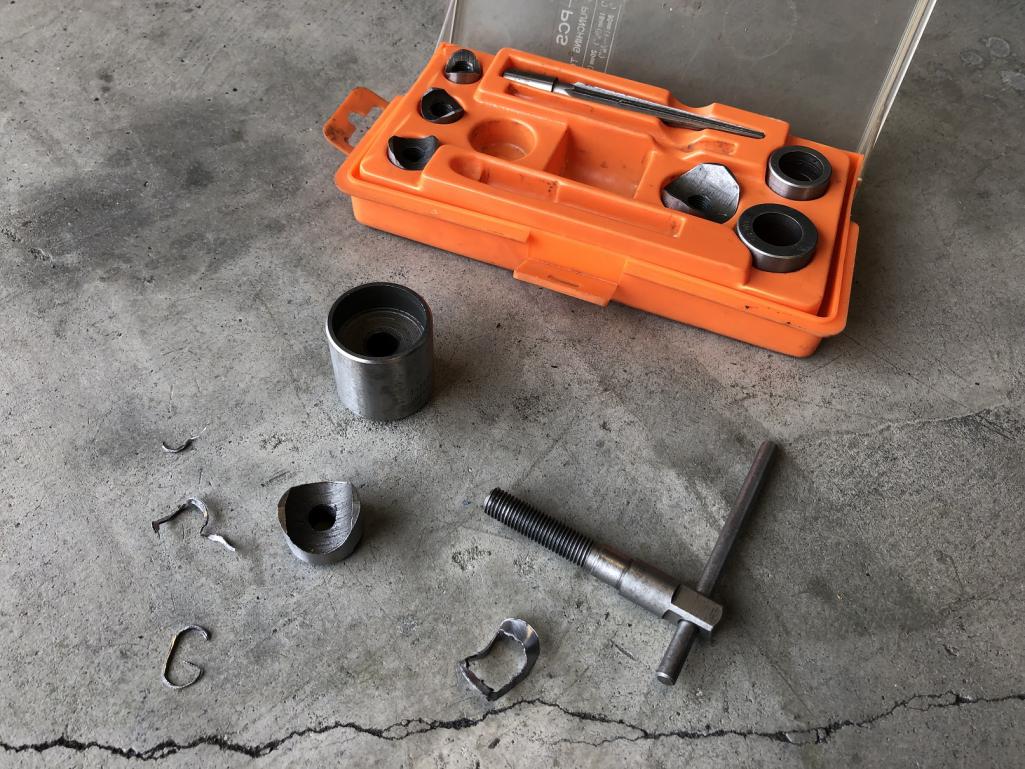 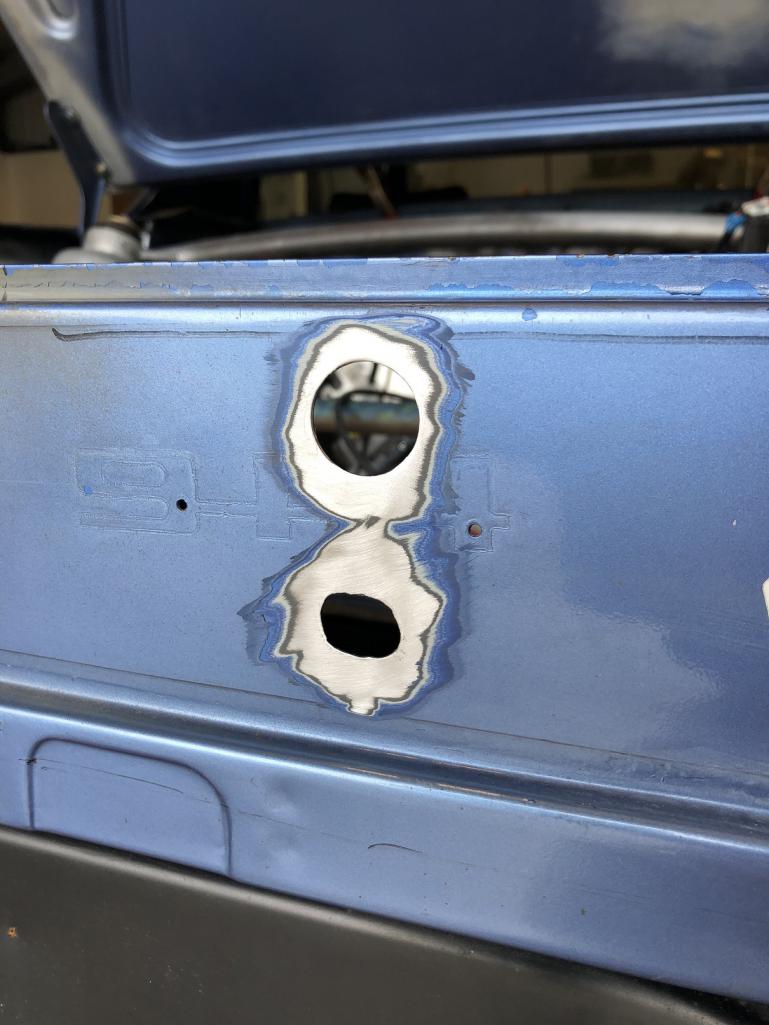
|
| bbrock |
 Mar 31 2019, 07:56 PM Mar 31 2019, 07:56 PM
Post
#1476
|
|
914 Guru      Group: Members Posts: 5,269 Joined: 17-February 17 From: Montana Member No.: 20,845 Region Association: Rocky Mountains 
|
Is that the Harbor Freight kit or something more upscale? I've had a hole punch set on my wish list for awhile but haven't really needed one enough to pull the trigger.
|
| tygaboy |
 Apr 1 2019, 09:00 AM Apr 1 2019, 09:00 AM
Post
#1477
|
|
914 Guru      Group: Members Posts: 5,551 Joined: 6-October 15 From: Petaluma, CA Member No.: 19,241 Region Association: Northern California 
|
Is that the Harbor Freight kit or something more upscale? I've had a hole punch set on my wish list for awhile but haven't really needed one enough to pull the trigger. @bbrock - It's a "Light" kit. I got it as part of an estate sale where they were selling a home machine shop. I'd bet the HF set is similar. Not used too often, but they sure are handy when the need arises. Attached thumbnail(s) 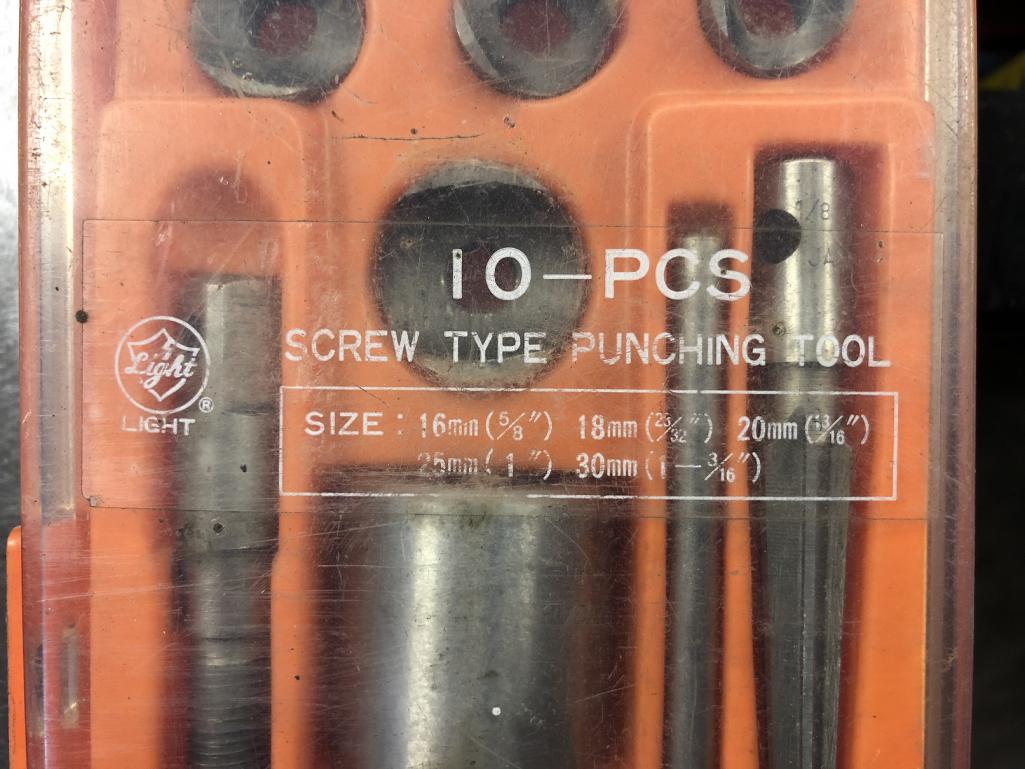
|
| mb911 |
 Apr 1 2019, 10:15 AM Apr 1 2019, 10:15 AM
Post
#1478
|
|
914 Guru      Group: Members Posts: 7,546 Joined: 2-January 09 From: Burlington wi Member No.: 9,892 Region Association: Upper MidWest 
|
Chris,
What were those holes used for? You are just using the punch to create perfect circles?? |
| preach |
 Apr 1 2019, 12:39 PM Apr 1 2019, 12:39 PM
Post
#1479
|
|
Ridge Runner    Group: Members Posts: 1,044 Joined: 27-March 10 From: Live Free or Die Member No.: 11,513 Region Association: North East States 
|
|
| tygaboy |
 Apr 2 2019, 03:02 PM Apr 2 2019, 03:02 PM
Post
#1480
|
|
914 Guru      Group: Members Posts: 5,551 Joined: 6-October 15 From: Petaluma, CA Member No.: 19,241 Region Association: Northern California 
|
The motor is out and almost on its way to a session on the engine dyno to get a base map/tune.
As I was looking at all that space I thought, "I wonder how much work it would be to get 993 rear suspension in this thing..." (IMG:style_emoticons/default/idea.gif) Let's find out! And yes, this likely means tube chassis-ing the rear of the car. Oh, and go ahead and say it. I know you're thinking it: "He's never going to get this thing on the road..." Maybe not, but think of how much fun I'll have trying! (Anyone need fully rebuilt, tricked out complete 914 trailing arms w/911 e-brake set up or a Tangerine Racing rear suspension pick up point kit?) (IMG:style_emoticons/default/wacko.gif) Attached thumbnail(s) 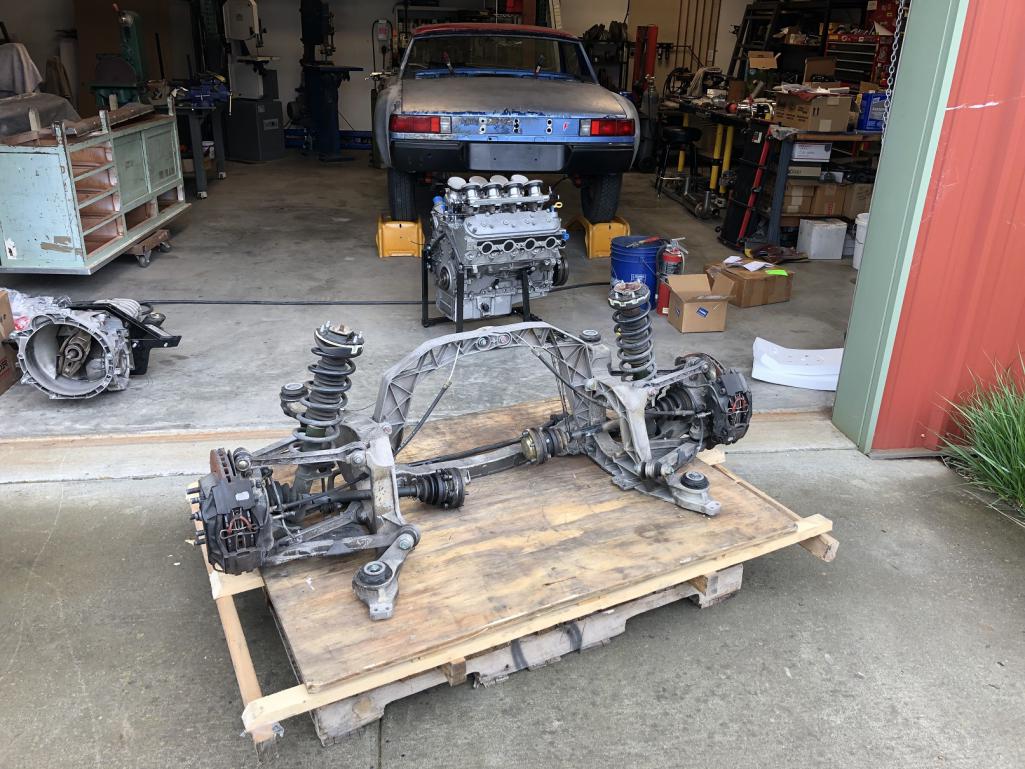
|
  |
1 User(s) are reading this topic (1 Guests and 0 Anonymous Users)
0 Members:

|
Lo-Fi Version | Time is now: 23rd April 2025 - 12:20 AM |
Invision Power Board
v9.1.4 © 2025 IPS, Inc.


