|
|

|
Porsche, and the Porsche crest are registered trademarks of Dr. Ing. h.c. F. Porsche AG.
This site is not affiliated with Porsche in any way. Its only purpose is to provide an online forum for car enthusiasts. All other trademarks are property of their respective owners. |
|
|
  |
| tygaboy |
 May 26 2019, 05:08 PM May 26 2019, 05:08 PM
Post
#1661
|
|
914 Guru      Group: Members Posts: 5,552 Joined: 6-October 15 From: Petaluma, CA Member No.: 19,241 Region Association: Northern California 
|
Mocking things into place.
It still needs trimming in the gauge area as well as a panel below that area to join the two parts. I'll shape and weld on some sort of end caps, too. Then it's time to work up the layout of everything. I'll need an access panel for the InfinityBox brain, a switch panel, stereo, maybe some vents. Maybe even a glove box? It's literally a blank canvas so I have a bit of design work ahead of me. And I wonder what's up with the missing shift lever... (IMG:style_emoticons/default/shades.gif) Attached thumbnail(s) 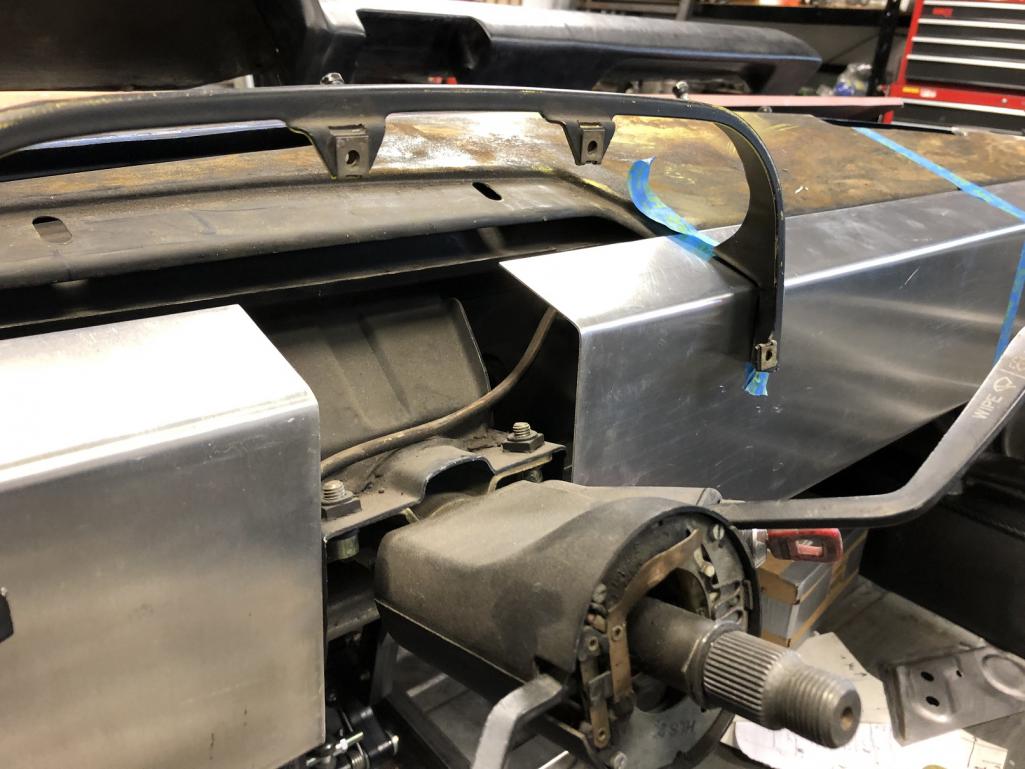 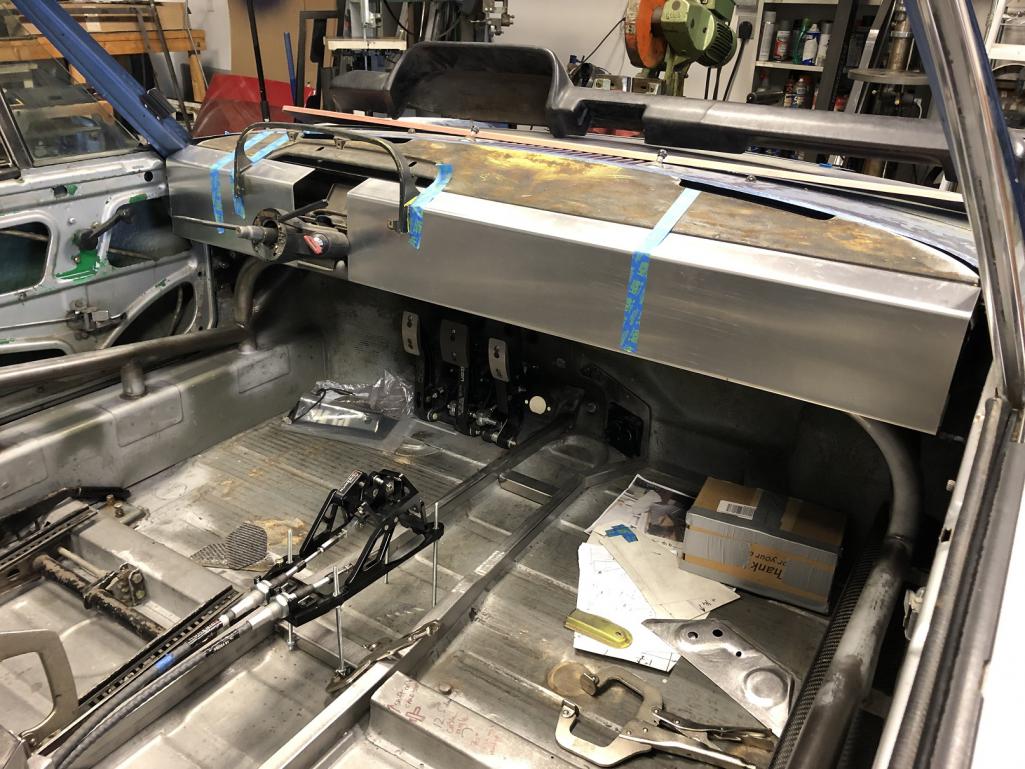
|
| tygaboy |
 May 26 2019, 05:11 PM May 26 2019, 05:11 PM
Post
#1662
|
|
914 Guru      Group: Members Posts: 5,552 Joined: 6-October 15 From: Petaluma, CA Member No.: 19,241 Region Association: Northern California 
|
@horizontally-opposed Great details. I'm headed back out to the shop to assess how to make this mod to my car. I owe you one, Pete - heck, let's make that two! (IMG:style_emoticons/default/smilie_pokal.gif) Right on! Glad you dig it, and I think it's a really nice upgrade. Just remembered there is one "detail" issue with this mod I've noticed in the years and miles since if you're going to use the stock 3-point seat belts: It'd be nice if the upper mounting "triangle" for the belt was a bit lower. While I wouldn't want to mess with the attachment point on the targa bar, which I suspect is well engineered, I keep meaning to look at how to make a "hanger" that subtly lowers the belt by 0.5 to 08 inch while respecting its engineering. Would improve comfort (and maybe safety) a bit. It isn't a big deal, but I do think about it from time to time. Great point! I'll noodle on that and see what I can come up with... If it does turn out to be something bolt in, I'll make a set for you. |
| horizontally-opposed |
 May 27 2019, 01:29 PM May 27 2019, 01:29 PM
Post
#1663
|
|
Advanced Member     Group: Members Posts: 3,456 Joined: 12-May 04 From: San Francisco Member No.: 2,058 Region Association: None 
|
Great point! I'll noodle on that and see what I can come up with... If it does turn out to be something bolt in, I'll make a set for you. Hey, thanks man. I'd just love to see your car at some point. Maybe it also makes sense to stop by with my 914 when I'm off the next deadline—you can check out what I am talking about. Have had some ideas, but don't have the skillz with metal... (IMG:style_emoticons/default/welder.gif) |
| tygaboy |
 May 27 2019, 02:30 PM May 27 2019, 02:30 PM
Post
#1664
|
|
914 Guru      Group: Members Posts: 5,552 Joined: 6-October 15 From: Petaluma, CA Member No.: 19,241 Region Association: Northern California 
|
Great point! I'll noodle on that and see what I can come up with... If it does turn out to be something bolt in, I'll make a set for you. Hey, thanks man. I'd just love to see your car at some point. Maybe it also makes sense to stop by with my 914 when I'm off the next deadline—you can check out what I am talking about. Have had some ideas, but don't have the skillz with metal... (IMG:style_emoticons/default/welder.gif) @horizontally-opposed Pete - It'd be great to meet you and see your car. PM me when you have a date in mind and we'll get something on calendar. I can make most any day/time work. Looking forward to it! |
| tygaboy |
 May 27 2019, 02:33 PM May 27 2019, 02:33 PM
Post
#1665
|
|
914 Guru      Group: Members Posts: 5,552 Joined: 6-October 15 From: Petaluma, CA Member No.: 19,241 Region Association: Northern California 
|
The Version 1 dash is looking a bit too plain to me so today I played around seeing if I could bend up an all aluminum profile that approximates the top and bottom dash pad. This was only eye-balled so the dimensions aren't correct.
I mostly just wanted to see if I could do it. I think there's something between these two that I'll end up doing. More head scratching required. Attached thumbnail(s) 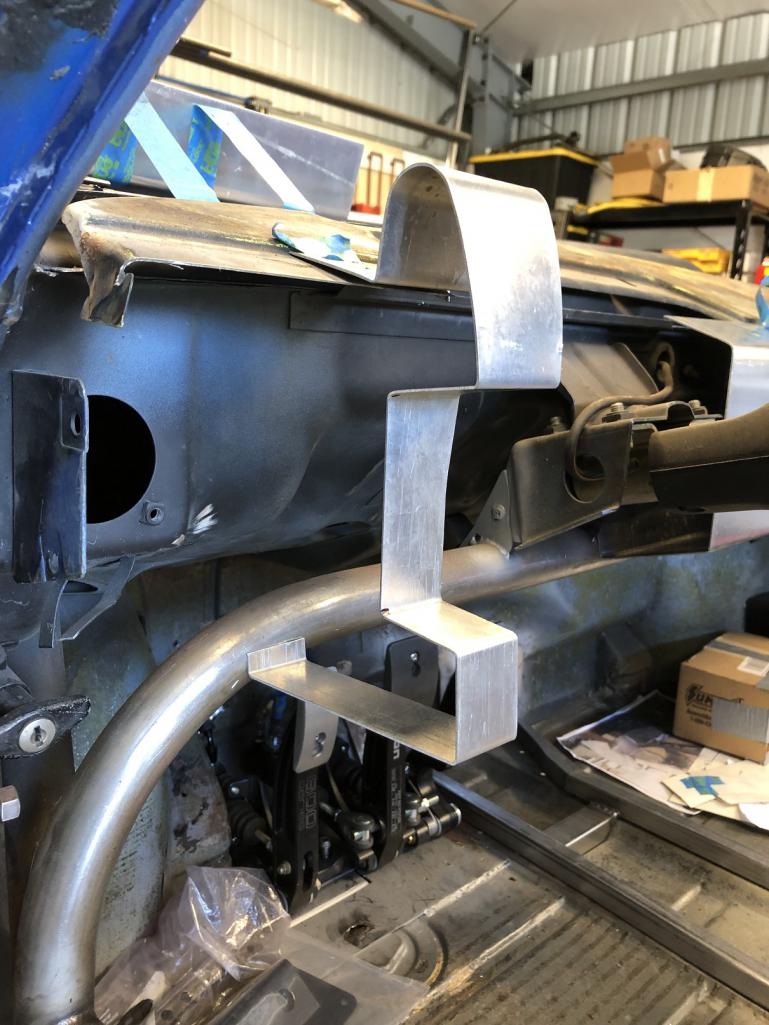
|
| tygaboy |
 May 27 2019, 02:39 PM May 27 2019, 02:39 PM
Post
#1666
|
|
914 Guru      Group: Members Posts: 5,552 Joined: 6-October 15 From: Petaluma, CA Member No.: 19,241 Region Association: Northern California 
|
Then it was back to the console and getting the bulkheads located. I mis-measured the holes for the fuel lines and had to close up the incorrect holes. Other than that, it's looking like I have the room I need.
The three smaller fittings: the upper-most is for the hydraulic clutch and the lower two are for the left/right brake lines. I wasn't sure if I wanted to run a Y-block inside or outside the tunnel so this gives me the flexibility. And I still have to add pass-throughs for the electronics. Attached thumbnail(s) 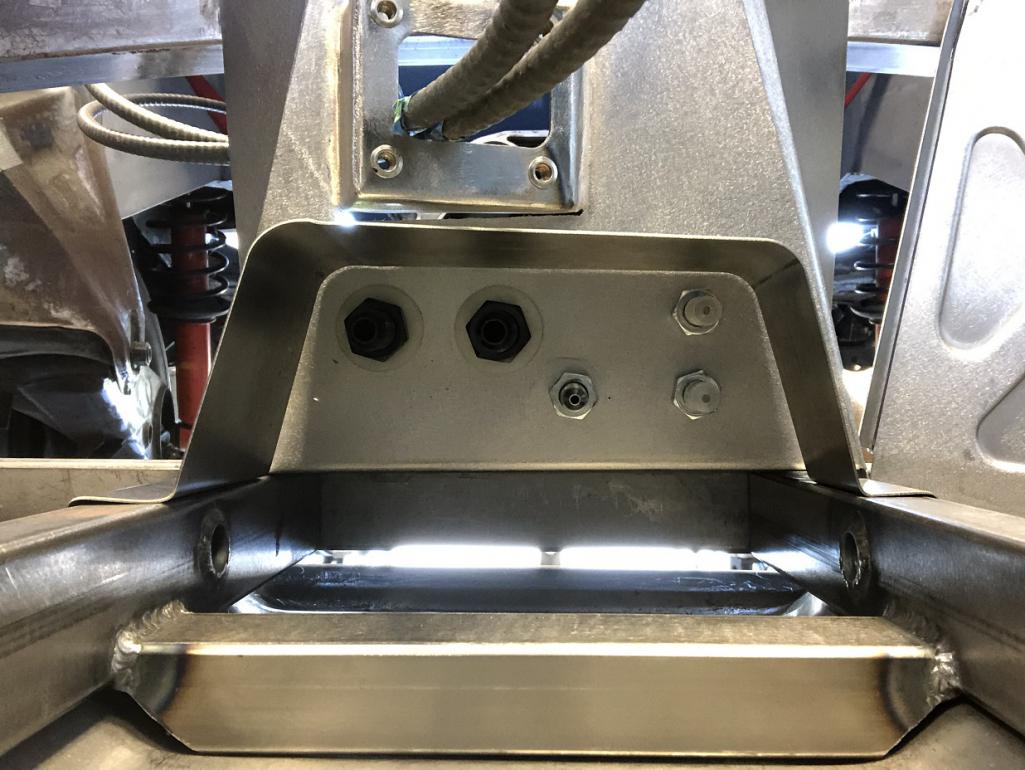 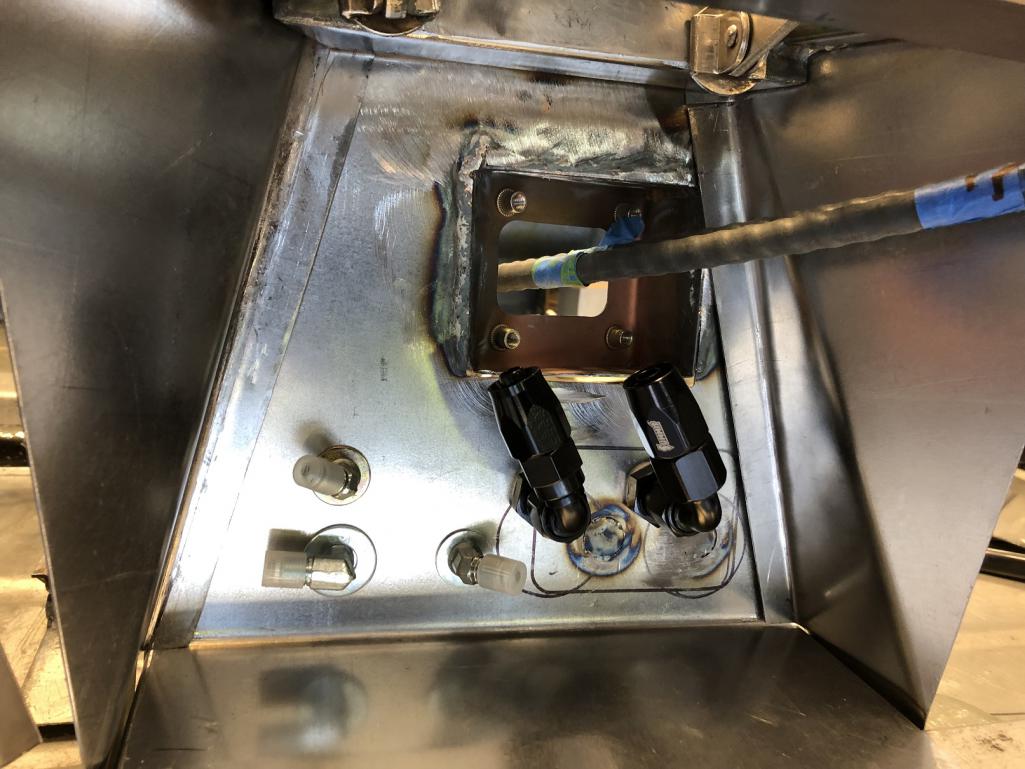
|
| andys |
 May 28 2019, 12:58 PM May 28 2019, 12:58 PM
Post
#1667
|
|
Advanced Member     Group: Members Posts: 2,165 Joined: 21-May 03 From: Valencia, CA Member No.: 721 Region Association: None 
|
Working up a design for the hood vent. The overall shape is the same as the inner support structure. Initial thoughts are that this would be riveted to the outside of the hood as a design element. The louvers still have to be attached in the design but in the end, they'll be rotated up to an appropriate angle. Still lots to work out but it's a start. Would you mind posting a few dimensions of your louvered vent? Small end width, large end width, and height. Have you seen the vent offerings from: http://vraptorspeedworks.com/large-universal-hood-louvers/ You stuff looks great! Thanks, Andys |
| tygaboy |
 May 30 2019, 12:20 PM May 30 2019, 12:20 PM
Post
#1668
|
|
914 Guru      Group: Members Posts: 5,552 Joined: 6-October 15 From: Petaluma, CA Member No.: 19,241 Region Association: Northern California 
|
Today I was able to work out the mounting locations for the InfinityBox MasterCell and front PowerCell. Some measuring, a few rivnuts and some isolation mounts will serve as the upper mounts.
For the lowers, I'm planning to make tabs that weld to the front hoop. Attached thumbnail(s) 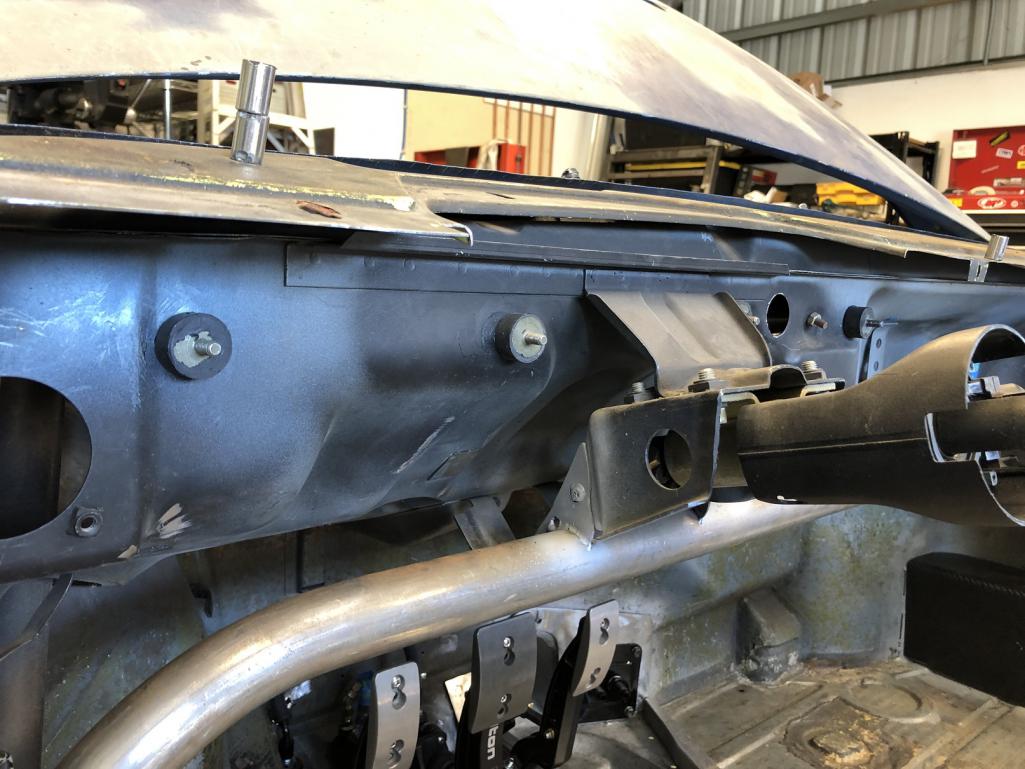
|
| tygaboy |
 May 30 2019, 12:24 PM May 30 2019, 12:24 PM
Post
#1669
|
|
914 Guru      Group: Members Posts: 5,552 Joined: 6-October 15 From: Petaluma, CA Member No.: 19,241 Region Association: Northern California 
|
For someone like me who isn't experienced with wiring and electronics, this is looking a bit intimidating! And this doesn't include any of the switches or gauges! (IMG:style_emoticons/default/huh.gif) (IMG:style_emoticons/default/wacko.gif)
Attached thumbnail(s) 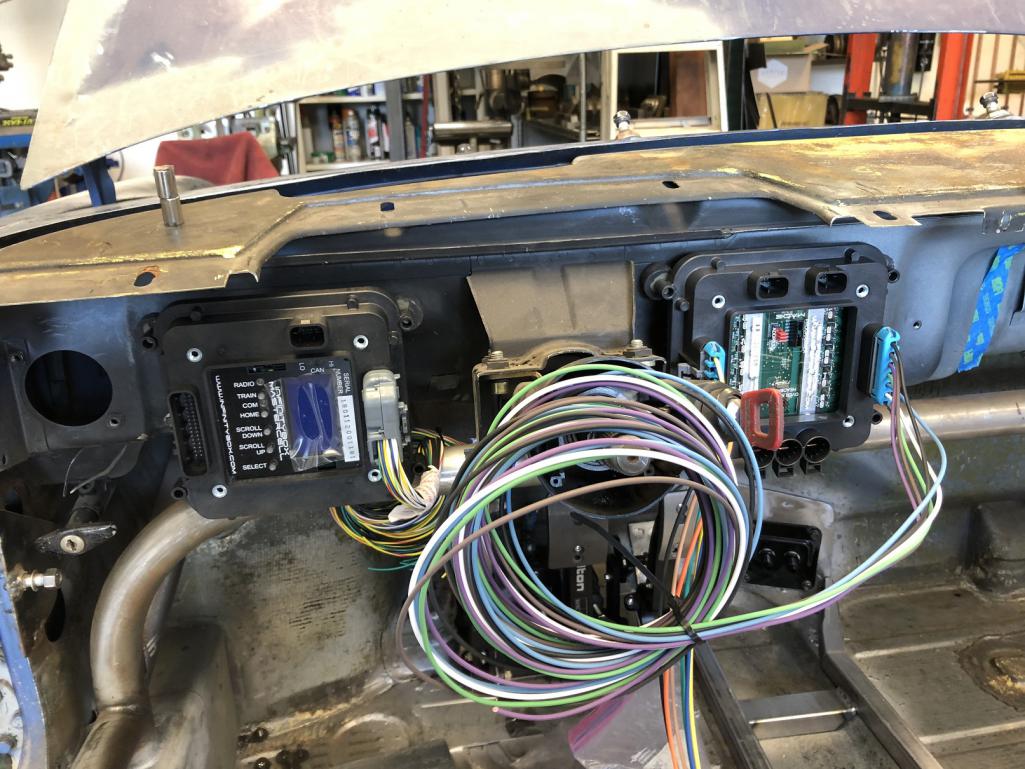
|
| tygaboy |
 May 30 2019, 12:49 PM May 30 2019, 12:49 PM
Post
#1670
|
|
914 Guru      Group: Members Posts: 5,552 Joined: 6-October 15 From: Petaluma, CA Member No.: 19,241 Region Association: Northern California 
|
Working up a design for the hood vent. The overall shape is the same as the inner support structure. Initial thoughts are that this would be riveted to the outside of the hood as a design element. The louvers still have to be attached in the design but in the end, they'll be rotated up to an appropriate angle. Still lots to work out but it's a start. Would you mind posting a few dimensions of your louvered vent? Small end width, large end width, and height. Have you seen the vent offerings from: http://vraptorspeedworks.com/large-universal-hood-louvers/ You stuff looks great! Thanks, Andys @andys - Hi Andy! Thanks for the kind words. Having drooled over your work, that means a lot, coming from you. Here are the dimensions (in inches) of what I did so far. I'd likely narrow up the upper dimension as I think it's a bit too much for the look of the car. But that's just my opinion. And I have seen those SpeedWorks vents. I didn't think any of them would quite work for me and with the plasma table, it's easy enough to make exactly what I want. I'd be happy to share whatever I come up with. Just ask! Thanks again, Chris Attached thumbnail(s) 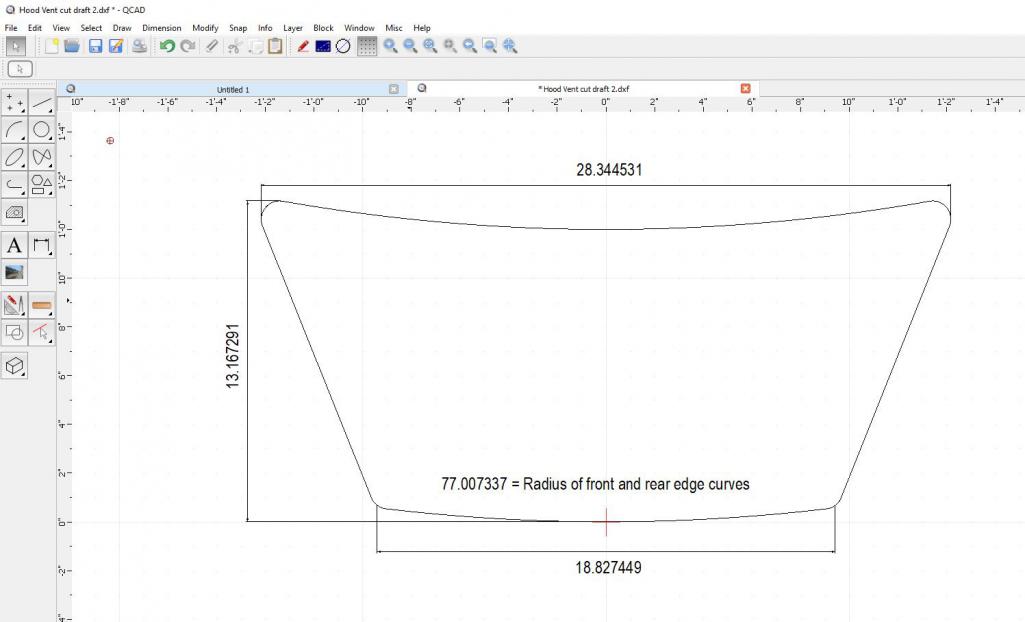
|
| tygaboy |
 May 30 2019, 05:27 PM May 30 2019, 05:27 PM
Post
#1671
|
|
914 Guru      Group: Members Posts: 5,552 Joined: 6-October 15 From: Petaluma, CA Member No.: 19,241 Region Association: Northern California 
|
Here's the InfinityBox set up in all its glory. It looking like I'll run the MasterCell (the main brain) in the center position and the front PowerCell on the left. The wiring seems to like it best this way.
Attached thumbnail(s) 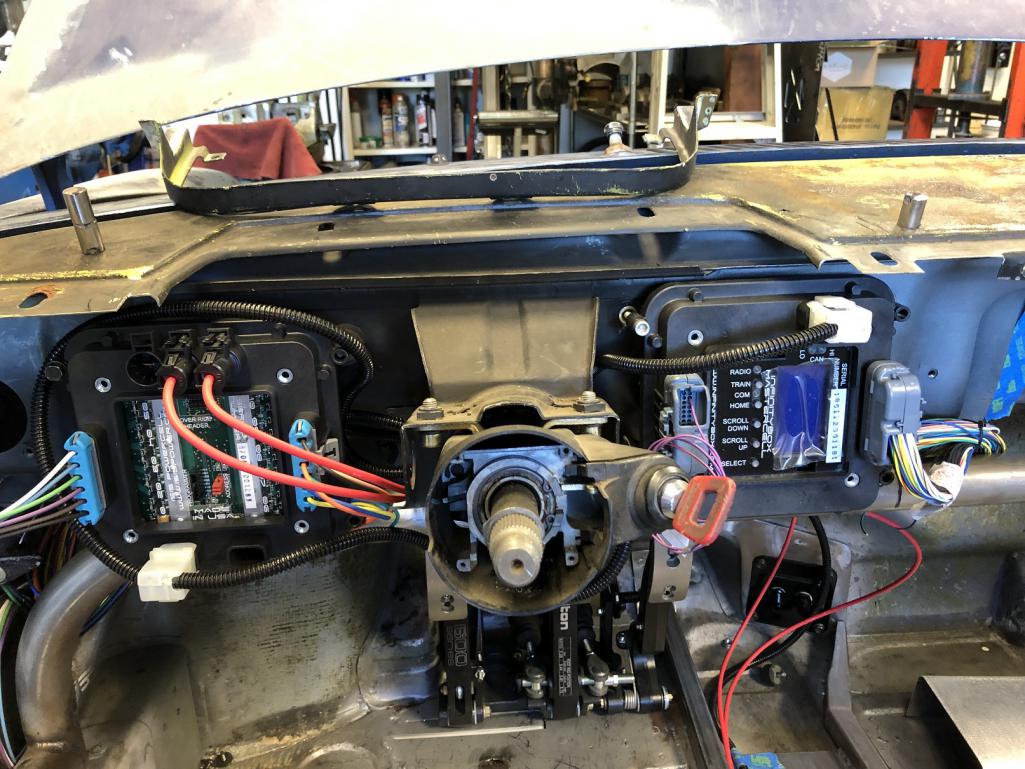
|
| tygaboy |
 May 30 2019, 05:31 PM May 30 2019, 05:31 PM
Post
#1672
|
|
914 Guru      Group: Members Posts: 5,552 Joined: 6-October 15 From: Petaluma, CA Member No.: 19,241 Region Association: Northern California 
|
For those who may not be aware, this set up is a CAN bus set up. Essentially a network for the car. The MasterCell gets wired to all the switches/controls and talks to the PowerCells (one at each end of the car).
The PowerCells wire to the loads - lights, signals, etc. It's all programmable, too. What I really like is that what you see in the tunnel is the entire wiring "harness" that connects the front to the back! It's two power leads and two comm wires. OK, I lied. I also have to add the wires for the heated seats... Attached thumbnail(s) 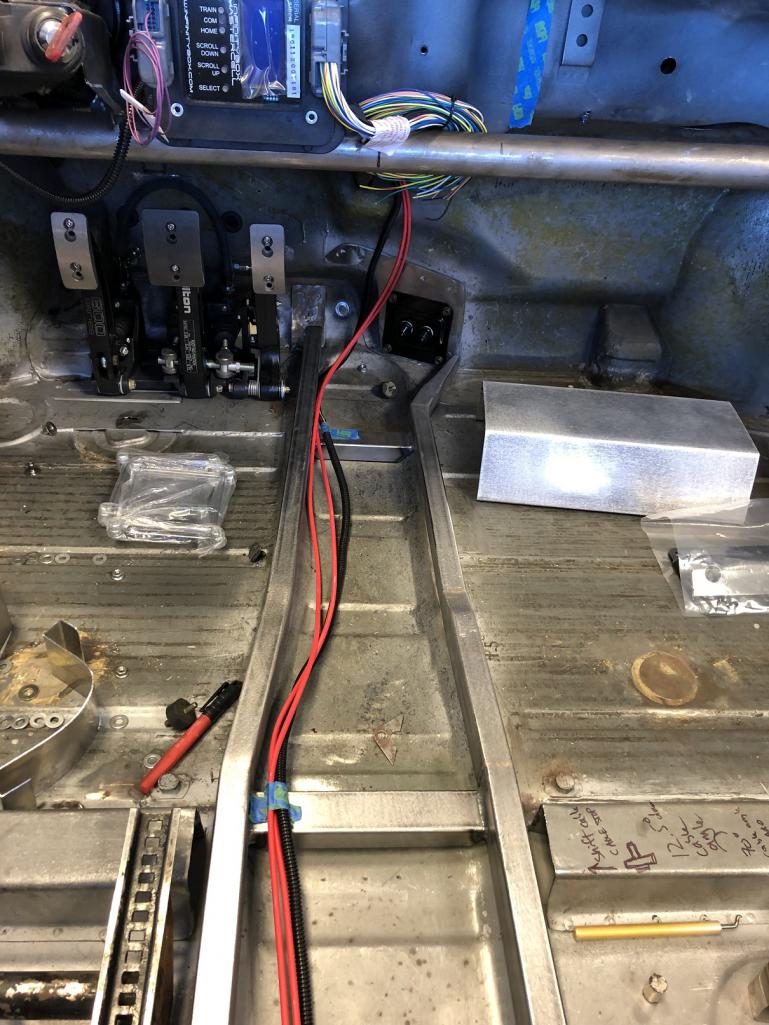
|
| tygaboy |
 May 30 2019, 05:33 PM May 30 2019, 05:33 PM
Post
#1673
|
|
914 Guru      Group: Members Posts: 5,552 Joined: 6-October 15 From: Petaluma, CA Member No.: 19,241 Region Association: Northern California 
|
Here, I'm working on a location for the rear PowerCell. I think I can fabricate a cubby so this one can live behind the seat. It's out of the way but accessible by removing the seat.
Attached thumbnail(s) 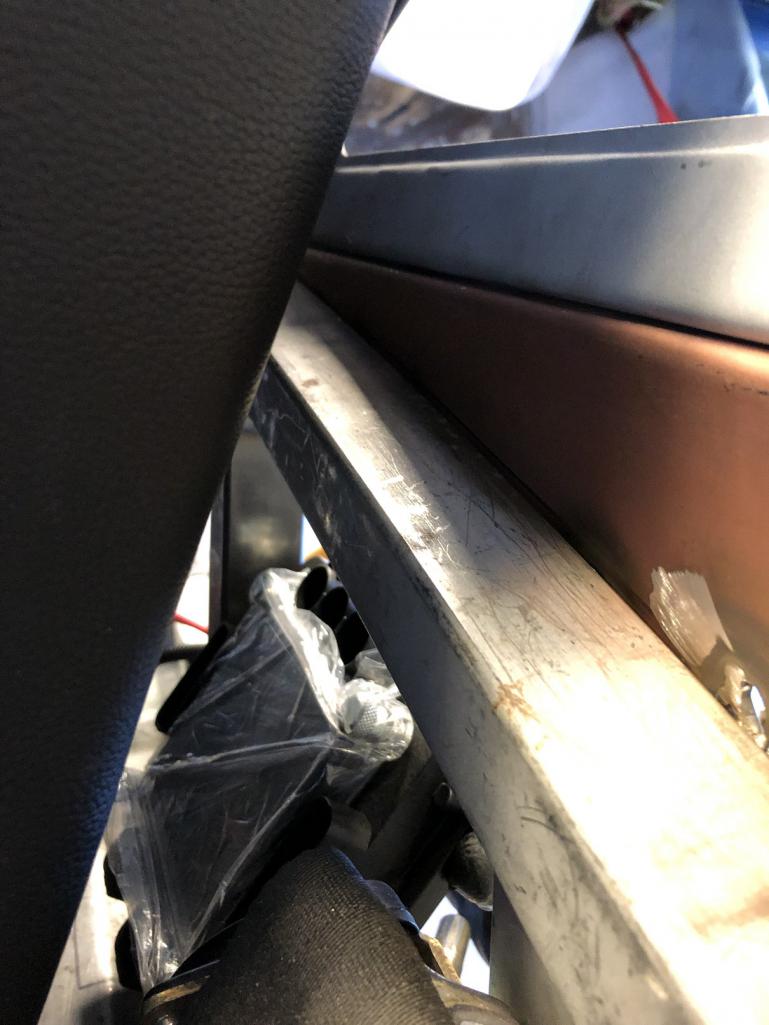 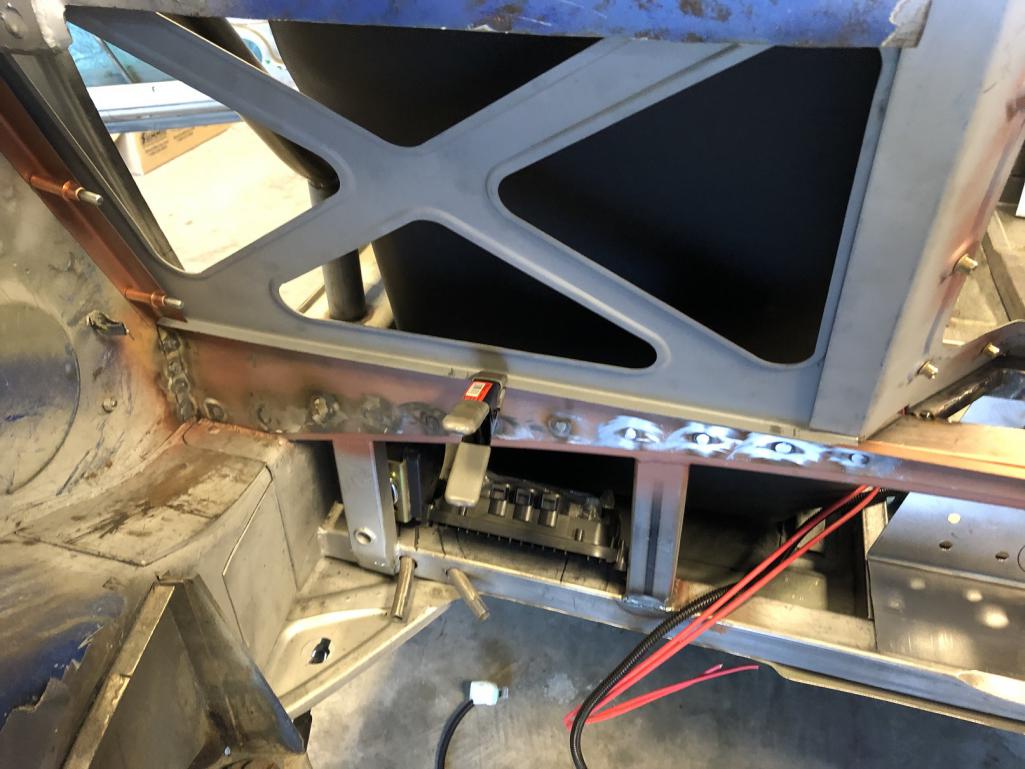
|
| Krieger |
 May 30 2019, 06:53 PM May 30 2019, 06:53 PM
Post
#1674
|
|
Advanced Member     Group: Members Posts: 4,800 Joined: 24-May 04 From: Santa Rosa CA Member No.: 2,104 Region Association: None 
|
Great idea for locating those boxes under the dash. What do you think about making those boxes somehow pull down so you can access them easily? With seats installed it can be painfull working under the dash.
|
| tygaboy |
 May 31 2019, 06:33 AM May 31 2019, 06:33 AM
Post
#1675
|
|
914 Guru      Group: Members Posts: 5,552 Joined: 6-October 15 From: Petaluma, CA Member No.: 19,241 Region Association: Northern California 
|
Great idea for locating those boxes under the dash. What do you think about making those boxes somehow pull down so you can access them easily? With seats installed it can be painfull working under the dash. @Krieger Andy - At this point, the plan is to add flip-up panels in the dash and/or make the dash front quick release (ish). Fingers crossed but I don't expect to have to be getting at these components very often. I'm ordering all the switches and once I get them and work out where everything fits, I'll have a better idea of what I'll need to do. |
| sixnotfour |
 May 31 2019, 10:47 AM May 31 2019, 10:47 AM
Post
#1676
|
|
914 Wizard           Group: Members Posts: 10,795 Joined: 12-September 04 From: Life Elevated..planet UT. Member No.: 2,744 Region Association: Rocky Mountains 

|
you have great plans , Im sure, I saw this on FB ..spyder in Portugal.. (IMG:style_emoticons/default/idea.gif)
Attached image(s) 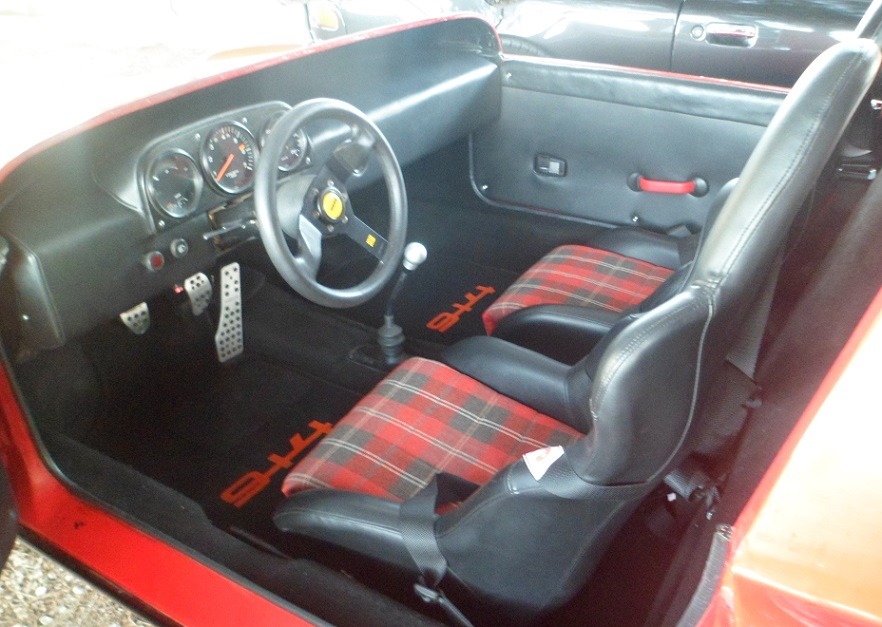
|
| andys |
 May 31 2019, 10:55 AM May 31 2019, 10:55 AM
Post
#1677
|
|
Advanced Member     Group: Members Posts: 2,165 Joined: 21-May 03 From: Valencia, CA Member No.: 721 Region Association: None 
|
[quote name='tygaboy' date='May 30 2019, 11:49 AM' post='2718284']
[/quote] Hi Andy! Thanks for the kind words. Having drooled over your work, that means a lot, coming from you. Here are the dimensions (in inches) of what I did so far. I'd likely narrow up the upper dimension as I think it's a bit too much for the look of the car. But that's just my opinion. And I have seen those SpeedWorks vents. I didn't think any of them would quite work for me and with the plasma table, it's easy enough to make exactly what I want. I'd be happy to share whatever I come up with. Just ask! Thanks again, Chris [/quote] Thanks, Chris! I don't really like my hood vent all that much (from a styling aspect), so I'm searching around for some ideas. What I like about the SpeedWorks stuff, is they are aluminum (water jet cut, I suspect). To avoid painting, I'd like to work around the existing opening in my hood, however that pretty much relegates me to construct it with fabricated pieces welded together........Guess I better brush-up on my tig welding skills. Keep up the good work! Andys |
| tygaboy |
 May 31 2019, 03:27 PM May 31 2019, 03:27 PM
Post
#1678
|
|
914 Guru      Group: Members Posts: 5,552 Joined: 6-October 15 From: Petaluma, CA Member No.: 19,241 Region Association: Northern California 
|
Decision made on rear PowerCell location. This is far simpler than making a behind-the-seat compartment and it provides better access. Plus, there are way fewer wires to have to get through the firewall. In this case, I'll agree with the KISS approach.
Once things are all connected, I'll get all the wiring into nice, tidy looms and tied down to the chassis. Attached thumbnail(s) 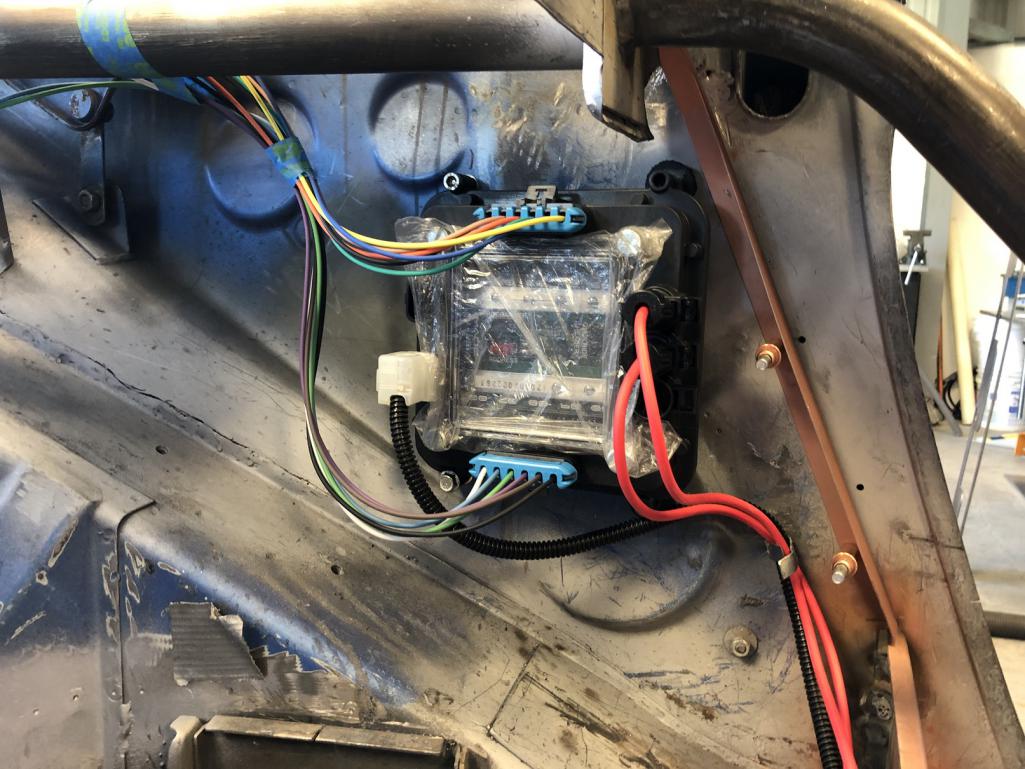
|
| tygaboy |
 May 31 2019, 03:31 PM May 31 2019, 03:31 PM
Post
#1679
|
|
914 Guru      Group: Members Posts: 5,552 Joined: 6-October 15 From: Petaluma, CA Member No.: 19,241 Region Association: Northern California 
|
And to be sure I keep with my "changed my mind" model, I changed the chassis wiring location. Turns out I can have NO wiring in the tunnel! (Like that's some sort of incredible build result...)
Anyway, this works out great and will keep the overall layout nice and clean. Attached thumbnail(s) 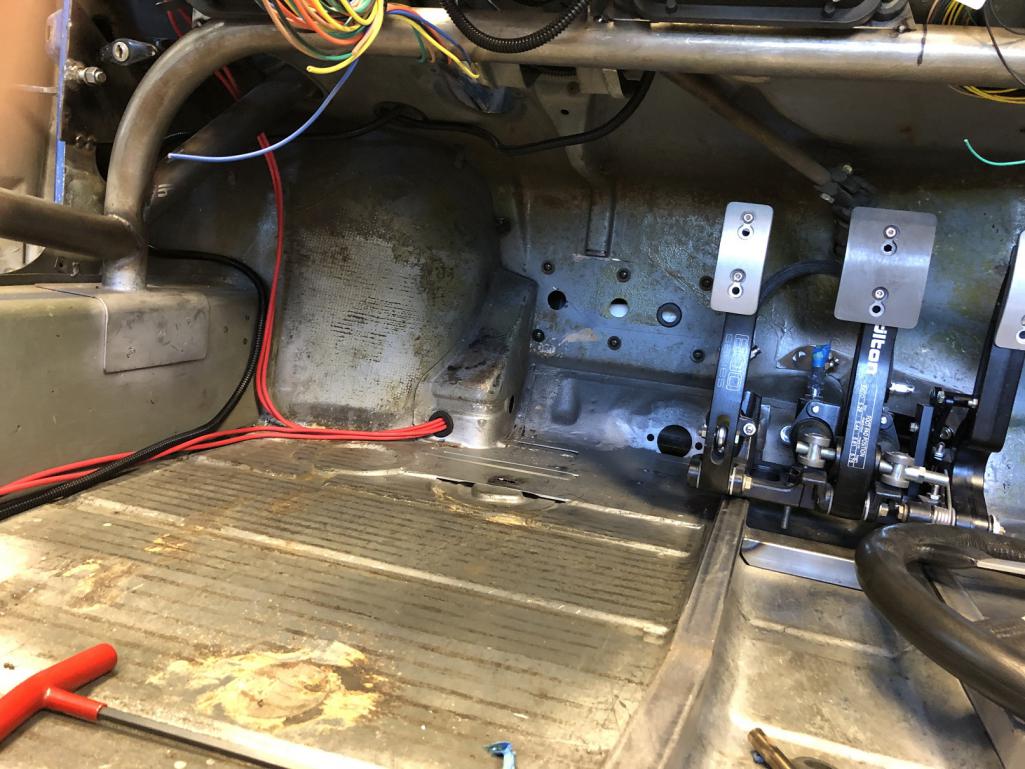
|
| tygaboy |
 May 31 2019, 03:36 PM May 31 2019, 03:36 PM
Post
#1680
|
|
914 Guru      Group: Members Posts: 5,552 Joined: 6-October 15 From: Petaluma, CA Member No.: 19,241 Region Association: Northern California 
|
Those four power leads connect to this fuse block and then one cable from the block to the battery. That's not the battery I'll run, just something to give me a basic feel for what sort of room I'll need for everything that has to happen in the frunk.
And yes, I still have to run power to the starter. OK, so it looks like I will have one wire in the tunnel. Or does anyone make a wireless starter? (IMG:style_emoticons/default/happy11.gif) Attached thumbnail(s) 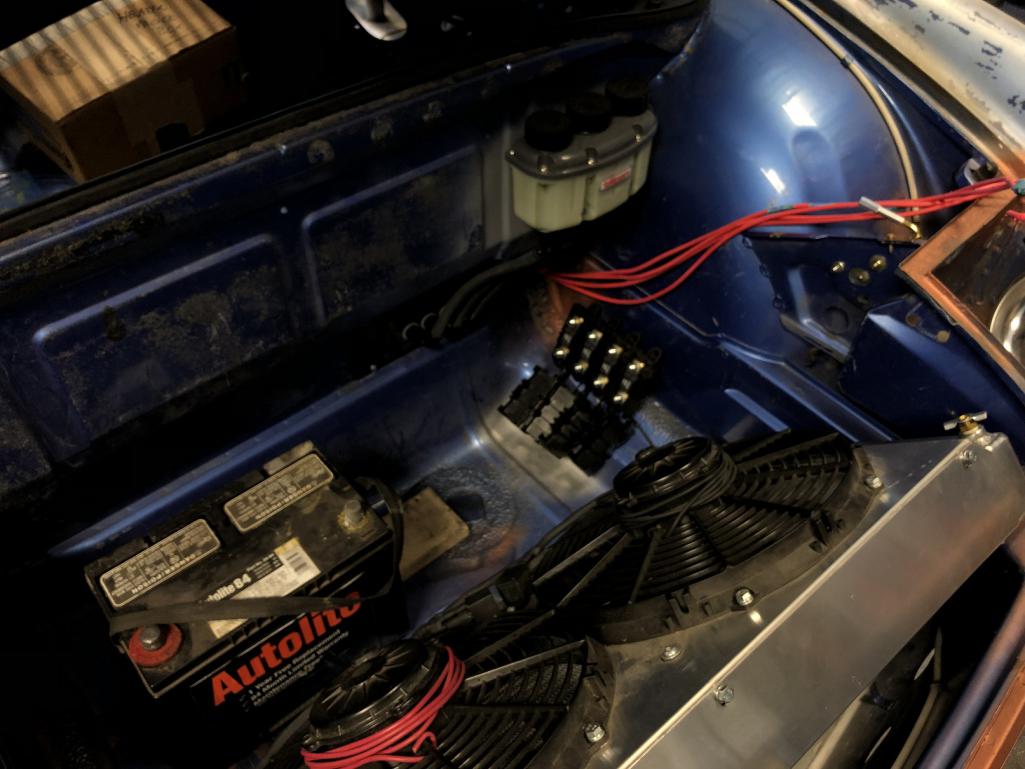
|
  |
2 User(s) are reading this topic (2 Guests and 0 Anonymous Users)
0 Members:

|
Lo-Fi Version | Time is now: 23rd April 2025 - 03:28 PM |
Invision Power Board
v9.1.4 © 2025 IPS, Inc.


