|
|

|
Porsche, and the Porsche crest are registered trademarks of Dr. Ing. h.c. F. Porsche AG.
This site is not affiliated with Porsche in any way. Its only purpose is to provide an online forum for car enthusiasts. All other trademarks are property of their respective owners. |
|
|
  |
| Andyrew |
 Aug 6 2019, 03:00 PM Aug 6 2019, 03:00 PM
Post
#1781
|
|
Spooling.... Please wait           Group: Members Posts: 13,377 Joined: 20-January 03 From: Riverbank, Ca Member No.: 172 Region Association: Northern California 
|
That looks great!!!
ClecoBoy should be a Emoji |
| burton73 |
 Aug 6 2019, 04:57 PM Aug 6 2019, 04:57 PM
Post
#1782
|
|
Senior member, and old dude     Group: Members Posts: 3,802 Joined: 2-January 07 From: Los Angeles Member No.: 7,414 Region Association: Southern California 
|
You are a great fabricator, but I guess you know that.
Bob B |
| tygaboy |
 Aug 6 2019, 05:22 PM Aug 6 2019, 05:22 PM
Post
#1783
|
|
914 Guru      Group: Members Posts: 5,552 Joined: 6-October 15 From: Petaluma, CA Member No.: 19,241 Region Association: Northern California 
|
You are a great fabricator, but I guess you know that. Bob B @burton73 Thanks for the nice compliment, Bob. A big reason I post all the details is to show others what can be accomplished if one just practices and sticks with it. Many of us ( @defianty , @bbrock @dion and others I'm forgetting) have used the "give it a try it and learn along the way" approach and have achieved what I think are really impressive results. I had very low skills at all this when I started a few years ago. I couldn't TIG at all, hadn't bent a piece of sheet metal and didn't own a single Cleco! (IMG:style_emoticons/default/lol-2.gif) But think I have developed my skills across the life of my build and feel like I'm approaching a point where I'm reasonably able to get a result that I like. To anyone thinking about fab work: Give it a try, then give it more tries. You'll get there faster than you'd think! |
| Dion |
 Aug 6 2019, 06:03 PM Aug 6 2019, 06:03 PM
Post
#1784
|
|
RN     Group: Members Posts: 2,839 Joined: 16-September 04 From: Audubon,PA Member No.: 2,766 Region Association: MidAtlantic Region 

|
Chris , I am humbled by that compliment coming from you. Thank you for that.
You always go the extra mile. It always shows through. Never stop being who you are. (IMG:style_emoticons/default/beerchug.gif) PS Your build always makes my brain hurt! (IMG:style_emoticons/default/laugh.gif) In a good way! |
| defianty |
 Aug 6 2019, 11:25 PM Aug 6 2019, 11:25 PM
Post
#1785
|
|
Senior Member    Group: Members Posts: 659 Joined: 9-August 06 From: Essex, UK Member No.: 6,621 Region Association: None  |
I think I need to do another few projects to get up to your standard of finish Chris (IMG:style_emoticons/default/biggrin.gif)
But I hear what you're saying and thanks for that. There's no better feeling than getting stuck in and accomplishing something you've never done before. Keep up the great build, it's inspiring! |
| bbrock |
 Aug 7 2019, 08:05 AM Aug 7 2019, 08:05 AM
Post
#1786
|
|
914 Guru      Group: Members Posts: 5,269 Joined: 17-February 17 From: Montana Member No.: 20,845 Region Association: Rocky Mountains 
|
Whoa - that is strong company. I need to buy a LOT of Clecos before I can get anywhere close to any of your level. (IMG:style_emoticons/default/beerchug.gif)
|
| ssuperflyoldguy |
 Aug 7 2019, 10:27 AM Aug 7 2019, 10:27 AM
Post
#1787
|
|
Member   Group: Members Posts: 179 Joined: 15-November 15 From: NorCal - East Bay Baby! Member No.: 19,364 Region Association: None |
Whoa - that is strong company. I need to buy a LOT of Clecos before I can get anywhere close to any of your level. (IMG:style_emoticons/default/beerchug.gif) If all it took was Cleco's - I'd be DaVinci this weekend - always lovin' on Tyga's work |
| ssuperflyoldguy |
 Aug 7 2019, 10:34 AM Aug 7 2019, 10:34 AM
Post
#1788
|
|
Member   Group: Members Posts: 179 Joined: 15-November 15 From: NorCal - East Bay Baby! Member No.: 19,364 Region Association: None |
@914forme Stephen - The switches are AL but I think I'm going to leave them "blank", at least for now. And the Momo hub came in so here's the wheel all set to go. It's working out just as I'd hoped. I like that steering wheel setup - will save me hours of agony wiring up an ECU to actuate a 3 stage vtec setup in my classic mini by manually actuating the vtec solenoids. Just hit the Yo! button somewhere over 3k and hold on. Probably don't need vtec until hitting the straights... |
| FL000 |
 Aug 7 2019, 01:55 PM Aug 7 2019, 01:55 PM
Post
#1789
|
|
Member   Group: Members Posts: 447 Joined: 31-January 12 From: Lancaster, CA Member No.: 14,076 Region Association: Southern California 
|
To anyone thinking about fab work: Give it a try, then give it more tries. You'll get there faster than you'd think! I have been interested in developing metal fab skills, but am never sure where to start investing the dollars or what is a worthwhile compromise of shop space. What would you say are the top 3 pieces of equipment/machinery that you find yourself using most often? I have a MIG and an assortment of hand tools, but nothing substantive yet. |
| tygaboy |
 Aug 8 2019, 08:19 AM Aug 8 2019, 08:19 AM
Post
#1790
|
|
914 Guru      Group: Members Posts: 5,552 Joined: 6-October 15 From: Petaluma, CA Member No.: 19,241 Region Association: Northern California 
|
To anyone thinking about fab work: Give it a try, then give it more tries. You'll get there faster than you'd think! I have been interested in developing metal fab skills, but am never sure where to start investing the dollars or what is a worthwhile compromise of shop space. What would you say are the top 3 pieces of equipment/machinery that you find yourself using most often? I have a MIG and an assortment of hand tools, but nothing substantive yet. @FL 000 - Hmm, that's a great question! Here's my opinion: There are only 4 things you can do when fabbing metal: cut, bend, shrink and stretch. So, depending on what you want to fab, you'll need tools to help do these things. As you point out, it's down to how much space you have and what you want to spend. Awesome tools are great and can allow you to do things more quickly but aren't required. (says the guy with a plasma table! (IMG:style_emoticons/default/laugh.gif) ) So in a sort of descending order of size/cost: CUT - stomp shear - band saw (not a wood saw with a metal-cutting blade in it!) - throatless shear - tubing notcher - electric shear - cut off wheel on an angle grinder - snips BEND - finger brake/radius brake - bead roller - tube bender w/die sets - roll bender - vise SHRINK/STRETCH - English Wheel - shrinker and stretcher - hammers/mallets - dollies - tree stump! Again, my opinion here and yes, I'm leaving out a number of options and other small stuff like measuring devices, scribes, etc. but this is what's worked for me so far. If you think it would be helpful, I'd be happy to talk in more detail so PM me, if I can help at all. Chris |
| bbrock |
 Aug 9 2019, 09:34 AM Aug 9 2019, 09:34 AM
Post
#1791
|
|
914 Guru      Group: Members Posts: 5,269 Joined: 17-February 17 From: Montana Member No.: 20,845 Region Association: Rocky Mountains 
|
Nice list (IMG:style_emoticons/default/smilie_pokal.gif)
In the bend section, I would add simple bending brake above the vice and add vice grips/pliers below it. I'd kill for enough space for a finger brake but you can do a surprising amount of fab work with a simple, cheap brake, a vice, and some pliers. Down to the shrink/stretch column, don't forget the shot bag along with the stump. |
| tygaboy |
 Aug 9 2019, 01:27 PM Aug 9 2019, 01:27 PM
Post
#1792
|
|
914 Guru      Group: Members Posts: 5,552 Joined: 6-October 15 From: Petaluma, CA Member No.: 19,241 Region Association: Northern California 
|
Yesterday and today was FINALLY coming up with a design then fabbing the final part of the console cover.
Simple as that sounds, I struggled for weeks to come up with something that I thought looked cohesive and allowed the entire cover to be removed. I want it removable as this greatly simplifies building and then servicing anything that runs in the tunnel. But in order to remove the cover, it has to slide forward (to clear the rear firewall lower dog house) before it can be lifted out. I didn't bother posting the various mock-ups of the "would this work?" ideas I've tried out. In the end, I made this removable "end cap" set up. OK, so it's really the "front cap"... (IMG:style_emoticons/default/laugh.gif) Installed, it looks like a continuation of the cover but once removed, the rest of the cover has all sorts of room to move forward for removal! (IMG:style_emoticons/default/aktion035.gif) It was really fiddly to make as I had to patch together three pieces to get the shape needed for that passenger side element. It slopes uphill and twists at the same time. I have a couple of the fastener locations Cleco'd and need to work up a couple/few more but nailing this down is a major item ticked off the "To Do" list. As always, it starts with, as @914forme calls it, CAD (Cardboard Aided Design) and rough cut pieces. Oh, and it's SOOOO fun working in the confines of the foot well for what took ~12 hours. Attached thumbnail(s) 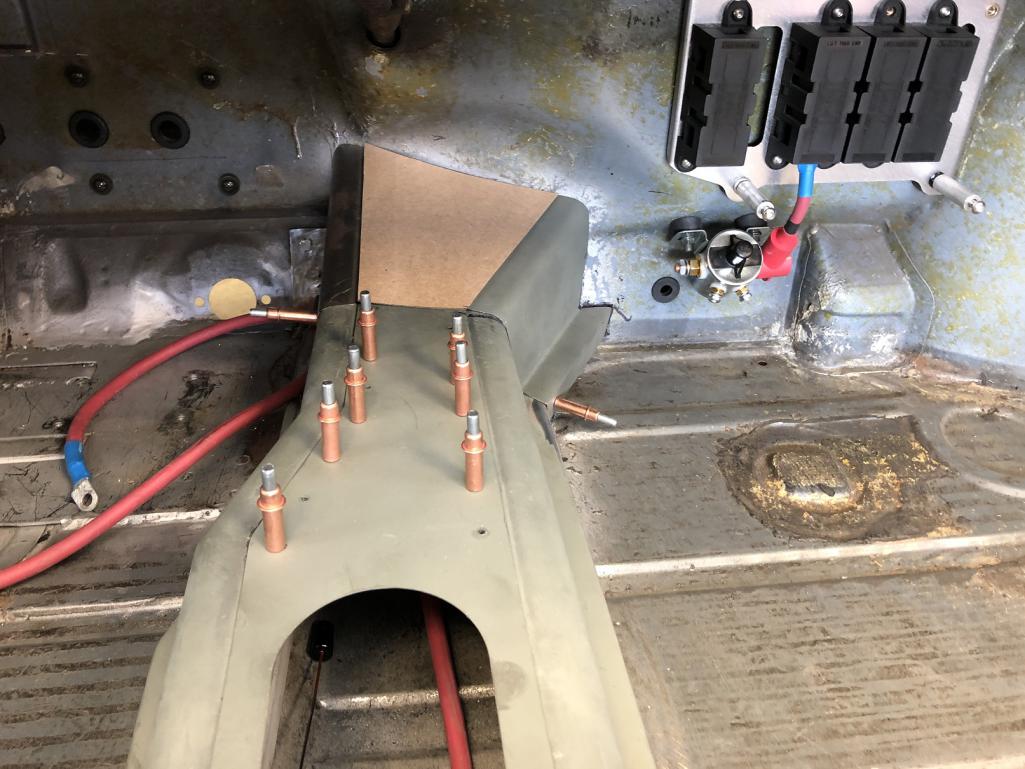 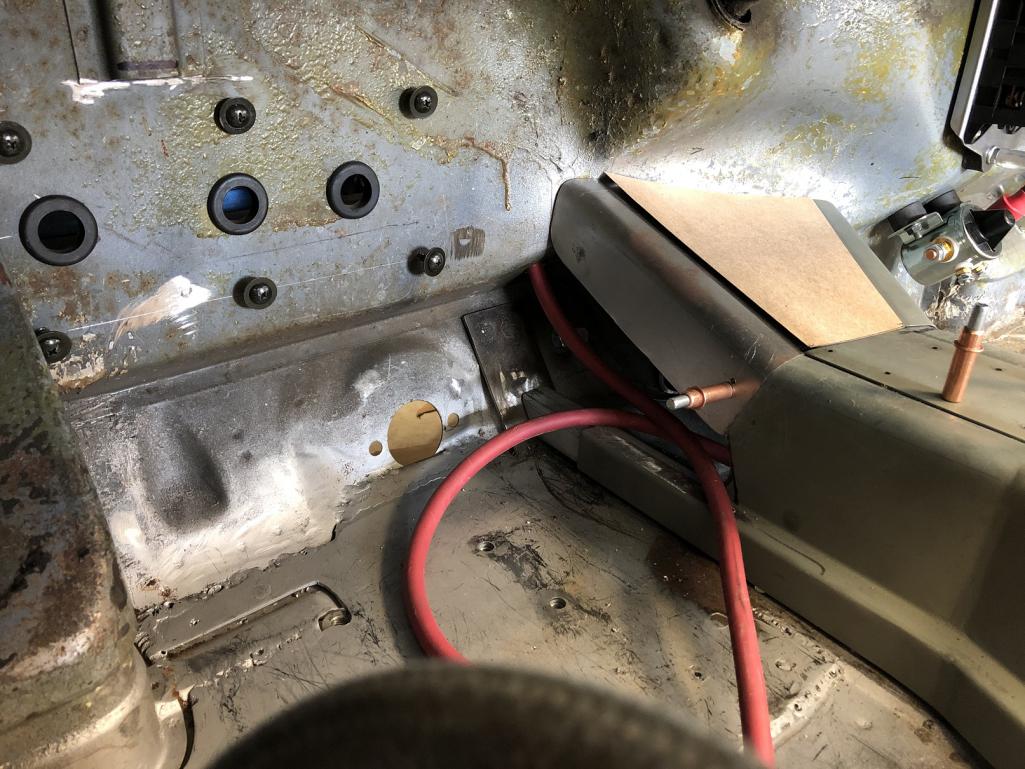
|
| tygaboy |
 Aug 9 2019, 01:30 PM Aug 9 2019, 01:30 PM
Post
#1793
|
|
914 Guru      Group: Members Posts: 5,552 Joined: 6-October 15 From: Petaluma, CA Member No.: 19,241 Region Association: Northern California 
|
Almost complete!
Attached thumbnail(s) 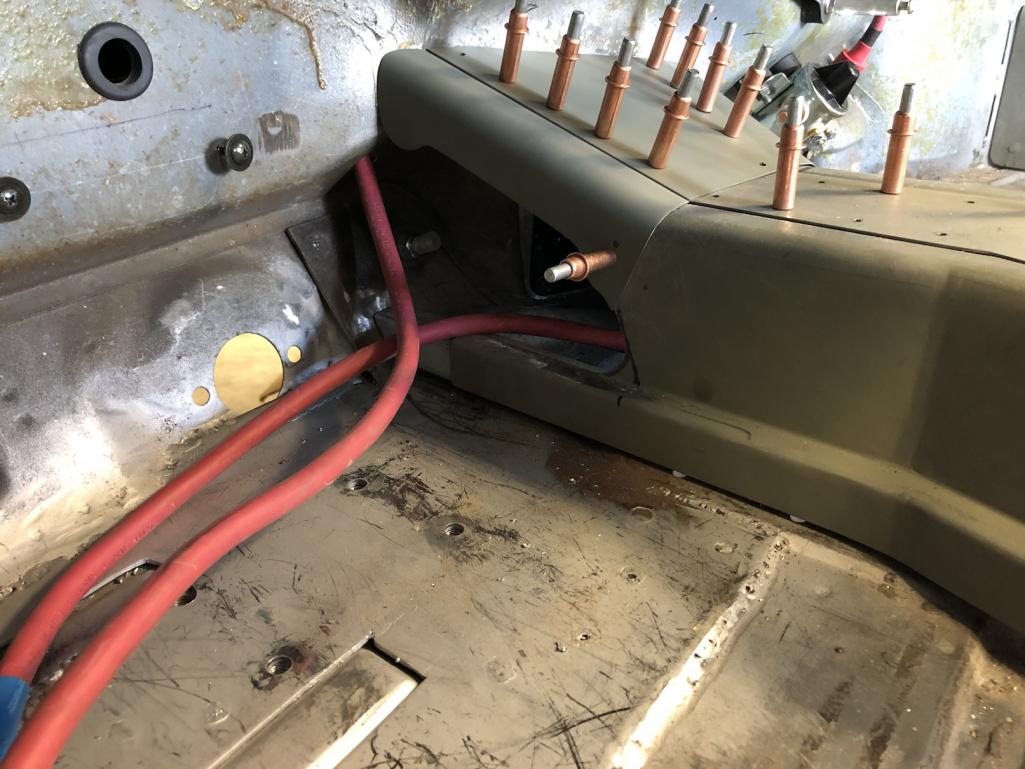 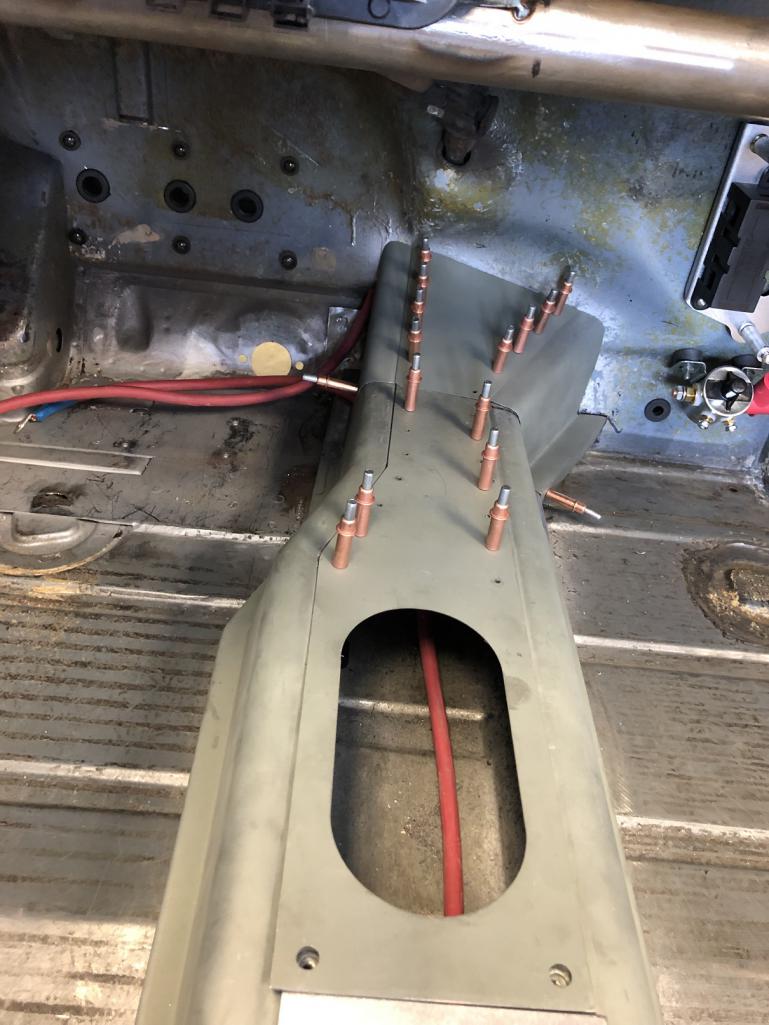
|
| tygaboy |
 Aug 11 2019, 01:52 PM Aug 11 2019, 01:52 PM
Post
#1794
|
|
914 Guru      Group: Members Posts: 5,552 Joined: 6-October 15 From: Petaluma, CA Member No.: 19,241 Region Association: Northern California 
|
Throttle cable linkage bracket design and fab in progress.
Attached thumbnail(s) 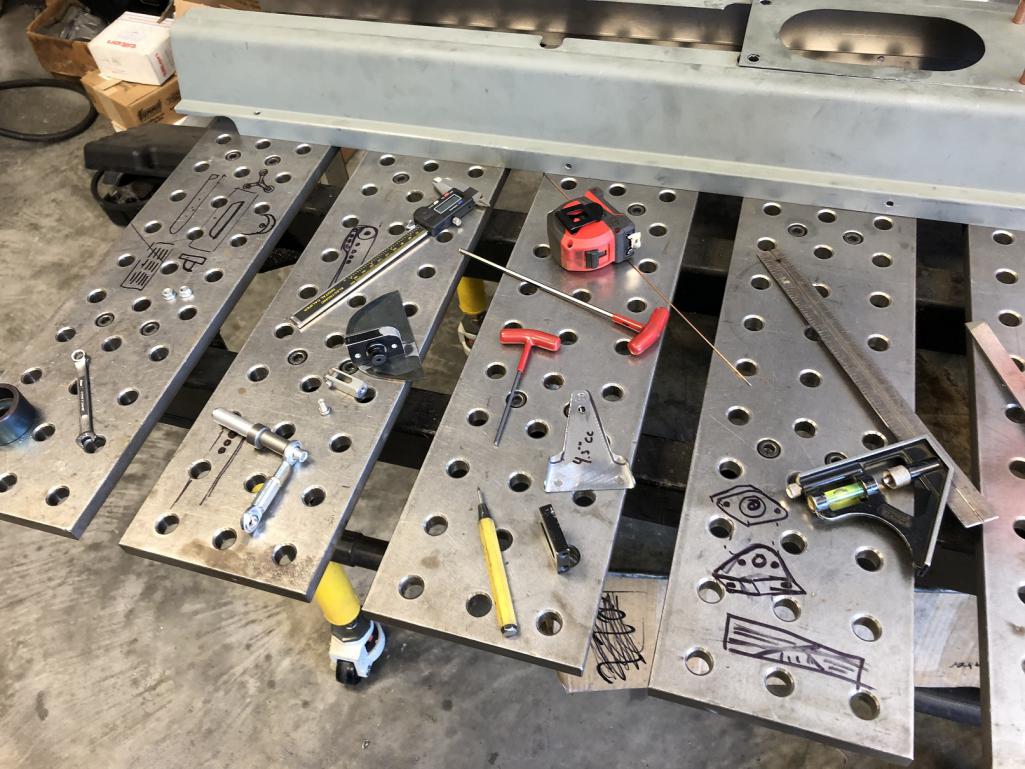
|
| tygaboy |
 Aug 11 2019, 02:01 PM Aug 11 2019, 02:01 PM
Post
#1795
|
|
914 Guru      Group: Members Posts: 5,552 Joined: 6-October 15 From: Petaluma, CA Member No.: 19,241 Region Association: Northern California 
|
I figured it was about time to post some actual 914 components!
Today was fitting the Boxster calipers (using Rich Johnson's adapters) and 911 e-brake components. @ChrisFoley did his full Monty upgrades to the trailing arms. Such nice stuff! Attached thumbnail(s) 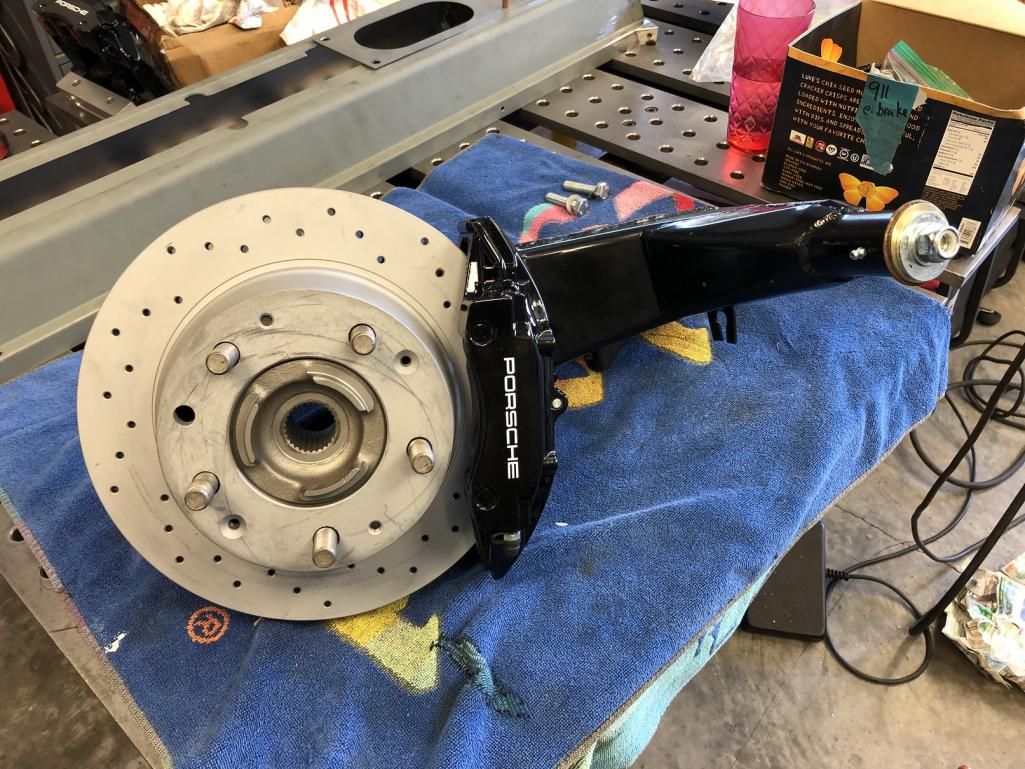
|
| Andyrew |
 Aug 11 2019, 04:15 PM Aug 11 2019, 04:15 PM
Post
#1796
|
|
Spooling.... Please wait           Group: Members Posts: 13,377 Joined: 20-January 03 From: Riverbank, Ca Member No.: 172 Region Association: Northern California 
|
Great work on that center console! Looks factory!
Those 914 bits are just gorgeous! |
| tygaboy |
 Aug 12 2019, 02:56 PM Aug 12 2019, 02:56 PM
Post
#1797
|
|
914 Guru      Group: Members Posts: 5,552 Joined: 6-October 15 From: Petaluma, CA Member No.: 19,241 Region Association: Northern California 
|
Thanks @Andyrew . I can't wait to see it in paint!
But lots to do before that happens. Today was finalizing the throttle linkage. It was another fiddly, long-time-to-fab set of pieces. It has to have appropriate travel while keeping everything under the tunnel cover and front cap, protecting the cable and all other moving parts throughout their travel and be adjustable. It needs to be adjustable because I have no idea what the throttle pedal response of the ITBs will be like and I may need to open them faster or slower, relative to throttle pedal travel. With this set up, I can adjust things in a bunch of ways. I can: - move the linkage pick up point up / down the throttle pedal - lengthen the heim linkage between the pedal and the cable pull plate - change the orientation between the aluminum "intermediate plate" and the black, lower pivot piece - move the cable pick up location on the intermediate plate - and worst case, remake the intermediate plate once I have things figured out But this should get me started. Attached thumbnail(s) 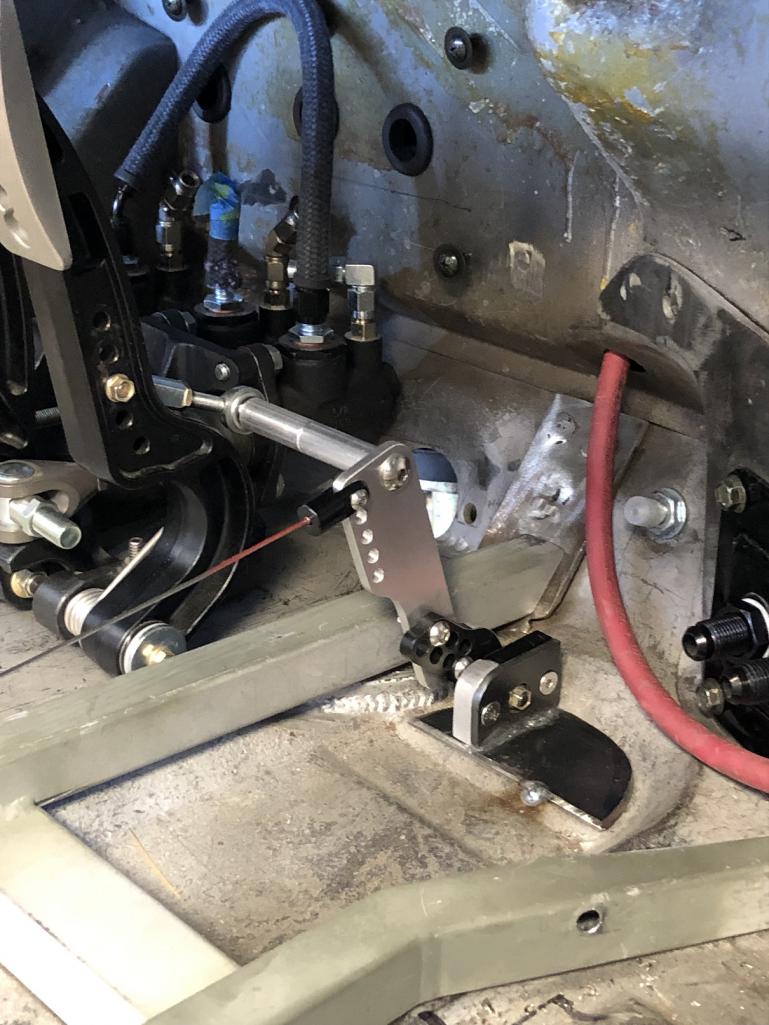
|
| sixnotfour |
 Aug 12 2019, 03:23 PM Aug 12 2019, 03:23 PM
Post
#1798
|
|
914 Wizard           Group: Members Posts: 10,797 Joined: 12-September 04 From: Life Elevated..planet UT. Member No.: 2,744 Region Association: Rocky Mountains 

|
you might as well run 2 cables....
|
| tygaboy |
 Aug 14 2019, 07:30 AM Aug 14 2019, 07:30 AM
Post
#1799
|
|
914 Guru      Group: Members Posts: 5,552 Joined: 6-October 15 From: Petaluma, CA Member No.: 19,241 Region Association: Northern California 
|
|
| tygaboy |
 Aug 14 2019, 07:33 AM Aug 14 2019, 07:33 AM
Post
#1800
|
|
914 Guru      Group: Members Posts: 5,552 Joined: 6-October 15 From: Petaluma, CA Member No.: 19,241 Region Association: Northern California 
|
And the 8" / 9" x 16" Ronals are here.
You don't see them all the time and I think they'll nicely compliment the look of this build. Big thanks to @MarkHoward for spotting these! Attached thumbnail(s) 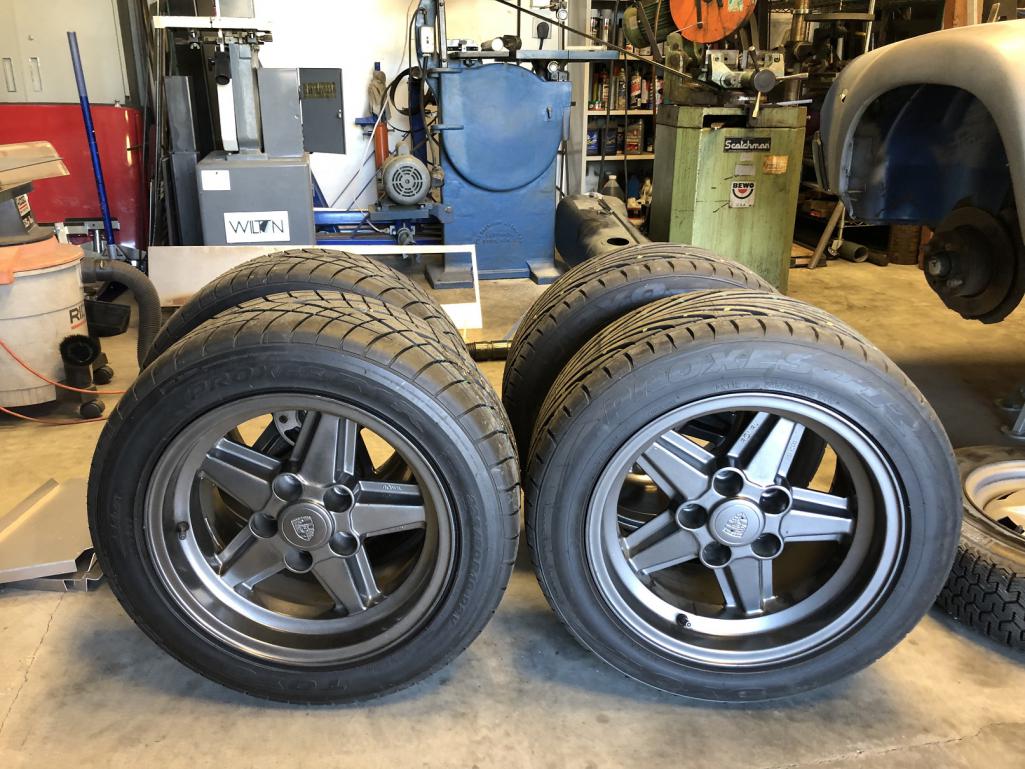 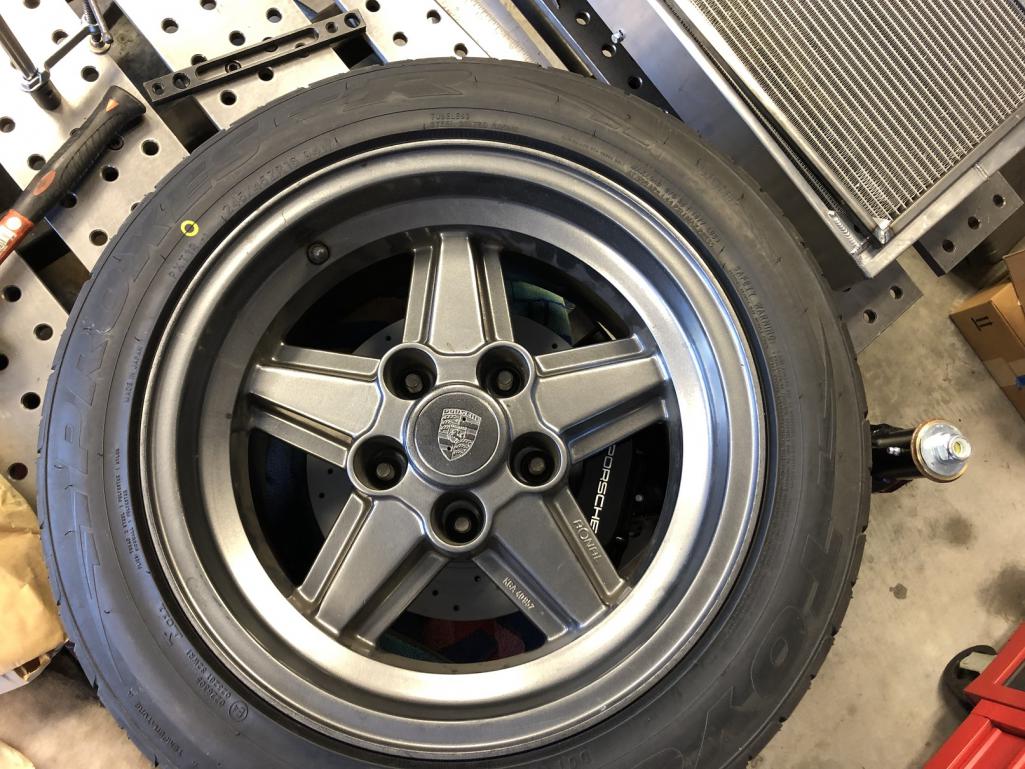
|
  |
2 User(s) are reading this topic (2 Guests and 0 Anonymous Users)
0 Members:

|
Lo-Fi Version | Time is now: 24th April 2025 - 01:00 AM |
Invision Power Board
v9.1.4 © 2025 IPS, Inc.


