|
|

|
Porsche, and the Porsche crest are registered trademarks of Dr. Ing. h.c. F. Porsche AG.
This site is not affiliated with Porsche in any way. Its only purpose is to provide an online forum for car enthusiasts. All other trademarks are property of their respective owners. |
|
|
  |
| tygaboy |
 Jan 5 2020, 05:57 PM Jan 5 2020, 05:57 PM
Post
#2181
|
|
914 Guru      Group: Members Posts: 5,552 Joined: 6-October 15 From: Petaluma, CA Member No.: 19,241 Region Association: Northern California 
|
So the first thing I did was crisp up the flare to get it in alignment with the chassis.
This is one of those moments where I'm thinking to myself "is this what they mean when they say 'things are going to get worse before they get better...'"? (IMG:style_emoticons/default/wacko.gif) I hope so! Attached thumbnail(s) 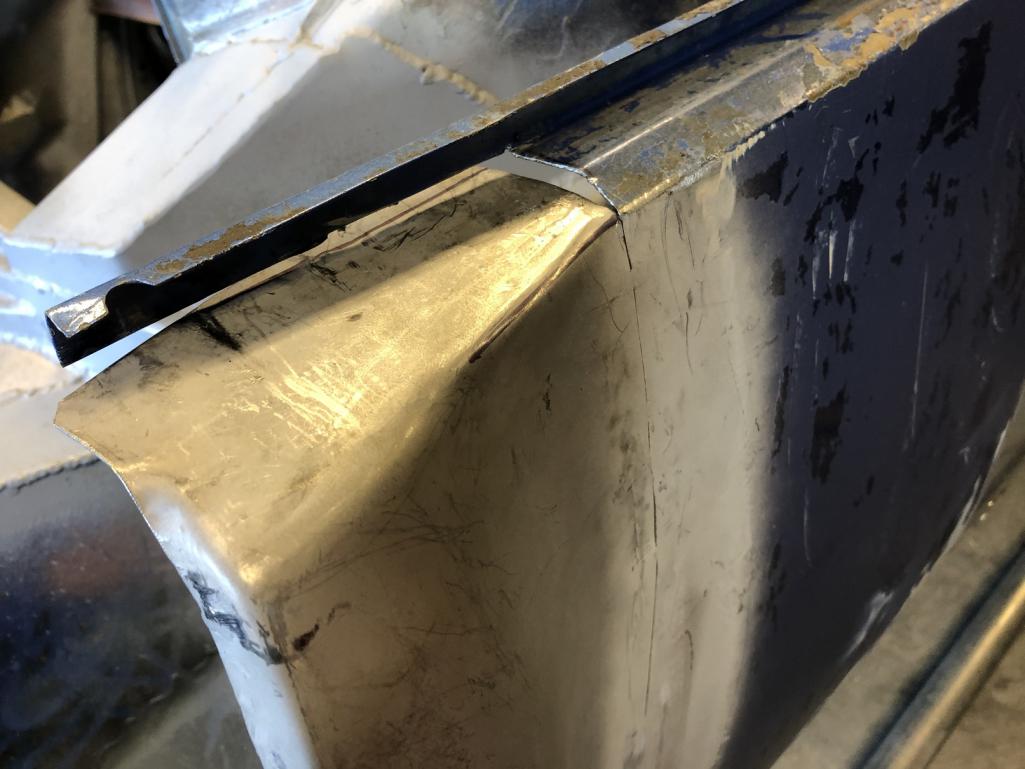
|
| tygaboy |
 Jan 5 2020, 05:59 PM Jan 5 2020, 05:59 PM
Post
#2182
|
|
914 Guru      Group: Members Posts: 5,552 Joined: 6-October 15 From: Petaluma, CA Member No.: 19,241 Region Association: Northern California 
|
That section of the chassis was in the way so I opted to slice it a bit and rotate it out of the way. It has the rocker mounting hole in it so I really wanted to keep it attached.
Again, worse before better? Eeesh... Anyway, with that first part crisped up, I bent the flare back up into alignment with that first, angled part of the chassis. Attached thumbnail(s) 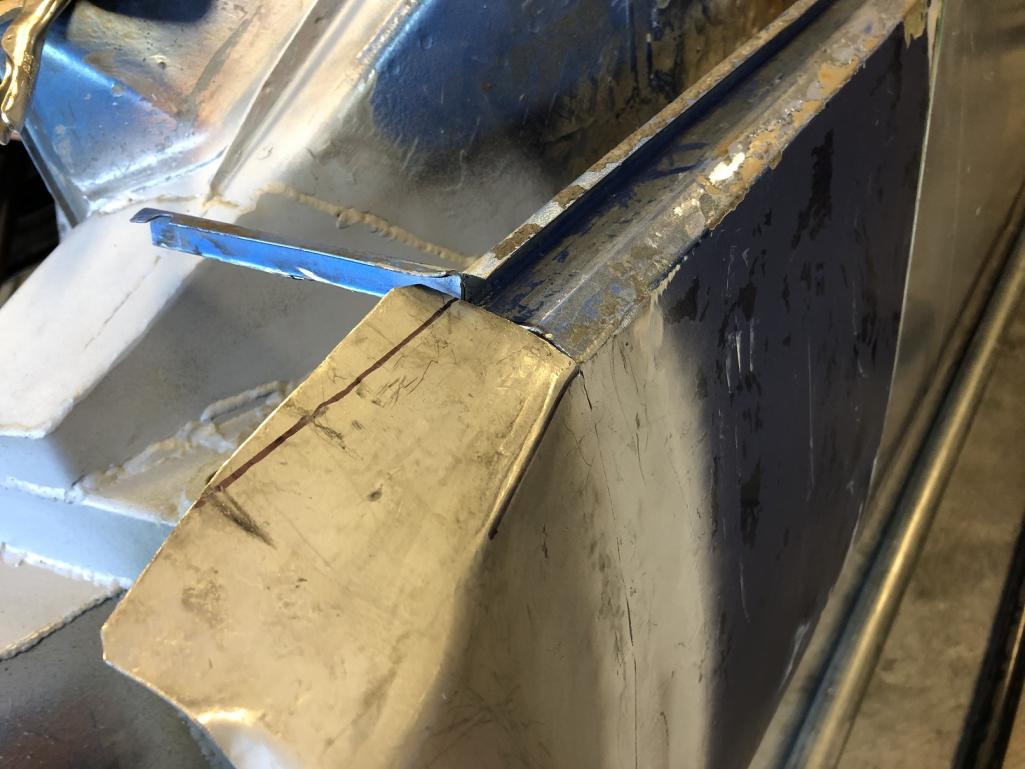
|
| tygaboy |
 Jan 5 2020, 06:01 PM Jan 5 2020, 06:01 PM
Post
#2183
|
|
914 Guru      Group: Members Posts: 5,552 Joined: 6-October 15 From: Petaluma, CA Member No.: 19,241 Region Association: Northern California 
|
Tack those planes together to keep things aligned.
Attached thumbnail(s) 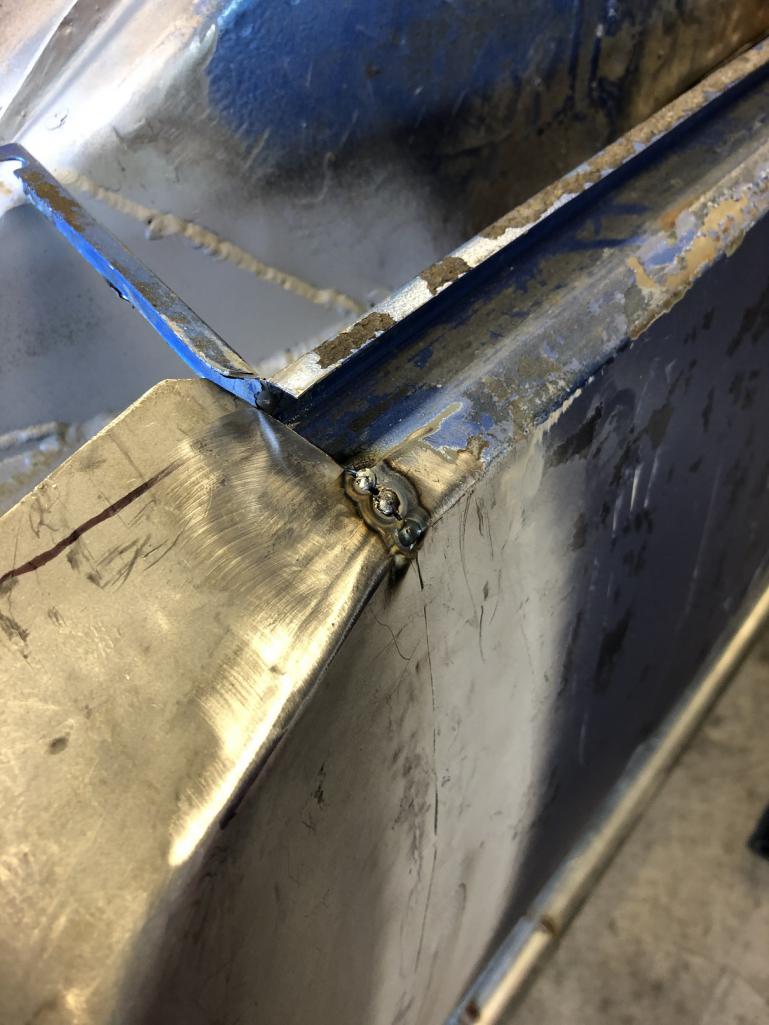
|
| tygaboy |
 Jan 5 2020, 06:02 PM Jan 5 2020, 06:02 PM
Post
#2184
|
|
914 Guru      Group: Members Posts: 5,552 Joined: 6-October 15 From: Petaluma, CA Member No.: 19,241 Region Association: Northern California 
|
Clamp the trusty "bending buck" into position and tip the flange to establish that 2nd crisp corner.
Attached thumbnail(s) 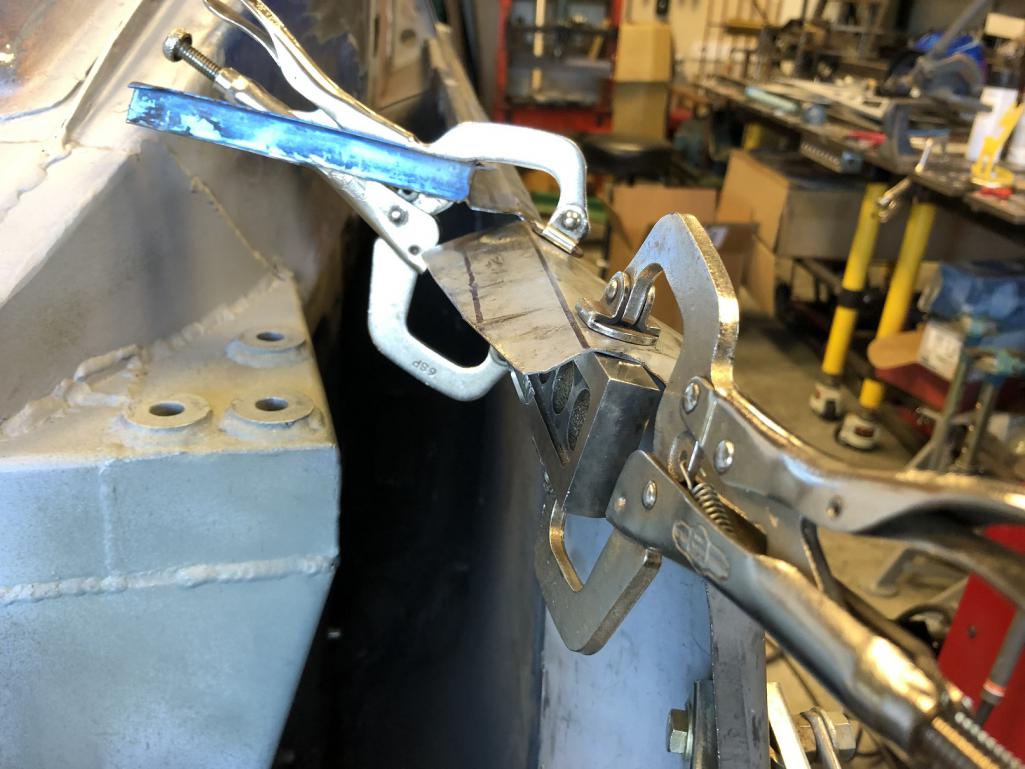
|
| tygaboy |
 Jan 5 2020, 06:03 PM Jan 5 2020, 06:03 PM
Post
#2185
|
|
914 Guru      Group: Members Posts: 5,552 Joined: 6-October 15 From: Petaluma, CA Member No.: 19,241 Region Association: Northern California 
|
Using this style of Vise Grip made aligning things more consistent than using only my hands or a hammer and dolly.
Attached thumbnail(s) 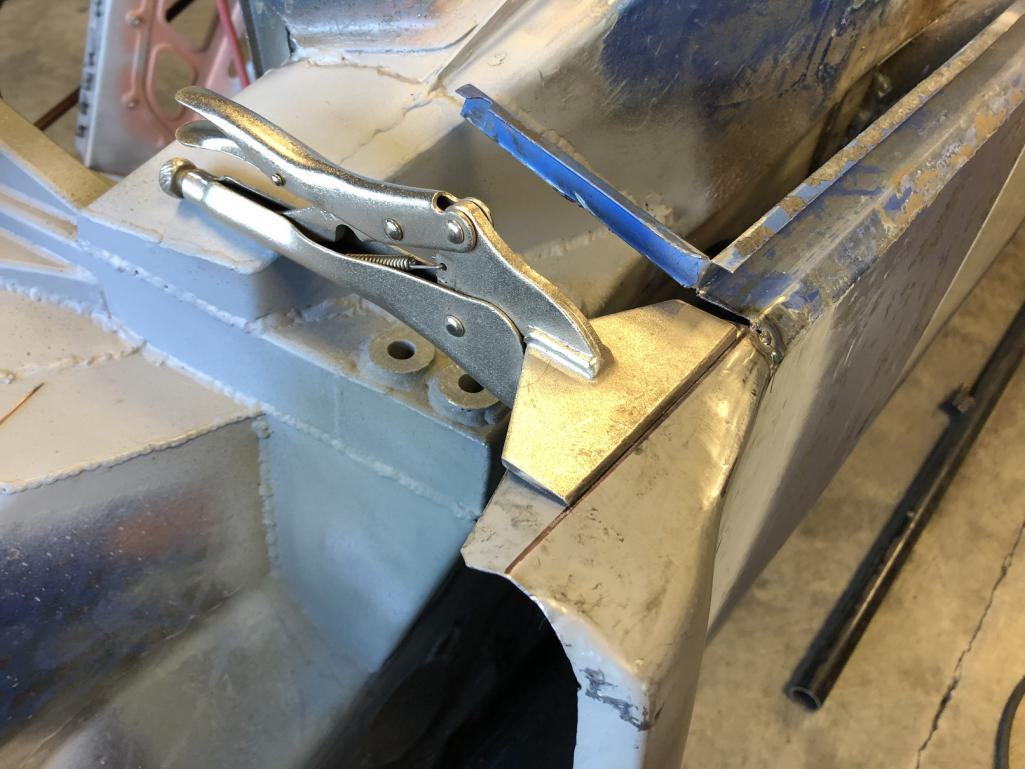
|
| tygaboy |
 Jan 5 2020, 06:04 PM Jan 5 2020, 06:04 PM
Post
#2186
|
|
914 Guru      Group: Members Posts: 5,552 Joined: 6-October 15 From: Petaluma, CA Member No.: 19,241 Region Association: Northern California 
|
Close up that seam.
Attached thumbnail(s) 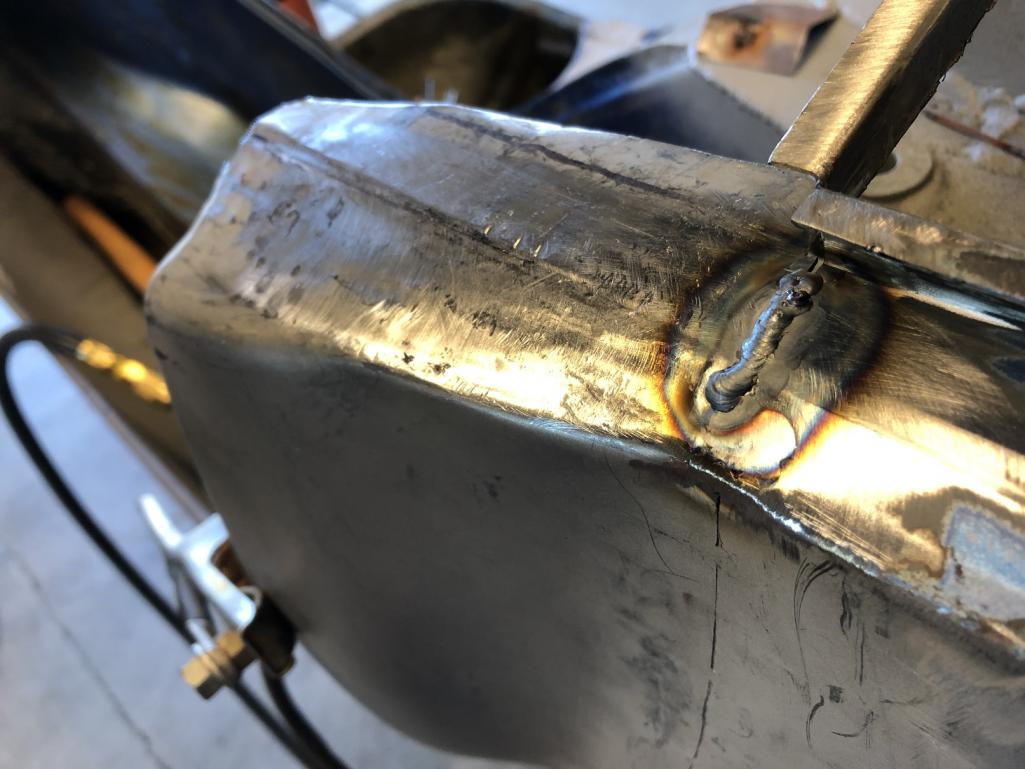
|
| tygaboy |
 Jan 5 2020, 06:09 PM Jan 5 2020, 06:09 PM
Post
#2187
|
|
914 Guru      Group: Members Posts: 5,552 Joined: 6-October 15 From: Petaluma, CA Member No.: 19,241 Region Association: Northern California 
|
Bend that small section back into position, lots of hammer and dolly work, weld things up, grind as needed, hammer and dolly, grind and conditioning disc everything and it's essentially done.
I will say that crisping up that first edge forced a flat-ish area into the lower about 1.5" of the flare bottom. (IMG:style_emoticons/default/idea.gif) I compared it to the other side, where the flare is "as delivered" and it's not quite as noticeably bad but also not really how I'd like things. I think I'll do a bit of slicing and dicing to move it into what I think is a better shape. It's always something, ain't it? Anyone else want to chime in on addressing these flare corner areas? Attached thumbnail(s) 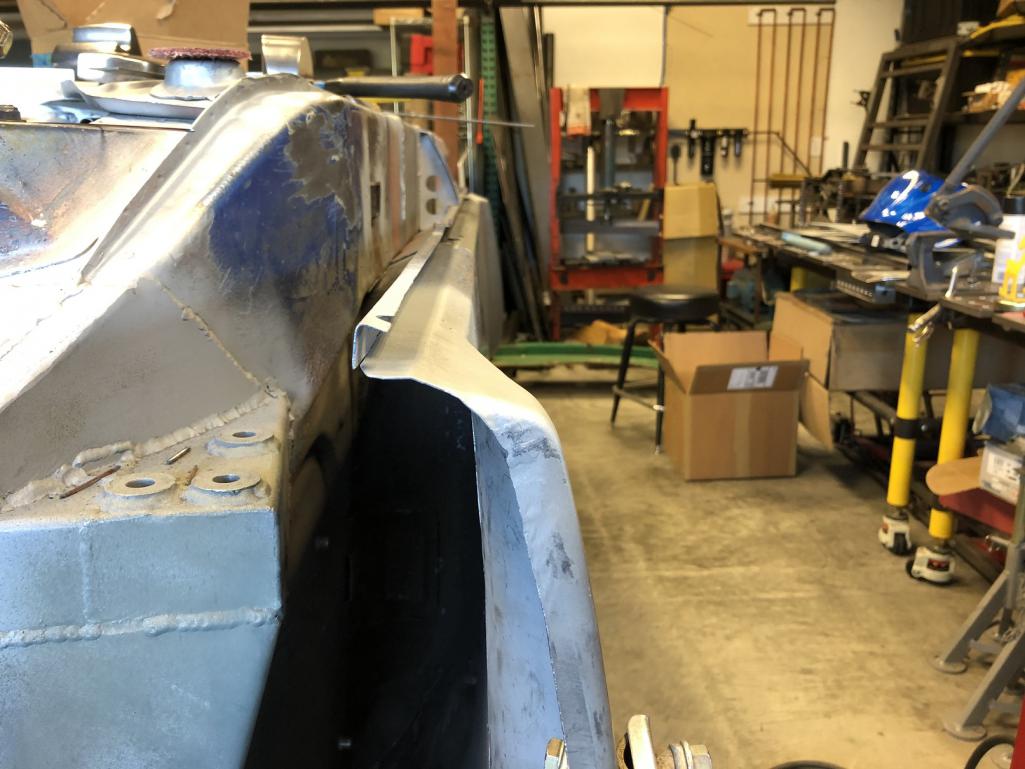
|
| Cracker |
 Jan 5 2020, 07:56 PM Jan 5 2020, 07:56 PM
Post
#2188
|
|
Advanced Member     Group: Members Posts: 2,148 Joined: 2-February 10 From: Atlanta (area) Member No.: 11,316 Region Association: South East States 
|
Very impressive Chris...I see surgery has had little effect at slowing you down!!! (IMG:style_emoticons/default/biggrin.gif)
T |
| tygaboy |
 Jan 6 2020, 12:52 PM Jan 6 2020, 12:52 PM
Post
#2189
|
|
914 Guru      Group: Members Posts: 5,552 Joined: 6-October 15 From: Petaluma, CA Member No.: 19,241 Region Association: Northern California 
|
Very impressive Chris...I see surgery has had little effect at slowing you down!!! (IMG:style_emoticons/default/biggrin.gif) T @Cracker Tony, the initial excision was nearly 2 weeks ago so I sorta figured I could do at least some stuff. The reconstruction surgery is tomorrow so it's back to another week of taking it easy. |
| tygaboy |
 Jan 6 2020, 12:58 PM Jan 6 2020, 12:58 PM
Post
#2190
|
|
914 Guru      Group: Members Posts: 5,552 Joined: 6-October 15 From: Petaluma, CA Member No.: 19,241 Region Association: Northern California 
|
I decided to see what I could do about that flat spot I introduced/exacerbated when I created the crisper corners. I started by using a small cut off wheel to make a couple relief cuts.
Then I used a curved dolly to try and persuade the curve to reappear. A bit hard to tell from the pic but it worked! The flat spot is gone. I'll weld things up and call this area done. Again, it going to require filler. But overall, another great learning, experience and skill development opportunity. When I do the other side, I think I'll make the relief cut first to see if I can "preserve the curve" as I'm crisping up those corners/bends. Attached thumbnail(s) 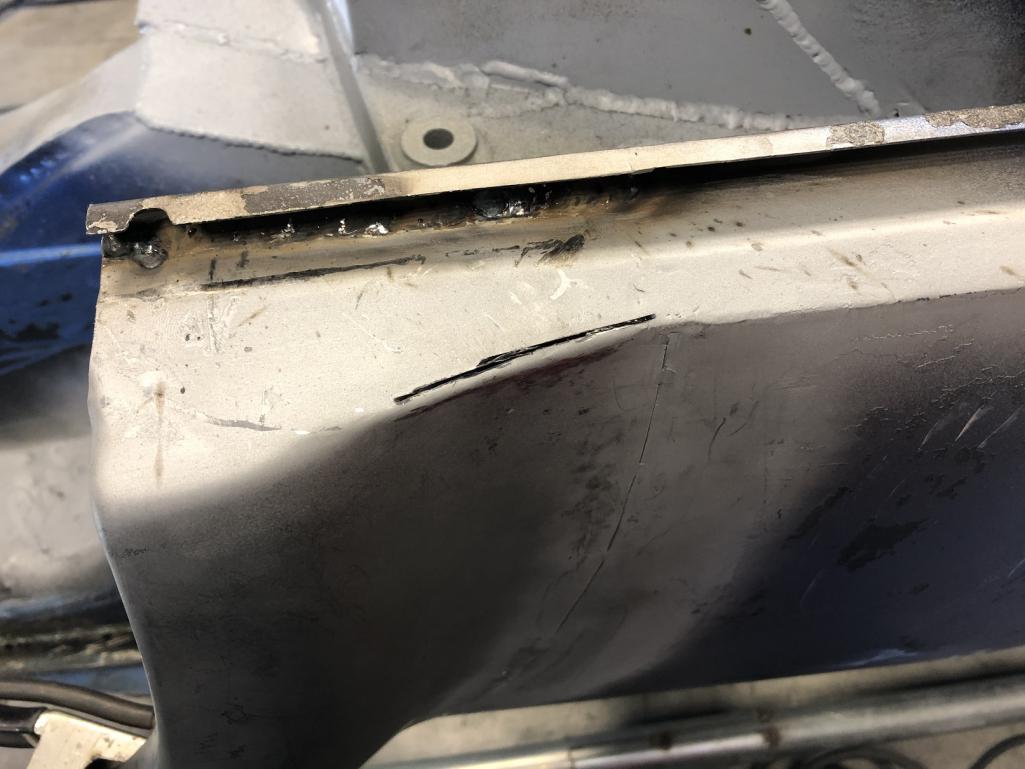 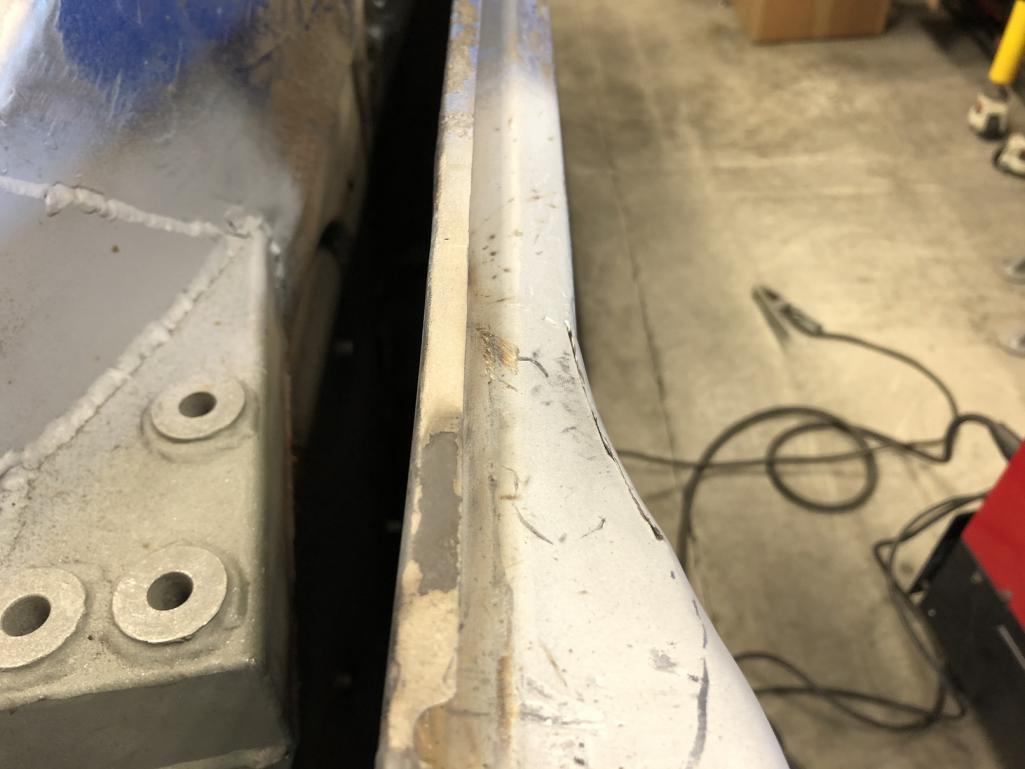
|
| ChrisFoley |
 Jan 6 2020, 01:27 PM Jan 6 2020, 01:27 PM
Post
#2191
|
|
I am Tangerine Racing      Group: Members Posts: 7,981 Joined: 29-January 03 From: Bolton, CT Member No.: 209 Region Association: None 
|
That little slice to restore the curve looks sorta familiar to me...
|
| 914forme |
 Jan 6 2020, 07:01 PM Jan 6 2020, 07:01 PM
Post
#2192
|
|
Times a wastin', get wrenchin'!     Group: Members Posts: 3,896 Joined: 24-July 04 From: Dayton, Ohio Member No.: 2,388 Region Association: None 
|
from the photos I can not tell if your face is flat on the curve, but the fenders look to have a slight radius on the edge. But the fender is more of a crisp edge. Is that what is making it look odd.
Custom T dolly and a slightly larger cut might be your friend. Advantage of metal, you can always shrink, stretch or weld it back to what you want. I don't have to tell you that. (IMG:style_emoticons/default/biggrin.gif) |
| tygaboy |
 Jan 8 2020, 09:07 AM Jan 8 2020, 09:07 AM
Post
#2193
|
|
914 Guru      Group: Members Posts: 5,552 Joined: 6-October 15 From: Petaluma, CA Member No.: 19,241 Region Association: Northern California 
|
Yeah, well you should see the other guy!
Reconstruction surgery was completed yesterday. All went well so a week of rest/no lifting and I'll be all set. Finger crossed that the 3rd time is the charm and this is the last of my issues. Oh, and fuck cancer. Attached thumbnail(s) 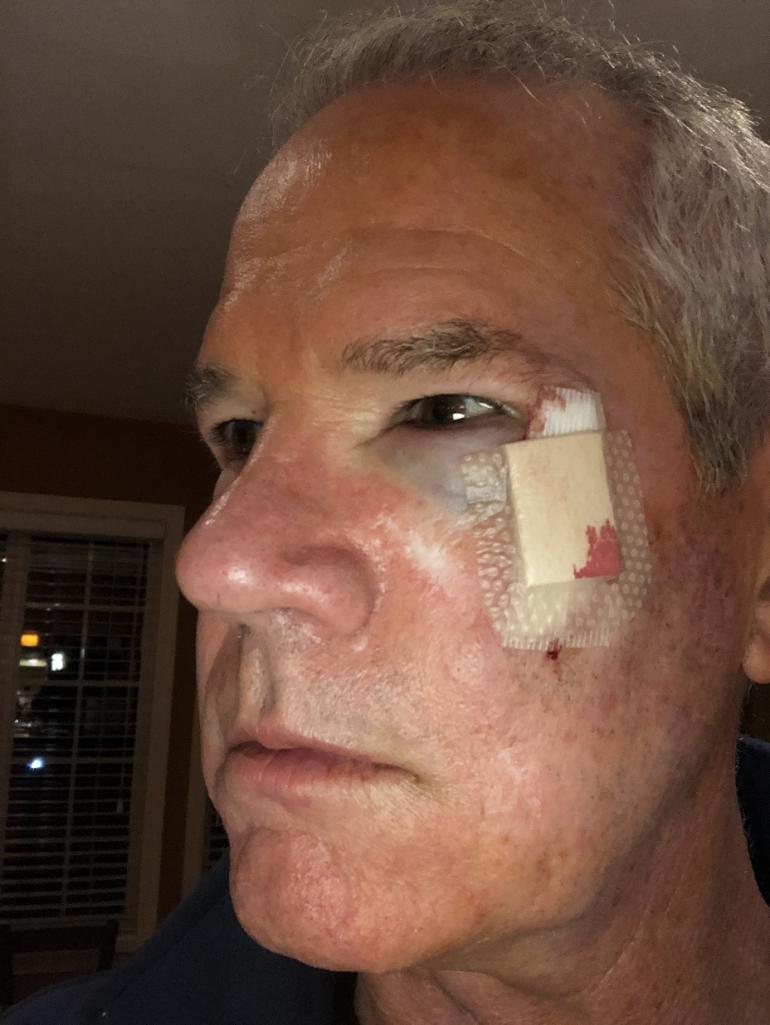
|
| Cracker |
 Jan 8 2020, 06:49 PM Jan 8 2020, 06:49 PM
Post
#2194
|
|
Advanced Member     Group: Members Posts: 2,148 Joined: 2-February 10 From: Atlanta (area) Member No.: 11,316 Region Association: South East States 
|
You'll be as pretty as always in a couple weeks! Be a good boy and lay low as instructed!!!
T |
| Krieger |
 Jan 9 2020, 12:58 AM Jan 9 2020, 12:58 AM
Post
#2195
|
|
Advanced Member     Group: Members Posts: 4,801 Joined: 24-May 04 From: Santa Rosa CA Member No.: 2,104 Region Association: None 
|
(IMG:style_emoticons/default/beerchug.gif) Time to watch some cartoons!
|
| Andyrew |
 Jan 10 2020, 11:07 AM Jan 10 2020, 11:07 AM
Post
#2196
|
|
Spooling.... Please wait           Group: Members Posts: 13,377 Joined: 20-January 03 From: Riverbank, Ca Member No.: 172 Region Association: Northern California 
|
Woo Hoo!!!! Success!
I hear someone's building a youtube channel with LS 914 content.. But you didnt hear that from me (IMG:style_emoticons/default/biggrin.gif) https://youtu.be/twl_gr6svqA |
| tygaboy |
 Jan 15 2020, 04:33 PM Jan 15 2020, 04:33 PM
Post
#2197
|
|
914 Guru      Group: Members Posts: 5,552 Joined: 6-October 15 From: Petaluma, CA Member No.: 19,241 Region Association: Northern California 
|
I've passed the "wait a week after surgery before doing anything strenuous" time period so I'm back in the shop!
Today it was another of the flare corners. I must be out of practice - I neglected to take any pics of what I did. All I can do is show the other side to give an idea of the before/after. Here's another example of what the corners look like: wrinkly and folded over on itself. Wait...that sounds like what's happening to me! (IMG:style_emoticons/default/lol-2.gif) You can see it's the same story with the flare corner not being crisp or being anywhere close to the shape of the chassis, no flange, etc, etc. Attached thumbnail(s) 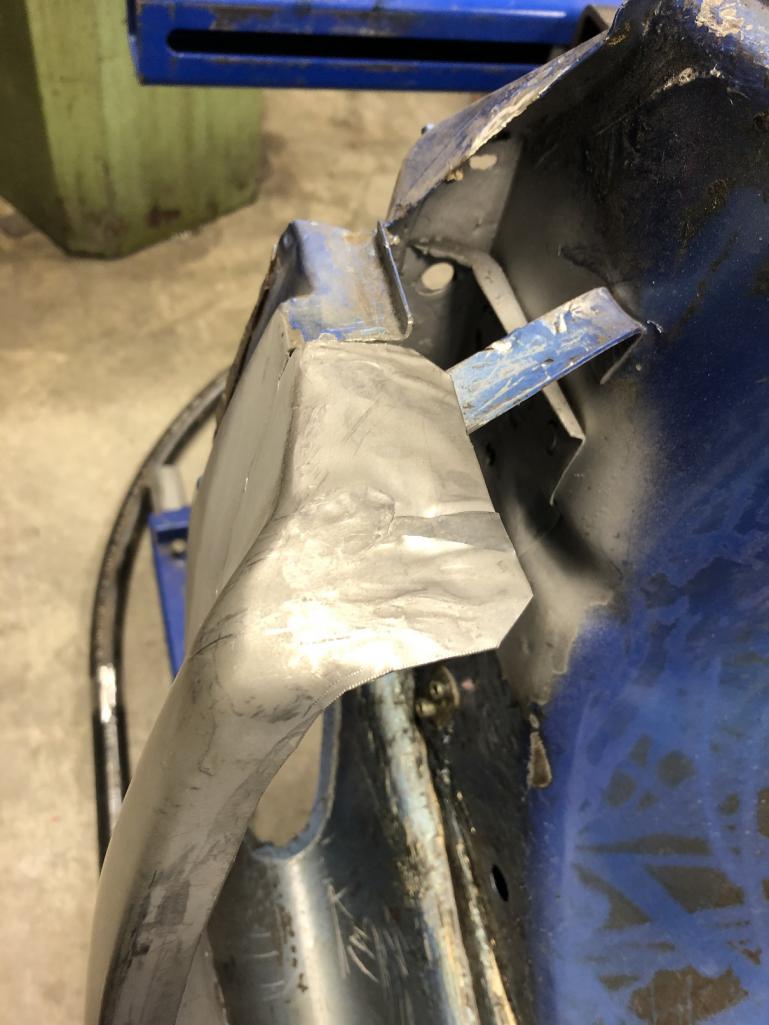 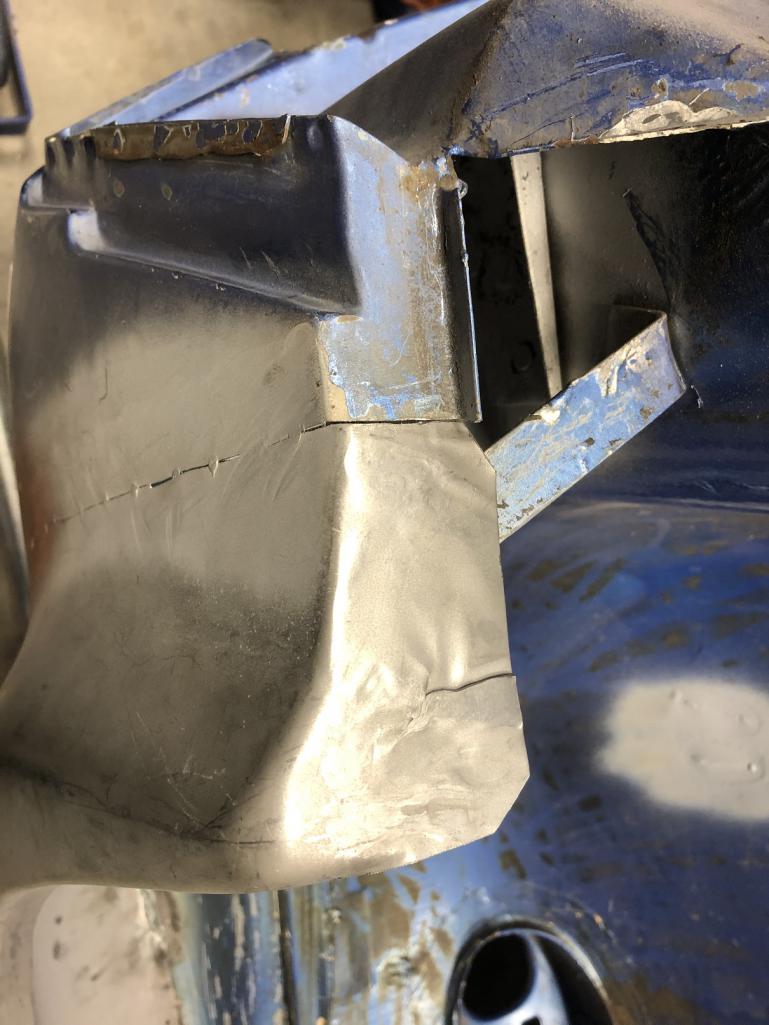
|
| tygaboy |
 Jan 15 2020, 04:36 PM Jan 15 2020, 04:36 PM
Post
#2198
|
|
914 Guru      Group: Members Posts: 5,552 Joined: 6-October 15 From: Petaluma, CA Member No.: 19,241 Region Association: Northern California 
|
Again, sorry for no in-process shots but here's how this corner turned out. Obviously, it'll need filler but it's lots better than what I started with. On to the next one.
Attached thumbnail(s) 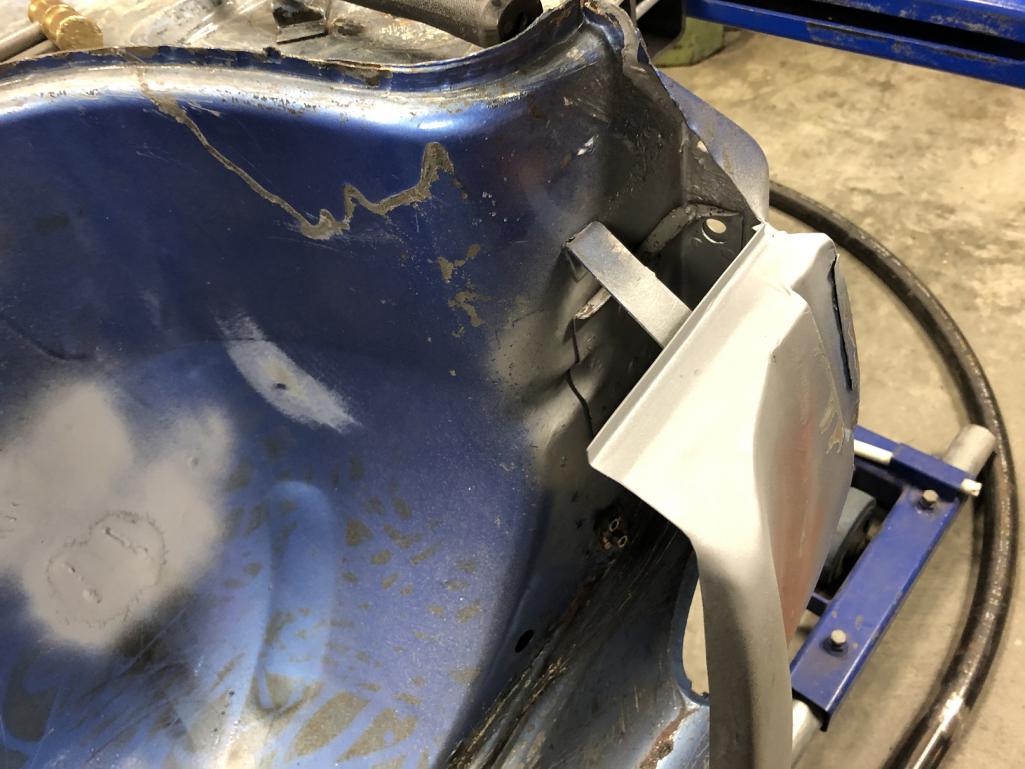 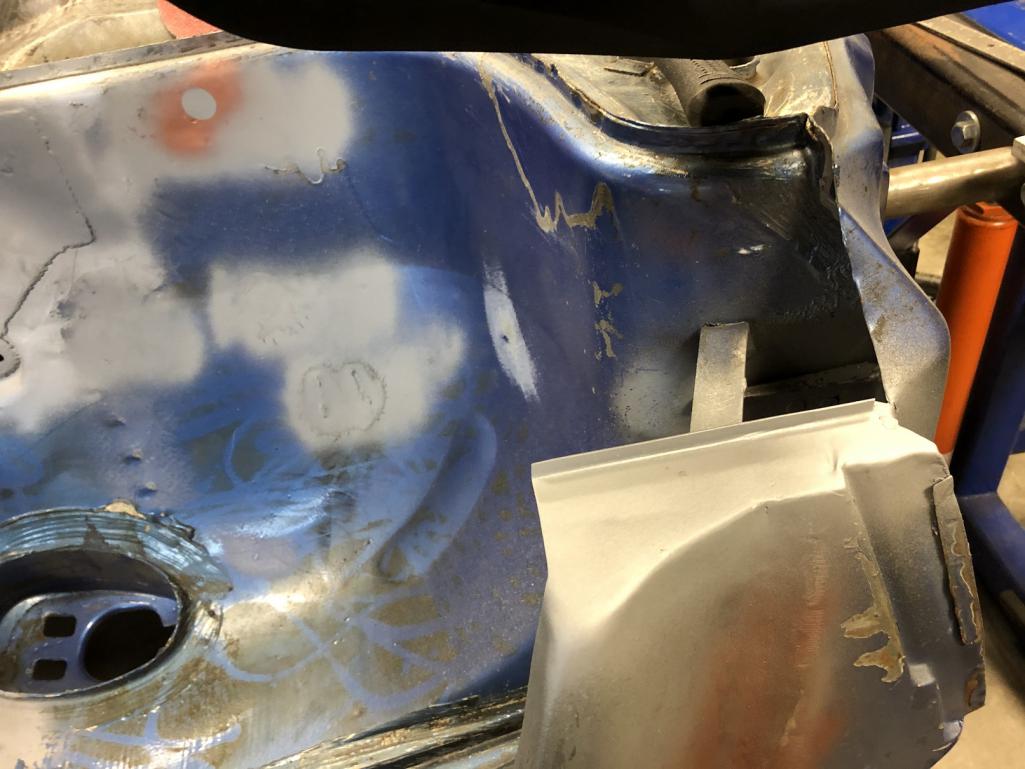
|
| Cairo94507 |
 Jan 15 2020, 05:04 PM Jan 15 2020, 05:04 PM
Post
#2199
|
|
Michael           Group: Members Posts: 10,301 Joined: 1-November 08 From: Auburn, CA Member No.: 9,712 Region Association: Northern California 
|
Great work Chris; glad you are back out in the shop. (IMG:style_emoticons/default/beerchug.gif)
|
| 914forme |
 Jan 15 2020, 06:06 PM Jan 15 2020, 06:06 PM
Post
#2200
|
|
Times a wastin', get wrenchin'!     Group: Members Posts: 3,896 Joined: 24-July 04 From: Dayton, Ohio Member No.: 2,388 Region Association: None 
|
Looks great, its all a learning process the next one will turn out even better.
|
  |
1 User(s) are reading this topic (1 Guests and 0 Anonymous Users)
0 Members:

|
Lo-Fi Version | Time is now: 25th April 2025 - 08:38 PM |
Invision Power Board
v9.1.4 © 2025 IPS, Inc.


