|
|

|
Porsche, and the Porsche crest are registered trademarks of Dr. Ing. h.c. F. Porsche AG.
This site is not affiliated with Porsche in any way. Its only purpose is to provide an online forum for car enthusiasts. All other trademarks are property of their respective owners. |
|
|
  |
| tygaboy |
 May 5 2020, 04:49 PM May 5 2020, 04:49 PM
Post
#2581
|
|
914 Guru      Group: Members Posts: 5,552 Joined: 6-October 15 From: Petaluma, CA Member No.: 19,241 Region Association: Northern California 
|
OK @tazz9924 , mismatched fasteners bug me, too! I'm OK with the different sizes, as mentioned. But I'll sleep better tonight! (IMG:style_emoticons/default/happy11.gif)
Attached thumbnail(s) 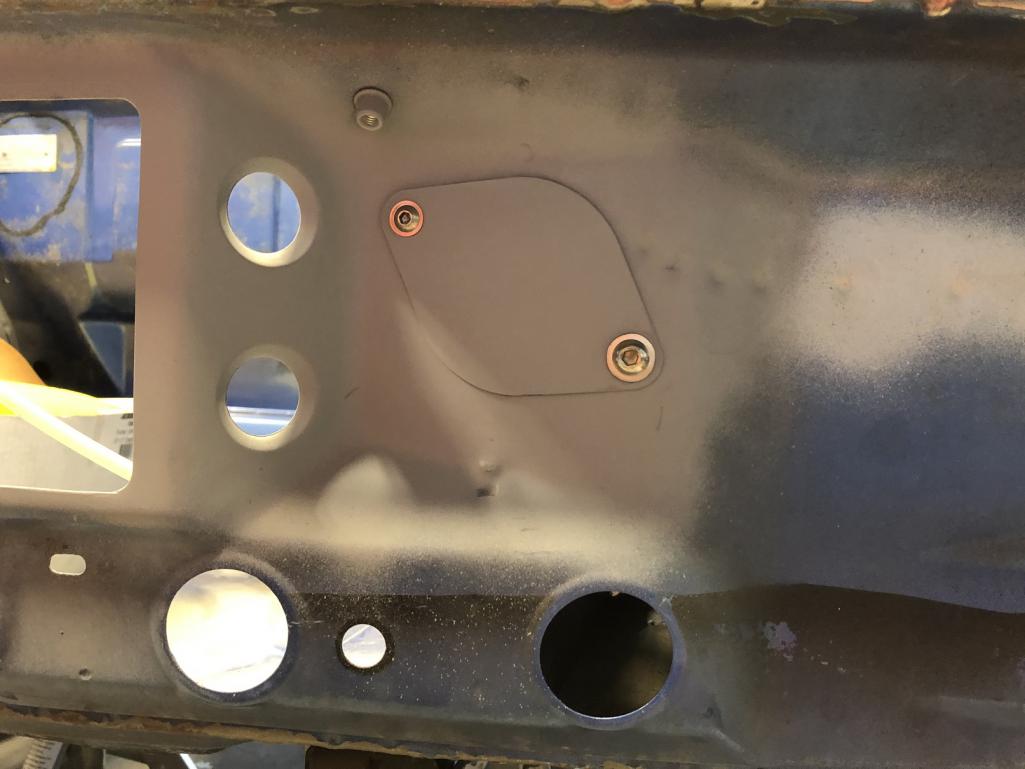
|
| tygaboy |
 May 5 2020, 04:58 PM May 5 2020, 04:58 PM
Post
#2582
|
|
914 Guru      Group: Members Posts: 5,552 Joined: 6-October 15 From: Petaluma, CA Member No.: 19,241 Region Association: Northern California 
|
Work today was making the bulkhead-to-fuel rail lines and assembling other tunnel items.
Talk about non 914 stuff... Here's the Numeric shifter and my fancy shifter cables firewall pass through set up, compete with split grommets and cover plate. As I'm putting things together, I realize I could never feel good about selling this car unless I created a shop manual! (IMG:style_emoticons/default/lol-2.gif) Attached thumbnail(s) 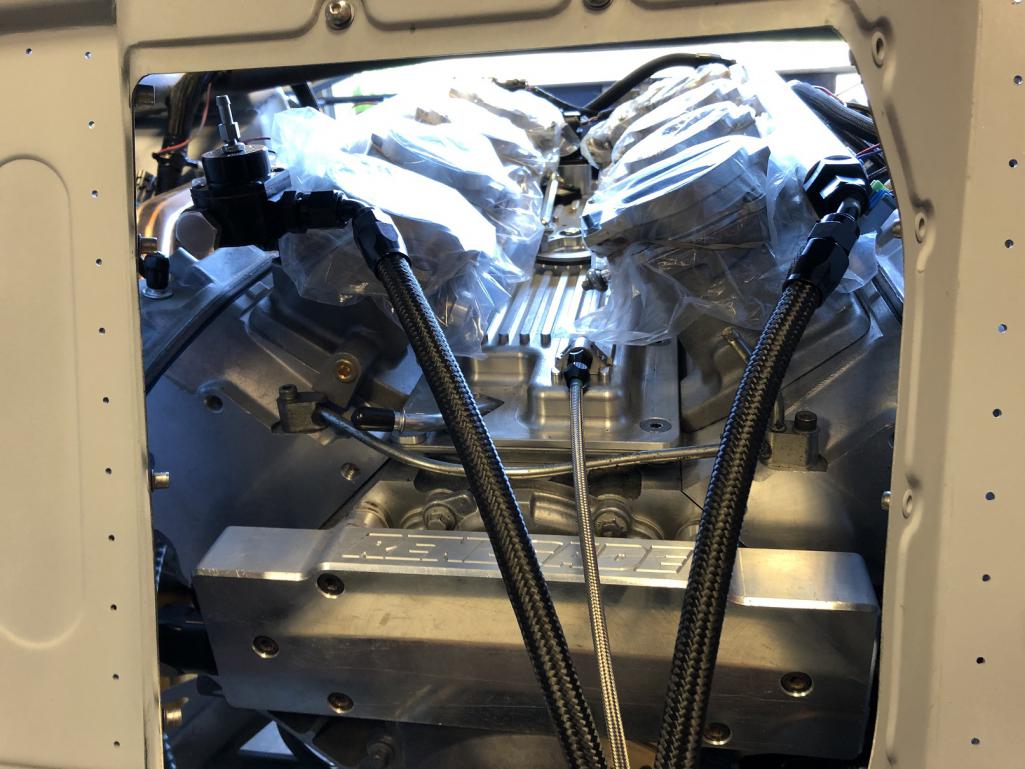 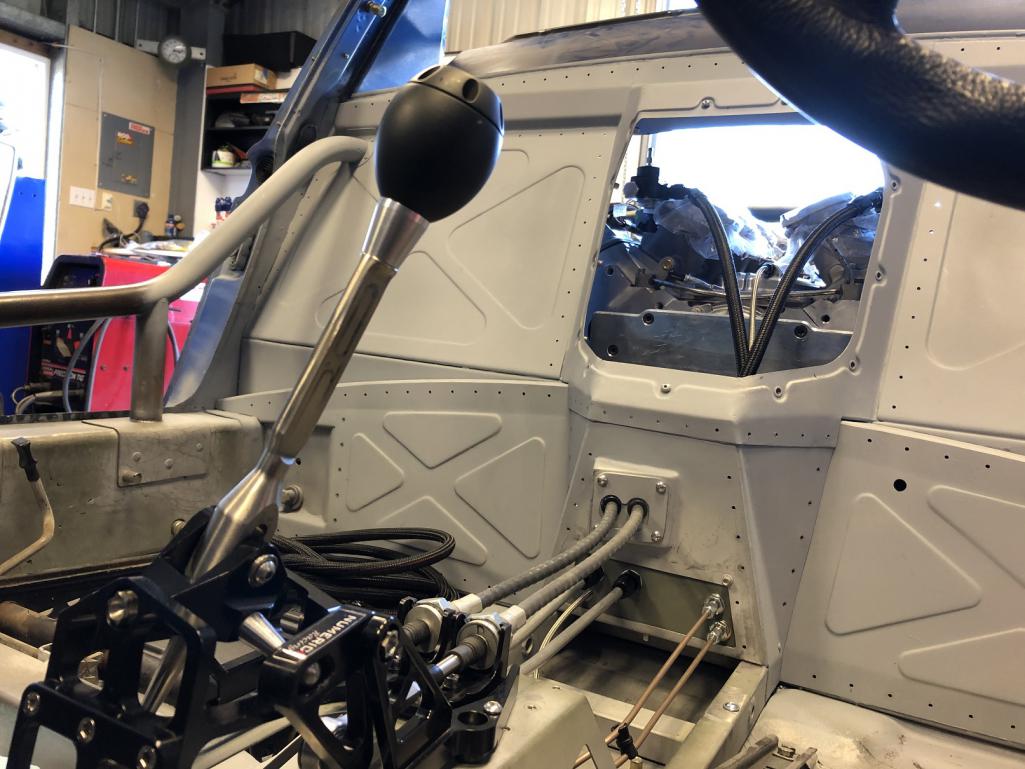 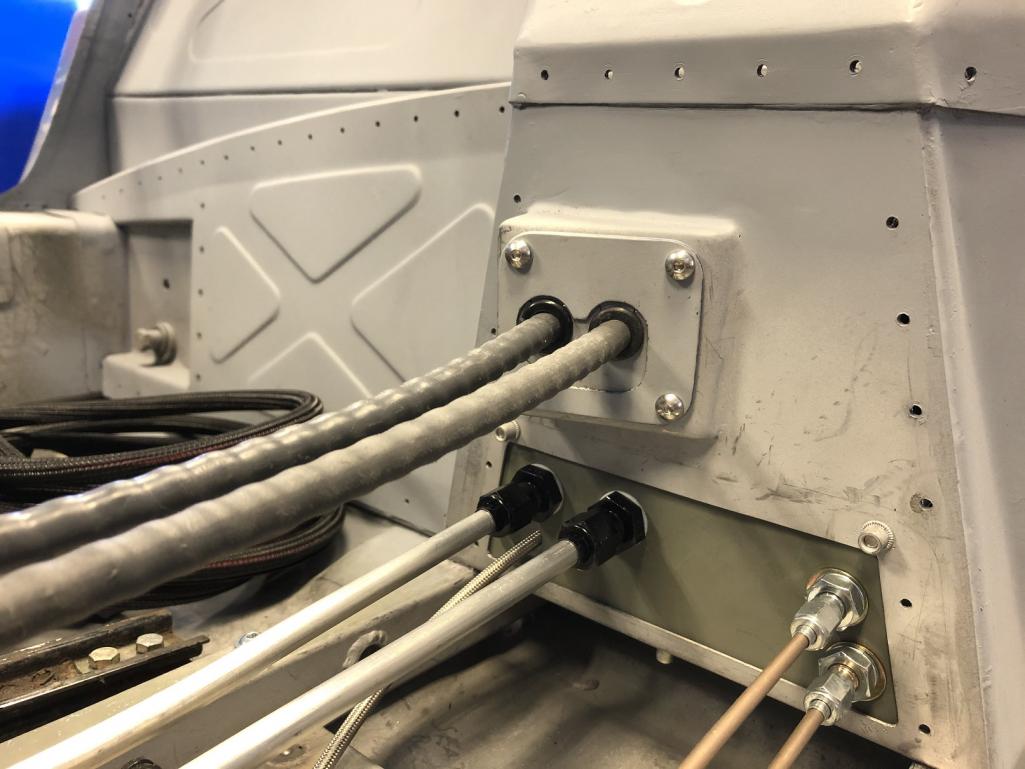
|
| Cracker |
 May 5 2020, 05:29 PM May 5 2020, 05:29 PM
Post
#2583
|
|
Advanced Member     Group: Members Posts: 2,148 Joined: 2-February 10 From: Atlanta (area) Member No.: 11,316 Region Association: South East States 
|
Chris: One correction, sir. I actually use the larger 997 front calipers on the front of my car and Boxster S Front calipers on my rears. Not quite the same but close enough...
Tony I couldn't resist a quick mock up! These are standard Boxster calipers, not Boxster S. They work for Tony @Cracker and his LS 914 and he sees nearly 170 at Road Atlanta... |
| tazz9924 |
 May 6 2020, 05:59 AM May 6 2020, 05:59 AM
Post
#2584
|
|
Senior Member    Group: Members Posts: 725 Joined: 31-May 15 From: Mooresville NC Member No.: 18,779 Region Association: None |
OK @tazz9924 , mismatched fasteners bug me, too! I'm OK with the different sizes, as mentioned. But I'll sleep better tonight! (IMG:style_emoticons/default/happy11.gif) Ok build is saved, you had me worried there (IMG:style_emoticons/default/biggrin.gif) |
| Cairo94507 |
 May 6 2020, 07:24 AM May 6 2020, 07:24 AM
Post
#2585
|
|
Michael           Group: Members Posts: 10,301 Joined: 1-November 08 From: Auburn, CA Member No.: 9,712 Region Association: Northern California 
|
Master craftsman level work and build. (IMG:style_emoticons/default/beerchug.gif)
|
| tygaboy |
 May 6 2020, 04:06 PM May 6 2020, 04:06 PM
Post
#2586
|
|
914 Guru      Group: Members Posts: 5,552 Joined: 6-October 15 From: Petaluma, CA Member No.: 19,241 Region Association: Northern California 
|
@Cairo94507 Michael - I really appreciate that. You are too kind. I have loads more to learn and my skills continue to improve. But I will say, I'm pretty happy with how it's turning out. |
| tygaboy |
 May 6 2020, 04:12 PM May 6 2020, 04:12 PM
Post
#2587
|
|
914 Guru      Group: Members Posts: 5,552 Joined: 6-October 15 From: Petaluma, CA Member No.: 19,241 Region Association: Northern California 
|
With the drive train in, I had to put it on the ground again and mess with the ride height.
I suspect I'm WAAAAY oversprung on the rear so I've posted a thread asking what torsion bars and rear spring rates other V8 folks are running. I'd like to see the rear about an inch lower. But it's looking loads better than it did with no drive train in it! I figured I'd also use this "on the ground" opportunity to do a home alignment, just to be sure everything is in range and there are no surprises, what with the work I did installing the Tangerine rear suspension pick up kit. Attached thumbnail(s) 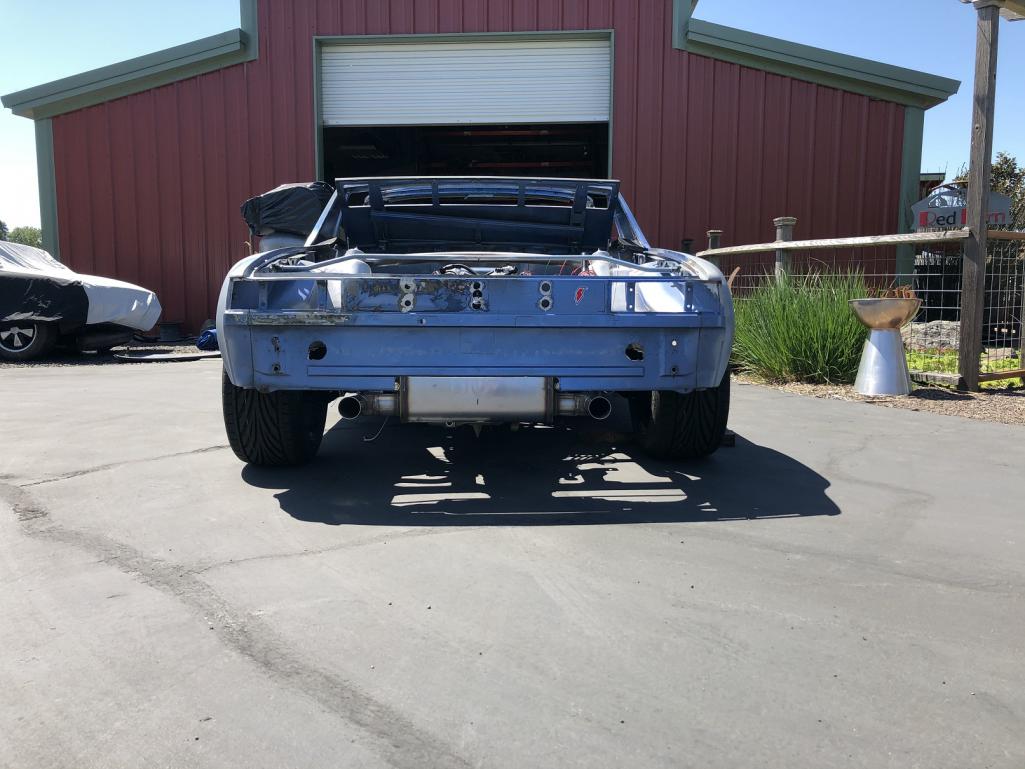 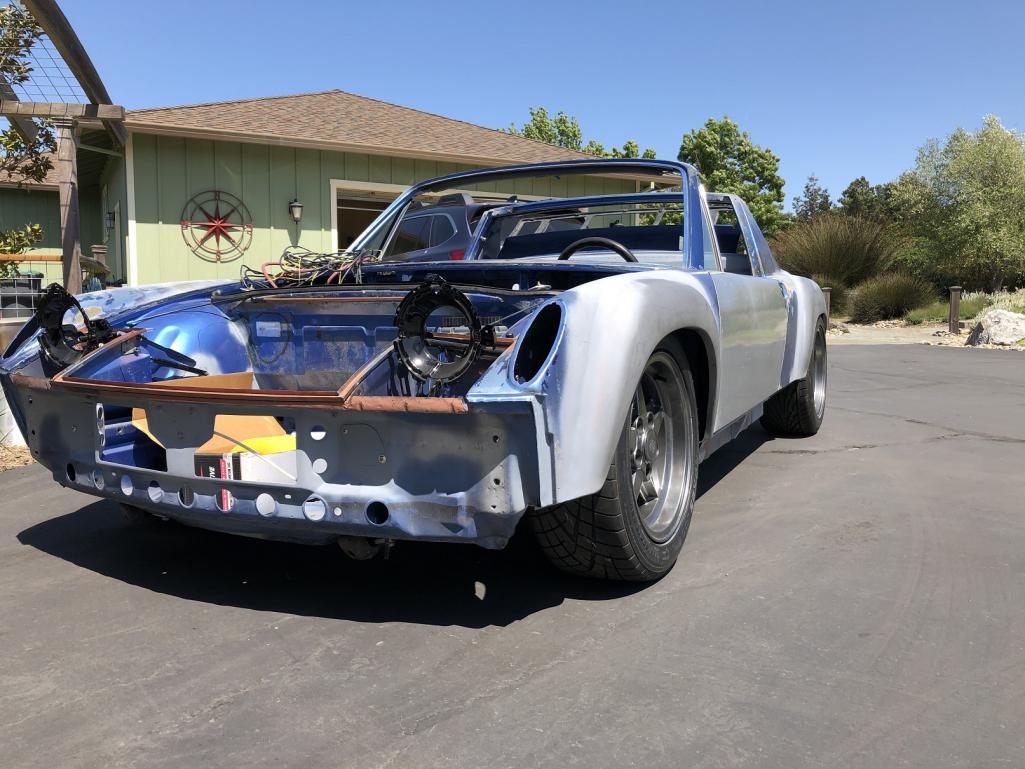 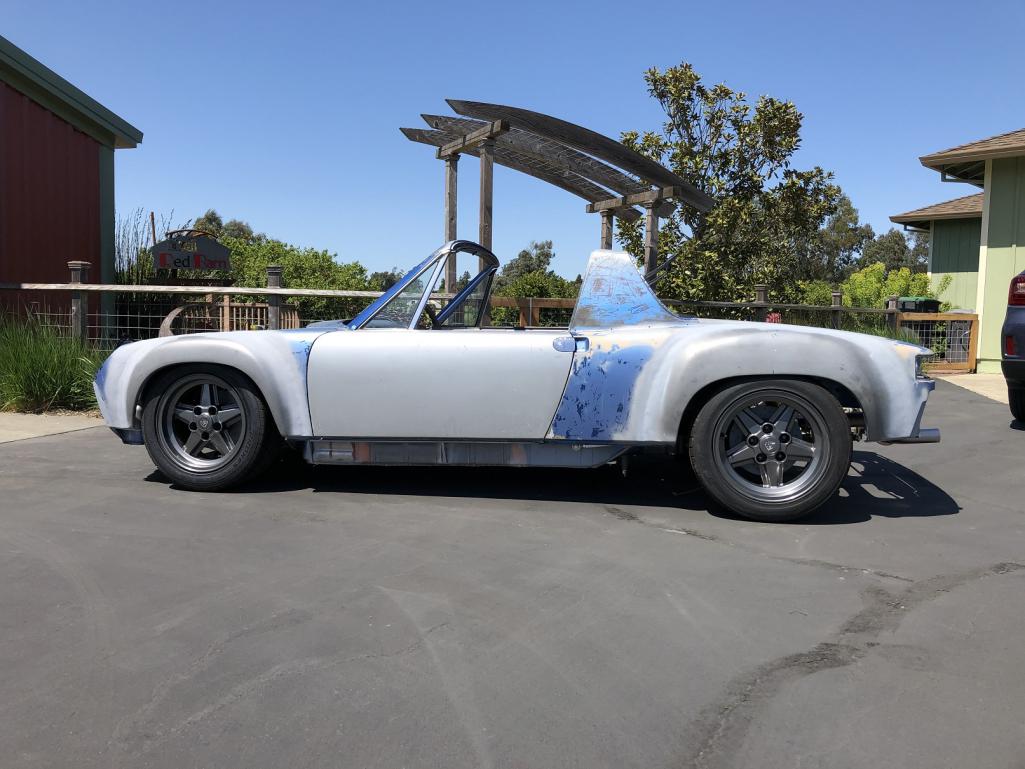
|
| Cairo94507 |
 May 6 2020, 05:25 PM May 6 2020, 05:25 PM
Post
#2588
|
|
Michael           Group: Members Posts: 10,301 Joined: 1-November 08 From: Auburn, CA Member No.: 9,712 Region Association: Northern California 
|
( @tygaboy ) Chris - Are you shooting for about 1/2" higher in the rear than the front? Also....what is that under the cover with the Fuchs? (IMG:style_emoticons/default/beerchug.gif)
|
| Retroracer |
 May 6 2020, 05:42 PM May 6 2020, 05:42 PM
Post
#2589
|
|
Senior Member    Group: Members Posts: 640 Joined: 7-July 13 From: Bend OR Member No.: 16,100 Region Association: Pacific Northwest 
|
Chris - feel free to completely ignore this; this is your build and this just some food for thought, as I know you like to mull over multiple options on features. Also, I know how annoying it can get sometimes when people tell you how things "should be designed" on something that you've designed and crafted for yourself!
So that said, was thinking about your hood venting. How about considering an alternate route? Weld back the center panel that I know you kept; Then: move the vents to the sides of the hood, following the headlamp line up and back (to just before the fuel tank bulkhead). This follows and extends the natural line of the hood/headlight inset, and parallels the hood edge. Louvers set at an angle give a hint of Urquattro (fine European design), as well as directing the hot trunk air to follow the angled airflow around the base of the windshield. When the lights are popped, the chaotic airflow around their rear sides may even help cooling..! Up close, the viewer gets a "peekaboo" effect on the fender inners with that gorgeous double curved, near spherical area beneath. Am assuming the entire trunk will act as a plenum, unless you get into some wacky ducting. Anyway, just a thought, dodgy sketch follows which hopefully helps: 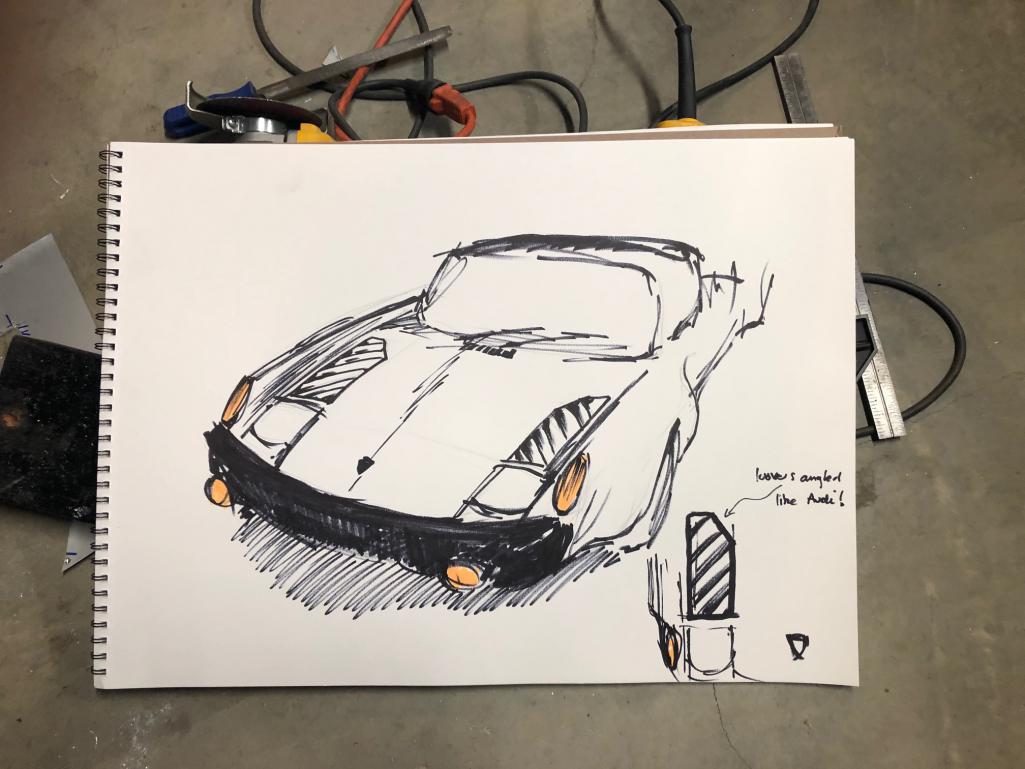 - Tony |
| tygaboy |
 May 6 2020, 06:23 PM May 6 2020, 06:23 PM
Post
#2590
|
|
914 Guru      Group: Members Posts: 5,552 Joined: 6-October 15 From: Petaluma, CA Member No.: 19,241 Region Association: Northern California 
|
@Retroracer - Tony - I REALLY like that design! It appeals to the "mine's different" vibe I hope to create with my build.
Now, I'm no aerodynamic engineer but I wonder if there's enough "alignment" between the radiator and those vents to end up with sufficient airflow. Plus, I think much of the rear of those is past the fuel tank bulkhead. Mostly, it'd require I rebuild the hood's support structure to pull that off. I'll take a look at those details tomorrow. But again: I think that's the most cohesive looking hood vent set up I've seen! Thanks for putting in the effort to draw up the design and suggest it! I owe you one... |
| tygaboy |
 May 6 2020, 06:27 PM May 6 2020, 06:27 PM
Post
#2591
|
|
914 Guru      Group: Members Posts: 5,552 Joined: 6-October 15 From: Petaluma, CA Member No.: 19,241 Region Association: Northern California 
|
@Retroracer Tony - ooooh! It just struck me: What if I made the vents part of the chassis and they stayed in place while the hood was narrowed so it opened without them?
I mean, if you're going to go for it, go ALL the way for it! (IMG:style_emoticons/default/aktion035.gif) |
| Mueller |
 May 6 2020, 06:30 PM May 6 2020, 06:30 PM
Post
#2592
|
|
914 Freak!                Group: Members Posts: 17,150 Joined: 4-January 03 From: Antioch, CA Member No.: 87 Region Association: None 
|
I dig that sketch there Tony.
Those vents look very appealing. Maybe with the radiator tilting at an acute angle relative to the hood would help and maybe a small splitter to help direct the air towards vents |
| Superhawk996 |
 May 6 2020, 06:34 PM May 6 2020, 06:34 PM
Post
#2593
|
|
914 Guru      Group: Members Posts: 6,997 Joined: 25-August 18 From: Woods of N. Idaho Member No.: 22,428 Region Association: Galt's Gulch 
|
|
| Krieger |
 May 6 2020, 06:39 PM May 6 2020, 06:39 PM
Post
#2594
|
|
Advanced Member     Group: Members Posts: 4,801 Joined: 24-May 04 From: Santa Rosa CA Member No.: 2,104 Region Association: None 
|
@Retroracer Tony - ooooh! It just struck me: What if I made the vents part of the chassis and they stayed in place while the hood was narrowed so it opened without them? I mean, if you're going to go for it, go ALL the way for it! (IMG:style_emoticons/default/aktion035.gif) That would be seeeeeexy! Just do it! |
| Dion |
 May 6 2020, 06:51 PM May 6 2020, 06:51 PM
Post
#2595
|
|
RN     Group: Members Posts: 2,839 Joined: 16-September 04 From: Audubon,PA Member No.: 2,766 Region Association: MidAtlantic Region 

|
Tony that’s pretty bad-ass. Do it Chris! I’m liking the “part of the chassis” idea.
Attached image(s) 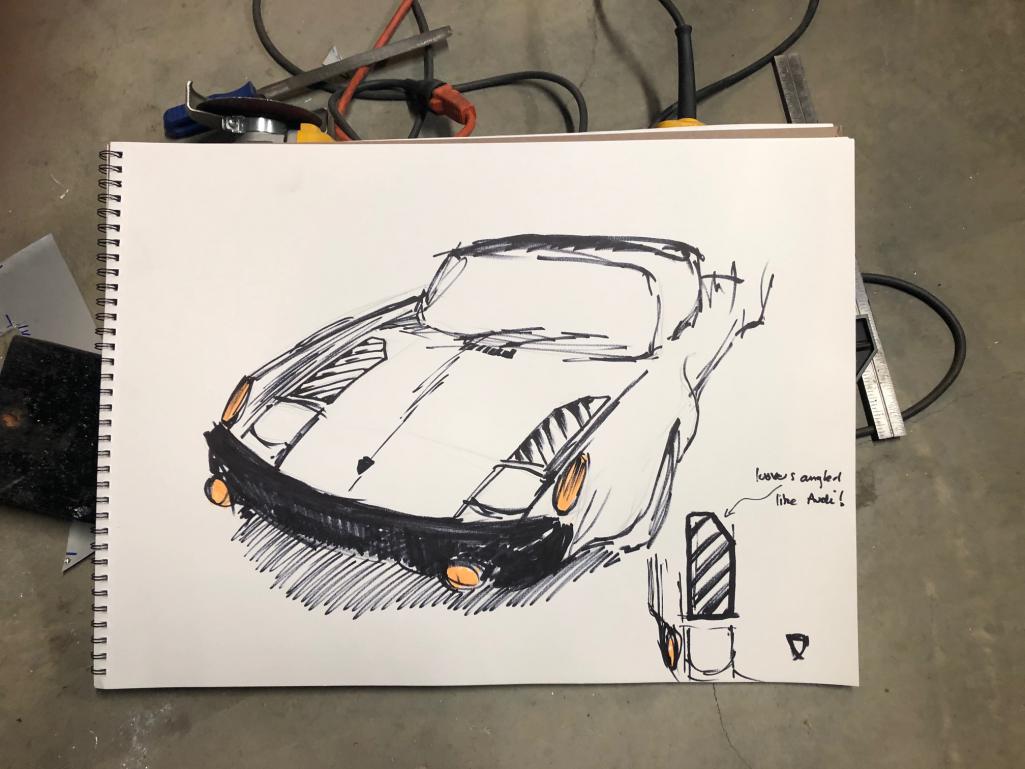
|
| live free & drive |
 May 6 2020, 06:54 PM May 6 2020, 06:54 PM
Post
#2596
|
|
Member   Group: Members Posts: 190 Joined: 29-June 16 From: New Hampshire Member No.: 20,159 Region Association: None 
|
Retro -I don't know if you are an ID guy, but I am, and was thinking along the same lines. For example this car is well integrated as a whole thought and includes similar vents to those that you propose:
http://www.914world.com/bbs2/index.php?showtopic=333845 |
| Retroracer |
 May 6 2020, 07:02 PM May 6 2020, 07:02 PM
Post
#2597
|
|
Senior Member    Group: Members Posts: 640 Joined: 7-July 13 From: Bend OR Member No.: 16,100 Region Association: Pacific Northwest 
|
@Retroracer Tony - ooooh! It just struck me: What if I made the vents part of the chassis and they stayed in place while the hood was narrowed so it opened without them? I mean, if you're going to go for it, go ALL the way for it! (IMG:style_emoticons/default/aktion035.gif) I like that! deep, deep louvers.... - Tony |
| Retroracer |
 May 6 2020, 07:11 PM May 6 2020, 07:11 PM
Post
#2598
|
|
Senior Member    Group: Members Posts: 640 Joined: 7-July 13 From: Bend OR Member No.: 16,100 Region Association: Pacific Northwest 
|
Retro -I don't know if you are an ID guy, but I am, and was thinking along the same lines. For example this car is well integrated as a whole thought and includes similar vents to those that you propose: http://www.914world.com/bbs2/index.php?showtopic=333845 I recall seeing that car before; similar concept on the vents but not really following the shut line of the lights - which as @tygaboy points out, will necessitate rethinking the underlying support framing. Also that has a rather aggressive Gurney strip on the front edge, and with the net positive pressure in the frunk (with air being rammed in through the rad at speed) I'm not sure you'd need it? - Tony PS. Not an ID guy; my training and career has been around electronics. I do have delusions of creativity occasionally. |
| Krieger |
 May 6 2020, 07:12 PM May 6 2020, 07:12 PM
Post
#2599
|
|
Advanced Member     Group: Members Posts: 4,801 Joined: 24-May 04 From: Santa Rosa CA Member No.: 2,104 Region Association: None 
|
Poor Chris! This time we're revising his work! (IMG:style_emoticons/default/poke.gif)
|
| Krieger |
 May 6 2020, 07:24 PM May 6 2020, 07:24 PM
Post
#2600
|
|
Advanced Member     Group: Members Posts: 4,801 Joined: 24-May 04 From: Santa Rosa CA Member No.: 2,104 Region Association: None 
|
With the drive train in, I had to put it on the ground again and mess with the ride height. I suspect I'm WAAAAY oversprung on the rear so I've posted a thread asking what torsion bars and rear spring rates other V8 folks are running. I'd like to see the rear about an inch lower. But it's looking loads better than it did with no drive train in it! I figured I'd also use this "on the ground" opportunity to do a home alignment, just to be sure everything is in range and there are no surprises, what with the work I did installing the Tangerine rear suspension pick up kit. What rear springs rate are you running? I had to have a couple more grooves cut in my Konis to get my rear end down. My rear springs are 200# |
  |
1 User(s) are reading this topic (1 Guests and 0 Anonymous Users)
0 Members:

|
Lo-Fi Version | Time is now: 26th April 2025 - 05:55 AM |
Invision Power Board
v9.1.4 © 2025 IPS, Inc.


