|
|

|
Porsche, and the Porsche crest are registered trademarks of Dr. Ing. h.c. F. Porsche AG.
This site is not affiliated with Porsche in any way. Its only purpose is to provide an online forum for car enthusiasts. All other trademarks are property of their respective owners. |
|
|
  |
| tygaboy |
 Aug 14 2020, 05:51 PM Aug 14 2020, 05:51 PM
Post
#2821
|
|
914 Guru      Group: Members Posts: 5,552 Joined: 6-October 15 From: Petaluma, CA Member No.: 19,241 Region Association: Northern California 
|
It's 103 degrees in Petaluma today so what do I decide I need to work on? The HEATER, of course! (IMG:style_emoticons/default/blink.gif)
I saw the old thread about this and liked the set up that uses a '94 Mustang heater core as they "fit" inside the fresh air box. Well, OK, after some minor surgery, they fit... I have a couple fresh air boxes so I figured if I screw this one up, I'll call it V1, claim it was practice, etc. Here's what I did: First, chop off the raised area around the opening on bottom. Then clearance for the in/out water lines. Yes, I went way overboard on the clearance. I'll do better next time... Once that's done, it turns out the heater core is a bit too deep - with the core pushed as far back as it can go, the front sticks out just enough that it doesn't allow the top to fit back on. Attached thumbnail(s) 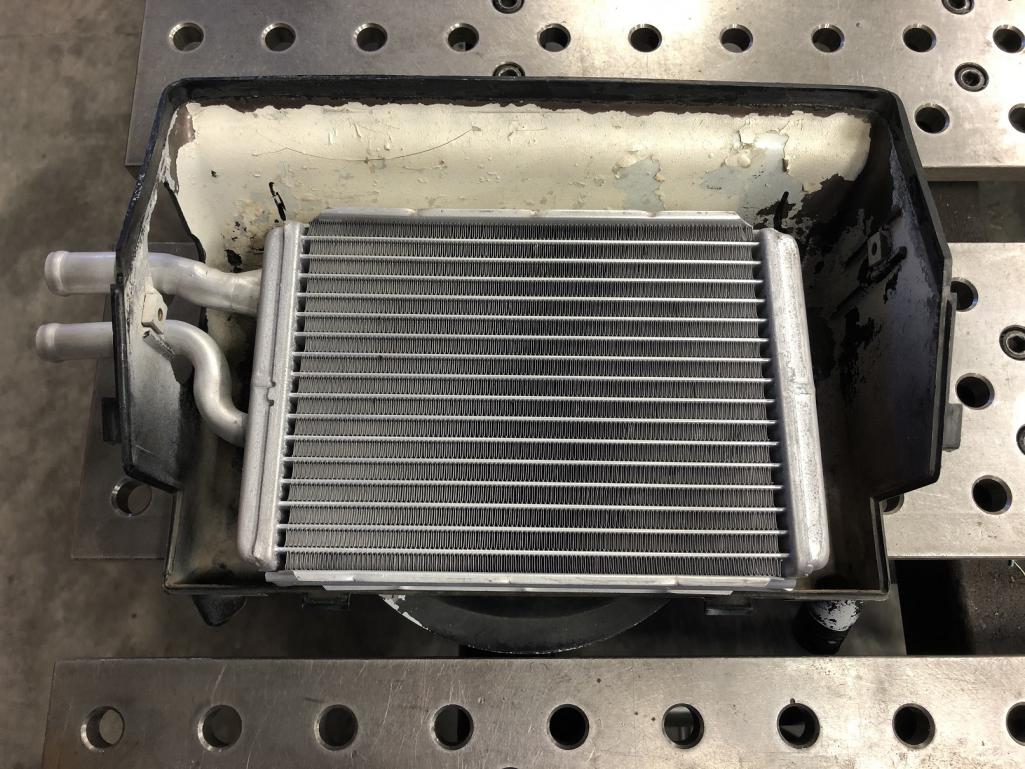
|
| tygaboy |
 Aug 14 2020, 05:58 PM Aug 14 2020, 05:58 PM
Post
#2822
|
|
914 Guru      Group: Members Posts: 5,552 Joined: 6-October 15 From: Petaluma, CA Member No.: 19,241 Region Association: Northern California 
|
What to do? These boxes are made of ABS so I could cut the back, get some sheet ABS and use Acetone or JB Weld to patch it up. But that would be too easy.
I've never messed with ABS so some of you may know this but it turns out this stuff is pretty pliable, once you apply a bit of heat. So out came the heat gun. I cut a piece of wood to the appropriate size and went (carefully) to town with the heat gun. Once the area I wanted to move was, well, movable, I pressed the wood into the desired position and held it there as the ABS cooled. The clamps on the top edge are to keep it from coming out of shape from the heat and pressure. Attached thumbnail(s) 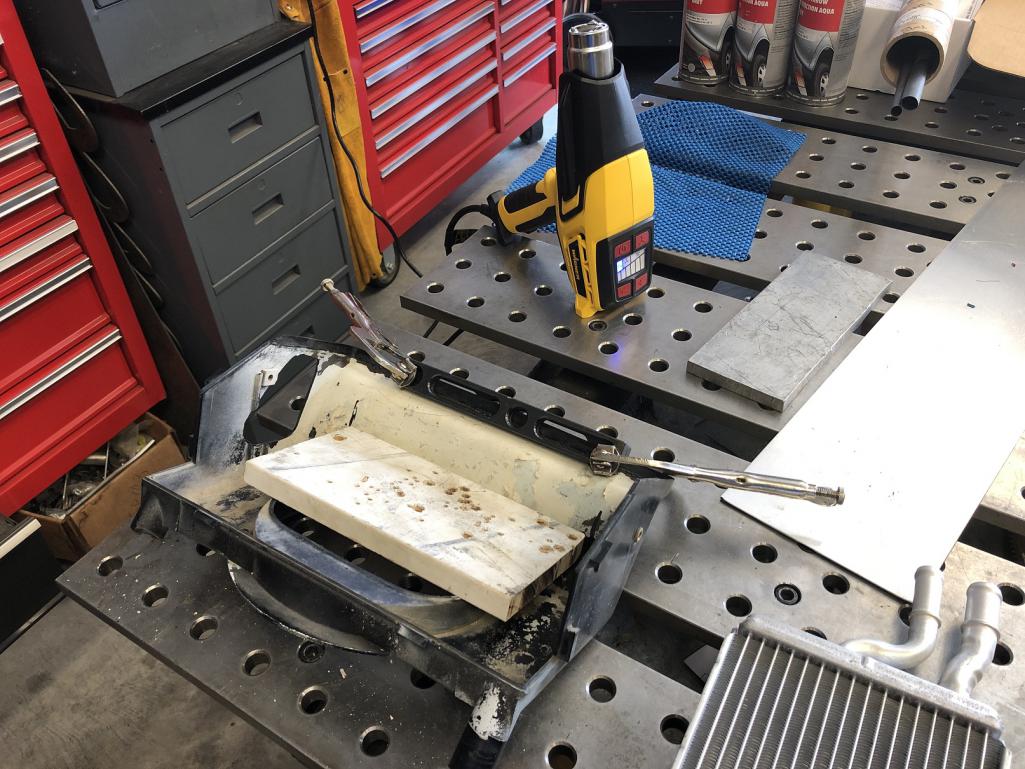
|
| tygaboy |
 Aug 14 2020, 05:59 PM Aug 14 2020, 05:59 PM
Post
#2823
|
|
914 Guru      Group: Members Posts: 5,552 Joined: 6-October 15 From: Petaluma, CA Member No.: 19,241 Region Association: Northern California 
|
And? We have clearance, Clarence! (IMG:style_emoticons/default/happy11.gif)
Attached thumbnail(s) 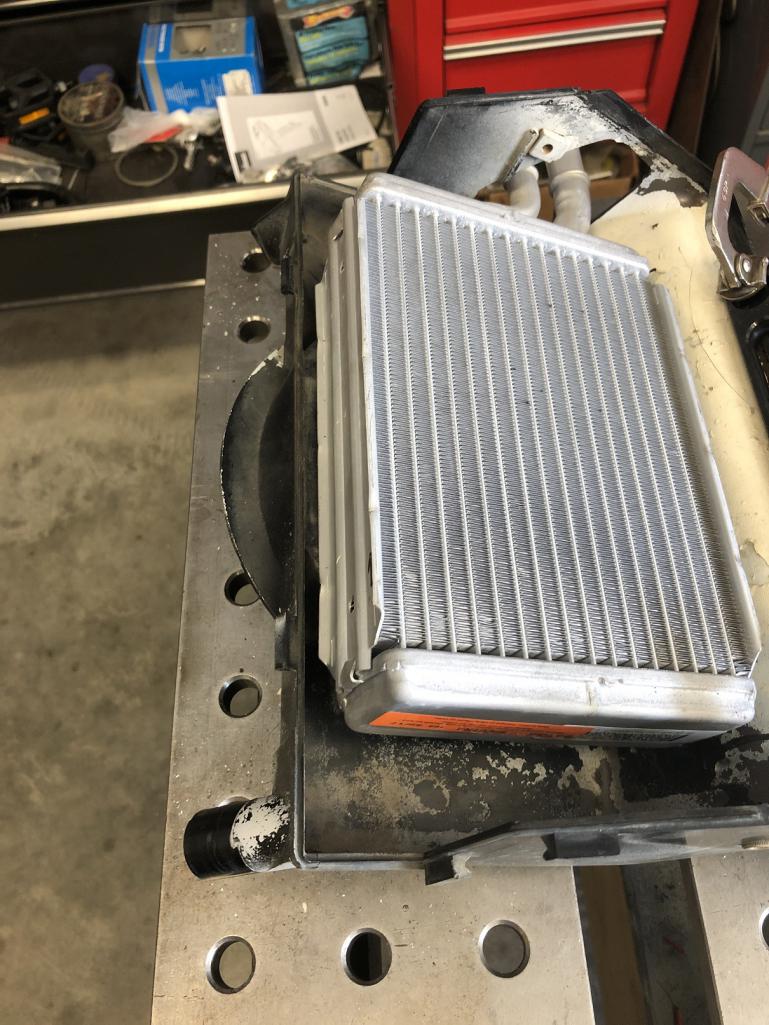
|
| tygaboy |
 Aug 14 2020, 06:02 PM Aug 14 2020, 06:02 PM
Post
#2824
|
|
914 Guru      Group: Members Posts: 5,552 Joined: 6-October 15 From: Petaluma, CA Member No.: 19,241 Region Association: Northern California 
|
And the backside. I'm really happy with how this worked out. Almost looks factory?
I did end up with a bit of distortion on the right and left sides so I can heat those and straighten them, or more probably, I'll do the whole procedure to another box, now that I know what to expect. And I can do a tidier job on the water line openings, too. Attached thumbnail(s) 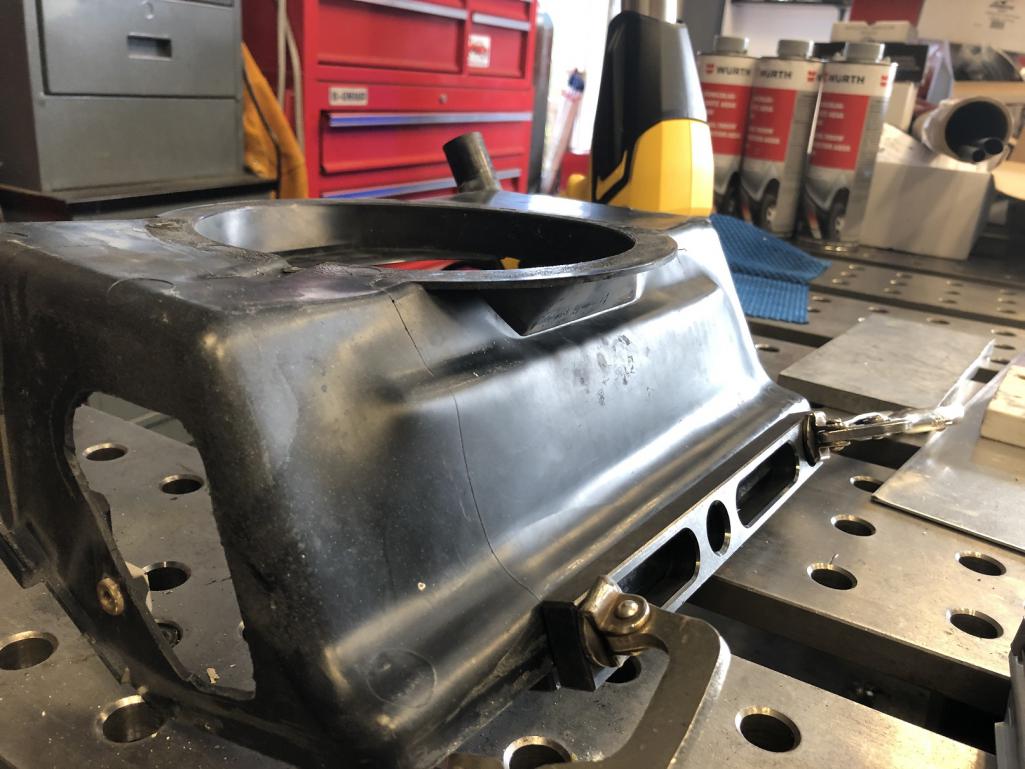
|
| Olympic 914 |
 Aug 14 2020, 06:02 PM Aug 14 2020, 06:02 PM
Post
#2825
|
   Group: Members Posts: 1,732 Joined: 7-July 11 From: Pittsburgh PA Member No.: 13,287 Region Association: North East States 
|
Will you ever run out of things to modify??
Crazy build thread. (IMG:style_emoticons/default/beer.gif) |
| tygaboy |
 Aug 14 2020, 06:05 PM Aug 14 2020, 06:05 PM
Post
#2826
|
|
914 Guru      Group: Members Posts: 5,552 Joined: 6-October 15 From: Petaluma, CA Member No.: 19,241 Region Association: Northern California 
|
For my next trick, I'm going to see if I can use the same approach to address the top piece. I cut this one to get an idea of just how far I'd need to move things.
Can I pull it off? It may be a bit of a stretch (IMG:style_emoticons/default/happy11.gif) but I'll let you know... Attached thumbnail(s) 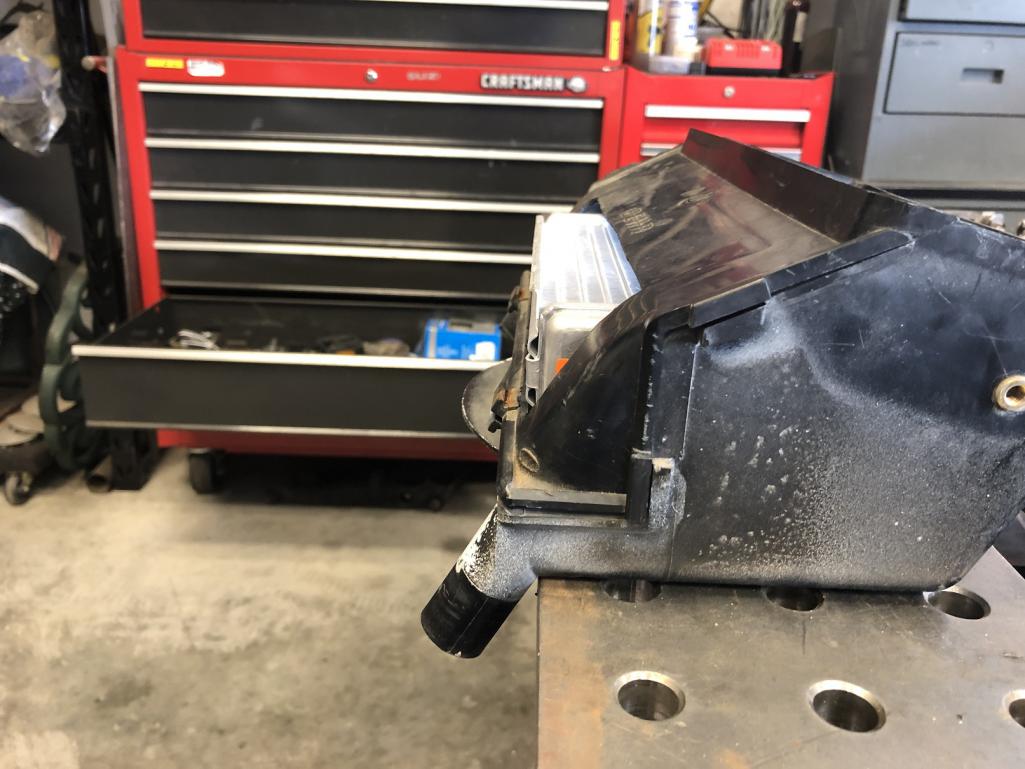
|
| tygaboy |
 Aug 17 2020, 02:19 PM Aug 17 2020, 02:19 PM
Post
#2827
|
|
914 Guru      Group: Members Posts: 5,552 Joined: 6-October 15 From: Petaluma, CA Member No.: 19,241 Region Association: Northern California 
|
Back to things needed to make it run. Today was completing the final engine-mounted coolant line.
With the drive train out, I have the access needed to weld one minor item to the chassis. Then it's fill the trans and the drive train goes back in for the last time. The to-do list is down to half a dozen relatively minor items and then I'll be ready to attempt the maiden The plan is to video and post the entire "let's see what it takes to get this mofo to run" process, not the fake one where things miraculously work. I will be enlisting a couple local friends to be here and man the fire extinguishers, just in case. I'm thinking maybe this coming weekend. Wish me luck! Attached thumbnail(s) 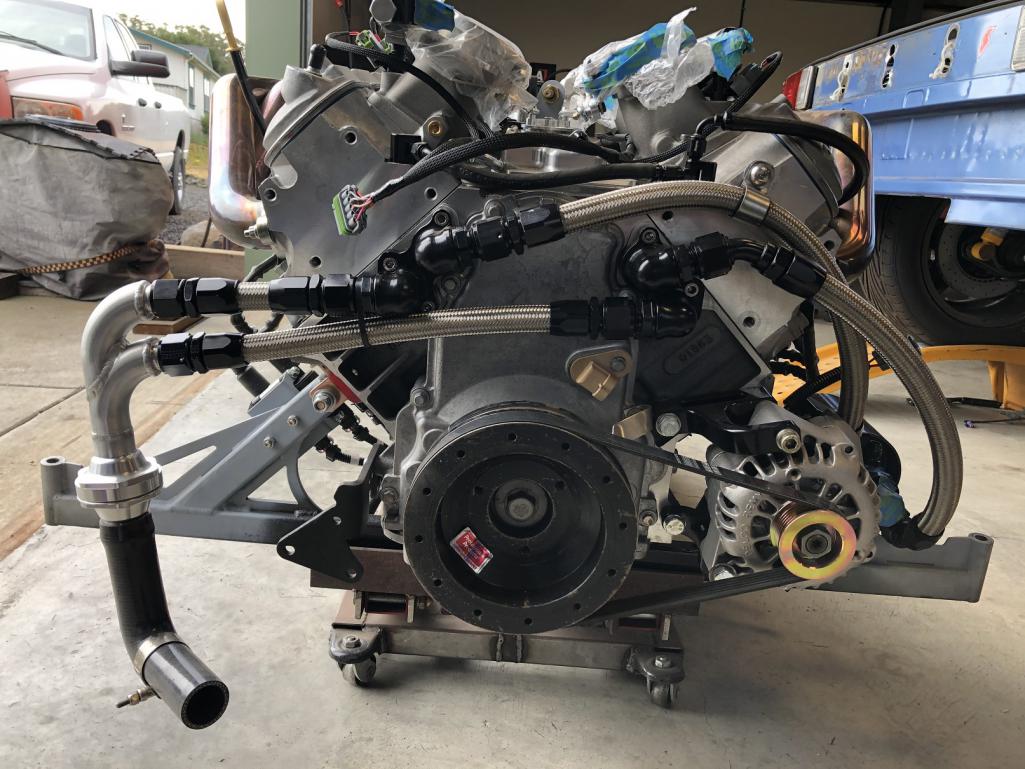
|
| Cairo94507 |
 Aug 17 2020, 03:48 PM Aug 17 2020, 03:48 PM
Post
#2828
|
|
Michael           Group: Members Posts: 10,300 Joined: 1-November 08 From: Auburn, CA Member No.: 9,712 Region Association: Northern California 
|
Hopefully the next time we come over we can hear that baby running. (IMG:style_emoticons/default/beerchug.gif)
|
| Matty900 |
 Aug 17 2020, 04:43 PM Aug 17 2020, 04:43 PM
Post
#2829
|
|
Senior Member    Group: Members Posts: 1,291 Joined: 21-February 15 From: Oregon Member No.: 18,454 Region Association: Pacific Northwest |
Damn that looks good! So excited for you. I am now working on going to an LS on my V8 car. Just finished cleaning the engine bay for paint after Cary fixed the hell hole for me. My alternator is hung it the same place and I want to use the original break proportioning value. They can't both be in the same place. What did you do?
|
| Rand |
 Aug 17 2020, 04:58 PM Aug 17 2020, 04:58 PM
Post
#2830
|
|
Cross Member      Group: Members Posts: 7,410 Joined: 8-February 05 From: OR Member No.: 3,573 Region Association: None |
like
|
| tygaboy |
 Aug 17 2020, 05:37 PM Aug 17 2020, 05:37 PM
Post
#2831
|
|
914 Guru      Group: Members Posts: 5,552 Joined: 6-October 15 From: Petaluma, CA Member No.: 19,241 Region Association: Northern California 
|
Damn that looks good! So excited for you. I am now working on going to an LS on my V8 car. Just finished cleaning the engine bay for paint after Cary fixed the hell hole for me. My alternator is hung it the same place and I want to use the original break proportioning value. They can't both be in the same place. What did you do? @Matty900 - I modified things a little - these pedals have separate front/rear master cylinders and the adjustable balance bar at the bottom of the pedal arms. No proportioning valve for me. Attached thumbnail(s) 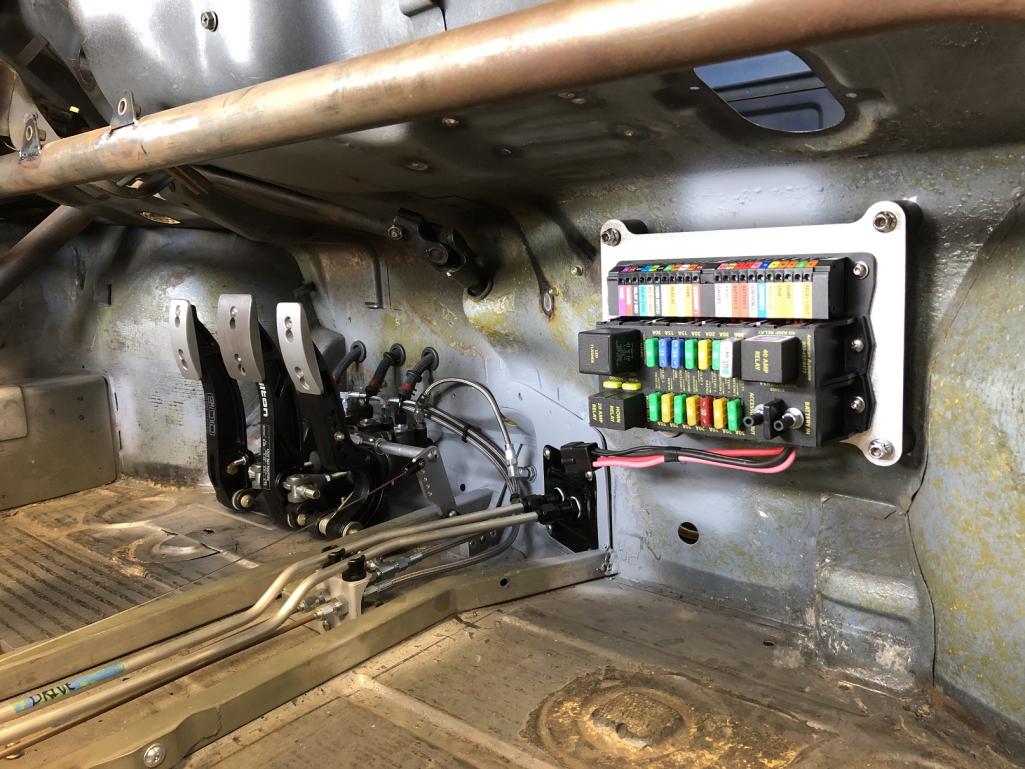
|
| tazz9924 |
 Aug 17 2020, 05:41 PM Aug 17 2020, 05:41 PM
Post
#2832
|
|
Senior Member    Group: Members Posts: 725 Joined: 31-May 15 From: Mooresville NC Member No.: 18,779 Region Association: None |
Damn that looks good! So excited for you. I am now working on going to an LS on my V8 car. Just finished cleaning the engine bay for paint after Cary fixed the hell hole for me. My alternator is hung it the same place and I want to use the original break proportioning value. They can't both be in the same place. What did you do? @Matty900 - I modified things a little - these pedals have separate front/rear master cylinders and the adjustable balance bar at the bottom of the pedal arms. No proportioning valve for me. Are you running boxster calipers? i forget. What size are your brake master cylinders |
| tygaboy |
 Aug 17 2020, 06:27 PM Aug 17 2020, 06:27 PM
Post
#2833
|
|
914 Guru      Group: Members Posts: 5,552 Joined: 6-October 15 From: Petaluma, CA Member No.: 19,241 Region Association: Northern California 
|
[ Are you running boxster calipers? i forget. What size are your brake master cylinders @tazz9924 - Yes, Boxster calipers all around. Not S, just base Boxster. I researched all the MC sizes when I bought the pedal set and if I recall, I have 5/8" bore for each brake master and 3/4" bore for the clutch master. Point of interest: This is a Tilton pedal set and using their 76-Series master cylinders, and using the top exit location for the hoses, I was able to install the pedal assembly and get the pedal faces are in the exact same vertical plane as the stock pedals without modifying the chassis in that area. |
| 914forme |
 Aug 17 2020, 06:36 PM Aug 17 2020, 06:36 PM
Post
#2834
|
|
Times a wastin', get wrenchin'!     Group: Members Posts: 3,896 Joined: 24-July 04 From: Dayton, Ohio Member No.: 2,388 Region Association: None 
|
For first fire ups ever since I had one go up, which was quickly extinguished with a blimp of the throttle. I now push them outside. Let the car burn if that's what it wants to do, my shop, and tools, no thank you.
I have a winch at the far wall from the door if I need to I can drag it back in. |
| 914forme |
 Aug 17 2020, 06:41 PM Aug 17 2020, 06:41 PM
Post
#2835
|
|
Times a wastin', get wrenchin'!     Group: Members Posts: 3,896 Joined: 24-July 04 From: Dayton, Ohio Member No.: 2,388 Region Association: None 
|
@tazz9924 21mm is the standard size MC recommended for the Boxster calipers, even 23mm is not unheard of.
@TygaBoy , Chris if you really installed 5/8" that is a bit undersized. That actual is about a 16.5mm cylinder size. I hope you are mistaken and installed at least 3/4 but then 7/8 would be even better choice. |
| tygaboy |
 Aug 17 2020, 06:54 PM Aug 17 2020, 06:54 PM
Post
#2836
|
|
914 Guru      Group: Members Posts: 5,552 Joined: 6-October 15 From: Petaluma, CA Member No.: 19,241 Region Association: Northern California 
|
@tazz9924 21mm is the standard size MC recommended for the Boxster calipers, even 23mm is not unheard of. @TygaBoy , Chris if you really installed 5/8" that is a bit undersized. That actual is about a 16.5mm cylinder size. I hope you are mistaken and installed at least 3/4 but then 7/8 would be even better choice. @914forme - Stephen, remember, I have one MC for the front and one for the rear calipers so I'm not splitting a single 23mm MC. Tony runs the same pedal assy and these same sizes on his so I took his recommendation. If I need something different, it's simple enough to swap them out. |
| FL000 |
 Aug 17 2020, 07:05 PM Aug 17 2020, 07:05 PM
Post
#2837
|
|
Member   Group: Members Posts: 447 Joined: 31-January 12 From: Lancaster, CA Member No.: 14,076 Region Association: Southern California 
|
Top notch work Chris, as expected. I think when you are done with this project you need to start working on a supercar concept. Not sure we have seen a one in while!
Not poking but I don’t see an a/c compressor on the engine. Is that still in the plans?! |
| tazz9924 |
 Aug 17 2020, 07:05 PM Aug 17 2020, 07:05 PM
Post
#2838
|
|
Senior Member    Group: Members Posts: 725 Joined: 31-May 15 From: Mooresville NC Member No.: 18,779 Region Association: None |
@tazz9924 21mm is the standard size MC recommended for the Boxster calipers, even 23mm is not unheard of. @TygaBoy , Chris if you really installed 5/8" that is a bit undersized. That actual is about a 16.5mm cylinder size. I hope you are mistaken and installed at least 3/4 but then 7/8 would be even better choice. @914forme - Stephen, remember, I have one MC for the front and one for the rear calipers so I'm not splitting a single 23mm MC. Tony runs the same pedal assy and these same sizes on his so I took his recommendation. If I need something different, It's simple enough to swap them out. Thats true but even on a single MC both front and rear use the same bore to move fluid so a single is in effect two master cylinders. I could be wrong and there is something im not accounting for, but it feels right. |
| tygaboy |
 Aug 19 2020, 02:08 PM Aug 19 2020, 02:08 PM
Post
#2839
|
|
914 Guru      Group: Members Posts: 5,552 Joined: 6-October 15 From: Petaluma, CA Member No.: 19,241 Region Association: Northern California 
|
As I approach the first attempt at starting this thing, it struck me that I ought to do my best to channel Steely Dan: Countdown to Ecstasy!
Boring photo but this is the "buttoned up enough to run" frunk: - radiator hose pass through panel temporarily pop riveted (can't final rivet it until the car is painted) - fan relays wired and tested - radiator hard lines fully installed - radiator shroud in place - brake/clutch reservoirs ready for fluids For those wondering, "what's up with that plain radiator shroud?", I have yet to source/layup the carbon fiber inserts for the stamped shroud and beyond that, it'll need to be painted ahead of bonding in the inserts. So, because I'm focused on doing only what's needed to get it running and driving, and I have to have some sort of shroud, I cut this aluminum version. Virtually no style points, only what's needed. @Rand , aren't you proud of me? (IMG:style_emoticons/default/shades.gif) Attached thumbnail(s) 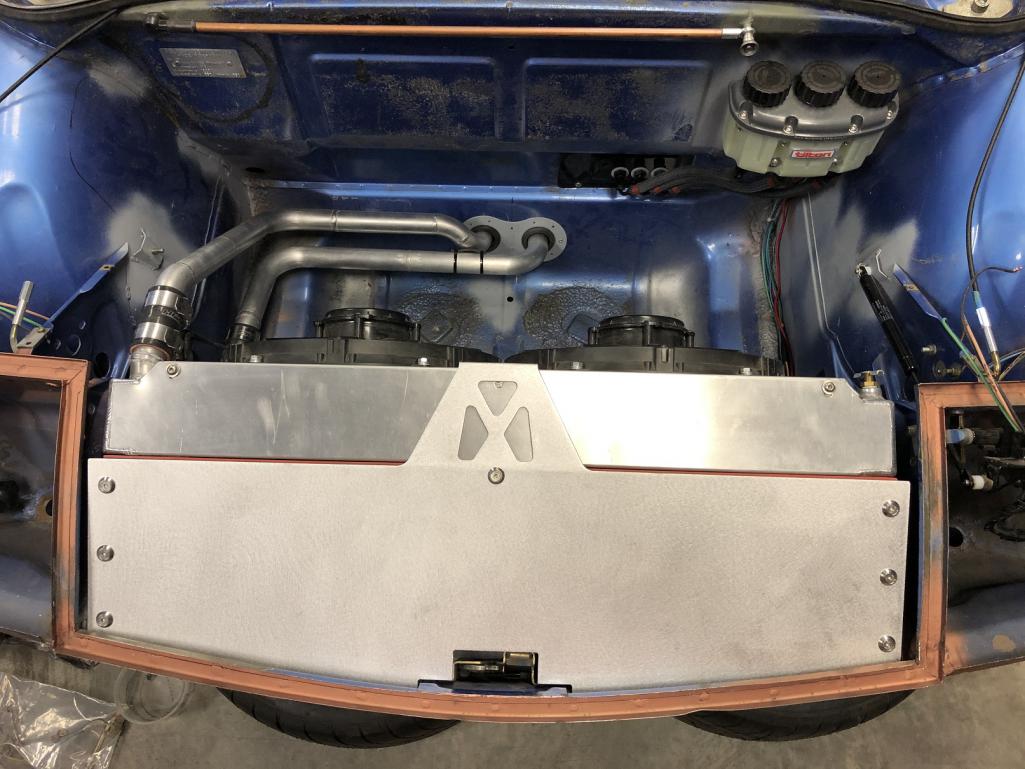
|
| tygaboy |
 Aug 19 2020, 02:18 PM Aug 19 2020, 02:18 PM
Post
#2840
|
|
914 Guru      Group: Members Posts: 5,552 Joined: 6-October 15 From: Petaluma, CA Member No.: 19,241 Region Association: Northern California 
|
Top notch work Chris, as expected. I think when you are done with this project you need to start working on a supercar concept. Not sure we have seen a one in while! Not poking but I don’t see an a/c compressor on the engine. Is that still in the plans?! @FL 000 I fabbed all the engine compartment stuff so the compressor and lines have room but I'm not working to fit the AC system at this point. I'll worry about it after the car is on the road but ahead of painting it. |
  |
3 User(s) are reading this topic (3 Guests and 0 Anonymous Users)
0 Members:

|
Lo-Fi Version | Time is now: 24th April 2025 - 04:09 PM |
Invision Power Board
v9.1.4 © 2025 IPS, Inc.


