|
|

|
Porsche, and the Porsche crest are registered trademarks of Dr. Ing. h.c. F. Porsche AG.
This site is not affiliated with Porsche in any way. Its only purpose is to provide an online forum for car enthusiasts. All other trademarks are property of their respective owners. |
|
|
  |
| tygaboy |
 Jun 23 2022, 04:56 PM Jun 23 2022, 04:56 PM
Post
#4181
|
|
914 Guru      Group: Members Posts: 5,547 Joined: 6-October 15 From: Petaluma, CA Member No.: 19,241 Region Association: Northern California 
|
Details, details. Here's the foot rest/guard with the grill in place, then installed.
I still need to sheath the chassis harness so forgive the visible wiring. It'll all but disappear once I complete it. Attached thumbnail(s) 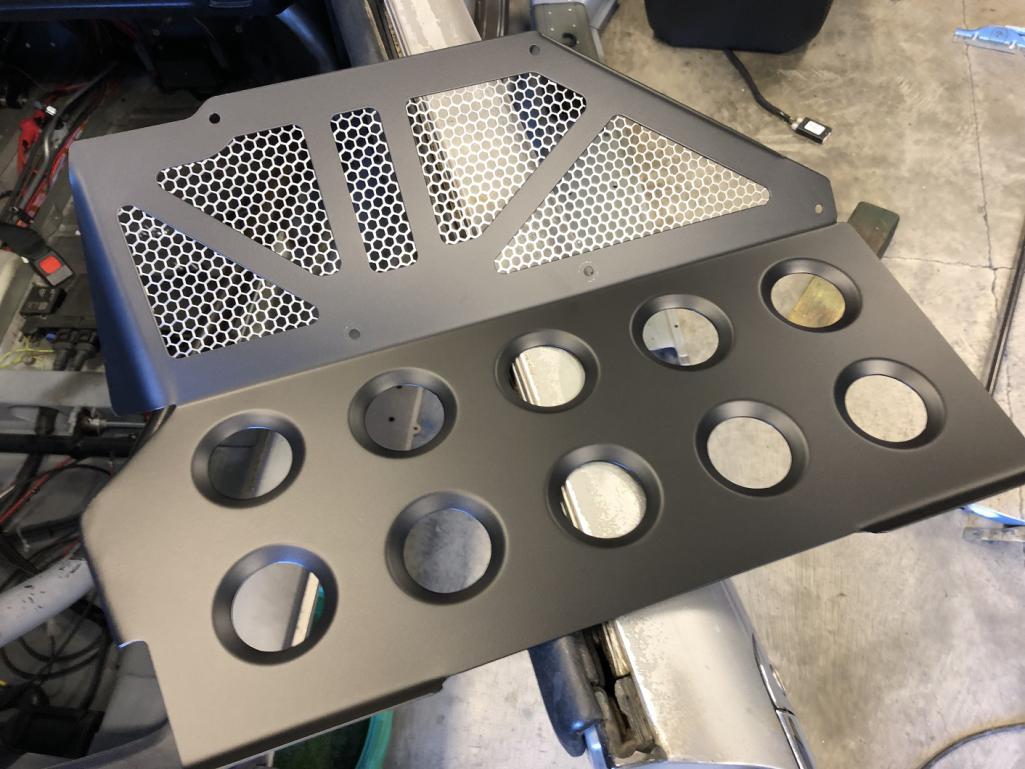 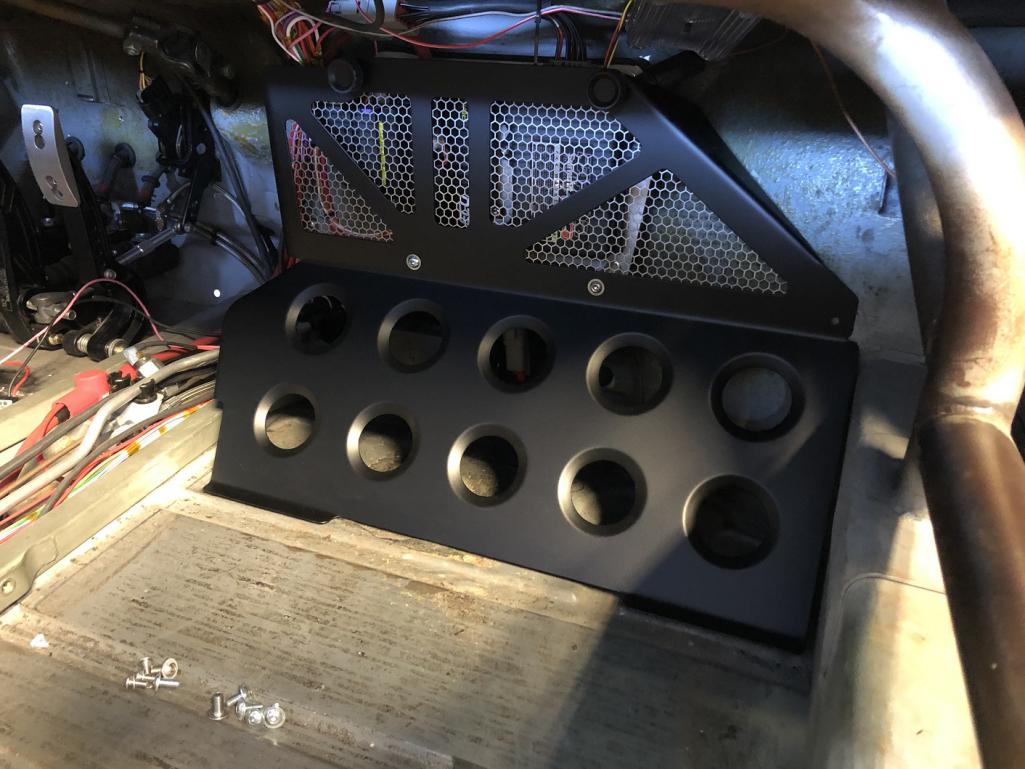
|
| tygaboy |
 Jun 23 2022, 05:01 PM Jun 23 2022, 05:01 PM
Post
#4182
|
|
914 Guru      Group: Members Posts: 5,547 Joined: 6-October 15 From: Petaluma, CA Member No.: 19,241 Region Association: Northern California 
|
OK, yes. I'm bragging a little. I happily confess I'm pretty proud of this piece and the quality of the fit I was able to get. The gap along that curve is consistent all along the rising radius of the inner fender - and buried in the foot well where no one will see it.
Another of the "but I know it's there" details I love about this build. (IMG:style_emoticons/default/sunglasses.gif) Attached thumbnail(s) 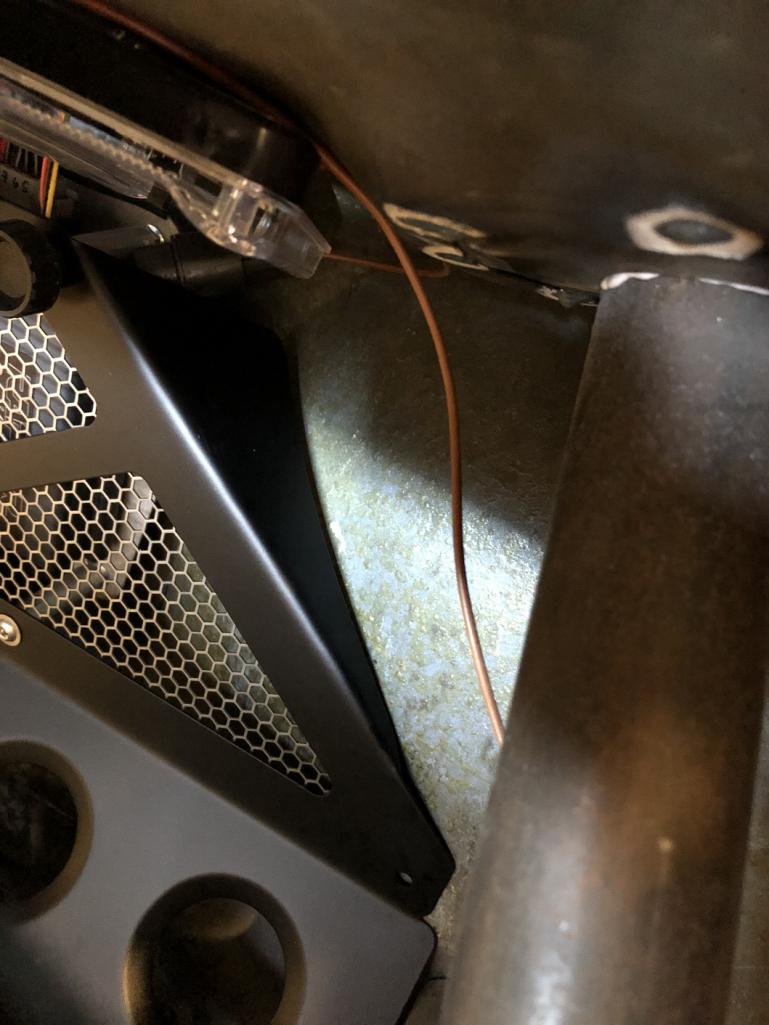
|
| Cairo94507 |
 Jun 25 2022, 07:03 AM Jun 25 2022, 07:03 AM
Post
#4183
|
|
Michael           Group: Members Posts: 10,297 Joined: 1-November 08 From: Auburn, CA Member No.: 9,712 Region Association: Northern California 
|
People are going to have to remove their shoes when they get in because those parts are just beautiful Chris. (IMG:style_emoticons/default/beerchug.gif)
|
| Mayne |
 Jun 25 2022, 08:15 AM Jun 25 2022, 08:15 AM
Post
#4184
|
|
Member   Group: Members Posts: 254 Joined: 28-February 17 From: NM Member No.: 20,880 Region Association: None |
Details, details. Here's the foot rest/guard with the grill in place, then installed. I still need to sheath the chassis harness so forgive the visible wiring. It'll all but disappear once I complete it. Absolutely beautiful! Love the mesh design. What is the finish on the entire piece? Makes me think of Cerakote. |
| tygaboy |
 Jun 27 2022, 05:35 PM Jun 27 2022, 05:35 PM
Post
#4185
|
|
914 Guru      Group: Members Posts: 5,547 Joined: 6-October 15 From: Petaluma, CA Member No.: 19,241 Region Association: Northern California 
|
Details, details. Here's the foot rest/guard with the grill in place, then installed. I still need to sheath the chassis harness so forgive the visible wiring. It'll all but disappear once I complete it. Absolutely beautiful! Love the mesh design. What is the finish on the entire piece? Makes me think of Cerakote. @Mayne - it's powder coat. It's a color called "Black Magic II", which I think the guy referred to as "1/2 gloss" or something like that. I can find out, if you want specifics. PM me, if so. |
| tygaboy |
 Jun 27 2022, 05:44 PM Jun 27 2022, 05:44 PM
Post
#4186
|
|
914 Guru      Group: Members Posts: 5,547 Joined: 6-October 15 From: Petaluma, CA Member No.: 19,241 Region Association: Northern California 
|
I will not be quitting my day job to become a paint guy. Ugh. I hated every minute of this process.
The details: Since I'm planning to blow the car apart, media blast it and get it painted at some point, for now, I opted to use a 2k rattle can epoxy primer and good ol' Rustoleum "Smoke Gray" to at least tidy up the engine bay. Essentially, a typical race car approach: Forget what color/livery the outside will be. The business areas get painted a light color so it's easy to spot fluids, easy to touch up, etc. Anyway, it looks 100X better than it ever has. Should look pretty good once it's all back together. The transmission shim is supposed to arrive at CMS today and they expect to finish assembly and ship this week. It's going to be tight getting it all back together and tested in time for WCR. (IMG:style_emoticons/default/wacko.gif) Attached thumbnail(s) 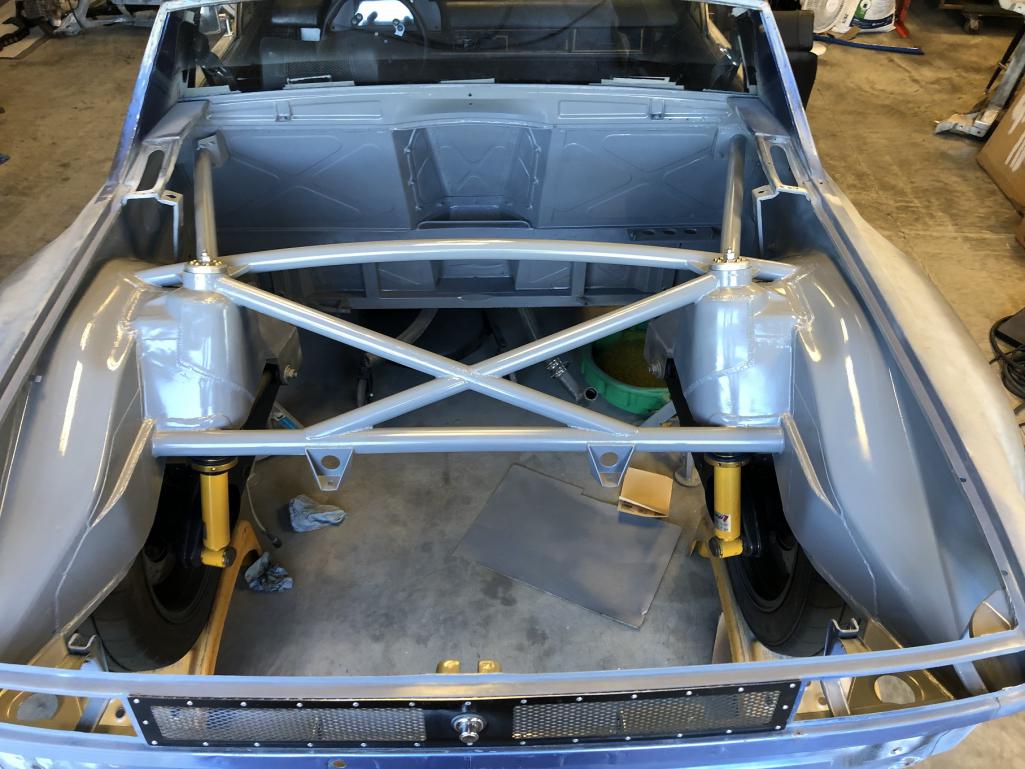
|
| Cairo94507 |
 Jun 28 2022, 06:57 AM Jun 28 2022, 06:57 AM
Post
#4187
|
|
Michael           Group: Members Posts: 10,297 Joined: 1-November 08 From: Auburn, CA Member No.: 9,712 Region Association: Northern California 
|
That does look very nice. Paint work is all about the prep and it is no fun. (IMG:style_emoticons/default/beerchug.gif)
|
| tygaboy |
 Jun 28 2022, 01:27 PM Jun 28 2022, 01:27 PM
Post
#4188
|
|
914 Guru      Group: Members Posts: 5,547 Joined: 6-October 15 From: Petaluma, CA Member No.: 19,241 Region Association: Northern California 
|
Here's another non-914 part that will never be seen: the removable bulkhead panel at the aft end of the tunnel. Now all nicely powder coated and back in place.
Attached thumbnail(s) 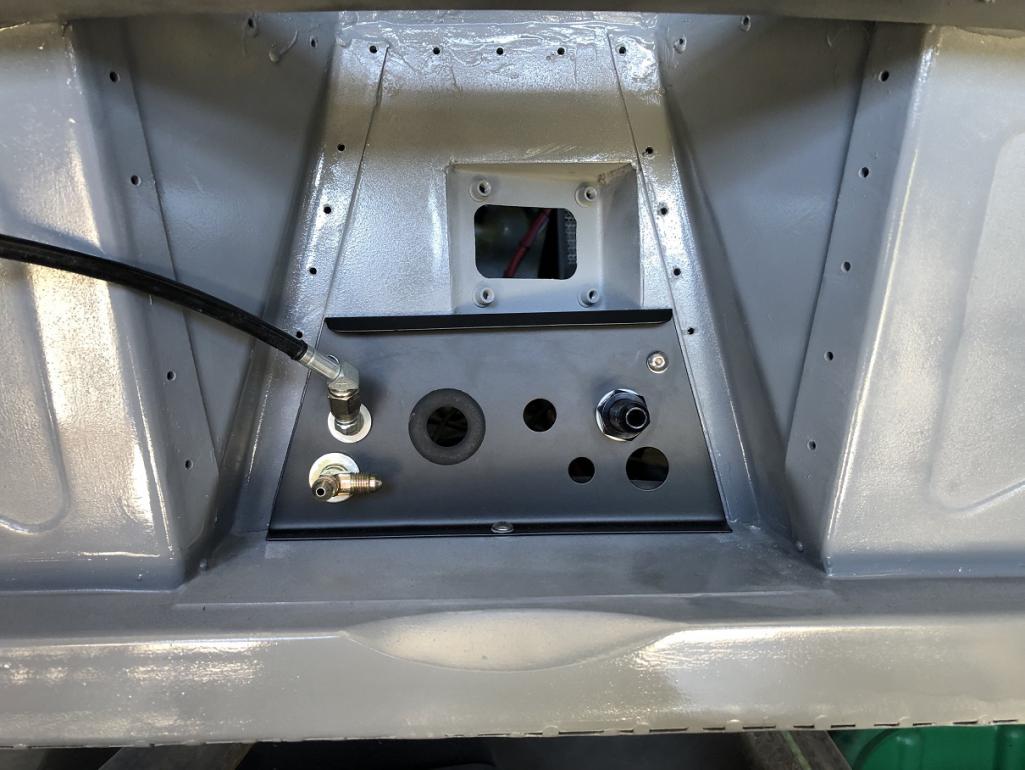
|
| Shivers |
 Jun 28 2022, 01:57 PM Jun 28 2022, 01:57 PM
Post
#4189
|
|
Senior Member     Group: Members Posts: 2,951 Joined: 19-October 20 From: La Quinta, CA Member No.: 24,781 Region Association: Southern California |
OK, yes. I'm bragging a little. I happily confess I'm pretty proud of this piece and the quality of the fit I was able to get. The gap along that curve is consistent all along the rising radius of the inner fender - and buried in the foot well where no one will see it. Another of the "but I know it's there" details I love about this build. (IMG:style_emoticons/default/sunglasses.gif) Yes Sir, this is pretty slick. This auto of your has turned into a Mona Lisa Project. Perfect in every way, yet never quite done. That and it's also had an Italian up her skirt. (IMG:style_emoticons/default/laugh.gif) Some day, they'll come up with a material that will actually take weight away from the car (IMG:style_emoticons/default/rolleyes.gif) And you'll need to do this stuff all over again. (IMG:style_emoticons/default/biggrin.gif) I tip my hat Sir (IMG:style_emoticons/default/aktion035.gif) |
| tygaboy |
 Jun 28 2022, 05:31 PM Jun 28 2022, 05:31 PM
Post
#4190
|
|
914 Guru      Group: Members Posts: 5,547 Joined: 6-October 15 From: Petaluma, CA Member No.: 19,241 Region Association: Northern California 
|
Things go from flat...
Attached thumbnail(s) 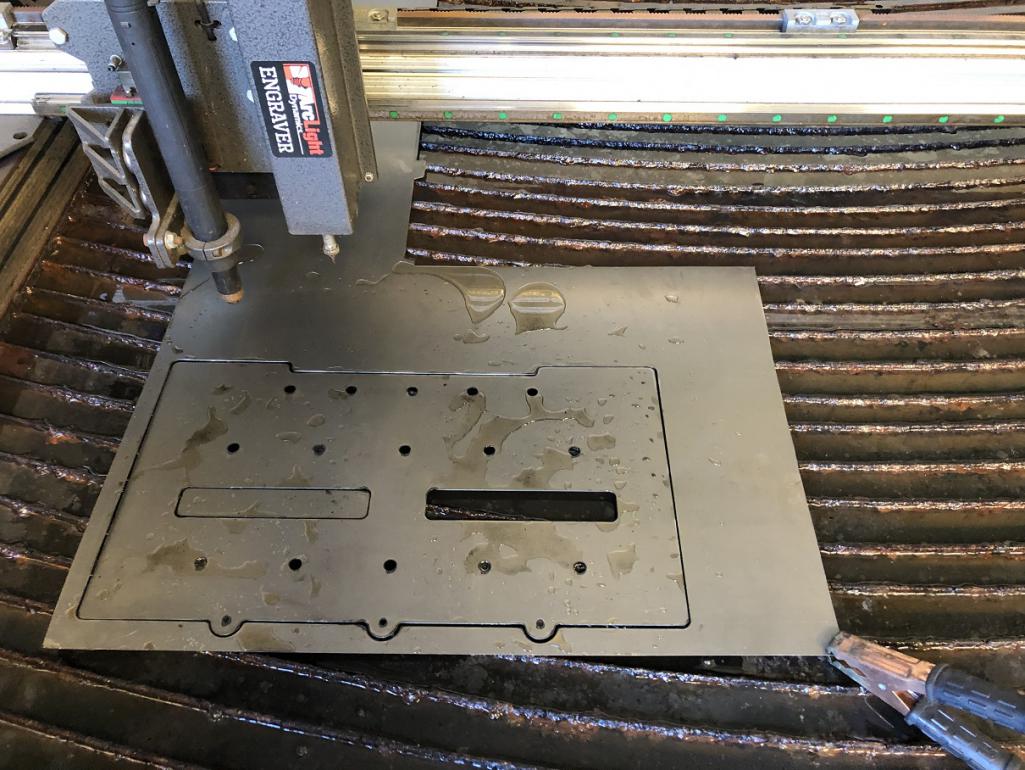
|
| Superhawk996 |
 Jun 28 2022, 05:33 PM Jun 28 2022, 05:33 PM
Post
#4191
|
|
914 Guru      Group: Members Posts: 6,966 Joined: 25-August 18 From: Woods of N. Idaho Member No.: 22,428 Region Association: Galt's Gulch 
|
So many cool fab toys! I'm jealous.
|
| tygaboy |
 Jun 28 2022, 05:38 PM Jun 28 2022, 05:38 PM
Post
#4192
|
|
914 Guru      Group: Members Posts: 5,547 Joined: 6-October 15 From: Petaluma, CA Member No.: 19,241 Region Association: Northern California 
|
...to that. A protective cover for the ECU. With the seat in place, you can only see the front portion of it but that doesn't mean I can ignore the style points!
The rectangular areas will get the same mesh as the foot rest/guard. It'll get the same powder coat treatment, too. And in keeping with my typical approach, now that I see it in the metal and in place, I decided it needed a few design tweaks, so I updated the CAD file. Unfortunately, I ran out of the needed material. I'll get to the steel supply tomorrow and see if I can knock this out. Attached thumbnail(s) 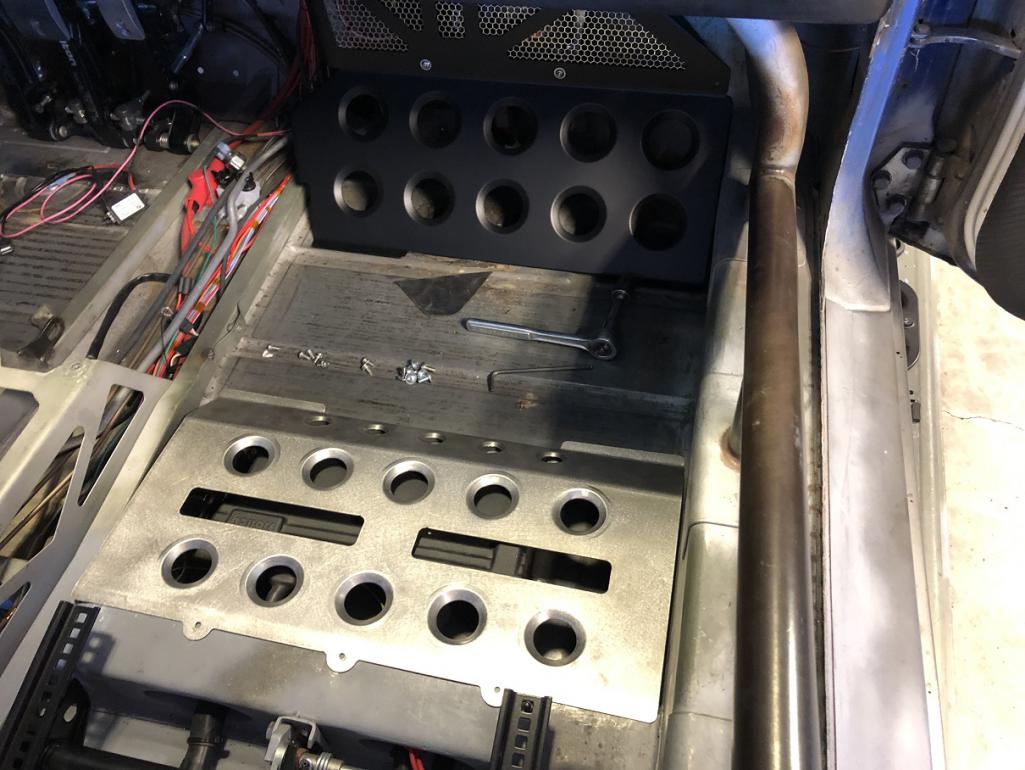
|
| tazz9924 |
 Jun 29 2022, 10:55 AM Jun 29 2022, 10:55 AM
Post
#4193
|
|
Senior Member    Group: Members Posts: 724 Joined: 31-May 15 From: Mooresville NC Member No.: 18,779 Region Association: None |
...to that. A protective cover for the ECU. With the seat in place, you can only see the front portion of it but that doesn't mean I can ignore the style points! The rectangular areas will get the same mesh as the foot rest/guard. It'll get the same powder coat treatment, too. And in keeping with my typical approach, now that I see it in the metal and in place, I decided it needed a few design tweaks, so I updated the CAD file. Unfortunately, I ran out of the needed material. I'll get to the steel supply tomorrow and see if I can knock this out. Dont let people eat food in your car, i can only imagine trying to vacuum out crumbs from under the dimple die floor! (IMG:style_emoticons/default/laugh.gif) |
| tygaboy |
 Jun 29 2022, 12:09 PM Jun 29 2022, 12:09 PM
Post
#4194
|
|
914 Guru      Group: Members Posts: 5,547 Joined: 6-October 15 From: Petaluma, CA Member No.: 19,241 Region Association: Northern California 
|
A rare sighting: An actual 914 part!
Thanks to @bdstone914 for the lovely powder coated pieces and new hardware. Though to keep with the "mine is different" theme, that is a custom washer and oversized bolt to work with the Renegade engine crossbar. Attached thumbnail(s) 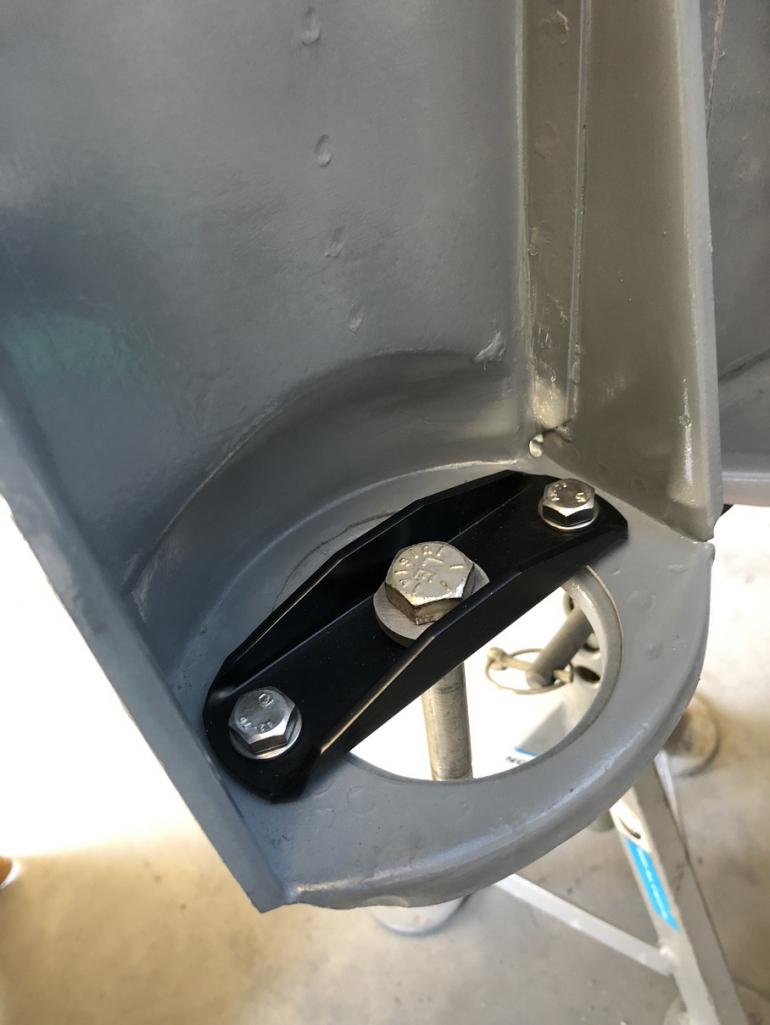
|
| tygaboy |
 Jun 29 2022, 12:13 PM Jun 29 2022, 12:13 PM
Post
#4195
|
|
914 Guru      Group: Members Posts: 5,547 Joined: 6-October 15 From: Petaluma, CA Member No.: 19,241 Region Association: Northern California 
|
Dont let people eat food in your car, i can only imagine trying to vacuum out crumbs from under the dimple die floor! (IMG:style_emoticons/default/laugh.gif) @tazz9924 - There will be mesh to stop entire french fries and pickle slices from falling through. (IMG:style_emoticons/default/laugh.gif) But it's also likely that the front portion of the ECU cover and the foot rest up to the mesh will be covered by carpet. It'll probably be "quick release" carpet so I can remove it, if I want the cool bits to be visible. |
| tygaboy |
 Jun 30 2022, 11:49 AM Jun 30 2022, 11:49 AM
Post
#4196
|
|
914 Guru      Group: Members Posts: 5,547 Joined: 6-October 15 From: Petaluma, CA Member No.: 19,241 Region Association: Northern California 
|
The metal supply place didn't have anything but full 5' x 10' or 4' x 8' sheets of steel and I have to order them to be cut in half, which take a couple days for them to process. I didn't feel like waiting so I opted to use some .063 AL I had on hand. Once it's powder coated, I doubt anyone will be able to tell.
Anyway, this updated design is a better fit and the holes are more accurately positioned. Plus, it's lighter! (IMG:style_emoticons/default/biggrin.gif) On to the fastener set up. Attached thumbnail(s) 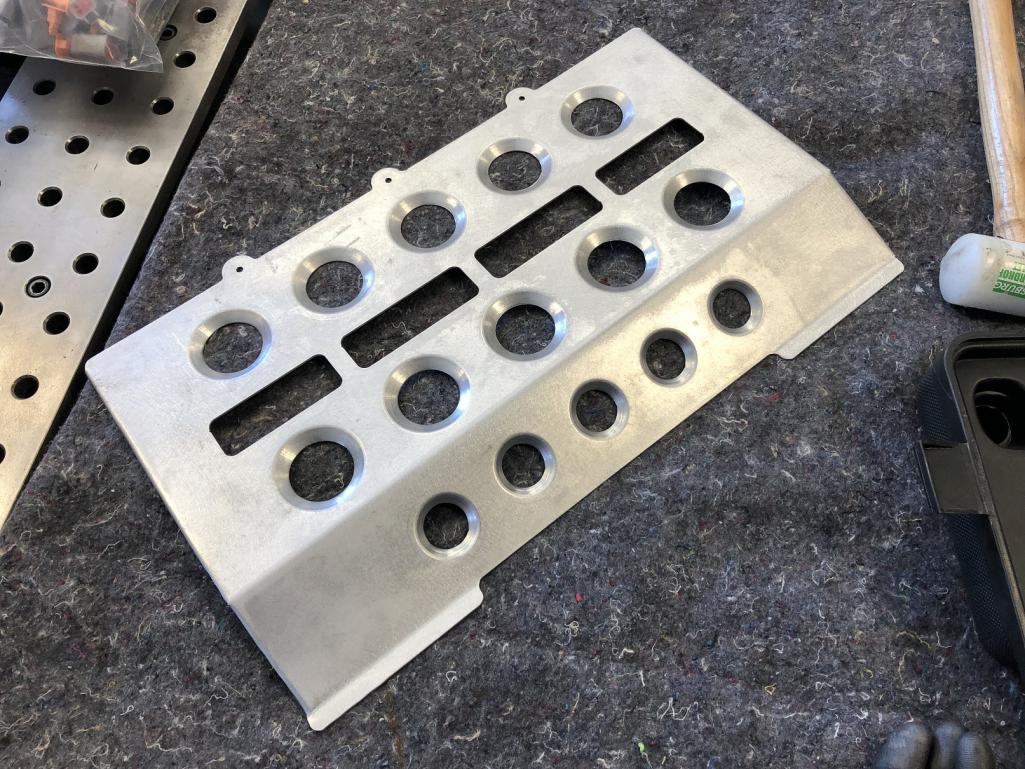 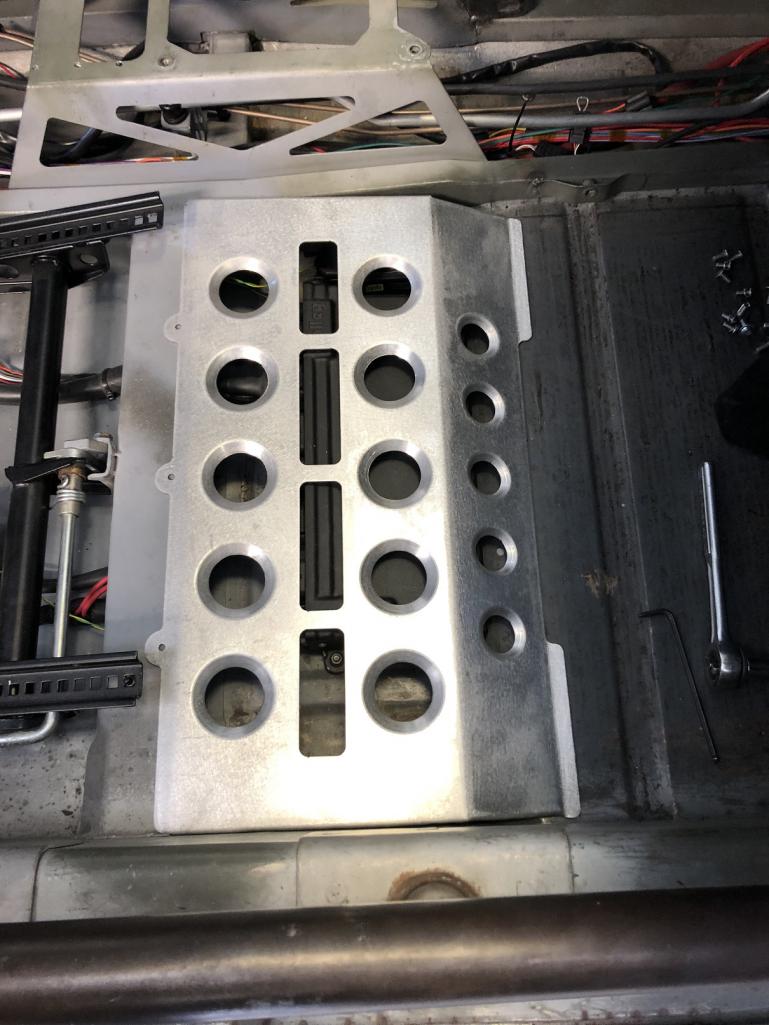
|
| tygaboy |
 Jul 2 2022, 03:44 PM Jul 2 2022, 03:44 PM
Post
#4197
|
|
914 Guru      Group: Members Posts: 5,547 Joined: 6-October 15 From: Petaluma, CA Member No.: 19,241 Region Association: Northern California 
|
My transmission shipped on Friday! Should be here mid next week... so what to do in the meantime?
I mentioned earlier how boring I find "plain" things. Well, my radiator shroud couldn't have been any plainer and I've been wanting to do something about it since I first made it. Well, today was the day. First, I worked up a design that I hope echos the stamping in the fuel tank bulkhead and matches the curve of the frunk opening. Is it too simple? Too late - it's off to the plasma table! Attached thumbnail(s) 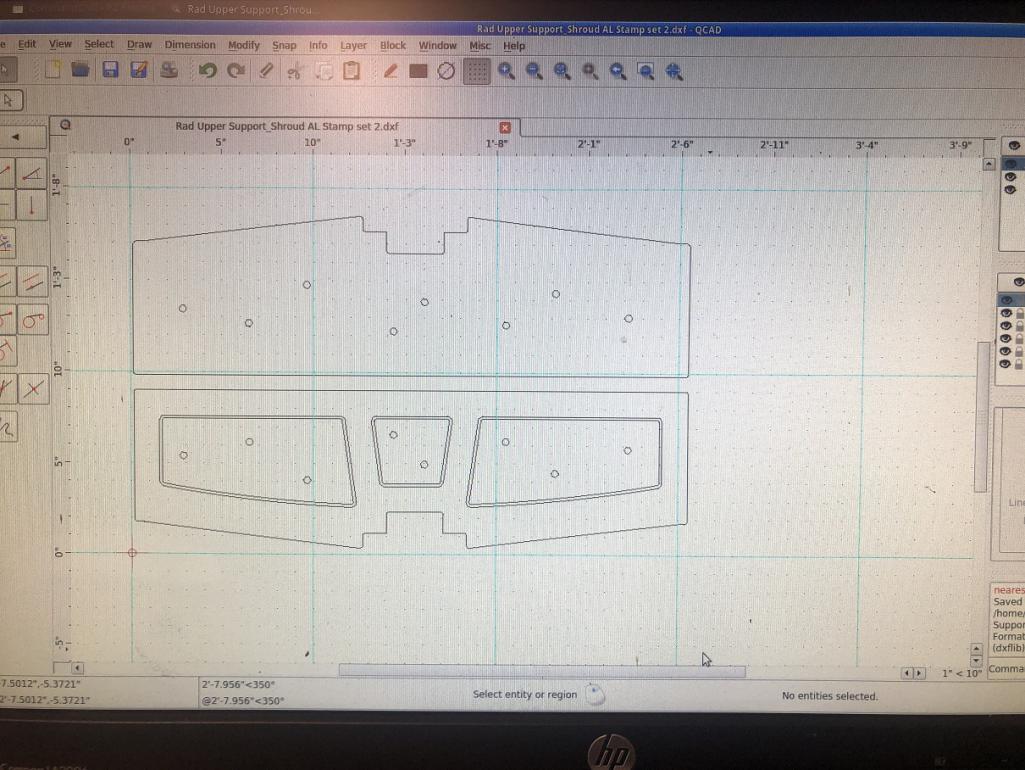 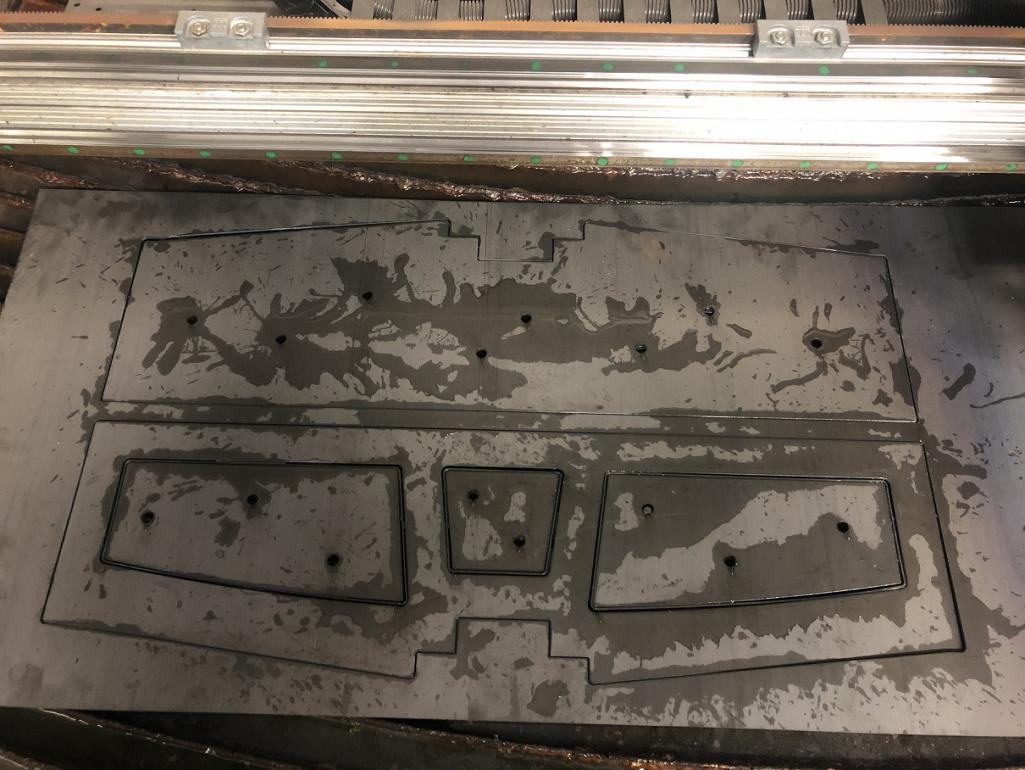
|
| tygaboy |
 Jul 2 2022, 03:48 PM Jul 2 2022, 03:48 PM
Post
#4198
|
|
914 Guru      Group: Members Posts: 5,547 Joined: 6-October 15 From: Petaluma, CA Member No.: 19,241 Region Association: Northern California 
|
A behind the scenes look at "stamping station". The tubing bender hydraulics are dry break, quick release and can be hooked to the H-press. A pretty handy set of capabilities, if a bit cumbersome and on the large size. But it sure works well for this sort of thing.
Attached thumbnail(s) 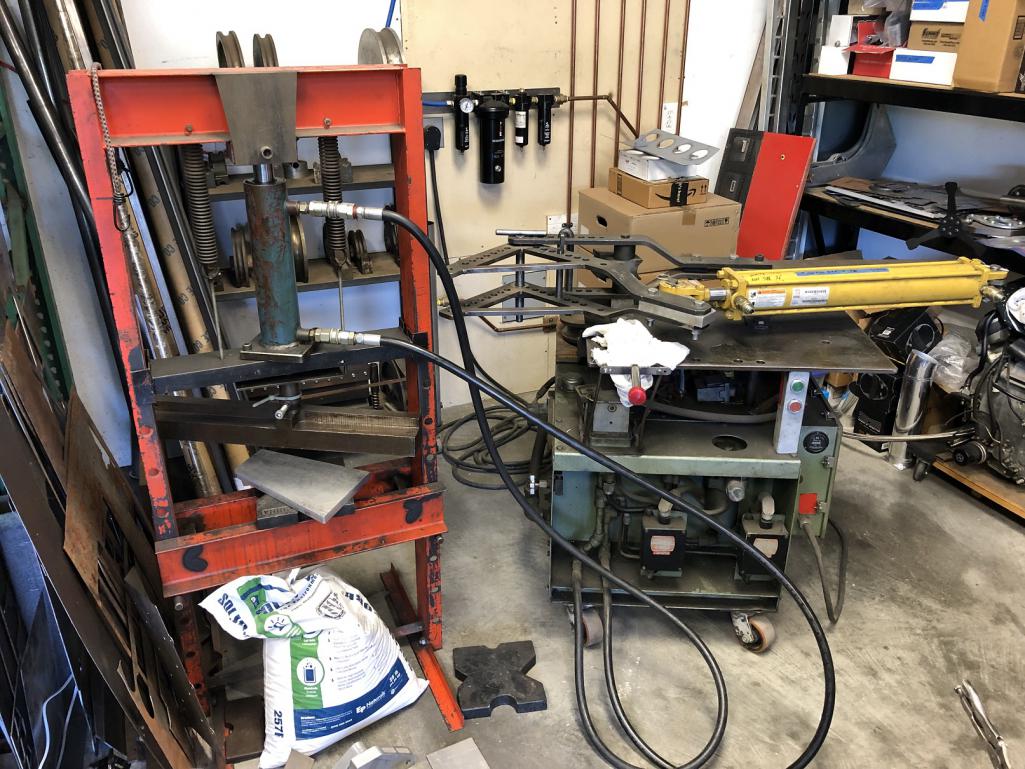
|
| tygaboy |
 Jul 2 2022, 03:50 PM Jul 2 2022, 03:50 PM
Post
#4199
|
|
914 Guru      Group: Members Posts: 5,547 Joined: 6-October 15 From: Petaluma, CA Member No.: 19,241 Region Association: Northern California 
|
With the stamping die male components welded in place to the male backer, the shroud is placed between the two pieces. Note that, as always, I cut the die to be the same shape as the piece being stamped, making it simple to get everything positioned nearly perfectly.
Attached thumbnail(s) 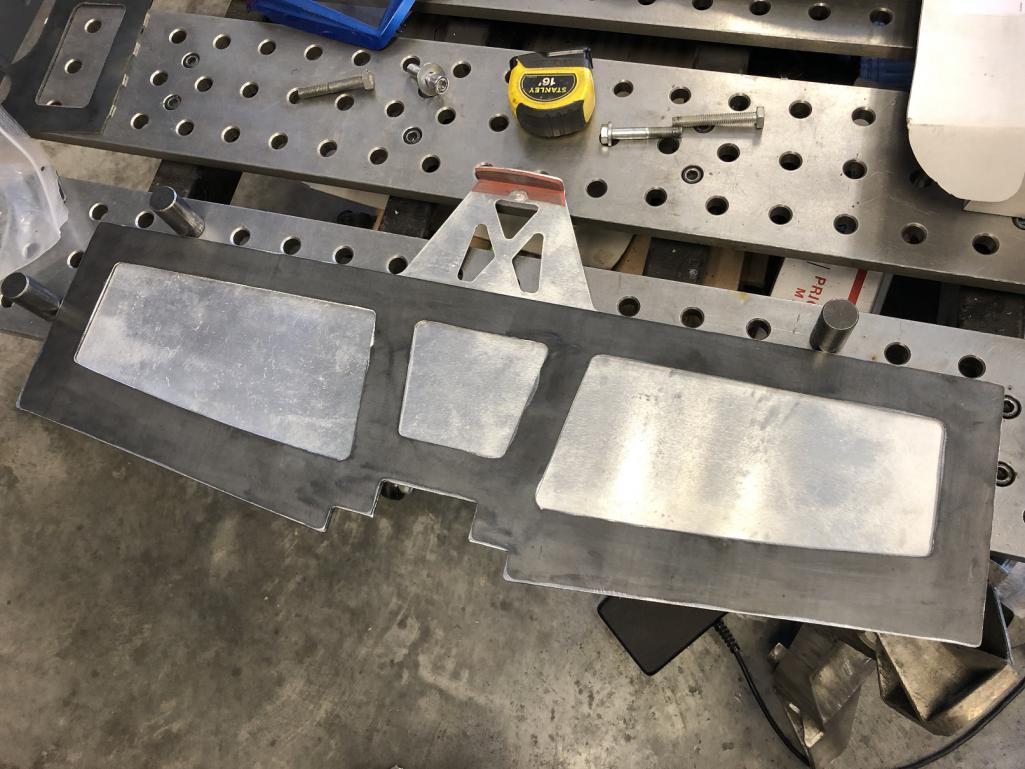
|
| tygaboy |
 Jul 2 2022, 03:58 PM Jul 2 2022, 03:58 PM
Post
#4200
|
|
914 Guru      Group: Members Posts: 5,547 Joined: 6-October 15 From: Petaluma, CA Member No.: 19,241 Region Association: Northern California 
|
Into the press it goes. And this isn't a "one and done" operation. Because of the size and shape of the area the press presses at any one time, I have to walk the assembled die/part through the press in order to get stamping force on all parts of the assembly.
This was my first time stamping aluminum, and it's always a bit nerve-wracking pulling the part out of the dies, wondering, "How'd I do? Is the part ruined?" (IMG:style_emoticons/default/wacko.gif) Here's the before and after and I'm calling it a success. (IMG:style_emoticons/default/smilie_pokal.gif) There are a couple flaws but since it'll be getting powder coated, I'm pretty sure it'll be fine. It's certainly a LOT more interesting looking and I think I achieved the design goals I was after. Attached thumbnail(s) 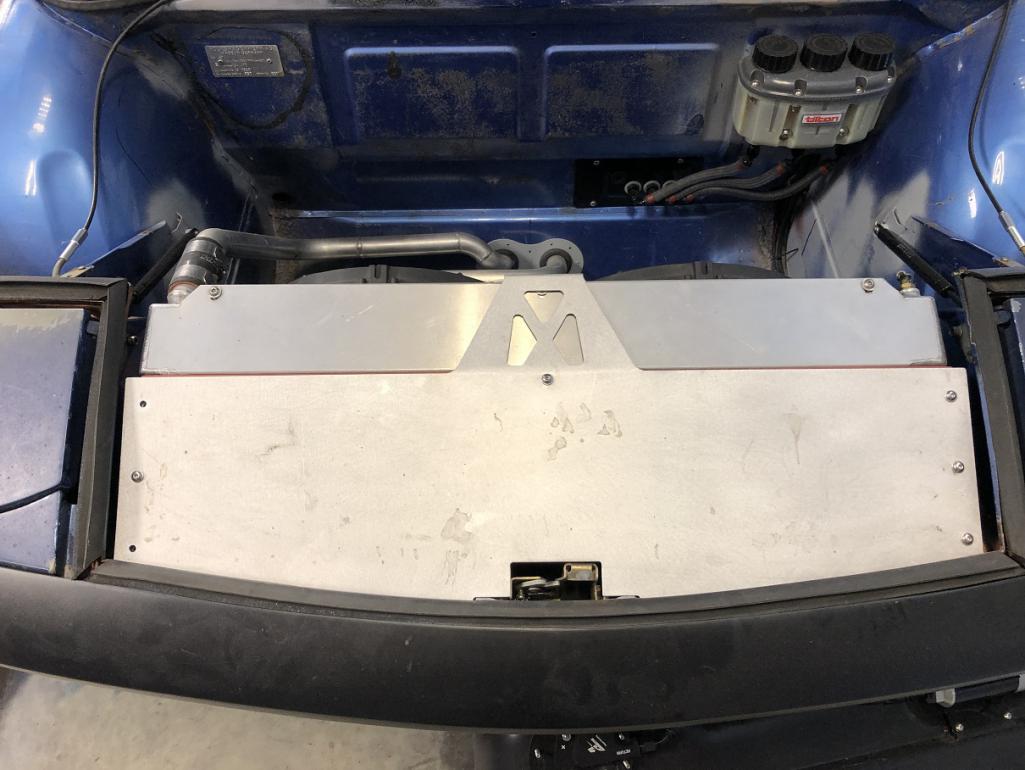 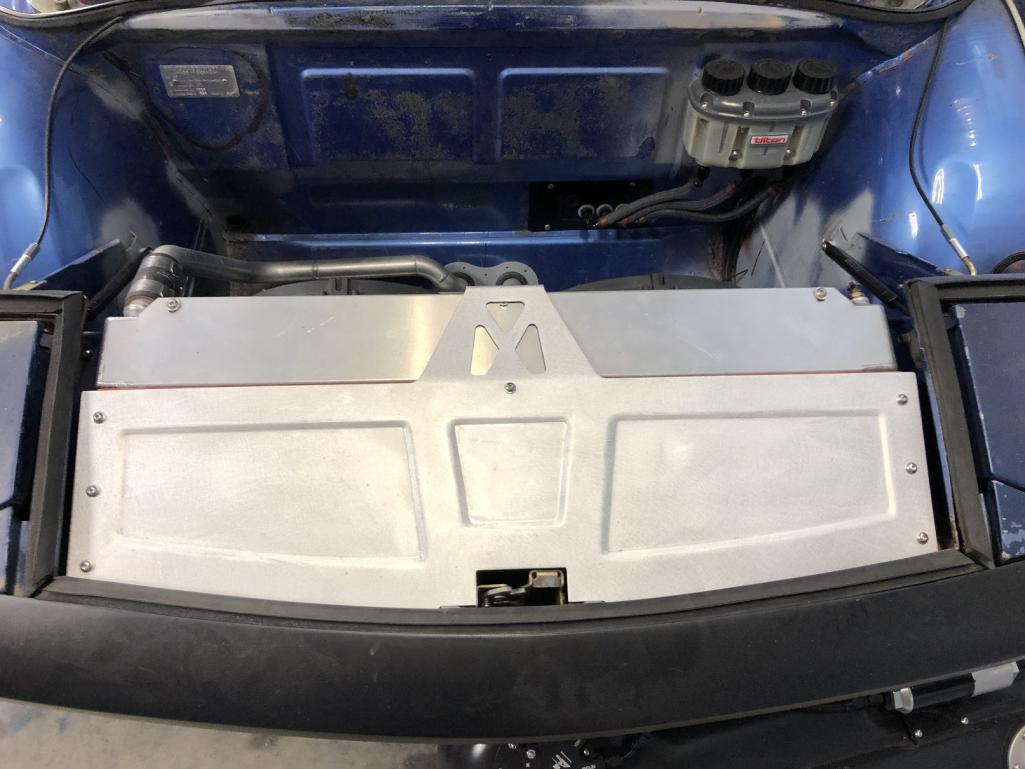
|
  |
1 User(s) are reading this topic (1 Guests and 0 Anonymous Users)
0 Members:

|
Lo-Fi Version | Time is now: 20th April 2025 - 02:59 AM |
Invision Power Board
v9.1.4 © 2025 IPS, Inc.


