|
|

|
Porsche, and the Porsche crest are registered trademarks of Dr. Ing. h.c. F. Porsche AG.
This site is not affiliated with Porsche in any way. Its only purpose is to provide an online forum for car enthusiasts. All other trademarks are property of their respective owners. |
|
|
  |
| markhoward |
 Sep 13 2022, 10:47 AM Sep 13 2022, 10:47 AM
Post
#4281
|
|
Member   Group: Members Posts: 389 Joined: 5-March 17 From: Lafayette, CA Member No.: 20,897 Region Association: Northern California 
|
Aubergine is an enticing thought!
|
| Retroracer |
 Sep 13 2022, 12:20 PM Sep 13 2022, 12:20 PM
Post
#4282
|
|
Senior Member    Group: Members Posts: 639 Joined: 7-July 13 From: Bend OR Member No.: 16,100 Region Association: Pacific Northwest 
|
|
| tygaboy |
 Sep 13 2022, 04:27 PM Sep 13 2022, 04:27 PM
Post
#4283
|
|
914 Guru      Group: Members Posts: 5,547 Joined: 6-October 15 From: Petaluma, CA Member No.: 19,241 Region Association: Northern California 
|
With a potential major direction change on the Ferrari build, I moved it to the trailer and got back to work on the LS car. I wanted to see if I could improve the look of the interior panels so gave a go to creating "raised area" grills. As usual, this is proof of concept to get a look that I like.
If you look closely you'll see each one is slightly different. It took a few tries of holding the mesh over a large socket and hammering a slightly smaller one down into the bigger one. I ended up finding a stepped spacer that happened to be the right size so now it's just a matter of making a bunch more and fixing them to the rear of the panel. Attached thumbnail(s) 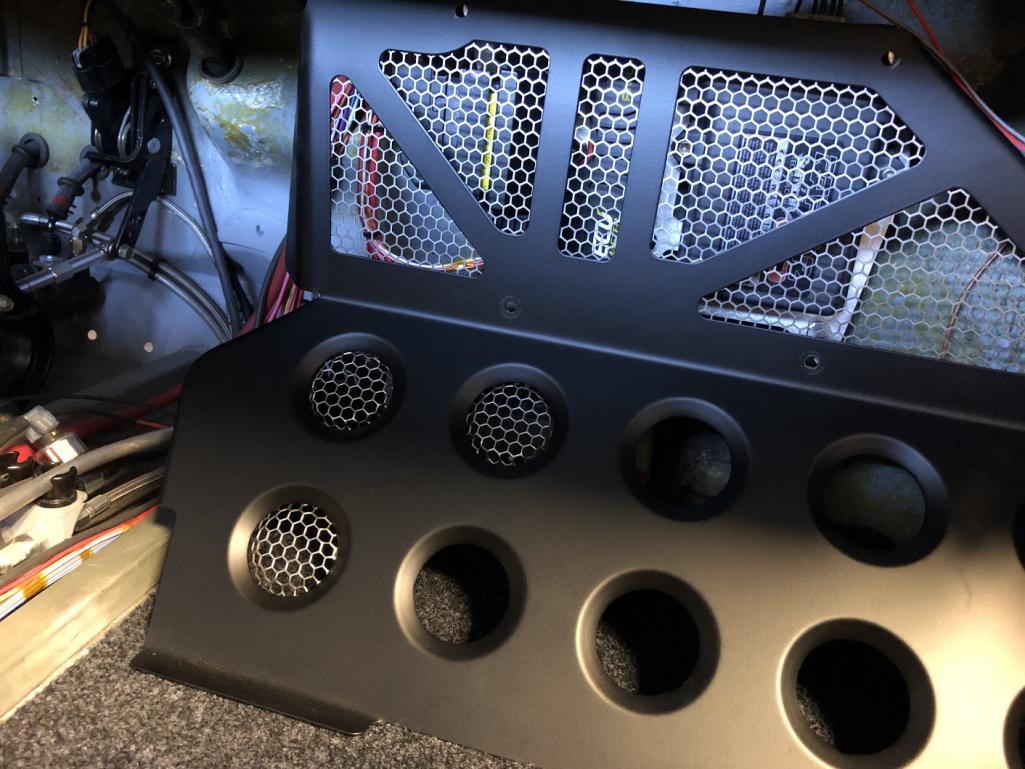 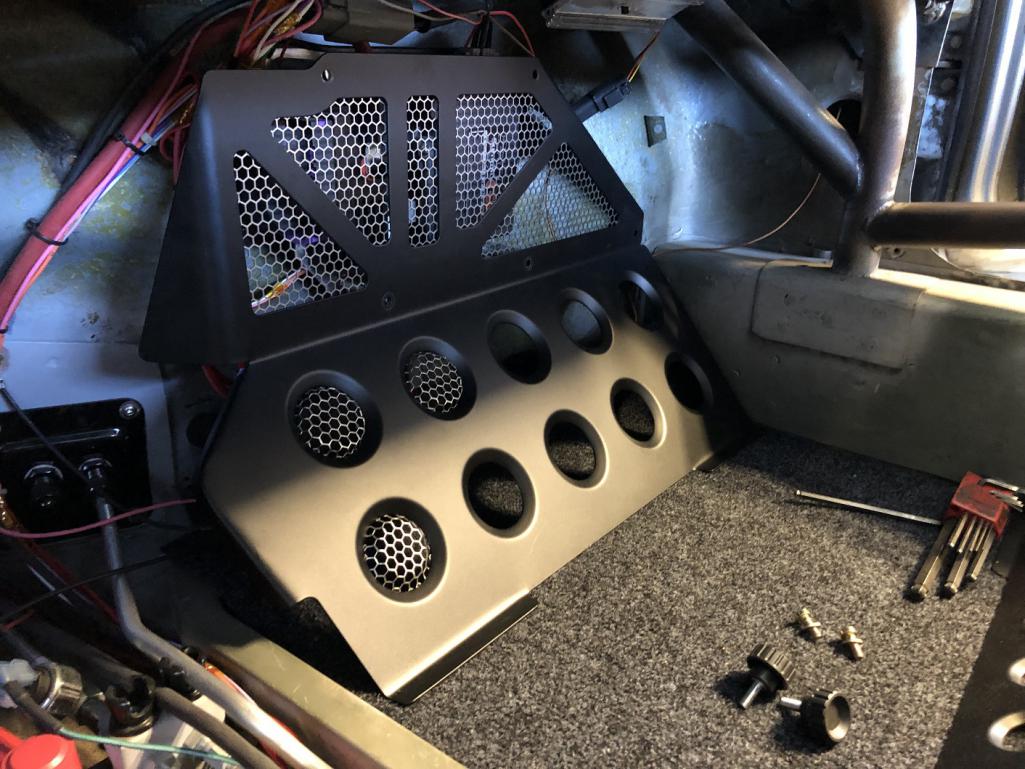 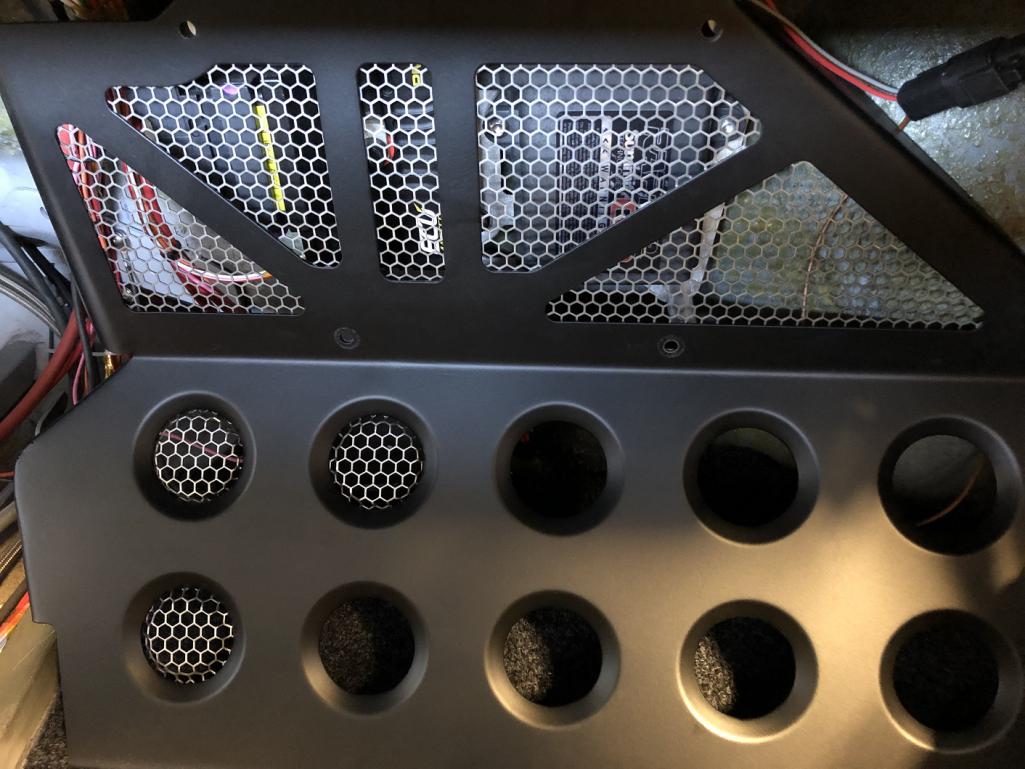
|
| Cairo94507 |
 Sep 14 2022, 07:07 AM Sep 14 2022, 07:07 AM
Post
#4284
|
|
Michael           Group: Members Posts: 10,297 Joined: 1-November 08 From: Auburn, CA Member No.: 9,712 Region Association: Northern California 
|
That looks bitchin' Chris. (IMG:style_emoticons/default/beerchug.gif)
|
| tygaboy |
 Sep 15 2022, 01:08 PM Sep 15 2022, 01:08 PM
Post
#4285
|
|
914 Guru      Group: Members Posts: 5,547 Joined: 6-October 15 From: Petaluma, CA Member No.: 19,241 Region Association: Northern California 
|
Continuing on with the interior, I got the console cover pieces back from powder coat this morning and immediately went to work. Major milestone: this marks the first use of the CherryMax structural rivets. These retain a solid steel core and are far stronger in every way than the usual pop rivet. No kill like overkill, as I always say! Yes, it's a detail many will miss, thinking they're plain ol' hardware store rivets... but you'll know how cool they really are! (IMG:style_emoticons/default/shades.gif)
I just love they way they look against the matte black finish and couldn't be happier with how this piece has turned out. It's one that makes me think "I can't believe I made this." (IMG:style_emoticons/default/wub.gif) Attached thumbnail(s) 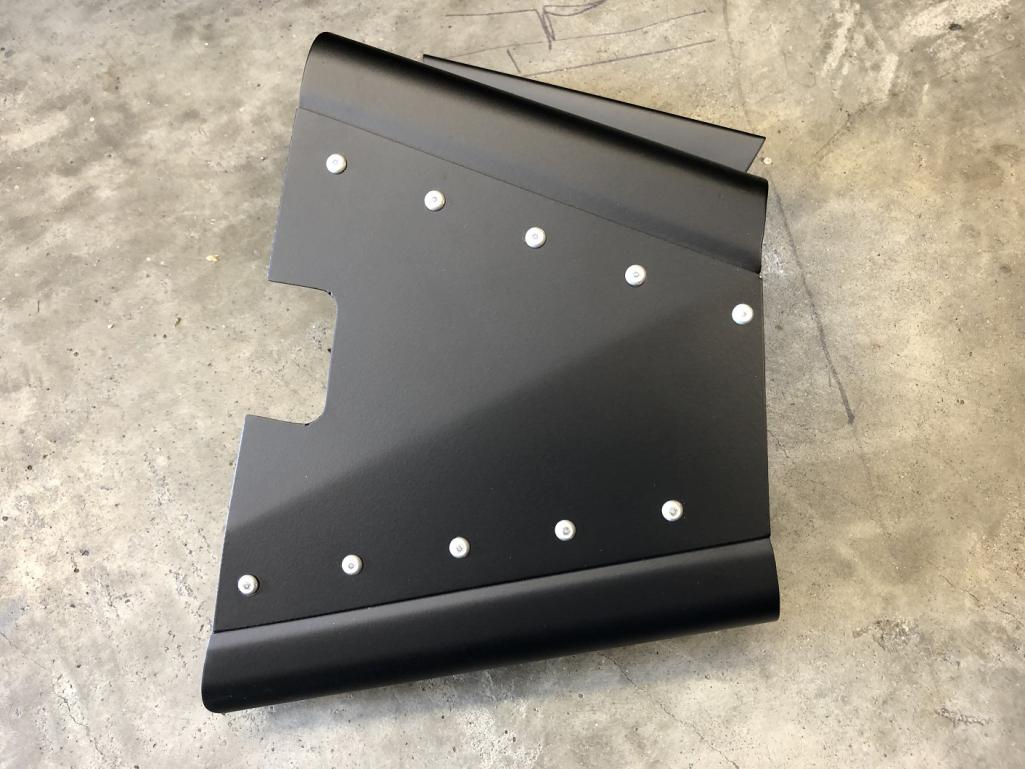 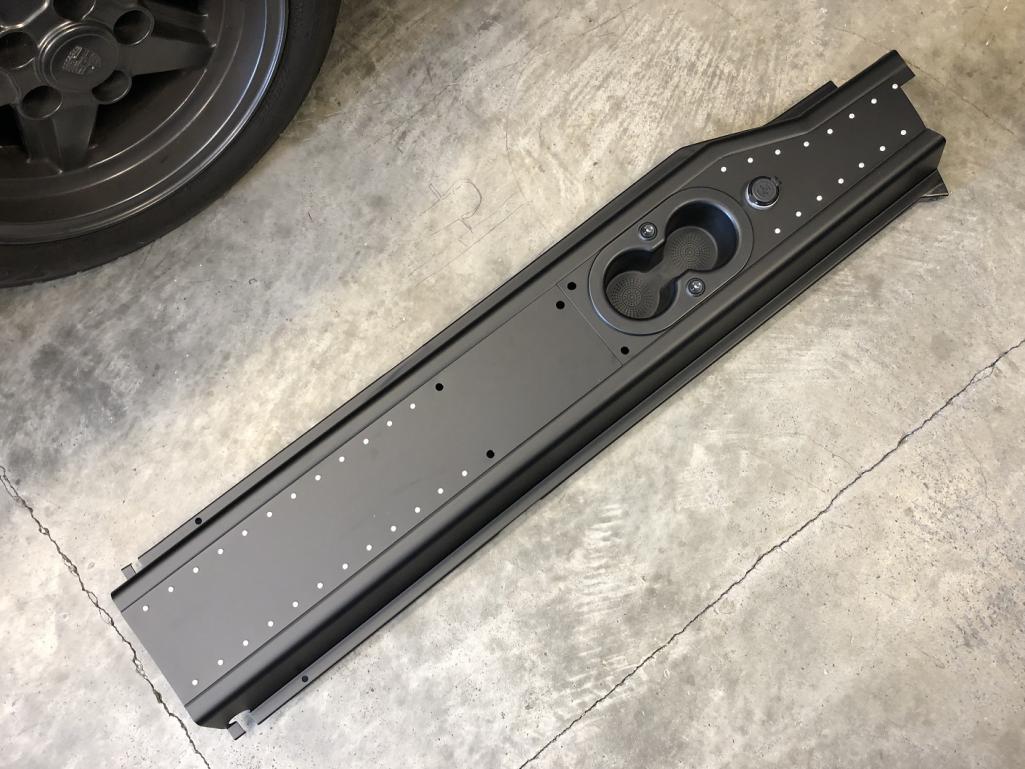 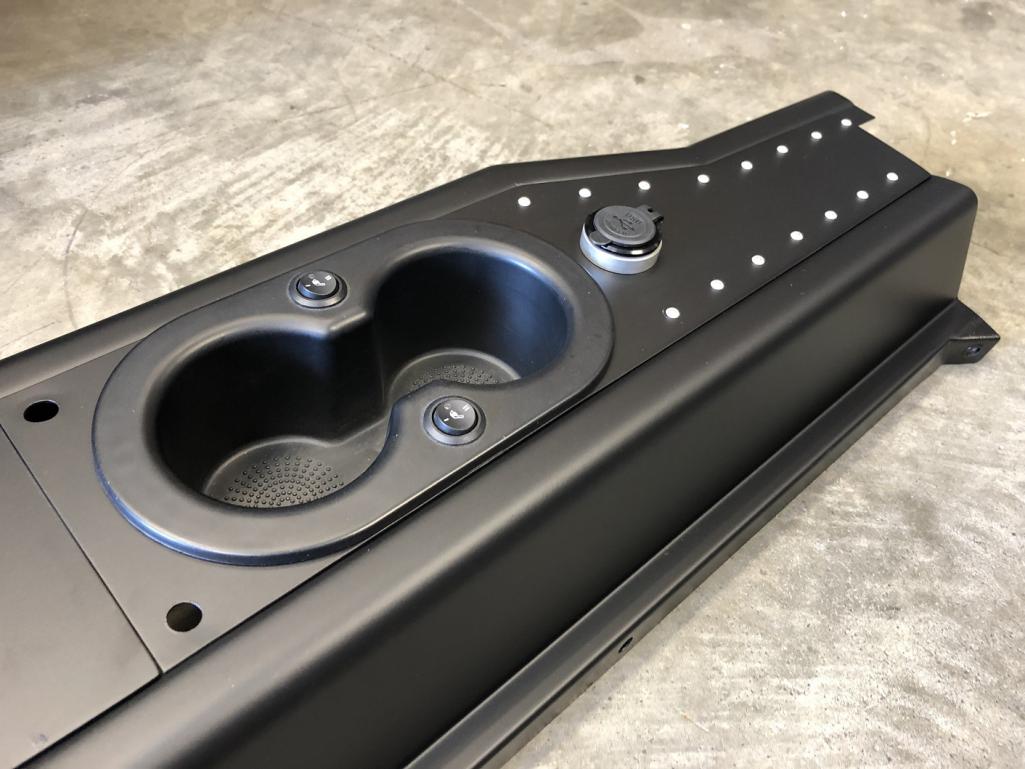
|
| mikey63 |
 Sep 15 2022, 02:11 PM Sep 15 2022, 02:11 PM
Post
#4286
|
|
Member   Group: Members Posts: 126 Joined: 30-March 10 From: Windsor,Ca Member No.: 11,529 Region Association: Northern California 
|
This looks great! Those little details make the difference. (IMG:style_emoticons/default/drooley.gif)
|
| mgarrison |
 Sep 15 2022, 02:55 PM Sep 15 2022, 02:55 PM
Post
#4287
|
|
Member   Group: Members Posts: 390 Joined: 14-February 20 From: Chandler, AZ Member No.: 23,922 Region Association: Southwest Region 
|
So...Dang...COOL! (IMG:style_emoticons/default/pray.gif)
|
| tygaboy |
 Sep 15 2022, 04:33 PM Sep 15 2022, 04:33 PM
Post
#4288
|
|
914 Guru      Group: Members Posts: 5,547 Joined: 6-October 15 From: Petaluma, CA Member No.: 19,241 Region Association: Northern California 
|
With all the new lovely happening, I had to do something about the fact that the wiring could be seen through the mesh in the footrest panel - see post 4283, above.
I've only sheathed the part of the harness that runs to the fuse panel but as you can see, it totally disappears those wires. Just what you'd expect (not) to see! I'll get the rest finished soon then go after the floor covering. I'm really enjoying this interior spiff-up effort. It's instant gratification when a freshly finished part gets installed. Plus, it's totally "clean" work, vs that messy ol' fab stuff. (IMG:style_emoticons/default/happy11.gif) Attached thumbnail(s) 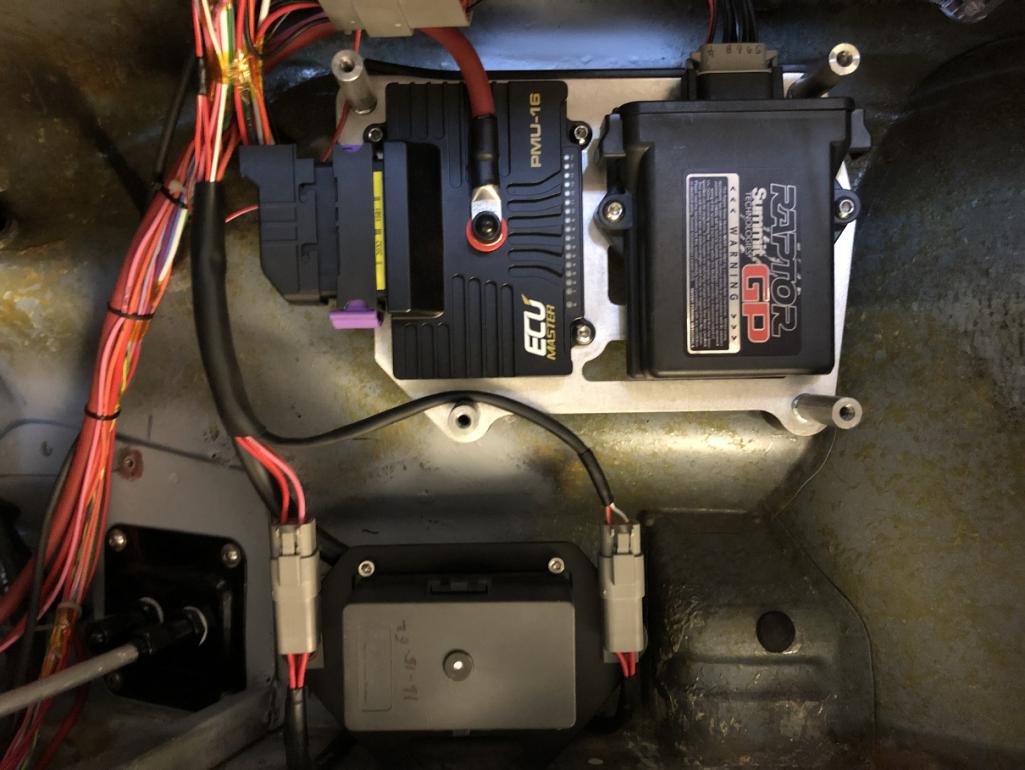 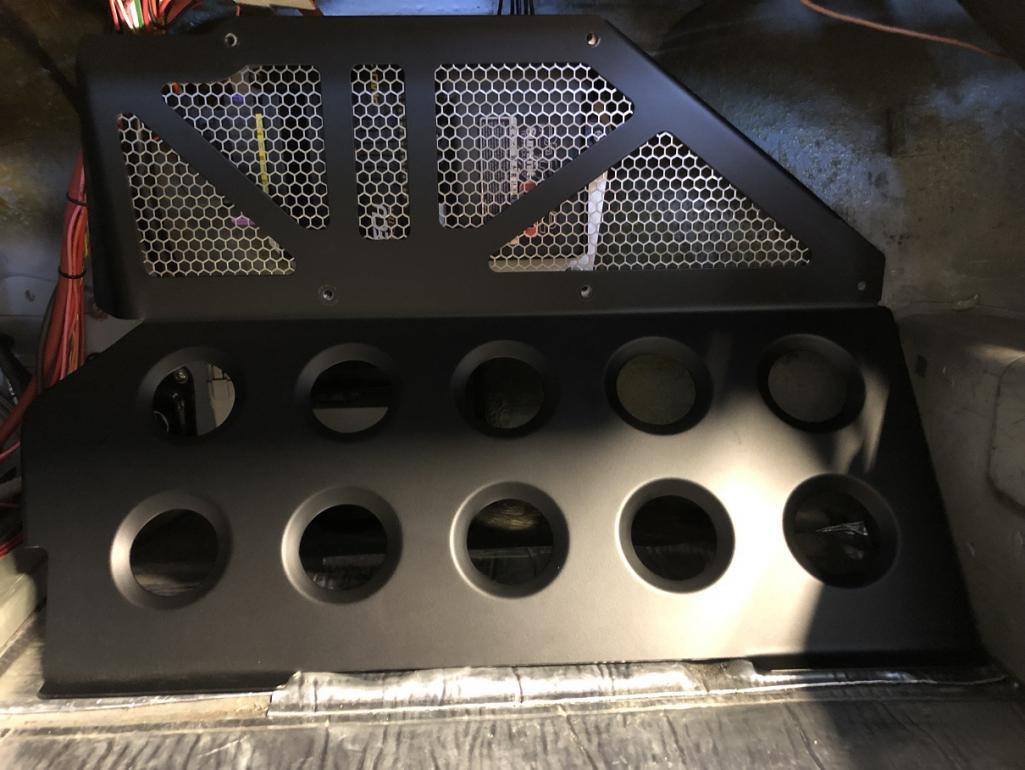
|
| tygaboy |
 Sep 19 2022, 12:07 PM Sep 19 2022, 12:07 PM
Post
#4289
|
|
914 Guru      Group: Members Posts: 5,547 Joined: 6-October 15 From: Petaluma, CA Member No.: 19,241 Region Association: Northern California 
|
The console and floor panels look so nice they make the dash hard to even look at (IMG:style_emoticons/default/barf.gif) so I went after making the face panel.
My approach is always to measure as best I can then make a test piece(s) to validate fit. In this case, I didn't have enough material to go all the way across so decided to make it only wide enough to cover all but the glove box area. I'm quite proud of the fact that I paid enough attention that I accounted for the upper dash fasteners - hence that notch in the upper right. And yes, this piece is much taller than the factory part that's covered in basket weave because I wanted it to be trapped by the upper and lower dash pads and not risk being able to see an exposed edge. Attached thumbnail(s) 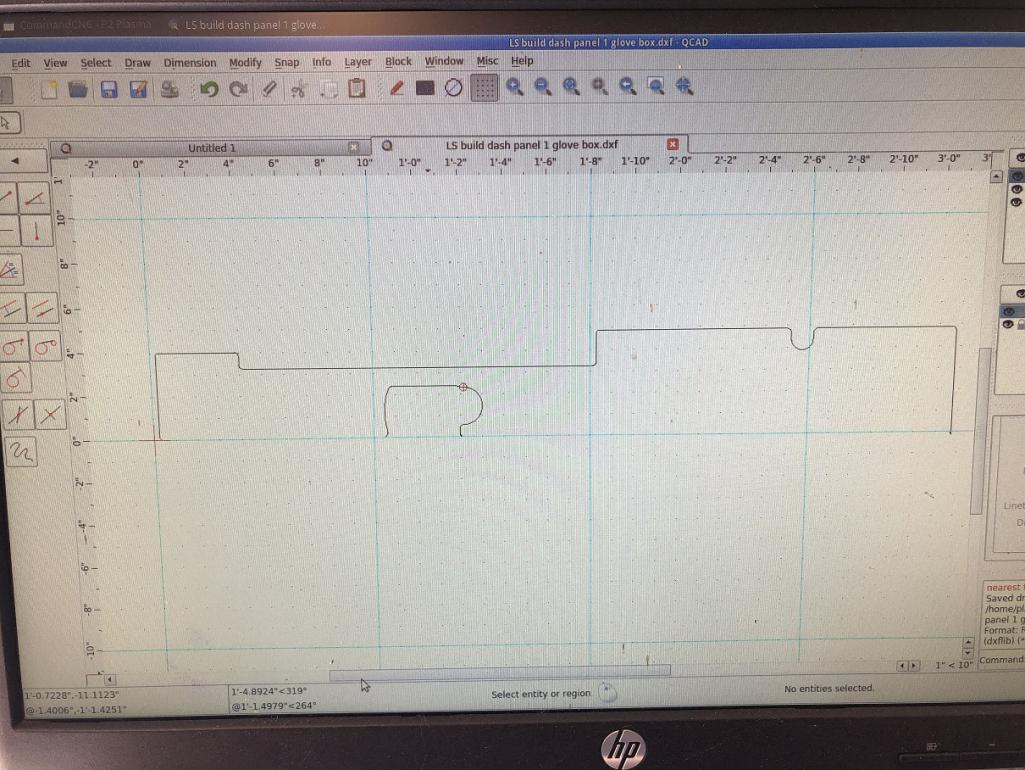
|
| tygaboy |
 Sep 19 2022, 12:12 PM Sep 19 2022, 12:12 PM
Post
#4290
|
|
914 Guru      Group: Members Posts: 5,547 Joined: 6-October 15 From: Petaluma, CA Member No.: 19,241 Region Association: Northern California 
|
Test piece, indeed! I figured it'd be a long shot that I'd get the correct fit around the steering column and I was correct. I need to make a couple small updates to get that top shape's reveal to be consistent around the column.
But pretty good, otherwise. Attached thumbnail(s) 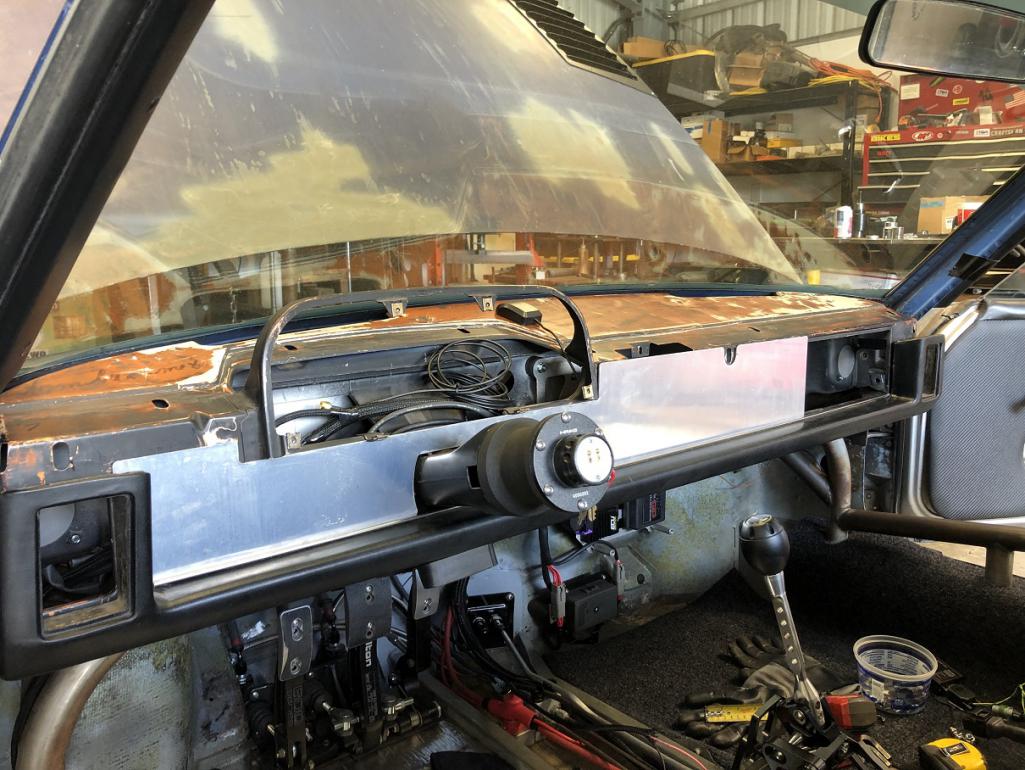
|
| tygaboy |
 Sep 19 2022, 12:18 PM Sep 19 2022, 12:18 PM
Post
#4291
|
|
914 Guru      Group: Members Posts: 5,547 Joined: 6-October 15 From: Petaluma, CA Member No.: 19,241 Region Association: Northern California 
|
I couldn't resist a quick mock-up, just to get a feel for the look. Note that the panel is raw and looks crappy. It'll get hit with 80 grit on a DA for a nice, consistent finish, then some semi gloss clear to protect it.
As I mentioned long ago, with all the switch gear on the wireless steering wheel panel, I wanted to all as much nothingness to the dash as I could. I'm loving the look. So much so that I found an early lower dash pad so I can eliminate the dash vents. I'll then extend the aluminum panel all the way out and have even more nothingness! (IMG:style_emoticons/default/aktion035.gif) |
| tygaboy |
 Sep 19 2022, 12:19 PM Sep 19 2022, 12:19 PM
Post
#4292
|
|
914 Guru      Group: Members Posts: 5,547 Joined: 6-October 15 From: Petaluma, CA Member No.: 19,241 Region Association: Northern California 
|
I couldn't resist a quick mock-up, just to get a feel for the look. Note that the panel is raw and looks crappy. It'll get hit with 80 grit on a DA for a nice, consistent finish, then some semi gloss clear to protect it.
As I mentioned long ago, with all the switch gear on the wireless steering wheel panel, I wanted to add as much nothingness to the dash as I could. I'm loving the look. So much so that I found an early lower dash pad so I can eliminate the dash vents. I'll then extend the aluminum panel all the way out and have even more nothingness! (IMG:style_emoticons/default/aktion035.gif) Attached thumbnail(s) 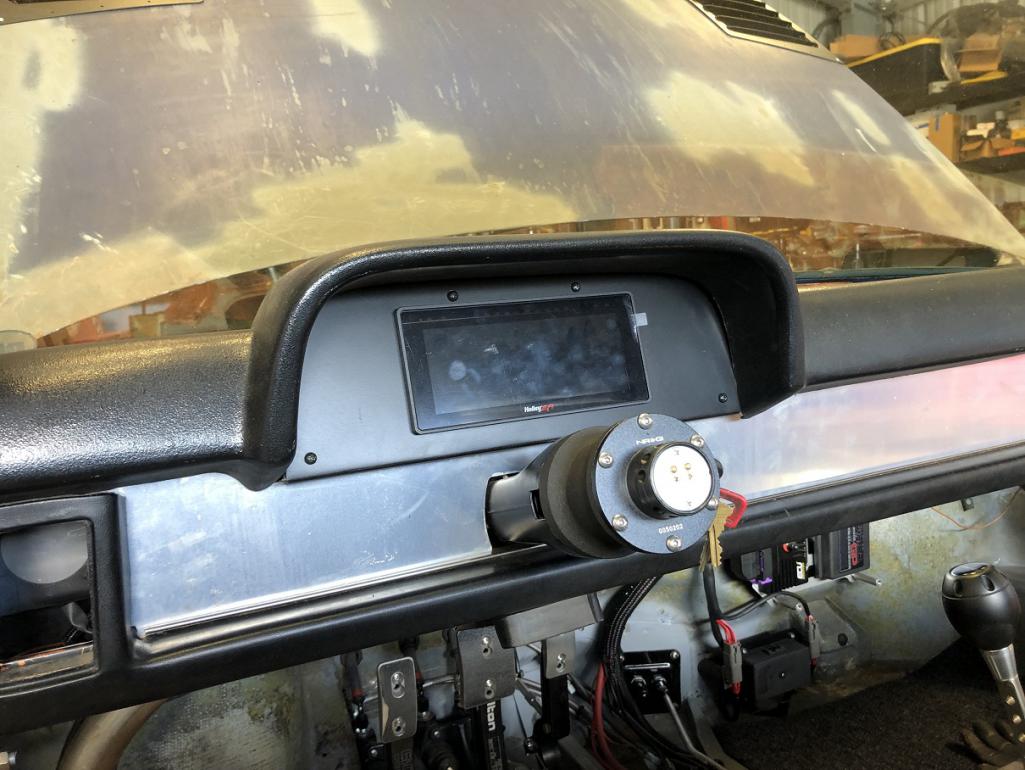
|
| Cairo94507 |
 Sep 19 2022, 04:19 PM Sep 19 2022, 04:19 PM
Post
#4293
|
|
Michael           Group: Members Posts: 10,297 Joined: 1-November 08 From: Auburn, CA Member No.: 9,712 Region Association: Northern California 
|
Looking good Chris. (IMG:style_emoticons/default/beerchug.gif)
|
| Dion |
 Sep 20 2022, 06:07 AM Sep 20 2022, 06:07 AM
Post
#4294
|
|
RN     Group: Members Posts: 2,839 Joined: 16-September 04 From: Audubon,PA Member No.: 2,766 Region Association: MidAtlantic Region 

|
The dash and the console look fantastic. I love that smooth dash appearance. It’s like a Porsche concept car. Well of course it is! It’s Chris’ concept (IMG:style_emoticons/default/beerchug.gif)
Brilliant stuff Chris. |
| tygaboy |
 Sep 21 2022, 04:35 PM Sep 21 2022, 04:35 PM
Post
#4295
|
|
914 Guru      Group: Members Posts: 5,547 Joined: 6-October 15 From: Petaluma, CA Member No.: 19,241 Region Association: Northern California 
|
Almost there with the reveal around the column. A couple more tweaks and I'll call this done. Those scratches just outside the cut is the torch dragging due to my settings being not quite right. The good news is they'll sand out.
Attached thumbnail(s) 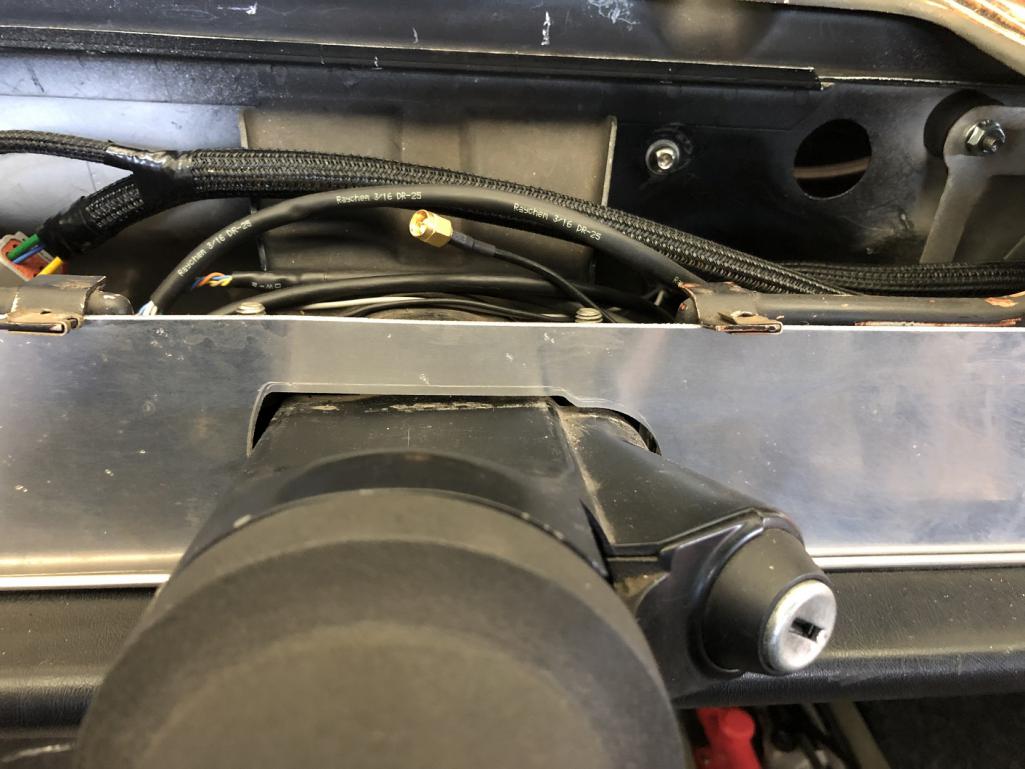
|
| tygaboy |
 Sep 21 2022, 04:40 PM Sep 21 2022, 04:40 PM
Post
#4296
|
|
914 Guru      Group: Members Posts: 5,547 Joined: 6-October 15 From: Petaluma, CA Member No.: 19,241 Region Association: Northern California 
|
And here's the full width panel, ready for the early, lower dash pad - hence the view of the panel through the vent locations.
But this is the look I wanted: digital dash, ashtray delete upper pad and nothing on the dash face. Now to work out a finish I like and see if I can incorporate a similar look into the door cards. Attached thumbnail(s) 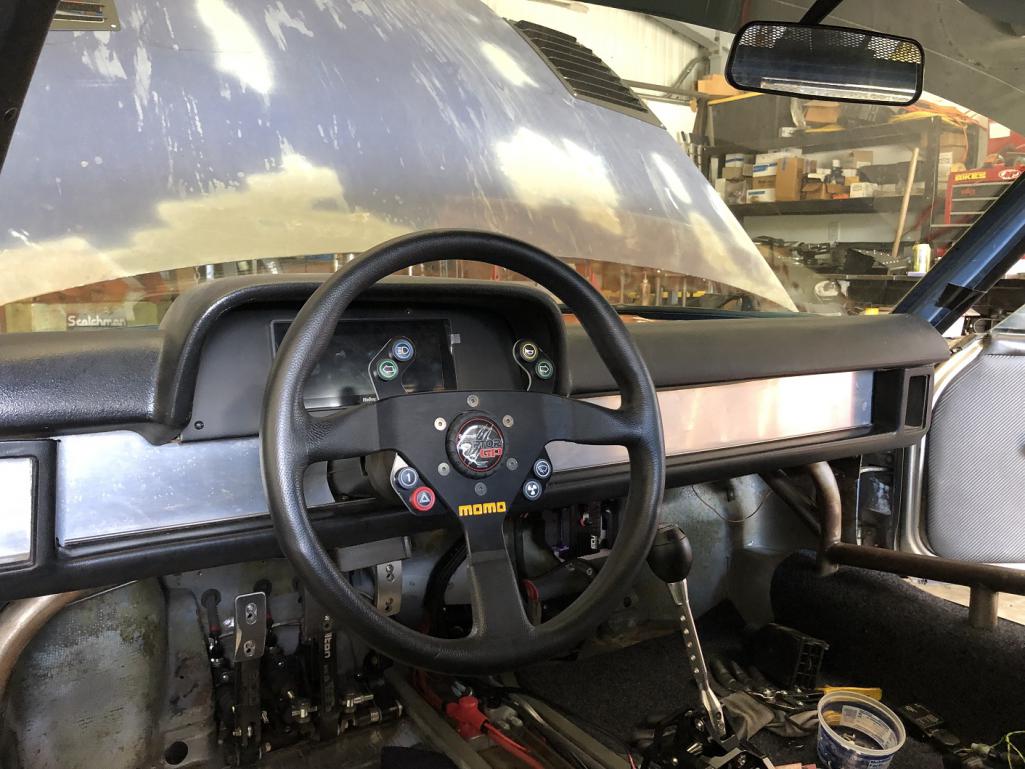 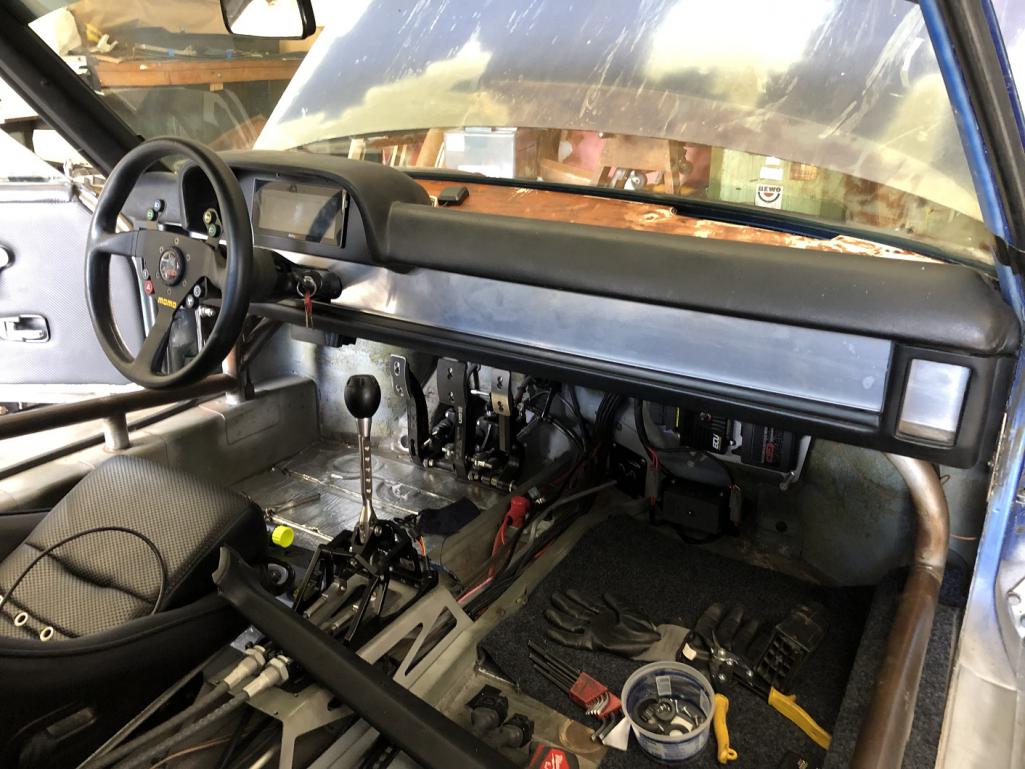
|
| mikey63 |
 Sep 21 2022, 04:50 PM Sep 21 2022, 04:50 PM
Post
#4297
|
|
Member   Group: Members Posts: 126 Joined: 30-March 10 From: Windsor,Ca Member No.: 11,529 Region Association: Northern California 
|
Looks good Chris! Clean and simple. (IMG:style_emoticons/default/piratenanner.gif)
|
| Dion |
 Sep 21 2022, 05:38 PM Sep 21 2022, 05:38 PM
Post
#4298
|
|
RN     Group: Members Posts: 2,839 Joined: 16-September 04 From: Audubon,PA Member No.: 2,766 Region Association: MidAtlantic Region 

|
How about anodizing the dash panel a colour. A cool blue or get rad with purple or red (IMG:style_emoticons/default/aktion035.gif) just ideas.
|
| 76-914 |
 Sep 22 2022, 07:55 AM Sep 22 2022, 07:55 AM
Post
#4299
|
|
Repeat Offender & Resident Subaru Antagonist           Group: Members Posts: 13,698 Joined: 23-January 09 From: Temecula, CA Member No.: 9,964 Region Association: Southern California 
|
I couldn't resist a quick mock-up, just to get a feel for the look. Note that the panel is raw and looks crappy. It'll get hit with 80 grit on a DA for a nice, consistent finish, then some semi gloss clear to protect it. As I mentioned long ago, with all the switch gear on the wireless steering wheel panel, I wanted to add as much nothingness to the dash as I could. I'm loving the look. So much so that I found an early lower dash pad so I can eliminate the dash vents. I'll then extend the aluminum panel all the way out and have even more nothingness! (IMG:style_emoticons/default/aktion035.gif) Sleek! (IMG:style_emoticons/default/beerchug.gif) |
| NS914 |
 Sep 22 2022, 04:14 PM Sep 22 2022, 04:14 PM
Post
#4300
|
|
Member   Group: Members Posts: 198 Joined: 9-June 09 From: Dartmouth, Nova Scotia Member No.: 10,455 Region Association: Canada 
|
Continuing on with the interior, I got the console cover pieces back from powder coat this morning and immediately went to work. Major milestone: this marks the first use of the CherryMax structural rivets. These retain a solid steel core and are far stronger in every way than the usual pop rivet. No kill like overkill, as I always say! Yes, it's a detail many will miss, thinking they're plain ol' hardware store rivets... but you'll know how cool they really are! (IMG:style_emoticons/default/shades.gif) I just love they way they look against the matte black finish and couldn't be happier with how this piece has turned out. It's one that makes me think "I can't believe I made this." (IMG:style_emoticons/default/wub.gif) This looks amazing Chris! Wow!!! |
  |
1 User(s) are reading this topic (1 Guests and 0 Anonymous Users)
0 Members:

|
Lo-Fi Version | Time is now: 19th April 2025 - 05:51 PM |
Invision Power Board
v9.1.4 © 2025 IPS, Inc.


