|
|

|
Porsche, and the Porsche crest are registered trademarks of Dr. Ing. h.c. F. Porsche AG.
This site is not affiliated with Porsche in any way. Its only purpose is to provide an online forum for car enthusiasts. All other trademarks are property of their respective owners. |
|
|
  |
| tygaboy |
 Aug 5 2017, 01:14 PM Aug 5 2017, 01:14 PM
Post
#501
|
|
914 Guru      Group: Members Posts: 5,722 Joined: 6-October 15 From: Petaluma, CA Member No.: 19,241 Region Association: Northern California 
|
Teaser questions:
1. What's wrong with this picture? - Hint the LS3 operates with a DBW throttle body. That there is a mechanical linkage. Answer: Nothing is wrong with the pic. 2. What silliness have I committed myself to now? Answer: I'll post pics as soon as I can! (IMG:style_emoticons/default/stirthepot.gif) (IMG:style_emoticons/default/happy11.gif) Attached thumbnail(s) 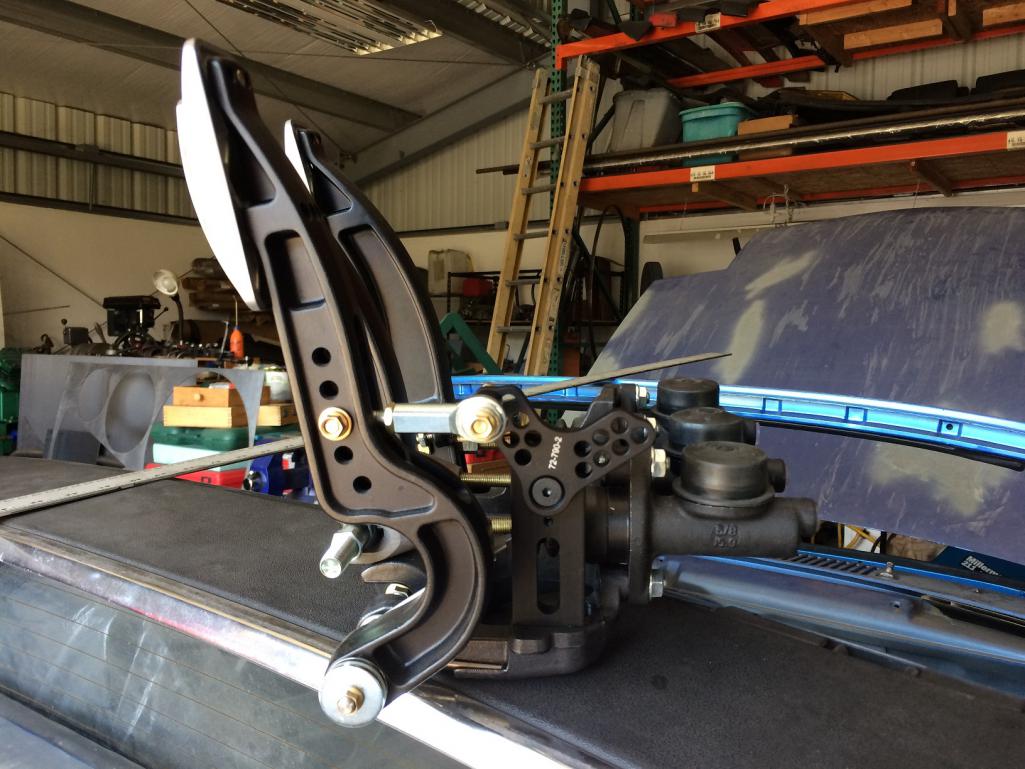
|
| Cracker |
 Aug 5 2017, 02:03 PM Aug 5 2017, 02:03 PM
Post
#502
|
|
Advanced Member     Group: Members Posts: 2,148 Joined: 2-February 10 From: Atlanta (area) Member No.: 11,316 Region Association: South East States 
|
I have a hunch...does that control the Flux-Capacitor?!?!?
T |
| tygaboy |
 Aug 5 2017, 06:32 PM Aug 5 2017, 06:32 PM
Post
#503
|
|
914 Guru      Group: Members Posts: 5,722 Joined: 6-October 15 From: Petaluma, CA Member No.: 19,241 Region Association: Northern California 
|
Well, it's finally happened. I'd been doing well on the "nothing I've welded in has had to be cut out" front but the work sunk into the fire wall openings for the initial main hoop design has been cut out. And it's going back to exactly what it was before I started messing with it.
Ah well, it is what it is... (IMG:style_emoticons/default/sawzall-smiley.gif) |
| tygaboy |
 Aug 6 2017, 11:19 AM Aug 6 2017, 11:19 AM
Post
#504
|
|
914 Guru      Group: Members Posts: 5,722 Joined: 6-October 15 From: Petaluma, CA Member No.: 19,241 Region Association: Northern California 
|
Turns out I had kept the driver side piece from the '72 I parted out. I still have a few tweaks before I'll call it done but it's turning out pretty well. I'm (IMG:style_emoticons/default/smile.gif) !
Now to source the passenger side piece. Sounds like Cary has a nice one... Attached thumbnail(s) 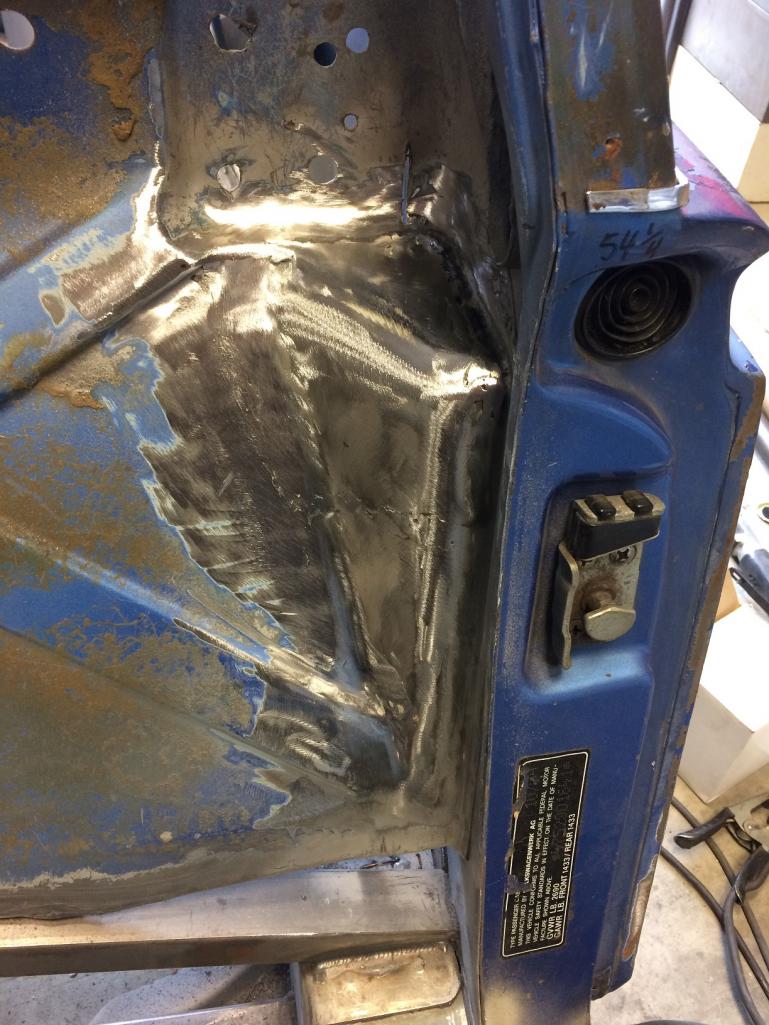
|
| Cracker |
 Aug 6 2017, 11:30 AM Aug 6 2017, 11:30 AM
Post
#505
|
|
Advanced Member     Group: Members Posts: 2,148 Joined: 2-February 10 From: Atlanta (area) Member No.: 11,316 Region Association: South East States 
|
Very well done Chris...it look great!
T |
| tygaboy |
 Aug 6 2017, 09:07 PM Aug 6 2017, 09:07 PM
Post
#506
|
|
914 Guru      Group: Members Posts: 5,722 Joined: 6-October 15 From: Petaluma, CA Member No.: 19,241 Region Association: Northern California 
|
It was a day of metal work. First the firewall then back to work on the chassis stiffening.
I decided not to do the gussets as the primary tie-in for the front hoop. Instead, it'll be a bar from the hoop to the front suspension tower. So I thought I'd take a swing at fabbing up a support pad. The big compound curve means I got to practice with the English Wheel and shrinker. It still needs some additional work and final trimming but I think I like it! Attached thumbnail(s) 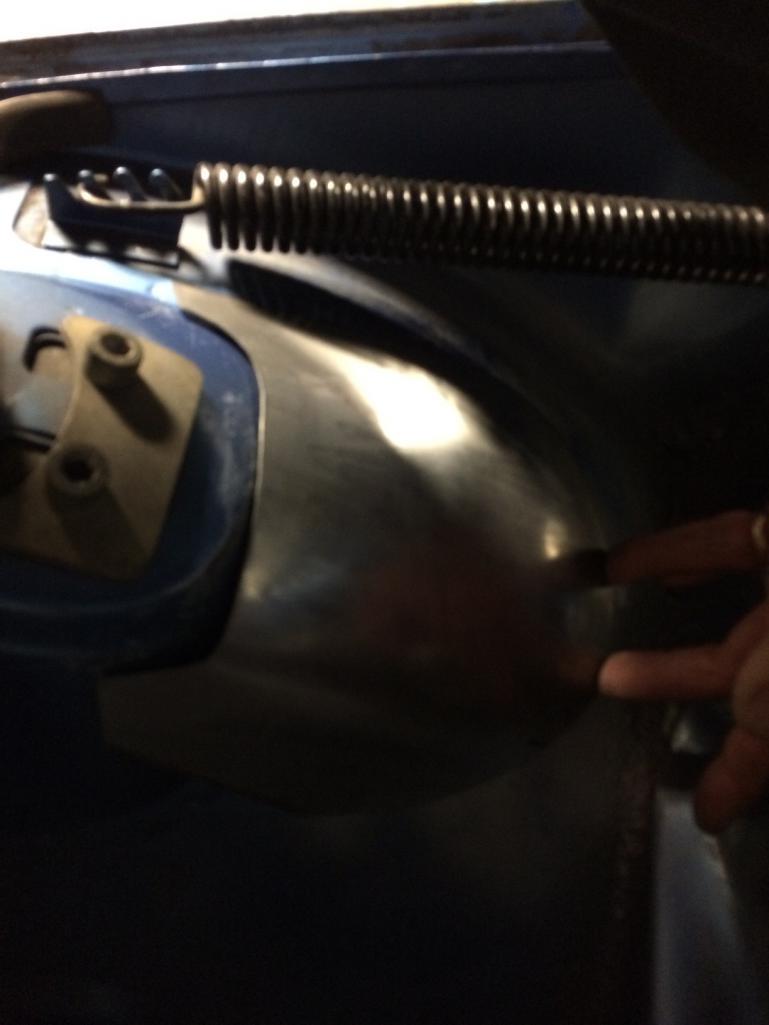
|
| tygaboy |
 Aug 6 2017, 09:11 PM Aug 6 2017, 09:11 PM
Post
#507
|
|
914 Guru      Group: Members Posts: 5,722 Joined: 6-October 15 From: Petaluma, CA Member No.: 19,241 Region Association: Northern California 
|
Very well done Chris...it look great! T Thank you, sir! I'm leaning toward doing a tinted bed liner on the entire underside of the chassis and both sides of the firewall. I suspect once that coating goes on, any evidence of the repair will totally disappear. Hope so, anyway. |
| Andyrew |
 Aug 6 2017, 09:20 PM Aug 6 2017, 09:20 PM
Post
#508
|
|
Spooling.... Please wait           Group: Members Posts: 13,380 Joined: 20-January 03 From: Riverbank, Ca Member No.: 172 Region Association: Northern California 
|
It was a day of metal work. First the firewall then back to work on the chassis stiffening. I decided not to do the gussets as the primary tie-in for the front hoop. Instead, it'll be a bar from the hoop to the front suspension tower. So I thought I'd take a swing at fabbing up a support pad. The big compound curve means I got to practice with the English Wheel and shrinker. It still needs some additional work and final trimming but I think I like it! English wheels are fun!!! Thats a small panel to be working though... Be careful with your fingers... |
| cary |
 Aug 7 2017, 01:16 PM Aug 7 2017, 01:16 PM
Post
#509
|
|
Advanced Member     Group: Members Posts: 3,900 Joined: 26-January 04 From: Sherwood Oregon Member No.: 1,608 Region Association: Pacific Northwest 
|
Took a bit of work to get the piece you need. Its jacked up on Super In Laws wooden stacker. So we got the Big Joe pallet stacker out and lifted it off the contraption.
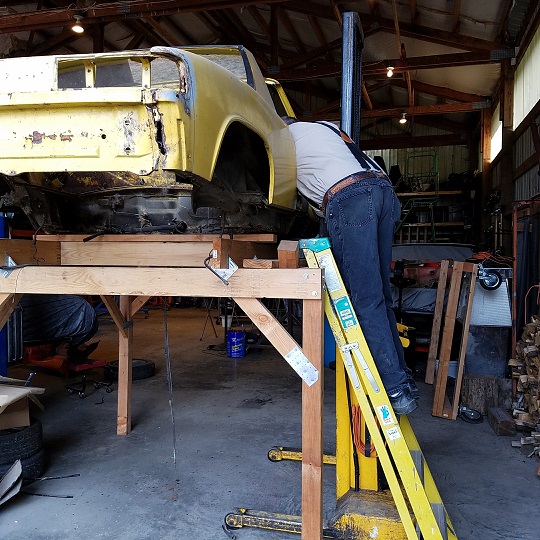 Down on to Doug's wooden dolly and ready for amputation. 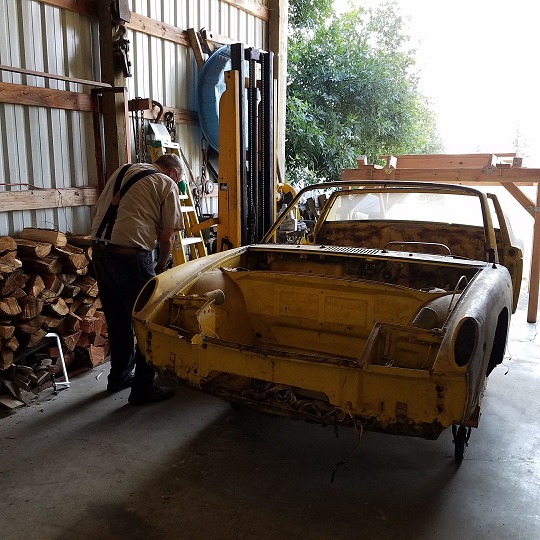 Part was extracted by Super In Law. Pretty simple until you get to the air vent hole. It has 3-4 layers going 3-4 different directions. Took him a couple hours to figure it out. But he got it out for you with the flanges intact. 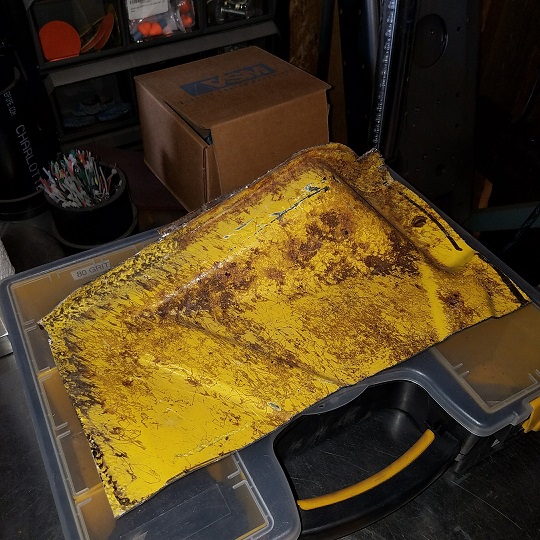 Part left with Matt. It will get shipped out at 914 Rubber. After that he kept tearing down the parts car. Not keeping too much. Cut out the remaining portion of the firewall. Probably the headlight buckets. Longs are crap, but we'll cut out the uppers and the mounts. We'll cut out the tunnel and see what we have. Door hinge posts. Front portion of engine the engine tray. He busted his ass all day .. Still amazes me .......... |
| tygaboy |
 Aug 7 2017, 02:40 PM Aug 7 2017, 02:40 PM
Post
#510
|
|
914 Guru      Group: Members Posts: 5,722 Joined: 6-October 15 From: Petaluma, CA Member No.: 19,241 Region Association: Northern California 
|
Cary - That's it exactly! I send you an email w/details on next steps.
Thanks SO MUCH! (IMG:style_emoticons/default/pray.gif) Chris |
| tygaboy |
 Aug 9 2017, 12:40 PM Aug 9 2017, 12:40 PM
Post
#511
|
|
914 Guru      Group: Members Posts: 5,722 Joined: 6-October 15 From: Petaluma, CA Member No.: 19,241 Region Association: Northern California 
|
Much as I love Martin's help doing the TIG welding - and plan to have him do more - I happily admit it pisses me off and is a personal sore point. I will never hide this fact and whenever anyone comments "wow, nice welding", I have to give credit where it's due and I tell them about Martin.
It's... I'll say "disappointing", because I'll never be able to say I did 100% of my build. It's just how I'm wired. So what to do? How about practice? As some of you may know, I have a little side business doing yard art sorts of stuff and that affords me some work where my welding structural and visual results aren't quite as critical. Not that I don't do the best I can... Anyway, here's part of yesterday's MIG work, as welded, not cleaned up. It's part of a 12' wide, 7' tall, vertical xylophone I was commissioned to do for a local school. The "out of position" work is where I'm not reliably up to snuff. But I'm SLOWLY getting to where I may feel comfortable doing my own welding on some of the more visual areas of my build. Attached thumbnail(s) 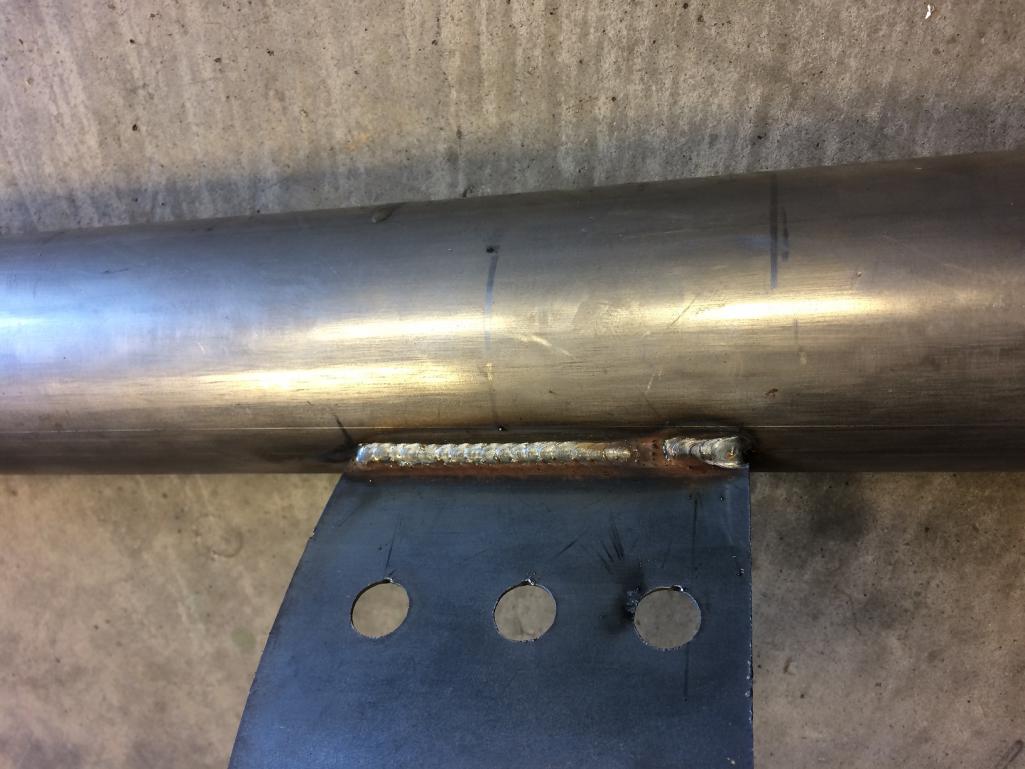
|
| Andyrew |
 Aug 9 2017, 01:32 PM Aug 9 2017, 01:32 PM
Post
#512
|
|
Spooling.... Please wait           Group: Members Posts: 13,380 Joined: 20-January 03 From: Riverbank, Ca Member No.: 172 Region Association: Northern California 
|
Dem some nice C's! Penetration looks great as well!
Can you turn up your welder any more? I would have preferred a hair more heat myself so long as the metal can take it. (My only critique, Your technique looks spot on!) |
| Dion |
 Aug 9 2017, 01:45 PM Aug 9 2017, 01:45 PM
Post
#513
|
|
RN     Group: Members Posts: 2,920 Joined: 16-September 04 From: Audubon,PA Member No.: 2,766 Region Association: MidAtlantic Region 

|
Chris, top notch as usual. You reshape metal quicker than I can turn the welder on!
Looks great. Cheers |
| tygaboy |
 Aug 9 2017, 02:10 PM Aug 9 2017, 02:10 PM
Post
#514
|
|
914 Guru      Group: Members Posts: 5,722 Joined: 6-October 15 From: Petaluma, CA Member No.: 19,241 Region Association: Northern California 
|
Dem some nice C's! Penetration looks great as well! Can you turn up your welder any more? I would have preferred a hair more heat myself so long as the metal can take it. (My only critique, Your technique looks spot on!) Thanks Andrew - Yep, I have lots more headroom in the welder and I was thinking that same thing when I examined the HAZ. Coulda been a little hotter. |
| tygaboy |
 Aug 9 2017, 02:21 PM Aug 9 2017, 02:21 PM
Post
#515
|
|
914 Guru      Group: Members Posts: 5,722 Joined: 6-October 15 From: Petaluma, CA Member No.: 19,241 Region Association: Northern California 
|
Chris, top notch as usual. You reshape metal quicker than I can turn the welder on! Looks great. Cheers Hey Dion! Not so sure about the "...as usual" part. More like "sporadic flashes of competence!" But I am gaining some consistency. (IMG:style_emoticons/default/welder.gif) It's funny how I "know" what to do but things seems to get a little blurred as they moves from my brain to my hands...! |
| tygaboy |
 Aug 11 2017, 04:24 PM Aug 11 2017, 04:24 PM
Post
#516
|
|
914 Guru      Group: Members Posts: 5,722 Joined: 6-October 15 From: Petaluma, CA Member No.: 19,241 Region Association: Northern California 
|
Big thanks to Cary, Super In-Law and 914 Rubber! The firewall patch showed up yesterday! (IMG:style_emoticons/default/aktion035.gif)
I had planned a day off to work on the car so in it went. Here it is all trimmed up, ready for welding. Attached thumbnail(s) 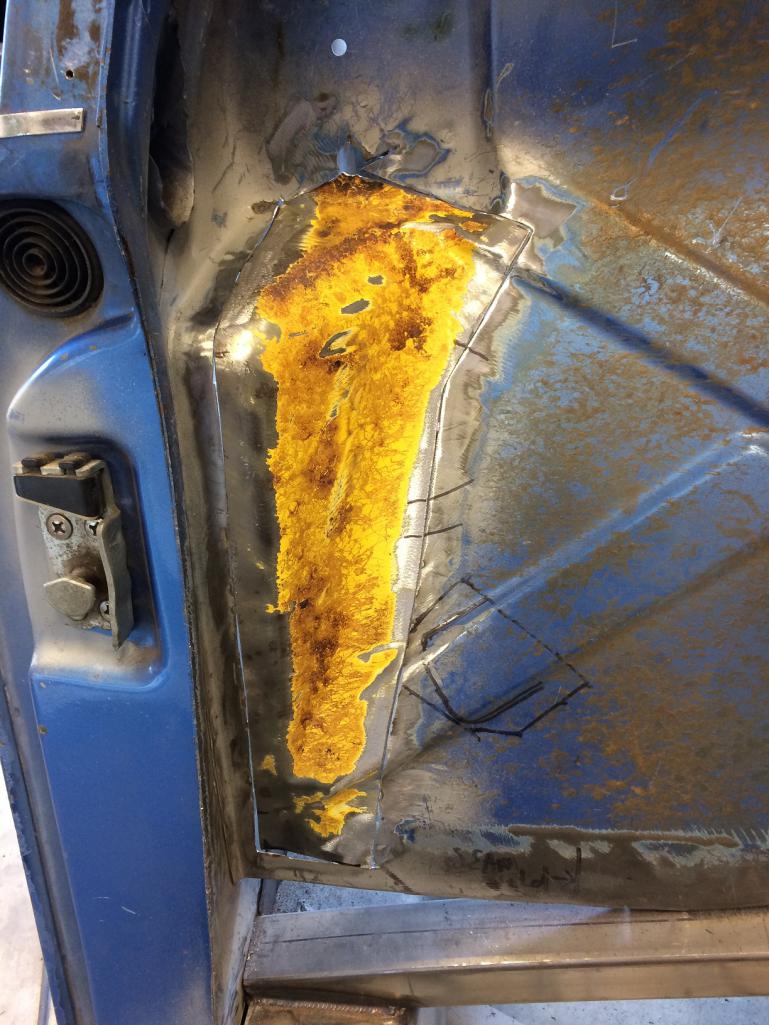
|
| tygaboy |
 Aug 11 2017, 04:25 PM Aug 11 2017, 04:25 PM
Post
#517
|
|
914 Guru      Group: Members Posts: 5,722 Joined: 6-October 15 From: Petaluma, CA Member No.: 19,241 Region Association: Northern California 
|
(IMG:style_emoticons/default/welder.gif) (IMG:style_emoticons/default/welder.gif) and some (IMG:style_emoticons/default/welder.gif) and a bit of grinding...
Attached thumbnail(s) 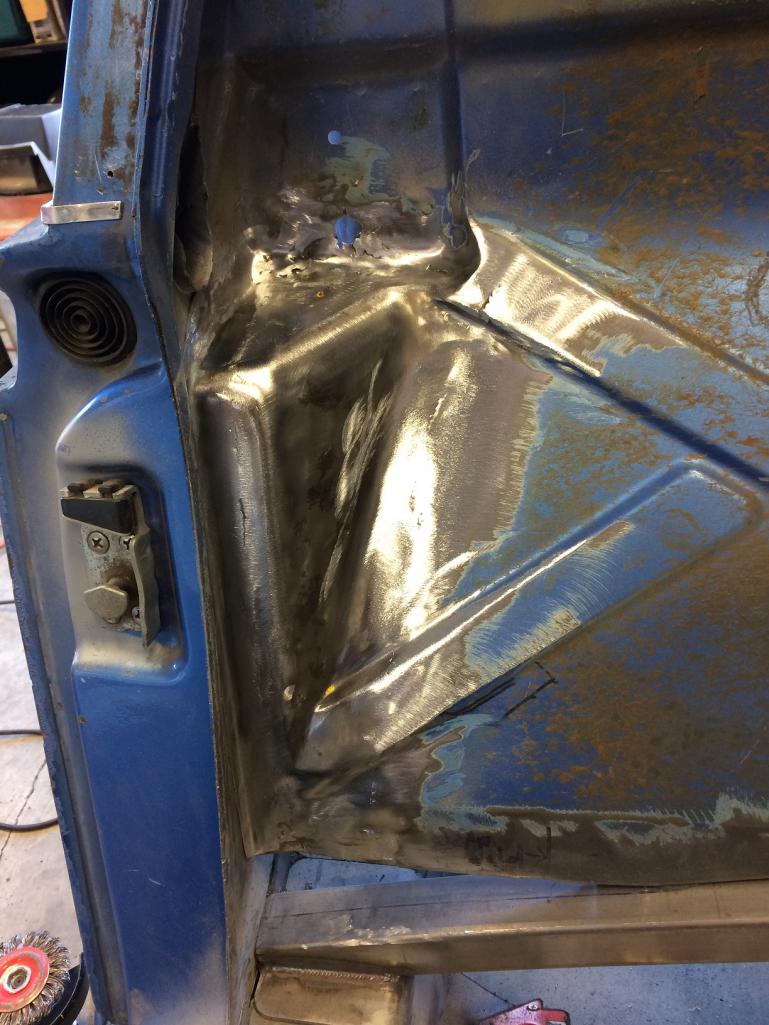
|
| tygaboy |
 Aug 11 2017, 04:27 PM Aug 11 2017, 04:27 PM
Post
#518
|
|
914 Guru      Group: Members Posts: 5,722 Joined: 6-October 15 From: Petaluma, CA Member No.: 19,241 Region Association: Northern California 
|
Hit it with some weld through primer (I found a few pin holes I need to close up...) but I wanted to get it at least some protection.
By the time it gets the final finish, I think it'll look "factory fresh". Hope so, anyway. Attached thumbnail(s) 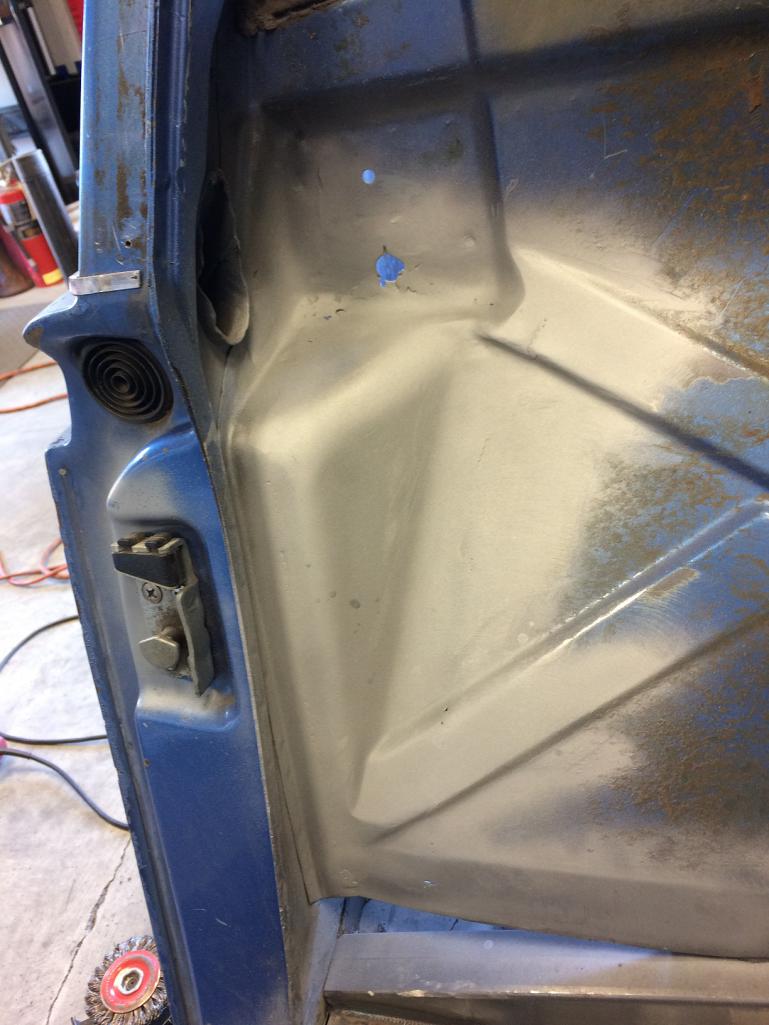
|
| bbrock |
 Aug 11 2017, 04:52 PM Aug 11 2017, 04:52 PM
Post
#519
|
|
914 Guru      Group: Members Posts: 5,269 Joined: 17-February 17 From: Montana Member No.: 20,845 Region Association: Rocky Mountains 
|
Hit it with some weld through primer (I found a few pin holes I need to close up...) but I wanted to get it at least some protection. By the time it gets the final finish, I think it'll look "factory fresh". Hope so, anyway. (IMG:http://www.914world.com/bbs2/uploads/post-19241-1502490473_thumb.jpg) (IMG:style_emoticons/default/pray.gif) Dangit! You aren't helping me feel satisfied with the patch I just did in that same spot. Nicely done. But you know... I REALLY could have used that firewall patch a couple days ago. (IMG:style_emoticons/default/poke.gif) |
| cary |
 Aug 11 2017, 11:49 PM Aug 11 2017, 11:49 PM
Post
#520
|
|
Advanced Member     Group: Members Posts: 3,900 Joined: 26-January 04 From: Sherwood Oregon Member No.: 1,608 Region Association: Pacific Northwest 
|
gooder as new.
|
  |
2 User(s) are reading this topic (2 Guests and 0 Anonymous Users)
0 Members:

|
Lo-Fi Version | Time is now: 14th December 2025 - 05:19 AM |
Invision Power Board
v9.1.4 © 2025 IPS, Inc.


