|
|

|
Porsche, and the Porsche crest are registered trademarks of Dr. Ing. h.c. F. Porsche AG.
This site is not affiliated with Porsche in any way. Its only purpose is to provide an online forum for car enthusiasts. All other trademarks are property of their respective owners. |
|
|
  |
| tygaboy |
 Mar 18 2018, 10:18 PM Mar 18 2018, 10:18 PM
Post
#941
|
|
914 Guru      Group: Members Posts: 5,550 Joined: 6-October 15 From: Petaluma, CA Member No.: 19,241 Region Association: Northern California 
|
Did I say "tedious"?
Forgive the horrific-ness of this little part. I an no where near skilled / experienced enough to be able to apply the "measure twice, cut once" approach to this part of the project. Instead, I make a little practice part to learn how all these angles and corners need to come together. It's all about learning for the next little while. But I think you get the idea of what I'm after. I'm pretty confident I will achieve a good fit and I think it'll look pretty good. That said, "practice" translates to "wasted material". Just perfect timing for a steel tariff! (IMG:style_emoticons/default/shades.gif) Attached thumbnail(s) 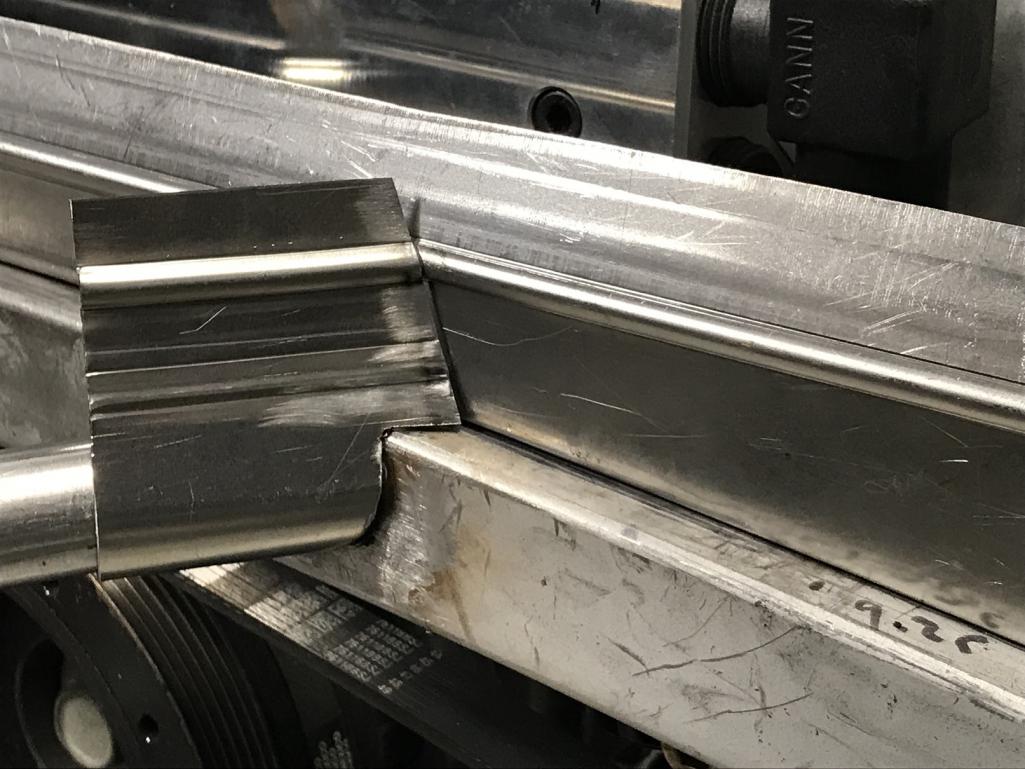
|
| live free & drive |
 Mar 19 2018, 10:52 AM Mar 19 2018, 10:52 AM
Post
#942
|
|
Member   Group: Members Posts: 190 Joined: 29-June 16 From: New Hampshire Member No.: 20,159 Region Association: None 
|
Great work!
I don't know if you've ever seen the rapid sheet-metal prototyping machines, video below: https://youtu.be/Wl5_wUVxRvw |
| tygaboy |
 Mar 19 2018, 12:42 PM Mar 19 2018, 12:42 PM
Post
#943
|
|
914 Guru      Group: Members Posts: 5,550 Joined: 6-October 15 From: Petaluma, CA Member No.: 19,241 Region Association: Northern California 
|
Great work! I don't know if you've ever seen the rapid sheet-metal prototyping machines, video below: https://youtu.be/Wl5_wUVxRvw Thanks, very cool! I haven't seen that before... It seems a bit like flow forming. I'm about to give that a try. Essentially, you use an air hammer/rivet gun with a soft-ish head and (carefully!) drive the metal into a form. The form can be made of wood. It opens a lot of doors as it's not silly expensive to get started. |
| bbrock |
 Mar 19 2018, 12:47 PM Mar 19 2018, 12:47 PM
Post
#944
|
|
914 Guru      Group: Members Posts: 5,269 Joined: 17-February 17 From: Montana Member No.: 20,845 Region Association: Rocky Mountains 
|
Great work! I don't know if you've ever seen the rapid sheet-metal prototyping machines, video below: https://youtu.be/Wl5_wUVxRvw Thanks, very cool! I haven't seen that before... It seems a bit like flow forming. I'm about to give that a try. Essentially, you use an air hammer/rivet gun with a soft-ish head and (carefully!) drive the metal into a form. The form can be made of wood. It opens a lot of doors as it's not silly expensive to get started. Can't wait to see what you produce with the flow forming. I have a project I hope to tackle sometime this summer that I was going to try that on. Looking forward to hearing/seeing you experience with it. |
| tygaboy |
 Mar 21 2018, 09:03 AM Mar 21 2018, 09:03 AM
Post
#945
|
|
914 Guru      Group: Members Posts: 5,550 Joined: 6-October 15 From: Petaluma, CA Member No.: 19,241 Region Association: Northern California 
|
For all the other tool geeks/whores, here's more of the bender in action:
rolling the radius farther around I'm fortunate to have some pretty cool tools and it really drives home the fact that all these things really do is speed up the process of making the part... or totally screwing up the part and wasting material! I have a long way to go and lots to learn... https://www.youtube.com/watch?v=DGyqrkp1RLo |
| 914forme |
 Mar 21 2018, 12:27 PM Mar 21 2018, 12:27 PM
Post
#946
|
|
Times a wastin', get wrenchin'!     Group: Members Posts: 3,896 Joined: 24-July 04 From: Dayton, Ohio Member No.: 2,388 Region Association: None 
|
(IMG:style_emoticons/default/agree.gif) That Magnabrake is on a very long list of items I would love to have in my shop.
|
| Mueller |
 Mar 21 2018, 10:38 PM Mar 21 2018, 10:38 PM
Post
#947
|
|
914 Freak!                Group: Members Posts: 17,150 Joined: 4-January 03 From: Antioch, CA Member No.: 87 Region Association: None 
|
I have an oxy/acet rig with Meco torch that you are free to borrow to weld on those flares.
I don't have real truck so you'd have to pick up , I'll provide entertainment with a tour of poorly put together and disorganized shop (IMG:style_emoticons/default/smile.gif) https://www.tinmantech.com/products/welding...ch-accessories/ |
| tygaboy |
 Mar 24 2018, 02:50 PM Mar 24 2018, 02:50 PM
Post
#948
|
|
914 Guru      Group: Members Posts: 5,550 Joined: 6-October 15 From: Petaluma, CA Member No.: 19,241 Region Association: Northern California 
|
Working on the final upper portion of the fire wall that lives under the cross bar.
Learning, learning... When making multiple folds that need to intersect at a particular angle, I need to plan better. I didn't know exactly what the angle needed to be so I had to, um.... improvise! Yes, let's go with that. Hammer and dolly = improvise (IMG:style_emoticons/default/idea.gif) Fortunately, it turned out OK. Still needs to be trimmed to final dimensions so that little bit of overlap at the corner isn't an issue. Plus, I'll weld it up, too. Attached thumbnail(s) 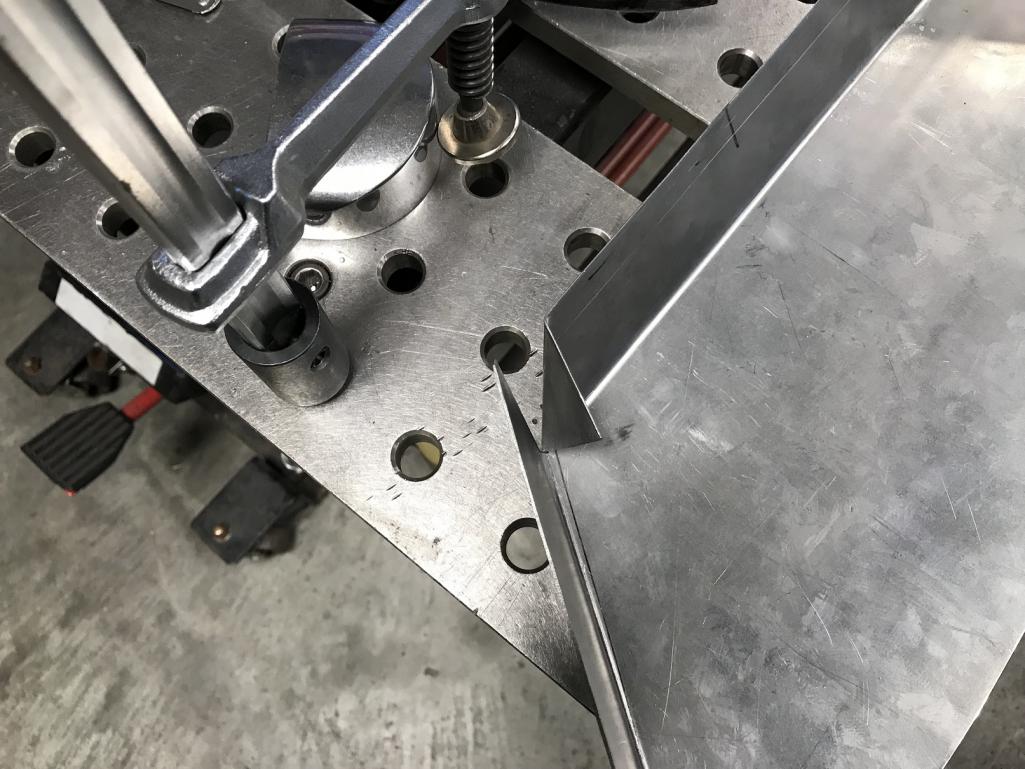 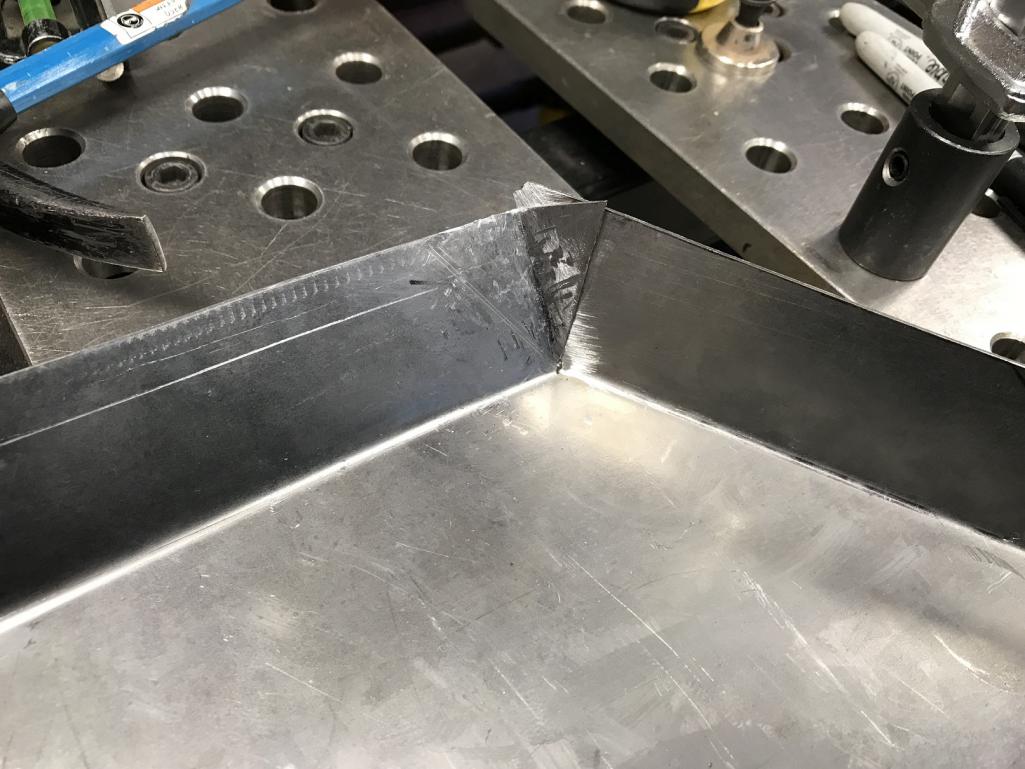
|
| tygaboy |
 Mar 24 2018, 02:59 PM Mar 24 2018, 02:59 PM
Post
#949
|
|
914 Guru      Group: Members Posts: 5,550 Joined: 6-October 15 From: Petaluma, CA Member No.: 19,241 Region Association: Northern California 
|
Essentially impossible to see but I need this piece to tilt down a bit. That's to allow clearance for the cross bar to be fitted ahead of final welding.
You wouldn't know it but since the door bars angle down as they leave the fire wall, the cross bar needs to slide up and in as it's being installed. Super happy I accounted for this before final welding the part I'm working on! Anyway, what's the big deal about this piece needing to tilt down? As a flat plane tilts away from a curve, like this piece does with that reinforcement arch I added to the fire wall, it creates a gap at the front of the curve. So I used the English wheel to raise up a bit of a hump to close that gap. Again, no one will ever see it but it makes all the difference in terms of fitment. Attached thumbnail(s) 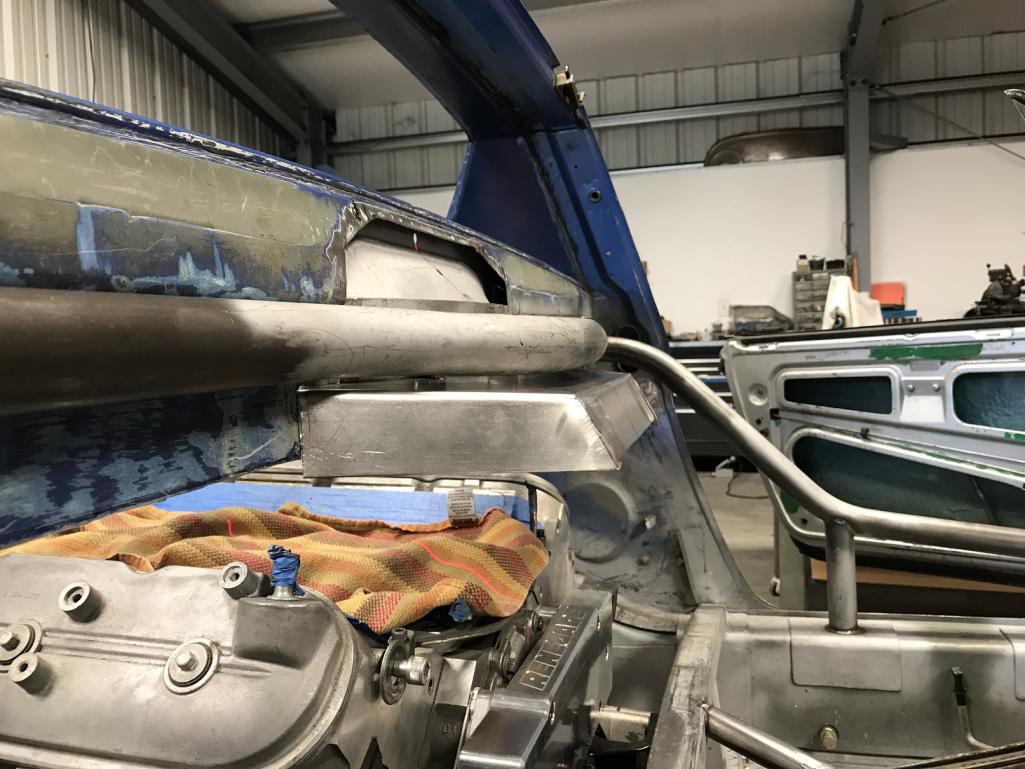
|
| tygaboy |
 Mar 24 2018, 03:00 PM Mar 24 2018, 03:00 PM
Post
#950
|
|
914 Guru      Group: Members Posts: 5,550 Joined: 6-October 15 From: Petaluma, CA Member No.: 19,241 Region Association: Northern California 
|
Line 'em up! (IMG:style_emoticons/default/welder.gif)
Attached thumbnail(s) 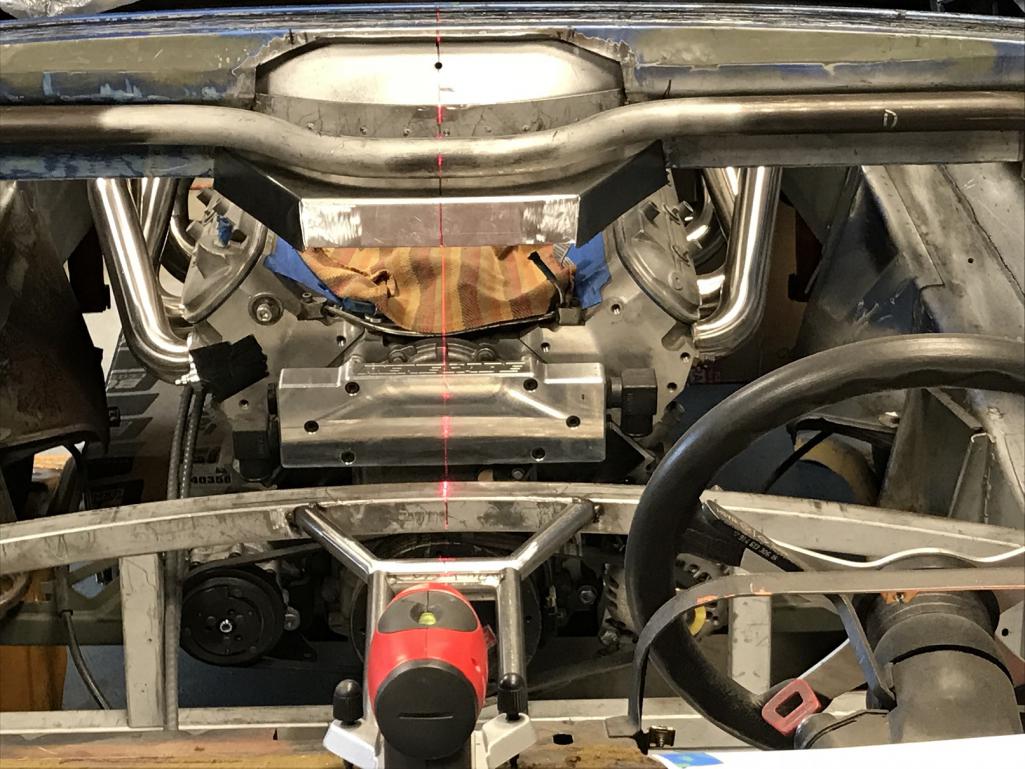
|
| tygaboy |
 Mar 24 2018, 06:25 PM Mar 24 2018, 06:25 PM
Post
#951
|
|
914 Guru      Group: Members Posts: 5,550 Joined: 6-October 15 From: Petaluma, CA Member No.: 19,241 Region Association: Northern California 
|
Back to the compound curve I needed to put into the upper piece. It didn't take much but I was able to get a really nice fit.
Arch at the back, flat across the front. (IMG:style_emoticons/default/shades.gif) Attached thumbnail(s) 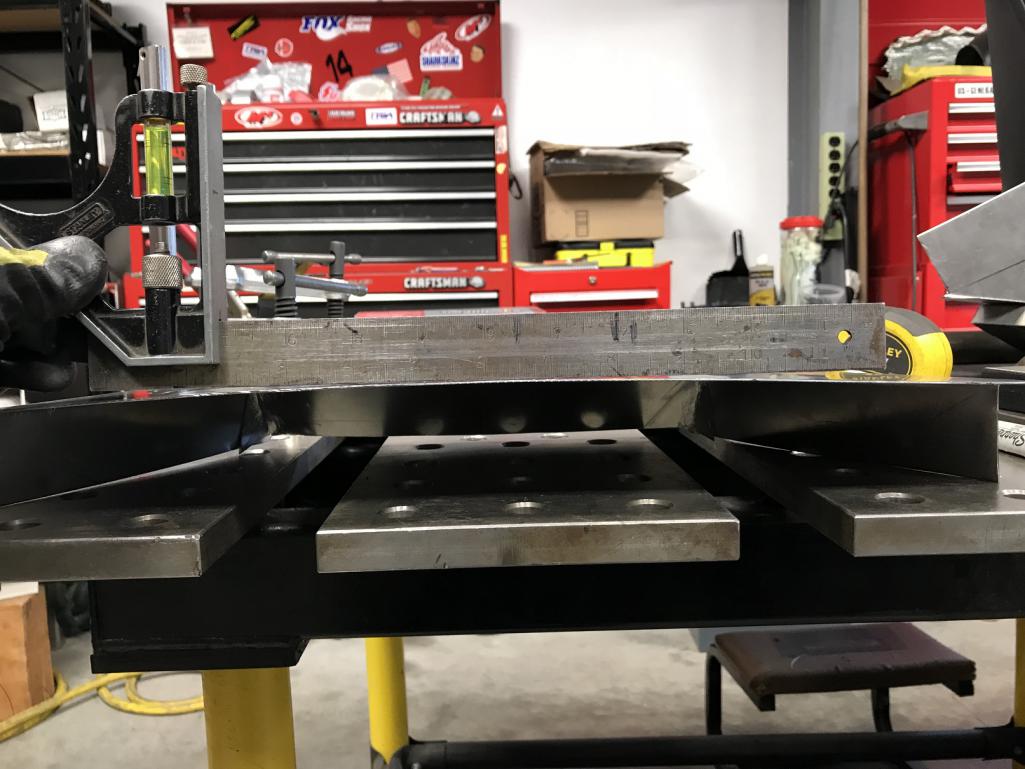
|
| tygaboy |
 Mar 24 2018, 06:29 PM Mar 24 2018, 06:29 PM
Post
#952
|
|
914 Guru      Group: Members Posts: 5,550 Joined: 6-October 15 From: Petaluma, CA Member No.: 19,241 Region Association: Northern California 
|
Then it was working up an understanding of how things need to come together to frame the removable inspection panel.
My main take-away from this was: I wish I paid closer attention during Geometry class... (IMG:style_emoticons/default/blink.gif) But it's coming together and I'm starting to think I can achieve what I'm after. Attached thumbnail(s) 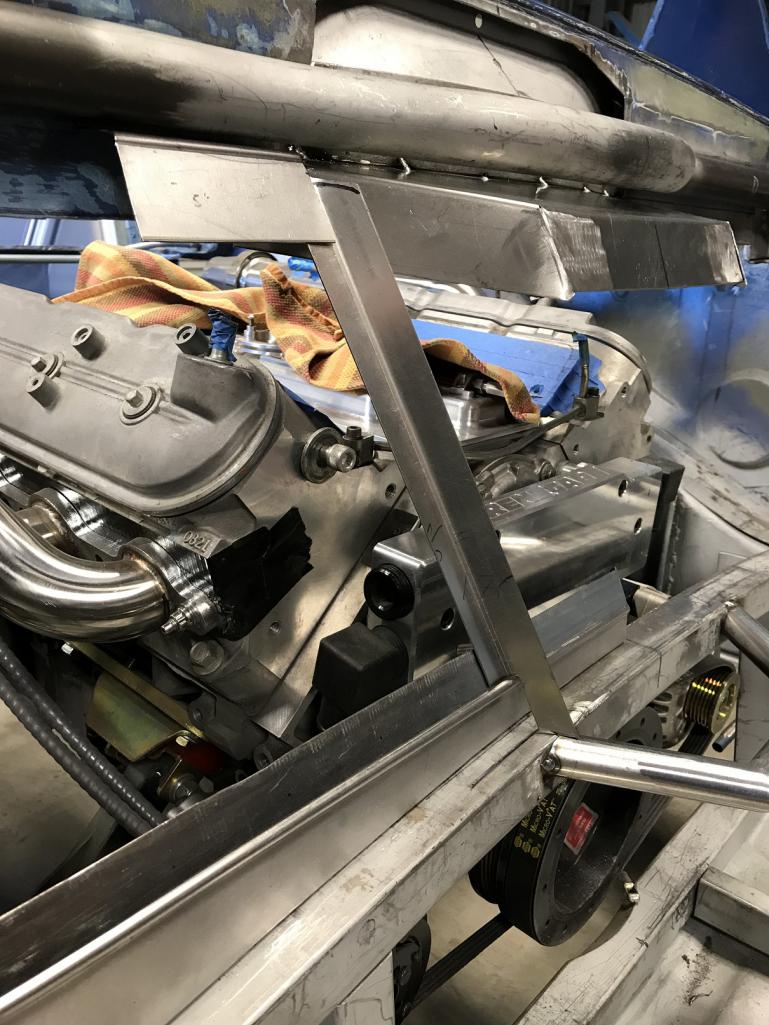 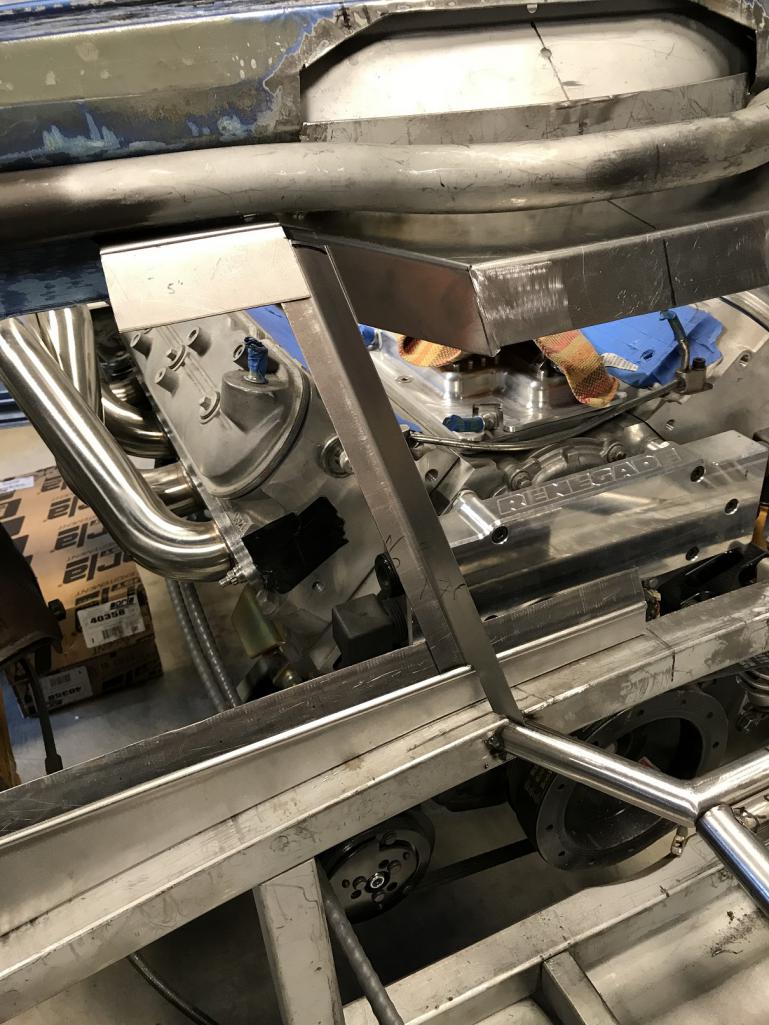
|
| Jeff Hail |
 Mar 25 2018, 12:40 PM Mar 25 2018, 12:40 PM
Post
#953
|
|
Senior Member    Group: Members Posts: 1,141 Joined: 3-May 07 From: LA/ CA Member No.: 7,712 |
[quote name='tygaboy' date='Mar 18 2018, 09:18 PM' post='2590237']
Did I say "tedious"? "Forgive the horrific-ness of this little part. I an no where near skilled / experienced enough to be able to apply the "measure twice, cut once" approach to this part of the project." Hey Chris, Think of those as "prototypes". Some folks have scrap bins. We have containers for research and development aka the metallurgical origami department. Keep up the good work. Jeff |
| Mueller |
 Mar 25 2018, 12:55 PM Mar 25 2018, 12:55 PM
Post
#954
|
|
914 Freak!                Group: Members Posts: 17,150 Joined: 4-January 03 From: Antioch, CA Member No.: 87 Region Association: None 
|
How much of this stuff do you dream up while sleeping? Great work.
|
| Dion |
 Mar 26 2018, 09:38 AM Mar 26 2018, 09:38 AM
Post
#955
|
|
RN     Group: Members Posts: 2,839 Joined: 16-September 04 From: Audubon,PA Member No.: 2,766 Region Association: MidAtlantic Region 

|
|
| bbrock |
 Mar 26 2018, 09:48 AM Mar 26 2018, 09:48 AM
Post
#956
|
|
914 Guru      Group: Members Posts: 5,269 Joined: 17-February 17 From: Montana Member No.: 20,845 Region Association: Rocky Mountains 
|
How much of this stuff do you dream up while sleeping? Great work. Agree 100%! I get lost trying to keep up with Chris project. Talk about architecture. totally cool. Cheers,Dion (IMG:style_emoticons/default/agree.gif) We need a blueprint to follow... but we know that doesn't exist. (IMG:style_emoticons/default/av-943.gif) I've never seen a car get constructed around an engine before. Fascinating to watch. |
| 914350 |
 Mar 26 2018, 03:38 PM Mar 26 2018, 03:38 PM
Post
#957
|
|
Senior Member    Group: Members Posts: 548 Joined: 21-April 14 From: Torrance Ca. Member No.: 17,275 Region Association: Southern California |
Great fab work, beautiful build. Going to be an awsome car for sure. (IMG:style_emoticons/default/beerchug.gif)
|
| Rand |
 Mar 26 2018, 03:55 PM Mar 26 2018, 03:55 PM
Post
#958
|
|
Cross Member      Group: Members Posts: 7,410 Joined: 8-February 05 From: OR Member No.: 3,573 Region Association: None |
QUOTE We need a blueprint to follow No, the beauty of a build like this is it's own life not following a blueprint. |
| Matty900 |
 Mar 27 2018, 12:54 AM Mar 27 2018, 12:54 AM
Post
#959
|
|
Senior Member    Group: Members Posts: 1,291 Joined: 21-February 15 From: Oregon Member No.: 18,454 Region Association: Pacific Northwest |
Love seeing the detail of your Art. This is going to be a real masterpiece (IMG:style_emoticons/default/beerchug.gif)
|
| tygaboy |
 Mar 31 2018, 06:11 PM Mar 31 2018, 06:11 PM
Post
#960
|
|
914 Guru      Group: Members Posts: 5,550 Joined: 6-October 15 From: Petaluma, CA Member No.: 19,241 Region Association: Northern California 
|
Thanks for all your kind and encouraging words. I really need them...
This firewall is giving me fits! (IMG:style_emoticons/default/hissyfit.gif) Every time I think I've solved a problem, I seem to create three others. Today's was REALLY understanding what happens when you tip a plane out of level but want other level planes to intersect with it. It's hard to explain but let me just say "things weren't lining up". Well, they were, but but not in a way that would let me complete the more complex corners without multiple, tedious cuts and welds and grinds and LOTS of cursing. (IMG:style_emoticons/default/headbang.gif) (My wife was gardening and poked her head into the shop at one point and said "No more "Goddamnits", please?") It was one of those days where I thought, "Well, I could always chuck this chassis and start over with a different one...." But after a bit of noodling, I realized I could simplify things greatly by keeping the planes in line. Great. But that changes all of the dimensions I've worked out so far. So I cut out all of last week's work and started over by remaking the piece that lives under the cross bar. Instead of the cool English wheeled, zippidy do-dah, angled approach, it turns out I want it 90 degrees to the vertical part of the fire wall. So, back to tipping flanges on inside curves and stretching to get things flat again. Thankfully, the mag brake lends itself to "interesting" shapes. Note this new version (#4, btw) has no sides or front. Another simplification is that I'll add the sides and front as separate pieces. This should make it easier to get the beading detail to align across all the various pieces. It'll be easier to explain once I get to that point and have some pics. And apologies, I'm sure you're as bored with this part of the build as I am... Attached thumbnail(s) 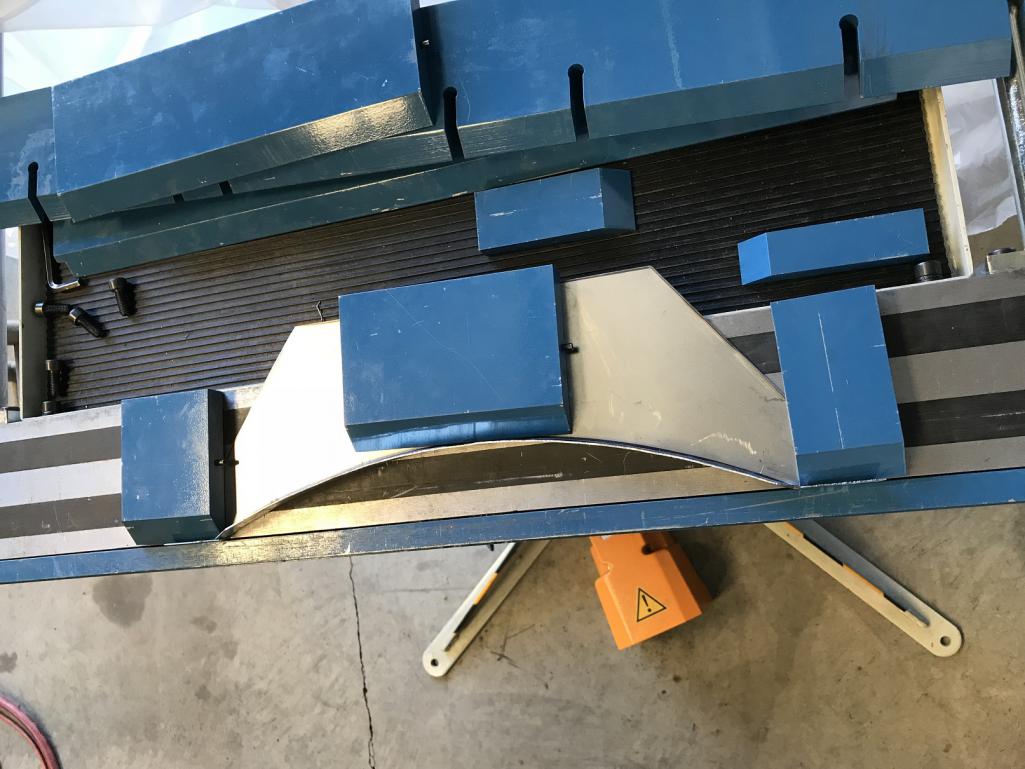
|
  |
1 User(s) are reading this topic (1 Guests and 0 Anonymous Users)
0 Members:

|
Lo-Fi Version | Time is now: 21st April 2025 - 11:30 AM |
Invision Power Board
v9.1.4 © 2025 IPS, Inc.


