|
|
|
Porsche, and the Porsche crest are registered trademarks of Dr. Ing. h.c. F. Porsche AG.
This site is not affiliated with Porsche in any way. Its only purpose is to provide an online forum for car enthusiasts. All other trademarks are property of their respective owners. |
|
|

  |

| seanpaulmc |
 Sep 9 2024, 01:20 PM Sep 9 2024, 01:20 PM
Post
#101
|
|
Member  Group: Members Posts: 373 Joined: 6-December 16 From: Orlando, FL Member No.: 20,649 Region Association: South East States |
Found more rot in the firewall (I looked, again) and had to put in another patch. And, while I was at it I re-welded all my patches from the engine bay side so I can be confident there are no pin holes.
I may leave the angled weld bead running along the panel crease on th driver side because it kind of matches the scar and hardware from my clavicle repair back in March. (IMG:style_emoticons/default/huh.gif) same side to. 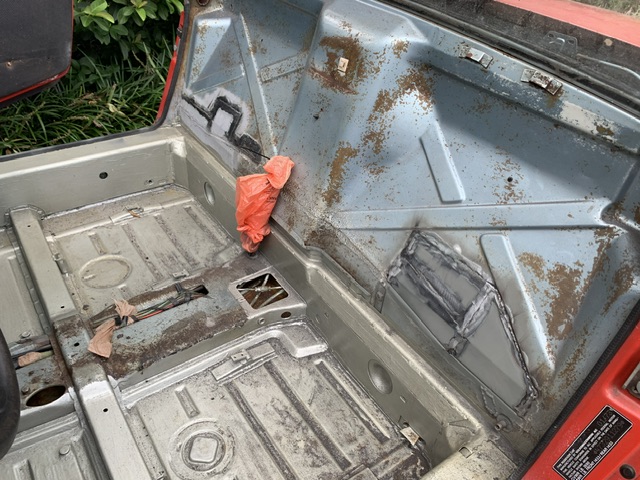 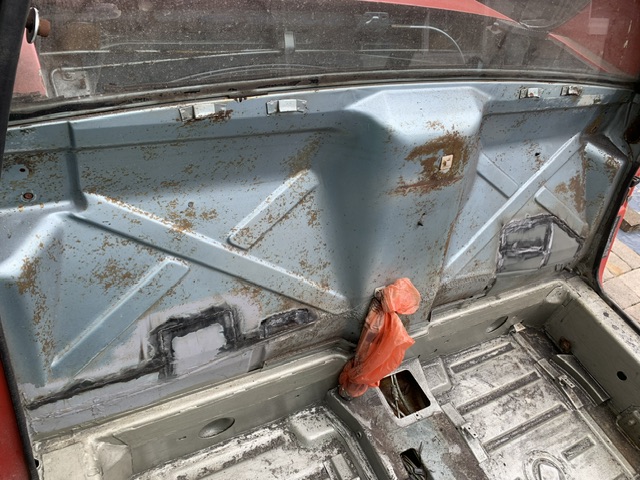 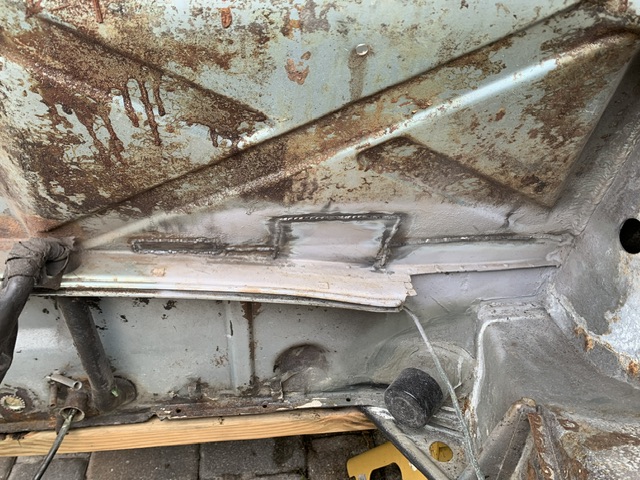 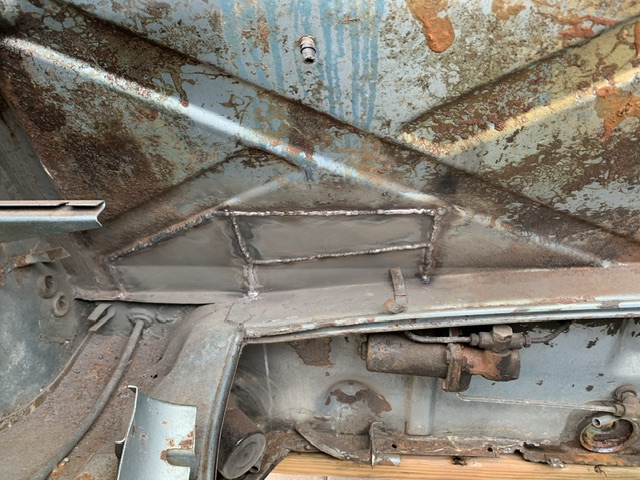 Ground down most of the welds on the cabin side. Finding it very awkward to grind the welds on the engine side because of the angle in the wall and the size of the tools. At some point I’m going to have to learn to paint. There’s a fair amount of new metal needing protection. |
   |

 
|
| 930cabman |
Sep 10 2024, 11:05 AM
Post
#102
|
|
Advanced Member Group: Members Posts: 3,706 Joined: 12-November 20 From: Buffalo Member No.: 24,877 Region Association: North East States |
QUOTE(seanpaulmc @ Sep 9 2024, 01:20 PM)  Found more rot in the firewall (I looked, again) and had to put in another patch. And, while I was at it I re-welded all my patches from the engine bay side so I can be confident there are no pin holes. I may leave the angled weld bead running along the panel crease on th driver side because it kind of matches the scar and hardware from my clavicle repair back in March. (IMG:style_emoticons/default/huh.gif) same side to. Ground down most of the welds on the cabin side. Finding it very awkward to grind the welds on the engine side because of the angle in the wall and the size of the tools. At some point I’m going to have to learn to paint. There’s a fair amount of new metal needing protection. Is that an original hell hole? if so it must be one of the best around |
 |
|
| seanpaulmc |
Sep 10 2024, 11:33 AM
Post
#103
|
|
Member Group: Members Posts: 373 Joined: 6-December 16 From: Orlando, FL Member No.: 20,649 Region Association: South East States |
QUOTE(930cabman @ Sep 10 2024, 01:05 PM) QUOTE(seanpaulmc @ Sep 9 2024, 01:20 PM) Found more rot in the firewall (I looked, again) and had to put in another patch. And, while I was at it I re-welded all my patches from the engine bay side so I can be confident there are no pin holes. I may leave the angled weld bead running along the panel crease on th driver side because it kind of matches the scar and hardware from my clavicle repair back in March. (IMG:style_emoticons/default/huh.gif) same side to. Ground down most of the welds on the cabin side. Finding it very awkward to grind the welds on the engine side because of the angle in the wall and the size of the tools. At some point I’m going to have to learn to paint. There’s a fair amount of new metal needing protection. Is that an original hell hole? if so it must be one of the best around Negative. Already repaired. Go back to post #26 for originality. |
|
|
|
| seanpaulmc |
Sep 12 2024, 05:38 PM
Post
#104
|
|
Member Group: Members Posts: 373 Joined: 6-December 16 From: Orlando, FL Member No.: 20,649 Region Association: South East States |
I had originally planned on leaving the battery wall alone and just paint it. I’m not trying to hide anything here. Attempting to prep for paint I took the wire brush to it and the holes began to show. (It’s been a pattern these last few weeks.) (IMG:style_emoticons/default/headbang.gif)
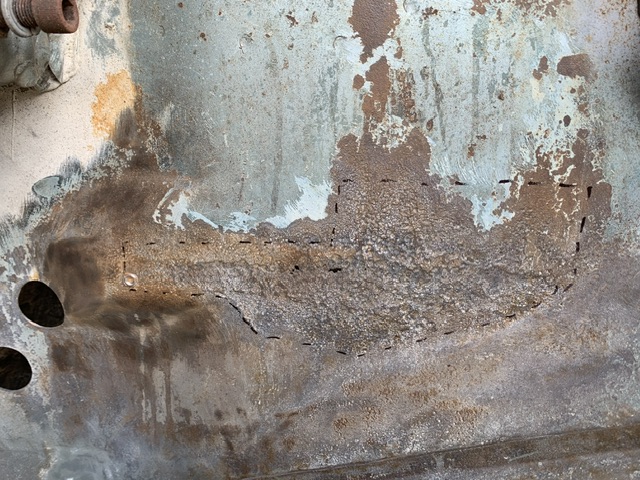 So, I cut out the worst of the pitted metal and will begin to fab patches.  I’m thinking to make the battery tray bolt in as I’ve seen some others do instead of welding it back in. To do: Repair wall Install engine shelf Install battery tray |
|
|
|
| seanpaulmc |
Sep 13 2024, 12:57 PM
Post
#105
|
|
Member Group: Members Posts: 373 Joined: 6-December 16 From: Orlando, FL Member No.: 20,649 Region Association: South East States |
As a reminder of where we were with this battery tray when we began this saga, here’s a few reminder pics in case you haven’t been following along.
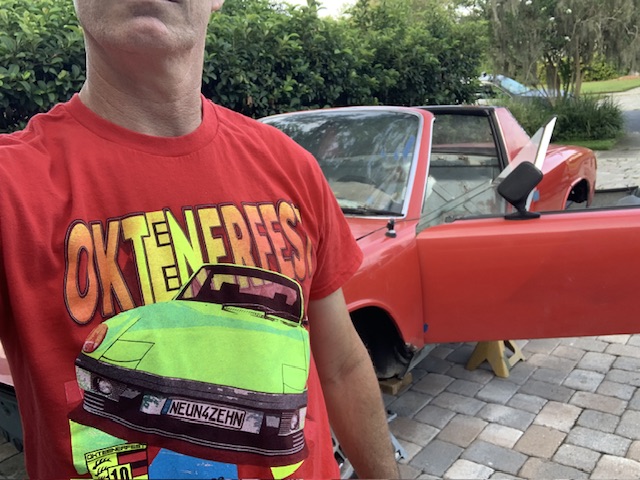
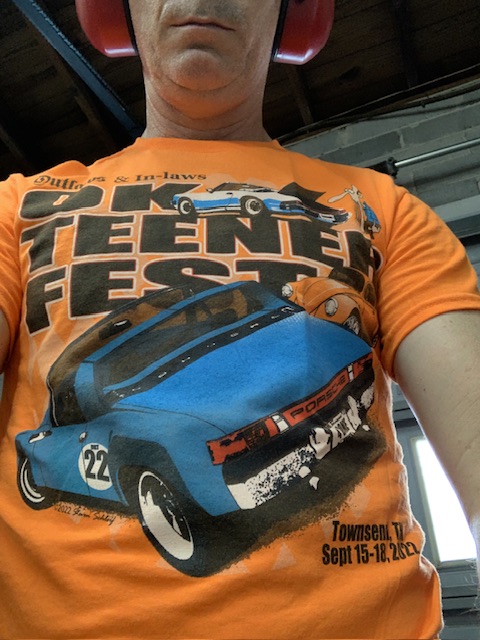
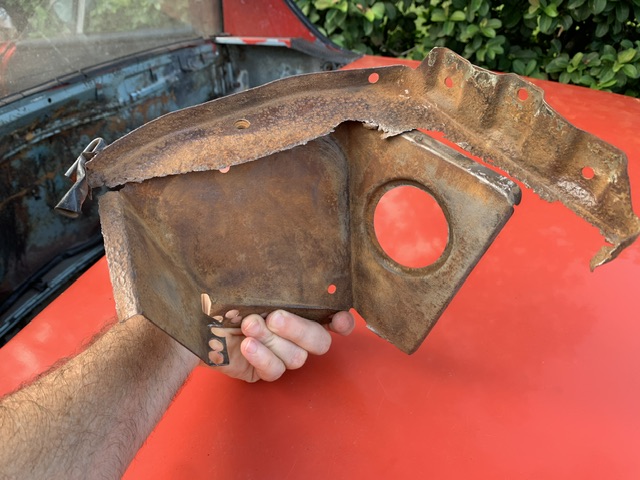 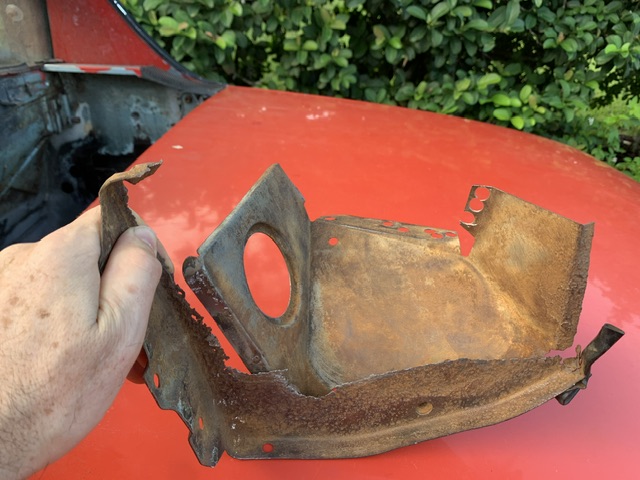 Should buff out, right? (IMG:style_emoticons/default/screwy.gif) Even had to use the spot weld cutter to get it out. And in the spirit of Okteenerfest weekend, which I couldn’t make this year, I’ll be sporting Okteenerfest inspired work wear through the weekend. Here’s Thursday’s 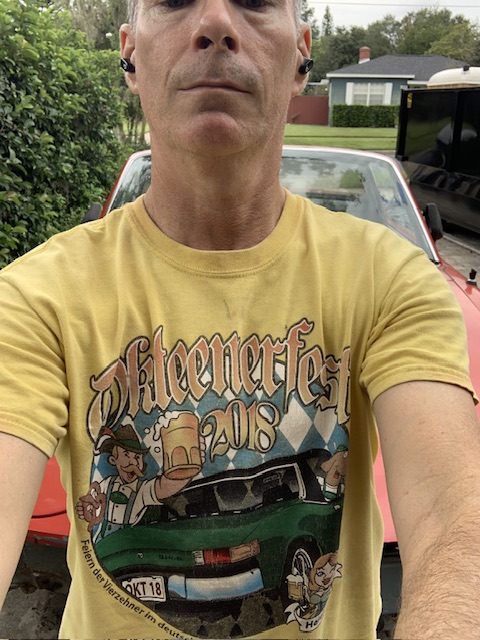 Stay safe and have fun at all your events this weekend! (IMG:style_emoticons/default/driving.gif) (IMG:style_emoticons/default/beerchug.gif) |
|
|
|
| seanpaulmc |
Sep 13 2024, 04:46 PM
Post
#106
|
|
Member Group: Members Posts: 373 Joined: 6-December 16 From: Orlando, FL Member No.: 20,649 Region Association: South East States |
Taking the day off in solo support of Okteenerfest. Here’s today’s workwear
 Started the day off with some light salvage work on the battery tray support to see if I could save it for reuse. (IMG:style_emoticons/default/welder.gif)  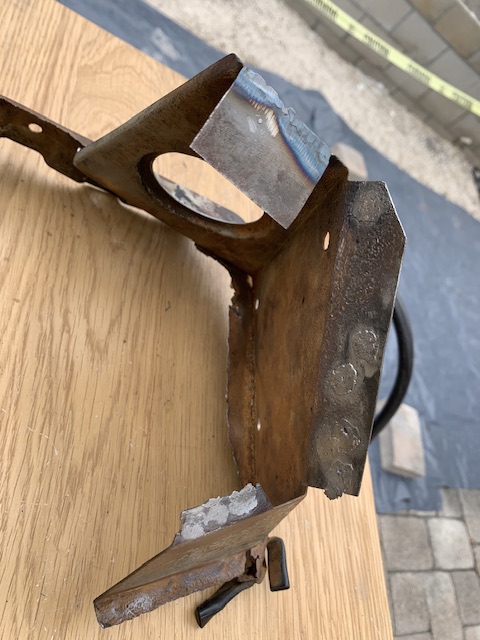 It might be useable but we’ll see when I start grinding on it. Then got on to filling in the hole I made yesterday. 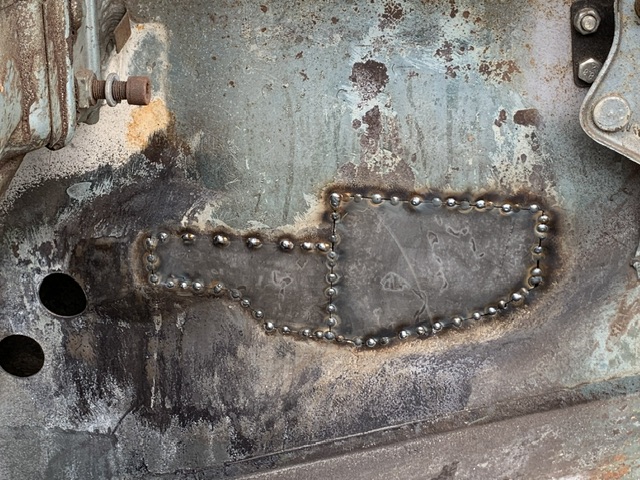 I did play connect the dots but forgot to get a finish pic. Those circle holes are from the A/C this car once had. I plan to leave them as they can be easily temporarily plugged. Rain ended the progress. 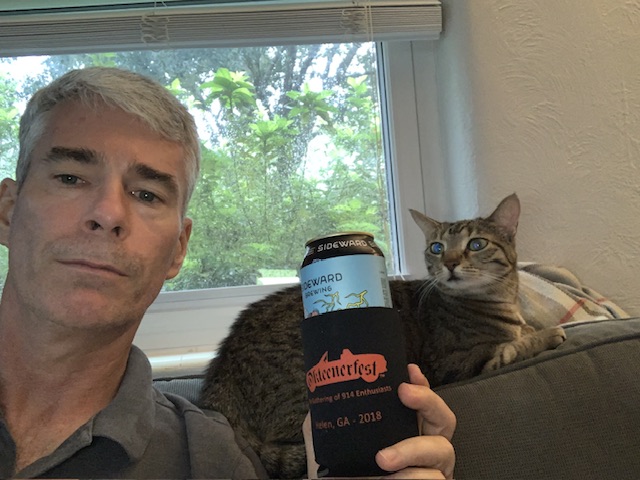 Cheers |
|
|
|
| seanpaulmc |
Sep 14 2024, 07:00 PM
Post
#107
|
|
Member Group: Members Posts: 373 Joined: 6-December 16 From: Orlando, FL Member No.: 20,649 Region Association: South East States |
Happy 9/14 all you Teeners!
 With the rain yesterday and overnight it was a damp morning so worked a bit more on the battery support in the garage but seems I forgot to get a picture. I’m thinking it’ll be useable…with just a little more work. Then moved on and finished the patch in the battery wall. All the dots connected. 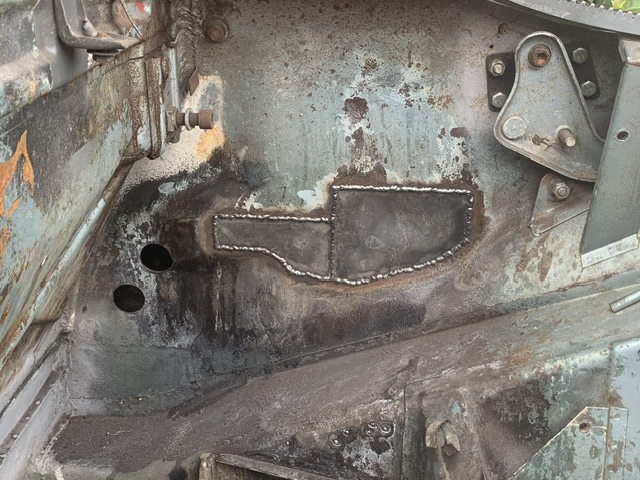 Welds ground down and a spritz of Ospho. 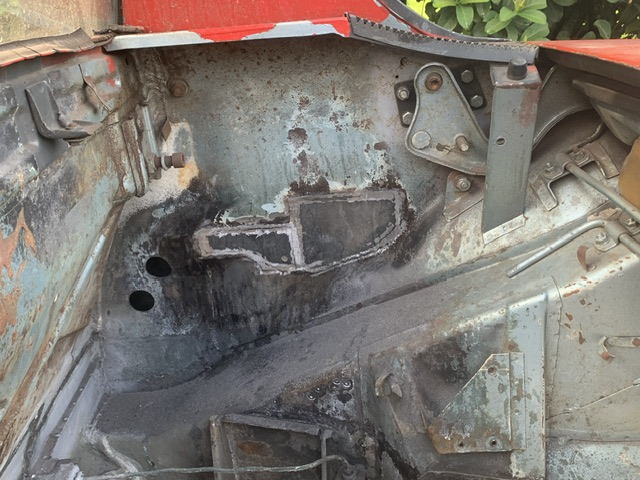 Put some black paint on the fender well side. Been collecting stuff for future use for long enough I’ve forgotten what I’ve collected. Happy to find but forgot I had picked up some trunk pieces along the way. 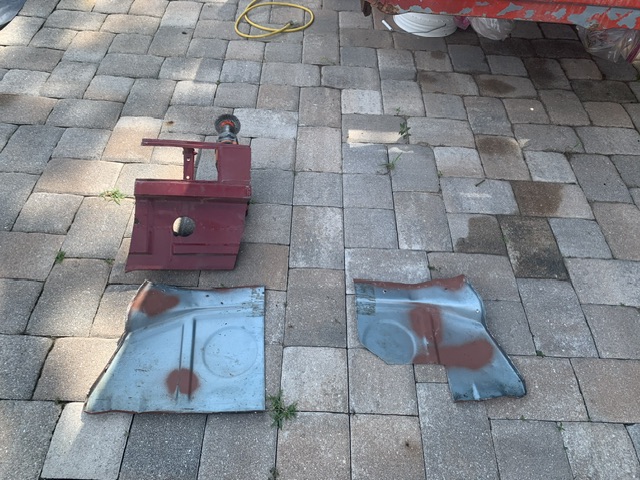 Fits okay on the right. 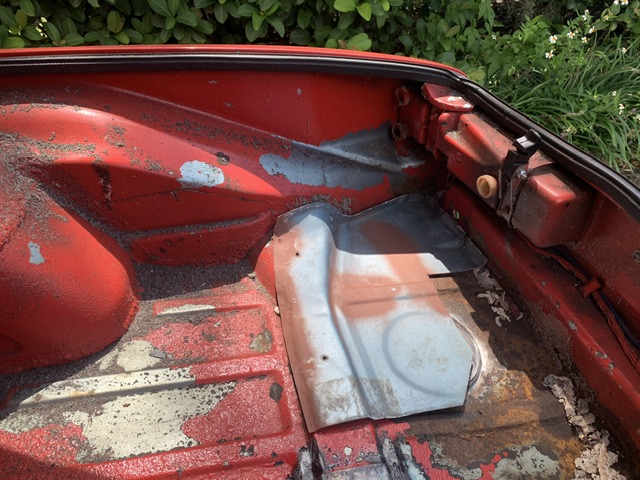 Does not fit well on the driver’s side but that’s where the accident damage needs repairing. 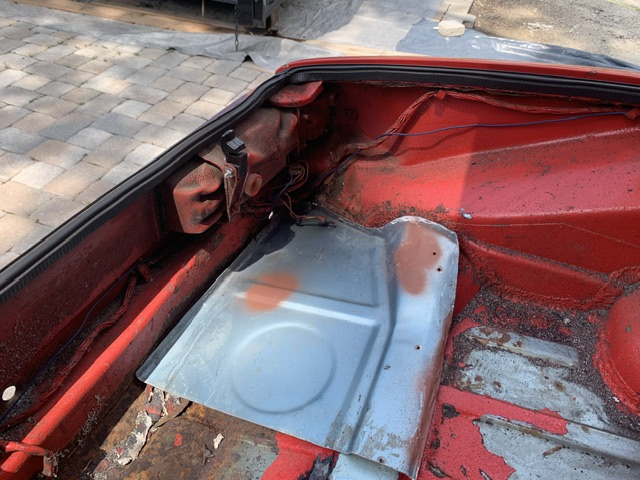 Ended with starting on the removal of the cross brace, and pulled the plug for the day. 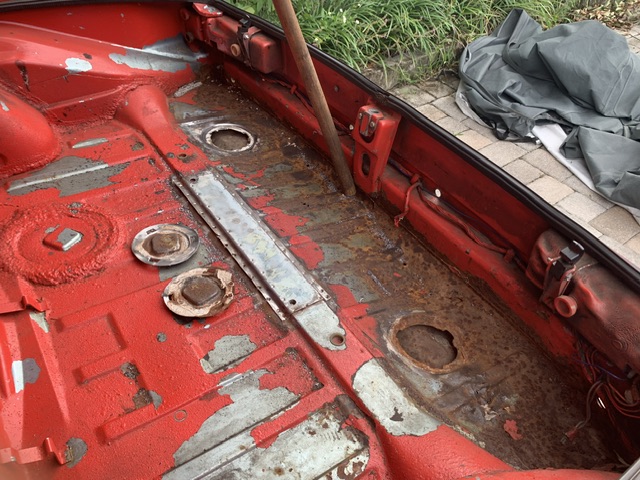 |
|
|
|
| 930cabman |
Sep 15 2024, 10:56 AM
Post
#108
|
|
Advanced Member Group: Members Posts: 3,706 Joined: 12-November 20 From: Buffalo Member No.: 24,877 Region Association: North East States |
Patch panels look great in the battery tray area, MIG? and what tool are you using to grind the welds
|
|
|
|
| seanpaulmc |
Sep 15 2024, 05:04 PM
Post
#109
|
|
Member Group: Members Posts: 373 Joined: 6-December 16 From: Orlando, FL Member No.: 20,649 Region Association: South East States |
QUOTE(930cabman @ Sep 15 2024, 12:56 PM) Patch panels look great in the battery tray area, MIG? and what tool are you using to grind the welds  Thanks. I’m pleased with the outcome on the battery wall even though I didn’t intend to do that repair. It’s best it got done. Yes, MIG. And the tools here were pretty simple - grinder and finger sander. Love these tools. Most of it is pretty accessible without the battery tray or engine shelf there so I had good access. Thanks for the support. |
|
|
|
| 930cabman |
Sep 15 2024, 05:49 PM
Post
#110
|
|
Advanced Member Group: Members Posts: 3,706 Joined: 12-November 20 From: Buffalo Member No.: 24,877 Region Association: North East States |
QUOTE(seanpaulmc @ Sep 15 2024, 05:04 PM) QUOTE(930cabman @ Sep 15 2024, 12:56 PM) Patch panels look great in the battery tray area, MIG? and what tool are you using to grind the welds Thanks. I’m pleased with the outcome on the battery wall even though I didn’t intend to do that repair. It’s best it got done. Yes, MIG. And the tools here were pretty simple - grinder and finger sander. Love these tools. Most of it is pretty accessible without the battery tray or engine shelf there so I had good access. Thanks for the support. What state is the running gear? ETA? Workmanship looks good, keep it moving forward |
|
|
|
| seanpaulmc |
Sep 15 2024, 05:53 PM
Post
#111
|
|
Member Group: Members Posts: 373 Joined: 6-December 16 From: Orlando, FL Member No.: 20,649 Region Association: South East States |
End of a productive Ockteenerfest weekend home working on this revival. Many thanks to my wife for her support and allowing me to play with the toy car all weekend.
Shirt of the day is 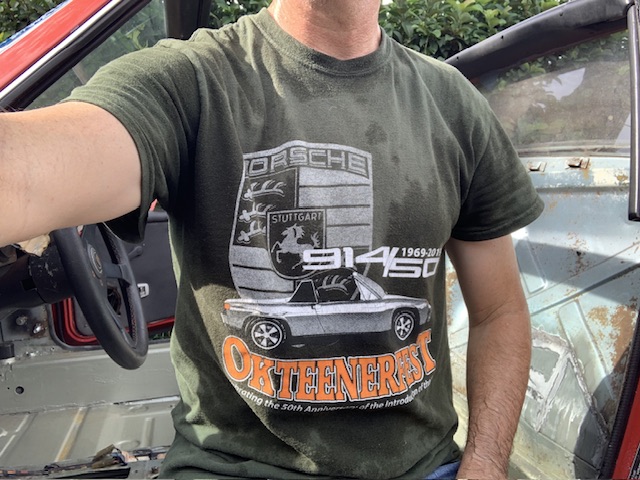 Didn’t get much in the way of pictures but worked until the rain chased me off. It may not look like much but spent nearly 3 hours cleaning the battery wall area so I could finally get some kind of paint on it. 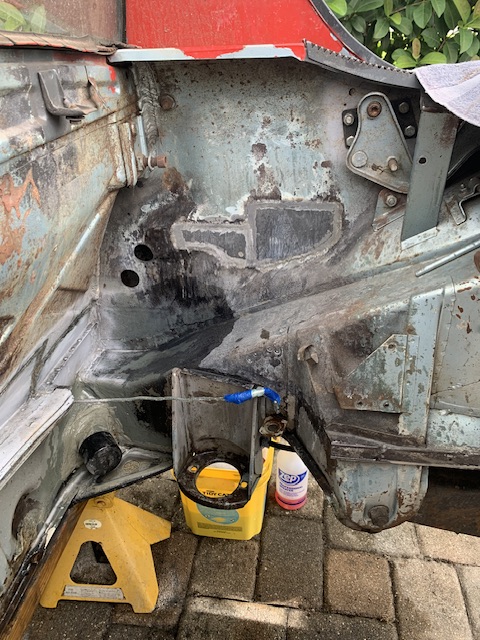 As I finished getting the second coat of paint on it started raining and I scrambled to get the top back on and the car cover to protect the day’s work. Whenever I can get back to it I’ll get some pictures, bad or good, I have no idea how it came out. Hope that everyone had great times at all the events this weekend and that you make it home safely. Please upload those event pictures to give us that push and motivation for next year. Cheers |
|
|
|
| seanpaulmc |
Sep 20 2024, 09:46 AM
Post
#112
|
|
Member Group: Members Posts: 373 Joined: 6-December 16 From: Orlando, FL Member No.: 20,649 Region Association: South East States |
[/quote]
What state is the running gear? ETA? Workmanship looks good, keep it moving forward [/quote] @930cabman missed your comment on this earlier. On the positive I already have a rebuilt Dr.Evil transaxle. It’s been sitting waiting patiently for a few years now. (IMG:style_emoticons/default/sad.gif) Motor not so much. I believe it to be a very, very tired 2.0L. I see wear patterns on the cam lobes and the lifters are flat (no convex to the surface). Crank endplay is also way out of spec. I’m pretty sure it needs a bottom end rebuild. I’ve already had the heads rebuilt. I lack the space to have an engine rebuild project going on simultaneously with all the metal work shenanigans. Tools and parts remain in the garage while the body stays outside until most of the metal work gets completed. Even with a small car like this it’s amazing how much real estate is taken up when it’s in pieces. I really do look forward to getting into the mechanicals. My goal is to get it to a ‘rolling restoration’ status and continue the work from there. With as much new metal the body has needed that just hasn’t yet been possible. It’s getting closer. Thanks |
|
|
|
| friethmiller |
Sep 20 2024, 10:24 AM
Post
#113
|
|
Senior Member Group: Members Posts: 665 Joined: 10-February 19 From: Austin, TX Member No.: 22,863 Region Association: Southwest Region |
QUOTE(seanpaulmc @ Sep 15 2024, 06:53 PM) Didn’t get much in the way of pictures but worked until the rain chased me off. It may not look like much but spent nearly 3 hours cleaning the battery wall area so I could finally get some kind of paint on it. @seanpaulmc - first off, nice work! (IMG:style_emoticons/default/popcorn[1].gif) Do you own a D/A sander? If you do, next time try going over the entire area lightly with some 180-grit on the sander. It'll blend in all your good grinding work. If you care to, that is. You've seen this (below) but that's how I finish things up - if I have enough space to get in there, of course. (IMG:style_emoticons/default/biggrin.gif) 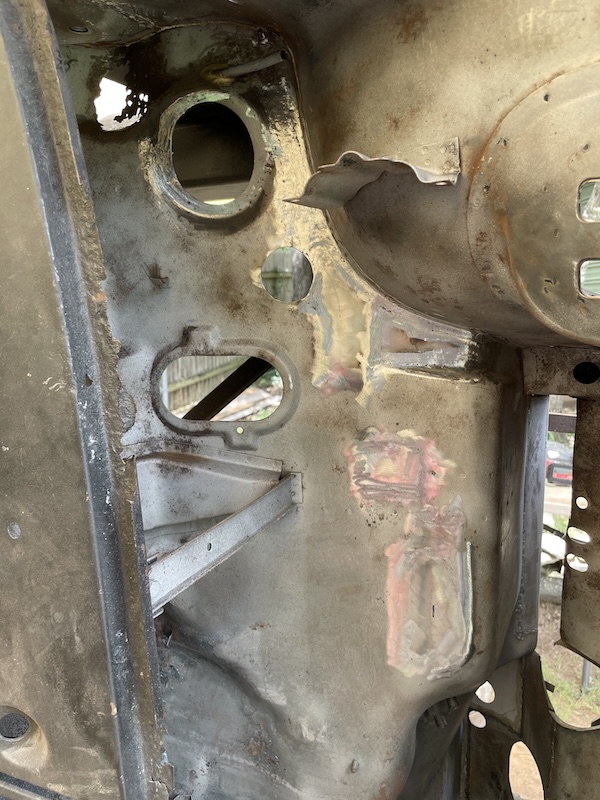 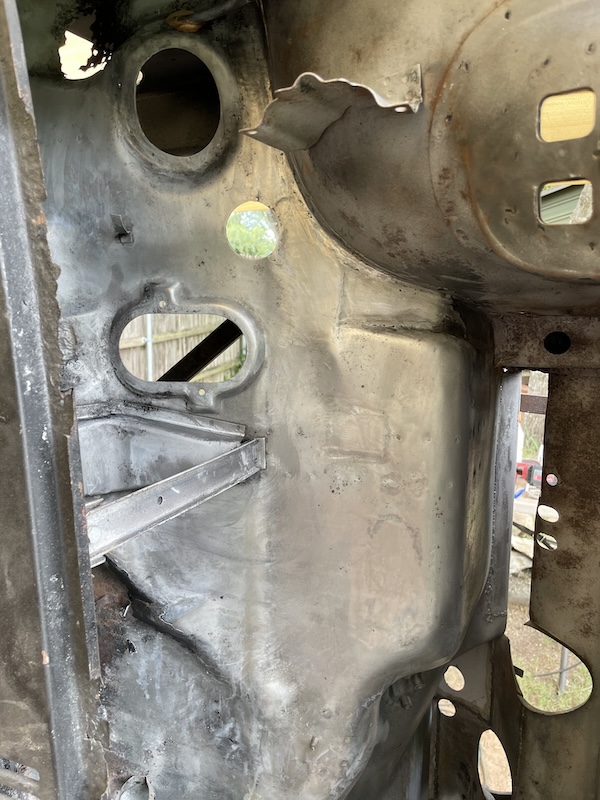 |
|
|
|
| seanpaulmc |
Sep 22 2024, 11:04 AM
Post
#114
|
|
Member Group: Members Posts: 373 Joined: 6-December 16 From: Orlando, FL Member No.: 20,649 Region Association: South East States |
QUOTE(friethmiller @ Sep 20 2024, 12:24 PM) QUOTE(seanpaulmc @ Sep 15 2024, 06:53 PM) Didn’t get much in the way of pictures but worked until the rain chased me off. It may not look like much but spent nearly 3 hours cleaning the battery wall area so I could finally get some kind of paint on it. @seanpaulmc - first off, nice work! (IMG:style_emoticons/default/popcorn[1].gif) Do you own a D/A sander? If you do, next time try going over the entire area lightly with some 180-grit on the sander. It'll blend in all your good grinding work. If you care to, that is. You've seen this (below) but that's how I finish things up - if I have enough space to get in there, of course. (IMG:style_emoticons/default/biggrin.gif) @friethmiller - thanks for the pro tip! I will look into the DA sander. Judging by your results I’m sure it’ll help. Thanks, Sean |
|
|
|
| Dave_Darling |
Sep 22 2024, 01:20 PM
Post
#115
|
|
914 Idiot Group: Members Posts: 15,062 Joined: 9-January 03 From: Silicon Valley / Kailua-Kona Member No.: 121 Region Association: Northern California |
QUOTE(seanpaulmc @ Sep 20 2024, 08:46 AM) I see wear patterns on the cam lobes and the lifters are flat (no convex to the surface). Crank endplay is also way out of spec. Flat lifters mean the motor is toast. It's likely that debris from the cam and lifters will do more damage to everything if you drive it. Crank endplay out of spec means the motor is toast. At a minimum you will need oversize bearings. Driving the car will do nothing but add to the wear pretty rapidly, very possibly damaging the crankcase as well. I suggest looking for a better used motor, at least for the short term, and rebuilding this one when you are able. If it is rebuildable at all, that is. --DD |
|
|
|
| seanpaulmc |
Sep 23 2024, 06:44 AM
Post
#116
|
|
Member Group: Members Posts: 373 Joined: 6-December 16 From: Orlando, FL Member No.: 20,649 Region Association: South East States |
QUOTE(Dave_Darling @ Sep 22 2024, 03:20 PM) QUOTE(seanpaulmc @ Sep 20 2024, 08:46 AM) I see wear patterns on the cam lobes and the lifters are flat (no convex to the surface). Crank endplay is also way out of spec. Flat lifters mean the motor is toast. It's likely that debris from the cam and lifters will do more damage to everything if you drive it. Crank endplay out of spec means the motor is toast. At a minimum you will need oversize bearings. Driving the car will do nothing but add to the wear pretty rapidly, very possibly damaging the crankcase as well. I suggest looking for a better used motor, at least for the short term, and rebuilding this one when you are able. If it is rebuildable at all, that is. --DD Thanks Dave! I kinda resigned myself to that fate but you confirmed what I suspected. Never done engine work so I appreciate the remarks and I can I avoid the pitfalls with attempting to reuse this one. I think @Montreal914 will be having a fire sale engine bits soon. (IMG:style_emoticons/default/poke.gif) (IMG:style_emoticons/default/biggrin.gif) |
|
|
|
| seanpaulmc |
Sep 28 2024, 12:09 PM
Post
#117
|
|
Member Group: Members Posts: 373 Joined: 6-December 16 From: Orlando, FL Member No.: 20,649 Region Association: South East States |
From back on 18th I did get some paint on the battery wall. Rust Bullet. Brush.
First coat looked great. Not so pleased with the second coat. I’m not sure if dry and recoat timing was wrong or if it reacted poorly with the rain I was trying to beat that day. Which I did not. It rained pretty hard and stayed damp into the next day where it eventually rained again. It is Florida after all. Which brings me to today and since it is raining now, I’m inside updating here.   Nevertheless, the metal repairs, which were significant in this area, are protected and it allows me to move forward with the battery tray and engine shelf repairs. Visually it is nice to see a uniform color. |
|
|
|
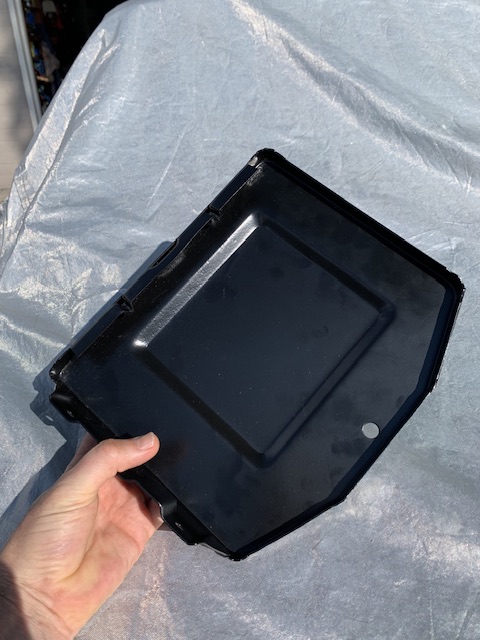
| seanpaulmc |
Sep 28 2024, 12:16 PM
Post
#118
|
|
Member Group: Members Posts: 373 Joined: 6-December 16 From: Orlando, FL Member No.: 20,649 Region Association: South East States |
|
|
|
|
| friethmiller |
Sep 28 2024, 05:41 PM
Post
#119
|
|
Senior Member Group: Members Posts: 665 Joined: 10-February 19 From: Austin, TX Member No.: 22,863 Region Association: Southwest Region |
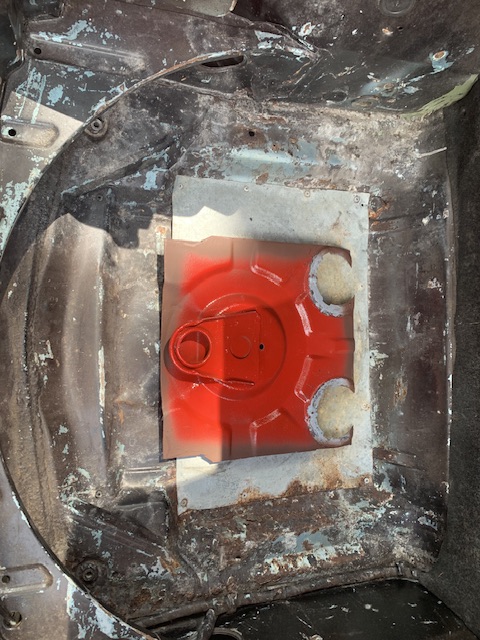
QUOTE(seanpaulmc @ Sep 28 2024, 01:16 PM) Nice! You've got it upside down (kidding) (IMG:style_emoticons/default/lol-2.gif) |
|
|
|
| seanpaulmc |
Oct 5 2024, 03:45 PM
Post
#120
|
|
Member Group: Members Posts: 373 Joined: 6-December 16 From: Orlando, FL Member No.: 20,649 Region Association: South East States |
Got that fixed…
 |
|
|
|
|
20 User(s) are reading this topic (20 Guests and 0 Anonymous Users)
0 Members:

|
Lo-Fi Version | Time is now: 28th November 2024 - 06:39 AM |
Invision Power Board
v9.1.4 © 2024 IPS, Inc.