|
|
|
Porsche, and the Porsche crest are registered trademarks of Dr. Ing. h.c. F. Porsche AG.
This site is not affiliated with Porsche in any way. Its only purpose is to provide an online forum for car enthusiasts. All other trademarks are property of their respective owners. |
|
|

  |

| bkrantz |
 Jul 17 2024, 07:24 PM Jul 17 2024, 07:24 PM
Post
#81
|
|
914 Guru  Group: Members Posts: 8,154 Joined: 3-August 19 From: SW Colorado Member No.: 23,343 Region Association: Rocky Mountains |
QUOTE(seanpaulmc @ Aug 27 2023, 03:29 PM)  Back at it. I made up my own replacement corner out of some other cut offs rather than cutting out a tiny section from a brand new RD piece which seemed wasteful to me. Used the RD piece as a template. Turned out rather nice. But it is just going to get covered up by the outer reinforcement piece that goes here. Question for you experts. Any tips for getting the door on and off alone? To install the outer reinforcement piece I have to get the door out of the way. It’ll probably take a couple on and offs I’m sure so looking for some practiced advise. Thanks for looking. Loosen all the bolts. Find a box or stack of lumber that the open door can sit on, and take the weight. Remove the bolts (be ready to hold the door for the last two). |
   |

 
|
| seanpaulmc |
Jul 23 2024, 12:08 PM
Post
#82
|
|
Member Group: Members Posts: 373 Joined: 6-December 16 From: Orlando, FL Member No.: 20,649 Region Association: South East States |
QUOTE(bkrantz @ Jul 17 2024, 09:24 PM) QUOTE(seanpaulmc @ Aug 27 2023, 03:29 PM) Back at it. I made up my own replacement corner out of some other cut offs rather than cutting out a tiny section from a brand new RD piece which seemed wasteful to me. Used the RD piece as a template. Turned out rather nice. But it is just going to get covered up by the outer reinforcement piece that goes here. Question for you experts. Any tips for getting the door on and off alone? To install the outer reinforcement piece I have to get the door out of the way. It’ll probably take a couple on and offs I’m sure so looking for some practiced advise. Thanks for looking. Loosen all the bolts. Find a box or stack of lumber that the open door can sit on, and take the weight. Remove the bolts (be ready to hold the door for the last two). I wound up using a floor jack and some blocking. A bit awkward so will look to improve on that next time. There will surely e a next time. I appreciate the advice! Keep it coming. |
 |
|
| seanpaulmc |
Jul 23 2024, 12:21 PM
Post
#83
|
|
Member Group: Members Posts: 373 Joined: 6-December 16 From: Orlando, FL Member No.: 20,649 Region Association: South East States |
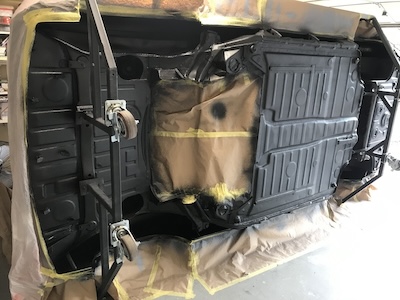
Kind of a wash out last week when outside of day job working hours. Missed the opportunity to work on the car over the weekend due to travel. But the rained missed us yesterday which left the car dry and was able to get the seam sealer on the underside.
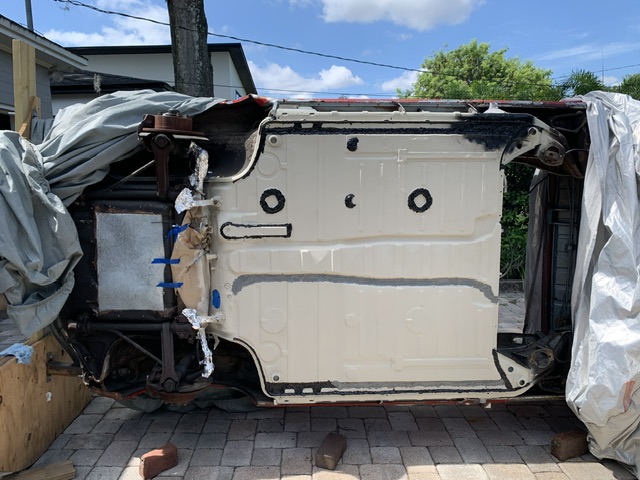 After some cure time the next step will be to coat the floor. I bought the aerosol Raptor liner. |
|
|
|
| friethmiller |
Jul 23 2024, 01:55 PM
Post
#84
|
|
Senior Member Group: Members Posts: 665 Joined: 10-February 19 From: Austin, TX Member No.: 22,863 Region Association: Southwest Region |
Good job! (IMG:style_emoticons/default/smilie_pokal.gif) Glad to know I'm not the only one trying to restore their 914 outside (IMG:style_emoticons/default/biggrin.gif)
|
|
|
|
| seanpaulmc |
Jul 23 2024, 06:51 PM
Post
#85
|
|
Member Group: Members Posts: 373 Joined: 6-December 16 From: Orlando, FL Member No.: 20,649 Region Association: South East States |
QUOTE(friethmiller @ Jul 23 2024, 03:55 PM) Good job! (IMG:style_emoticons/default/smilie_pokal.gif) Glad to know I'm not the only one trying to restore their 914 outside (IMG:style_emoticons/default/biggrin.gif) @friethmiller your work on that LE is incredible and awe inspiring. (IMG:style_emoticons/default/pray.gif) |
|
|
|
| friethmiller |
Jul 24 2024, 06:37 AM
Post
#86
|
|
Senior Member Group: Members Posts: 665 Joined: 10-February 19 From: Austin, TX Member No.: 22,863 Region Association: Southwest Region |
QUOTE(seanpaulmc @ Jul 23 2024, 07:51 PM) QUOTE(friethmiller @ Jul 23 2024, 03:55 PM) Good job! (IMG:style_emoticons/default/smilie_pokal.gif) Glad to know I'm not the only one trying to restore their 914 outside (IMG:style_emoticons/default/biggrin.gif) @friethmiller your work on that LE is incredible and awe inspiring. (IMG:style_emoticons/default/pray.gif) Thanks man! I certainly have my hands full. I like your wooden rotisserie. You shouldn’t have any issues creating a test stand to run your engine, if needed. Definitely following your work here. Keep up the good work! (IMG:style_emoticons/default/popcorn[1].gif) |
|
|
|
| 930cabman |
Jul 24 2024, 01:29 PM
Post
#87
|
|
Advanced Member Group: Members Posts: 3,708 Joined: 12-November 20 From: Buffalo Member No.: 24,877 Region Association: North East States |
QUOTE(friethmiller @ Jul 24 2024, 06:37 AM) QUOTE(seanpaulmc @ Jul 23 2024, 07:51 PM) QUOTE(friethmiller @ Jul 23 2024, 03:55 PM) Good job! (IMG:style_emoticons/default/smilie_pokal.gif) Glad to know I'm not the only one trying to restore their 914 outside (IMG:style_emoticons/default/biggrin.gif) @friethmiller your work on that LE is incredible and awe inspiring. (IMG:style_emoticons/default/pray.gif) Thanks man! I certainly have my hands full. I like your wooden rotisserie. You shouldn’t have any issues creating a test stand to run your engine, if needed. Definitely following your work here. Keep up the good work! (IMG:style_emoticons/default/popcorn[1].gif) Hats off to these guys working outdoors (IMG:style_emoticons/default/happy11.gif) |
|
|
|
| seanpaulmc |
Jul 25 2024, 06:00 PM
Post
#88
|
|
Member Group: Members Posts: 373 Joined: 6-December 16 From: Orlando, FL Member No.: 20,649 Region Association: South East States |
Rain delay today. Workshop closed.
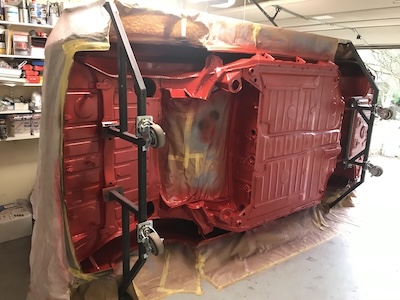
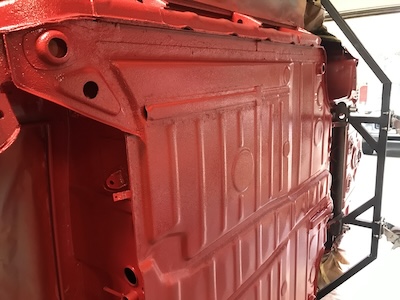
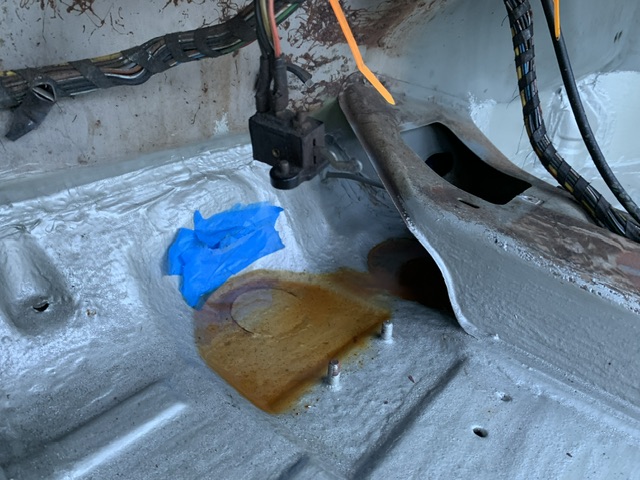
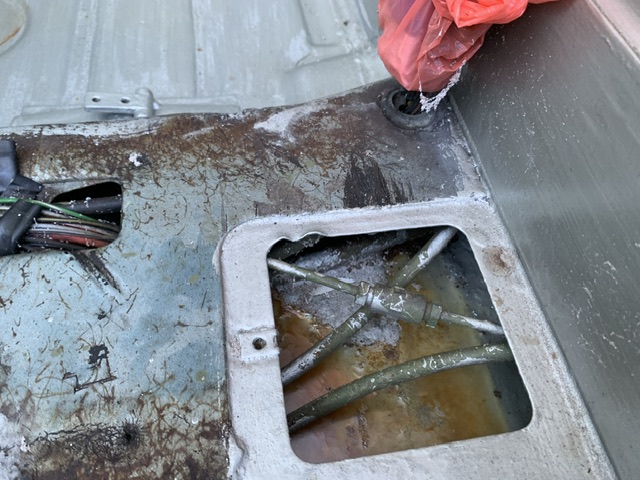
But yesterday we dodged the rain and I was able to get the floor pans coated. Used all four cans. (I’d estimate two aerosol cans per wheel well for potential future use.) 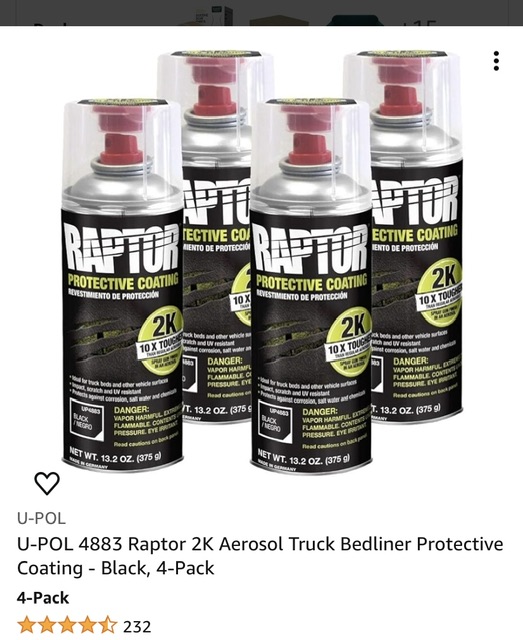 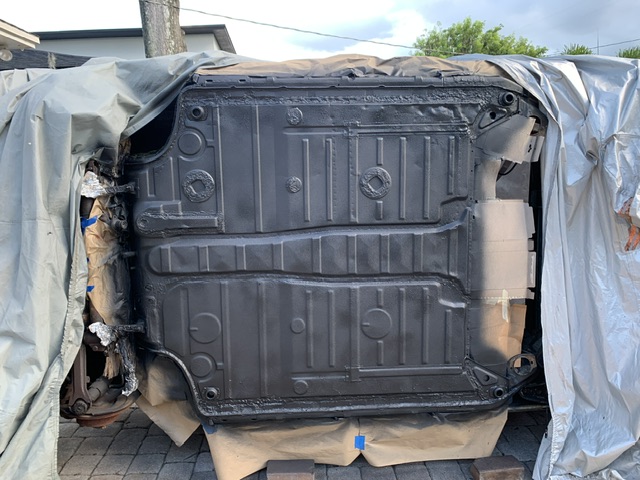 How it looks today not quite 24 hours later… 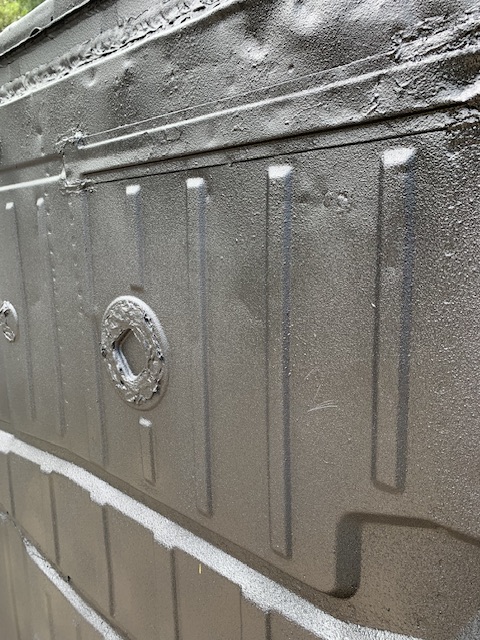 Seems good. Not yet fully cured but wasn’t even 24 hours when I tried to scratch at it. I thought the texture in it would cover/hide some of the imperfections but no. It’s literally the bottom of the car so no big deal. It’s sealed and protected. Happy to have made this milestone. Direct work started on the floor repairs 8/2022 after hell hole, firewall, jack points, longs, and long stiffening kit. Bought the welder 5/2020. Time flies! Much, much more still to do but I’d say this is finally a solid tub even with the remaining holes. Anyone got a frunk floor or louvered floor pan up for grabs? Thanks |
|
|
|
| seanpaulmc |
Jul 26 2024, 07:19 PM
Post
#89
|
|
Member Group: Members Posts: 373 Joined: 6-December 16 From: Orlando, FL Member No.: 20,649 Region Association: South East States |
Roll over jig
I did not come up with this but couldn't be more pleased. (IMG:style_emoticons/default/aktion035.gif) Let's give credit where due... Website: Restocar.com (IMG:style_emoticons/default/smilie_pokal.gif) YouTube: “914 Hillbilly tip-over jig” – https://www.youtube.com/watch?v=9QFZxzxtLJc “WOODEN Tip Over Jig: How to Build One for your Car! (DIY)” – https://www.youtube.com/watch?v=1YIZdwXgSao I won't post the plans, just go to the source, but I will attest that they work. 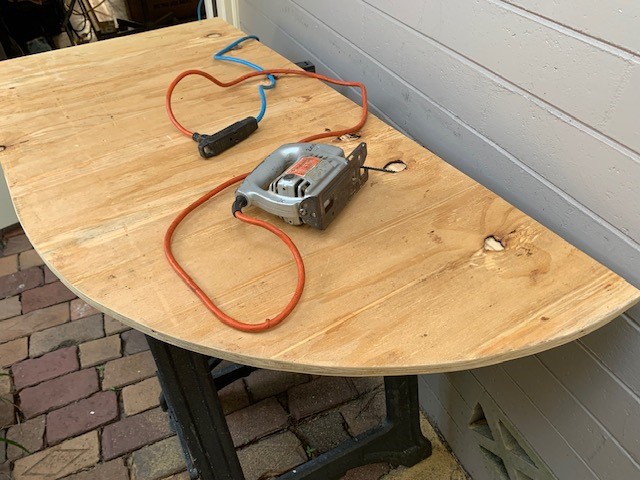 I only use the most modern of tools. 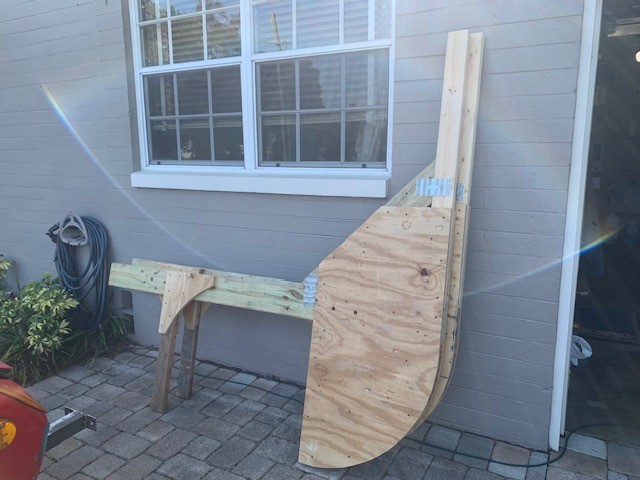 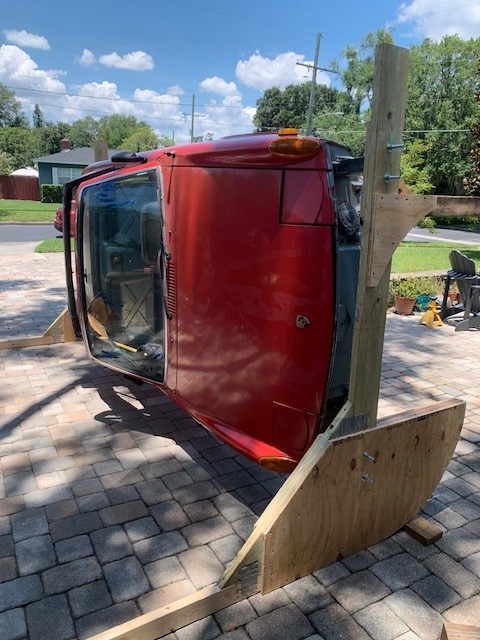 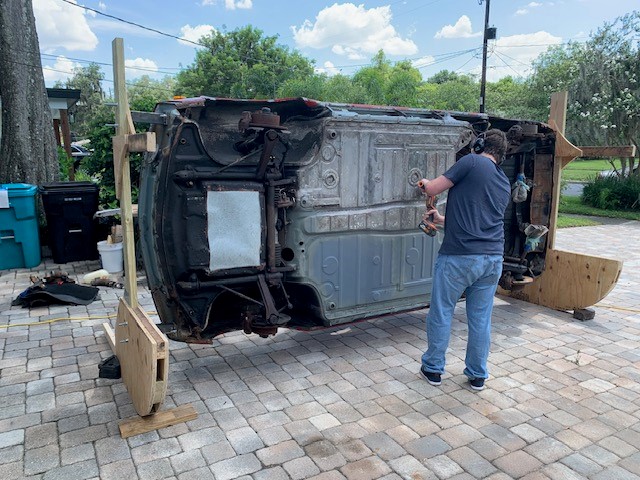 Adjustments to the design used in my application were: 1. Jigs are sandwiched with 3/4 plywood 2. Legs on rear jig (centerline to ground) are 1-inch longer than the front jig due to bumper locations. Front jig per plans. 3. All member intersections are reinforced (either by the plywood or a truss mending plate). With a bare or mostly stripped shell, this design handles it with ease. And, I suspect one person would be able to flip it. Not the case with what I did here. (IMG:style_emoticons/default/screwy.gif) The interior is out of the car, the drive train out, the wheels are off, doors, glass, and suspension remain and we were still able to rotate the car over but it is heavy to get started. It has been up for two weeks and is very stable up on its side. My welded brackets that interface between the jig and the car need some TLC because I weld like (IMG:style_emoticons/default/stromberg.gif) This has allowed me, I dare say, to finish the cabin's floor. Cheers |
|
|
|
| seanpaulmc |
Jul 27 2024, 07:21 PM
Post
#90
|
|
Member Group: Members Posts: 373 Joined: 6-December 16 From: Orlando, FL Member No.: 20,649 Region Association: South East States |
|
|
|
|
| seanpaulmc |
Aug 27 2024, 09:27 AM
Post
#91
|
|
Member Group: Members Posts: 373 Joined: 6-December 16 From: Orlando, FL Member No.: 20,649 Region Association: South East States |
Looking to the weekend ahead and hoping to put in some time on the teener. A month ago left her like… (IMG:style_emoticons/default/sawzall-smiley.gif)
  …with some holes to patch. |
|
|
|
| Geezer914 |
Aug 27 2024, 11:37 AM
Post
#92
|
|
Geezer914 Group: Members Posts: 1,769 Joined: 18-March 09 From: Salem, NJ Member No.: 10,179 Region Association: North East States |
That's what I did, coated the underside with truck bed liner. Tough stuff, better than undercoating.
|
|
|
|
| friethmiller |
Aug 27 2024, 12:22 PM
Post
#93
|
|
Senior Member Group: Members Posts: 665 Joined: 10-February 19 From: Austin, TX Member No.: 22,863 Region Association: Southwest Region |
[Not trying to hijack the thread here with my pics] Thought I'd present another option. On my last 914 I used a paintable 3M undercoating followed a PPG's [Bahia Red] 2-stage paint. Didn't have to tint anything. It was all the same paint/color as the rest of the car.
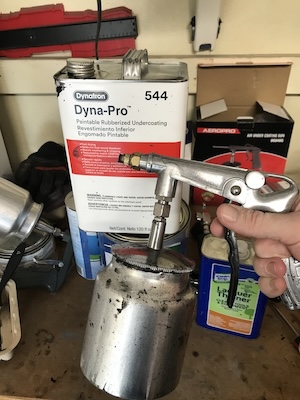   . .  |
|
|
|
| seanpaulmc |
Aug 27 2024, 12:50 PM
Post
#94
|
|
Member Group: Members Posts: 373 Joined: 6-December 16 From: Orlando, FL Member No.: 20,649 Region Association: South East States |
QUOTE(friethmiller @ Aug 27 2024, 02:22 PM) [Not trying to hijack the thread here with my pics] Thought I'd present another option. On my last 914 I used a paintable 3M undercoating followed a PPG's [Bahia Red] 2-stage paint. Didn't have to tint anything. It was all the same paint/color as the rest of the car. . Nice! I like what you did there. How to finish and protect the underside has been a long, stressful, and nearly unending debate in my head since I got the passenger floor pan installed. I really wanted to go back with body color but chose the aerosol Raptor liner because of availability and convenience so I could move this project along. Some limitations I have to work around: I don't have any air supply or air tools therefore no paint guns and such. With doing this outside I have to constantly keep the metal weather protected and can't get too far ahead or leave it too long. Breaking my clavicle (bicycle crash) earlier this year really made me consider trying to crawl back under the car and continue to work like I was doing. No bueno! Hence the wooden roll over jig and the quick progress that's allowed me with the floor's underside. I'm greatful for your post and your advice. Please, keep it coming! Cheers, |
|
|
|
| friethmiller |
Aug 27 2024, 01:26 PM
Post
#95
|
|
Senior Member Group: Members Posts: 665 Joined: 10-February 19 From: Austin, TX Member No.: 22,863 Region Association: Southwest Region |
So true about being outside! Part of any restoration is making decisions along the way based on your situation. Thanks for sharing your project. Keep up the great work!
(IMG:style_emoticons/default/popcorn[1].gif) |
|
|
|
| seanpaulmc |
Aug 31 2024, 06:24 PM
Post
#96
|
|
Member Group: Members Posts: 373 Joined: 6-December 16 From: Orlando, FL Member No.: 20,649 Region Association: South East States |
Need a waterproof car cover. Thought this was fine but apparently not.
  Shows my floors are fixed well enough to retain water. Far cry from what I started with so there is that. |
|
|
|
| seanpaulmc |
Aug 31 2024, 06:31 PM
Post
#97
|
|
Member Group: Members Posts: 373 Joined: 6-December 16 From: Orlando, FL Member No.: 20,649 Region Association: South East States |
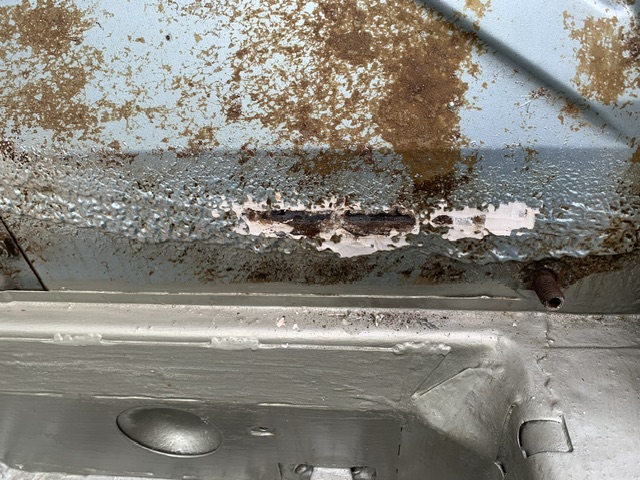
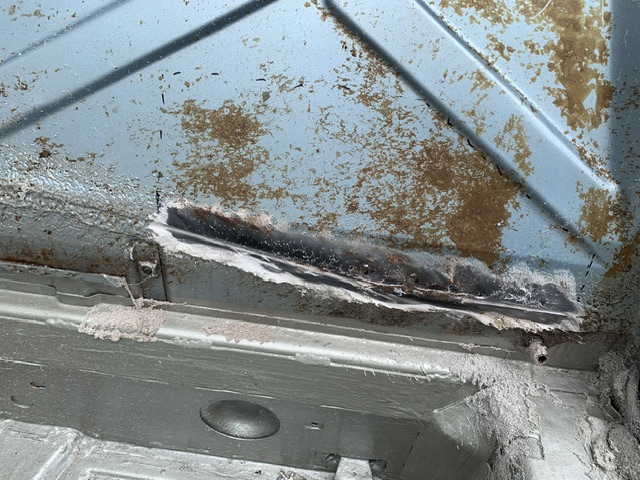
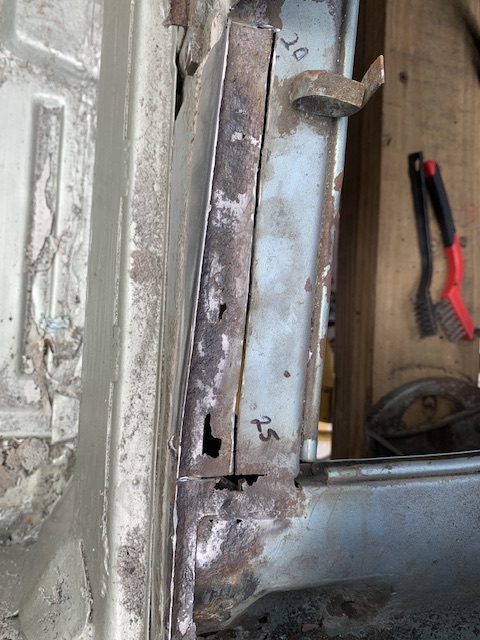
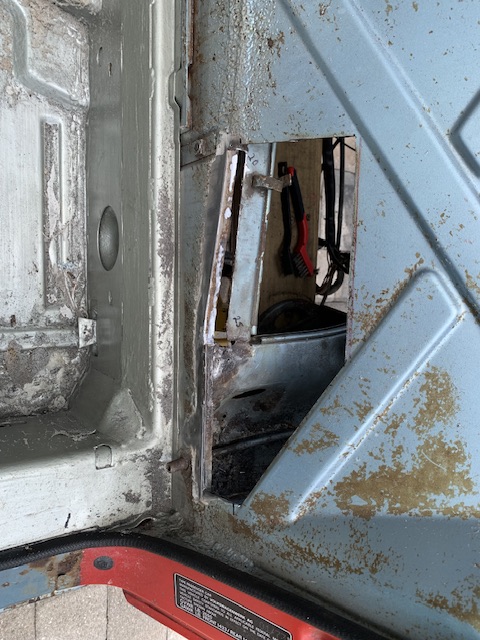
Hot!
No rain today. Welding could be done. (IMG:style_emoticons/default/welder.gif)  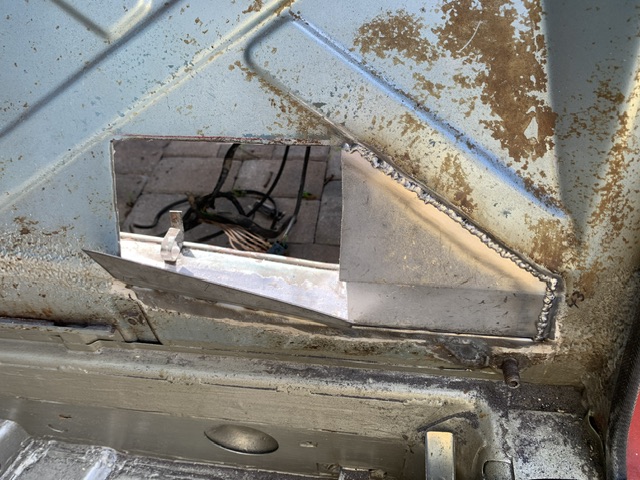 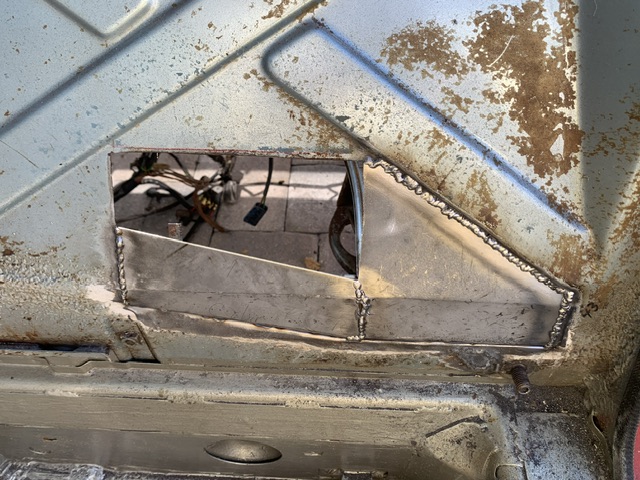 All because I looked under the seam sealer. |
|
|
|
| 930cabman |
Sep 1 2024, 05:22 AM
Post
#98
|
|
Advanced Member Group: Members Posts: 3,708 Joined: 12-November 20 From: Buffalo Member No.: 24,877 Region Association: North East States |
QUOTE(seanpaulmc @ Aug 31 2024, 06:31 PM) Hot! No rain today. Welding could be done. (IMG:style_emoticons/default/welder.gif) All because I looked under the seam sealer. Don't look any further (IMG:style_emoticons/default/aktion035.gif) |
|
|
|
| seanpaulmc |
Sep 1 2024, 01:56 PM
Post
#99
|
|
Member Group: Members Posts: 373 Joined: 6-December 16 From: Orlando, FL Member No.: 20,649 Region Association: South East States |
QUOTE(930cabman @ Sep 1 2024, 07:22 AM) QUOTE(seanpaulmc @ Aug 31 2024, 06:31 PM) Hot! No rain today. Welding could be done. (IMG:style_emoticons/default/welder.gif) All because I looked under the seam sealer. Don't look any further (IMG:style_emoticons/default/aktion035.gif) See my WTB ad for metal bits. (IMG:style_emoticons/default/lol-2.gif) |
|
|
|
| seanpaulmc |
Sep 1 2024, 02:01 PM
Post
#100
|
|
Member Group: Members Posts: 373 Joined: 6-December 16 From: Orlando, FL Member No.: 20,649 Region Association: South East States |
Got the rest of it in just before the heavens broke loose. It is pouring rain in the sunshine state.
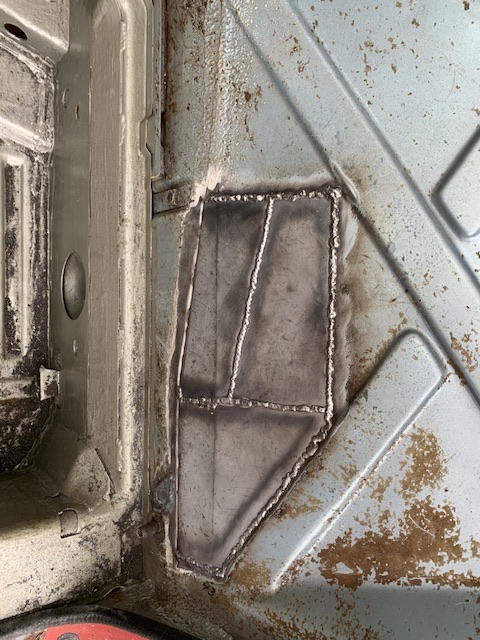 Didn’t even have a chance to get the grinder out. |
|
|
|
|
49 User(s) are reading this topic (49 Guests and 0 Anonymous Users)
0 Members:

|
Lo-Fi Version | Time is now: 28th November 2024 - 06:54 AM |
Invision Power Board
v9.1.4 © 2024 IPS, Inc.