|
|
|
Porsche, and the Porsche crest are registered trademarks of Dr. Ing. h.c. F. Porsche AG.
This site is not affiliated with Porsche in any way. Its only purpose is to provide an online forum for car enthusiasts. All other trademarks are property of their respective owners. |
|
|

  |

| falcor75 |
 Jan 8 2020, 02:51 AM Jan 8 2020, 02:51 AM
Post
#1381
|
|
Senior Member  Group: Members Posts: 1,579 Joined: 22-November 12 From: Sweden Member No.: 15,176 Region Association: Scandinavia |
Sorry for your loss. (IMG:style_emoticons/default/sad.gif)
|
   |

 
|
| 914_7T3 |
Jan 8 2020, 11:57 AM
Post
#1382
|
|
Please forgive me, I'm new to all of this! Group: Members Posts: 1,875 Joined: 3-April 17 From: Los Angeles, CA Member No.: 20,991 Region Association: Southern California |
Brent, so sorry to hear of your loss. Its never easy losing a loyal friend like Niaquq.
|
|
|
|
| tygaboy |
Jan 8 2020, 02:41 PM
Post
#1383
|
|
914 Guru Group: Members Posts: 5,550 Joined: 6-October 15 From: Petaluma, CA Member No.: 19,241 Region Association: Northern California |
Brent - Most importantly, I'll raise one this evening in honor of Niaquq.
So sorry to hear. 2nd, I believe that L-shaped rubber piece is there so if you have the engine cover and trunk open at the same time, and mistakenly go to close the engine cover, the rubber hits the trunk lid, preventing damage. Give that a go and see if you think that's it. |
|
|
|
| burton73 |
Jan 8 2020, 04:52 PM
Post
#1384
|
|
Senior member, and old dude Group: Members Posts: 3,801 Joined: 2-January 07 From: Los Angeles Member No.: 7,414 Region Association: Southern California |
Brent,
I am so sorry of your loss of your buddie. We love our dogs so much. They are better than most people. The true unconditional love they give us like a mother to a child. As you know it takes time to work through the grief. I hope that part passes quickly for you, and that you are left with a warm feeling whenever you think of Niaquq. Bob B |
|
|
|
| theer |
Jan 8 2020, 05:54 PM
Post
#1385
|
|
Senior Member Group: Members Posts: 691 Joined: 31-July 15 From: Dover, MA Member No.: 19,014 Region Association: North East States |
QUOTE(bbrock @ Jan 8 2020, 12:13 AM)  The new all plastic nuts for the grill are also easier to work with than the originals. I found this tool or a 7mm deep well socket ideal for pushing them on. @bbrock where did you find those all plastic grill nuts? I'm in need of a complete set for Grey Matter. Thanks, Tom |
|
|
|
| FlacaProductions |
Jan 8 2020, 06:20 PM
Post
#1386
|
|
Senior Member Group: Members Posts: 1,901 Joined: 24-November 17 From: LA Member No.: 21,628 Region Association: Southern California |
QUOTE(tygaboy @ Jan 8 2020, 12:41 PM) I believe that L-shaped rubber piece is there so if you have the engine cover and trunk open at the same time, and mistakenly go to close the engine cover, the rubber hits the trunk lid, preventing damage. Give that a go and see if you think that's it. That's always been my belief as well but I'm curious as I don't believe every year has/had them....my 73 did - my 74 doesn't. |
|
|
|
| bbrock |
Jan 8 2020, 06:46 PM
Post
#1387
|
|
914 Guru Group: Members Posts: 5,269 Joined: 17-February 17 From: Montana Member No.: 20,845 Region Association: Rocky Mountains |
QUOTE(theer @ Jan 8 2020, 04:54 PM) QUOTE(bbrock @ Jan 8 2020, 12:13 AM) The new all plastic nuts for the grill are also easier to work with than the originals. I found this tool or a 7mm deep well socket ideal for pushing them on. @bbrock where did you find those all plastic grill nuts? I'm in need of a complete set for Grey Matter. Thanks, Tom @theer they are a dealer item. Kind of pricey of course. I got mine through Sunset Porsche: https://www.sunsetporscheparts.com/oem-part...nut-99950722040 |
|
|
|
| bbrock |
Jan 8 2020, 06:55 PM
Post
#1388
|
|
914 Guru Group: Members Posts: 5,269 Joined: 17-February 17 From: Montana Member No.: 20,845 Region Association: Rocky Mountains |
QUOTE(FlacaProductions @ Jan 8 2020, 05:20 PM) QUOTE(tygaboy @ Jan 8 2020, 12:41 PM) I believe that L-shaped rubber piece is there so if you have the engine cover and trunk open at the same time, and mistakenly go to close the engine cover, the rubber hits the trunk lid, preventing damage. Give that a go and see if you think that's it. That's always been my belief as well but I'm curious as I don't believe every year has/had them....my 73 did - my 74 doesn't. @tygaboy @FlacaProductions By golly I think you are right. That was driving me nuts trying to figure out how to adjust that thing and the idea that Porsche might have included a completely useless and unnecessary part was challenging my world view! You guys are so smart. (IMG:style_emoticons/default/pray.gif) 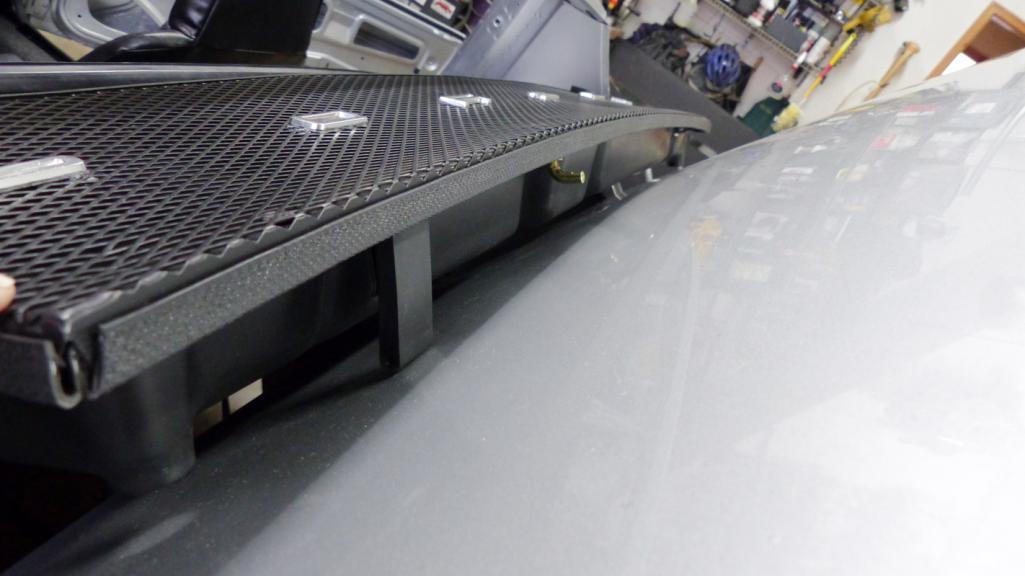 |
|
|
|
| bbrock |
Jan 8 2020, 07:10 PM
Post
#1389
|
|
914 Guru Group: Members Posts: 5,269 Joined: 17-February 17 From: Montana Member No.: 20,845 Region Association: Rocky Mountains |
My lunchtime project today. @tygaboy should recognize the window since he donated it. (IMG:style_emoticons/default/beerchug.gif)
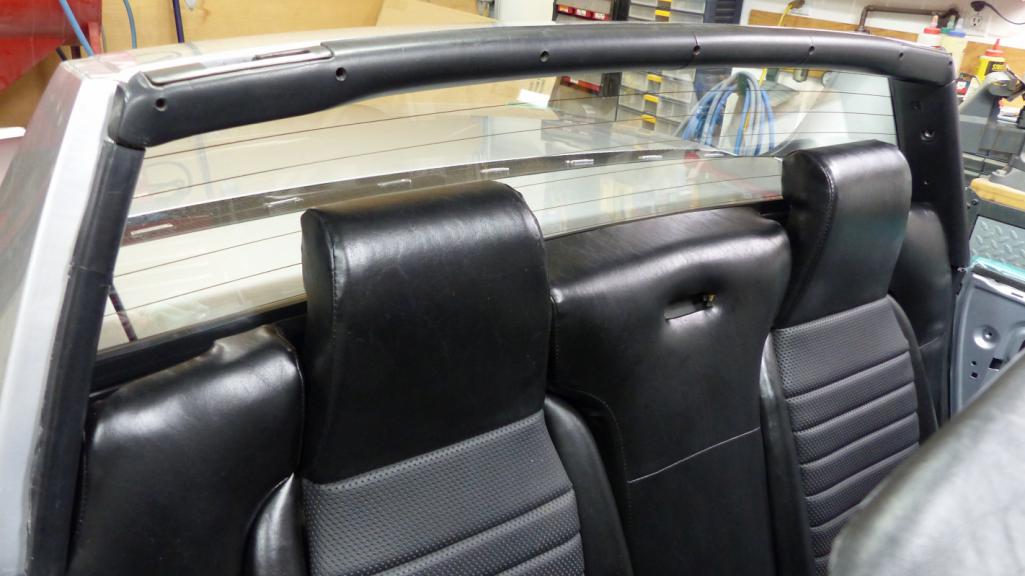 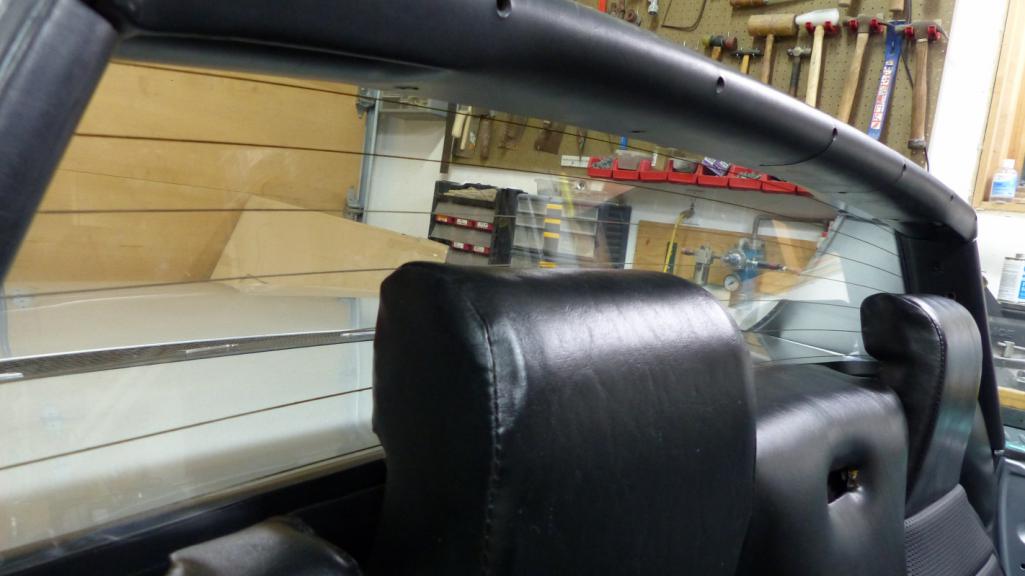 Why is the interior light missing? Because the contact snapped off the cheap POS repop when I tried to plug the wires in. JB Weld to the rescue. Should have it installed after the epoxy sets overnight. 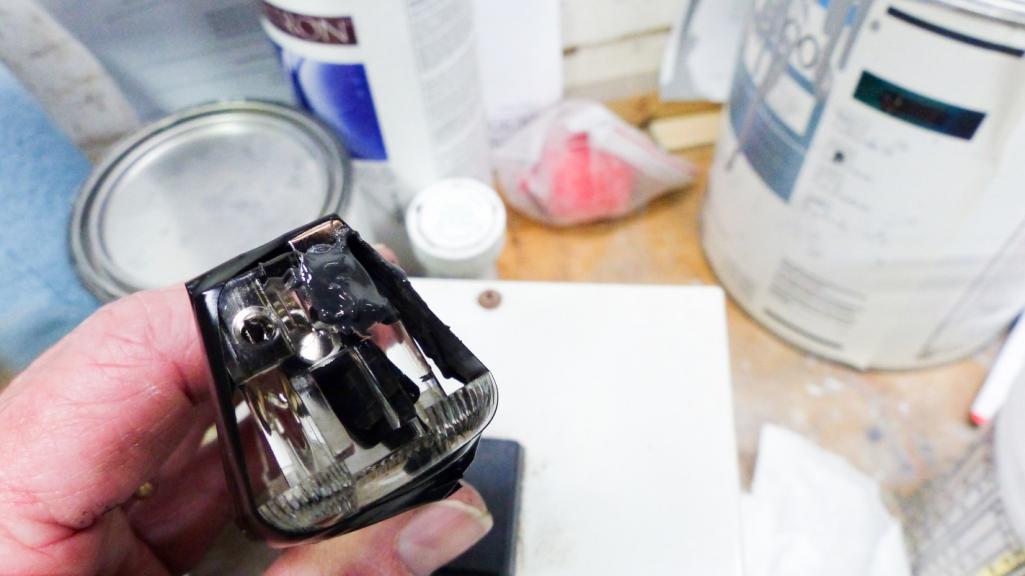 |
|
|
|
| tygaboy |
Jan 8 2020, 07:17 PM
Post
#1390
|
|
914 Guru Group: Members Posts: 5,550 Joined: 6-October 15 From: Petaluma, CA Member No.: 19,241 Region Association: Northern California |
I've been waiting to see that window go in! Now I say officially that you couldn't have done your build without me! (IMG:style_emoticons/default/av-943.gif)
And seriously Brent, your car is looking SOOOO good. It's helping keep me motivated to get mine moved along. |
|
|
|
| FlacaProductions |
Jan 8 2020, 09:54 PM
Post
#1391
|
|
Senior Member Group: Members Posts: 1,901 Joined: 24-November 17 From: LA Member No.: 21,628 Region Association: Southern California |
More on the L-shaped piece - I knew I had read about it not being on all years...from 914Rubber's site:
New reproduction of the NLA engine deck lid bumper used on early model year cars. This rubber bumper prevents the rear trunk lid from hitting the engine deck lid and rain tray. Used for the 1970-73 914 model years, 1 required per car. 914.512.195.10, 914 512 195 10, 914-512-195-10, 91451219510 https://900designs-container.zoeysite.com/1...for-porsche-914 |
|
|
|
| raynekat |
Jan 9 2020, 11:54 PM
Post
#1392
|
|
Advanced Member Group: Members Posts: 2,169 Joined: 30-December 14 From: Coeur d'Alene, Idaho Member No.: 18,263 Region Association: Pacific Northwest |
Looking good there Brent on all the paintwork and assembly riddles.
And so sorry to hear about your bud. Sounds like you really had a special bonding. May he be in the real dog heaven now. All the best my friend. |
|
|
|
| bbrock |
Jan 14 2020, 11:16 PM
Post
#1393
|
|
914 Guru Group: Members Posts: 5,269 Joined: 17-February 17 From: Montana Member No.: 20,845 Region Association: Rocky Mountains |
Made a big purchase yesterday. Trying to keep up with @914_7T3 . You aren't the only one with NOS hold down dude. Of course, when I bought mine, it was just N but I guess since it stayed in the package in the 30 years I've owned it, it has earned the OS. I'm not digging the finish on the mounting bolt. I think it was just black oxide and has started to rust. I'll replate that with a black chromate finish.
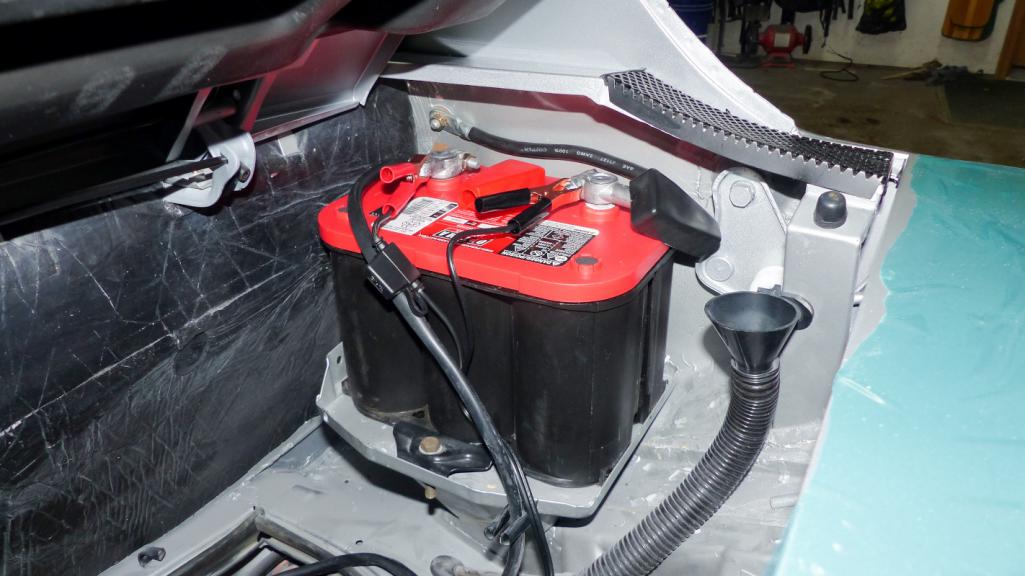 Also bought one of these to keep it topped up. 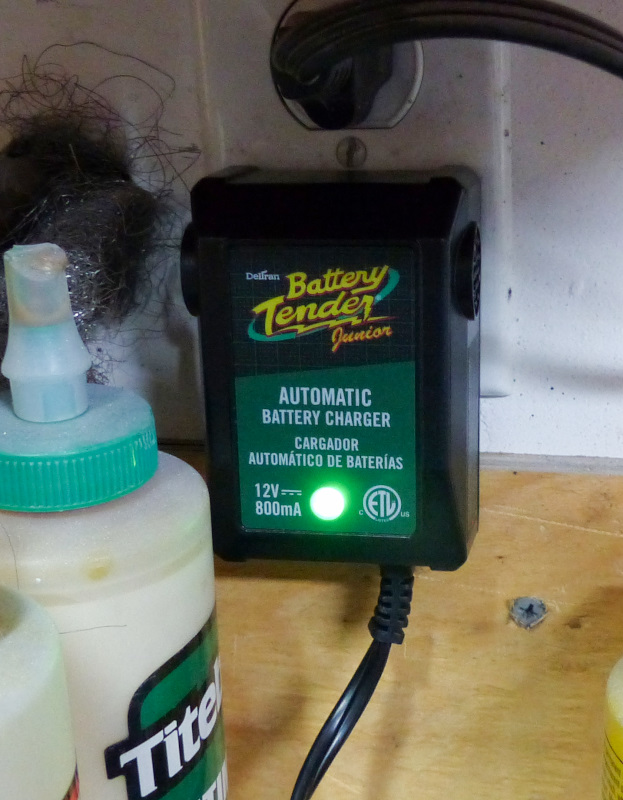 With an actual battery in, I finally got to hear what the Hella Sharptone horns sound like. LOUD! I do have an electrical mystery though. I don't have three speeds on my fresh air blower. Low works fine but medium and low both run at the same speed. I was hoping it was just because my little power supply couldn't pump enough amperage to run high speed but no. I think it might actually be running at high speed on both medium and low settings. I double check connections to the controller to make sure it is wired according to the schematic but the connector on the blower is still a mystery. Those wires got mixed up when I was working on the harness and I haven't found a diagram that shows how they should go. I'll have to do a little more trouble shooting to figure that out. |
|
|
|
| Superhawk996 |
Jan 15 2020, 06:12 AM
Post
#1394
|
|
914 Guru Group: Members Posts: 6,971 Joined: 25-August 18 From: Woods of N. Idaho Member No.: 22,428 Region Association: Galt's Gulch |
The power supply probably can't source enough current. Motors are current hogs to get them up to speed. Even if steady state is 3A, you'll need more current to cover inrush current and to get the mass and inertia up to speed which might be making high seem a lot like medium.
IIRC the low and medium speeds are current limited by a wire wound resistive element. High should be straight through to the motor windings. If low and medium work OK with no smoke escapage, check the schematic and your wiring and you'd be safe to run the motor directly off the battery via jumpers if you don't want to energize the rest of the harness. if you do this, isolate the motor so you don't backfeed the harness. Great progress! |
|
|
|
| bbrock |
Jan 15 2020, 09:04 AM
Post
#1395
|
|
914 Guru Group: Members Posts: 5,269 Joined: 17-February 17 From: Montana Member No.: 20,845 Region Association: Rocky Mountains |
QUOTE(Superhawk996 @ Jan 15 2020, 05:12 AM) The power supply probably can't source enough current. Motors are current hogs to get them up to speed. Even if steady state is 3A, you'll need more current to cover inrush current and to get the mass and inertia up to speed which might be making high seem a lot like medium. IIRC the low and medium speeds are current limited by a wire wound resistive element. High should be straight through to the motor windings. If low and medium work OK with no smoke escapage, check the schematic and your wiring and you'd be safe to run the motor directly off the battery via jumpers if you don't want to energize the rest of the harness. if you do this, isolate the motor so you don't backfeed the harness. Great progress! Correct on almost all fronts. Yes, it was my assumption that the power supply was only providing enough oomph for low and medium and that when I hooked up the battery, I would get my high speed back - but no. When I rebuilt the blower, I opened up the guts to clean cobwebs off the resistor coils and test for continuity etc. I bench tested the blower using a 4 amp battery charger (didn't have the power supply at the time). IIRC, I was able to get all speeds but can't be sure. Now here's where the mystery and I think the problem is. When I removed the harness for refurb, I labeled all the wires on the control "front, middle, and rear." Then I made the dumb move of pulling wires from the connector on the blower without documenting positions. I assumed the factory schematic would provide that detail. They do NOT. I posted a thread on The World and got a pic of the wire connections from another member. Then on reassembly, I found that neither the original connections to the controller or the wiring pic for the blower connector were correct. I rewired the controller according to the schematic and found @BeatNavy 's excellent post on wiring. I believe that wiring is correct. One thing I know is that I have positive power connected correctly and that the control wires just alter ground paths so I'm safe from sending power backward through the harness. According to Rob, low speed runs through both resistors to ground, med speed runs only through one resistor, and high is direct to ground. My next step will be manually ground each of the control wires to see if I can get low, med, and high. If I can, then the problem would be in the finger contacts. If I can't, I it will mean either wiring at the blower connection, or an open wire in the blower itself. One problem is that I'm not sure if I'm getting low and med, or low and high. The med speed seems kind of high to me but I don't know. Also, the blower runs in all three positions, I just don't hear a change in fan speed between med and high. One way or the other, I'll get it figured out. Electrical troubleshooting is one of the few things I can do well. (IMG:style_emoticons/default/thumb3d.gif) |
|
|
|
| bbrock |
Jan 15 2020, 10:18 AM
Post
#1396
|
|
914 Guru Group: Members Posts: 5,269 Joined: 17-February 17 From: Montana Member No.: 20,845 Region Association: Rocky Mountains |
This one is for @raynekat - the dreaded 914rubber door stay kits. Here's how I tamed the click.
First step was to clean and replate all the brackets so they were nice and shiny. Then rebuild with the 914Rubber kit. Easy enough and looks pretty nice. 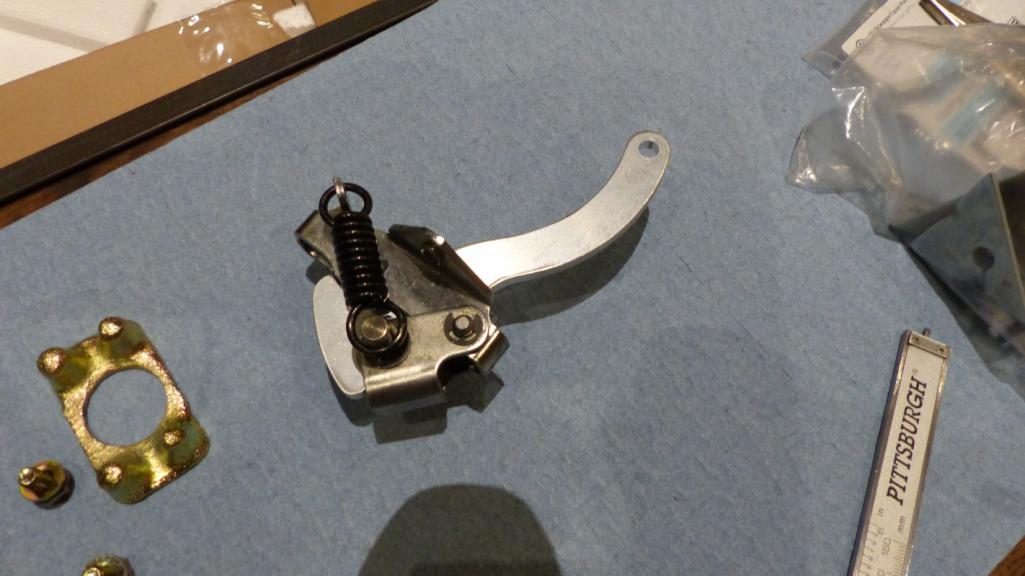 That's when the fun begins. In an effort to fix the notorious "click" problem, 914Rubber decided to overbore the pivot hole on the arm and supply an oversized pin to match. Their theory is that the click was caused by the bracket holes on the chassis being wallowed out by wear and allowing play. Problem is that is not always the case. Many of our car's bracket holes are just fine and they are a PITA to drill or ream out. I had no interest in molesting my original brackets - especially with fresh paint on. I cut my challenge in half by simply re-using the one original stay arm that was still in good condition. That has the correct 6mm bore to match the bracket. Only challenge there was sourcing the correct pin. OEM pin is 6x16mm and the 914Rubber pin is 1/4inch or about 6.3mm. I couldn't find a 6mm pin locally (they can be found on ebay) but I did find 6mm tension pins. Look at the door stays of most modern cars and you will probably find a tension pin instead of a clevis - I think for good reason. I chose a 6x20 mm pin to provide a little more length since there is no head to rest on at the top. The diameter of the untensioned pins were 6.5mm which was way too big to drive into the brackets and arms easily so I compressed them in a vice before installing. The only thing I did on the OEM arm was to very lightly file the bore with a round chain saw file. Just enough to see fresh metal. The idea here was that the tension pins will remain stationary in the brackets (which should prevent future wallowing of the brackets) with the arm pivoting snuggly but smoothly around the pin. It worked! Door opens and closes as it should with NO CLICKS. Now to mod the 914Rubber arm to get the same result. I bought a 1/4" OD aluminum spacer bushing that fit snuggly inside the bore. 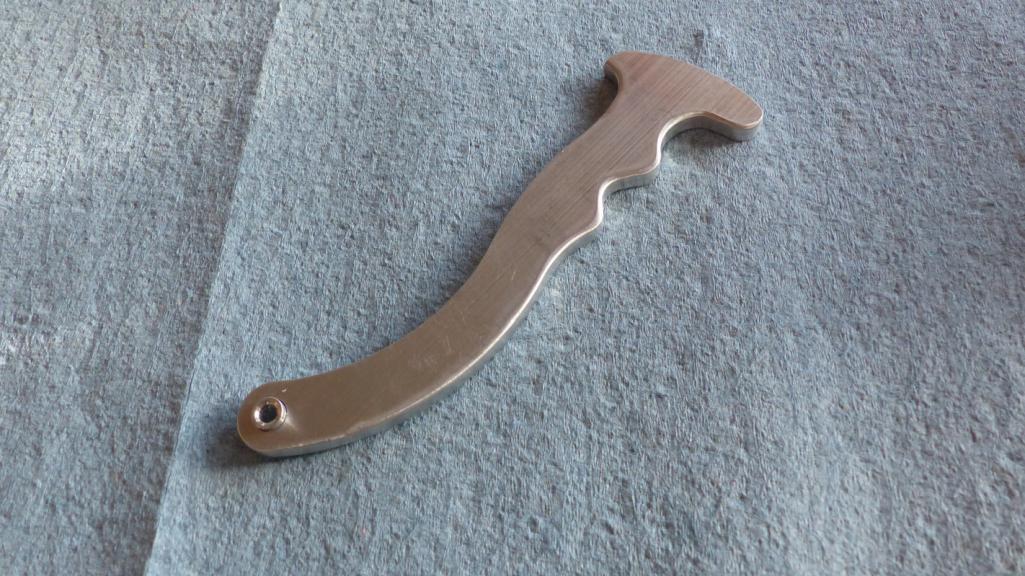 I JB Welded the bushing in because almost all of the bushing gets drilled back out. Drilled perfectly, there will only be 0.15mm of material left after drilling. A better way would probably be to drill the arm hole out to 3/8" and source a matching O.D. bushing to leave more wall behind. I may wind up doing that but will see how long this lasts. After drilling (to 6mm or 15/64") and filing the bushing flush with the arm, here's what it looks like. 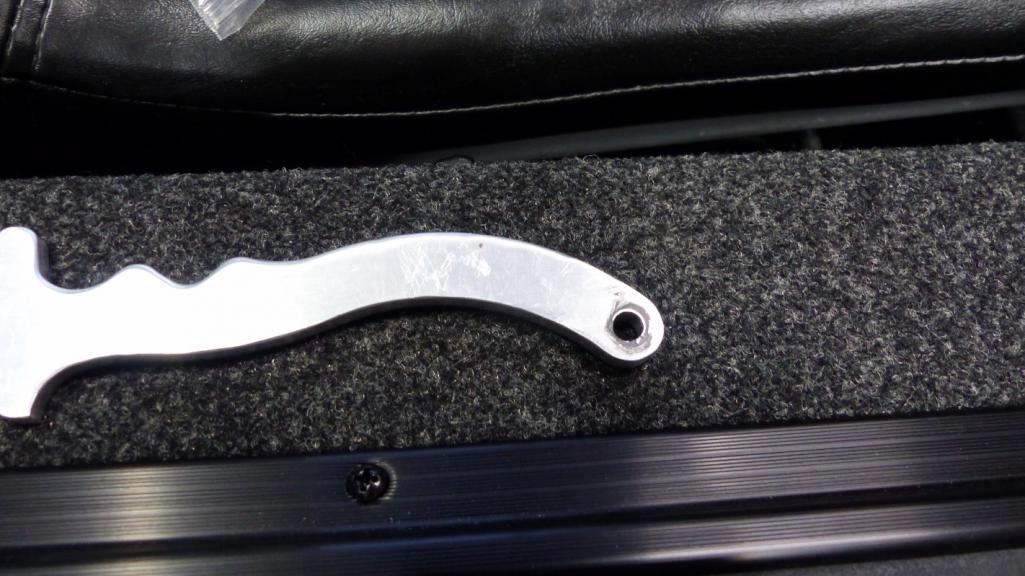 After installing the tension pin on this side, all was in place and again, NO CLICKS! (IMG:style_emoticons/default/shades.gif) (Doug, you might recognize that door switch (IMG:style_emoticons/default/laugh.gif) ) 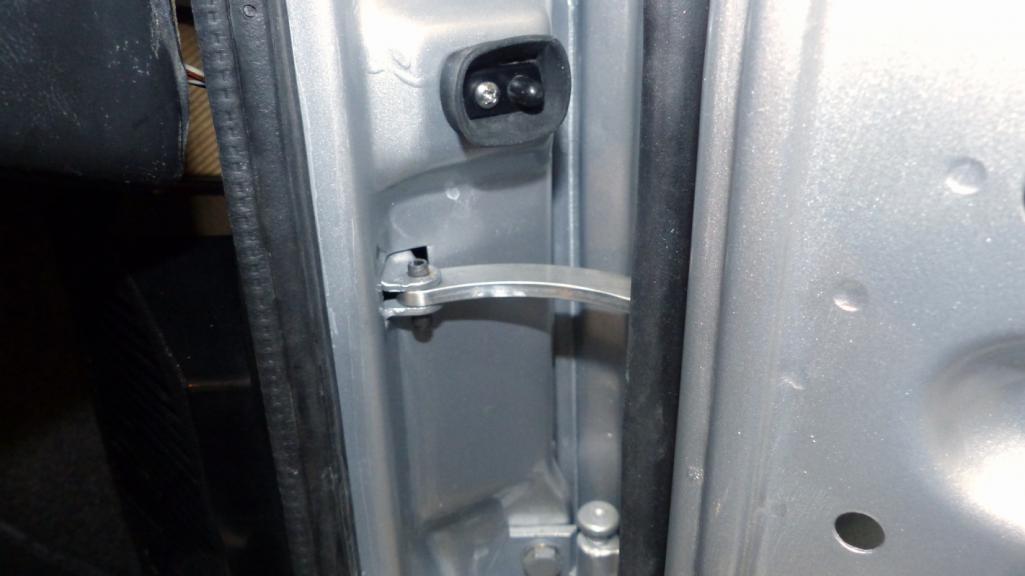 And a parting shot of the mechanism in its home. 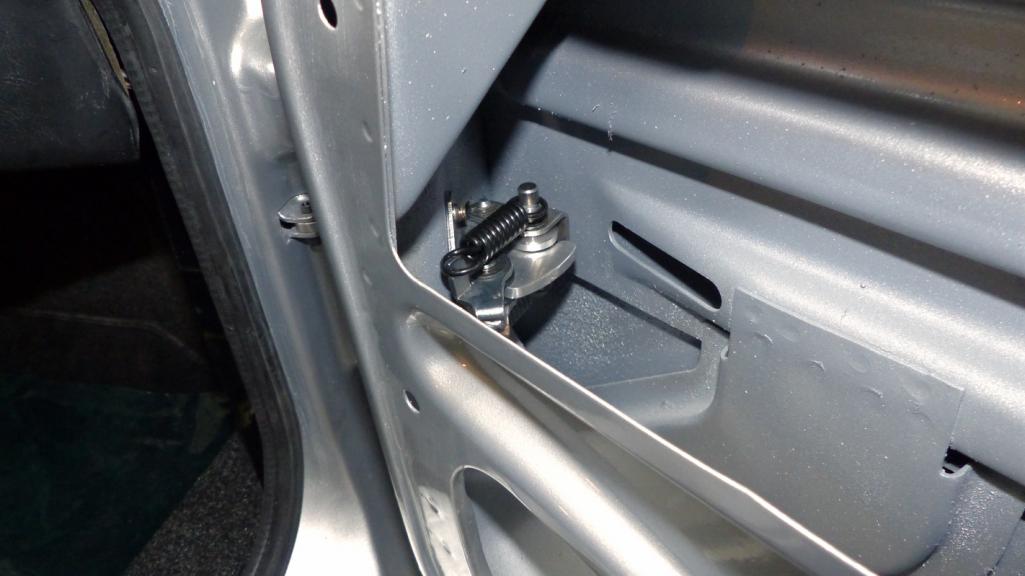 |
|
|
|
| cary |
Jan 15 2020, 10:25 AM
Post
#1397
|
|
Advanced Member Group: Members Posts: 3,900 Joined: 26-January 04 From: Sherwood Oregon Member No.: 1,608 Region Association: Pacific Northwest |
Well done ............
|
|
|
|
| defianty |
Jan 15 2020, 10:27 AM
Post
#1398
|
|
Senior Member Group: Members Posts: 659 Joined: 9-August 06 From: Essex, UK Member No.: 6,621 Region Association: None |
Just caught up with your last few posts Brent.
Firstly, so sorry about your loss. The car is looking just great, super progress! |
|
|
|
| BeatNavy |
Jan 15 2020, 03:43 PM
Post
#1399
|
|
Certified Professional Scapegoat Group: Members Posts: 2,951 Joined: 26-February 14 From: Easton, MD Member No.: 17,042 Region Association: MidAtlantic Region |
QUOTE(defianty @ Jan 15 2020, 11:27 AM) Just caught up with your last few posts Brent. Firstly, so sorry about your loss. The car is looking just great, super progress! I'm also sorry about your friend, Brent. Such a beautiful dog and happy dog in those pictures (IMG:style_emoticons/default/sad.gif) Rock on - your car is looking fantastic. Your attention to detail is amazing, and you're getting closer to hitting the road (IMG:style_emoticons/default/beerchug.gif) |
|
|
|
| johnlush |
Jan 15 2020, 05:50 PM
Post
#1400
|
|
What's all this then? Group: Members Posts: 376 Joined: 26-May 04 From: Cheyenne, WY Member No.: 2,108 Region Association: Rocky Mountains |
Just catching up on this thread.
Brent, the car looks great and the progress is inspiring. Sorry about your pooch. Sounds similar to how my last Shepherd went. Here today and gone tomorrow. I felt like a gutted fish for a long time. |
|
|
|
|
1 User(s) are reading this topic (1 Guests and 0 Anonymous Users)
0 Members:

|
Lo-Fi Version | Time is now: 21st April 2025 - 11:48 AM |
Invision Power Board
v9.1.4 © 2025 IPS, Inc.