|
|
|
Porsche, and the Porsche crest are registered trademarks of Dr. Ing. h.c. F. Porsche AG.
This site is not affiliated with Porsche in any way. Its only purpose is to provide an online forum for car enthusiasts. All other trademarks are property of their respective owners. |
|
|

  |

| bbrock |
 Mar 1 2020, 12:01 AM Mar 1 2020, 12:01 AM
Post
#1441
|
|
914 Guru  Group: Members Posts: 5,269 Joined: 17-February 17 From: Montana Member No.: 20,845 Region Association: Rocky Mountains |
QUOTE(Superhawk996 @ Feb 29 2020, 10:41 PM)  Nice work! Maybe contacts are bi-metallic and close if resistors get too hot and then increase fan speed until it cools? I think you just put the pieces together for me! My first thought was that these were indeed bi-metallic and it was for thermal protection but I couldn't figure out why they would want the fan sped up instead of just breaking the circuit. Independently, I was thinking how clever they were to use coil resistors and put them in the air stream to keep them cool. You just put the two together and solved the riddle! |
   |

 
|
| Superhawk996 |
Mar 1 2020, 08:16 AM
Post
#1442
|
|
914 Guru Group: Members Posts: 6,970 Joined: 25-August 18 From: Woods of N. Idaho Member No.: 22,428 Region Association: Galt's Gulch |
@bbrock
If you haven't already reassembled, it would be interesting to put a heat gun on the contacts and see if they indeed are bi-metallic and move toward closure. |
 |
|
| bbrock |
Mar 1 2020, 09:26 AM
Post
#1443
|
|
914 Guru Group: Members Posts: 5,269 Joined: 17-February 17 From: Montana Member No.: 20,845 Region Association: Rocky Mountains |
QUOTE(Superhawk996 @ Mar 1 2020, 07:16 AM) @bbrock If you haven't already reassembled, it would be interesting to put a heat gun on the contacts and see if they indeed are bi-metallic and move toward closure. @Superhawk996 I thought the same thing but not until AFTER it was all buttoned up and back in the car. Those contacts look exactly like old fashioned thermostat contacts though. |
|
|
|
| Superhawk996 |
Mar 1 2020, 10:45 AM
Post
#1444
|
|
914 Guru Group: Members Posts: 6,970 Joined: 25-August 18 From: Woods of N. Idaho Member No.: 22,428 Region Association: Galt's Gulch |
QUOTE(bbrock @ Mar 1 2020, 10:26 AM) QUOTE(Superhawk996 @ Mar 1 2020, 07:16 AM) @bbrock If you haven't already reassembled, it would be interesting to put a heat gun on the contacts and see if they indeed are bi-metallic and move toward closure. @Superhawk996 I thought the same thing but not until AFTER it was all buttoned up and back in the car. Those contacts look exactly like old fashioned thermostat contacts though. @bbrock (IMG:style_emoticons/default/lol-2.gif) Let's roll with that theory rather than have you unbutton it again. Someday when I refresh my fresh air box and make sure the motor is top notch I'll try the experiment. |
|
|
|
| bbrock |
Mar 1 2020, 10:42 PM
Post
#1445
|
|
914 Guru Group: Members Posts: 5,269 Joined: 17-February 17 From: Montana Member No.: 20,845 Region Association: Rocky Mountains |
Okay, here's something that some of you might be interested in. I finished a task that has been bogging down progress for almost a month and a half. My original side glass was pretty scratched up and I really wanted tinted glass anyway. So last year I bought a set for fairly cheap. Unfortunately, they had seen better days; especially the passenger window. It had deep scratches on both sides of the glass along with lots of grinding spatter and the whole glass was badly hard water etched.
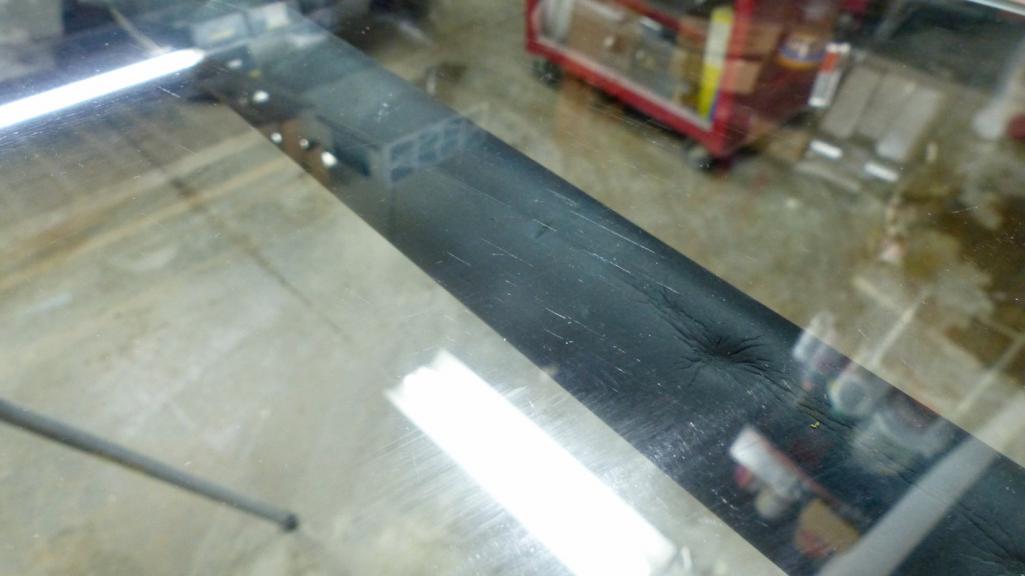 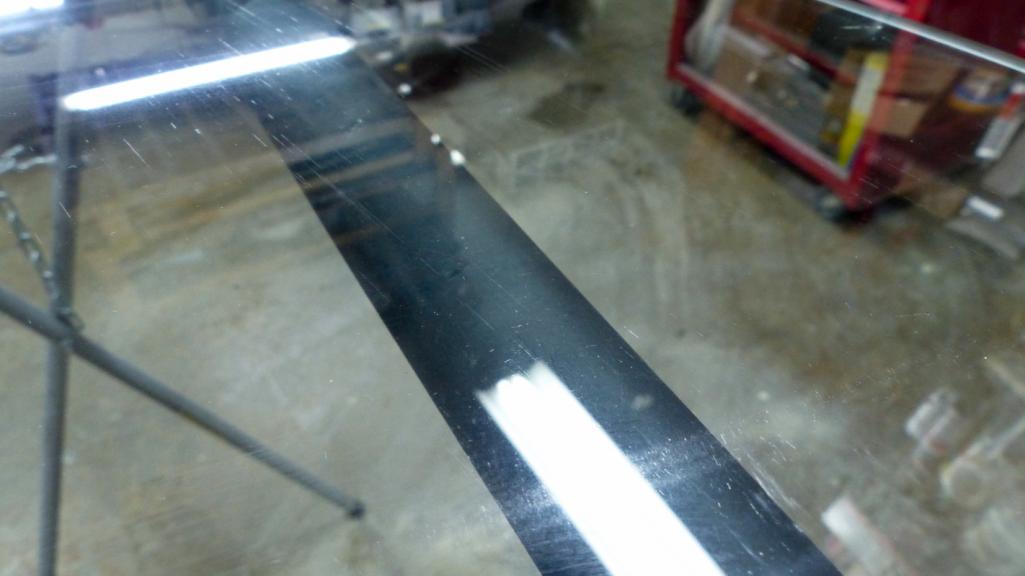 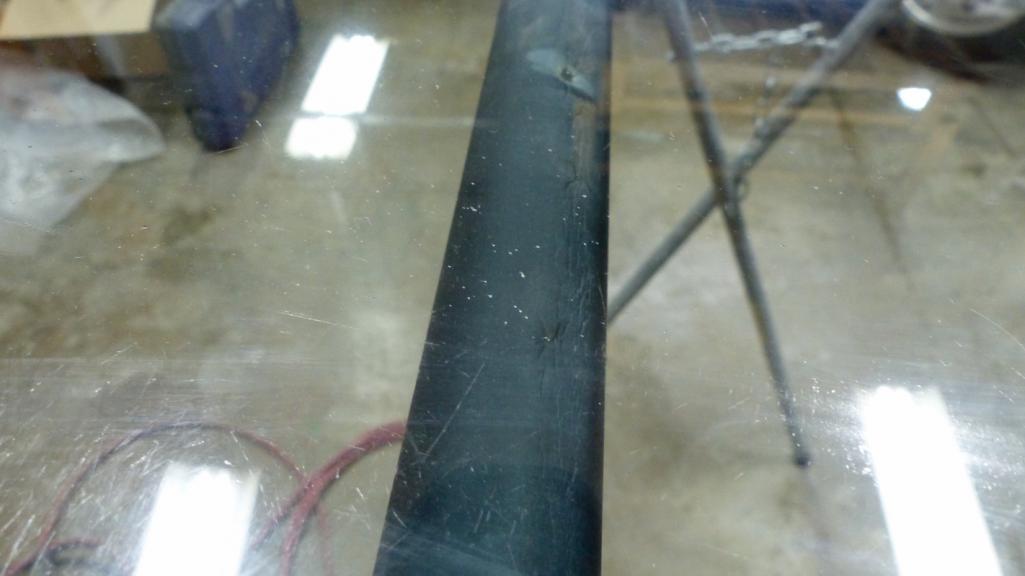 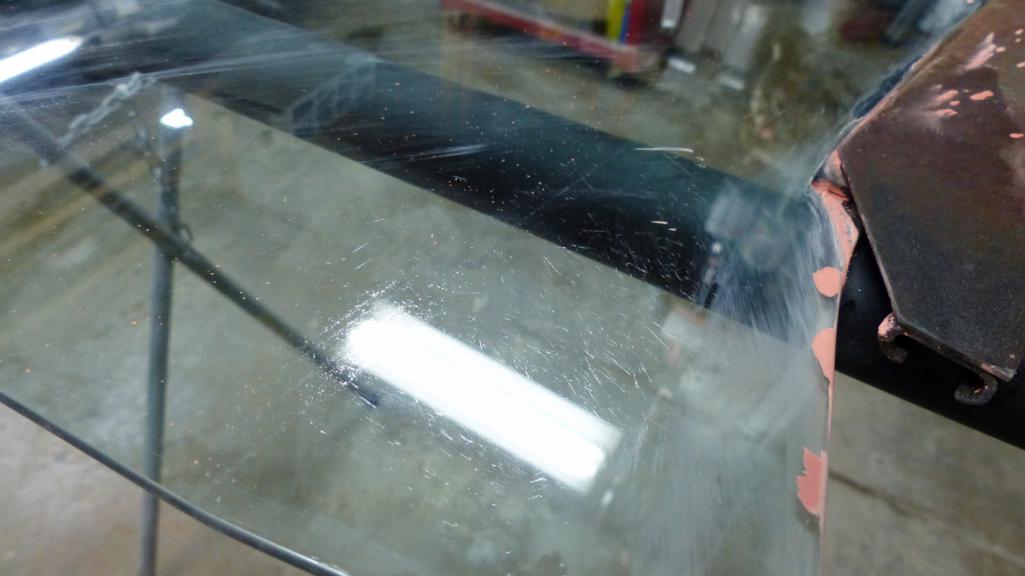 I tried to convince myself I could live with it but nope, not even close. This would not do. So that sent me on a month long odyssey to try to repair the glass. Spoiler alert, it wasn't easy. There were dead ends and failures and I almost through in the towel a few times, but today I'm declaring victory. I'll spare what didn't work and skip to what did. The process is basically the same as cutting and polishing paint but with the right abrasives. I used GP-Pro abrasives for the initial grinding to remove scratches and most of the pitting. Then I followed up with polishes I had on hand or that came with the first glass repair kit I ordered that did not work. Here's a video of the grinding process. It starts with the medium abrasive but since my scratches were so deep, I had to order a set of course pads (another week's delay). Also, because the entire window was damaged and needed grinding, I went with 5" discs rather than the 3" shown in the vid. https://www.youtube.com/watch?v=doYlaQlCloQ The 5" discs are better for grinding a large surface to keep it even without troughs and worked well for grinding on the exterior surface of the glass, but were a little difficult to work on the concave interior surface. If I had a better foam interface backer pad for my drill, this probably wouldn't have been a problem but I cobbled together the best I could source locally which was a POS. I doubt scratches on the interior are as common as exterior. I got lucky. Here's what it looked like after the first grinding cut. 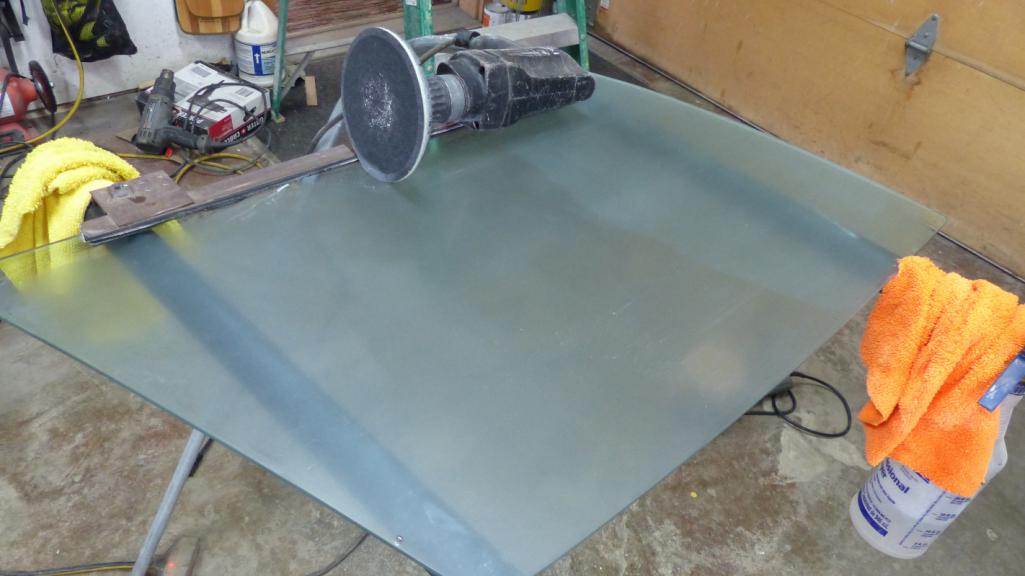 BTW, this all needs to be done with a high speed rotary tool (I used an industrial quality corded drill). A D/A buffer does not work and makes things worse... trust me. Here's how it looks after the fine abrasive cut. I had about 10 hours of labor into it at this point not counting the dead end detours. 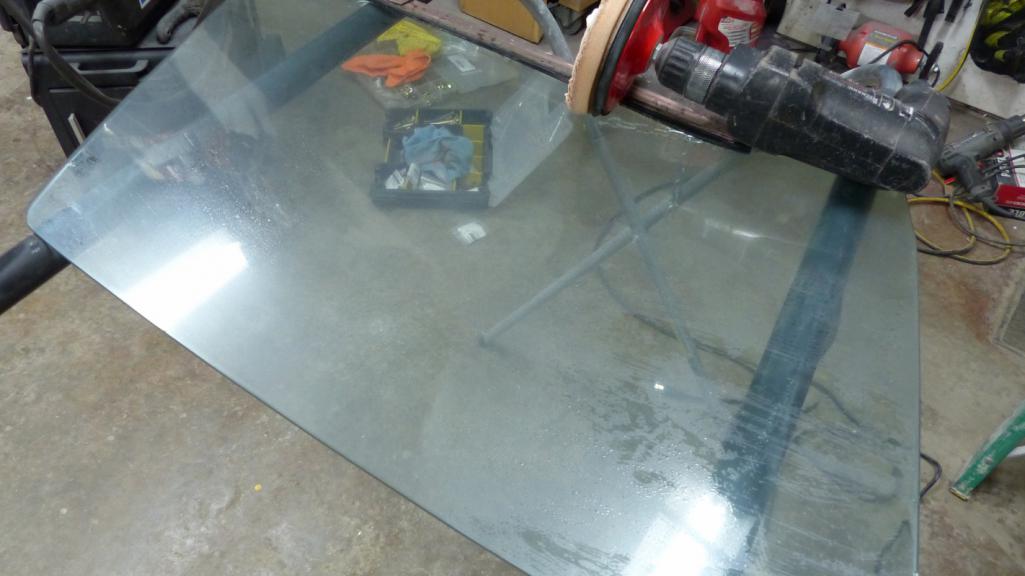 Then it was time to polish. I started with using Chemical Guys 32 polish on a foam pad followed by their 34 (same stuff used on the paint). Then I switched to cerium oxide pasted. I used a 5" felt pad first and then went over both surfaces with a 2" felt disc. 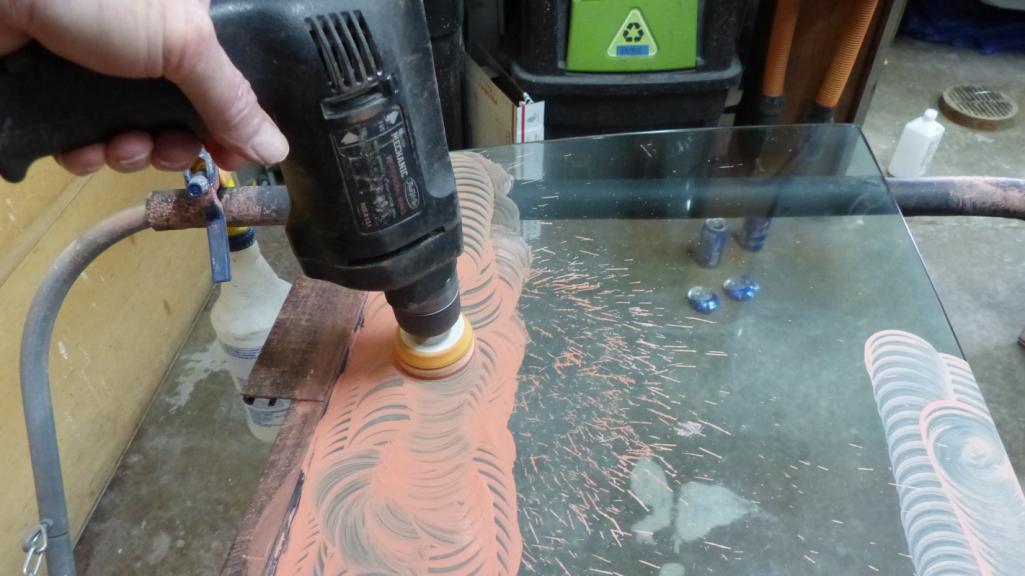 Here's a pic of the complete kit. 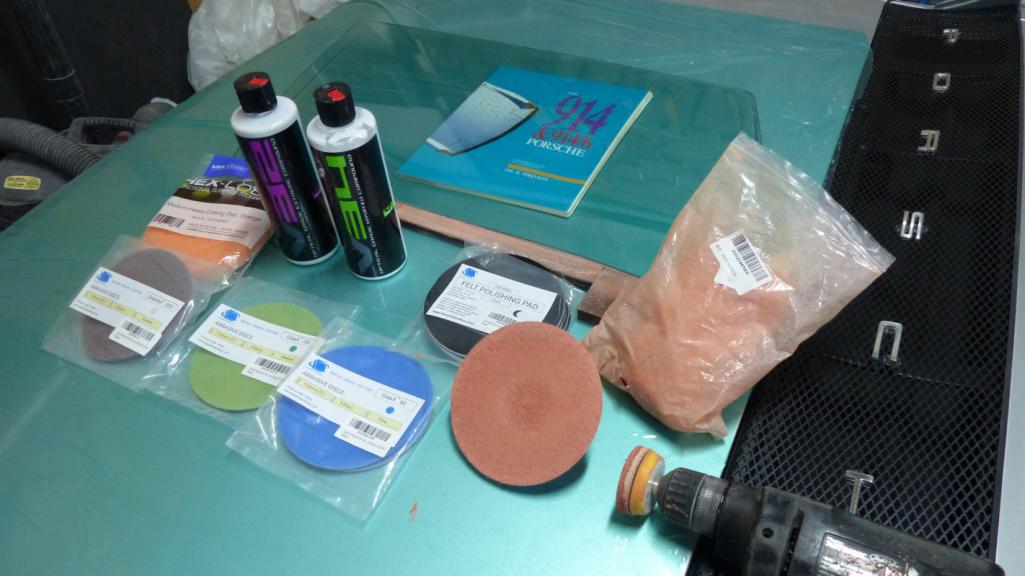 These abrasive pads were the secret to scratch removal. 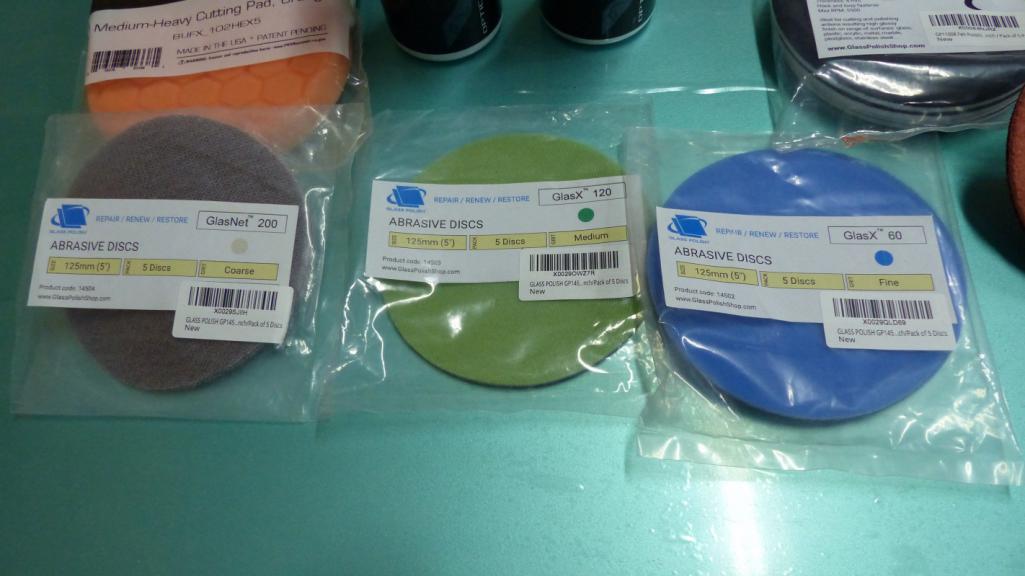 And the finished result. 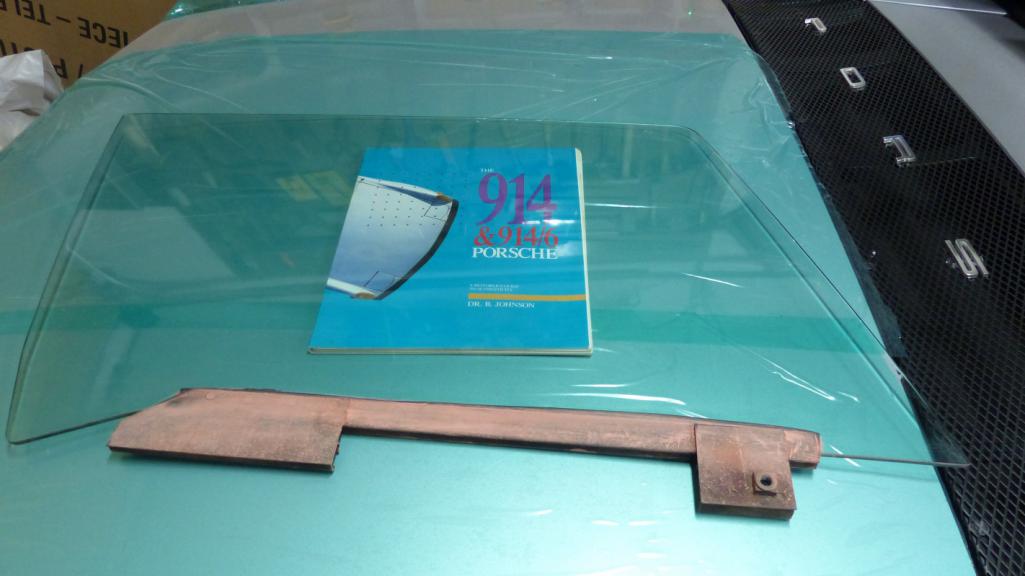  Does it look like brand new glass? No. Is it a thousand times better than it started? You betcha. Now I get to do the driver's side. Luckily, it isn't as bad and won't require resurfacing the entire window. |
|
|
|
| KELTY360 |
Mar 1 2020, 11:16 PM
Post
#1446
|
|
914 Neferati Group: Members Posts: 5,121 Joined: 31-December 05 From: Pt. Townsend, WA Member No.: 5,344 Region Association: Pacific Northwest |
Clearly, you've put a new spin on scratching the surface.
|
|
|
|
| Krieger |
Mar 1 2020, 11:43 PM
Post
#1447
|
|
Advanced Member Group: Members Posts: 4,800 Joined: 24-May 04 From: Santa Rosa CA Member No.: 2,104 Region Association: None |
Good work! Man what a lot of work...
|
|
|
|
| preach |
Mar 2 2020, 02:40 AM
Post
#1448
|
|
Ridge Runner Group: Members Posts: 1,044 Joined: 27-March 10 From: Live Free or Die Member No.: 11,513 Region Association: North East States |
@bbrock
Coming along great. (IMG:style_emoticons/default/smile.gif) Doubt that polish set up would take out the pitting on the inside of my windshield from the PO grinding out the old floorboards. (IMG:style_emoticons/default/dry.gif) |
|
|
|
| Dion |
Mar 2 2020, 05:24 AM
Post
#1449
|
|
RN Group: Members Posts: 2,839 Joined: 16-September 04 From: Audubon,PA Member No.: 2,766 Region Association: MidAtlantic Region |
That’s amazing Brent. Beautiful work. That’s a lot of labor and planning.
Fantastic save. |
|
|
|
| doug_b_928 |
Mar 2 2020, 07:49 AM
Post
#1450
|
|
Senior Member Group: Members Posts: 714 Joined: 17-January 13 From: Winnipeg Member No.: 15,382 Region Association: Canada |
Wow, Brent. I didn’t know that was possible. Do you think that would work on spots where sparks from grinding have hit and melted the glass?
|
|
|
|
| bbrock |
Mar 2 2020, 08:12 AM
Post
#1451
|
|
914 Guru Group: Members Posts: 5,269 Joined: 17-February 17 From: Montana Member No.: 20,845 Region Association: Rocky Mountains |
Thanks all. On the grinding sparks, I think it depends. Luckily on mine the metal slag didn't go too deep so I was able to pop all of the metal bits out by running a razor blade over them at the start. Still, there are still quite a few of the deepest pits in this glass that I didn't get out. I think you COULD do it, but the question becomes how thin do you want to grind the glass? The worst part of mine is that they are filled with red cerium oxide now and easy to see. I'll try to get a pick later. Once I get that cleaned out, I don't think they will be very noticeable. I've been looking at pit filler as maybe a way to keep them from filling with crap again. It's kind of expensive though.
|
|
|
|
| defianty |
Mar 2 2020, 08:17 AM
Post
#1452
|
|
Senior Member Group: Members Posts: 659 Joined: 9-August 06 From: Essex, UK Member No.: 6,621 Region Association: None |
Excellent work on the glass. TO be honest I didn't know you could polish glass. I want to do mine now!
|
|
|
|
| bbrock |
Mar 6 2020, 06:09 PM
Post
#1453
|
|
914 Guru Group: Members Posts: 5,269 Joined: 17-February 17 From: Montana Member No.: 20,845 Region Association: Rocky Mountains |
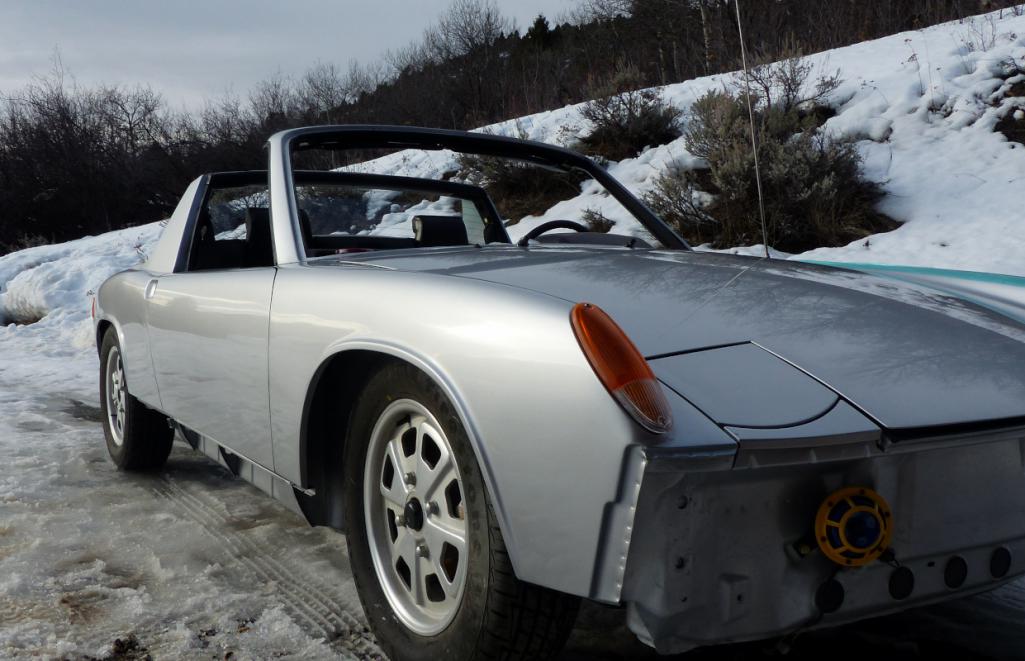
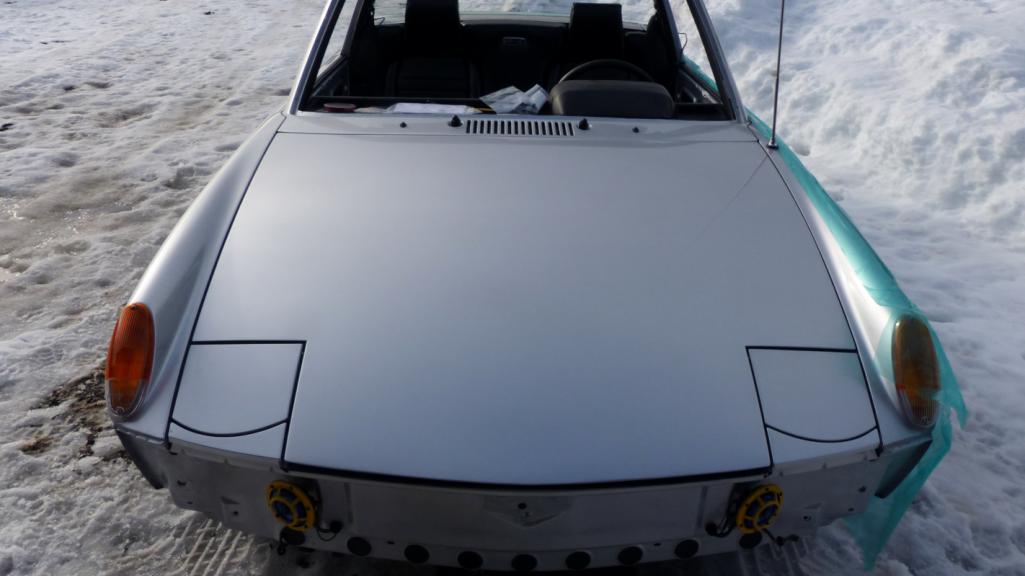
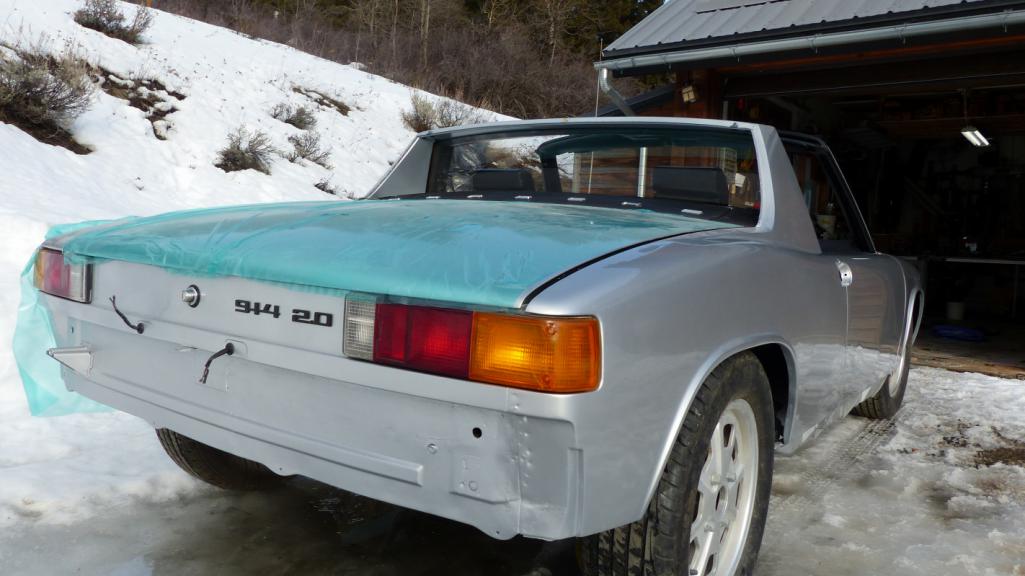
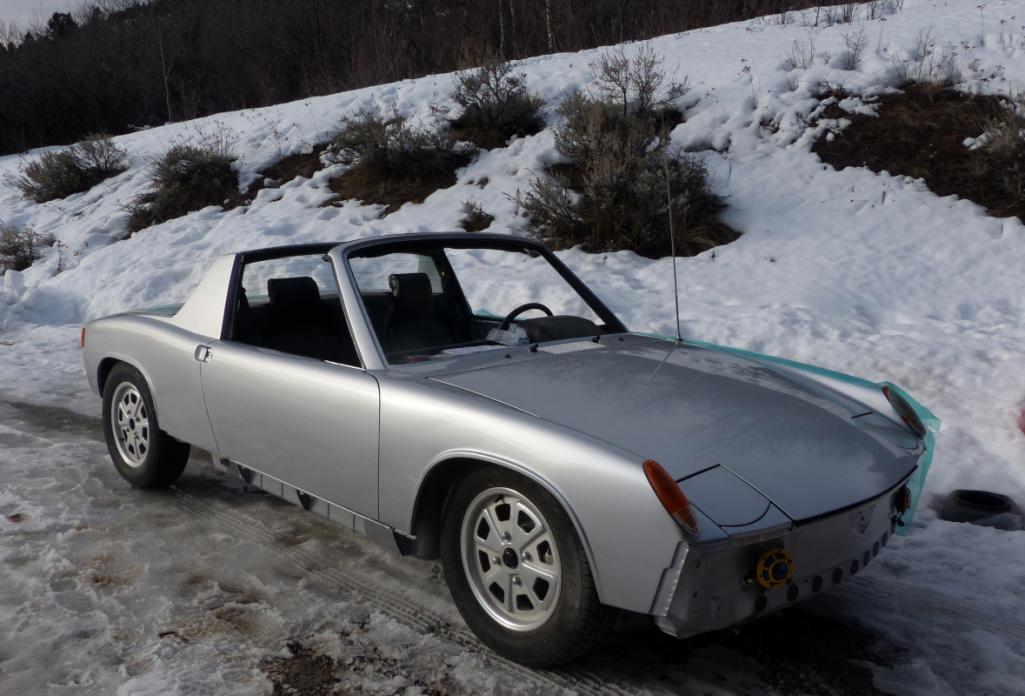
Nice spring-like weather today so, inspired by @defianty 's shot of his gorgeous car, I wheeled her out into the fresh air for a quickie photo session. Not glamor shots but this is the first time I've really gotten to see her in natural light since the paint went on. Of course, the clouds moved across the sun the second I picked up my camera but still a nice taste of her potential.
    |
|
|
|
| BPic |
Mar 6 2020, 06:13 PM
Post
#1454
|
|
Member Group: Members Posts: 341 Joined: 5-February 18 From: Miami, Florida Member No.: 21,864 Region Association: South East States |
QUOTE(bbrock @ Mar 6 2020, 07:09 PM) Nice spring-like weather today so, inspired by @defiantly 's shot of his gorgeous car, I wheeled here out into the fresh air for a quickie photo session. Not glamor shots but this is the first time I've really gotten to see her in natural light since the paint went on. Of course, the clouds moved across the sun the second I picked up my camera but still a nice taste of her potential. She’s gorgeous Brent!! Nice work!! (IMG:style_emoticons/default/piratenanner.gif) |
|
|
|
| KELTY360 |
Mar 6 2020, 06:17 PM
Post
#1455
|
|
914 Neferati Group: Members Posts: 5,121 Joined: 31-December 05 From: Pt. Townsend, WA Member No.: 5,344 Region Association: Pacific Northwest |
Stunning! That soft light really sets off the lines of the car. Nice gaps on that frunk pic too.
(IMG:style_emoticons/default/wub.gif) |
|
|
|
| 914forme |
Mar 6 2020, 06:21 PM
Post
#1456
|
|
Times a wastin', get wrenchin'! Group: Members Posts: 3,896 Joined: 24-July 04 From: Dayton, Ohio Member No.: 2,388 Region Association: None |
You got to be proud, lots of hard work coming together. (IMG:style_emoticons/default/drooley.gif)
|
|
|
|
| doug_b_928 |
Mar 6 2020, 06:37 PM
Post
#1457
|
|
Senior Member Group: Members Posts: 714 Joined: 17-January 13 From: Winnipeg Member No.: 15,382 Region Association: Canada |
Beautiful result Brent!
|
|
|
|
| 914_7T3 |
Mar 6 2020, 07:14 PM
Post
#1458
|
|
Please forgive me, I'm new to all of this! Group: Members Posts: 1,875 Joined: 3-April 17 From: Los Angeles, CA Member No.: 20,991 Region Association: Southern California |
|
|
|
|
| FlacaProductions |
Mar 6 2020, 08:58 PM
Post
#1459
|
|
Senior Member Group: Members Posts: 1,901 Joined: 24-November 17 From: LA Member No.: 21,628 Region Association: Southern California |
oh, yes. love the gaps....so good!
|
|
|
|
| bbrock |
Mar 6 2020, 09:23 PM
Post
#1460
|
|
914 Guru Group: Members Posts: 5,269 Joined: 17-February 17 From: Montana Member No.: 20,845 Region Association: Rocky Mountains |
Thanks guys. The pics make the gaps look better than they actually are. I haven't adjusted the headlight covers yet. I don't even have the correct brackets on the left headlight yet, but there should be no problem getting the gaps where they need to be.
|
|
|
|
|
1 User(s) are reading this topic (1 Guests and 0 Anonymous Users)
0 Members:

|
Lo-Fi Version | Time is now: 21st April 2025 - 09:16 AM |
Invision Power Board
v9.1.4 © 2025 IPS, Inc.