|
|
|
Porsche, and the Porsche crest are registered trademarks of Dr. Ing. h.c. F. Porsche AG.
This site is not affiliated with Porsche in any way. Its only purpose is to provide an online forum for car enthusiasts. All other trademarks are property of their respective owners. |
|
|

  |

| Cairo94507 |
 Aug 10 2020, 06:17 AM Aug 10 2020, 06:17 AM
Post
#1661
|
|
Michael  Group: Members Posts: 10,297 Joined: 1-November 08 From: Auburn, CA Member No.: 9,712 Region Association: Northern California |
|
   |

 
|
| bbrock |
Aug 10 2020, 08:10 AM
Post
#1662
|
|
914 Guru Group: Members Posts: 5,269 Joined: 17-February 17 From: Montana Member No.: 20,845 Region Association: Rocky Mountains |
QUOTE(Superhawk996 @ Aug 10 2020, 06:03 AM)  Keep hammering on it. (IMG:style_emoticons/default/smash.gif) (IMG:style_emoticons/default/drooley.gif) Again with the hammer? (IMG:style_emoticons/default/wacko.gif) (IMG:style_emoticons/default/lol-2.gif) Not sure if you guys are joking about the snow but it definitely feels like fall in the mornings now. We usually get our first light flurry of snow in August so I'm expecting to see some in the next couple weeks. It has been a brutal summer. There were at least five full days when the temp at our house spiked above 80F. One day, it read 87F!!!! We actually had to close the windows to keep that blistering heat out. Thank goodness it was only the one day. Whew! This is no joke. A couple weeks ago I was in town for a vet appt. and heard guys on the radio warning people to stay safe outside because it was "dangerously hot." I looked at the car thermometer and it read 87F... no humidity. These people don't have a clue. |
 |
|
| Superhawk996 |
Aug 10 2020, 11:12 AM
Post
#1663
|
|
914 Guru Group: Members Posts: 6,966 Joined: 25-August 18 From: Woods of N. Idaho Member No.: 22,428 Region Association: Galt's Gulch |
|
|
|
|

| bbrock |
Aug 10 2020, 06:49 PM
Post
#1664
|
|
914 Guru Group: Members Posts: 5,269 Joined: 17-February 17 From: Montana Member No.: 20,845 Region Association: Rocky Mountains |
I'll try to do a few short posts over the next few days to get caught up. Anyone have an interest in boiled tit? (IMG:style_emoticons/default/teef.gif)
I've got Marc's nice D-cup for the left but my right tit wasn't looking so good. It was mushed up from being mounted on a dented bumper for decades. 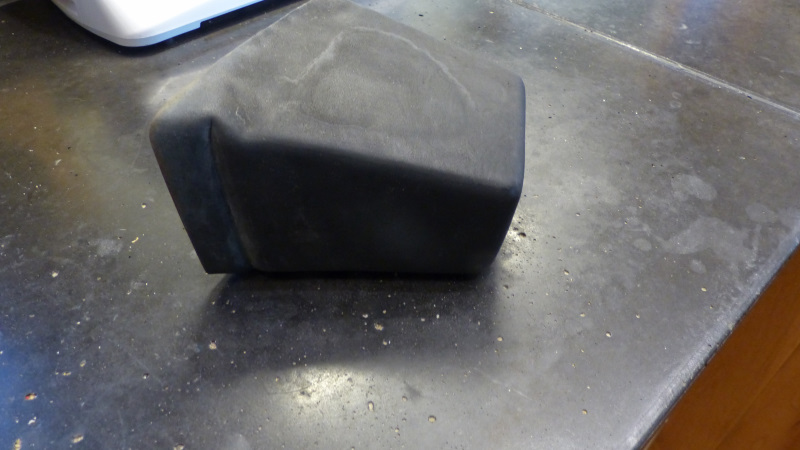 I let it sit for a couple months to see if it would remember its shape, but it didn't. Well, who doesn't like a hot tit, so I decided to try boiling it. 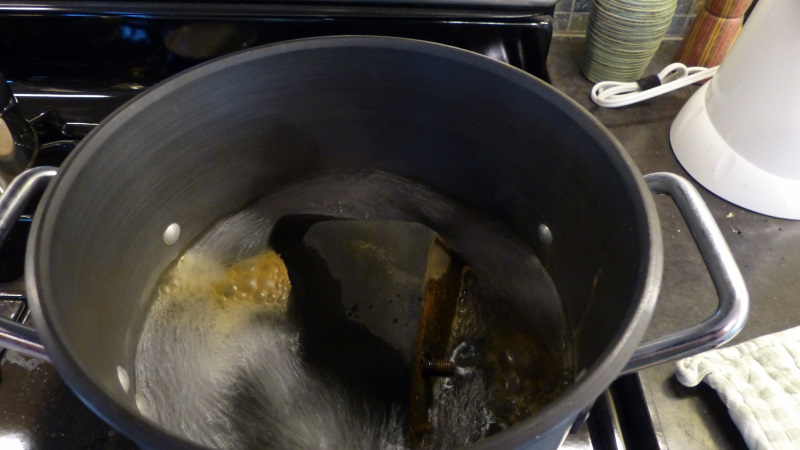 Well whadya know? It worked! That small crease is on the bottom so won't be noticeable. Important thing is it won't dangle down all droopy. 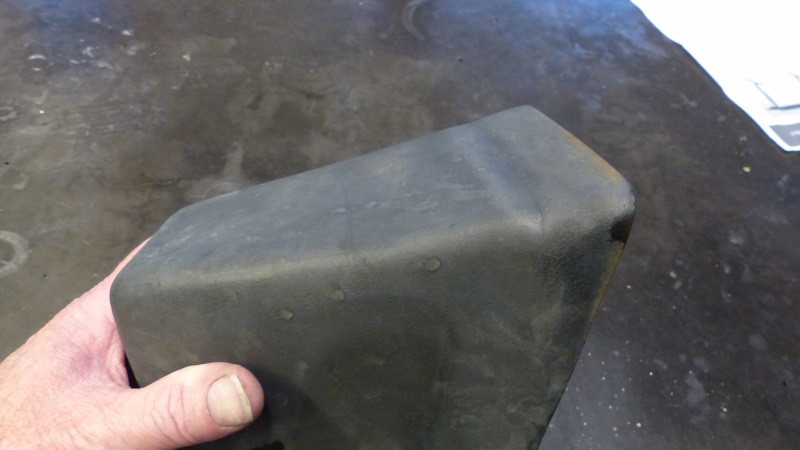 Not out of the woods yet though. I busted off one of the studs when I removed it. 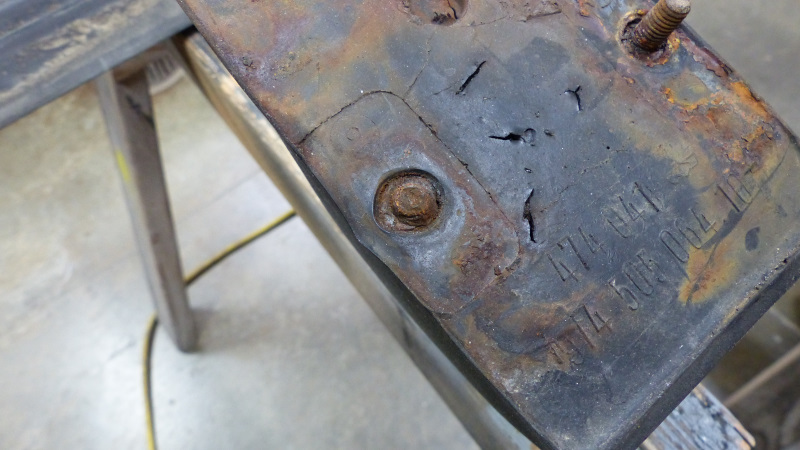 I took a guess that the studs have disc heads embedded in the foam so decided to try drilling and tapping for a new stud. I don't know if my hunch was right, but there was enough meat to thread in a new stud at least. 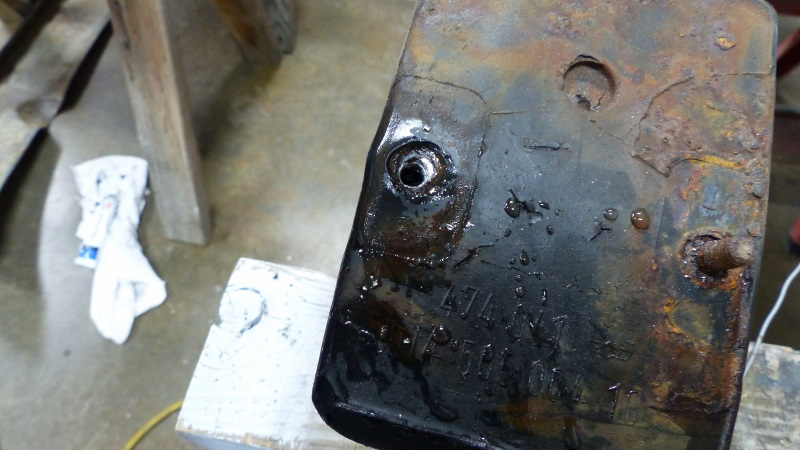 I had a few repairs to make on the bumper tops so I bought this single part urethane adhesive based on another thread (that will be another post). I used the same stuff to anchor a new stainless steel stud in. I just filled the drill cavity with the goop and screwed the stud it. 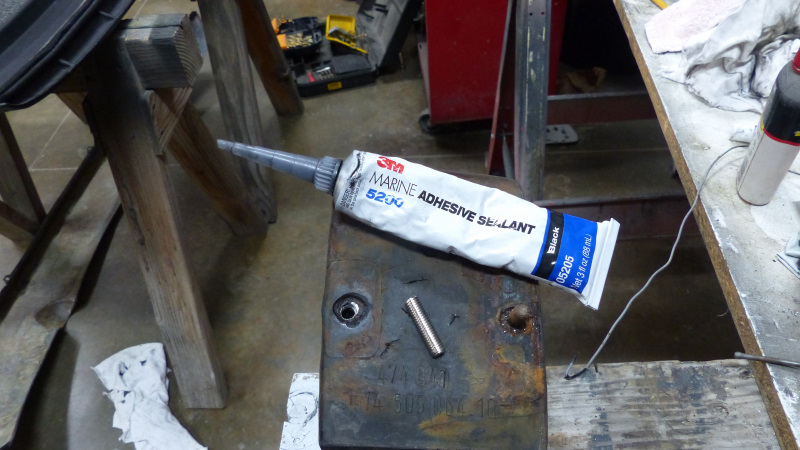 After a good clean up, it should be good as new. 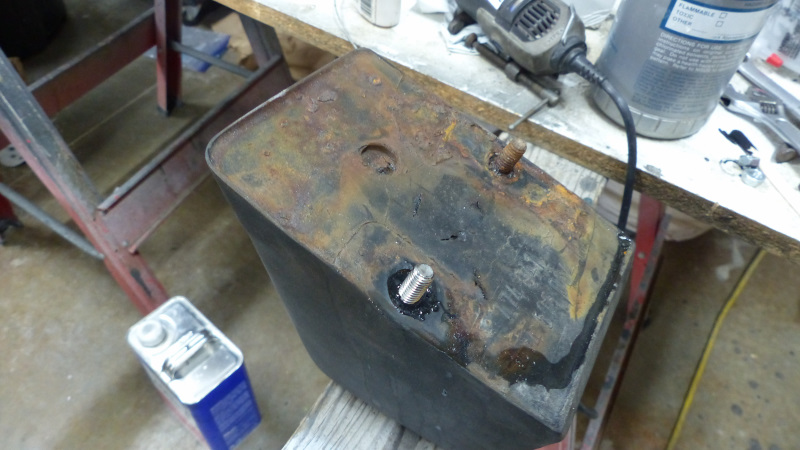 |
|
|
|
| 914_7T3 |
Aug 10 2020, 06:49 PM
Post
#1665
|
|
Please forgive me, I'm new to all of this! Group: Members Posts: 1,875 Joined: 3-April 17 From: Los Angeles, CA Member No.: 20,991 Region Association: Southern California |
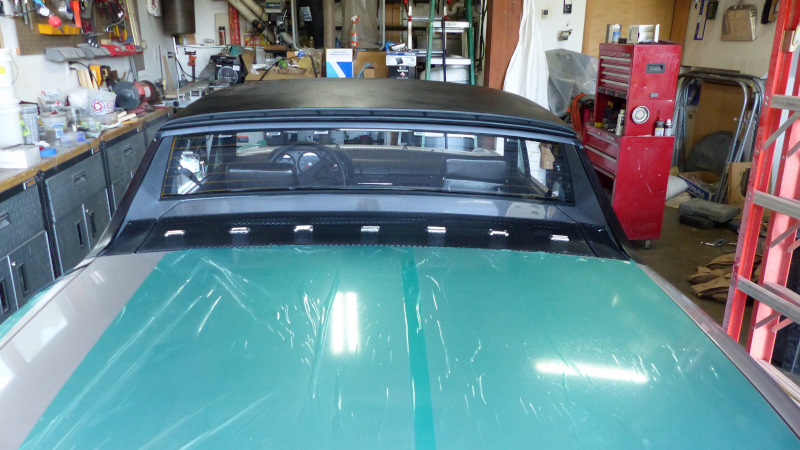
QUOTE(bbrock @ Aug 9 2020, 08:07 PM) Okay, so the top is all done. How did we do? Hermetic fuching perfection! (IMG:style_emoticons/default/aktion035.gif) (IMG:style_emoticons/default/shades.gif) How can this car not be quiet as a Caddy? And I have to tell you, the sound of closing these doors with the top on and windows up makes me positively randy. (IMG:style_emoticons/default/wub.gif) That is truly Fuchn’ Amazing! Your patience level is next level! I got as far as swapping out the latches and will add some plated hardware and paint the latch receivers at the back. Then I’ll call it good. (IMG:style_emoticons/default/laugh.gif) |
|
|
|
| raynekat |
Aug 11 2020, 12:37 AM
Post
#1666
|
|
Advanced Member Group: Members Posts: 2,169 Joined: 30-December 14 From: Coeur d'Alene, Idaho Member No.: 18,263 Region Association: Pacific Northwest |
Well....considering the top refurb 'splanation.
With Brent you not only get a picture is worth a 1000 words....you get the 1000 words as well. Yea baby! I never feel as crazy I as think I am after reading Brent's latest project. (IMG:style_emoticons/default/smile.gif) (IMG:style_emoticons/default/smile.gif) (IMG:style_emoticons/default/smile.gif) (IMG:style_emoticons/default/tongue.gif) |
|
|
|
| tygaboy |
Aug 11 2020, 08:00 AM
Post
#1667
|
|
914 Guru Group: Members Posts: 5,548 Joined: 6-October 15 From: Petaluma, CA Member No.: 19,241 Region Association: Northern California |
So, Brent, if I got this right, you just did a tit implant.
And you give me a hard time for how I spend my time! Oh, and by the way. We need to schedule a time for you to come out and refurb my car's roof. You did a "top" job on that! (IMG:style_emoticons/default/happy11.gif) Seriously, I agree with the others that you really have taken all this stuff to the next level and your documentation is going to help countless others with their restos. Really, really great stuff. (IMG:style_emoticons/default/smilie_pokal.gif) Thanks! |
|
|
|
| bbrock |
Aug 30 2020, 07:42 PM
Post
#1668
|
|
914 Guru Group: Members Posts: 5,269 Joined: 17-February 17 From: Montana Member No.: 20,845 Region Association: Rocky Mountains |
Okay, time for an update. I've mostly been toiling with getting the bumpers, valences and rocker covers into shape. It is coming along but tedious and boring because it is just a repeat of the endless body work - strip, straighten, weld, straighten, blah, blah, blah. I needed a diversion to feel like I had accomplished something so here it is. Whadaya think? (IMG:style_emoticons/default/clap56.gif)
 What? You don't see it? C'mon man, it's right there in the middle of the pic. Here, maybe some better lighting will help. Boom! (IMG:style_emoticons/default/shades.gif) 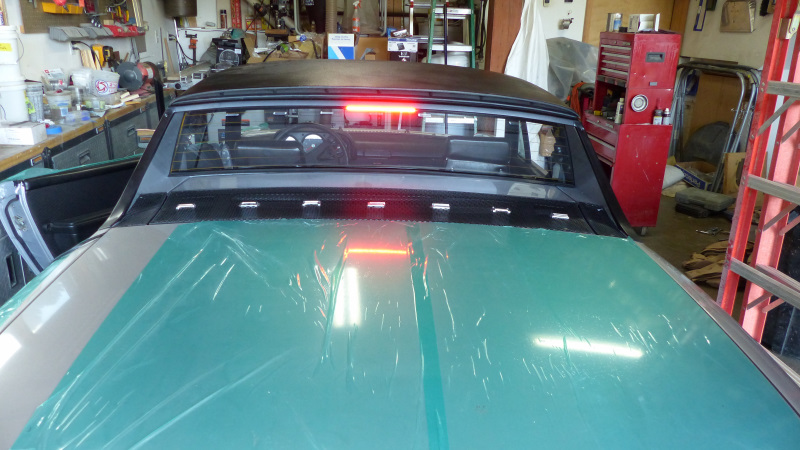 That's right bitches, I may have discovered the ultimate stealth third brake light yet. No cutting or drilling. 100% reversible. It is BRIGHT too. This thing will literally damage your eyes if you stare at it too long. It also functions as as a tail light. This should increase visibility and safety considerably. BTW, both these pics were taken with the full sun shining right on the light. 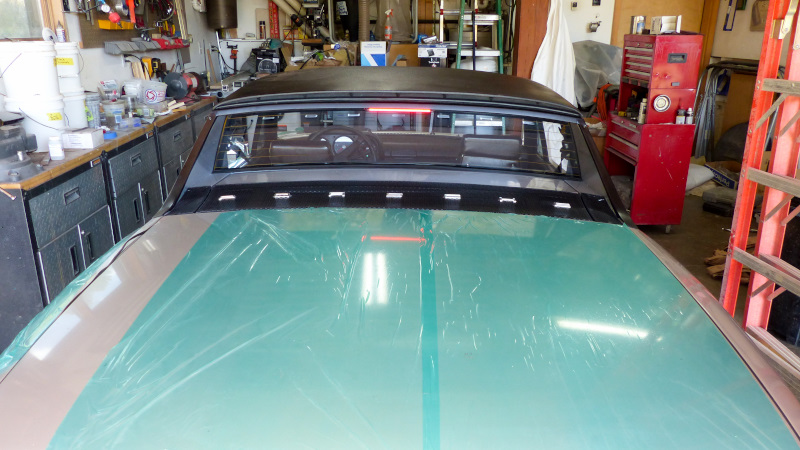 You know there are going to be details so here we go. The light is a flexible 9 inch LED strip for motorcycles. It isn't cheap, but quite a bit cheaper than a coffin. I went with the smoke colored tube to help it blend with the black targa trim. If I had bright work trim, I would have gone with clear. I also bought their little dual converter that creates a high and low circuit. It's just a resistor and a couple of diodes encapsulated in epoxy but only $5 so beat having to make my own. I'll admit, I'm a bit psycho about wiring harness so I wired this one up with color coded wires and piggyback connectors so the wires match factory wiring where the harness plugs into the tail light. 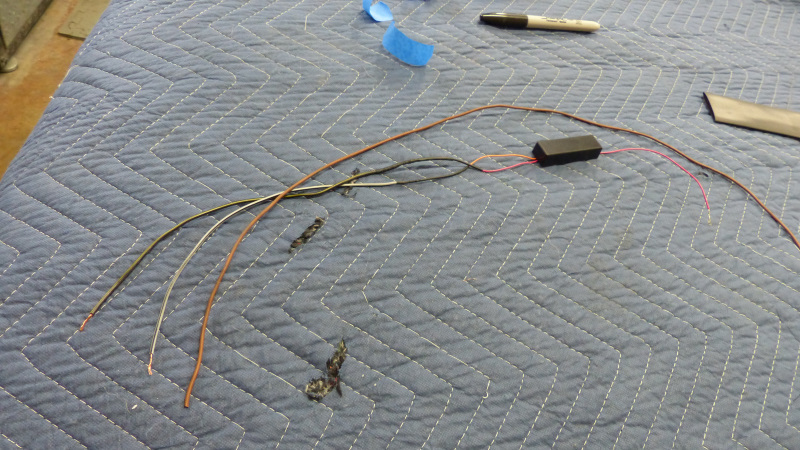 Here's the final assembly with the LED strip attached. 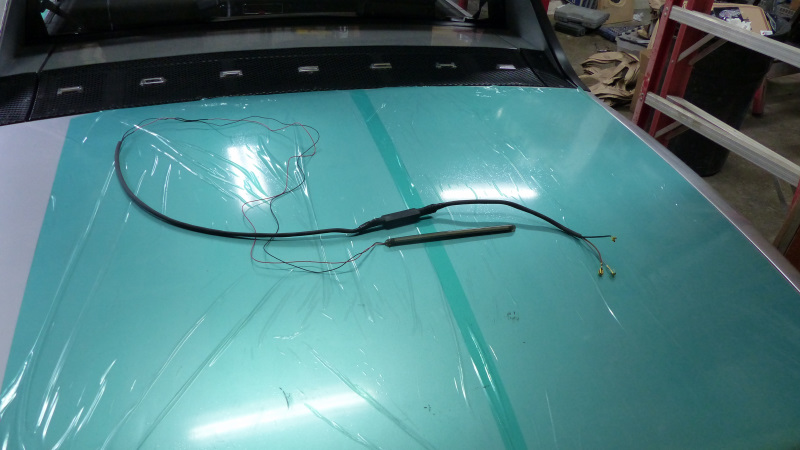 I got a little excited and forgot to take pics of mounting the light, but it is just side mounted onto the targa trip with 3M trim mounting tape. They sell a special side mounting kit but it is just a strip of tape and a strip of black backer plastic to stick onto what was the bottom of the light. I already had the tape on hand so just went rogue. The wire was just tucked inside the trim strip with a few small pieces of tape to stick it to the bottom just to keep it from flopping around while I snapped the trim strip back on. Then it was just a matter of running the wire down the back of the sail panel - again using a few pieces of tape to hold it down. 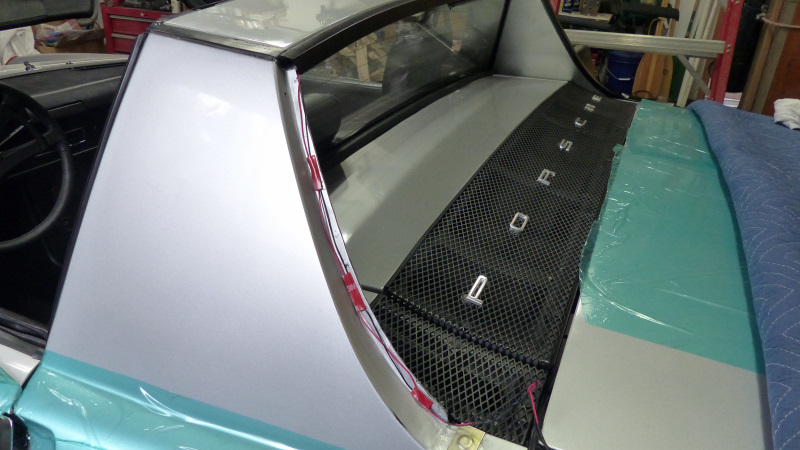 I added a shrink wrap ahead of time on each wire positioned where the wire would exit the trim strip to add a little protection where it would be pinched. I tucked the wire inside the trunk seal welt to minimize wire exposure to the elements. That the exposed wires got a coat of liquid electrical tape for both extra protection but mostly to hide them. 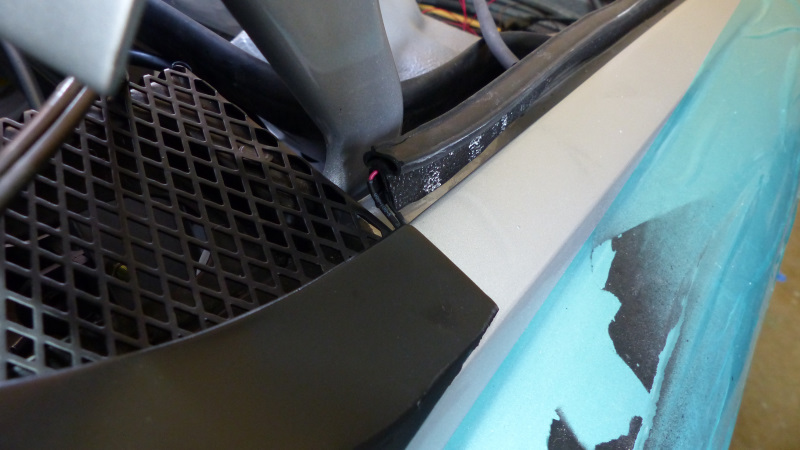 The thin wires exit the seal welt a couple inches down - again protected by shrink wrap where they are pinched. Then it was just a matter of tucking the sleeved harness behind the factory harness. 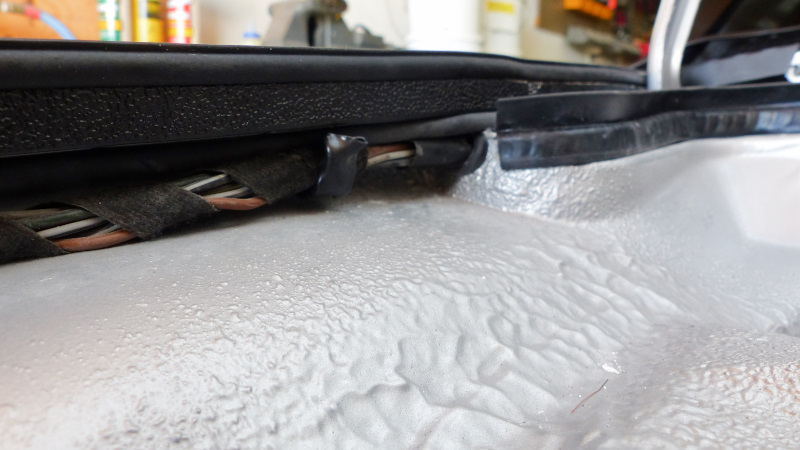 You'd have a difficult time seeing anything suspicious was happening at the connections to the tail lights. 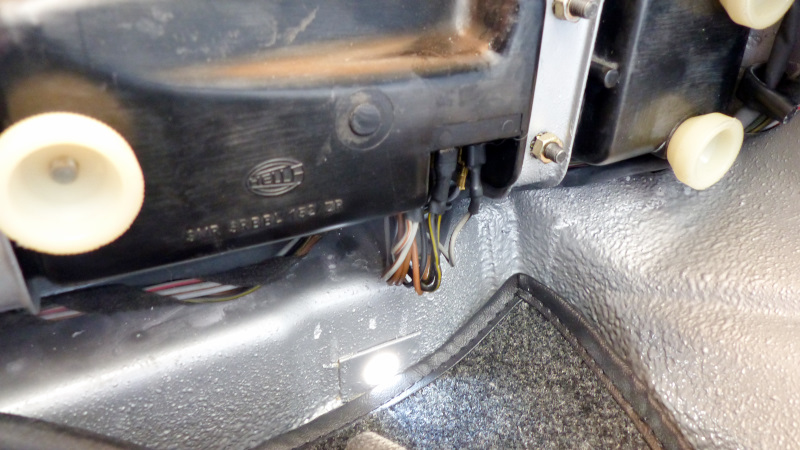 With everything installed, here's the only bit of wire showing. If anybody decides to comment on it, let's be honest, you really are kind of a dick. (IMG:style_emoticons/default/rolleyes.gif) 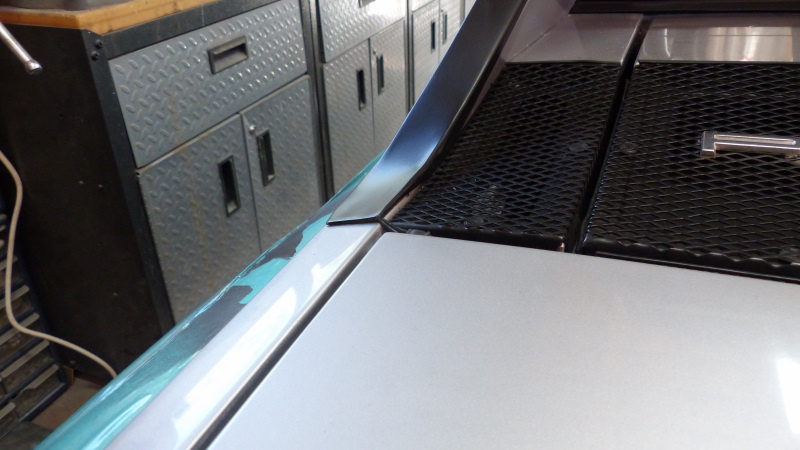 Here's a closer look at the light unit itself. 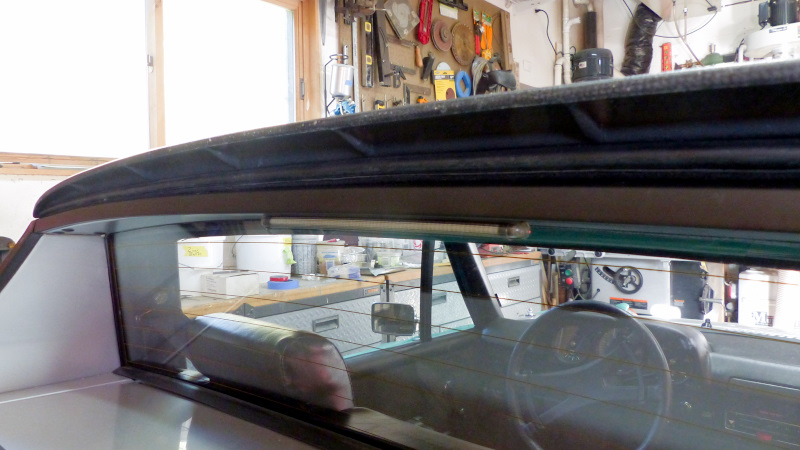 And here's the monster truck view of the light. I'm pretty happy with the extra visibility this will provide. 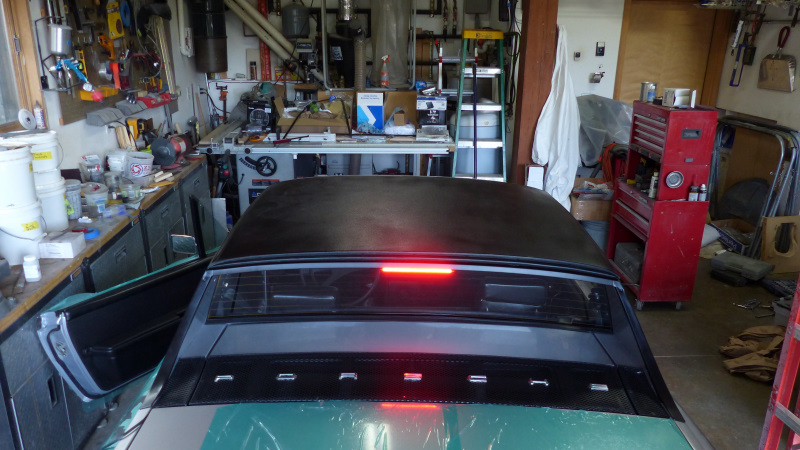 |
|
|
|
| bkrantz |
Aug 30 2020, 08:37 PM
Post
#1669
|
|
914 Guru Group: Members Posts: 8,342 Joined: 3-August 19 From: SW Colorado Member No.: 23,343 Region Association: Rocky Mountains |
Gee thanks, Brent. Now you have me thinking about running another wire in my recently completed rebuilt harness.
|
|
|
|
| doug_b_928 |
Aug 30 2020, 09:33 PM
Post
#1670
|
|
Senior Member Group: Members Posts: 714 Joined: 17-January 13 From: Winnipeg Member No.: 15,382 Region Association: Canada |
Looks really nice!
|
|
|
|
| dr.tim |
Aug 31 2020, 06:45 AM
Post
#1671
|
|
Member Group: Members Posts: 101 Joined: 17-December 11 From: Butte, America Member No.: 13,907 Region Association: Rocky Mountains |
Brent!
You are running out of summer. (IMG:style_emoticons/default/unsure.gif) Time to get it on the road. Don't make me come all the way over there. (IMG:style_emoticons/default/mad.gif) |
|
|
|
| bbrock |
Aug 31 2020, 07:31 AM
Post
#1672
|
|
914 Guru Group: Members Posts: 5,269 Joined: 17-February 17 From: Montana Member No.: 20,845 Region Association: Rocky Mountains |
He he (IMG:style_emoticons/default/biggrin.gif) Between COVID, the new job, and getting three years behind on lots of other projects due to this car, I made a decision about a month and a half ago to not even try to get it on the road this year. It could still happen, but I don't want to rush and have a LOoong winter ahead to get everything buttoned up just right. I'm counting on you to help tune these carbs though. (IMG:style_emoticons/default/beerchug.gif)
|
|
|
|
| Tdskip |
Aug 31 2020, 07:33 AM
Post
#1673
|
|
Advanced Member Group: Members Posts: 3,730 Joined: 1-December 17 From: soCal Member No.: 21,666 Region Association: None |
Very tidy work, as usual, on the lights .
|
|
|
|
| Amphicar770 |
Aug 31 2020, 11:05 AM
Post
#1674
|
|
Senior Member Group: Members Posts: 1,216 Joined: 20-April 10 From: PA, USA Member No.: 11,639 Region Association: MidAtlantic Region |
Nice. I also have a motorcycle strip light which works great. I like that this one also serves as a daytime running light.
|
|
|
|
| 914_7T3 |
Aug 31 2020, 12:43 PM
Post
#1675
|
|
Please forgive me, I'm new to all of this! Group: Members Posts: 1,875 Joined: 3-April 17 From: Los Angeles, CA Member No.: 20,991 Region Association: Southern California |
QUOTE(bbrock @ Aug 30 2020, 06:42 PM) With everything installed, here's the only bit of wire showing. If anybody decides to comment on it, let's be honest, you really are kind of a dick. (IMG:style_emoticons/default/rolleyes.gif) Isn't that a 'lil bit of exposed wiring? (IMG:style_emoticons/default/laugh.gif) Just kidding Brent, beautifully engineered as always! |
|
|
|
| jaredmcginness |
Aug 31 2020, 01:00 PM
Post
#1676
|
|
... Group: Members Posts: 508 Joined: 12-June 19 From: Baltimore Member No.: 23,209 Region Association: MidAtlantic Region |
I do love that blue protective wrap.... Maybe one day for me... for now everything I do around the car aids in the 'patina' (IMG:style_emoticons/default/tongue.gif)
|
|
|
|
| Olympic 914 |
Aug 31 2020, 04:16 PM
Post
#1677
|
|
Group: Members Posts: 1,731 Joined: 7-July 11 From: Pittsburgh PA Member No.: 13,287 Region Association: North East States |
Really like this Third brake light set-up. May put that on the list for this winters projects.
BTW, I am also running the Trucklites headlights and Hella yellow horns... You are gong to love both. When you finally start driving it, that is.... (IMG:style_emoticons/default/beer.gif) |
|
|
|
| Superhawk996 |
Aug 31 2020, 04:58 PM
Post
#1678
|
|
914 Guru Group: Members Posts: 6,966 Joined: 25-August 18 From: Woods of N. Idaho Member No.: 22,428 Region Association: Galt's Gulch |
Something about 3rd brake lights on a vintage car just rubs me the wrong way.
However, having had my 1st teener totaled by an idiot that drove into the back of it at 45mph while it was stopped, I totally get it and think that it IS the wise thing to do. Especially so in light of what just happened to Clay's car. I really like the way this one is so low profile and well hidden. Well done Brent. Put this one in the books as another lesson to copy. Really makes me wonder . . . . is anyone doing a wireless version? That sure would be sweet and would avoid that unsightly wire showing. (IMG:style_emoticons/default/shades.gif) (IMG:style_emoticons/default/laugh.gif) . . . Just kidding! They are all clunky as crap! |
|
|
|
| Cairo94507 |
Sep 1 2020, 06:45 AM
Post
#1679
|
|
Michael Group: Members Posts: 10,297 Joined: 1-November 08 From: Auburn, CA Member No.: 9,712 Region Association: Northern California |
Very nicely done Brent. I wonder about the running light feature you added to the 3rd brake light though. I have thought about doing exactly that but wonder if it would somehow minimize the alerting factor of the 3rd brake light when it illuminates? Regardless, that is a nice clean job and our cars definitely need a high-mount 3rd brake light -the brighter the better. (IMG:style_emoticons/default/beerchug.gif)
|
|
|
|
| bbrock |
Sep 1 2020, 07:41 AM
Post
#1680
|
|
914 Guru Group: Members Posts: 5,269 Joined: 17-February 17 From: Montana Member No.: 20,845 Region Association: Rocky Mountains |
QUOTE(Cairo94507 @ Sep 1 2020, 06:45 AM) Very nicely done Brent. I wonder about the running light feature you added to the 3rd brake light though. I have thought about doing exactly that but wonder if it would somehow minimize the alerting factor of the 3rd brake light when it illuminates? Regardless, that is a nice clean job and our cars definitely need a high-mount 3rd brake light -the brighter the better. (IMG:style_emoticons/default/beerchug.gif) Hi Michael, I had the same concern and was fully prepared to not install the dual module. After a quick bench test, that concern vanished. The brake light function is blisteringly bright and the contrast between brake and running light function is impossible to miss. I've also toyed with adding a strobe module to the brake function but I think the brightness alone is a good enough attention grabber. I don't want to give drivers following me seizures. (IMG:style_emoticons/default/smile.gif) |
|
|
|
|
1 User(s) are reading this topic (1 Guests and 0 Anonymous Users)
0 Members:

|
Lo-Fi Version | Time is now: 20th April 2025 - 10:11 AM |
Invision Power Board
v9.1.4 © 2025 IPS, Inc.