|
|
|
Porsche, and the Porsche crest are registered trademarks of Dr. Ing. h.c. F. Porsche AG.
This site is not affiliated with Porsche in any way. Its only purpose is to provide an online forum for car enthusiasts. All other trademarks are property of their respective owners. |
|
|

  |

| bbrock |
 Dec 20 2020, 05:22 PM Dec 20 2020, 05:22 PM
Post
#1781
|
|
914 Guru  Group: Members Posts: 5,269 Joined: 17-February 17 From: Montana Member No.: 20,845 Region Association: Rocky Mountains |
The problem with sticker is that's the GT look which opens a whole can of worms. At a minimum I'd have to flare the fenders to match. Then open up the engine grill, then fiberglass the hood, then... (IMG:style_emoticons/default/biggrin.gif)
Definitely on the same page about not drilling the hood. Like I said, I would cut the posts off of the badge and use 3M Trim Tape so it would be completely reversible. I've seen enough pics of silver 914s to know that I very much prefer the look with the badge on. I actually had a 914 I painted black and badged back when you could buy them at reasonable prices. I liked that one better too. When it comes to 914's on bright colors, I don't think the badge adds as much and can take it or leave it. It really comes down to whether it is worth the $ to me and I am cheap, cheap cheap. Maybe I'll just go with this instead. 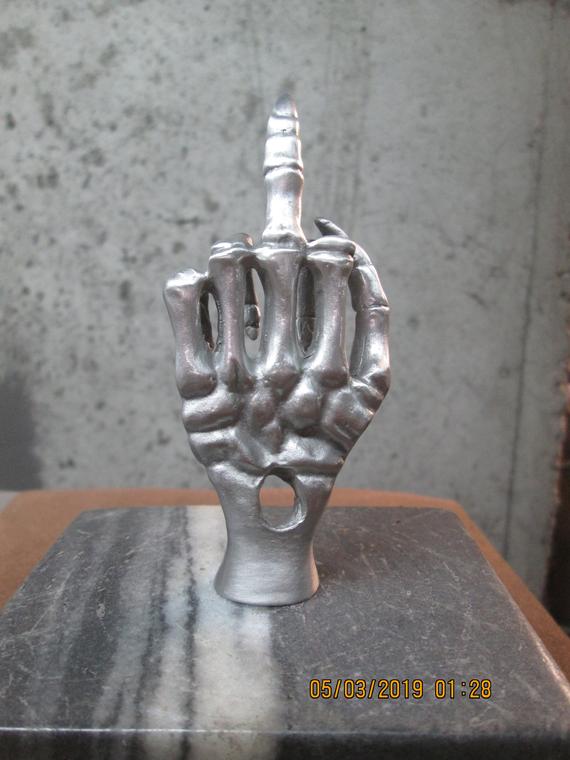 Speaking of cheap, I believe this is post #3,887 Just three more and I get a free sub! (IMG:style_emoticons/default/piratenanner.gif) |
   |

 
|
| bbrock |
Dec 20 2020, 08:08 PM
Post
#1782
|
|
914 Guru Group: Members Posts: 5,269 Joined: 17-February 17 From: Montana Member No.: 20,845 Region Association: Rocky Mountains |
This Sucks... I Hope
Caught a lucky break today. Had a Pelican order from FedEx delivered today and I guess since USPS does the Sunday FedEx deliveries, they decided to deliver the drill bits that got held up in Billings. No more excuse not to install the vacuum tube in one of my carbs. 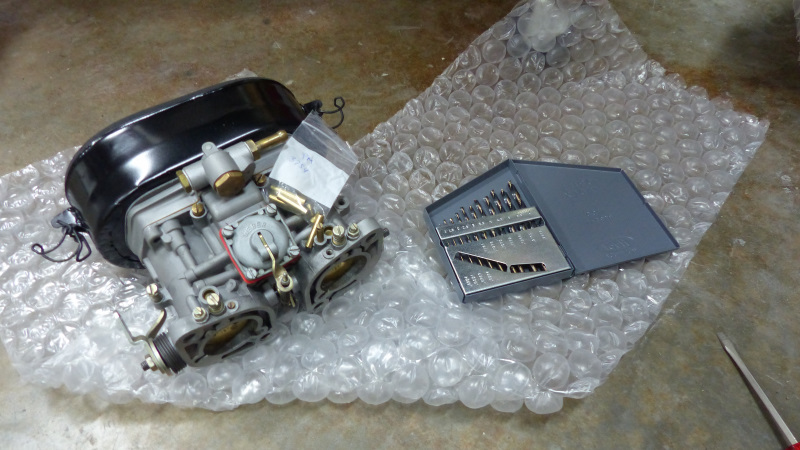 The job was easy because tubes were already installed for ported vacuum and drilled and plugged for manifold vacuum. It was just a matter of chasing the threaded hole with a 5mm bit and smearing a bit of JB Weld on the new tube for good measure, and gently tapping it into place. 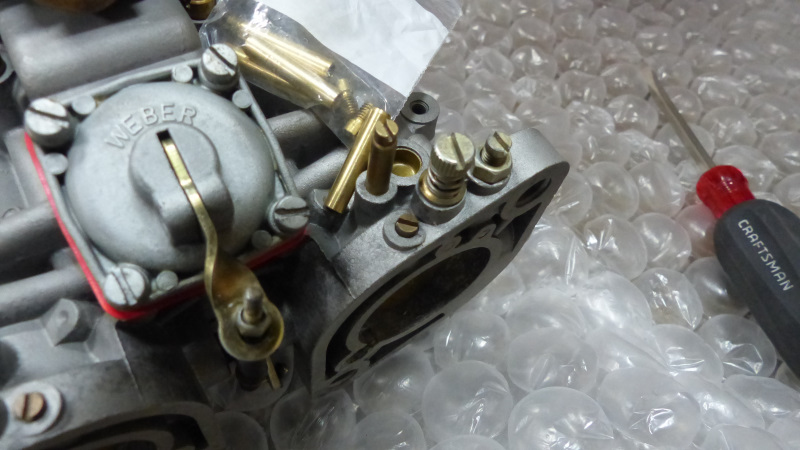 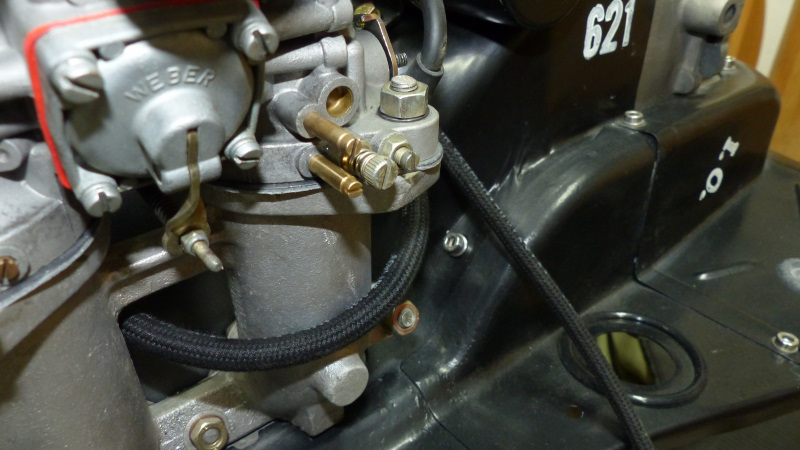 Hoses connected. Hmm (IMG:style_emoticons/default/idea.gif) , there's something not quite right about one of those. I'll have to figure something out. 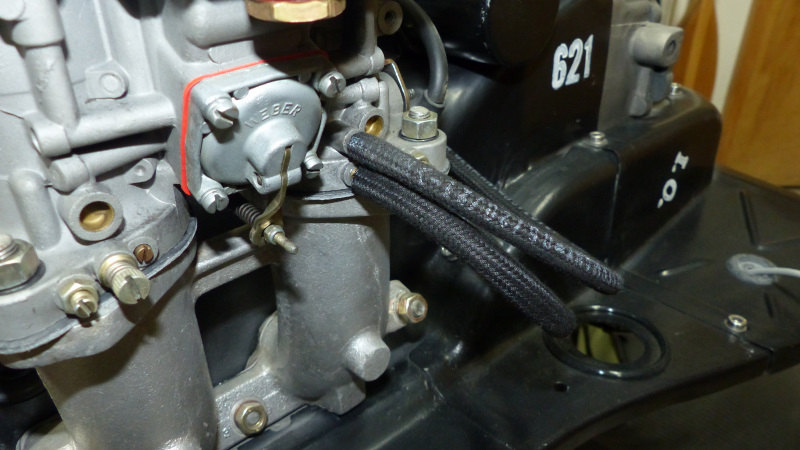 Post 3,889 (IMG:style_emoticons/default/chowtime.gif) |
|
|
|
| bbrock |
Dec 20 2020, 08:21 PM
Post
#1783
|
|
914 Guru Group: Members Posts: 5,269 Joined: 17-February 17 From: Montana Member No.: 20,845 Region Association: Rocky Mountains |
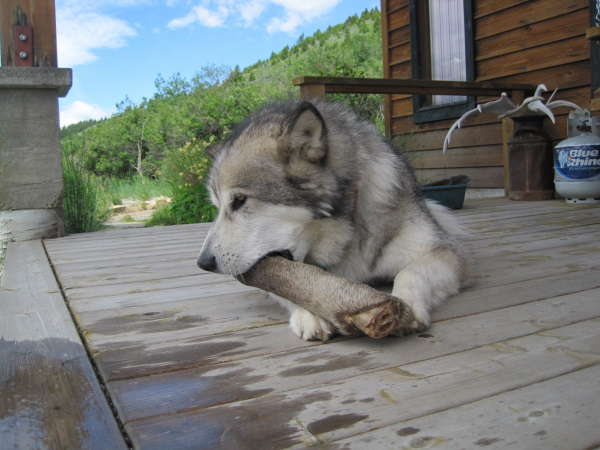
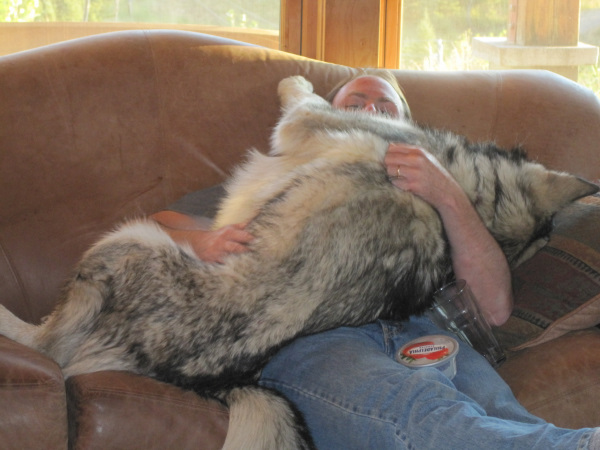
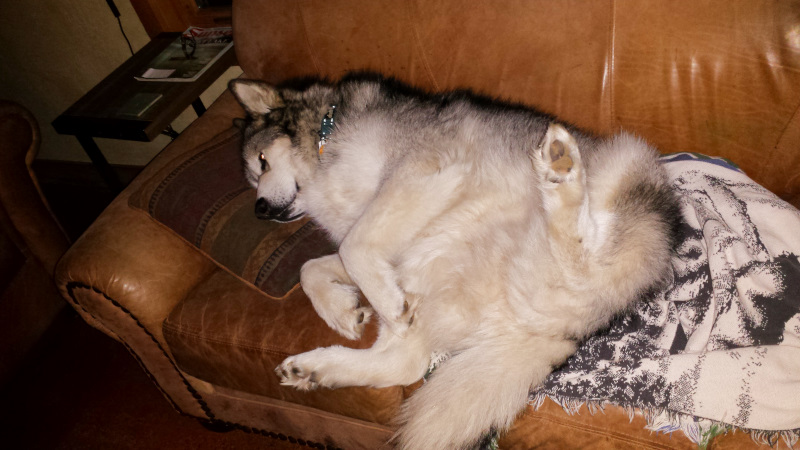
Thanks everyone for the fun banter on this thread the last couple days. It means more than you know. Today has not been an easy day. It is my wife's birthday today but also marks the one year anniversary of losing our Niaquq. One night he was wrestling with me on the couch, and 24 hours later his corpse was getting cold on our porch. We've lost dogs before and it always sucks, but goddammit, this one was special and to lose him when we thought he had so much life still ahead really hurt. It just wouldn't feel right to pass the day without paying tribute.
    |
|
|
|
| altitude411 |
Dec 20 2020, 08:32 PM
Post
#1784
|
|
I drove my 6 into a tree Group: Members Posts: 1,306 Joined: 21-September 14 From: montana Member No.: 17,932 Region Association: Rocky Mountains |
Here's to Niaquq (IMG:style_emoticons/default/beerchug.gif) Your wifes birthday (IMG:style_emoticons/default/beerchug.gif)
(IMG:style_emoticons/default/confused24.gif) ...and your new sub?!? (IMG:style_emoticons/default/blink.gif) 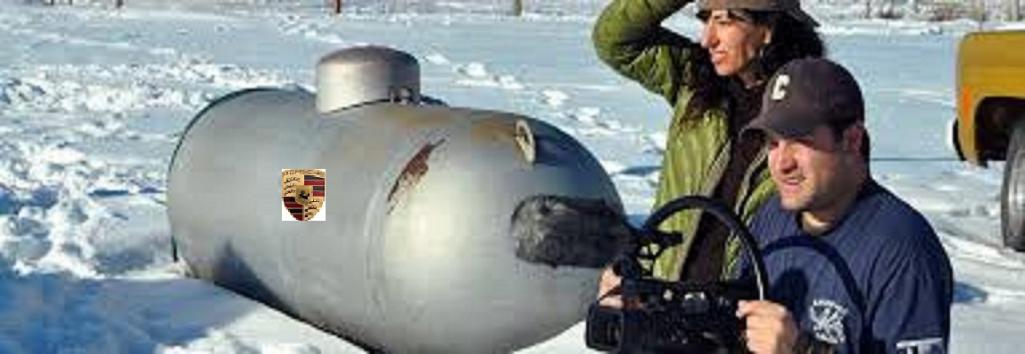 * seriously though Brent. Thank you for giving us all a fantastic build thread and letting us into your world for a bit. Looking forward to your submarine restoration thread. (keep it silver, lose the badge) (IMG:style_emoticons/default/sunglasses.gif) |
|
|
|
| 930cabman |
Dec 23 2020, 01:57 PM
Post
#1785
|
|
Advanced Member Group: Members Posts: 4,044 Joined: 12-November 20 From: Buffalo Member No.: 24,877 Region Association: North East States |
Threshold - take three QUOTE(tygaboy @ Sep 30 2017, 08:14 AM) * agree.gif !! Looking REALLY good. And if it's anything like what I experience, it looks even better in real life. Funny you should mention this. I've wasted way too much time just staring at this side of the car and admiring how nice it looks. But the more I stared, the more something was bugging me. The threshold gap below the door looked wide toward the front. I tried to convince myself it was just an illusion caused by the rust in the lower right corner of the door. But no. Somehow the narrow section of threshold that goes around the hinge post had slipped low before I welded it. I think the torque of the zip screws I used to pull the seam tight probably did it. Anyway, I spent an hour cutting that part loose and rewelding. Looks better now but not anything that shows up in a pic. Mostly grunt work today The rest of the day was a lot of work but not much worth photographing. This morning I installed this new tank purging valve on my compressor. I thought I had enough wire on hand to wire up a 120 outlet to plug into. I was wrong so will have to wait for my next trip to town before wiring it in. Attached Image My compressor is in an unheated shed and it is usually chilly here, so despite our low humidity, it still produces a lot of water. I had one of those cheap HF valves on it which worked well through the summer. But after the first night below freezing (we've already had a couple of snows), it started leaking. This one should do better, While I was in there, I also installed a union joint to make things easier if I ever have to move the compressor again. Attached Image Most of the day was spent cutting the old gussets off of the donor suspension consoles and grinding off those welds. Then a final bead blasting and a soak down with Jasco to kill any rust that might still be hiding in seams. I bought the first set of gussets from 914Rubber after Mark put them on the site and they are on the way. I really like recycling donor parts but these consoles chew up a lot of time cleaning and prepping. Hopefully, I'll get the outer console attached tomorrow. I mentioned I needed an ~230mm long M10 bolt to follow the factory procedure to check the alignment spec for this part. Good luck finding one. Googling turned up one in a warehouse in Germany. McMaster-Carr and Belmetric both top out at 200mm. Fastenal carries 220mm and 240mm which would work, but $20 shipped. My improvisation was to buy the longest M10 I could find locally, cut it in two pieces, and weld a piece of steel tube between to get the right length. Seems to have worked out okay. Attached Image Where does one find an "outer console", I am hoping we don't need to fab this from scratch? |
|
|
|
| mepstein |
Dec 23 2020, 02:47 PM
Post
#1786
|
|
914-6 GT in waiting Group: Members Posts: 19,843 Joined: 19-September 09 From: Landenberg, PA/Wilmington, DE Member No.: 10,825 Region Association: MidAtlantic Region |
Where does one find an "outer console", I am hoping we don't need to fab this from scratch? From a parts car |
|
|
|
| bbrock |
Dec 27 2020, 07:20 PM
Post
#1787
|
|
914 Guru Group: Members Posts: 5,269 Joined: 17-February 17 From: Montana Member No.: 20,845 Region Association: Rocky Mountains |
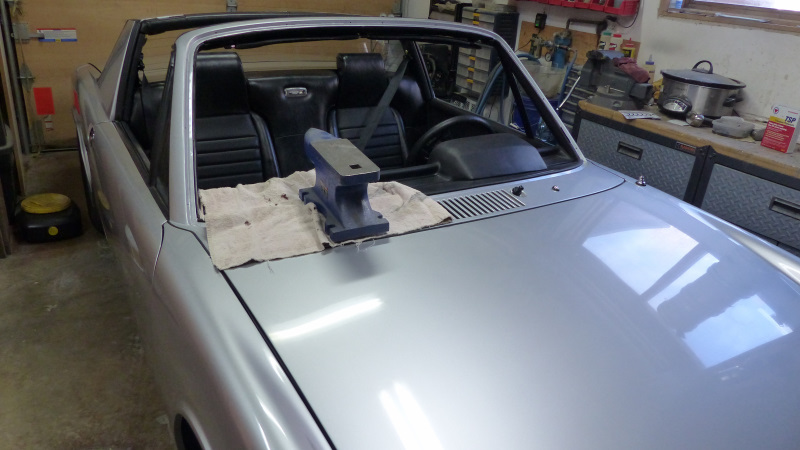 Well that's not what you want to find on your car (IMG:style_emoticons/default/yikes.gif) Here's the deal. Yesterday I went out to the garage to complete a quick little task which was to install new windshield washer nozzles as my old ones were shot. 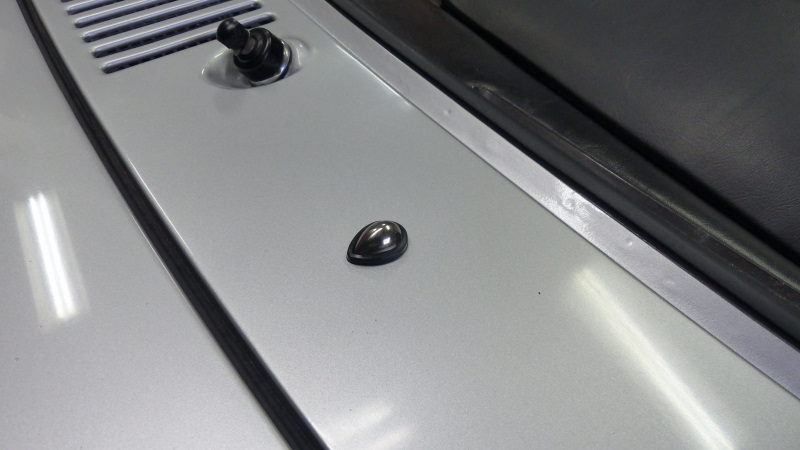 I should have know better. It is those "little tasks" that wind up biting you in the ass. First, I had to remove the fuel filler to gain access under the passenger side nozzle to replace the check valve. Not the worst job but kind of a pain. Nozzles were easy to replace and it was a matter of popping the new nozzles into their holes and hooking up the check valves.Ha! #@$% those little fuchers! The rubber is formed into a wide flange that needs to be pushed or pulled through the holes to lock the nozzles into place. Pulling from the back side so hard I thought the nozzle would tear in half and wiggling back and forth was no use. Trying to wrangle them in wound up tearing the paint loose around the hole on one side. (IMG:style_emoticons/default/headbang.gif) 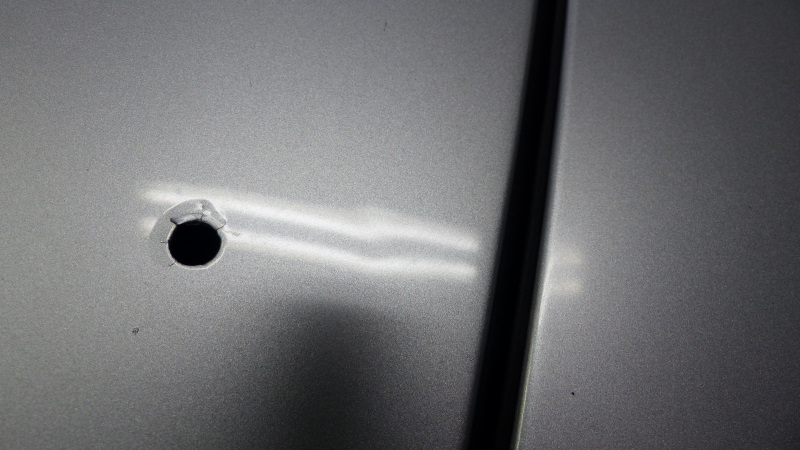 Luckily the damage is all hidden by the nozzle but I needed to seal those cracks so mixed up a bit of clear coat and let it seep in to reseal so moisture couldn't get in. If you look at the light reflection, you cam see a small dent pressed int the cowl from having to press those goddam nozzles so hard. There is a match one on the other side. I'm probably the only one who will notice but might wind up taking it to a paintless dent repair guru to see if they and be smoothed out. After all that, I still wasn't any closer to getting those little ass pustules in place. The only way I was able to get them in was to lay down a towel to protect the paint and use a small screwdriver to slide under the nozzle into the slot the sheet metal is suppose to fit in and pry the rubber flange down through the hole. I couldn't use a plastic tool because of the force required. A completely nerve-wracking operation to say the least. Hands down the worst designed part I've had to fight on this car but they finally went in... almost. Even after all that, the passenger side nozzle wanted to lift up just slightly on the front just enough it would invite moisture to creep in and get trapped. My solution was to work some 3M Weatherstrip adhesive under the nozzle with a toothpick and put some weight on the top while it set up. Hence, the anvil. Sadly, I was leaning heavily toward buying the newer style nozzles that are not only about a third the price, but would have matched the blackout trim on the car better AND really would have just popped in place since they use plastic spring prongs rather than those wads of rubber damnation. Anyway, those little assholes are in and I finally pressurized the system for the first time in 35 years and gave them a test - with air only since there is no windshield and I didn't feel like spraying water into my interior. They work! (IMG:style_emoticons/default/piratenanner.gif) I've said it before, but I just don't understand why you guys "upgrade" these things to an electric pump. The system is so ridiculously German that I can't imagine eliminating such a great conversation piece. Just the other day I was explaining it to a neighbor and the look of horror on her face was worth any inconvenience this system creates. (IMG:style_emoticons/default/lol-2.gif) Most of the rest of the weekend was spending cleaning up the shop. I did get one other little job done which was to crimp terminals onto the Pertronix leads and hook up the coil. Note the color correct sleeve. I'm pretty sure the car would idle roughly if the "points lead" wasn't the proper green. (IMG:style_emoticons/default/shades.gif) 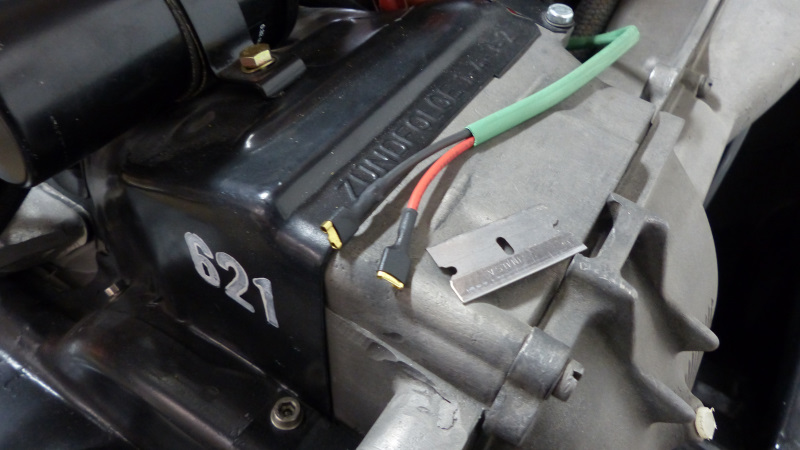 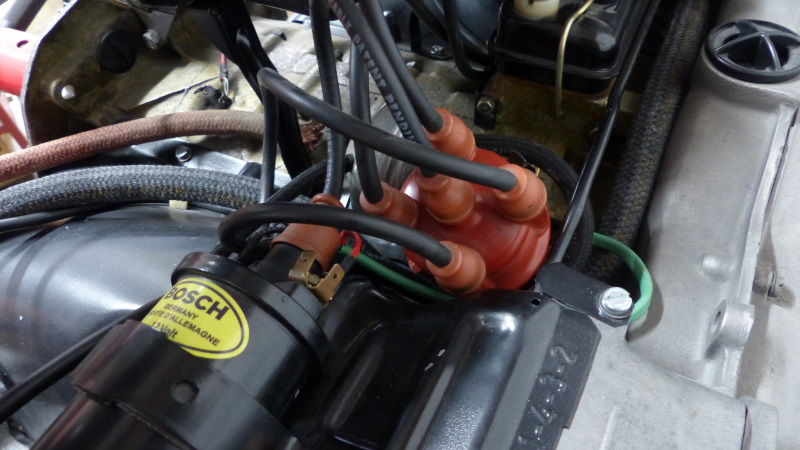 I'm mostly waiting on parts to arrive due to the USPS backlog. Hopefully some will arrive this week as I took the week off hoping to make a lot of progress on the car. |
|
|
|
| Superhawk996 |
Dec 27 2020, 07:35 PM
Post
#1788
|
|
914 Guru Group: Members Posts: 6,966 Joined: 25-August 18 From: Woods of N. Idaho Member No.: 22,428 Region Association: Galt's Gulch |
It's always the little details like those nozzles that make me mad. Just a little tweaking of the tooling and they should fit properly. But nope, tools get too worn, tolerances drift and then it's a PITA to install and/or modifications are necessary!
Looking good. You are 100% correct that the air powered washeres are cool. Until you get to the point were the check valve cuts you off and/or the washer bottle isn't fully sealed and then you find the spray pattern is like a 90 year old taking a leak. Lucky to get just a dribble. When I had mine set up that way in my 1st car, they always lost pressure at the most inconvenient times and I eventually rigged up an electric. Originality aside, I intend to go electric right out the chute this time. (IMG:style_emoticons/default/huh.gif) Looking great! Keep going. Want to see that puppy run this summer! |
 |
|
| bbrock |
Dec 27 2020, 07:58 PM
Post
#1789
|
|
914 Guru Group: Members Posts: 5,269 Joined: 17-February 17 From: Montana Member No.: 20,845 Region Association: Rocky Mountains |
QUOTE(Superhawk996 @ Dec 27 2020, 06:35 PM)  Originality aside, I intend to go electric right out the chute this time. (IMG:style_emoticons/default/huh.gif) Heresy! (IMG:style_emoticons/default/happy11.gif) The only issue I've had with the "pressure washer" is when one of the 914s I've owned had rotten lines and I went to my local FLAPS to get standard washer hose to replace them. Bad plan as I quickly learned when the hose burst right over my lap and I climbed out of the car looking like I'd peed my pants... and not just a 90 year old dribble either! The valve adjusters finally ended their two month journey from Germany to the US and then a lap up and down the west coast to LA yesterday and are now on their way along with my machined rockers and solid spacers to me. Turns out some poor lady's package label got stuck to the box which is why it took a side trip to Seattle and then spent two days in Portland. Then the valve geometry fun begins. |
|
|
|
| 76-914 |
Dec 27 2020, 10:14 PM
Post
#1790
|
|
Repeat Offender & Resident Subaru Antagonist Group: Members Posts: 13,698 Joined: 23-January 09 From: Temecula, CA Member No.: 9,964 Region Association: Southern California |
Sorry about you Dog Brent. Sorry is all I can say but there aren't any words that can express your sorrow once they've departed. Nor any words that can replace the lasting impression they've left you with. They bless our lives, steal our hearts and then in the next instant they are gone. Truly one of life's greatest inequities. I make no apologies for liking Dogs more than people. I hope ya'll will allow yourselves another dog soon. (IMG:style_emoticons/default/beerchug.gif)
|
|
|
|
| bbrock |
Dec 27 2020, 11:13 PM
Post
#1791
|
|
914 Guru Group: Members Posts: 5,269 Joined: 17-February 17 From: Montana Member No.: 20,845 Region Association: Rocky Mountains |
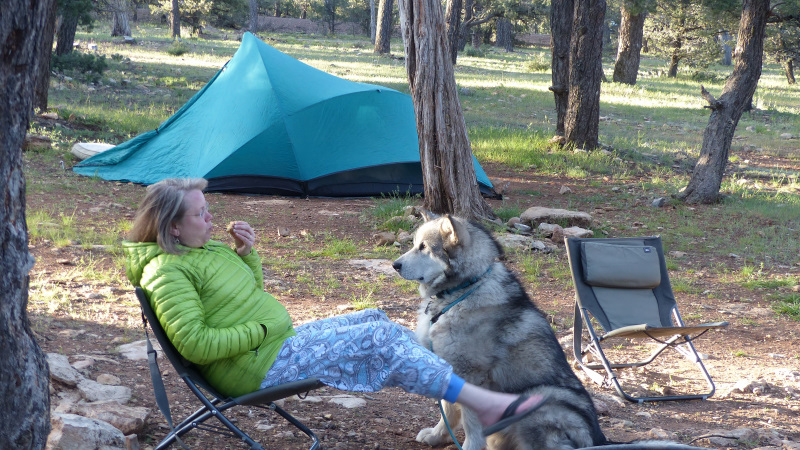
QUOTE(76-914 @ Dec 27 2020, 09:14 PM) Sorry about you Dog Brent. Sorry is all I can say but there aren't any words that can express your sorrow once they've departed. Nor any words that can replace the lasting impression they've left you with. They bless our lives, steal our hearts and then in the next instant they are gone. Truly one of life's greatest inequities. I make no apologies for liking Dogs more than people. I hope ya'll will allow yourselves another dog soon. (IMG:style_emoticons/default/beerchug.gif) @76-914 Thanks Kent. I agree. When you have a good dog, who needs people? (IMG:style_emoticons/default/beerchug.gif) Luckily, we didn't let the house remain dogless for long. In mid-February we drove out to Washington to adopt malamute #4. Here is Kalluq at our friend's place in Snohomish shortly after we picked him up from the rescue. 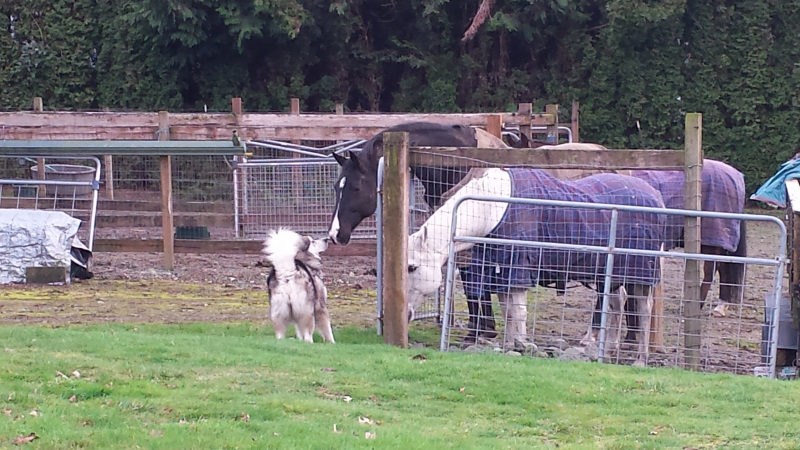 It was lucky we did because we were leaving the Seattle area just as the first cases of COVID were being diagnosed. Had we waited, we'd probably still have an empty house. To borrow from Pete Townsend, "Meet the new boss. Same as the old boss." 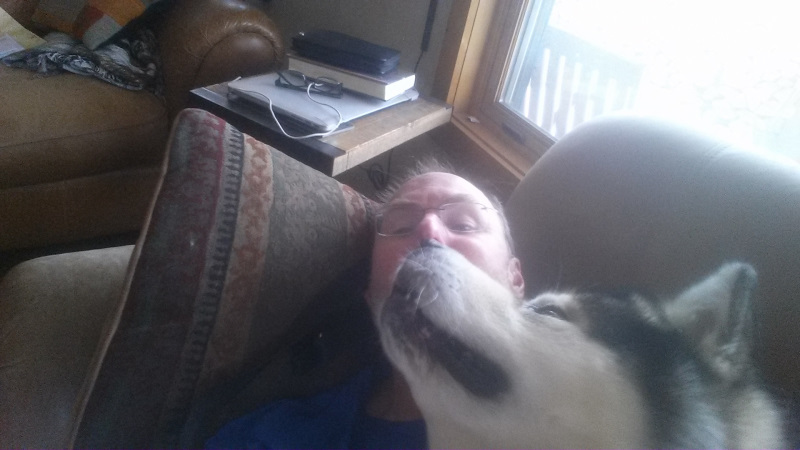 |
|
|
|
| 930cabman |
Dec 28 2020, 05:58 AM
Post
#1792
|
|
Advanced Member Group: Members Posts: 4,044 Joined: 12-November 20 From: Buffalo Member No.: 24,877 Region Association: North East States |
Man's best friend. Sorry for your and your family's loss
On a minor note, nice touch with an anvil on the cowl Keep up the good work |
|
|
|
| bbrock |
Dec 30 2020, 09:36 PM
Post
#1793
|
|
914 Guru Group: Members Posts: 5,269 Joined: 17-February 17 From: Montana Member No.: 20,845 Region Association: Rocky Mountains |
Anyone recognize this part? I can not figure out where it goes. (IMG:style_emoticons/default/confused24.gif)
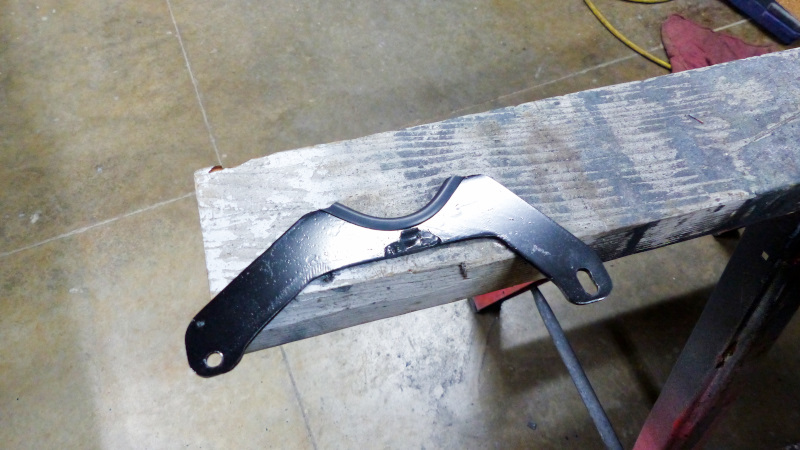 Oh right, I just remembered. @Superhawk996 said my snorkel was so massive that it needed support. (IMG:style_emoticons/default/shades.gif) (IMG:style_emoticons/default/happy11.gif) 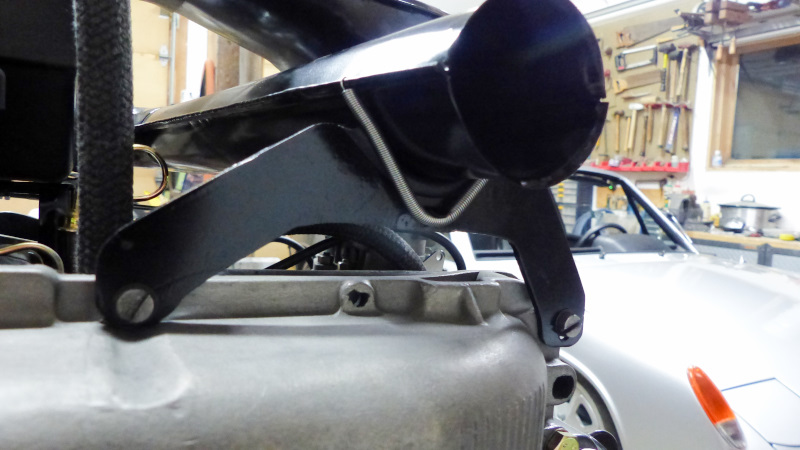 A few progress pics... First cardboard template. 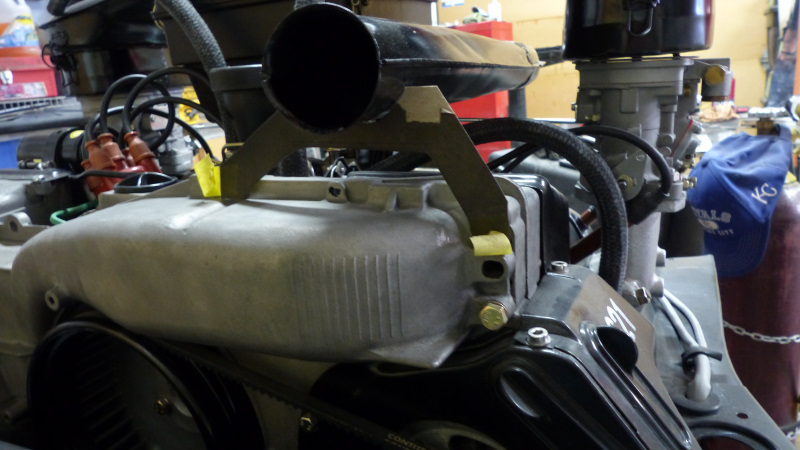 Transfer to flat stock. Feeling really envious of @tygaboy 's shop about now. 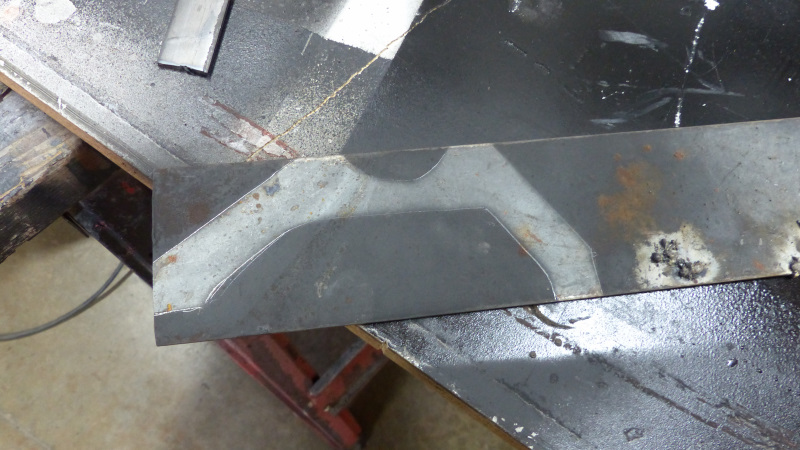 Lot's of quality time with the cutting and grinding wheels followed by some final shaping. 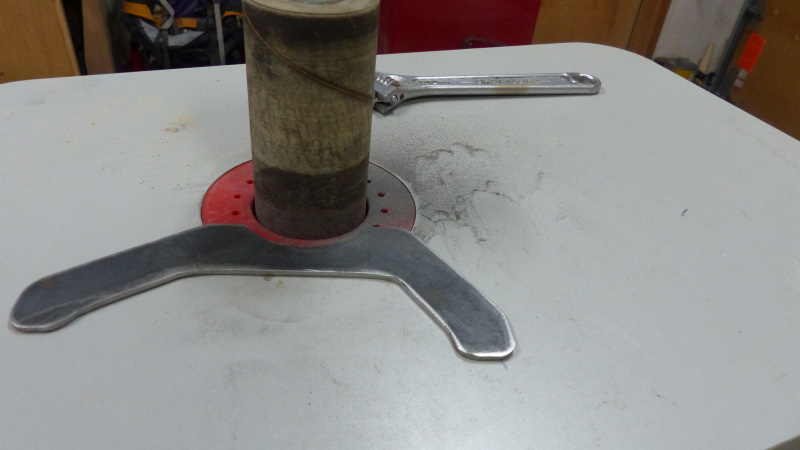 Last bit was to add a spring hook... crappy pic though. 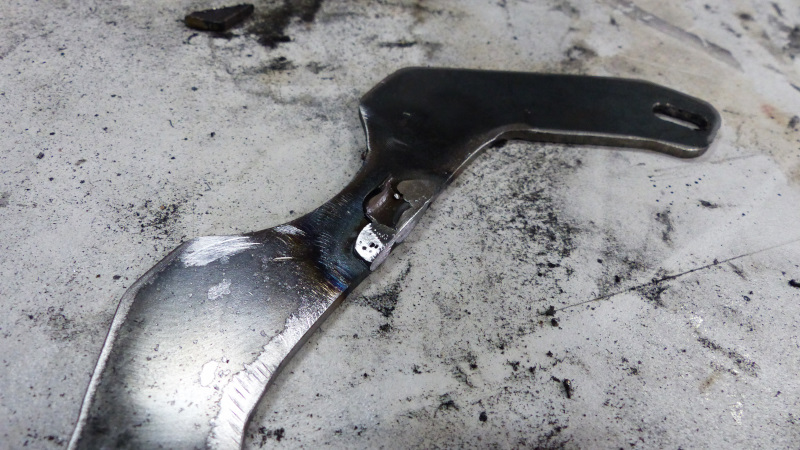 I put a rubber lip on the cradle to eliminate rattles. I came up with several ideas for securing the snorkel so it doesn't rattle around. I want to be able to remove the whole air cleaner without tools so that was a criteria. I thought the spring method was simple and fit with the engineering philosophy of the car. I might have to shorten the spring a little to add more tension but will see how this works. |
|
|
|
| raynekat |
Dec 30 2020, 09:48 PM
Post
#1794
|
|
Advanced Member Group: Members Posts: 2,169 Joined: 30-December 14 From: Coeur d'Alene, Idaho Member No.: 18,263 Region Association: Pacific Northwest |
Warning...warning.
Mad scientist hard at work. Get 'em Brent. |
|
|
|
| tygaboy |
Dec 30 2020, 10:59 PM
Post
#1795
|
|
914 Guru Group: Members Posts: 5,547 Joined: 6-October 15 From: Petaluma, CA Member No.: 19,241 Region Association: Northern California |
Hey Brent - Looks like you're doing just fine without all the fancy tool whore crap! (IMG:style_emoticons/default/aktion035.gif)
I'd volunteer to make you anything you might need but I suspect you're looking to do everything yourself, which I totally get. And admire! That said, if there ever is something I can do, I'd be honored to contribute to your build. |
|
|
|
| bbrock |
Dec 30 2020, 11:16 PM
Post
#1796
|
|
914 Guru Group: Members Posts: 5,269 Joined: 17-February 17 From: Montana Member No.: 20,845 Region Association: Rocky Mountains |
@tygaboy
Thanks Chris. I do have something I might take you up on your generous offer on. It might also be a good excuse to buy the 3D printer I've wanted for years though. The biggest challenge for most things is transferring the design in my head into something you could use to program your machine. I'm pretty slow with CAD. @raynekat I made a trip to the salvage yard to bring some corpse parts back to my lab for the next crazy thing I've cooked up. Stay tuned. (IMG:style_emoticons/default/naughty.gif) |
|
|
|
| Superhawk996 |
Dec 31 2020, 10:09 AM
Post
#1797
|
|
914 Guru Group: Members Posts: 6,966 Joined: 25-August 18 From: Woods of N. Idaho Member No.: 22,428 Region Association: Galt's Gulch |
A lot of non-stock parts here . . . that's going to cost you points at the concours. (IMG:style_emoticons/default/laugh.gif)
Can't wait to see the outcome from "corpse parts" (IMG:style_emoticons/default/hide.gif) |
|
|
|
| 930cabman |
Dec 31 2020, 11:11 AM
Post
#1798
|
|
Advanced Member Group: Members Posts: 4,044 Joined: 12-November 20 From: Buffalo Member No.: 24,877 Region Association: North East States |
It's a good thing we all have plenty of "extra time" for this nonsense And our wives put up with it
Keep up the good work BB, all of this stuff is just time, but generally satisfying Have a safe and Happy New Year to all |
|
|
|
| bbrock |
Jan 2 2021, 12:58 PM
Post
#1799
|
|
914 Guru Group: Members Posts: 5,269 Joined: 17-February 17 From: Montana Member No.: 20,845 Region Association: Rocky Mountains |
I think I mentioned before that after installing the 914Rubber dash cap, the gap around my ash tray was off. It's been bugging me so I decided to see if I could fix it. Here's the before. Note uneven gap across the top.
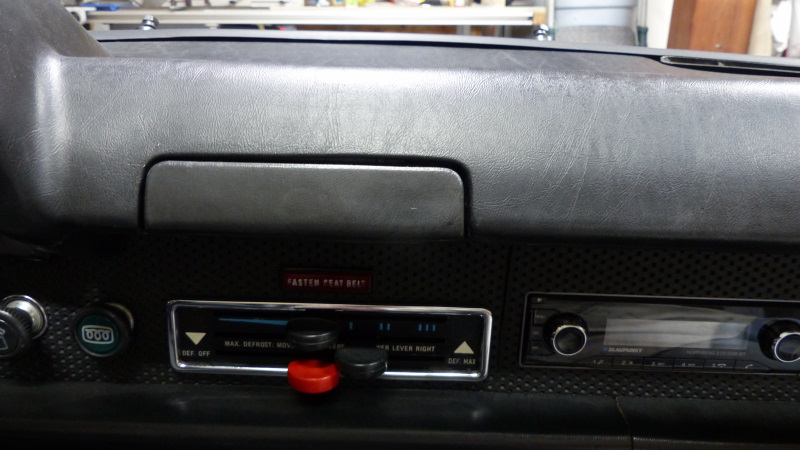 Here's after fiddling with it a bit. I'm pretty happy with this. 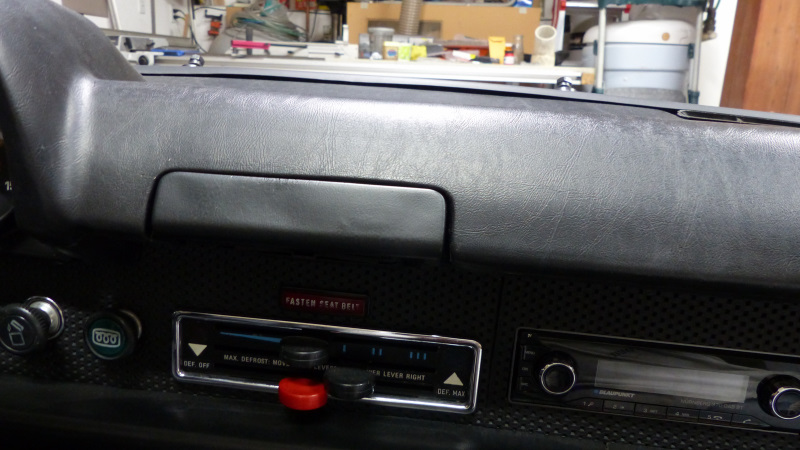 To spice things up a little, I thought I try making a little video to show how I did it. https://www.youtube.com/watch?v=9EcXdb3c_r0 |
|
|
|
| Superhawk996 |
Jan 2 2021, 01:56 PM
Post
#1800
|
|
914 Guru Group: Members Posts: 6,966 Joined: 25-August 18 From: Woods of N. Idaho Member No.: 22,428 Region Association: Galt's Gulch |
Nice job with the cupholder. Always fascinated by the creativity Brent! (IMG:style_emoticons/default/aktion035.gif)
Now about those gaps . . . I think the 1970's era fit and finish (i.e. crappy gaps) is all part of the 914 charm. (IMG:style_emoticons/default/shades.gif) We'll see how much I still feel that way when I get around to putting my interior back together. (IMG:style_emoticons/default/lol-2.gif) |
|
|
|
|
1 User(s) are reading this topic (1 Guests and 0 Anonymous Users)
0 Members:

|
Lo-Fi Version | Time is now: 20th April 2025 - 02:56 AM |
Invision Power Board
v9.1.4 © 2025 IPS, Inc.