|
|
|
Porsche, and the Porsche crest are registered trademarks of Dr. Ing. h.c. F. Porsche AG.
This site is not affiliated with Porsche in any way. Its only purpose is to provide an online forum for car enthusiasts. All other trademarks are property of their respective owners. |
|
|

  |

| 930cabman |
 Feb 8 2021, 10:29 AM Feb 8 2021, 10:29 AM
Post
#1841
|
|
Advanced Member  Group: Members Posts: 4,044 Joined: 12-November 20 From: Buffalo Member No.: 24,877 Region Association: North East States |
QUOTE(Superhawk996 @ Feb 8 2021, 09:59 AM)  Keep the momentum going, don't lose track of the finish line |
   |

 
|
| bbrock |
Feb 14 2021, 11:50 PM
Post
#1842
|
|
914 Guru Group: Members Posts: 5,269 Joined: 17-February 17 From: Montana Member No.: 20,845 Region Association: Rocky Mountains |
Let the car sit for a week to make sure the brake MC grommets held. No leaks!! (IMG:style_emoticons/default/cheer.gif) I can't say for sure if the problem before was my installation or the 914R grommets, but OEM Ate grommets are available and not expensive so why use anything else? (IMG:style_emoticons/default/confused24.gif) Anyway, I finally got to try out me Motive brake bleeder. Worked great. Pedal feels pretty firm. I'll need to bleed them once or twice more after the car has been driven to shake any remaining bubbles loose, but it will do for now. For some reason my brake lights are sticking on unless I release the peddle fast. Hopefully the switch just needs some adjustment but I'll have to track that down.
 I also resprayed the gravel pan and reinstalled. No pics. Today was valve geometry day. I made an adjustable push rod out of a spare and followed Jake's procedure. I'm hopefully I can stick with the stock push rods because they are aluminum (quieter than chromoly) and thicker walled than what is available aftermarket. The guy who machined my rockers can also shorten stock push rods, so it was worth a try - hence the adjustable stock push rod. I made a plate to screw to one of the rocker assembly posts that I could attached my crappy HF magnetic base to. 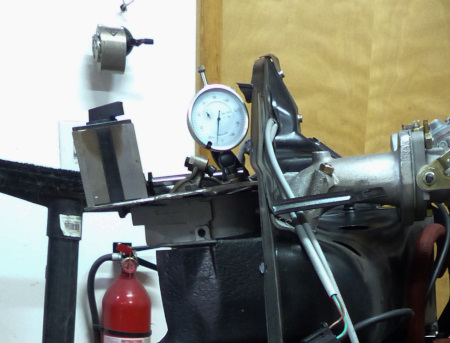 As Jake says in his procedure, it is a fiddly process that takes patience. I started with the push rod set at 271mm as suggested. The valve lift on my Elgin cam is .385 for intake. Lift with the 271mm rod measured at .392. Not bad. Jake says to try to get as much lift as you can within 5% of the card spec. which makes the max allowable lift being .404 . After some trial and error, I found by lengthening the rod a bit, I could get as high as .399 so I stopped there and moved to the geometry part. I didn't like the geometry at half lift so dialed back the rod length a bit. With a bit shorter rod, the rocker looked parallel to the valve and I was still getting .389" of lift. Not bad. 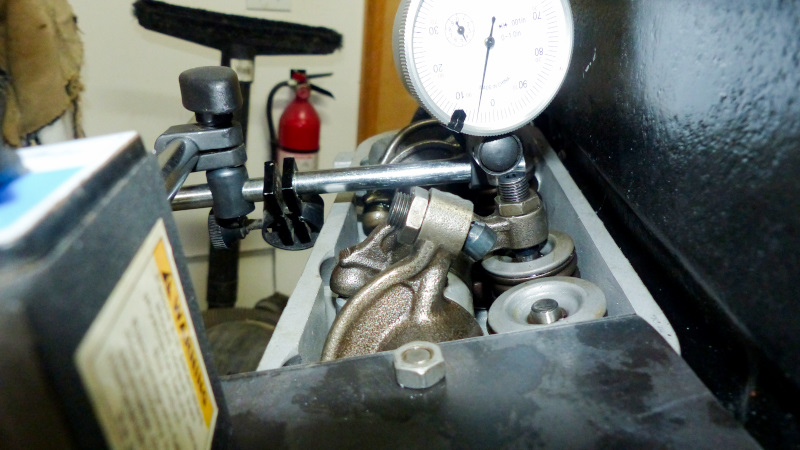 The push rod measured 271.5. The stock push rods are 270mm which meant I wouldn't be able to use them. That meant I would have to start over with an adjustable push rod with the same tip as would be installed after cut. For grins I decided to throw a stock 270mm rod in and see what it did. To my surprise, the lift was still .389" and the geometry at half lift looks just as good as with the longer rod. It also leaves a little more adjustmen on the screws (IMG:style_emoticons/default/piratenanner.gif) 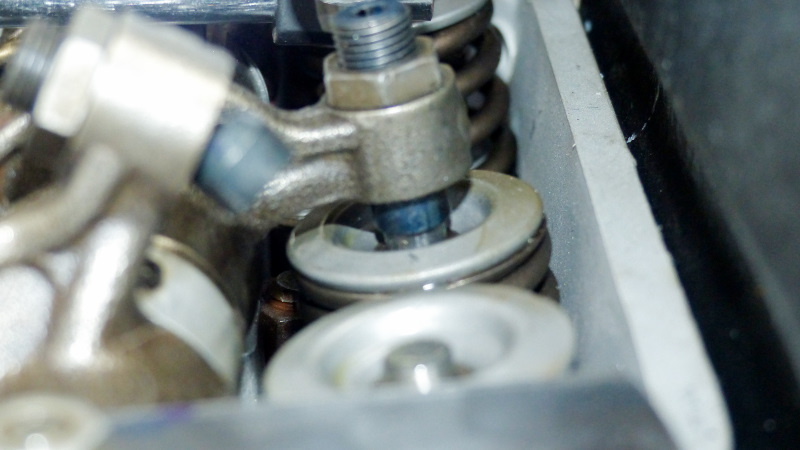 Tomorrow I will set the exhaust rod length. If it checks out at 270mm or less, I think I'll stick with the stock rods. Stronger, cheaper, and easier than having to buy and cut new ones. I'll also follow up using a sharpie and the original adjusters as another check on the sweep just to make sure things look good. It sure would be nice if I wind up being able to pop the old rods back in and call it a day! |
|
|
|
| euro911 |
Feb 15 2021, 01:14 AM
Post
#1843
|
|
Retired & living the dream. God help me if I wake up! Group: Members Posts: 8,878 Joined: 2-December 06 From: So.Cal. & No.AZ (USA) Member No.: 7,300 Region Association: Southern California |
Just got around to catching up on your progress, Brent. Your custom air box fabrication is over the top (IMG:style_emoticons/default/aktion035.gif)
Looking forward to the video (more so the audio) showing us the reduction in intake decibels (IMG:style_emoticons/default/popcorn[1].gif) |
|
|
|
| bbrock |
Feb 15 2021, 02:05 PM
Post
#1844
|
|
914 Guru Group: Members Posts: 5,269 Joined: 17-February 17 From: Montana Member No.: 20,845 Region Association: Rocky Mountains |
Thanks Mark. I'm looking forward to those measurements too!
I finished up the valve geometry today. I decided to start the exhaust valve measurement with a stock pushrod to get a baseline. My cam spec is .370 valve lift on the exhaust and with the stock rod, I got .368 Very close and well within 5% of the card spec (actually only .05% short). Here's a better shot of the rig using the very crappy HF magnetic gauge stand.  The geometry at half lift looked pretty good too. This was looking promising. 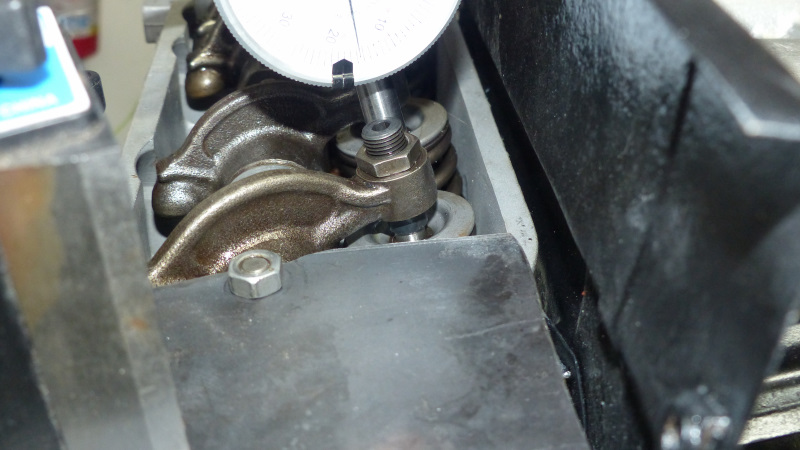 I then installed the adjustable rod to see how much lift I would be leaving on the table if I stuck with the stock rods. I was not able to get anything larger than .368 lift at any rod length which was actually a relief to be honest. Then I installed stock rods on both intake and exhaust of #1 cylinder and install the stock adjusters to check the sweep pattern. 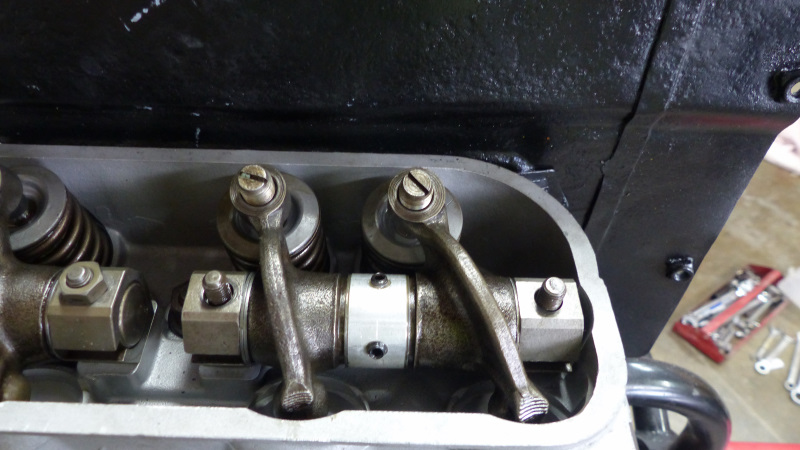 The pattern looks good, but to be honest, I think there is some voodoo here which is a carry over of my skepticism about offsets. Everyone says you are looking for a sweep that runs across the center of the valve stem, but where the adjuster sweeps is going to be influenced pretty strongly by how much offset you shim the rockers for. Anyway, mine seem to look pretty good. Just a tiny hair off center in the direction I shimmed for offset. 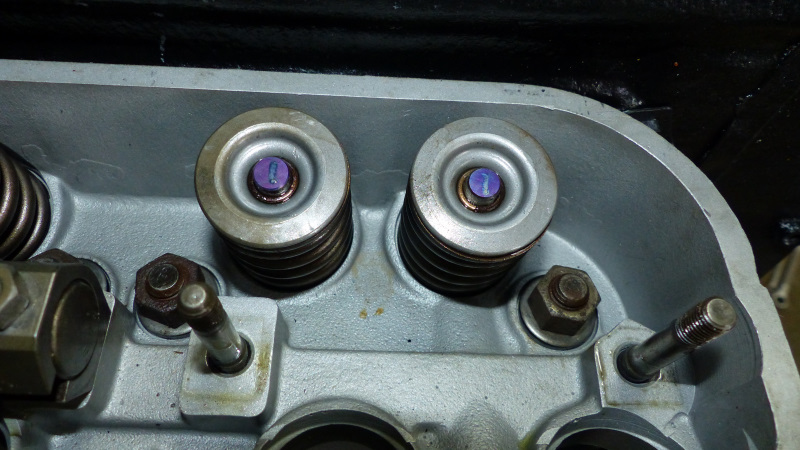 I'm pretty sure if I switched my rocker shims back to place the adjusters dead center, it would put the sweep pattern dead center too. So what are we looking for, center sweep or slightly offset adjusters? Whatever, I think it all looks good so I'm happy to just reuse my stock pushrods. The only thing that kept me from completing final assembly of the valve train was lack of a tube of this stuff: (IMG:http://www.914world.com/bbs2/uploads_offsite/cdn.shopify.com-20845-1613419551.1.jpg) I was fully expecting to have to either send my OE rods to be shortened, or purchase a new set to cut to length, so I wasn't in a hurry to order. I'll take care of that today so I can button this engine up. In the meantime, I loose fit the pushrod tubes and the rods to keep crap out of the engine, keep all the parts in one place, and have a chance to admire getting close to a finished engine. I still need to source a replacement tube retainer spring too. 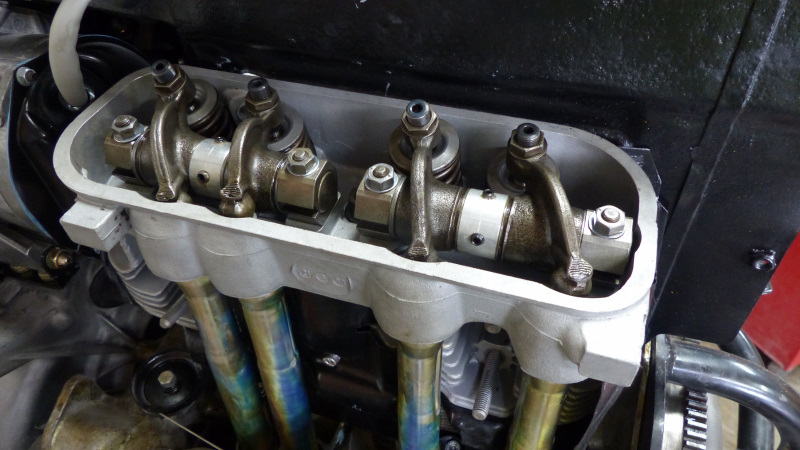 |
|
|
|
| bbrock |
Feb 15 2021, 08:14 PM
Post
#1845
|
|
914 Guru Group: Members Posts: 5,269 Joined: 17-February 17 From: Montana Member No.: 20,845 Region Association: Rocky Mountains |
Took some time off to do a little X-country skiing. It is finally looking like winter here. Such a strange year. I'm so lucky to live where I can literally ski right out of the front door.
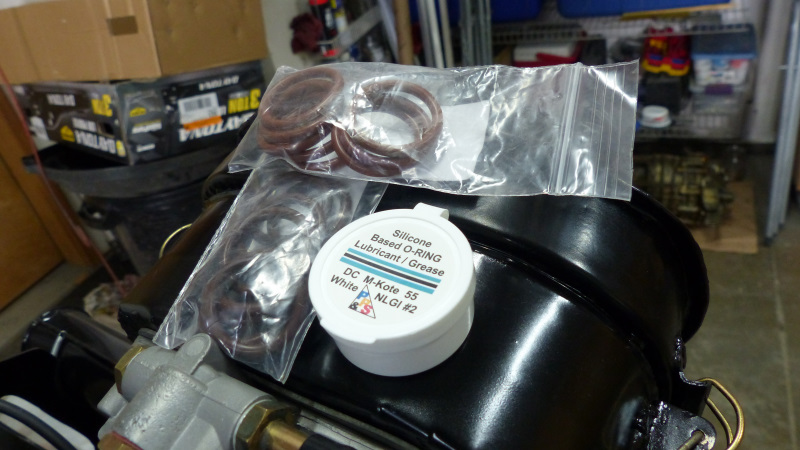
Got back in time for one last task to update - securing fuel lines. My research says this is the stuff to use for sealing fuel line fittings. 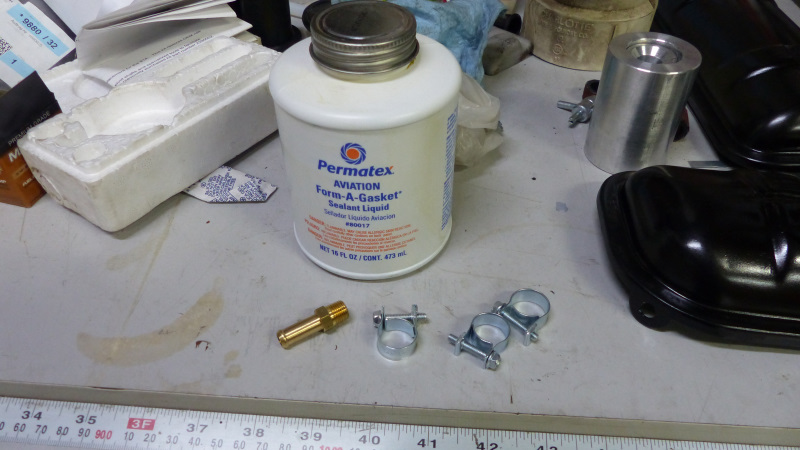 That stuff is messy to work with. I was expecting something more like pipe dope. Nope, it is a runny liquid that then dries tacky after applied. I should have put down some cardboard to catch drips because it is a pain to clean up. Anyway, got the pressure regulator fittings sealed and snugged up and attached the hoses with good clamps. 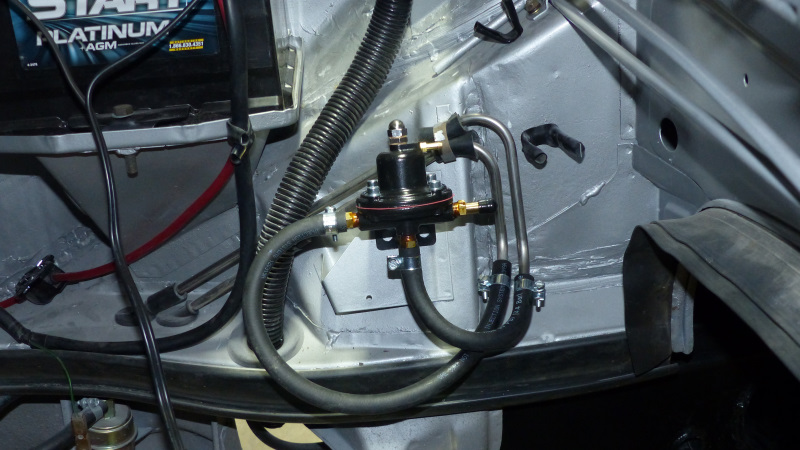 Then up front to clamp the hoses on the fuel pump. I forgot to pick up an inline filter to put in front of the pump when I was at the FLAPS getting the clamps (IMG:style_emoticons/default/screwy.gif) That means I'll have to get in here again but it is progress. 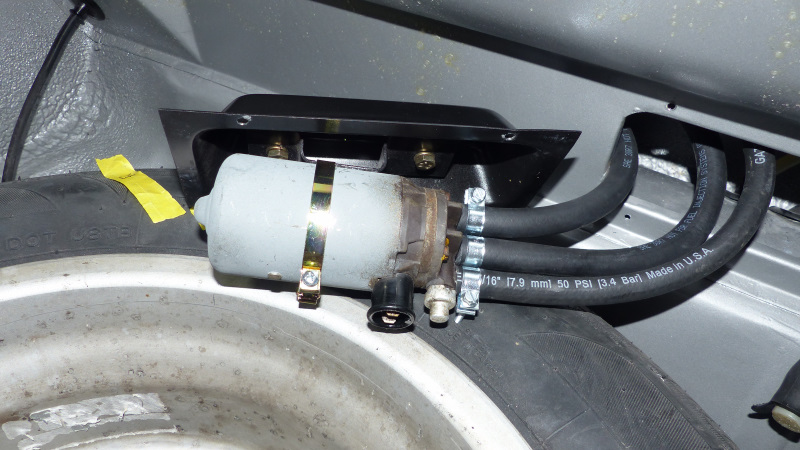 Got the O-ring sealant, 4 quarts of break in oil, and a fitting to mount the fuel pressure gauge on a carb ordered. I'm going to order a reman Bosch starter at Napa when I'm in town for the dog's vet appt. tomorrow. Inching closer... (IMG:style_emoticons/default/popcorn[1].gif) |
|
|
|
| Cairo94507 |
Feb 16 2021, 08:54 AM
Post
#1846
|
|
Michael Group: Members Posts: 10,297 Joined: 1-November 08 From: Auburn, CA Member No.: 9,712 Region Association: Northern California |
I am glad to see that you have the correct clamps for fuel lines instead of the typical hose clamps which cause leaks.
Just last week, my cousin and I were having coffee at Peet's and he brought his new to him Toyota Land Cruiser, a '75 with a 350 Chevy in it. As we drank coffee a fuel line began leaking. From where we were seated we smelled it and then went and opened the hood. Yup, typical hose clamps on rubber line cut right through the line and was now dripping. 30 minutes later new line and proper clamps and problem solved. We don't need any engine fires. (IMG:style_emoticons/default/beerchug.gif) |
|
|
|
| Superhawk996 |
Feb 16 2021, 09:10 AM
Post
#1847
|
|
914 Guru Group: Members Posts: 6,966 Joined: 25-August 18 From: Woods of N. Idaho Member No.: 22,428 Region Association: Galt's Gulch |
QUOTE(Cairo94507 @ Feb 16 2021, 09:54 AM) Toyota Land Cruiser, a '75 with a 350 Chevy in it. Just can't get over the uniquely American perspective that everything can be improved by putting some sort of V8/SBC/LS in it. (IMG:style_emoticons/default/lol-2.gif) Thank God that Brent stayed on the straight and narrow path. |
 |
|
| Dion |
Feb 16 2021, 06:47 PM
Post
#1848
|
|
RN Group: Members Posts: 2,839 Joined: 16-September 04 From: Audubon,PA Member No.: 2,766 Region Association: MidAtlantic Region |
Looking fantastic Brent. I like the sealant idea. Great research on your part. As usual your thread is a wealth of knowledge. Quick question:
What fuel clamps are you using? Source? I need a bunch for my carbs. Also my next project on the car is placing the fuel tank back in, running lines etc. As Cairo said , don’t need any fire! |
|
|
|
| Cairo94507 |
Feb 16 2021, 06:54 PM
Post
#1849
|
|
Michael Group: Members Posts: 10,297 Joined: 1-November 08 From: Auburn, CA Member No.: 9,712 Region Association: Northern California |
@superhawk996 - Yeah, he bought it 3 weeks ago from a guy in Montana and it came that way. He is still trying to decide if he is going to leave it or put the straight 6 back in it. However the V-8 fits with tons of room to spare and runs great.
|
|
|
|
| bbrock |
Feb 16 2021, 07:01 PM
Post
#1850
|
|
914 Guru Group: Members Posts: 5,269 Joined: 17-February 17 From: Montana Member No.: 20,845 Region Association: Rocky Mountains |
QUOTE(Dion @ Feb 16 2021, 05:47 PM) Looking fantastic Brent. I like the sealant idea. Great research on your part. As usual your thread is a wealth of knowledge. Quick question: What fuel clamps are you using? Source? I need a bunch for my carbs. Also my next project on the car is placing the fuel tank back in, running lines etc. As Cairo said , don’t need any fire! Thanks man. I wish I could give a better answer on the clamps, but I just went to my FLAPS (O'Reilly) and told them I needed the "good" fuel clamps that are omega shaped with the rolled edges that don't cut the hose. They knew exactly what I was talking about and grapped a box from the back room stock shelves (not the aisles). The box says Master Pro Select if that helps. However, the clamps I got from @Rotary'14 when I bought my SS lines from him are better because they have phillips screws rather than slotted like these. I find slotted screws on hose clamps a big PITA. It might be worth checking with him. |
|
|
|
| bbrock |
Feb 16 2021, 07:19 PM
Post
#1851
|
|
914 Guru Group: Members Posts: 5,269 Joined: 17-February 17 From: Montana Member No.: 20,845 Region Association: Rocky Mountains |
QUOTE(Superhawk996 @ Feb 16 2021, 08:10 AM) QUOTE(Cairo94507 @ Feb 16 2021, 09:54 AM) Toyota Land Cruiser, a '75 with a 350 Chevy in it. Just can't get over the uniquely American perspective that everything can be improved by putting some sort of V8/SBC/LS in it. (IMG:style_emoticons/default/lol-2.gif) Thank God that Brent stayed on the straight and narrow path. I've always been drawn more to quick, nimble and somewhat versatile. I just never bought into the "there is no replacement for displacement" philosophy. |
|
|
|
| mb911 |
Feb 16 2021, 07:26 PM
Post
#1852
|
|
914 Guru Group: Members Posts: 7,544 Joined: 2-January 09 From: Burlington wi Member No.: 9,892 Region Association: Upper MidWest |
QUOTE(bbrock @ Feb 16 2021, 05:01 PM) QUOTE(Dion @ Feb 16 2021, 05:47 PM) Looking fantastic Brent. I like the sealant idea. Great research on your part. As usual your thread is a wealth of knowledge. Quick question: What fuel clamps are you using? Source? I need a bunch for my carbs. Also my next project on the car is placing the fuel tank back in, running lines etc. As Cairo said , don’t need any fire! Thanks man. I wish I could give a better answer on the clamps, but I just went to my FLAPS (O'Reilly) and told them I needed the "good" fuel clamps that are omega shaped with the rolled edges that don't cut the hose. They knew exactly what I was talking about and grapped a box from the back room stock shelves (not the aisles). The box says Master Pro Select if that helps. However, the clamps I got from @Rotary'14 when I bought my SS lines from him are better because they have phillips screws rather than slotted like these. I find slotted screws on hose clamps a big PITA. It might be worth checking with him. Belmetric has the ones you speak of. |
|
|
|
| bkrantz |
Feb 16 2021, 09:07 PM
Post
#1853
|
|
914 Guru Group: Members Posts: 8,342 Joined: 3-August 19 From: SW Colorado Member No.: 23,343 Region Association: Rocky Mountains |
QUOTE(Superhawk996 @ Feb 16 2021, 08:10 AM) QUOTE(Cairo94507 @ Feb 16 2021, 09:54 AM) Toyota Land Cruiser, a '75 with a 350 Chevy in it. Just can't get over the uniquely American perspective that everything can be improved by putting some sort of V8/SBC/LS in it. (IMG:style_emoticons/default/lol-2.gif) Thank God that Brent stayed on the straight and narrow path. If I remember correctly, a small block V8 weighs less than the Landcruiser straight 6, provides more hp, torque, and mpg. Maybe not stock, but I would call it improved. |
|
|
|
| Dion |
Feb 17 2021, 06:25 AM
Post
#1854
|
|
RN Group: Members Posts: 2,839 Joined: 16-September 04 From: Audubon,PA Member No.: 2,766 Region Association: MidAtlantic Region |
QUOTE(mb911 @ Feb 16 2021, 05:26 PM) QUOTE(bbrock @ Feb 16 2021, 05:01 PM) QUOTE(Dion @ Feb 16 2021, 05:47 PM) Looking fantastic Brent. I like the sealant idea. Great research on your part. As usual your thread is a wealth of knowledge. Quick question: What fuel clamps are you using? Source? I need a bunch for my carbs. Also my next project on the car is placing the fuel tank back in, running lines etc. As Cairo said , don’t need any fire! Thanks man. I wish I could give a better answer on the clamps, but I just went to my FLAPS (O'Reilly) and told them I needed the "good" fuel clamps that are omega shaped with the rolled edges that don't cut the hose. They knew exactly what I was talking about and grapped a box from the back room stock shelves (not the aisles). The box says Master Pro Select if that helps. However, the clamps I got from @Rotary'14 when I bought my SS lines from him are better because they have phillips screws rather than slotted like these. I find slotted screws on hose clamps a big PITA. It might be worth checking with him. Belmetric has the ones you speak of. Thanks fellas! Looking forward to more Brent. (IMG:style_emoticons/default/beerchug.gif) |
|
|
|
| bbrock |
Feb 22 2021, 08:22 PM
Post
#1855
|
|
914 Guru Group: Members Posts: 5,269 Joined: 17-February 17 From: Montana Member No.: 20,845 Region Association: Rocky Mountains |
The O-ring grease I ordered has gone MIA in the USPS abyss so didn't arrive before the weekend as expected. That meant I couldn't finish off the engine assembly but I found a bunch of small things to keep me busy but it's pretty weird that I'm starting to run out of things to do.
Let's get the negative thing out of the way. I'm really not trying to pick on 914Rubber. I've probably bought 80% of the items in their catalog and probably 80% of that is great quality stuff. But sometimes they miss and the engine tin J-pipe grommets are a miss. I tried installing them and found they fit very loosely in the openings and would not stay in at all when the pipes were pushed in. Even though most part sources listed the OEM part as NLA, I found them listed in the Sunset Porsche catalog. Ridiculously expensive but a cheap repro that doesn't work is a waste of money. I ordered a pair expecting to get an email the next day saying they were NLA. Instead, I got an email from Luke saying they would have to be ordered from Germany and would take 3-4 weeks. I still expected to get an NLA noticed when the Germans got the order, but to my surprise, they arrived about 3 weeks later so here is a comparison. The OEM grommet on the left is a full 3mm larger OD and the center membrane is 1mm thinner than the 914Rubber grommet on the right. 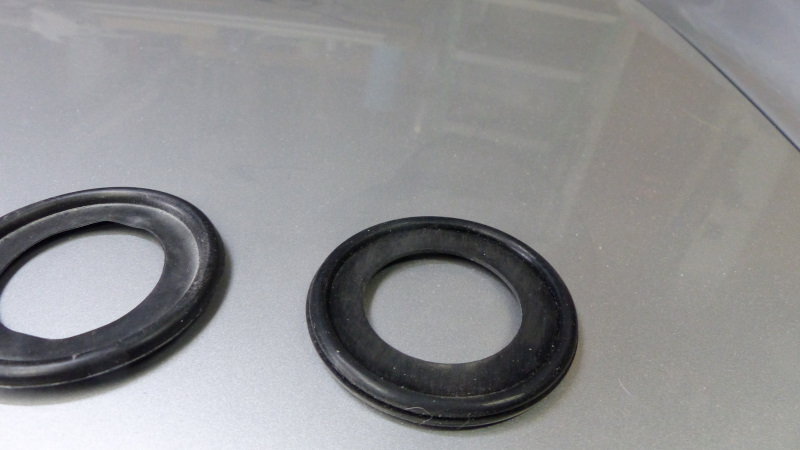 The OE grommets worked just fine. 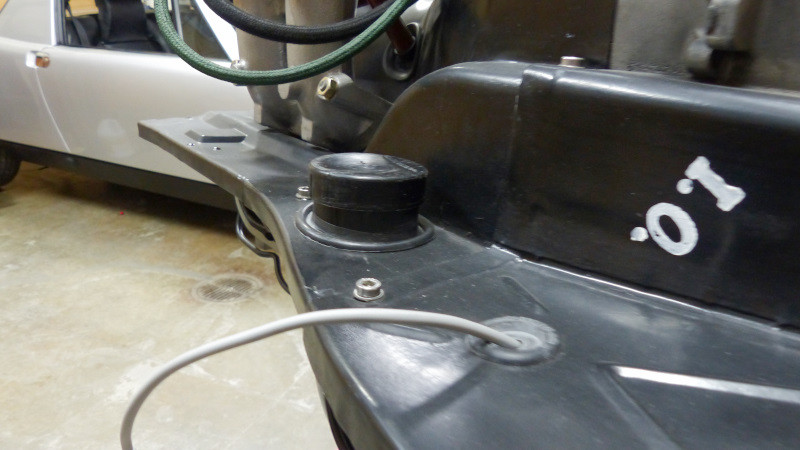 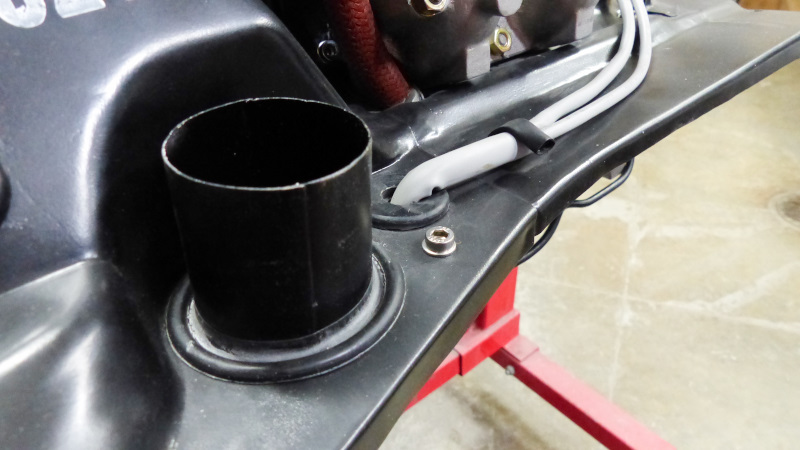 Next up was was lubing up the shift lever on the tranny and popping on the little plastic hat (I"m tying real hard not to be dirty here). 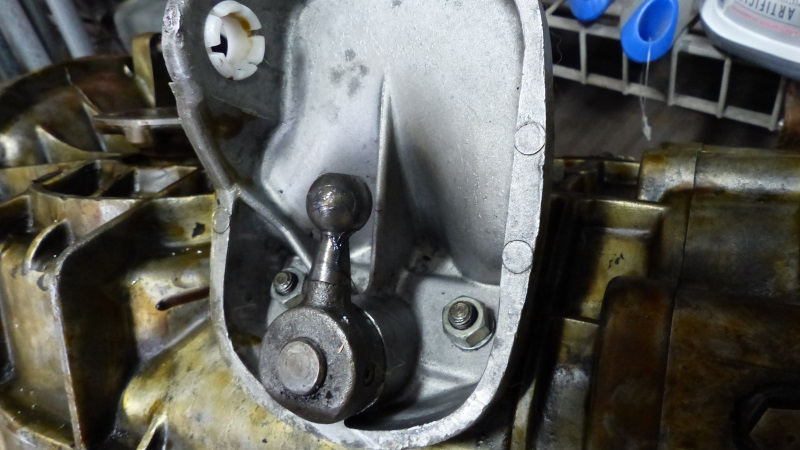 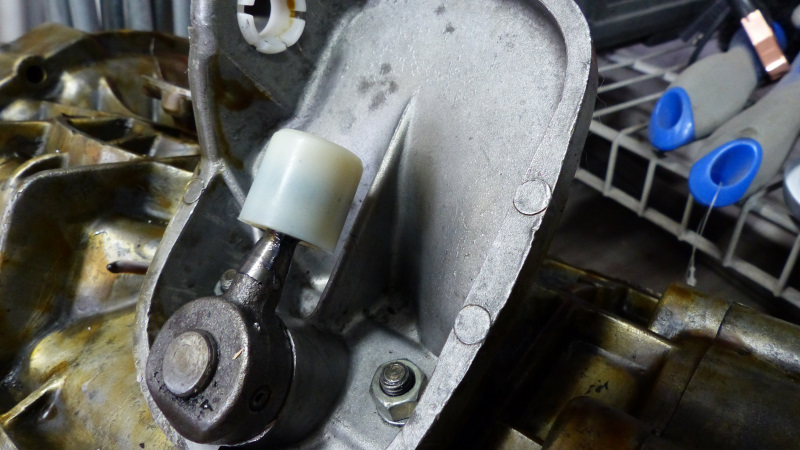 Then the iron helmet with my custom cone screw. 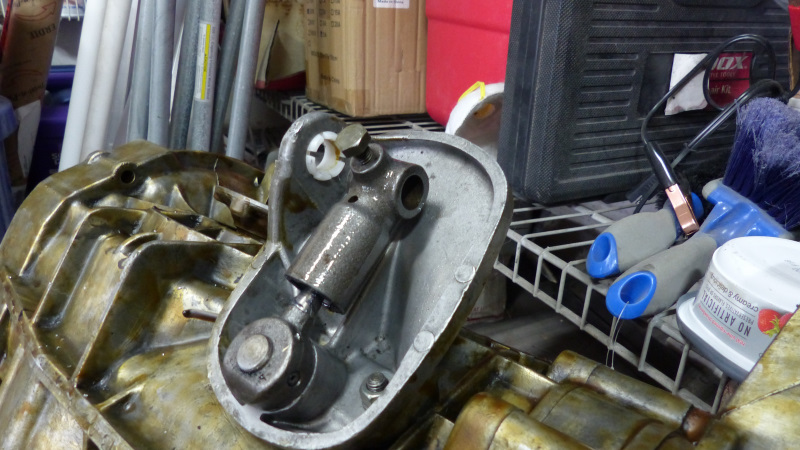 After that, I had to run to town but picked up something I've needed for many decades. I finally replaced my crappy and downright dangerous old Craftsman jack. 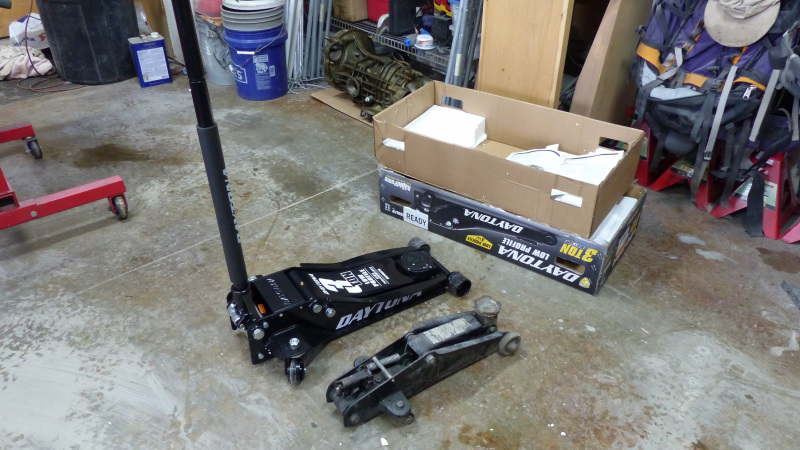 Yesterday was spent finishing up cleaning the heater parts and painting. 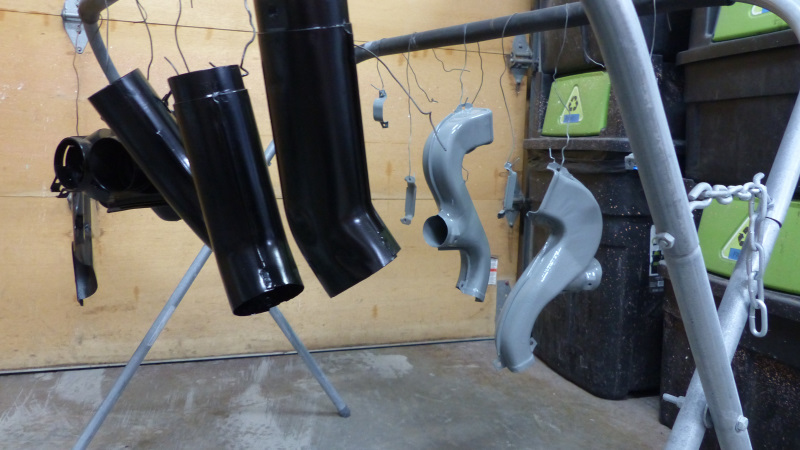 And after work today I added a fuel pressure gauge to the right carb. 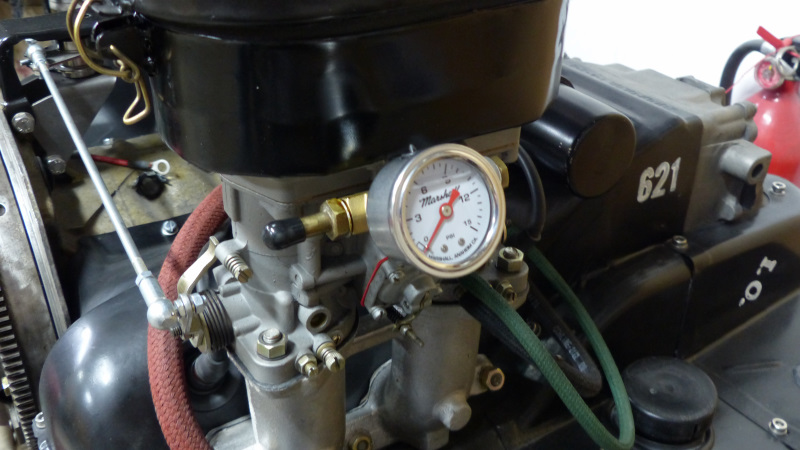 Finally, @914werke donated a good pushrod tube retainer to the cause. Thanks Rich! (IMG:style_emoticons/default/beerchug.gif) 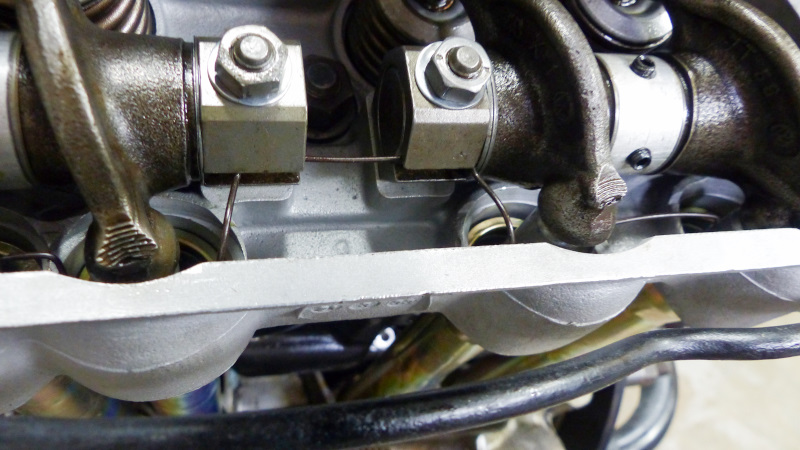 That's it for now. If things go right this week, next weekend may be an epic milestone on the project. |
|
|
|
| bbrock |
Mar 8 2021, 07:34 PM
Post
#1856
|
|
914 Guru Group: Members Posts: 5,269 Joined: 17-February 17 From: Montana Member No.: 20,845 Region Association: Rocky Mountains |
I'm two weeks behind on posting so let's get caught up. I had limited time to work on the car last weekend, so I made the most of it by going for the big O -rings.
 My pushrod tubes are not all fancy like @Superhawk996 's but I like 'em anyway (IMG:style_emoticons/default/smile.gif) . 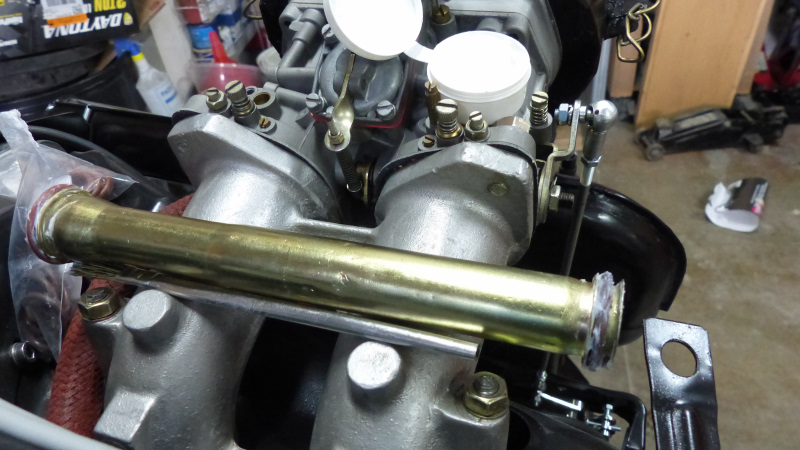  With that grease, those tubes are 100% guaranteed to never ever, EVER leak (IMG:style_emoticons/default/av-943.gif) Next was to set the clearances for the solid rocker spacers. 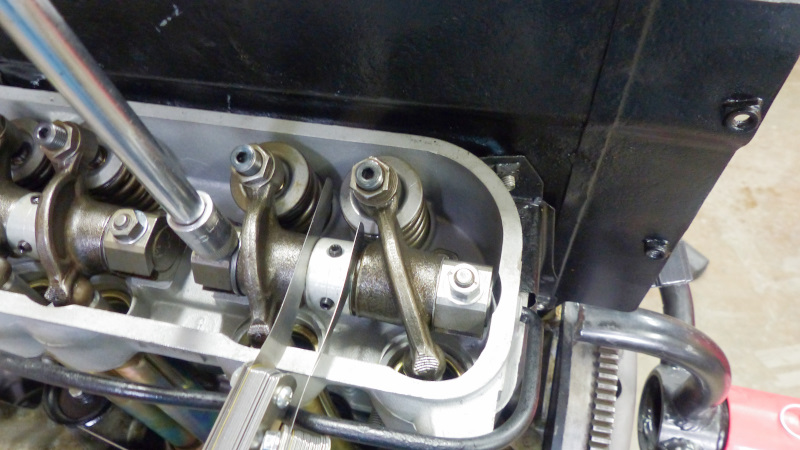 Then setting the valve clearances. 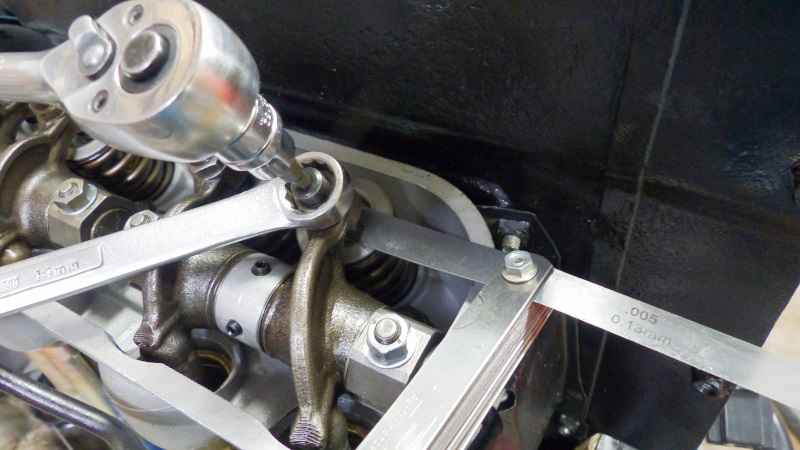 These gaskets have been sitting in a parts bin for over 30 years. They look like they may have shrunk a bit. Luckily, these aren't prone to leaking so I should be okay (IMG:style_emoticons/default/av-943.gif) (IMG:style_emoticons/default/av-943.gif) (IMG:style_emoticons/default/av-943.gif) They do seem to fit snug on the heads though but I need to double check that I have newer ones on hand when the oil gusher hits. 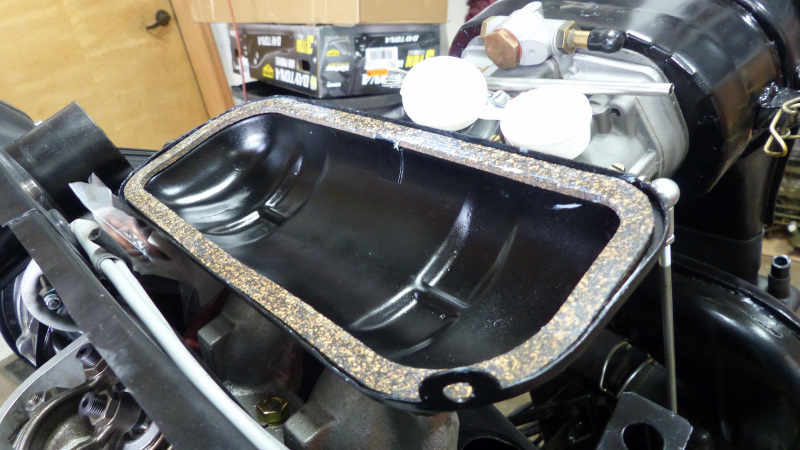 And this engine is buttoned up! (IMG:style_emoticons/default/clap56.gif) The rest of the weekend was dinking around with odds and ends and tidying up the shop a little. Nothing picture worthy. During the week, this arrived. It was not easy to find. All the FLAPS claim to have genuine Bosch reman starters available for ~ $130(ish) but when the each checked availability, they couldn't get them. Pelican has them but over $100 higher price. I found this one at Autohauz at FLAPS price. All the stickers and packaging indicate it was rebuilt by Bosch so hopefully it is good quality. 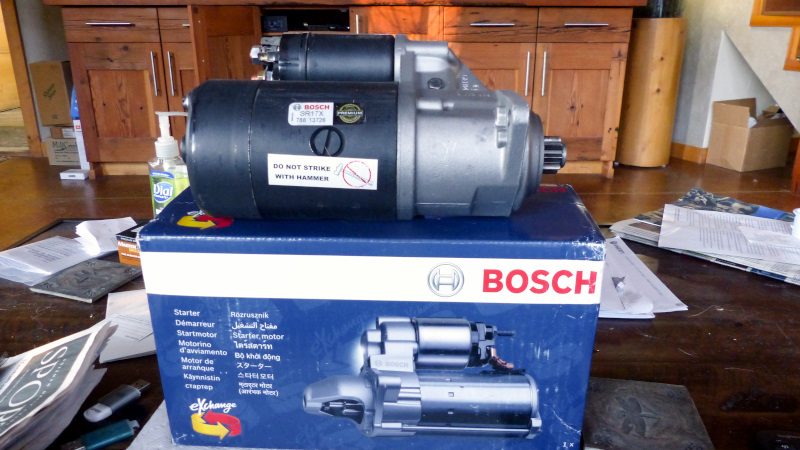 Of course, I had to bolt it on right away. 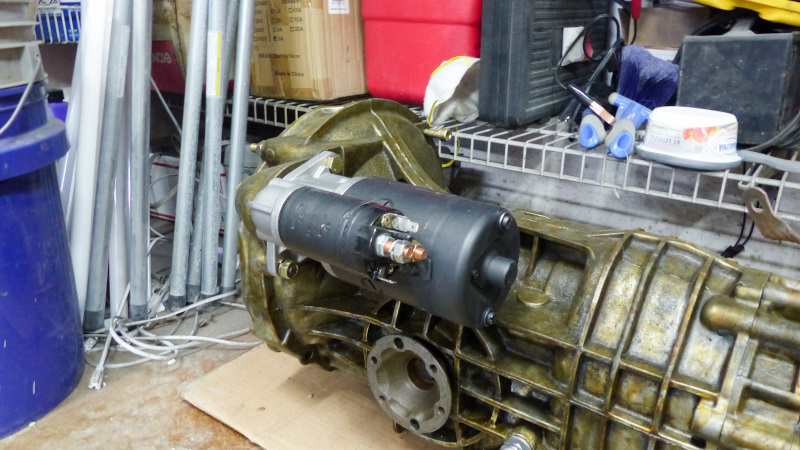 |
|
|
|
| bbrock |
Mar 8 2021, 08:38 PM
Post
#1857
|
|
914 Guru Group: Members Posts: 5,269 Joined: 17-February 17 From: Montana Member No.: 20,845 Region Association: Rocky Mountains |
Now for the weekend update. First, more on the starter. I like the idea of using a starter relay as it doesn't make a lot of sense to send 20 amps or so all the way through that long wire and through the expensive starter switch. @914_7T3 sent me a Bosch relay he wasn't going to use so I cleaned it up and installed. Of course, I had to do a little extra by adding heat shrink to the terminal clips. Then I painted all those connections with liquid electrical tape to seal them against moisture.
 I think it makes for a tidy installation. There are some threads on the Samba with a lot of starter relay hate. Personally, I think it is nonsense. The argument pretty much comes down to not wanting to add another part that could fail. Let's see, if the relay fails, the fix is to simply unplug the starter wire from the relay and plug it into the spare terminal on the solenoid. That sounds a lot easier than having to replace a fried $60 switch. 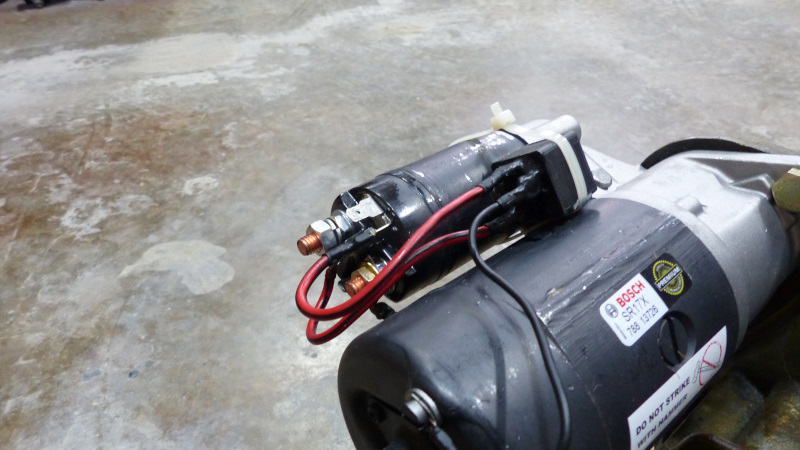 Next, I pulled out the engine mount bar that has been stowed away hanging under the chassis. 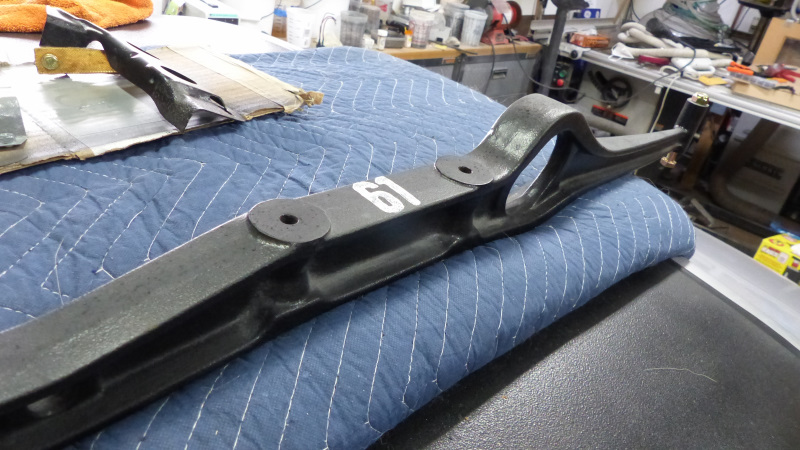 Good bye lovely #61. Will I ever see you again? 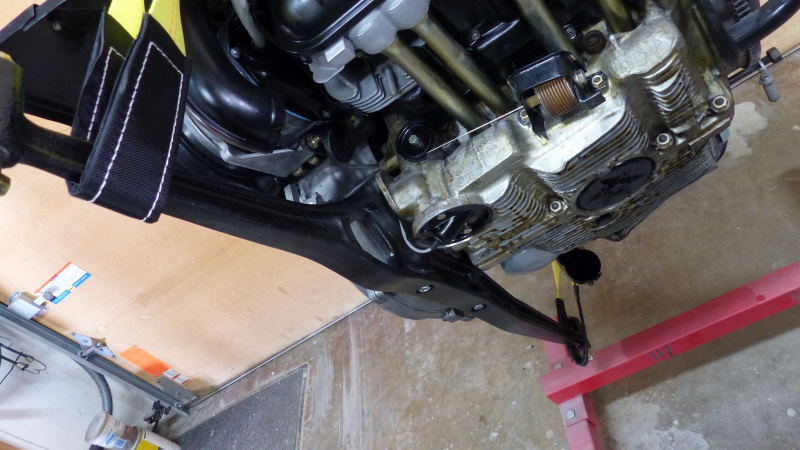 The rest of Saturday was spent pre-tuning the carbs and other small stuff. Not picture worthy. Sunday I made a trip across the road to borrow something from the neighbor. Holy (IMG:style_emoticons/default/stromberg.gif) This is happening!!!! 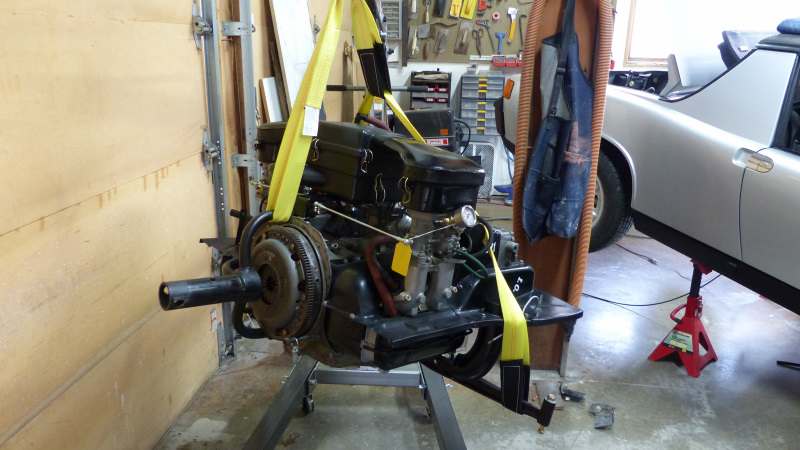 Tranquility base here. The Eagle has landed. 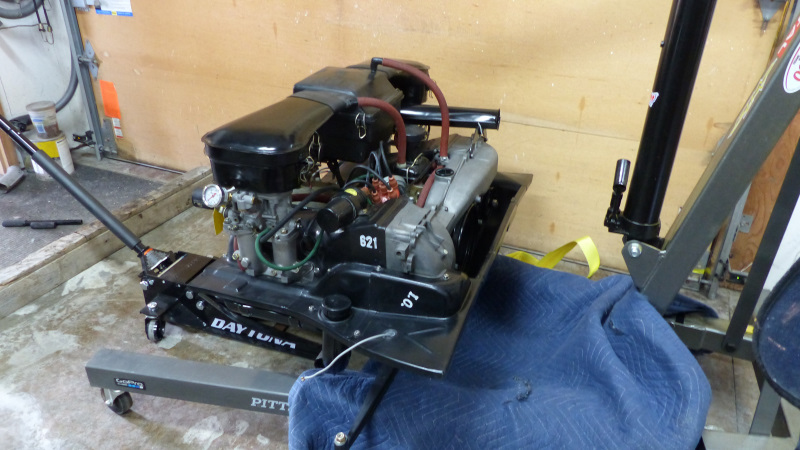 Well look at that. After being apart for 35 years, it still fits. 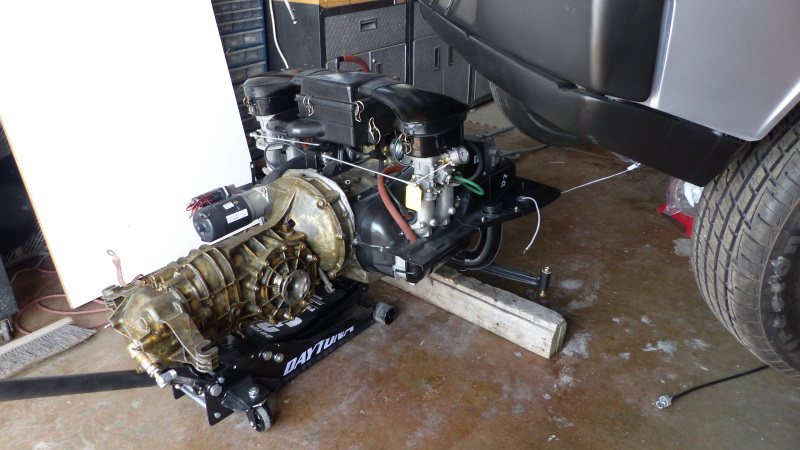 https://www.youtube.com/watch?v=Z-8RKmLa_xQ That was also the moment of maximum stupidity. Note that I'm preparing to roll the whole package under the car with carbs and air cleaner intact. What a greedy dumbass. Bear in mind that it has been 35 years since I jacked an engine into the belly of a 914 and my technique was rusty to say the least. I also never had a jack capable of sticking the ass of the car so high it looked like it was doing Downward Dog. And I've never installed one with dual 40IDFs. This was a bad combo of too much clearance, too much angle, and not enough brains. That is to say, it was a fight that included removing the air box under less than ideal conditions. Getting the right carb hung up on the chassis and mangling my lovely housing a bit before having to yank the carb off under REALLY less than ideal conditions, and having one helluva time jacking the engine high enough to secure the mounts. Thanks to my wife for helping out through the whole deal. Eventually, I prevailed. (IMG:style_emoticons/default/piratenanner.gif) 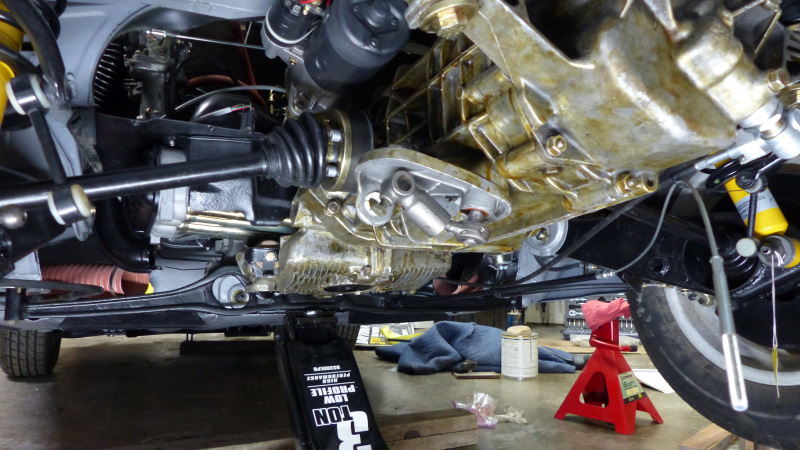 Still a lot of work to do under there but a great milestone that left me beat by the end of the day. How does it look from the topside though? Pretty damn badass, if you ask me. (IMG:style_emoticons/default/aktion035.gif) (IMG:style_emoticons/default/shades.gif) 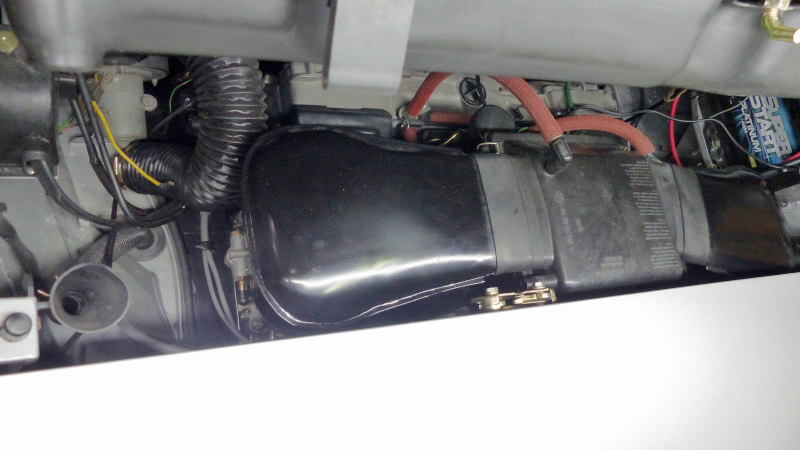 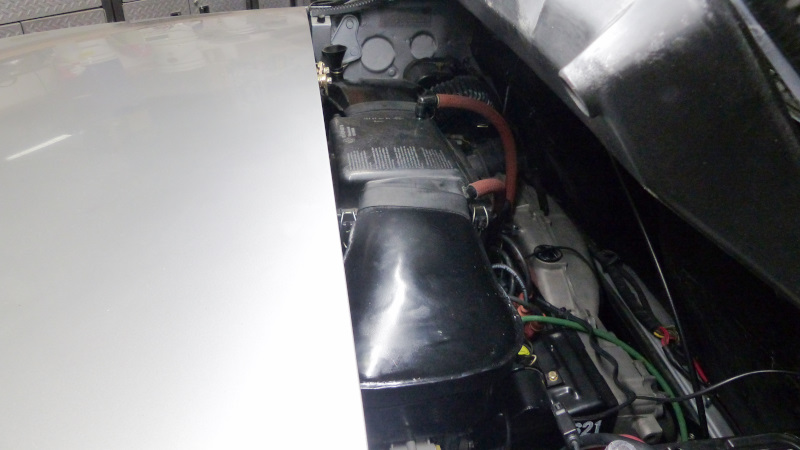 It's not all sunshine and baked potatoes in paradise though. There is a MAJOR problem.The trunk torsion rods interfere with the right carb housing preventing it from lining up to latch. Also, the engine lid won't close! The crank case breather port on top interferes with the rain tray. Both can be fixed. At a minimum, I'll have to do a fairly major rework of the right carb housing. However, if I have to lower the whole assembly, it will take some really major rework. I'll get it done though. (IMG:style_emoticons/default/beerchug.gif) |
|
|
|
| Dion |
Mar 9 2021, 05:32 AM
Post
#1858
|
|
RN Group: Members Posts: 2,839 Joined: 16-September 04 From: Audubon,PA Member No.: 2,766 Region Association: MidAtlantic Region |
An all day affair to be sure, BUT it’s in! A major milestone indeed.
Congrats. So you have a little tweaking to do. What ever you come up with I know it will look factory. Nice job man. (IMG:style_emoticons/default/beerchug.gif) |
|
|
|
| Superhawk996 |
Mar 9 2021, 07:10 AM
Post
#1859
|
|
914 Guru Group: Members Posts: 6,966 Joined: 25-August 18 From: Woods of N. Idaho Member No.: 22,428 Region Association: Galt's Gulch |
QUOTE(bbrock @ Mar 8 2021, 08:34 PM) My pushrod tubes are not all fancy like @Superhawk996 's but I like 'em anyway (IMG:style_emoticons/default/smile.gif) . If they aren't dull grey zinc, rust, or black oil dirt covered, they are considered fancy. Especially so if they are shinny yellow chromate colored. So good to see the engine in it. Great Job. (IMG:style_emoticons/default/first.gif) You're not too far from (IMG:style_emoticons/default/driving.gif) now! |
|
|
|
| Cairo94507 |
Mar 9 2021, 07:57 AM
Post
#1860
|
|
Michael Group: Members Posts: 10,297 Joined: 1-November 08 From: Auburn, CA Member No.: 9,712 Region Association: Northern California |
Congratulations on getting the engine & transaxle back into your car. Major milestone to be celebrated for sure. (IMG:style_emoticons/default/beerchug.gif)
|
|
|
|
|
1 User(s) are reading this topic (1 Guests and 0 Anonymous Users)
0 Members:

|
Lo-Fi Version | Time is now: 19th April 2025 - 11:43 PM |
Invision Power Board
v9.1.4 © 2025 IPS, Inc.