|
|
|
Porsche, and the Porsche crest are registered trademarks of Dr. Ing. h.c. F. Porsche AG.
This site is not affiliated with Porsche in any way. Its only purpose is to provide an online forum for car enthusiasts. All other trademarks are property of their respective owners. |
|
|

  |

| bbrock |
 Mar 10 2021, 06:56 PM Mar 10 2021, 06:56 PM
Post
#1881
|
|
914 Guru  Group: Members Posts: 5,269 Joined: 17-February 17 From: Montana Member No.: 20,845 Region Association: Rocky Mountains |
QUOTE(barefoot @ Mar 10 2021, 05:13 PM)  Test Stand ?? how about a couple cinder blocks some 2x6, and a 4x4. That's pretty much what I would have done only I was looking at strapping it to a pallet. There's still some work involved there with switches, fuel pump etc. and I'm lazy. |
   |

 
|
| raynekat |
Mar 10 2021, 09:52 PM
Post
#1882
|
|
Advanced Member Group: Members Posts: 2,169 Joined: 30-December 14 From: Coeur d'Alene, Idaho Member No.: 18,263 Region Association: Pacific Northwest |
Checked out your latest updates and have to say....
My 4 year old twins were laughing up a storm at all the different emoji's on this thread. They didn't care that much about what you were doing (hey, they're four), but were chuckling up a storm about all the emoji's. Well done there Mr. Mad Scientist. |
|
|
|
| bbrock |
Mar 24 2021, 08:55 PM
Post
#1883
|
|
914 Guru Group: Members Posts: 5,269 Joined: 17-February 17 From: Montana Member No.: 20,845 Region Association: Rocky Mountains |
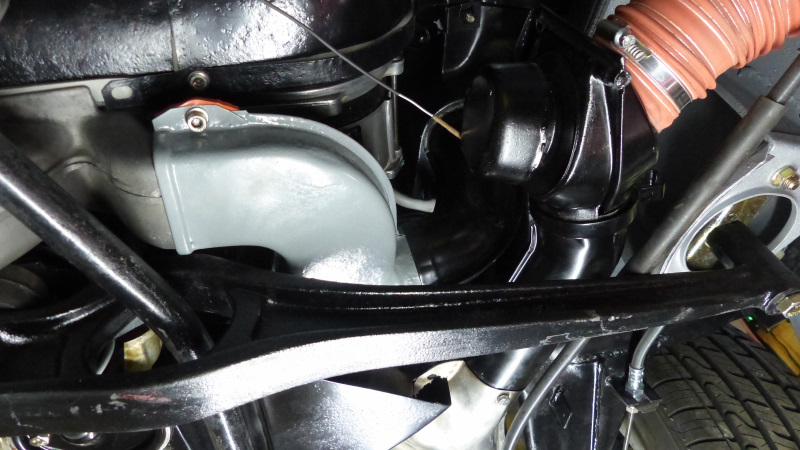
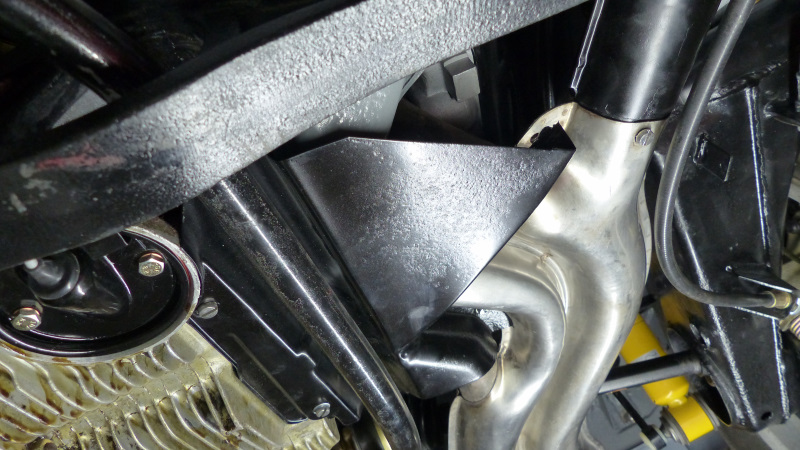
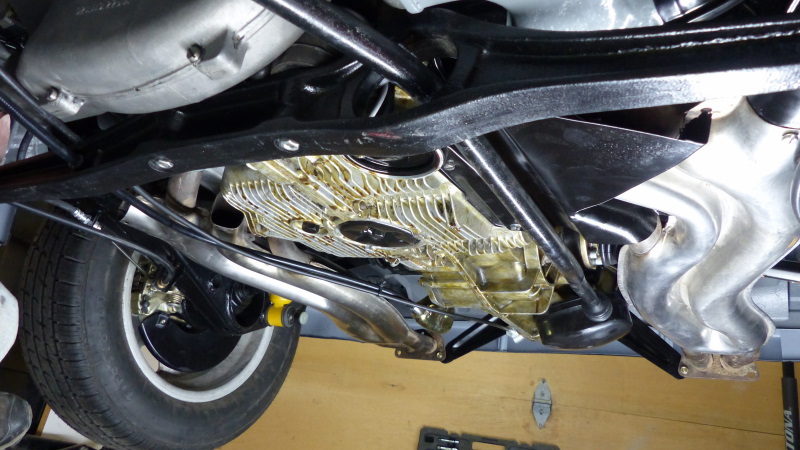
QUOTE(raynekat @ Mar 10 2021, 08:52 PM) Checked out your latest updates and have to say.... My 4 year old twins were laughing up a storm at all the different emoji's on this thread. They didn't care that much about what you were doing (hey, they're four), but were chuckling up a storm about all the emoji's. Well done there Mr. Mad Scientist. I'm overdue for an update, but first, a special emoji for the twins @raynekat . This one make me chuckle (IMG:style_emoticons/default/pain30.gif) Now back to business. With the engine hanging under the chassis, I was finally able to set the ride height. I started by adjusting the front to factory spec. That required re-indexing to get it up high enough, but no biggie. Whoa! it looked like a rally racer at that height so I dialed it back down about 12mm. I don't want to go too low because I have that 3 miles of dirt road between my house and nearest pavement. The rear was low riding so I pulled the shocks and adjusted the perches up a click. 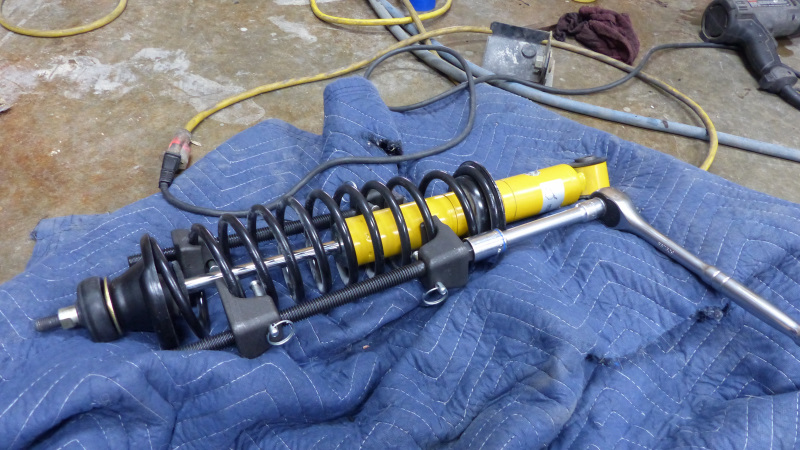 That gave me about 7" of clearance under the rockers and I think looks pretty good. This pic makes it look a little nose-up but it's level. 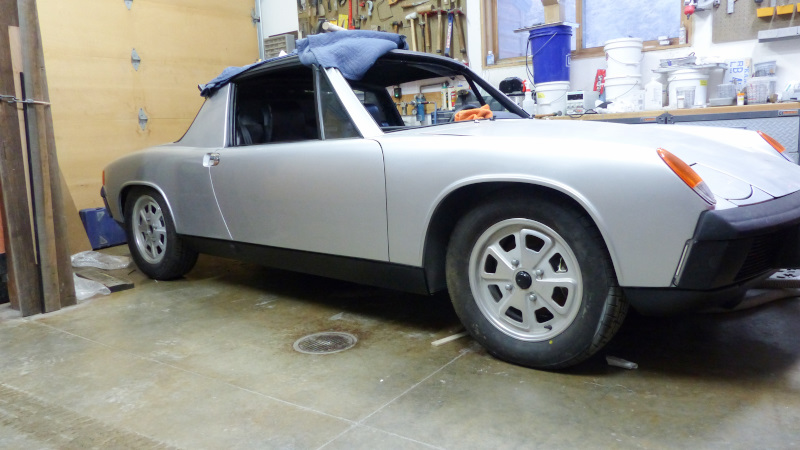 Then I turned back arse end. I had to move the whole drive train rearward about a quarter inch. That was easy enough to do by loosening the mounts and just pulling it back. The is was a matter of tuning up the engine bay seals. The rear seal had me scratching my head a bit until I figured out you need to pull a stretch on the seal to draw it down around the rear tin. 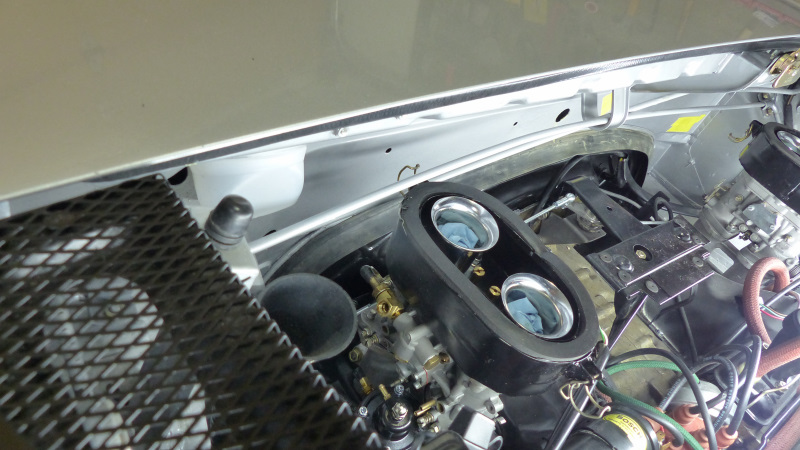 Then some final trimming on the other seals. I know you can use hog rings to pull the front corners together but after trimming, they were close enough I opted for another way. I gooped in 3M Weatherstrip adhesive into the joints and clamped them together to cure overnight. 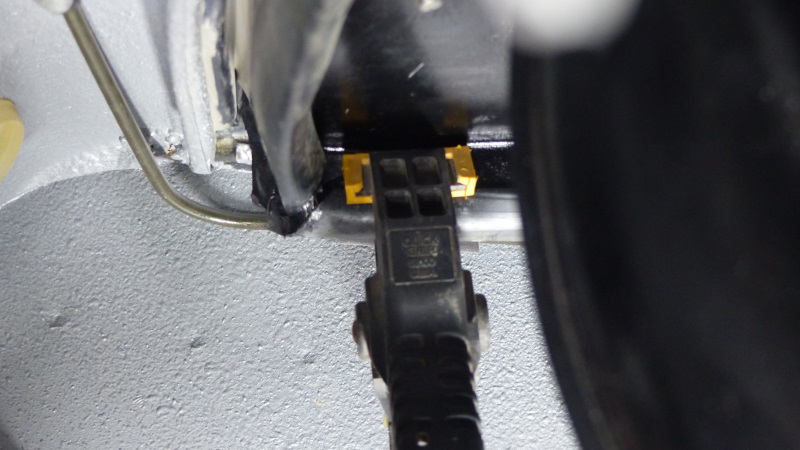 I did the same at the rear corners but will spare you the pic. Then a bunch of bits and bobs to move closer to a working machine. My genius plan for mounting the starter relay hit a snag. How are you going to access that you dumbass? 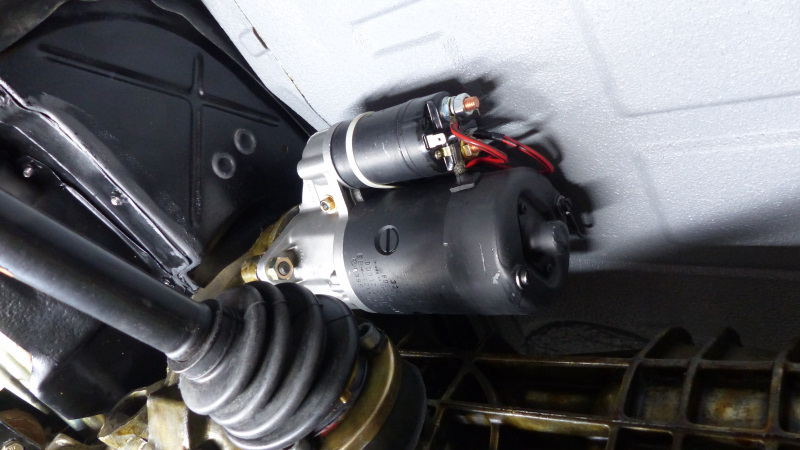 Fixed it. 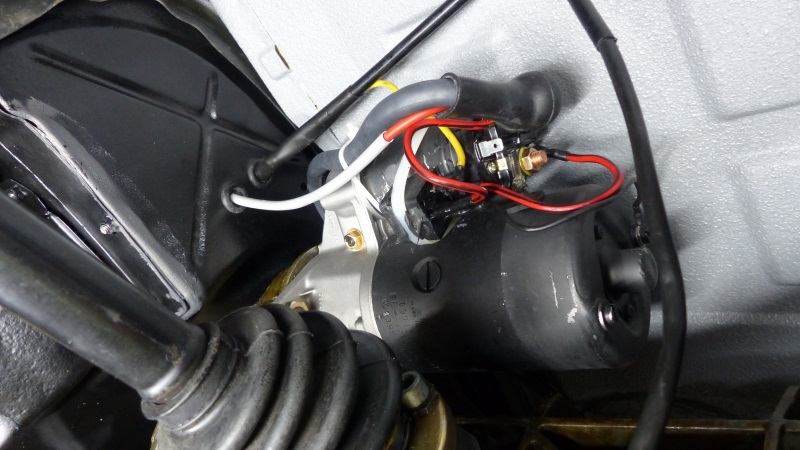 That starter won't work right without this critical part though - I'm just sure of it. 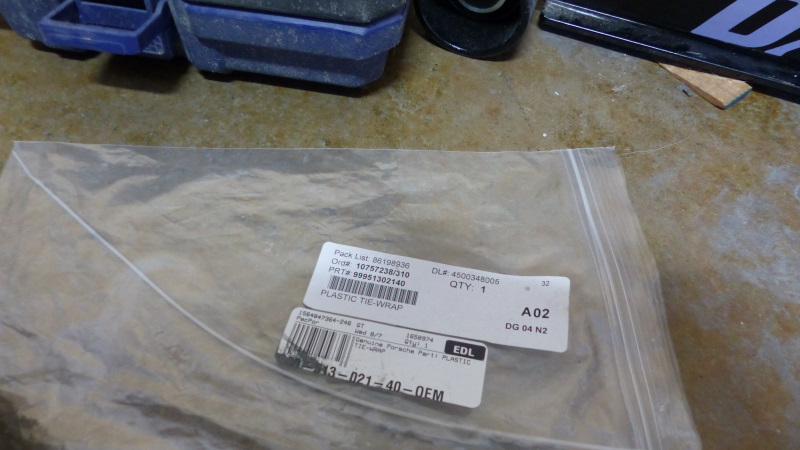 Yeah, that's the stuff. 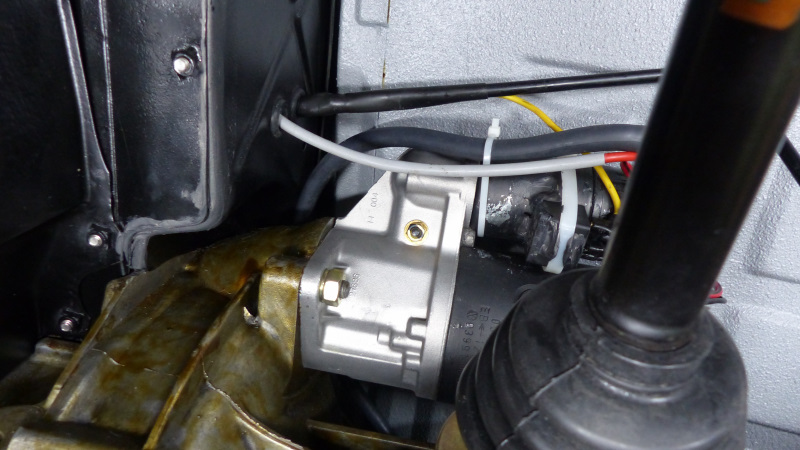 Now a bunch of other stuff. 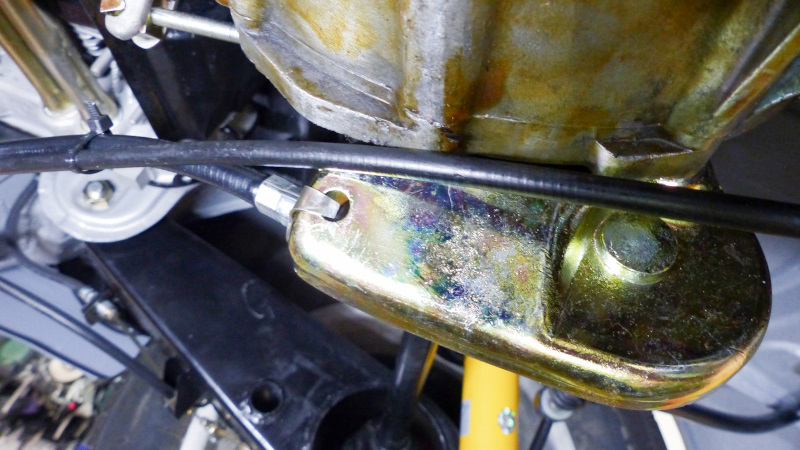 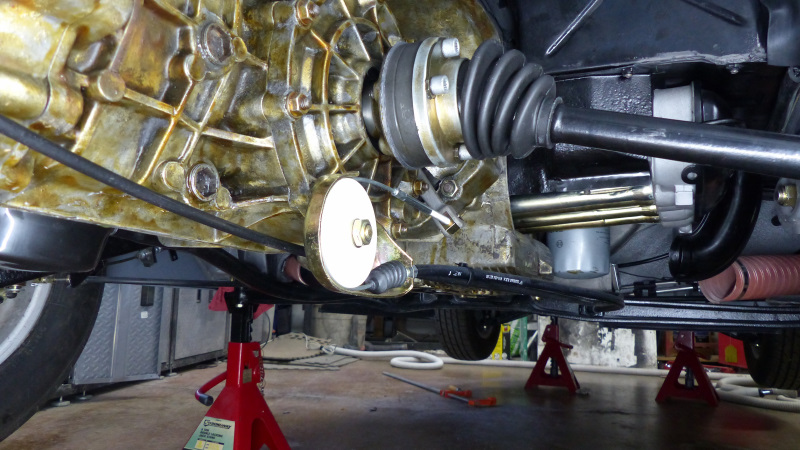 The shift linkage seems to be adjusted well, but I'll wait until a test drive before I secure the cover with the band. 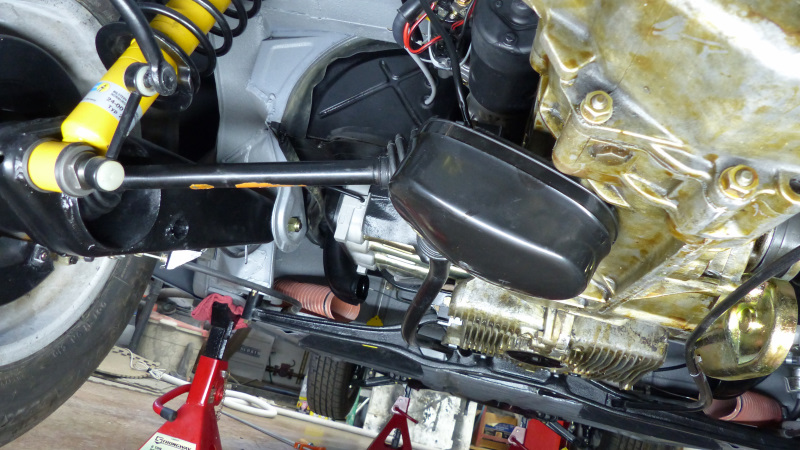 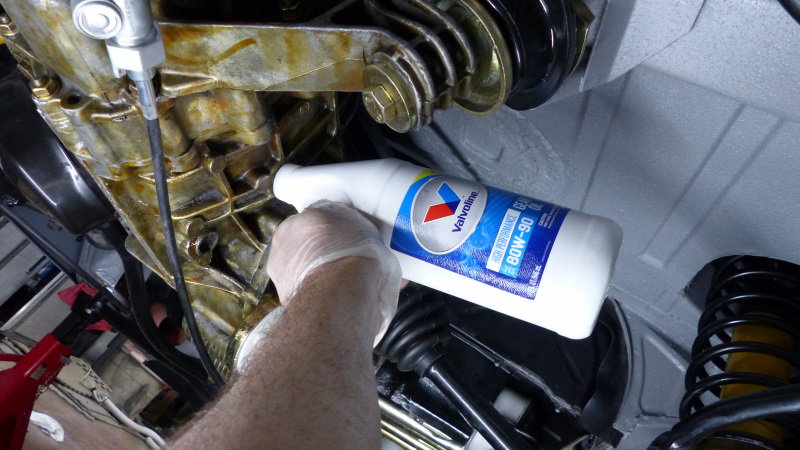 |
|
|
|
| Dion |
Mar 24 2021, 09:20 PM
Post
#1884
|
|
RN Group: Members Posts: 2,839 Joined: 16-September 04 From: Audubon,PA Member No.: 2,766 Region Association: MidAtlantic Region |
Damn ,you put a few hours in. Was missing this. Is that coating on the trans dry? Or is it like an oil? Nice golden hue. 3 miles of dirt road! You need to get some period correct
rallye tyres! Looking great as usual. (IMG:style_emoticons/default/clap.gif) |
|
|
|
| KELTY360 |
Mar 24 2021, 09:43 PM
Post
#1885
|
|
914 Neferati Group: Members Posts: 5,121 Joined: 31-December 05 From: Pt. Townsend, WA Member No.: 5,344 Region Association: Pacific Northwest |
Yowsa, you're adding fluids! Looks like store bought; I'm surprised you're not concocting your own personal brew of 90wt. Well, I guess you've got to cut corners somewhere.
BTW, I'm loving the body color sail and wartless front fender. Ride height looks perfect. |
|
|
|
| bbrock |
Mar 24 2021, 10:20 PM
Post
#1886
|
|
914 Guru Group: Members Posts: 5,269 Joined: 17-February 17 From: Montana Member No.: 20,845 Region Association: Rocky Mountains |
QUOTE(Dion @ Mar 24 2021, 08:20 PM) Damn ,you put a few hours in. Was missing this. Is that coating on the trans dry? Or is it like an oil? Nice golden hue. 3 miles of dirt road! You need to get some period correct rallye tyres! Looking great as usual. (IMG:style_emoticons/default/clap.gif) Thanks man. That coating (Tectyl) dries to a barely tacky wax. I can work all day under the car without gloves and my hands are barely dirty. Moving on... I had one last grungy job to complete. I saved the best for the last. 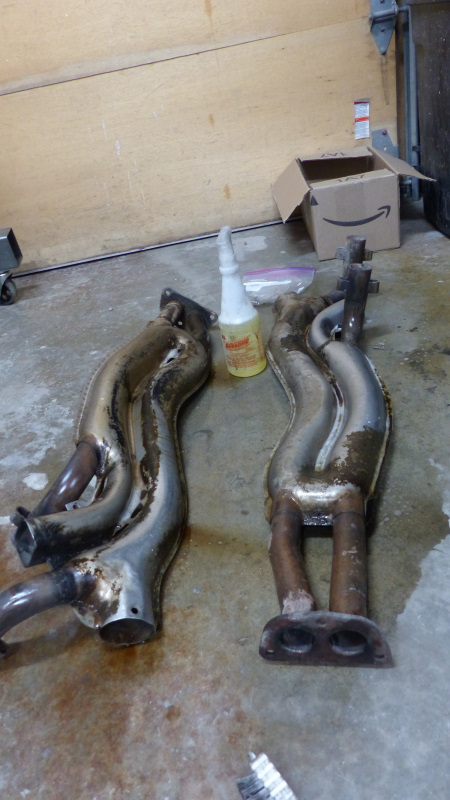 Several hours of degreaser, scrubbing and scraping off years of baked on oil and grime, followed by filing the mating surfaces to make sure they were perfectly aligned and they looked like this. 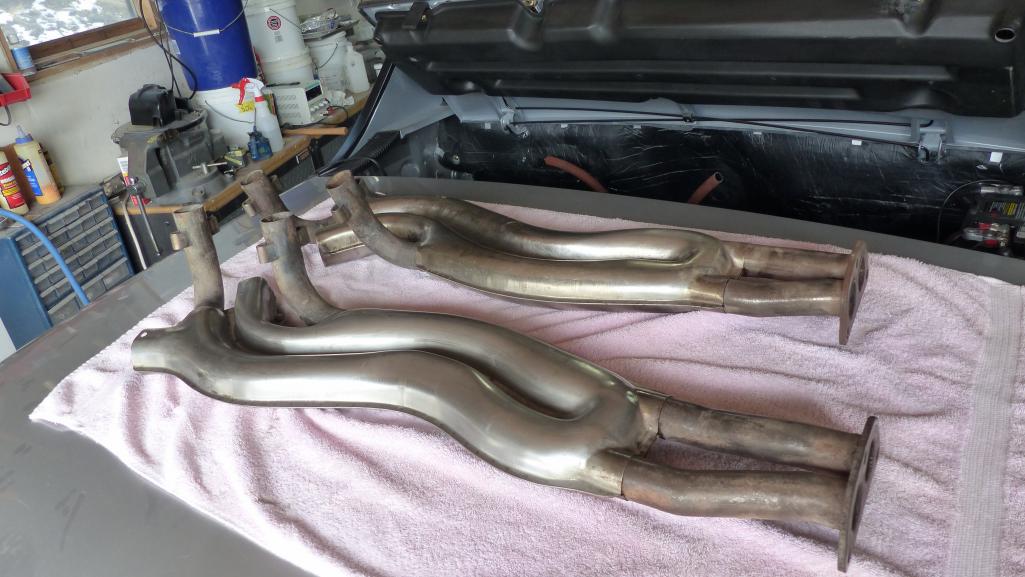 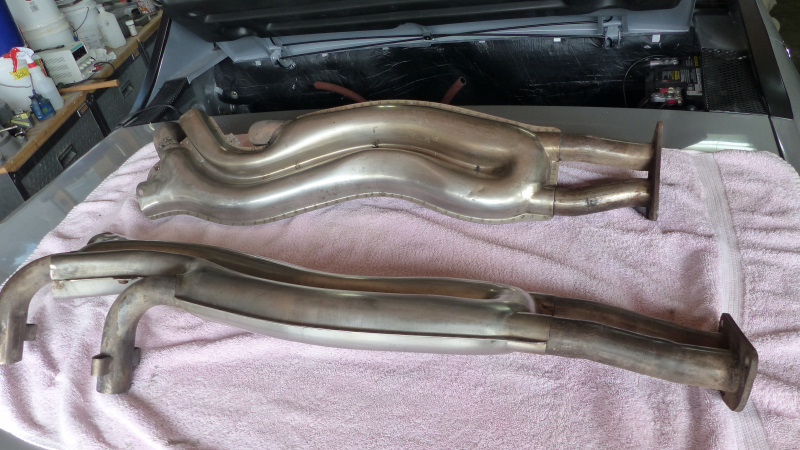 Now to put them on. There are several old threads with Cap'n Krusty explaining the exhaust nuts that Porsche used on our cars. This one is the best. They are again what Porsche calls "mid-grip" nuts that look like deep M8 nuts with helicoil inserts. They are still available if you want to pay about $80 for a set of nuts. Too rich for my blood so I decided to get clever. I ordered a bunch of of deep M8 nuts from Belmetric with the idea of drilling them out and inserting Helicoils, but after doing one, it didn't have the grip that the "mid-grip" transmission nuts have so I decide to use the rest of the nuts as is. I think the inserts Porsche uses much be slightly oversized to add just a bit of extra grip. We'll see how these hold. Here's the one I Helicoiled next to an unmolested version. 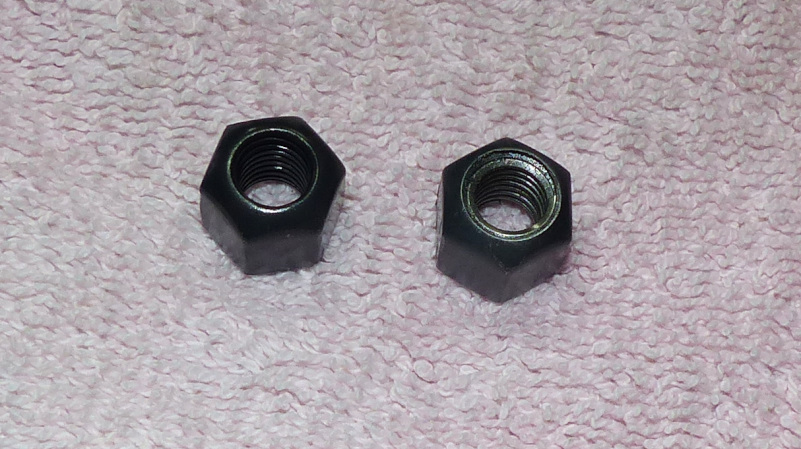 Got my kit ready for the installation. The RTV is for just a very thin smear on the copper gaskets so they stay in the heads during installation. 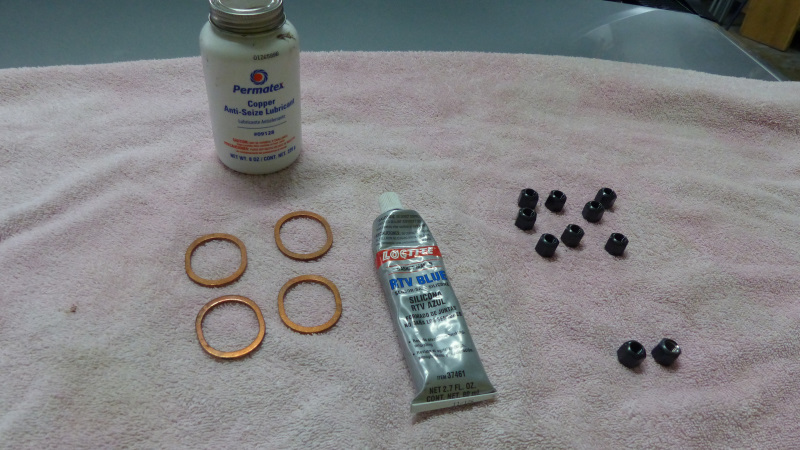 Gaskets in place and a bit of copper anti seize on the studs. 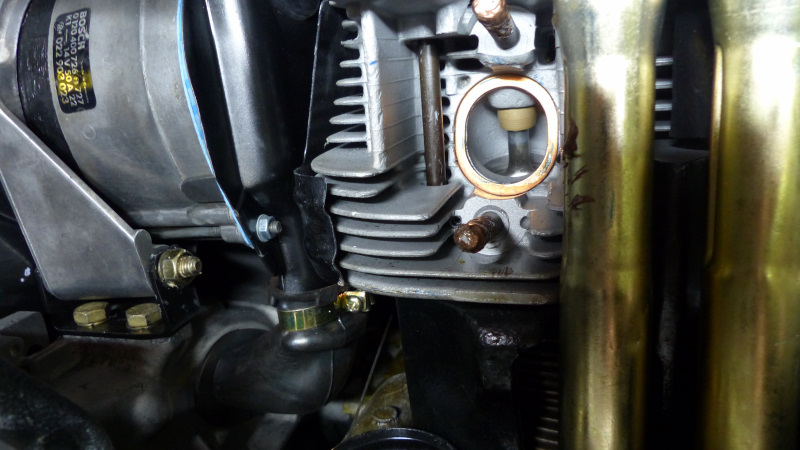 Exchangers and a bunch of heater parts. Attached image(s) 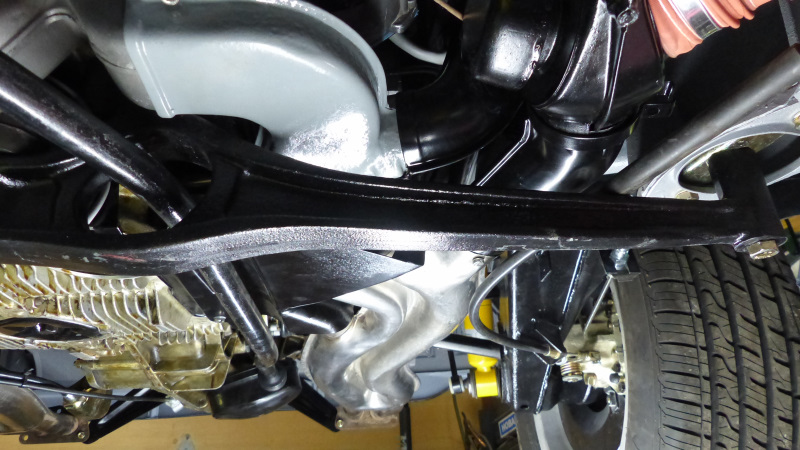
|
|
|
|
| bbrock |
Mar 24 2021, 10:24 PM
Post
#1887
|
|
914 Guru Group: Members Posts: 5,269 Joined: 17-February 17 From: Montana Member No.: 20,845 Region Association: Rocky Mountains |
   And lastly. 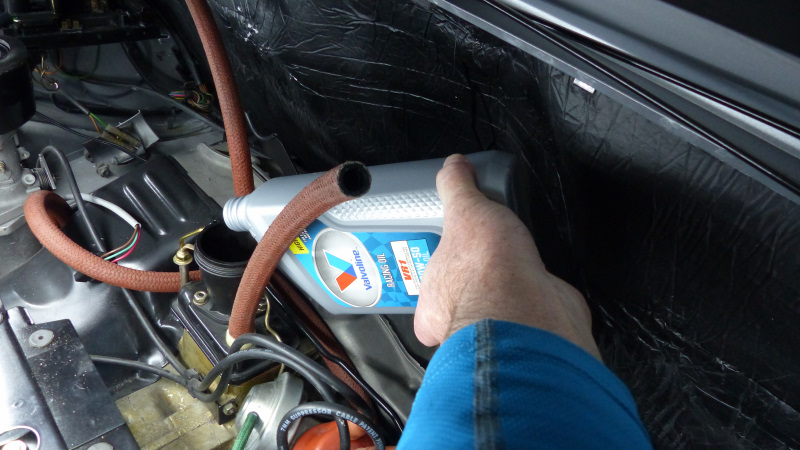 The plan is to break in the cam with VR1 in the case. Then I'll change the oil and filter, recheck the valves, and refill with Driven Break-in oil for the first few hundred miles of break in. For now, the important thing is - NO LEAKS! (IMG:style_emoticons/default/piratenanner.gif) |
|
|
|
| mb911 |
Mar 25 2021, 05:56 AM
Post
#1888
|
|
914 Guru Group: Members Posts: 7,544 Joined: 2-January 09 From: Burlington wi Member No.: 9,892 Region Association: Upper MidWest |
Looks great.
|
|
|
|
| Cairo94507 |
Mar 25 2021, 07:31 AM
Post
#1889
|
|
Michael Group: Members Posts: 10,297 Joined: 1-November 08 From: Auburn, CA Member No.: 9,712 Region Association: Northern California |
|
|
|
|
| Jamie |
Mar 25 2021, 07:59 AM
Post
#1890
|
|
Senior Member Group: Members Posts: 1,093 Joined: 13-October 04 From: Georgetown,KY Member No.: 2,939 Region Association: South East States |
QUOTE(bbrock @ Mar 24 2021, 08:24 PM) And lastly. The plan is to break in the cam with VR1 in the case. Then I'll change the oil and filter, recheck the valves, and refill with Driven Break-in oil for the first few hundred miles of break in. For now, the important thing is - NO LEAKS! (IMG:style_emoticons/default/piratenanner.gif) After all this beautifully detailed work I can't believe you have to drive up and down a long dusty gravel driveway! My sympathies! (IMG:style_emoticons/default/hissyfit.gif) |
|
|
|
| Cairo94507 |
Mar 25 2021, 08:44 AM
Post
#1891
|
|
Michael Group: Members Posts: 10,297 Joined: 1-November 08 From: Auburn, CA Member No.: 9,712 Region Association: Northern California |
Man, I totally agree. It would be breaking my heart to have to do that every time the car goes for a drive. But we do what we have to to let others enjoy our cars. (IMG:style_emoticons/default/beerchug.gif)
|
|
|
|
| FlacaProductions |
Mar 25 2021, 10:19 AM
Post
#1892
|
|
Senior Member Group: Members Posts: 1,901 Joined: 24-November 17 From: LA Member No.: 21,628 Region Association: Southern California |
So....about that rain tray....
|
|
|
|
| 930cabman |
Mar 25 2021, 10:27 AM
Post
#1893
|
|
Advanced Member Group: Members Posts: 4,044 Joined: 12-November 20 From: Buffalo Member No.: 24,877 Region Association: North East States |
Can you smell victory? Lookin great, thanks for posting
|
 |
|
| bbrock |
Mar 25 2021, 01:31 PM
Post
#1894
|
|
914 Guru Group: Members Posts: 5,269 Joined: 17-February 17 From: Montana Member No.: 20,845 Region Association: Rocky Mountains |
QUOTE(Cairo94507 @ Mar 25 2021, 07:44 AM) Man, I totally agree. It would be breaking my heart to have to do that every time the car goes for a drive. But we do what we have to to let others enjoy our cars. (IMG:style_emoticons/default/beerchug.gif) You guys (IMG:style_emoticons/default/rolleyes.gif) It'll be fine. These cars are tough. It just a windy 20 mph road (except for a couple of assholes) so a nice slow tool through a canyon to warm her up before hitting the pavement. And yes, she will be driven in the rain too. QUOTE(FlacaProductions @ Mar 25 2021, 09:19 AM) So....about that rain tray.... (IMG:style_emoticons/default/splat.gif) (IMG:style_emoticons/default/chair.gif) QUOTE(930cabman @ Mar 25 2021, 09:27 AM) Can you smell victory? Lookin great, thanks for posting I smell oil. Is that the same? |
|
|
|
| raynekat |
Mar 25 2021, 05:07 PM
Post
#1895
|
|
Advanced Member Group: Members Posts: 2,169 Joined: 30-December 14 From: Coeur d'Alene, Idaho Member No.: 18,263 Region Association: Pacific Northwest |
OK....now go park it in the living room.
Too nice to drive or chase moose with. (IMG:style_emoticons/default/wink.gif) |
|
|
|
| Jamie |
Mar 25 2021, 06:21 PM
Post
#1896
|
|
Senior Member Group: Members Posts: 1,093 Joined: 13-October 04 From: Georgetown,KY Member No.: 2,939 Region Association: South East States |
QUOTE(Jamie @ Mar 25 2021, 05:59 AM) QUOTE(bbrock @ Mar 24 2021, 08:24 PM) And lastly. The plan is to break in the cam with VR1 in the case. Then I'll change the oil and filter, recheck the valves, and refill with Driven Break-in oil for the first few hundred miles of break in. For now, the important thing is - NO LEAKS! (IMG:style_emoticons/default/piratenanner.gif) After all this beautifully detailed work I can't believe you have to drive up and down a long dusty gravel driveway! My sympathies! (IMG:style_emoticons/default/hissyfit.gif) This has been a monumental build thread, your skills are well evident in your high quality photos as illustration for many others. That comment about your photos is from a professional photographer, retired! Many thanks for your journey and commentary. (IMG:style_emoticons/default/pray.gif) |
|
|
|
| bbrock |
Mar 27 2021, 11:24 PM
Post
#1897
|
|
914 Guru Group: Members Posts: 5,269 Joined: 17-February 17 From: Montana Member No.: 20,845 Region Association: Rocky Mountains |
QUOTE(Jamie @ Mar 25 2021, 05:21 PM) This has been a monumental build thread, your skills are well evident in your high quality photos as illustration for many others. That comment about your photos is from a professional photographer, retired! Many thanks for your journey and commentary. (IMG:style_emoticons/default/pray.gif) I appreciate the high praise but I have to say the compliment on my photos made me laugh. I have a reputation among my friends for the crappy pics I take. I just point and hope for the best. (IMG:style_emoticons/default/biggrin.gif) Here's a few more crappy photos. Last week I went to hook up hoses to the fuel vapor circuit and discovered I didn't have grommets on the plastic tube where they entered the engine bay. I had forgotten that 914Rubber's full restoration kit only included 2 of those grommets and you need 4 for a full restoration. 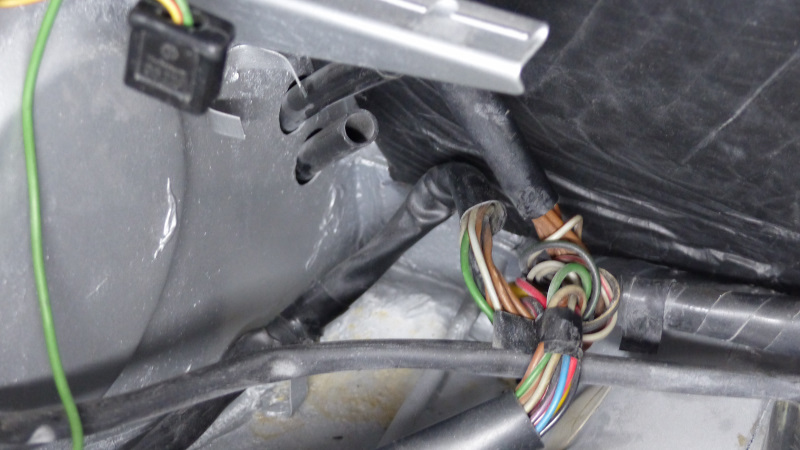 I ordered them over the weekend and they were here in a couple of days. 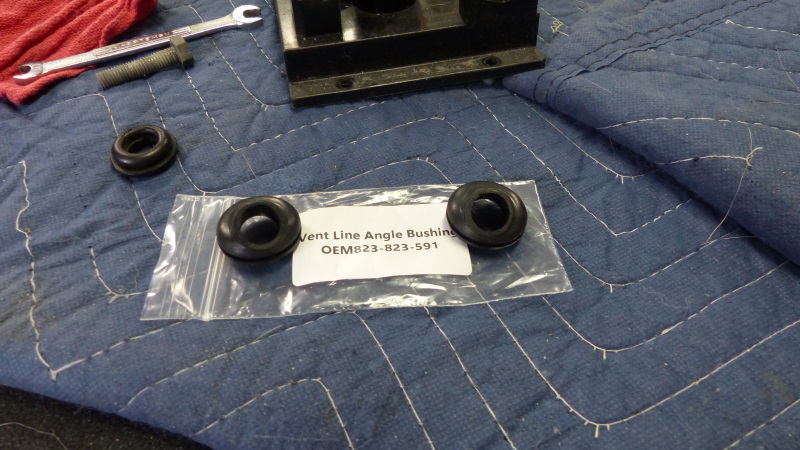 Forgetting these meant I had to pull the relay board and heater blower, plus the wheel to access the outside. After clearing the way, the install was pretty easy and I got things buttoned up, but the whole affair chewed up the whole morning. 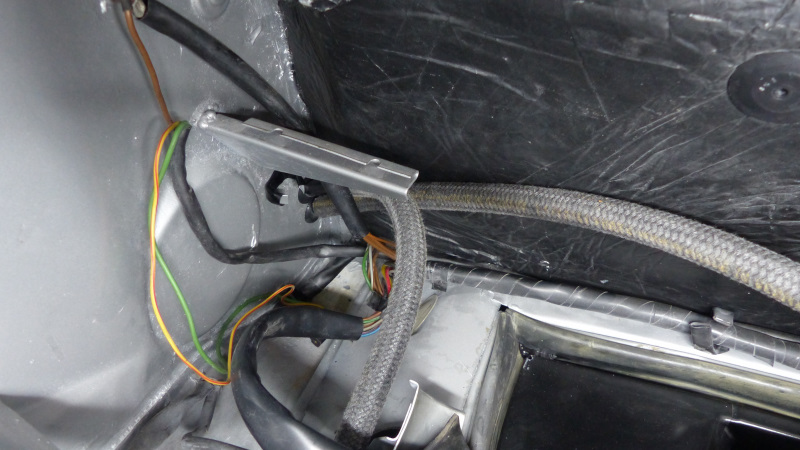 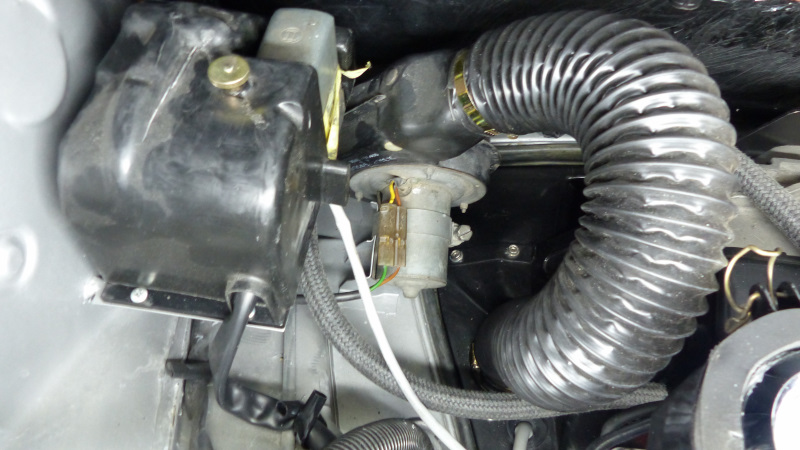 After lunch I set about on a chore I have not been looking forward to - torquing down the ball joints. I bought a 2-1/4" 4WD axle spindle socket at the FLAPS over a year ago for the task. It fit the castellated nut well but 180 ft. lbs. is a lot. Despite using my jack to hold pressure on the torque wrench, it kept popping out and I couldn't quick get the satisfying click at 180. I finally figure out that your REALLY need to put pressure on with the jack. Compressing the shock all the way to just about the point your are about to lift the car was the ticket. Then it was easy to reef it down for that nice *click*. 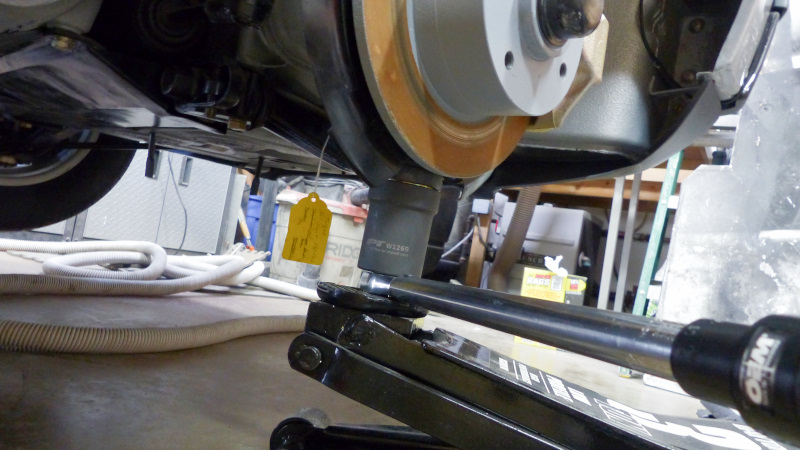 Then the lock plate bent into the tabs and cotter pin and this job was done! The other side went much easier once I had learned the trick. 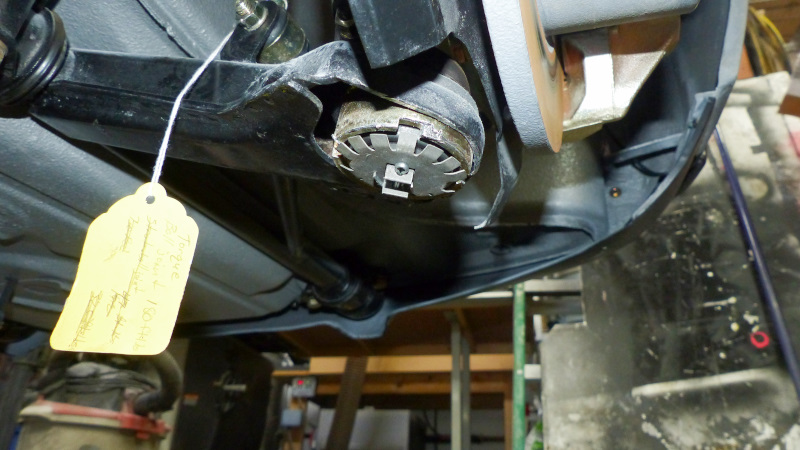 This pic is just gratuitous stamping porn. It's just so unnecessary and cool. 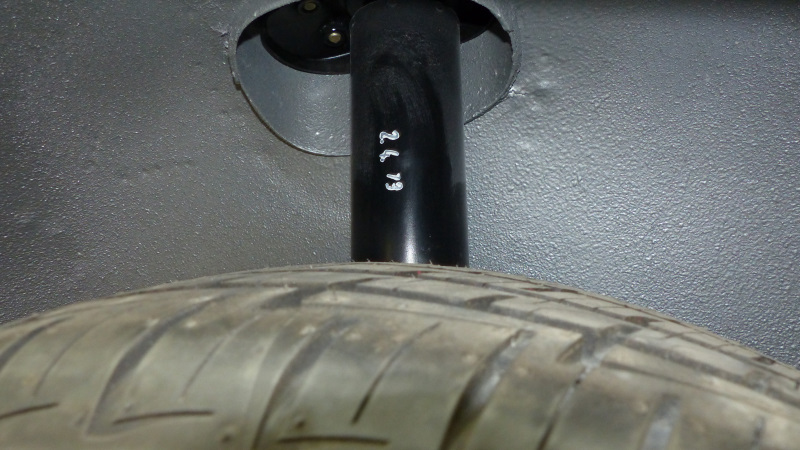 Ball joints secured, I then secured the tops. 57.9 ft-lbs. Not one tenth more or less (IMG:style_emoticons/default/biggrin.gif) 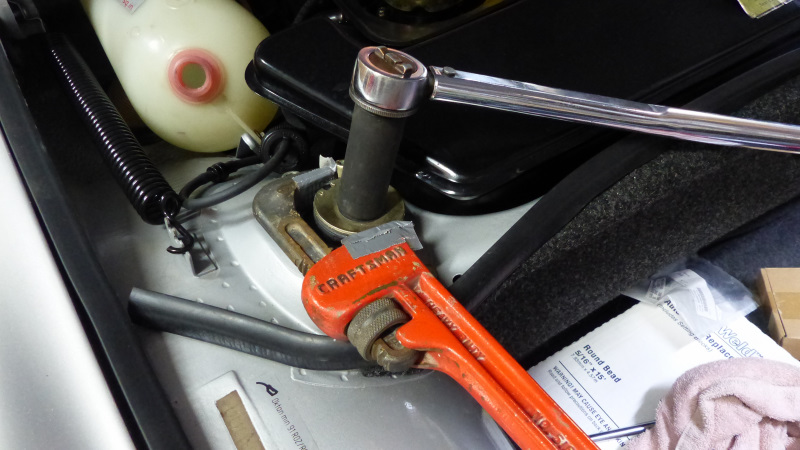 I ended the day with a stumbling block. I hooked up the wires to the oil pressure and temp senders and turned on the key. The temp gauge jumps to attention but no green light on the combo gauge. Troubleshooting was one of those irritating head scratchers because there were two problems. The first was that the LED bulbs I bought don't fit right in the dual post sockets in the gauges. I'm not exactly sure what the problem is but neither the oil pressure or low fuel lights were doing their thing. I had to fish around for some incandescent bulbs and those worked, but the green oil light would only come on if I connected the wire in the engine bay direct to ground. I pulled the switch and tried cleaning it with brake fluid. Continuity from the wire terminal to the body was glitchy though so a new switch is on order. I was hoping to set the static timing tomorrow and see if I could get oil pressure, but that's all on hold since the distributor has to be pulled to install the new switch. Not sure I'll get much done tomorrow. We'll see. |
|
|
|
| 914werke |
Mar 27 2021, 11:46 PM
Post
#1898
|
|
"I got blisters on me fingers" Group: Members Posts: 11,211 Joined: 22-March 03 From: USofA Member No.: 453 Region Association: Pacific Northwest |
|
|
|
|
| dr.tim |
Mar 28 2021, 07:36 AM
Post
#1899
|
|
Member Group: Members Posts: 101 Joined: 17-December 11 From: Butte, America Member No.: 13,907 Region Association: Rocky Mountains |
WOW! Getting close.
|
|
|
|
| Superhawk996 |
Mar 28 2021, 05:28 PM
Post
#1900
|
|
914 Guru Group: Members Posts: 6,965 Joined: 25-August 18 From: Woods of N. Idaho Member No.: 22,428 Region Association: Galt's Gulch |
QUOTE(bbrock @ Mar 25 2021, 03:31 PM) It just a windy 20 mph road (except for a couple of assholes) . . . I didn't think you could see when I was driving up there! (IMG:style_emoticons/default/idea.gif) Getting so close (IMG:style_emoticons/default/aktion035.gif) |
|
|
|
|
1 User(s) are reading this topic (1 Guests and 0 Anonymous Users)
0 Members:

|
Lo-Fi Version | Time is now: 19th April 2025 - 05:51 PM |
Invision Power Board
v9.1.4 © 2025 IPS, Inc.