|
|

|
Porsche, and the Porsche crest are registered trademarks of Dr. Ing. h.c. F. Porsche AG.
This site is not affiliated with Porsche in any way. Its only purpose is to provide an online forum for car enthusiasts. All other trademarks are property of their respective owners. |
|
|
  |
| aggiezig |
 Aug 1 2018, 07:46 AM Aug 1 2018, 07:46 AM
Post
#481
|
|
Porsche Wannabe   Group: Members Posts: 319 Joined: 13-January 16 From: Los Angeles, CA Member No.: 19,557 Region Association: Southern California 
|
Great progress, keep on keepin' on with the blasting. I've been there too with the HF blaster pot and I can vouch for how little fun it is.
Some things I learned in the process...
Lastly, Godspeed. This job sucks but it looks like you are making great time. |
| bbrock |
 Aug 1 2018, 09:36 AM Aug 1 2018, 09:36 AM
Post
#482
|
|
914 Guru      Group: Members Posts: 5,269 Joined: 17-February 17 From: Montana Member No.: 20,845 Region Association: Rocky Mountains 
|
Great progress, keep on keepin' on with the blasting. I've been there too with the HF blaster pot and I can vouch for how little fun it is. Some things I learned in the process...
Great tips, thanks! I'm down to just the rear wheel wells and cockpit left to go. Paint is thin in the cockpit so should go quickly. A few responses: - Coal slag - I saw youtube videos where people said the slag left a rougher texture. I tested mine on undercarriage areas that will get Raptor and couldn't tell any difference from the glass. Maybe because I was running at a low (40 psi) pressure? (IMG:style_emoticons/default/confused24.gif) Anyway, the slag got used up mostly on areas where Raptor will go. - Pressure - I'll try bumping mine up a bit. With the small nozzles that came with the blaster I found that about 40-60 psi at the pot worked best. But I've switched to larger nozzles so I'll bet more pressure could speed things up. - Nozzle - I picked up an HF deadman over the weekend. It has a larger nozzle which I like. The trigger spring is pretty stiff so tires the hand but not too bad. It doesn't shut the air flow off completely so you still need to shut off the media valve if you are going to stop for more than 15 seconds or so, but still, a big improvement over what can with the blaster. - Rubber hose - Yep, mine blew and scared the shit out of me when it popped. Luckily it had eroded where the tube bends coming out of the pot so I was able to just cut 8" off the end and reattach. Expect it to blow again but hoping I can get through the last of the job first. - Air - I am lucky and live in a dry climate. People complain about it getting "muggy" when relative humidity reaches 40%. I grew up in the humid Midwest so know how funny that is. So what I have is the longest line loop and drop I could fit in the compressor shed between the compressor and wall regulator. The wall regulator is a Sharpe drier which does a good job. I get about a teaspoon of water out after a day of spraying (more from the tank which is on an automatic purge). The only time I saw moisture in the little drier on the blaster was after forgetting to purge the Sharpe after several days of compressor use, and then only a few drops. I've had no problems with the blaster clogging except after recycling media with a fresh small nozzle. Window screen allows a few chunks too large to get through those tiny nozzles. Not a problem with the new nozzles I'm using. Before I paint, I'm thinking of replacing the copper line drop from the compressor with a length of coiled copper tubing to increase the drying capacity just for extra measure. - Hand held speed blaster - Great tip! I'll look into getting one because I'll have a lot of little spots to touch up after the main blasting is finished. Sounds a lot more convenient than the pot. Thanks again and enjoy your pretty blue car! Onward ho! |
| 76-914 |
 Aug 1 2018, 02:40 PM Aug 1 2018, 02:40 PM
Post
#483
|
|
Repeat Offender & Resident Subaru Antagonist           Group: Members Posts: 13,646 Joined: 23-January 09 From: Temecula, CA Member No.: 9,964 Region Association: Southern California 
|
Brent, I went thru 2 Horror Freight POS units before I found this place. I'm usually OK and settle with their "Not Quite as Good" products but I was so tired of clogged pick up tubes I thought I'd try them. I gutted my blast cabinet and used this kit they offer. OMG, what a HUGE difference. They have a sale 2-3 times a year and you can get 10%-20% discount. (IMG:style_emoticons/default/beerchug.gif)
http://www.tptools.com/USA-Cabinet-Gun-and...0.html?b=d*8026 |
| aggiezig |
 Aug 1 2018, 02:41 PM Aug 1 2018, 02:41 PM
Post
#484
|
|
Porsche Wannabe   Group: Members Posts: 319 Joined: 13-January 16 From: Los Angeles, CA Member No.: 19,557 Region Association: Southern California 
|
Brent, I went thru 2 Horror Freight POS units before I found this place. I'm usually OK and settle with their "Not Quite as Good" products but I was so tired of clogged pick up tubes I thought I'd try them. I gutted my blast cabinet and used this kit they offer. OMG, what a HUGE difference. They have a sale 2-3 times a year and you can get 10%-20% discount. (IMG:style_emoticons/default/beerchug.gif) http://www.tptools.com/USA-Cabinet-Gun-and...0.html?b=d*8026 TP makes great blasting equipment. I use their gun in my HF blasting cabinet. Miles better |
| bbrock |
 Aug 1 2018, 03:16 PM Aug 1 2018, 03:16 PM
Post
#485
|
|
914 Guru      Group: Members Posts: 5,269 Joined: 17-February 17 From: Montana Member No.: 20,845 Region Association: Rocky Mountains 
|
+1 on the TP gun. I thought I had posted about my CSOB mod but can't find it. My blasting cabinet is actually my neighbor's who loaned it to me as long as the project lasts. Not HF but the pickup tube sucked (well, actually DIDN'T suck... which sucked) although the gun and hose are pretty much the same as the TP design (maybe the same gun). So I modded the pickup by drilling and welding on a piece of tube I had laying around to replicate the TP design. Made a HUGE difference.
My blasting equipment: (IMG:http://www.914world.com/bbs2/uploads/post-20845-1524457665_thumb.jpg) Can't find a pic of my modded pickup, but it looks pretty much like this: (IMG:http://www.914world.com/bbs2/uploads/post-20845-1510777735.jpg) Before I get back to blasting parts in the cabinet, I'm going to install two under counter LED strip lights I picked up on clearance and enlarge the window. My neighbor will get back a much better cabinet than she lent me. (IMG:style_emoticons/default/beerchug.gif) |
| bbrock |
 Aug 15 2018, 09:53 AM Aug 15 2018, 09:53 AM
Post
#486
|
|
914 Guru      Group: Members Posts: 5,269 Joined: 17-February 17 From: Montana Member No.: 20,845 Region Association: Rocky Mountains 
|
I'm a little overdue on an update. I've been working my butt off on the car with little interesting to report so lack of motivation. The last couple weeks can be summed up with blasting, blasting and more blasting, and wiring, wiring, and more wiring. A few snags ordering the wrong parts to finish up harnesses, so that will be revealed in a later post. On Sunday, I finished my first round with the media blaster so the car is nearly naked. I need to do a bit more work on the roll bar and tail which I should finish this week, and strip portions of the right fenders with an abrasive wheel. I'm quite happy with the result.
Total bill for tools and consumables on the blasting was $380. That's a pretty good savings over having the car done elsewhere but you pay in other ways. Space was tight and lighting bad but here are some shots. Next task will be stripping out the remaining seam sealer and adhesive and blasting those areas. (IMG:style_emoticons/default/mad.gif) Before blasting the dash, I made a quick trace of the pattern for blackout spray around the vents. Why? I don't know. The factory did it so the car probably won't run right if I don't do it the same way. (IMG:style_emoticons/default/screwy.gif) 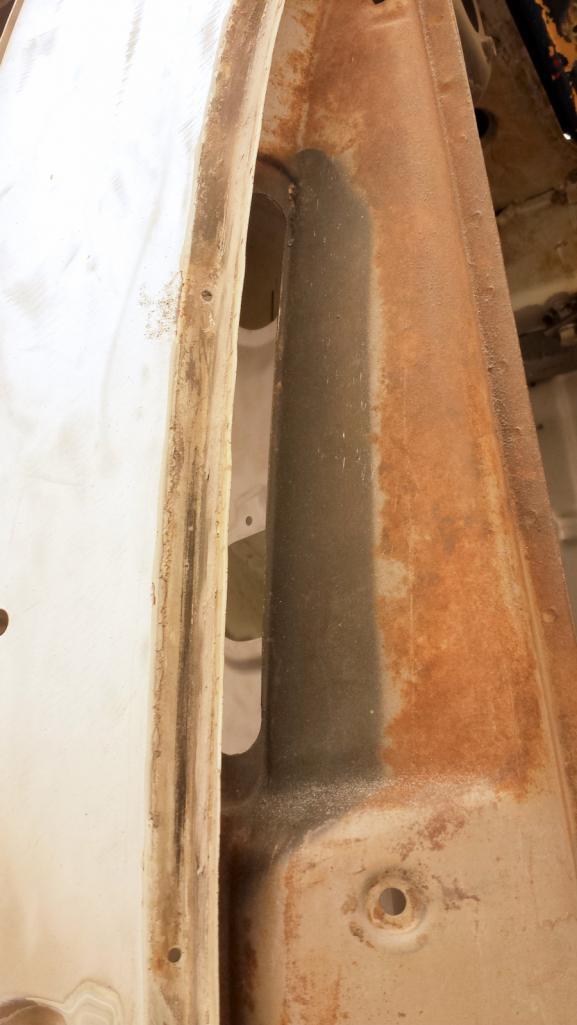 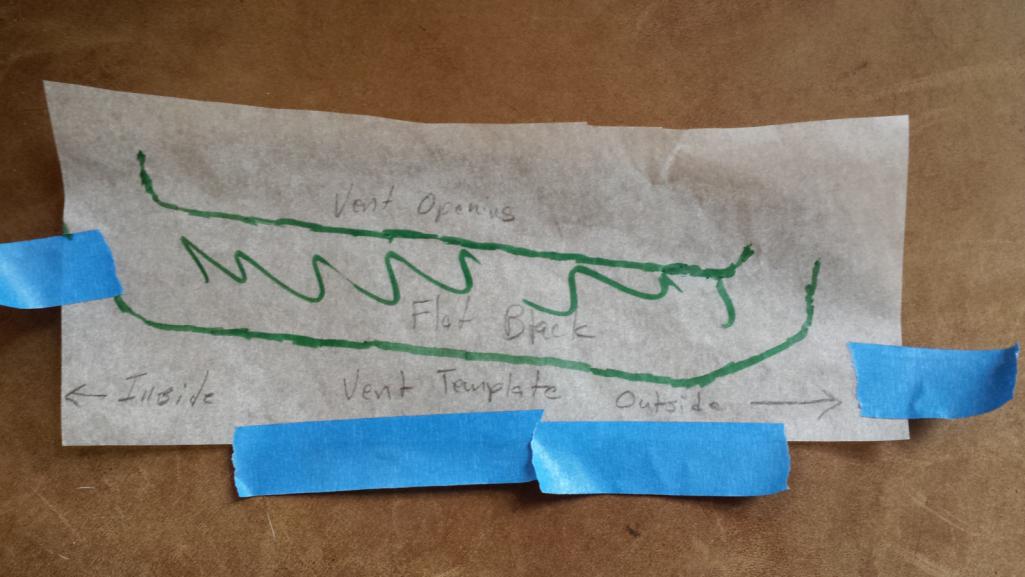 Nothing like a clean cabin. 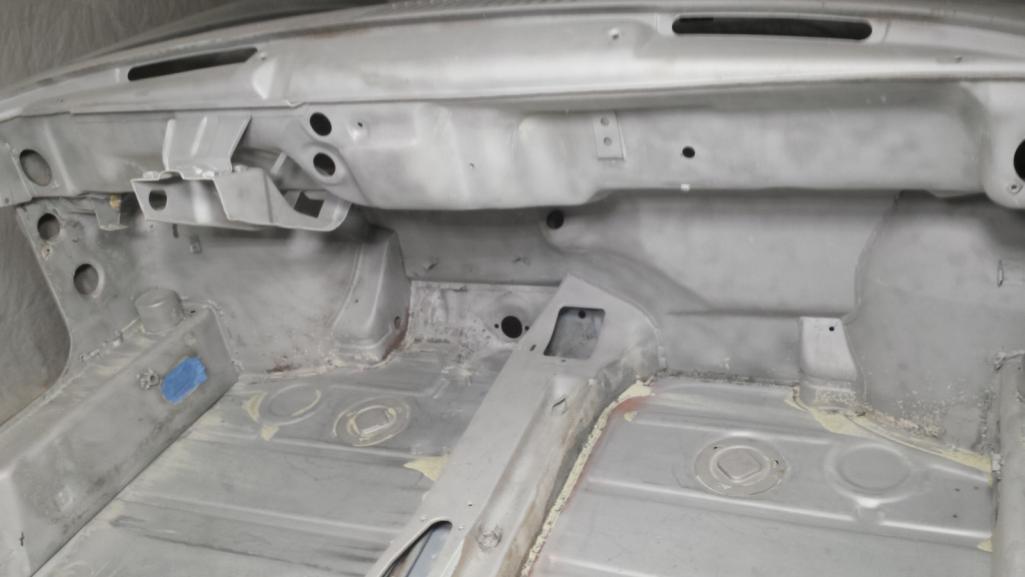 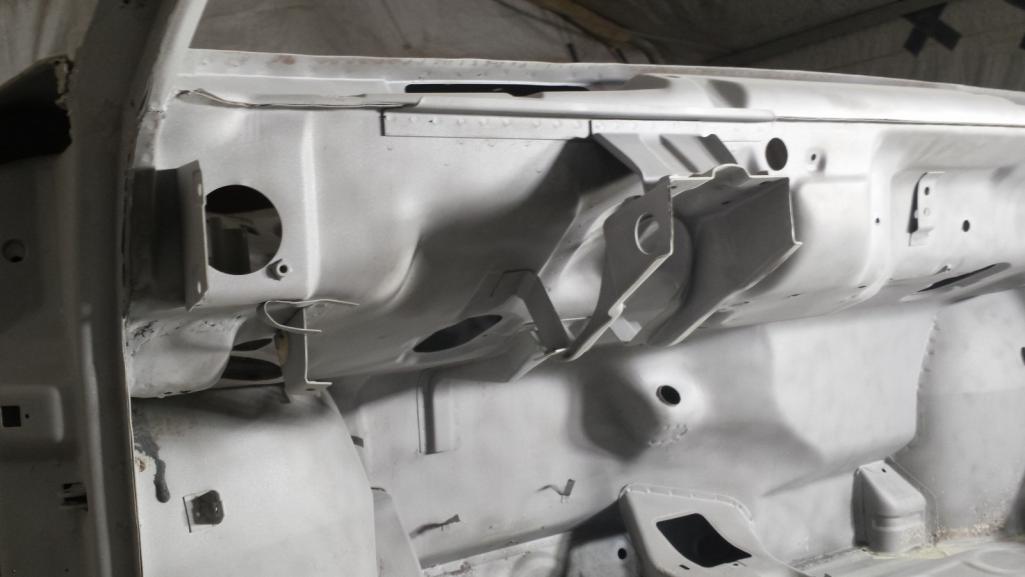 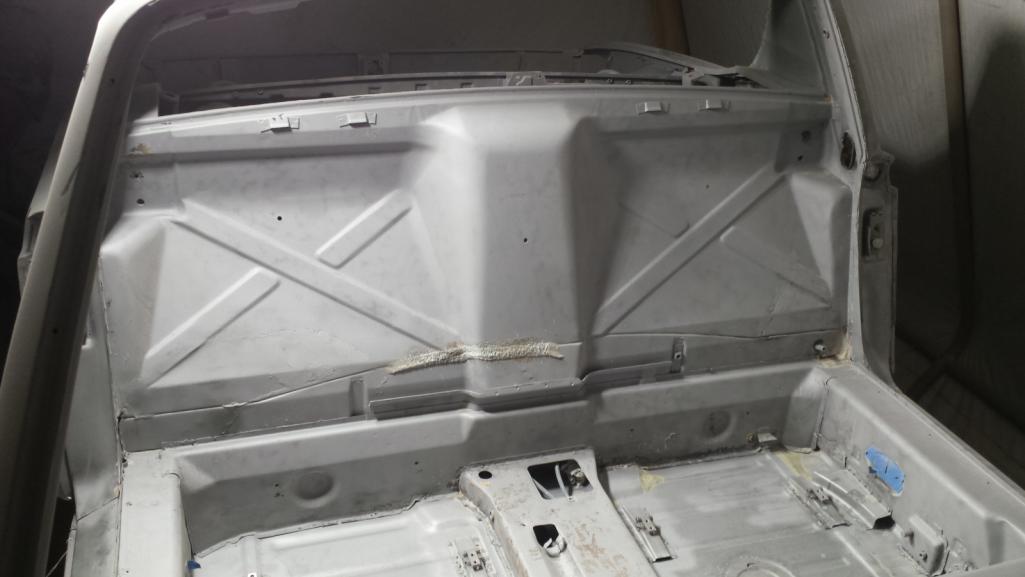 Fenders stripped. 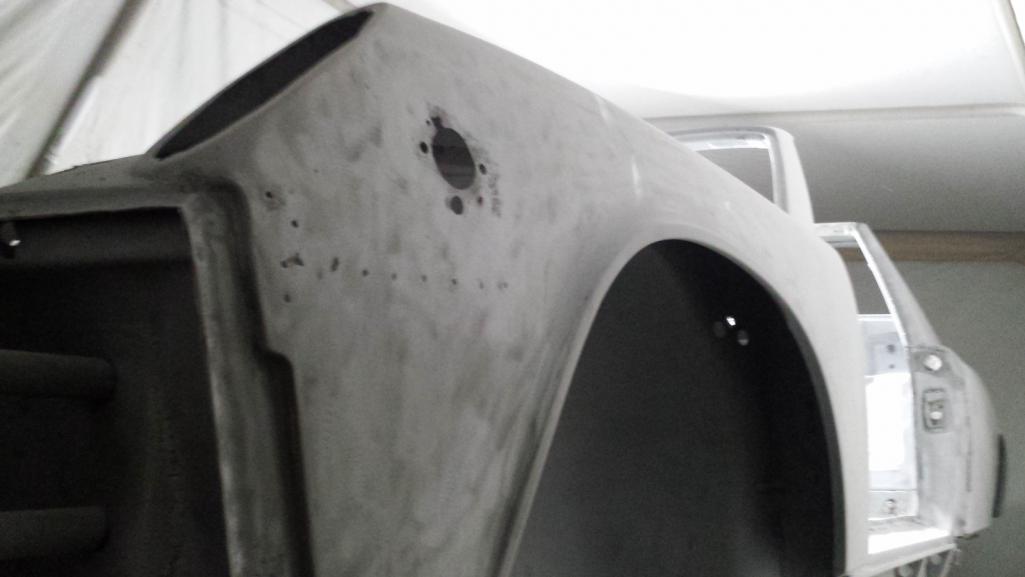 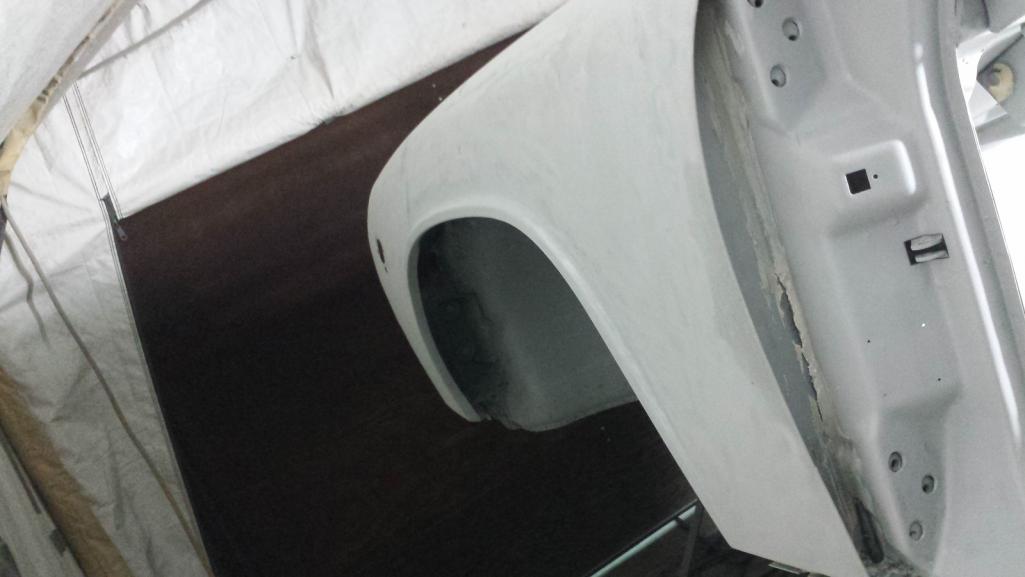 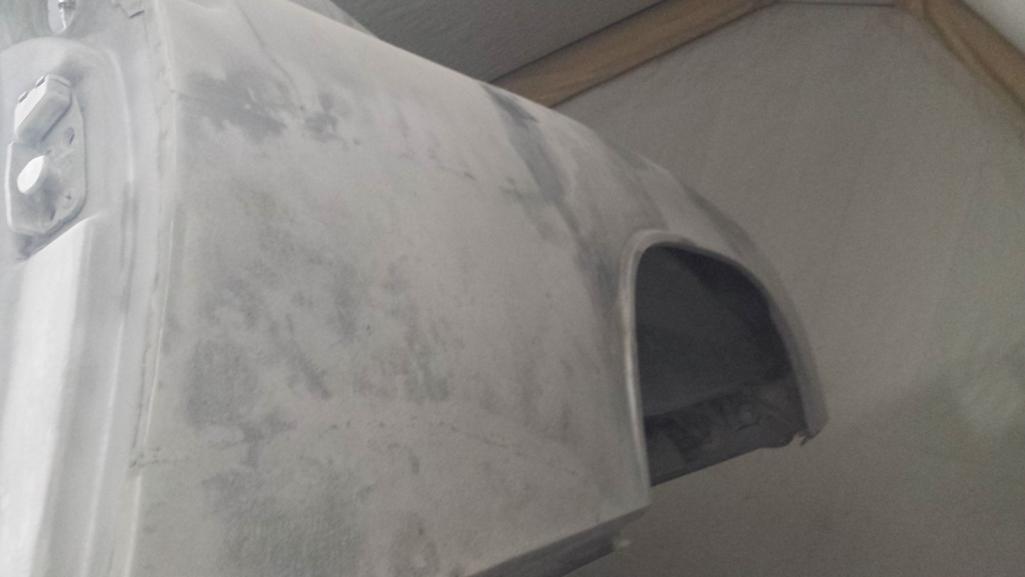 And a peak under her skirt. This area is a bitch to blast. I didn't go for total anhiliation of the rust, just made sure the paint and poly were gone and flaky rust removed down to solid metal that rust converter can handle. Not looking forward to stripping out that sealer. I hate that crap. 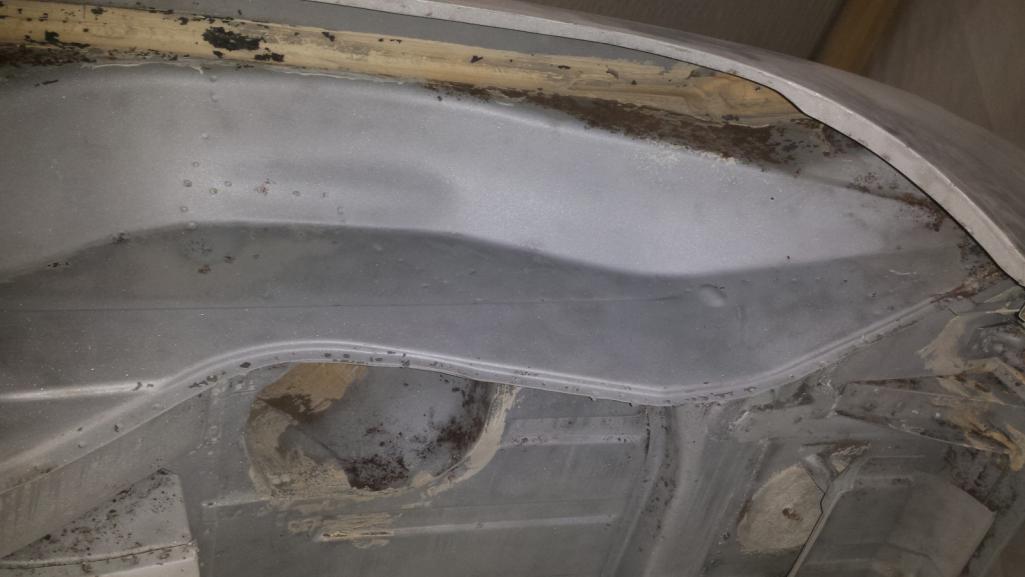 |
| bbrock |
 Aug 15 2018, 10:00 AM Aug 15 2018, 10:00 AM
Post
#487
|
|
914 Guru      Group: Members Posts: 5,269 Joined: 17-February 17 From: Montana Member No.: 20,845 Region Association: Rocky Mountains 
|
So what surprises popped up with the blasting? Not much really. Biggest surprise was the Swiss cheese and bondo on the front fender already posted.
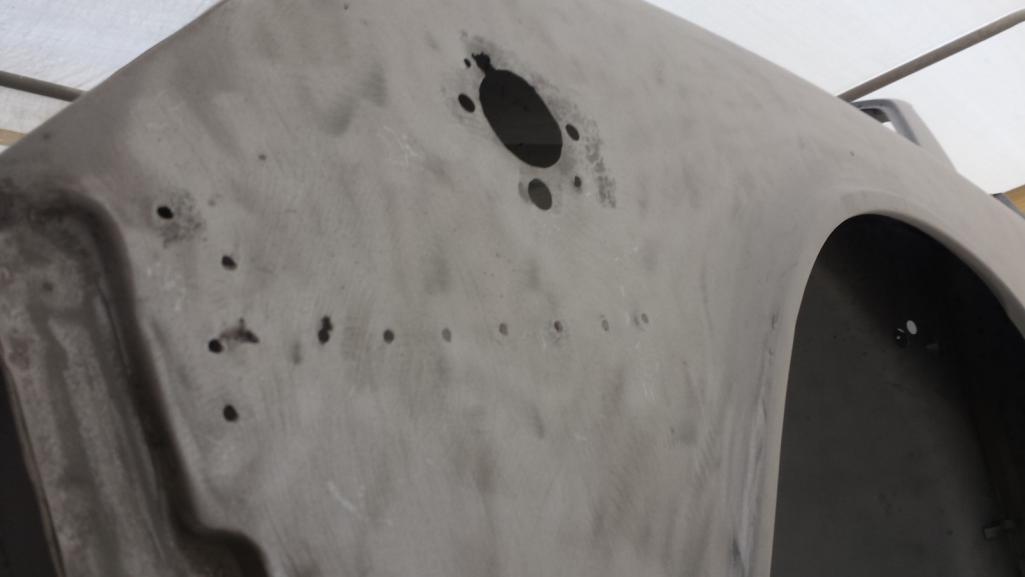 Moisture under the bondo attacked the side marker opening. No biggie since they are getting deleted, I'll just do a wide excision operation here. 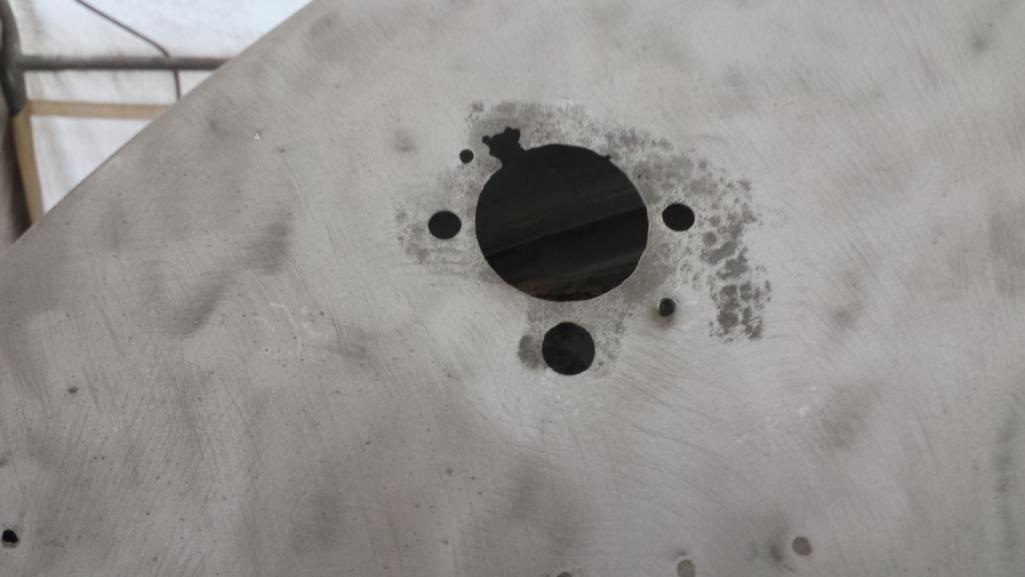 There's an annoying bit of rot near the left headlight opening that will need a patch. 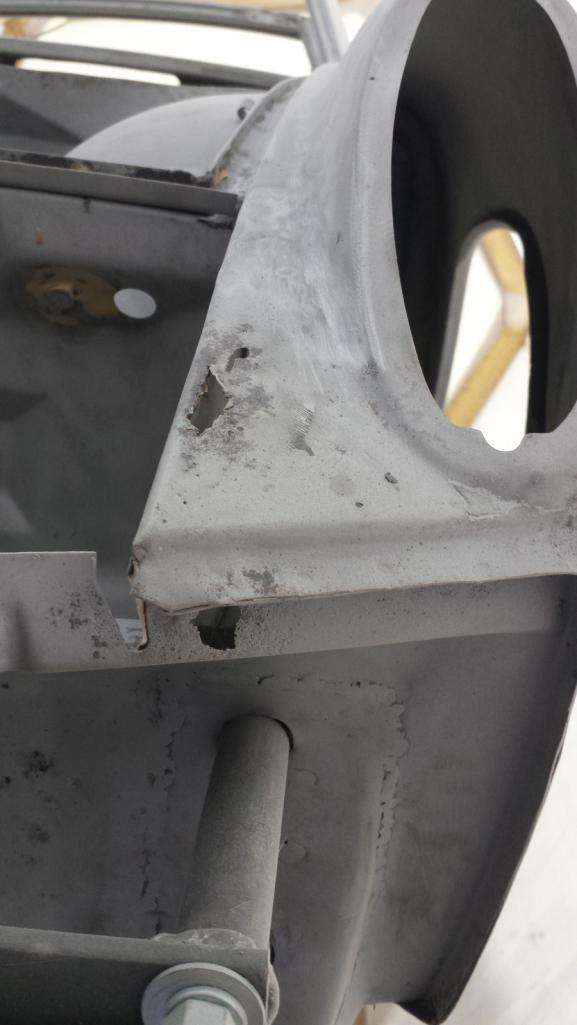 And this little dick on the rear right wheel arch. 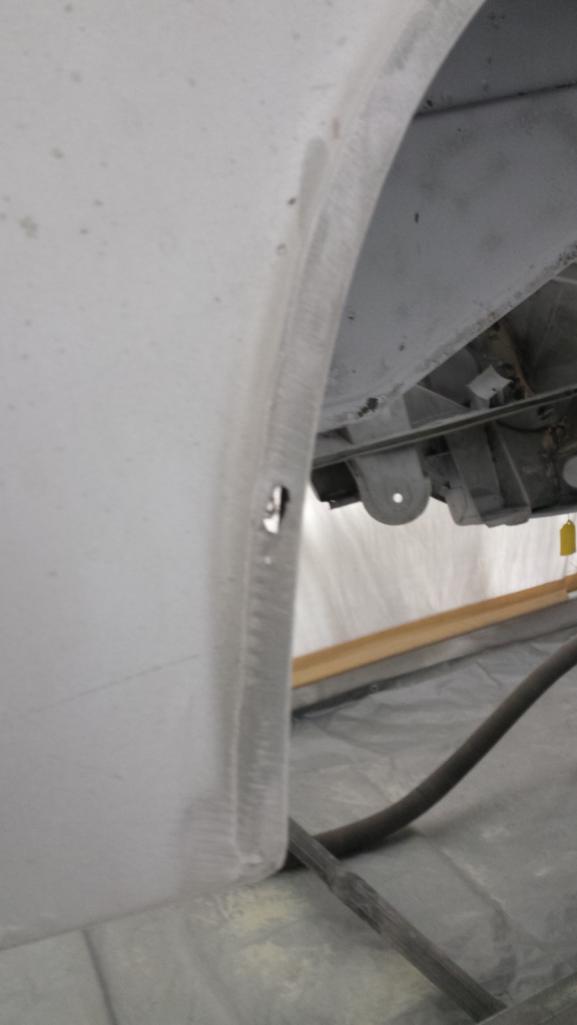 Other than that, a half dozen or so pinholes under the trunk, and a (IMG:style_emoticons/default/stromberg.gif) load of pinholes and boogers to fix from my welding. |
| tygaboy |
 Aug 15 2018, 10:23 AM Aug 15 2018, 10:23 AM
Post
#488
|
|
914 Guru      Group: Members Posts: 5,466 Joined: 6-October 15 From: Petaluma, CA Member No.: 19,241 Region Association: Northern California 
|
Brett - Looking really nice, all that bare metal... (IMG:style_emoticons/default/drooley.gif)
You've got to be happy to have the blasting work behind you. |
| Dion |
 Aug 15 2018, 01:35 PM Aug 15 2018, 01:35 PM
Post
#489
|
|
RN     Group: Members Posts: 2,804 Joined: 16-September 04 From: Audubon,PA Member No.: 2,766 Region Association: MidAtlantic Region 

|
Nice progress bro. I still have sand coming out crevices from last summer! What a job.
Looking great. (IMG:style_emoticons/default/beerchug.gif) |
| bbrock |
 Aug 16 2018, 03:29 PM Aug 16 2018, 03:29 PM
Post
#490
|
|
914 Guru      Group: Members Posts: 5,269 Joined: 17-February 17 From: Montana Member No.: 20,845 Region Association: Rocky Mountains 
|
|
| raynekat |
 Aug 17 2018, 12:03 AM Aug 17 2018, 12:03 AM
Post
#491
|
|
Advanced Member     Group: Members Posts: 2,167 Joined: 30-December 14 From: Coeur d'Alene, Idaho Member No.: 18,263 Region Association: Pacific Northwest 
|
Looking great there man....
You definitely saved some pesos by doing the blasting yourself. Well done. |
| doug_b_928 |
 Aug 17 2018, 08:09 AM Aug 17 2018, 08:09 AM
Post
#492
|
|
Senior Member    Group: Members Posts: 712 Joined: 17-January 13 From: Winnipeg Member No.: 15,382 Region Association: Canada |
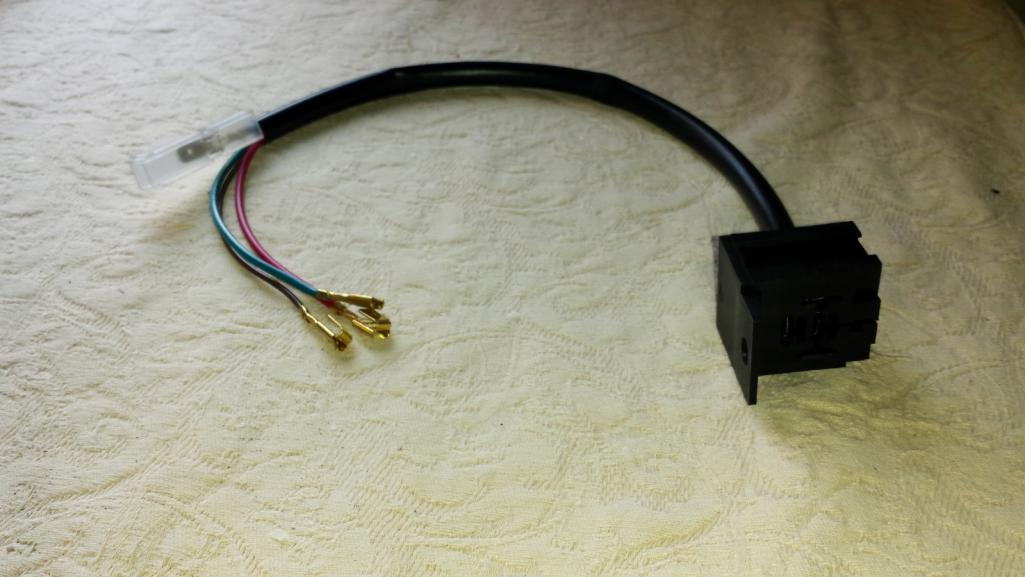
Brent, what is that sub-harness for?
|
| bbrock |
 Aug 17 2018, 05:50 PM Aug 17 2018, 05:50 PM
Post
#493
|
|
914 Guru      Group: Members Posts: 5,269 Joined: 17-February 17 From: Montana Member No.: 20,845 Region Association: Rocky Mountains 
|
Looking great there man.... You definitely saved some pesos by doing the blasting yourself. Well done. Thanks. There were times I wondered if it would save money at all. The really nice thing with investing this kind of sweat equity is that you wind up with the tools to do it again, or tackle other projects. Brent, what is that sub-harness for? Here I was starting to think nobody would ever ask. (IMG:style_emoticons/default/biggrin.gif) It's an intermittent wiper relay harness. Just need the relay now. |
| KELTY360 |
 Aug 17 2018, 06:45 PM Aug 17 2018, 06:45 PM
Post
#494
|
|
914 Neferati      Group: Members Posts: 5,094 Joined: 31-December 05 From: Pt. Townsend, WA Member No.: 5,344 Region Association: Pacific Northwest 
|
[/quote]
Here I was starting to think nobody would ever ask. (IMG:style_emoticons/default/biggrin.gif) It's an intermittent wiper relay harness. Just need the relay now. [/quote] If it was a British car it would just be called a wiper switch. (IMG:style_emoticons/default/shades.gif) |
| bbrock |
 Aug 17 2018, 10:13 PM Aug 17 2018, 10:13 PM
Post
#495
|
|
914 Guru      Group: Members Posts: 5,269 Joined: 17-February 17 From: Montana Member No.: 20,845 Region Association: Rocky Mountains 
|
QUOTE Here I was starting to think nobody would ever ask. (IMG:style_emoticons/default/biggrin.gif) It's an intermittent wiper relay harness. Just need the relay now. If it was a British car it would just be called a wiper switch. (IMG:style_emoticons/default/shades.gif) Probably why they won the war. Better rain gear. |
| bbrock |
 Aug 23 2018, 10:46 PM Aug 23 2018, 10:46 PM
Post
#496
|
|
914 Guru      Group: Members Posts: 5,269 Joined: 17-February 17 From: Montana Member No.: 20,845 Region Association: Rocky Mountains 
|
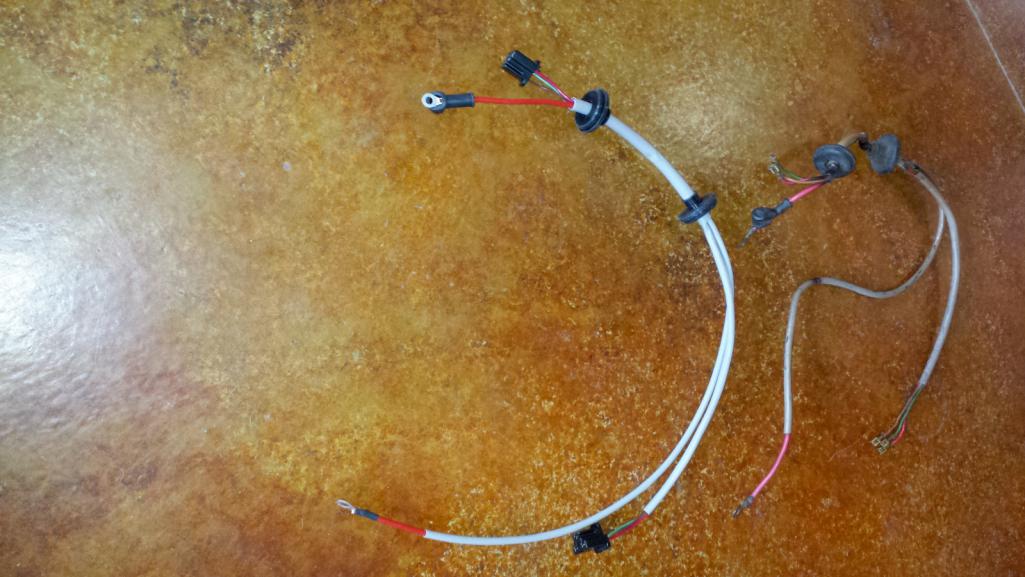
Finished up some loose ends on harnesses today. UPS delivered some new crimpers for heavier gauge wires. My old alternator harness was beyond shot so I decided to make a new one from scratch. Everything is brand new. I'm really happy with the way it turned out. I had to buy more wire than I needed so I figure I'll make a couple extra and sell them cheap to recoup some of the material costs. I'm just waiting on a slow boat from China to bring me some more gray heat shrink tubing.
 |
| bbrock |
 Aug 23 2018, 11:06 PM Aug 23 2018, 11:06 PM
Post
#497
|
|
914 Guru      Group: Members Posts: 5,269 Joined: 17-February 17 From: Montana Member No.: 20,845 Region Association: Rocky Mountains 
|
I also finally finished the main harness. Wires cleaned. All the rat's nests spliced and repaired. Sleeving cleaned or replaced. Every terminal cleaned and treated with dielectric grease. All missing terminals replaced. I also ran new 12 gauge wire to relocate the fuel pump to the late location under the fuel tank and integrated the rear window defrost cable I picked up from Mr. Baker into the main harness. Maybe some day he'll ship he window and I'll pay him (IMG:style_emoticons/default/poke.gif) Hopefully all this work will eliminate electrical gremlins when the car is back on the road.
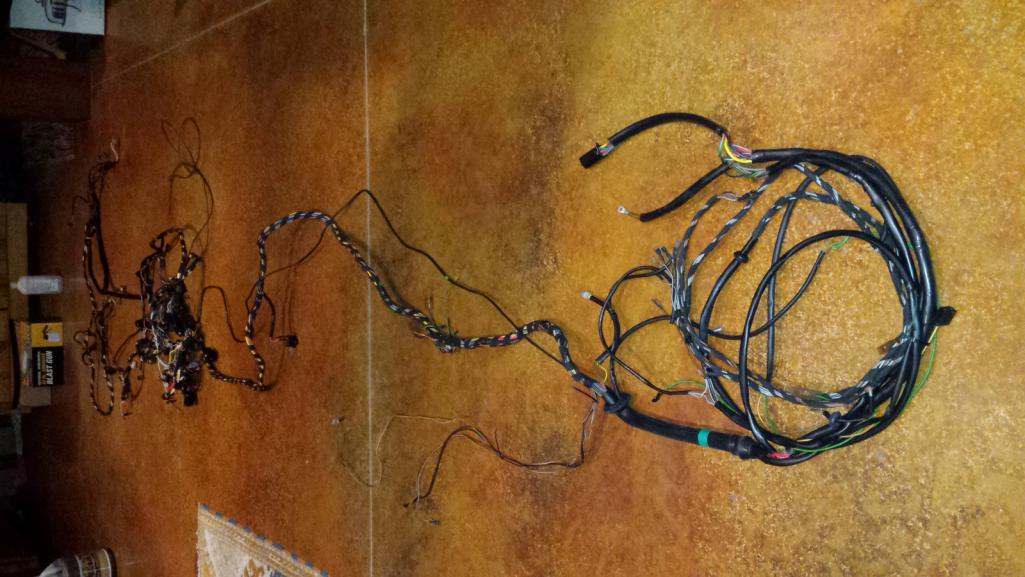 My counterfeit OEM snorkel. I noticed that OEM snorkels have a band of green tape wrapped around them so when a bundle of wire arrived bound with green tape I figured, what the hell. This is actually a 914rubber snorkel which is a little too long because its made for a six. I put what I'm calling the "reverse foreskin fold" in it to shorten it in a tidy manner. 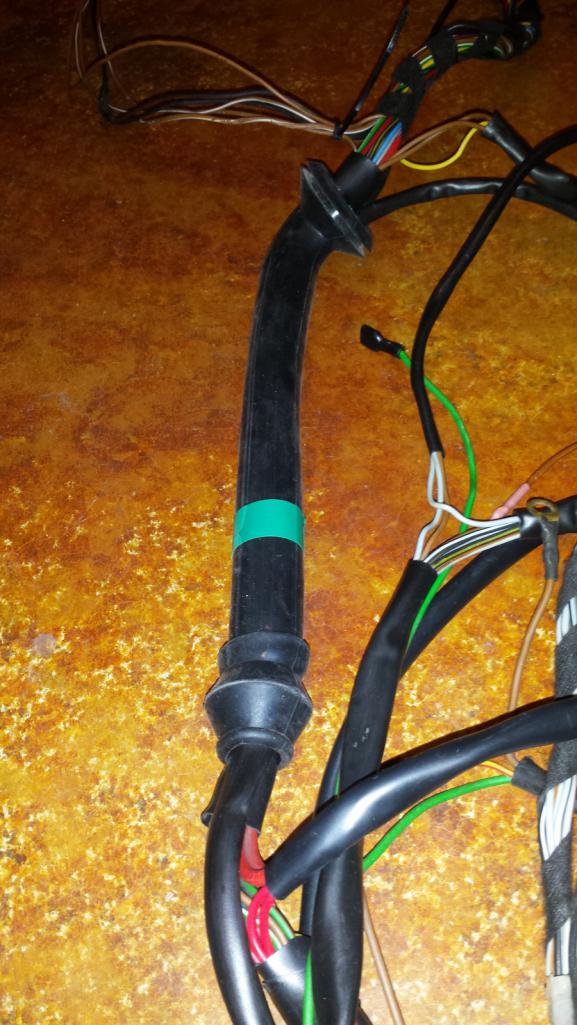 I crimped on new positive and ground terminals today and attached the positives to the 914rubber battery terminal block. 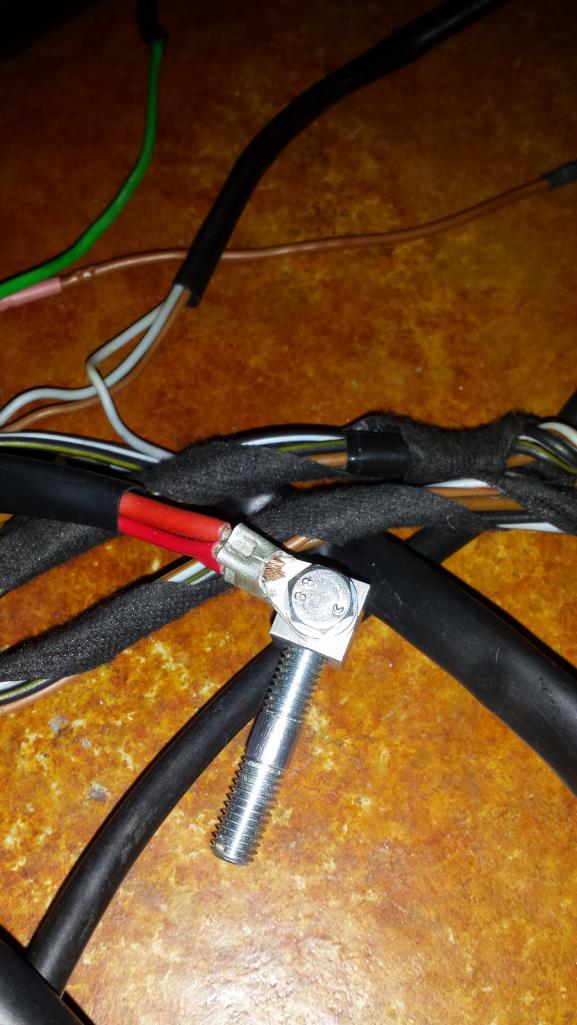 I ran an appropriately color coded blk/rd 12 gauge wire from the relay terminal to the fuel compartment area for the fuel pump relocation. I'll have to wait to see what length to cut the wires before I terminate the ends. 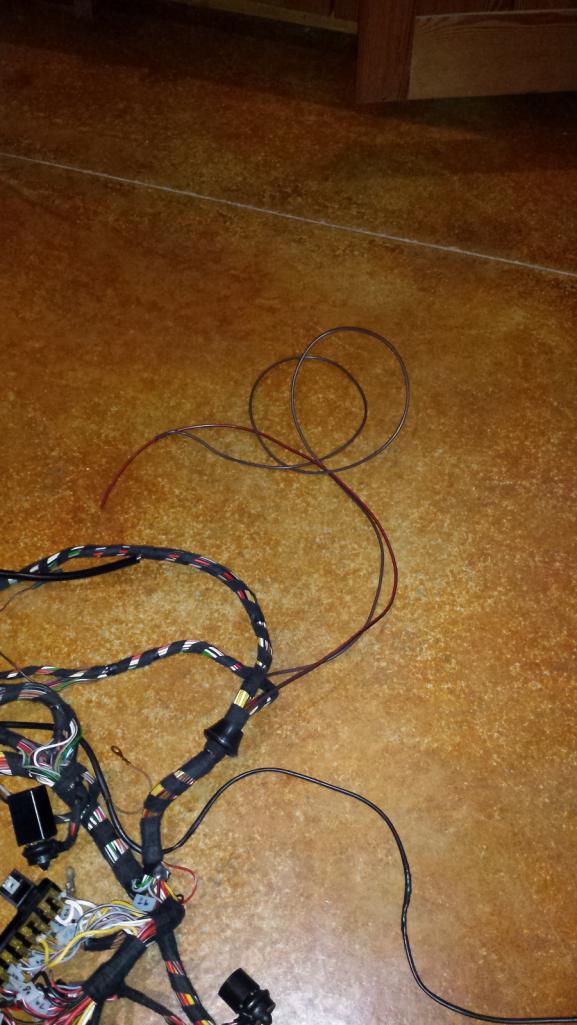 I routed the ground wire from the new pump location to the left headlight ground lug location. I was a little bummed that the brown wire I got was much darker than OEM, but at least it still matches the schematic. 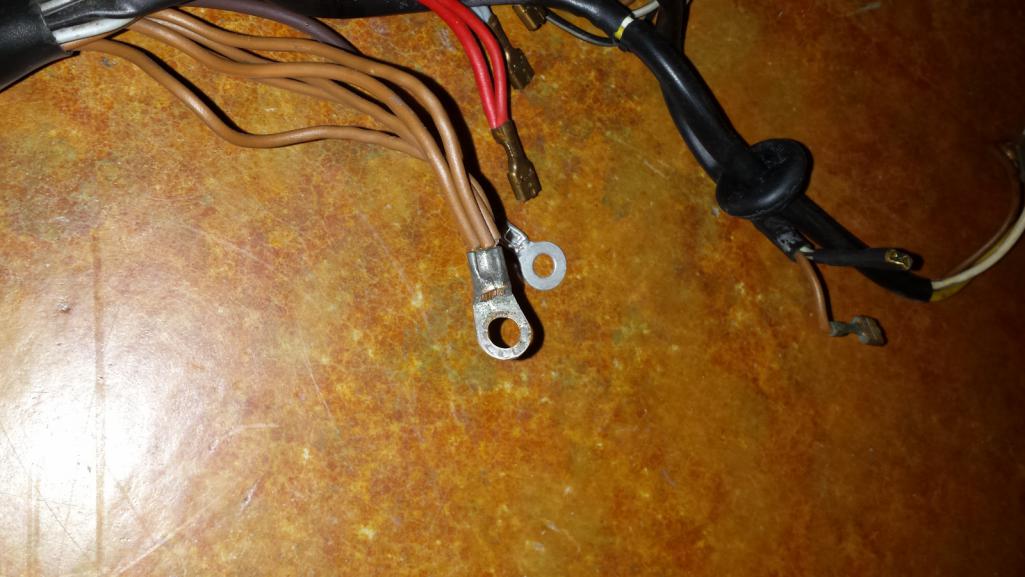 I just have one more simple harness to build and I will be done with all the harnesses on the car. Waiting for some more heat shrink to arrive for that. |
| 76-914 |
 Aug 24 2018, 08:41 AM Aug 24 2018, 08:41 AM
Post
#498
|
|
Repeat Offender & Resident Subaru Antagonist           Group: Members Posts: 13,646 Joined: 23-January 09 From: Temecula, CA Member No.: 9,964 Region Association: Southern California 
|
Looks good Brett. Have you thought about adding a little solder to those terminals? (IMG:style_emoticons/default/idea.gif) @McMark got me hooked on soldering crimp fittings. (IMG:style_emoticons/default/beerchug.gif)
|
| bbrock |
 Aug 24 2018, 08:53 AM Aug 24 2018, 08:53 AM
Post
#499
|
|
914 Guru      Group: Members Posts: 5,269 Joined: 17-February 17 From: Montana Member No.: 20,845 Region Association: Rocky Mountains 
|
Looks good Brett. Have you thought about adding a little solder to those terminals? (IMG:style_emoticons/default/idea.gif) @McMark got me hooked on soldering crimp fittings. (IMG:style_emoticons/default/beerchug.gif) Jeff Bowlsby said (and I've read it other places) that soldering crimp connections is frowned upon and not allowed in aviation standards. The rationale is that terminal connections are subject to vibration flex and a rigid solder connection can fatigue and fail. I don't know how important that is in the real world of a 914 and suspect it isn't an issue, but that's why I spared the solder. That said, I did solder a few flag connections because I couldn't justify $40 for a special crimper just to do a couple connections. So I massaged the best crimp I could with the tools I have and then added a little solder for good measure. I'd be interested about other people's thoughts and opinions on this. |
| aggiezig |
 Aug 24 2018, 10:21 AM Aug 24 2018, 10:21 AM
Post
#500
|
|
Porsche Wannabe   Group: Members Posts: 319 Joined: 13-January 16 From: Los Angeles, CA Member No.: 19,557 Region Association: Southern California 
|
Great work as usual. There's a lot more time invested in cleaning up that harness than the pics show.
|
  |
1 User(s) are reading this topic (1 Guests and 0 Anonymous Users)
0 Members:

|
Lo-Fi Version | Time is now: 22nd December 2024 - 10:52 PM |
Invision Power Board
v9.1.4 © 2024 IPS, Inc.


