|
|

|
Porsche, and the Porsche crest are registered trademarks of Dr. Ing. h.c. F. Porsche AG.
This site is not affiliated with Porsche in any way. Its only purpose is to provide an online forum for car enthusiasts. All other trademarks are property of their respective owners. |
|
|
  |
| tygaboy |
 Aug 24 2018, 02:44 PM Aug 24 2018, 02:44 PM
Post
#501
|
|
914 Guru      Group: Members Posts: 5,466 Joined: 6-October 15 From: Petaluma, CA Member No.: 19,241 Region Association: Northern California 
|
... integrated the rear window defrost cable I picked up from Mr. Baker into the main harness. Maybe some day he'll ship he window and I'll pay him (IMG:style_emoticons/default/poke.gif) Yea, yea, I know. I'm just trying to figure out the best way to safely pack it. I plan to get to that this weekend. You'll get my bill soon. (IMG:style_emoticons/default/happy11.gif) |
| bbrock |
 Aug 24 2018, 06:47 PM Aug 24 2018, 06:47 PM
Post
#502
|
|
914 Guru      Group: Members Posts: 5,269 Joined: 17-February 17 From: Montana Member No.: 20,845 Region Association: Rocky Mountains 
|
Great work as usual. There's a lot more time invested in cleaning up that harness than the pics show. Ain't that the truth? I need to go back and look, but I'm sure I started this last year. But honestly, the biggest time suck was the time spent sourcing parts and materials. There is no one stop shop, that's for sure. Finding small quantities of the necessary tracer wire is the worst. I used five sources in 3 countries and 2 continents just for the wire! I think there would be a market for someone to supply customized kits for people repairing these old harnesses. (IMG:style_emoticons/default/smash.gif) |
| bbrock |
 Aug 24 2018, 06:49 PM Aug 24 2018, 06:49 PM
Post
#503
|
|
914 Guru      Group: Members Posts: 5,269 Joined: 17-February 17 From: Montana Member No.: 20,845 Region Association: Rocky Mountains 
|
... integrated the rear window defrost cable I picked up from Mr. Baker into the main harness. Maybe some day he'll ship he window and I'll pay him (IMG:style_emoticons/default/poke.gif) Yea, yea, I know. I'm just trying to figure out the best way to safely pack it. I plan to get to that this weekend. You'll get my bill soon. (IMG:style_emoticons/default/happy11.gif) Please do! You can see that I'm just a week or so away from being ready to install it! (IMG:style_emoticons/default/av-943.gif) No hurry my friend, no hurry at all. (IMG:style_emoticons/default/beerchug.gif) |
| Dion |
 Aug 24 2018, 07:15 PM Aug 24 2018, 07:15 PM
Post
#504
|
|
RN     Group: Members Posts: 2,804 Joined: 16-September 04 From: Audubon,PA Member No.: 2,766 Region Association: MidAtlantic Region 

|
I know how much work you put in that harness. I saw Dave’s all apart
when he was doing his. It scared me off from tackling mine! Beautiful job Brent! |
| porschetub |
 Aug 24 2018, 08:42 PM Aug 24 2018, 08:42 PM
Post
#505
|
|
Advanced Member     Group: Members Posts: 4,751 Joined: 25-July 15 From: New Zealand Member No.: 18,995 Region Association: None |
Looks good Brett. Have you thought about adding a little solder to those terminals? (IMG:style_emoticons/default/idea.gif) @McMark got me hooked on soldering crimp fittings. (IMG:style_emoticons/default/beerchug.gif) Jeff Bowlsby said (and I've read it other places) that soldering crimp connections is frowned upon and not allowed in aviation standards. The rationale is that terminal connections are subject to vibration flex and a rigid solder connection can fatigue and fail. I don't know how important that is in the real world of a 914 and suspect it isn't an issue, but that's why I spared the solder. That said, I did solder a few flag connections because I couldn't justify $40 for a special crimper just to do a couple connections. So I massaged the best crimp I could with the tools I have and then added a little solder for good measure. I'd be interested about other people's thoughts and opinions on this. Someone wiser than me said to sweat the solder in to the ends then crimp,so I do that to the limits of my soldering iron,any joints are soldered and glued heatshrink anyway...do it once and do it right. |
| bbrock |
 Aug 27 2018, 01:20 PM Aug 27 2018, 01:20 PM
Post
#506
|
|
914 Guru      Group: Members Posts: 5,269 Joined: 17-February 17 From: Montana Member No.: 20,845 Region Association: Rocky Mountains 
|
Woo @#$%ing HOO! - Blasting is DONE!
Chassis is finally stripped.. I think. I spent a couple days digging out as much of the remaining seam sealer as I could. It was really tempting to leave sealer that looked in good shape alone, but pretty much every batch I dug out had rust hiding under it. Crap removal in progress and after. Shiny areas are where I used an abrasive disc. 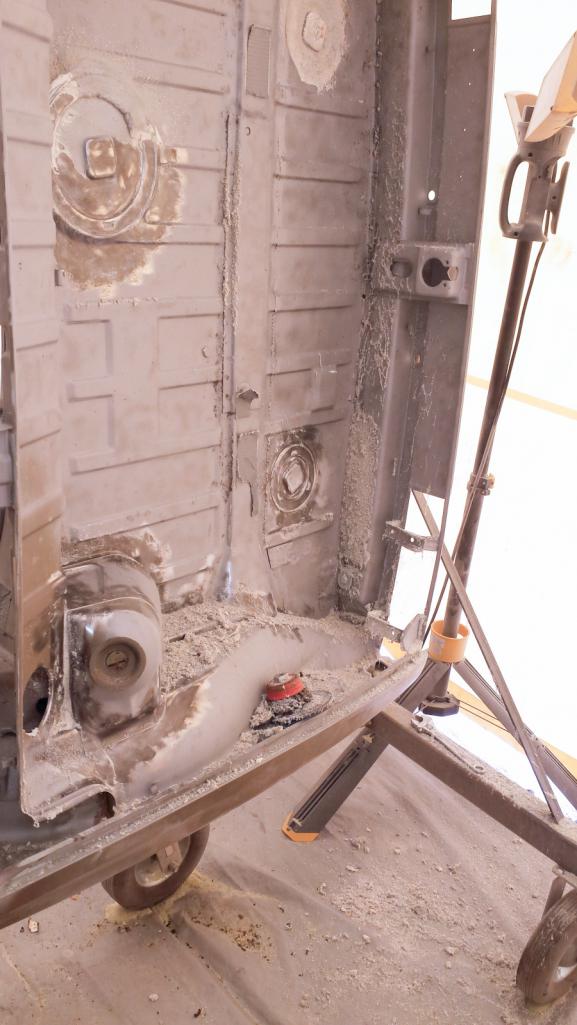 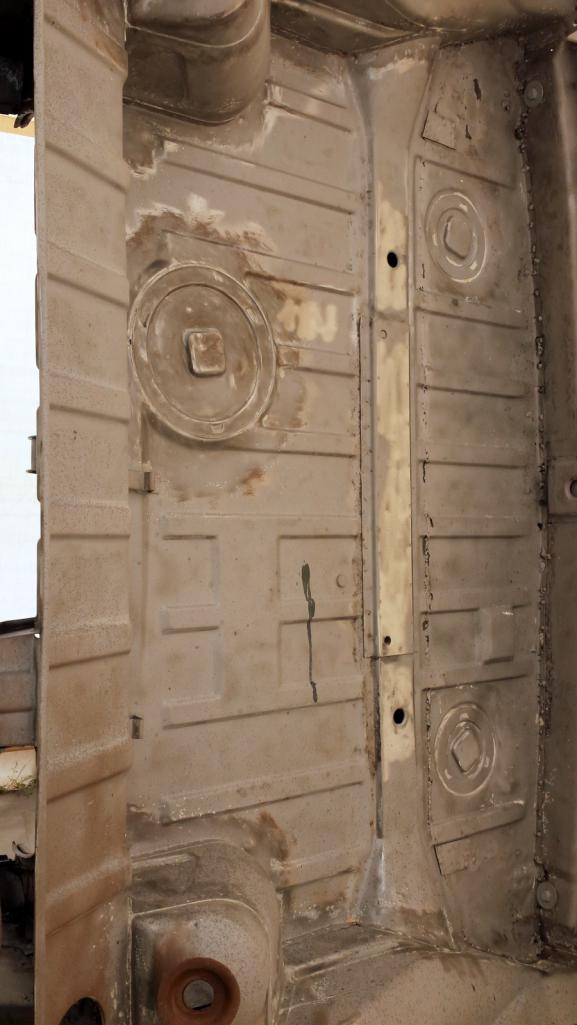 Some of these after pics look a little gross because it has been cool and rainy here so I sprayed areas that were flash rusting with phosphoric acid. 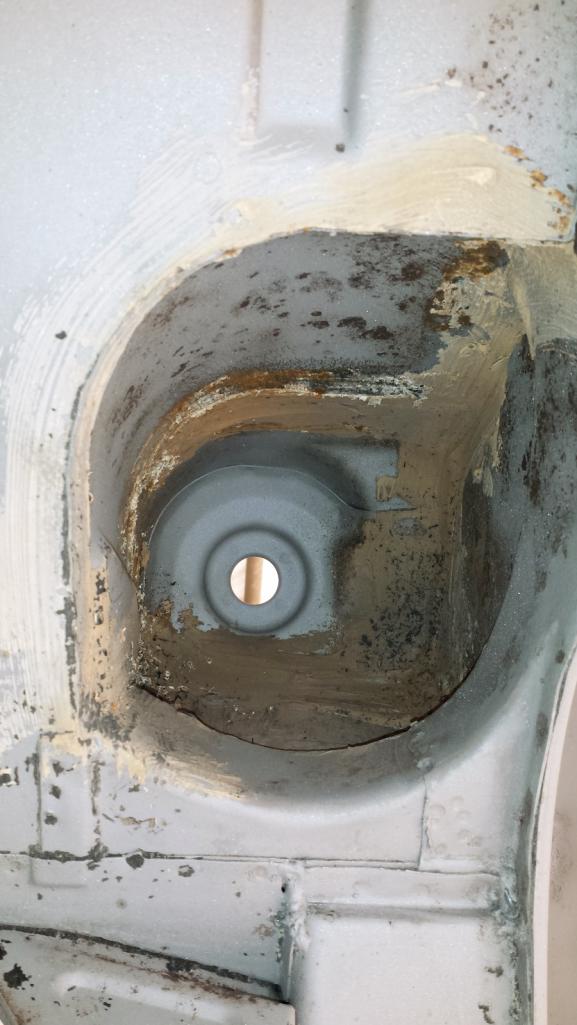 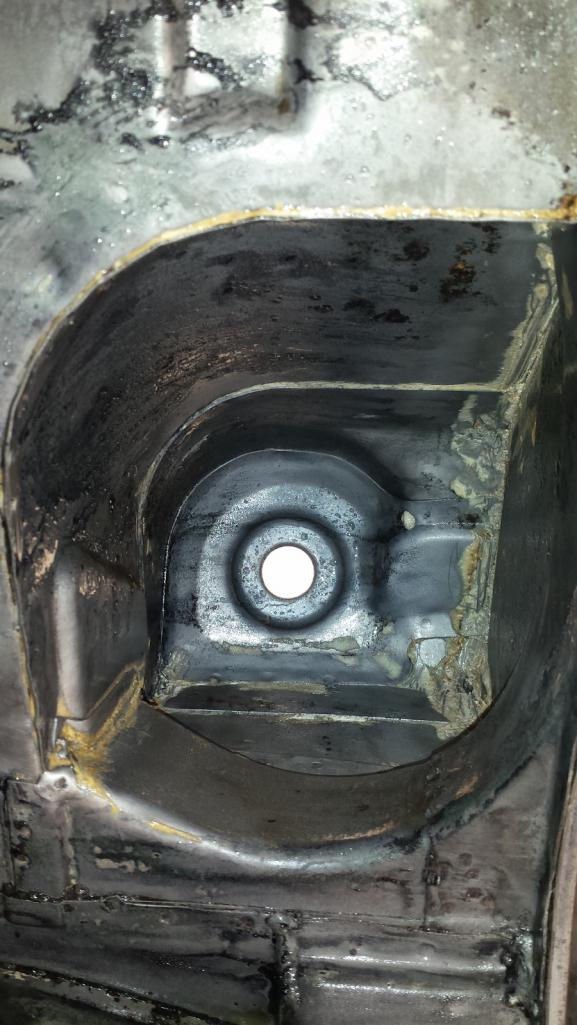 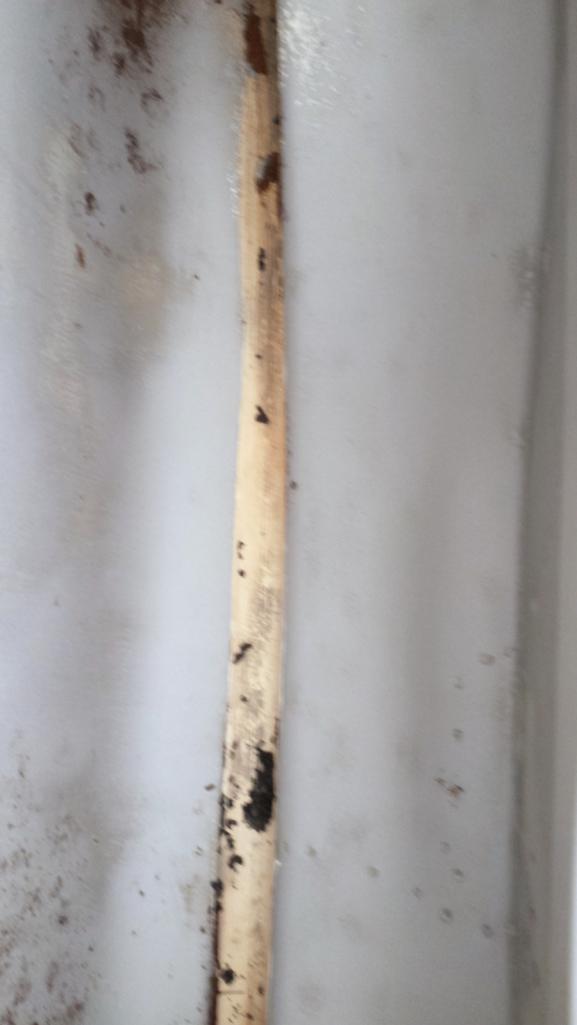 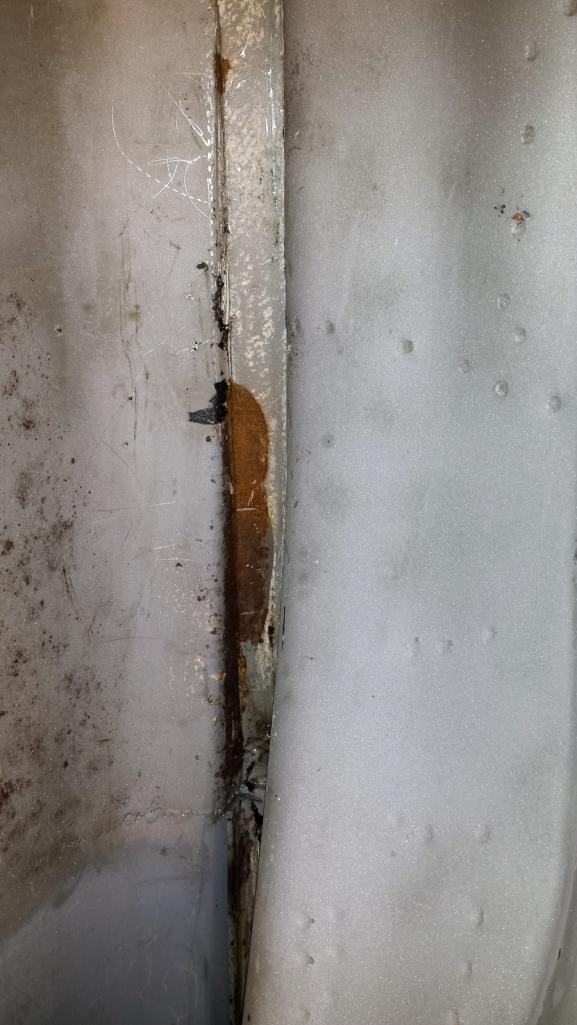 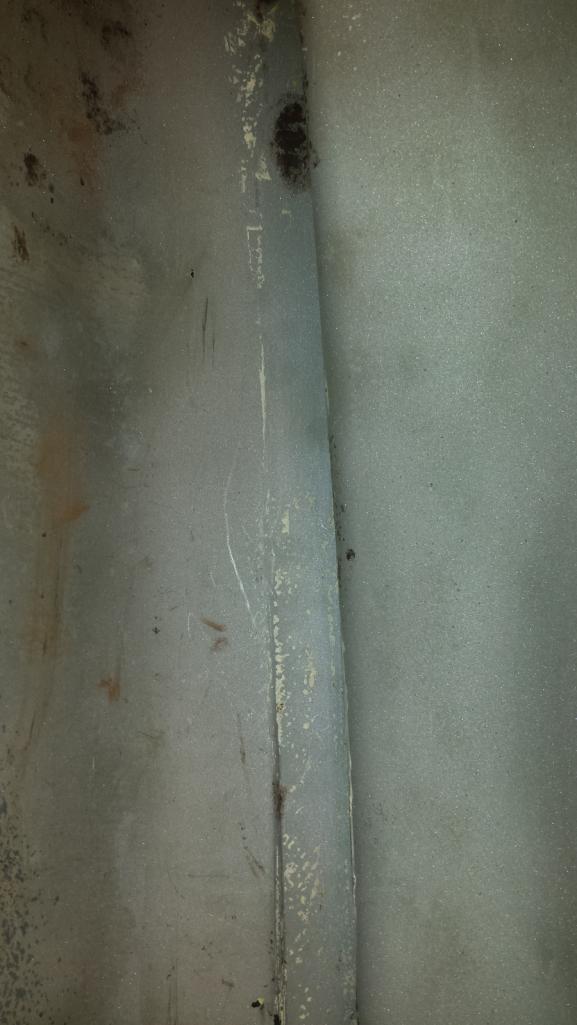 How much trouble will the remaining seam seal make? I'll shoot PPG epoxy primer then new seam sealer. |
| bbrock |
 Aug 27 2018, 01:31 PM Aug 27 2018, 01:31 PM
Post
#507
|
|
914 Guru      Group: Members Posts: 5,269 Joined: 17-February 17 From: Montana Member No.: 20,845 Region Association: Rocky Mountains 
|
This box of Cracker Jacks had a couple more toy surprises inside. Stripping off sealer on the door jambs, I found a little more rot hiding in the passenger side.
It's a little hard to see, but the pinch weld has rusted through here. 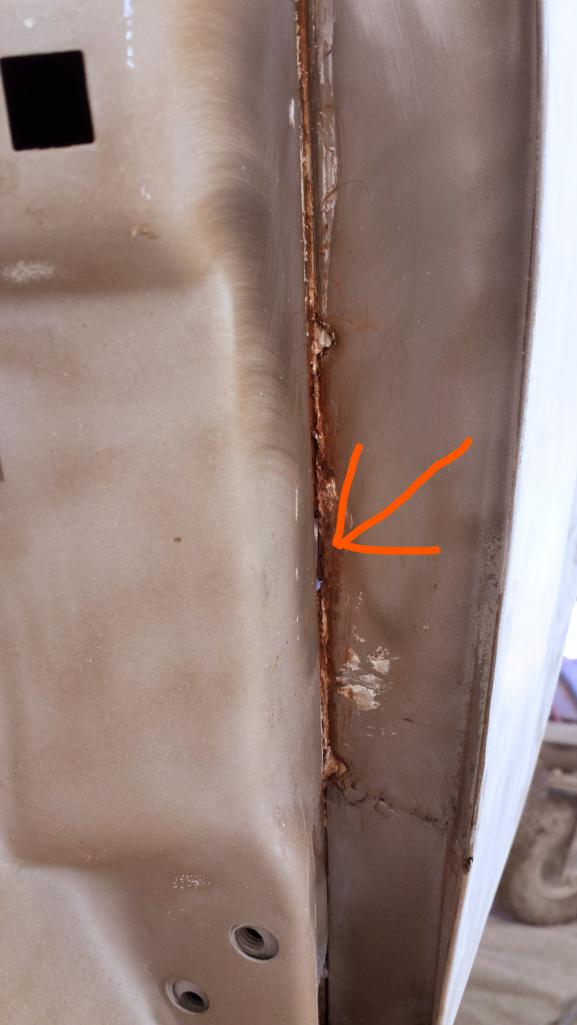 I'll probably just treat this one with rust converter and forget about it. There is supposed to be a hole here anyway, just not quite this big. It will be encapsulated in seam sealer on both sides again anyway. 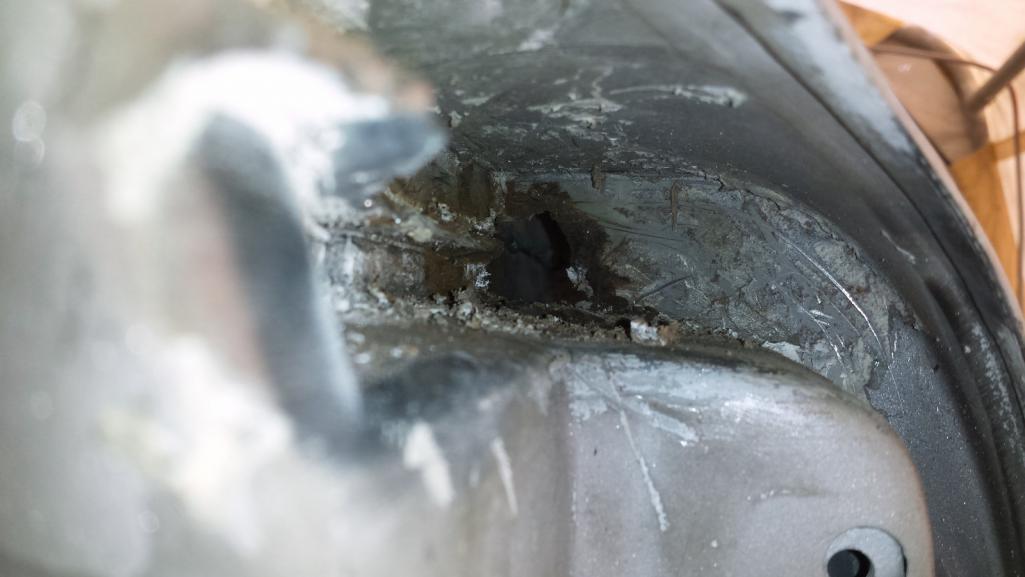 |
| aggiezig |
 Aug 27 2018, 01:47 PM Aug 27 2018, 01:47 PM
Post
#508
|
|
Porsche Wannabe   Group: Members Posts: 319 Joined: 13-January 16 From: Los Angeles, CA Member No.: 19,557 Region Association: Southern California 
|
Speaking from experience, that is hands down the worst job on this car. You did an awesome job and everything looks super clean now. Are you going to seam seal back over these areas? I left some bare and seam sealed others. No real rhyme or reason other than what I thought "needed" it.
Keep up the pace, you're killing it. -Cole |
| Lucky9146 |
 Aug 27 2018, 01:58 PM Aug 27 2018, 01:58 PM
Post
#509
|
|
Always Wanted A Bigger Go Cart    Group: Members Posts: 1,666 Joined: 22-September 14 From: Poway California Member No.: 17,942 Region Association: Southern California 
|
Keep at it, looks like you are doing all the right stuff! One benefit of going to this level is you know exactly what you have. (IMG:style_emoticons/default/beerchug.gif)
(IMG:style_emoticons/default/driving.gif) (IMG:style_emoticons/default/white914.jpg) |
| bbrock |
 Aug 27 2018, 02:32 PM Aug 27 2018, 02:32 PM
Post
#510
|
|
914 Guru      Group: Members Posts: 5,269 Joined: 17-February 17 From: Montana Member No.: 20,845 Region Association: Rocky Mountains 
|
Speaking from experience, that is hands down the worst job on this car. You did an awesome job and everything looks super clean now. Are you going to seam seal back over these areas? I left some bare and seam sealed others. No real rhyme or reason other than what I thought "needed" it. Keep up the pace, you're killing it. -Cole Thanks guys. Yes, I will be going back over with seam sealer but using a little more finesse in the areas where the factory gobbed it on to form rust traps. I'm still not sure what the best sequence is. My initial thought was to spray PPG epoxy primer first, then put sealer on top of that followed by another coat of primer but maybe the sealer should go down on bare metal first? I was also thinking about using brush on sealer on all seams and then spraying beige bedliner over appropriate seams like Kent did on Cairo's build to replicate the sprayed seam sealer look. I haven't seen a more affordable way to get that factory look. |
| bbrock |
 Sep 2 2018, 08:24 PM Sep 2 2018, 08:24 PM
Post
#511
|
|
914 Guru      Group: Members Posts: 5,269 Joined: 17-February 17 From: Montana Member No.: 20,845 Region Association: Rocky Mountains 
|
Back to patching
I cleaned all the blasting grit out of the cracks and crevices... then I cleaned out the car. (IMG:style_emoticons/default/laugh.gif) I've seen a lot of complaints about how hard it is to get blasting media out of the chassis, but honestly, it wasn't that hard. It did take a few hours. Before blasting, I taped off all of the holes and stuffed plastic bags to minimize what got inside boxed cavities. After blasting, I spent about 3 hours using a combination of the shop vac and compressed air cranked up on full to suck and blow the media out all the holes. When I was done, I couldn't hear anymore grit rattling around when I rotated the car, nor did more than a half teaspoon fall out. I'll go through it again before painting, but it seems pretty clean. Yesterday I started on patches for all the nice surprises revealed after blasting. First up was that left fender that was hiding under Bondo. 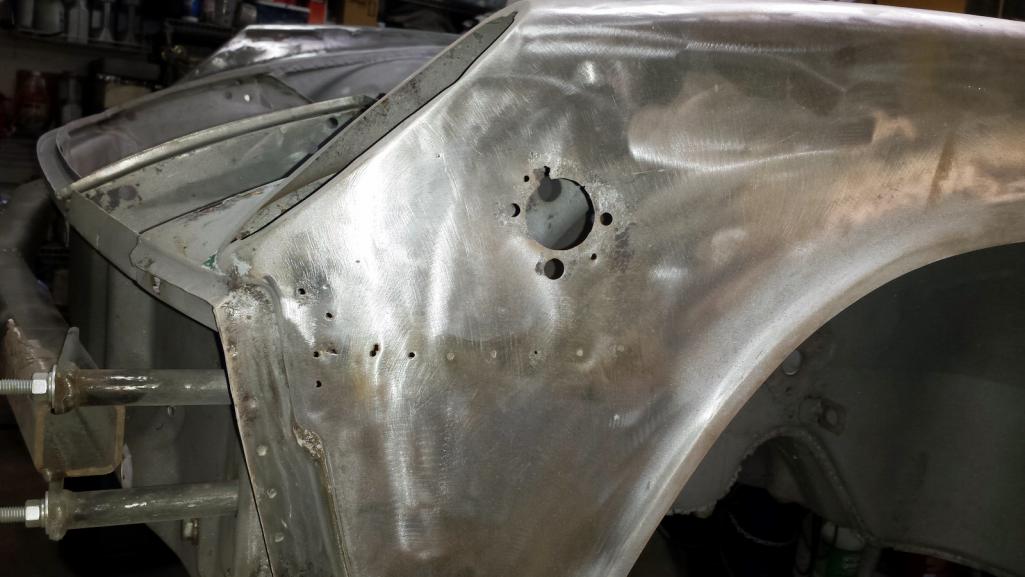 The fender had been hit, somewhat straightened, hogged out with some death tool to roughen the steel before hiding everything with Bondo. To add insult, the side wart was stuck on with sheet metal screws instead of the proper clips. The plan was simple, straighten the panel, weld up the slide hammer holes, then patch the rusted metal around the wart. Spent almost a full day with shrinking disc and hammers and dollies to get the panel straight and smooth. Welding the holes went well until I worked toward the front and everything started blowing out just waving the welder nozzle toward it. Closer inspection showed dumbasses at the body shop had hogged down the steel to about the thickness of aluminum foil in spots. Time for plan B: 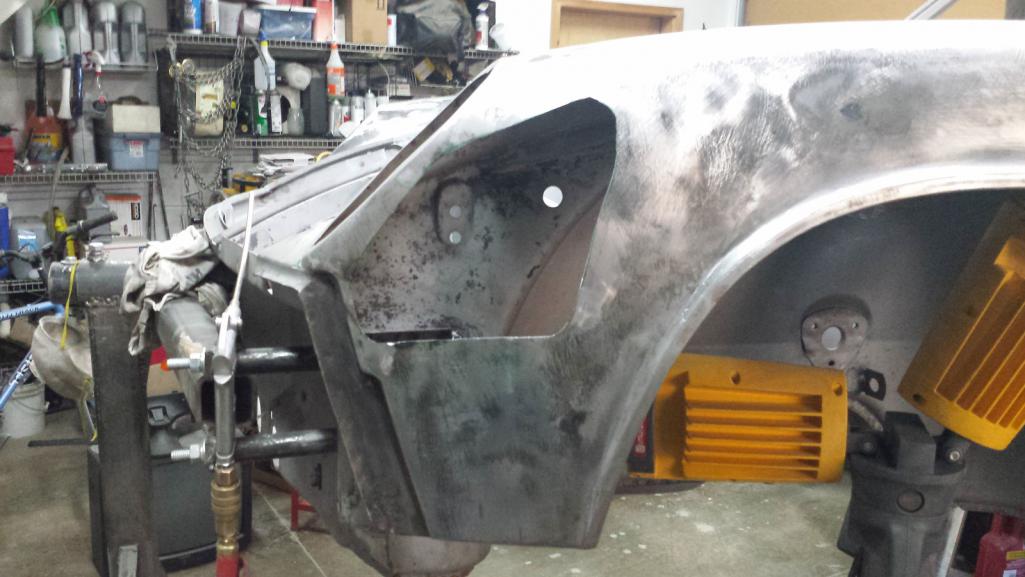 I tried to cut out all the metal that was either thin or rusted without getting into the curve at the top of the fender that I thought would be hard to match, or the rim around the turn signal bucket. I measured the piece I cut out and the thinnest spots were down to 27 gauge!!! Here it is ready for welding. 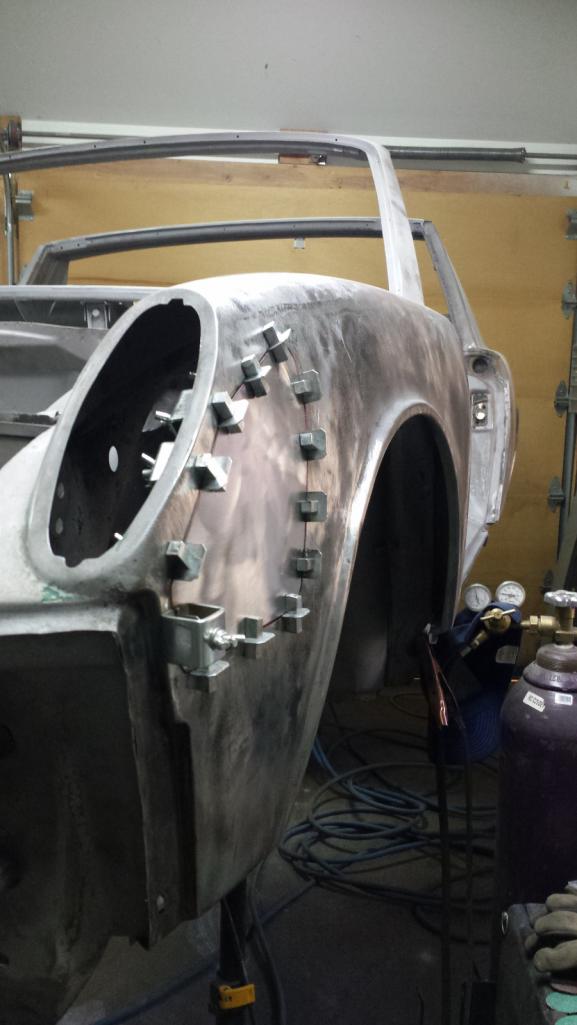 Things went pretty well except right under the turn signal where I hit some thin metal I hadn't noticed. I thought about cutting another patch but fueled by stubbornness, I was able to use a copper spoon to bridge the patch to good solid steel. After grinding, I sprayed a guide coat and block sanded with 80 grit. After just an hour of hammer and dolly, I had the panel looking pretty decent. It will take a few more hours with shrinking disc and hammers, but I think this is only going to need a very thin coat of filler to mainly fill the shrink around the welds. After the hard fight, I'm ecstatic how it is turning out. And look, no wart hole. (IMG:style_emoticons/default/aktion035.gif) 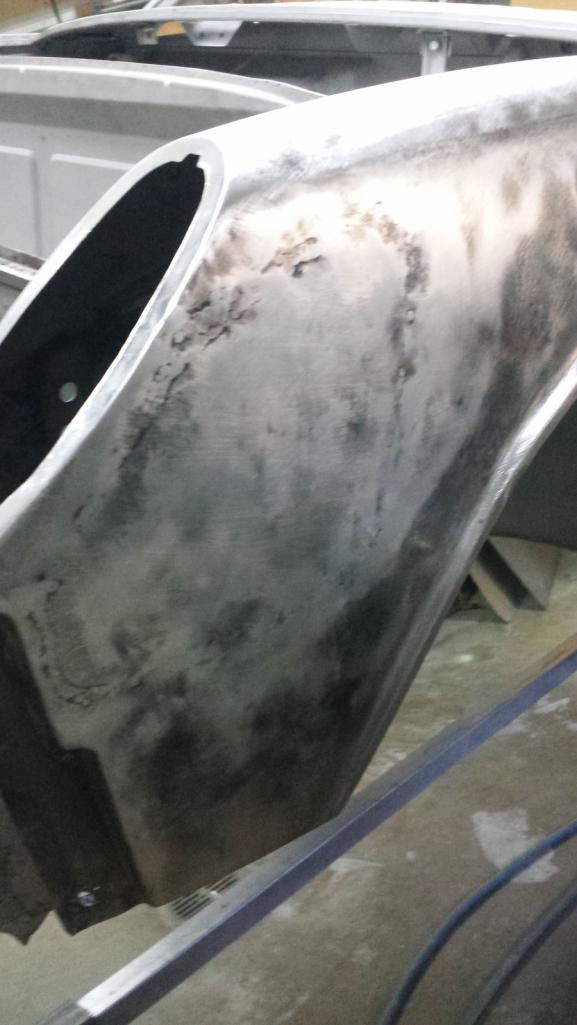 Then I took the wife and dog into town for a late lunch. After I got back, I tackled the fender patch next to the hood. 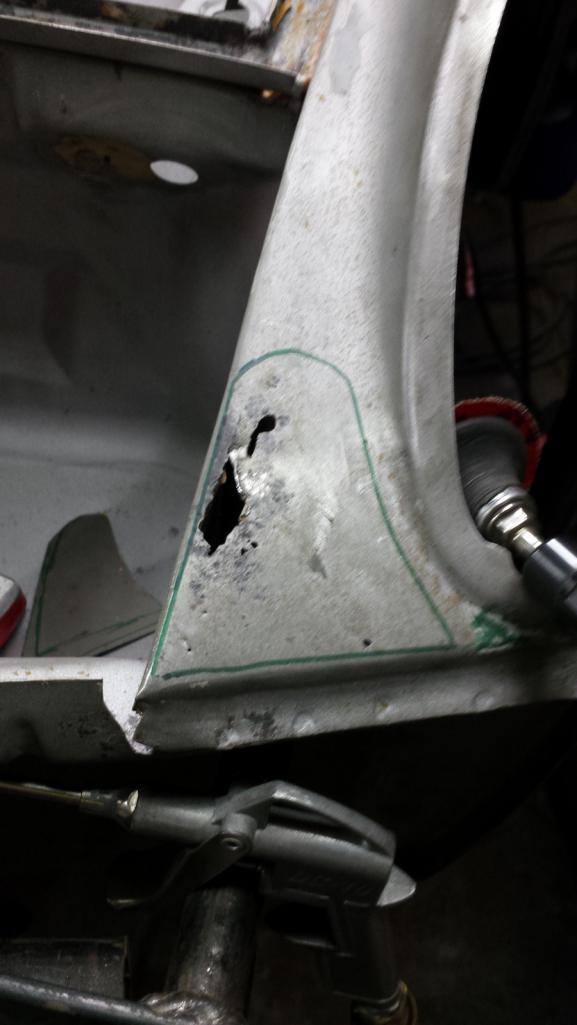 This one was pretty easy. 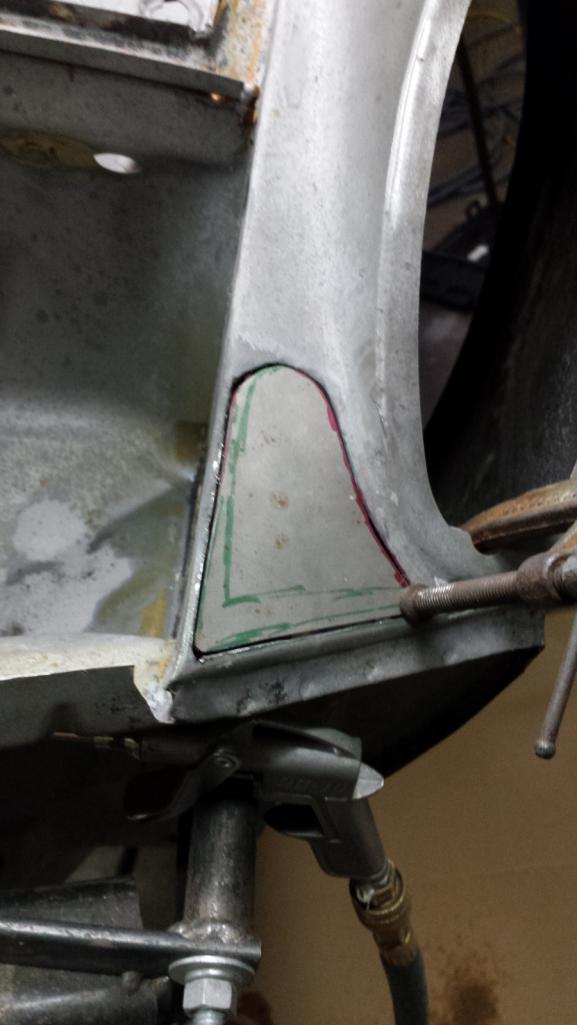 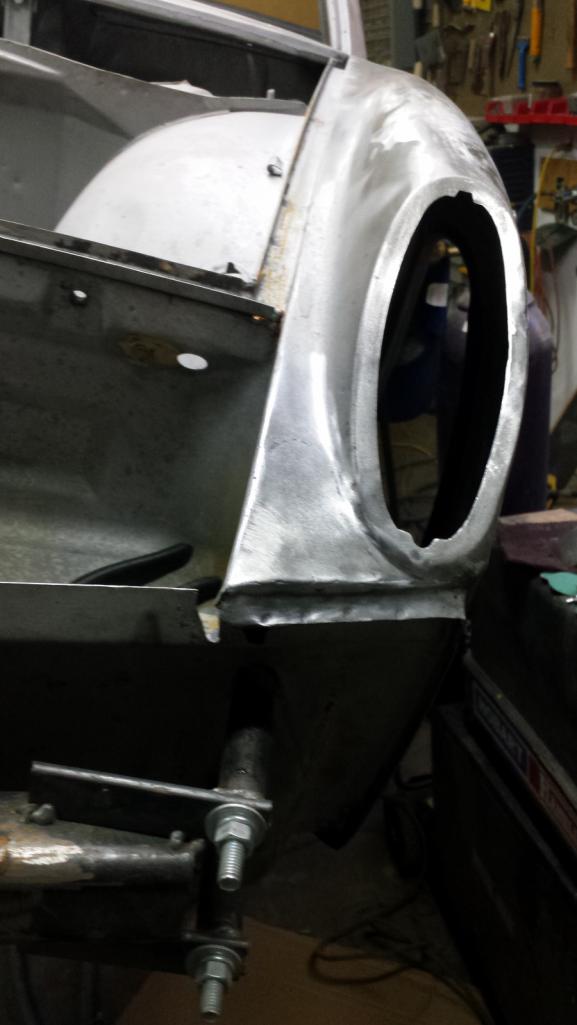 One last thing. With all the grinding still ahead of me to get this thing ready to paint, I decided to splurge and bought two boxes of 3M Cubitron II Roloc grinding discs. On box each of 36 grit and 80 grit. For some reason, you have to swear you are a professional when you buy these. (IMG:style_emoticons/default/screwy.gif) I love these discs! The discs last about 4X longer than the 3M green discs I've been buying and the edges don't wear out. Definitely the biggest bang for the buck I've found. |
| bbrock |
 Sep 3 2018, 12:25 PM Sep 3 2018, 12:25 PM
Post
#512
|
|
914 Guru      Group: Members Posts: 5,269 Joined: 17-February 17 From: Montana Member No.: 20,845 Region Association: Rocky Mountains 
|
(IMG:http://www.914world.com/bbs2/uploads_offsite/www.wegmans.com-20845-1535999121.1.jpg)
First, let's make a template in case warts become a fashion statement in the future and I need to put them back. 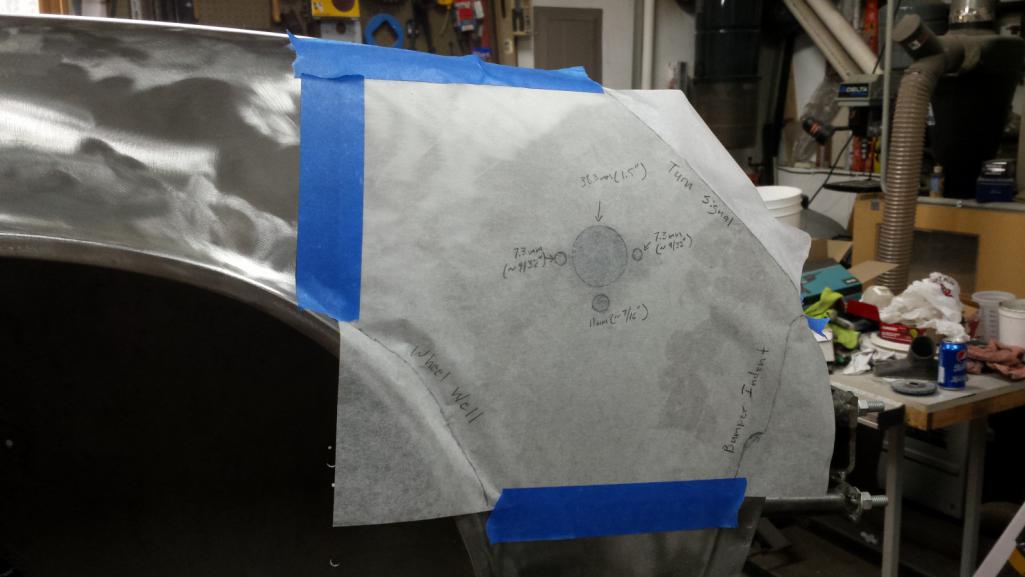 After guide coat, block sanding, and banging on it a bit. If I had a bullet pick, I think I could bring those last few low spots around the welds up. Not sure it is worth it, a tiny bit of filler is all it will need. 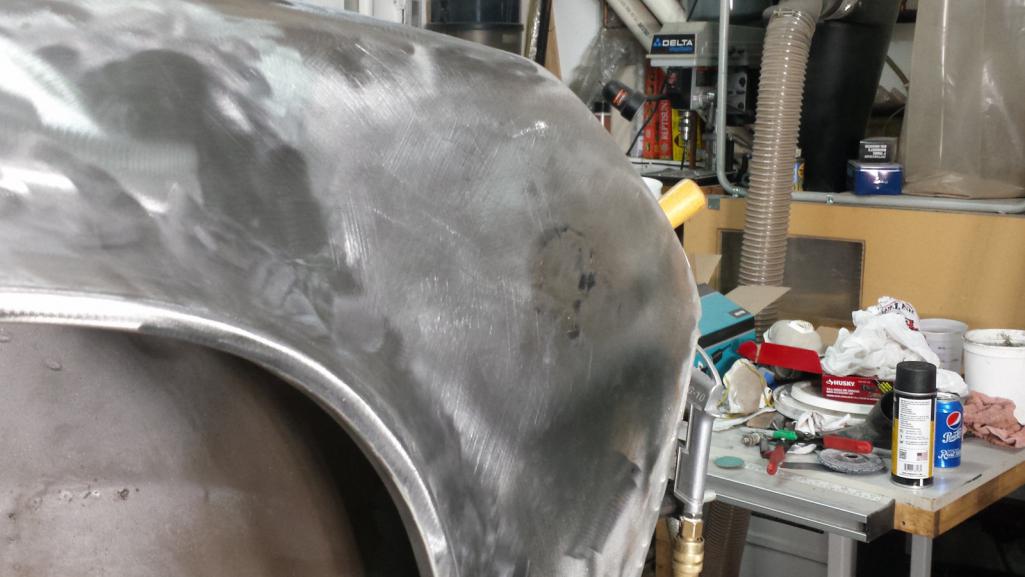 |
| Cairo94507 |
 Sep 4 2018, 07:53 AM Sep 4 2018, 07:53 AM
Post
#513
|
|
Michael           Group: Members Posts: 10,129 Joined: 1-November 08 From: Auburn, CA Member No.: 9,712 Region Association: Northern California 
|
Really looking nice. (IMG:style_emoticons/default/beerchug.gif)
|
| bbrock |
 Sep 5 2018, 07:56 PM Sep 5 2018, 07:56 PM
Post
#514
|
|
914 Guru      Group: Members Posts: 5,269 Joined: 17-February 17 From: Montana Member No.: 20,845 Region Association: Rocky Mountains 
|
Harnesses done.... oh so close anyway.
Got the last bit of gray sleeving yesterday so I was able to build the last harness for my car. The old temperature sender harness was beat to hell and crispy as a pretzel stick. 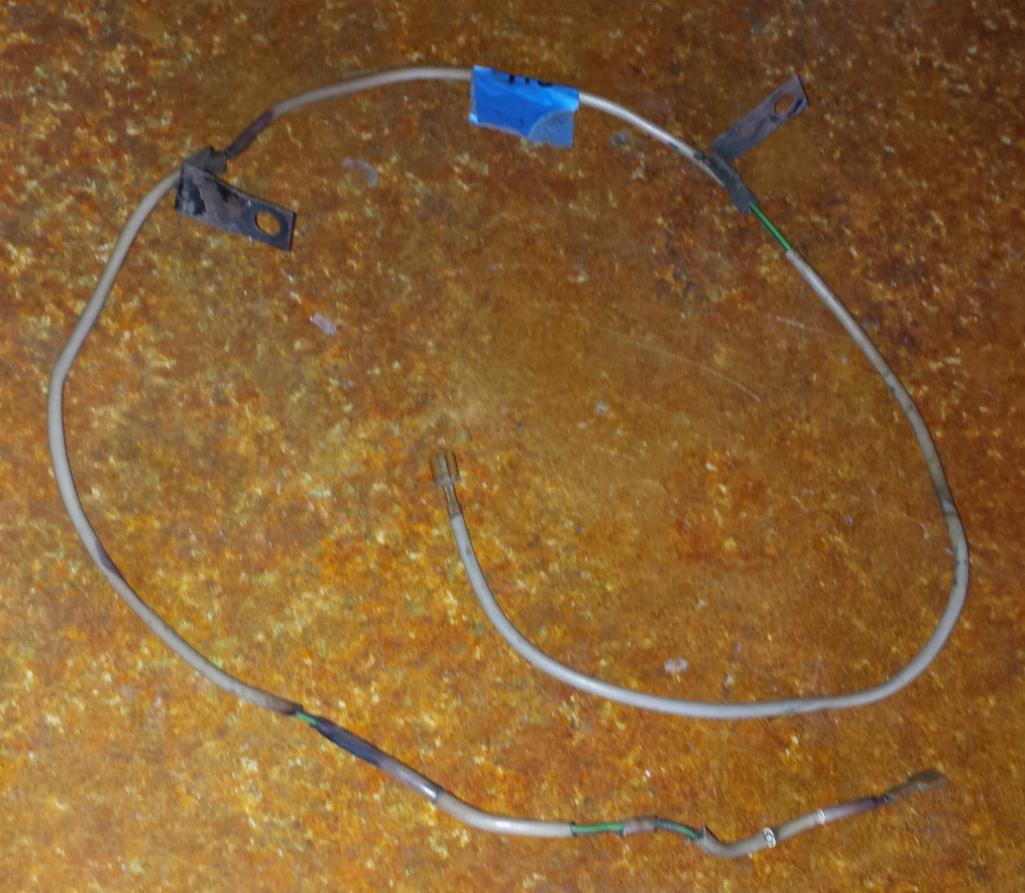 It's just a single wire, so easy to do. Good thing I special ordered the correct green/black wire so I could hide it under the sleeving where nobody will see it. I cleaned and straightened the brackets, gave them 3 coats of high temperature satin black and baked them in the oven for 15 minutes at 400F. I don't know if high temp was necessary but just to be safe. Should work anyway. 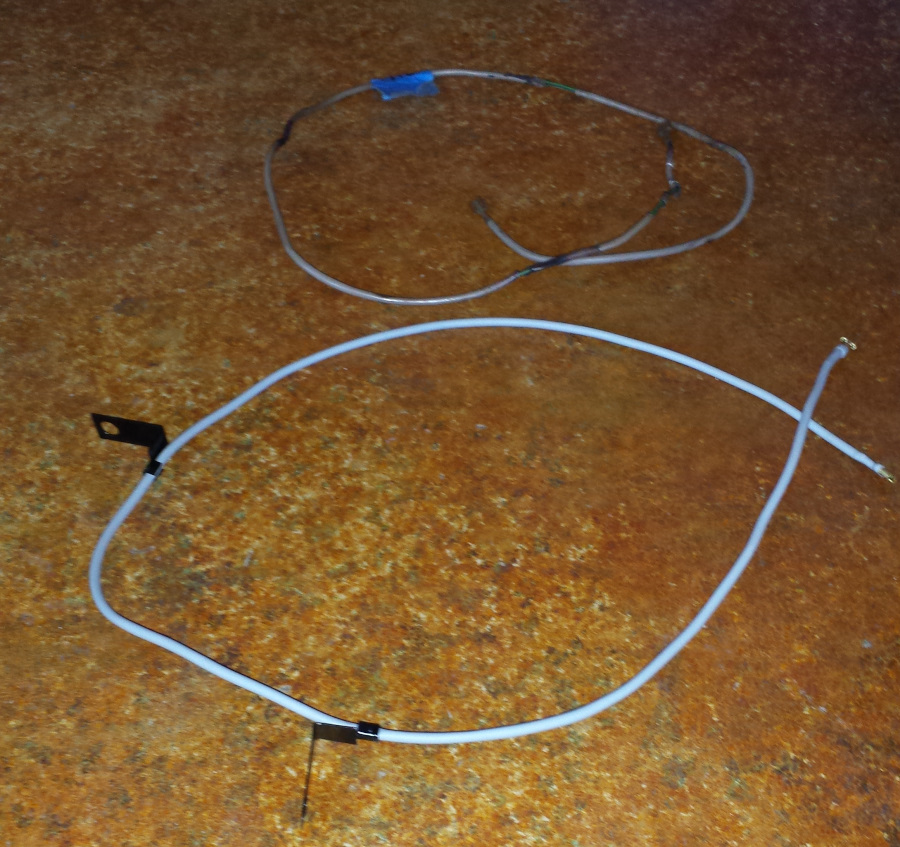 Had to take a shot of all my brand new and completely restored harnesses together. 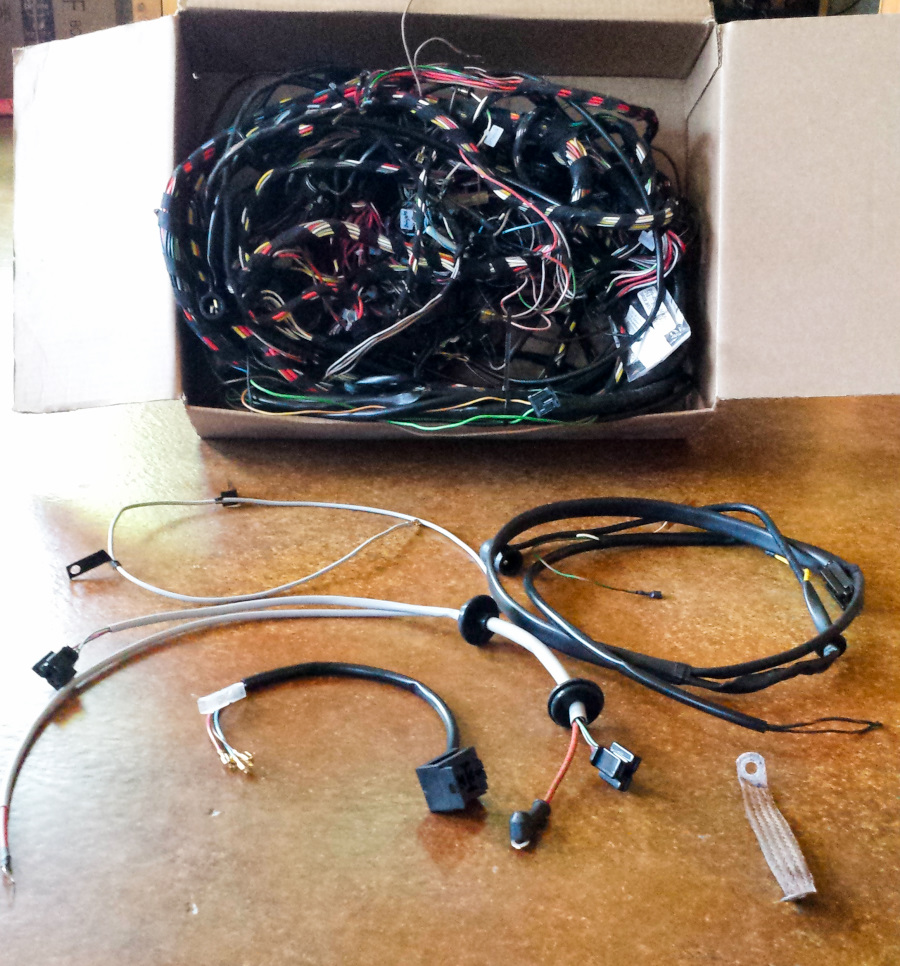 I mentioned the minimum buy on wire left me with extra, so I built a couple extra alternator harnesses. If anyone is looking for one for cheap, let me know. 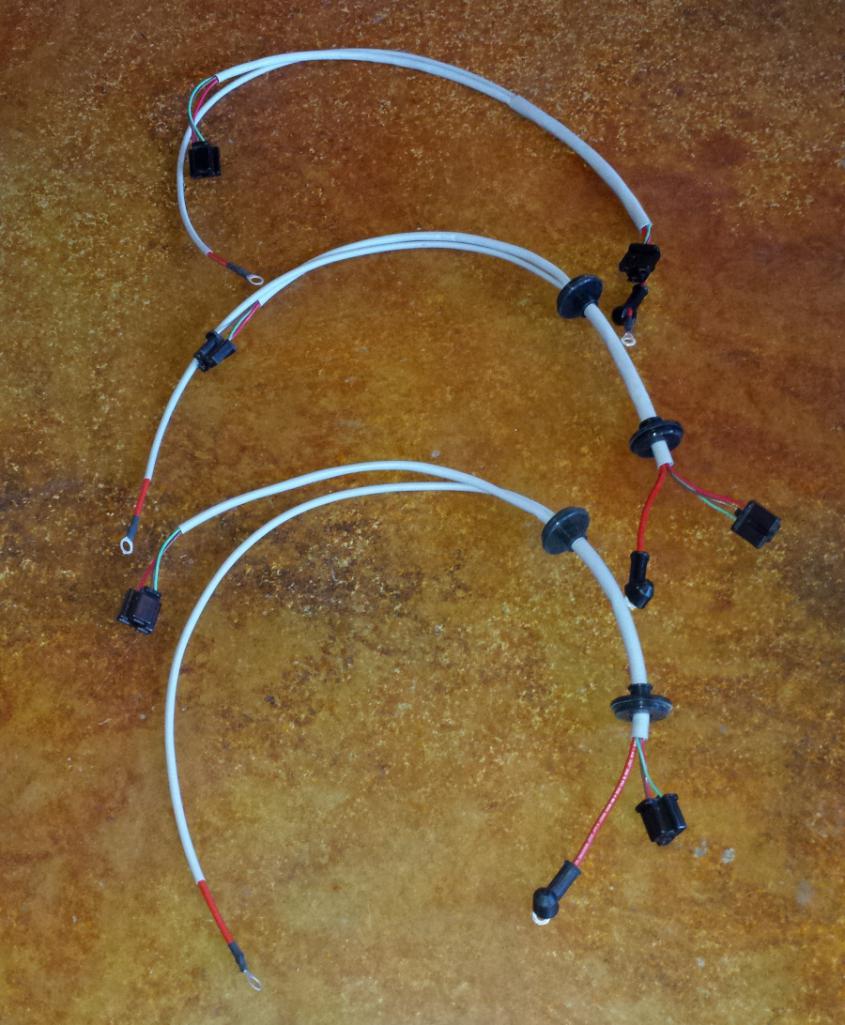 And there's still one incredibly annoying loose end. Literally. I still don't know the correct length for the coil wires on the ignition harness so can't crimp the terminals on. If anyone has an ignition harness handy and can get that measurement, I'd be a happy dude! 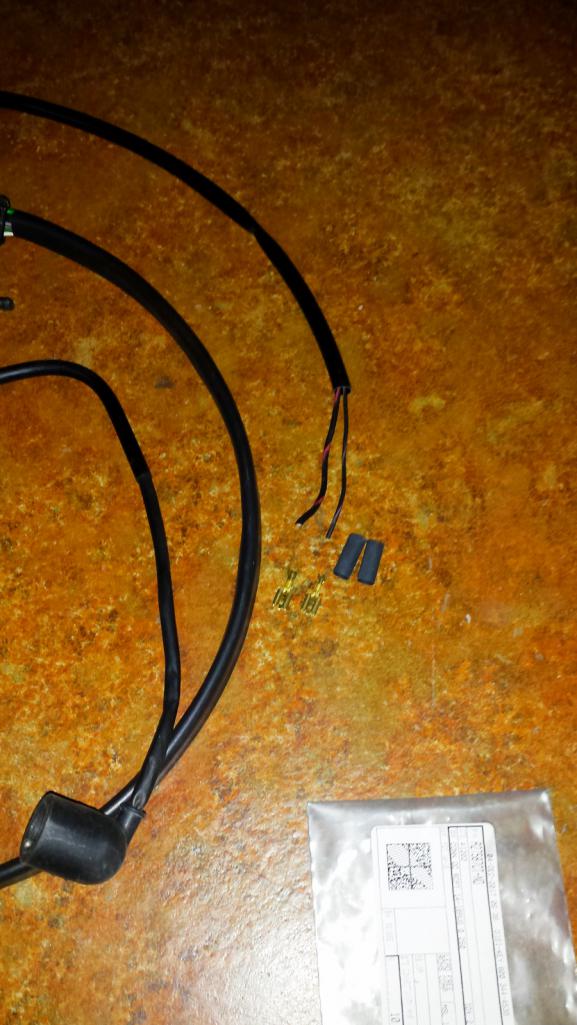 Regardless, after months of having wiring crap junking up the family room, I should score points with the wife when I box up all the harnesses and clean up this mess. |
| bbrock |
 Sep 7 2018, 11:13 PM Sep 7 2018, 11:13 PM
Post
#515
|
|
914 Guru      Group: Members Posts: 5,269 Joined: 17-February 17 From: Montana Member No.: 20,845 Region Association: Rocky Mountains 
|
Spent this week chasing down all the little rust holes revealed during blasting. I think showing them all would get pretty tedious, so here's just a couple representatives.
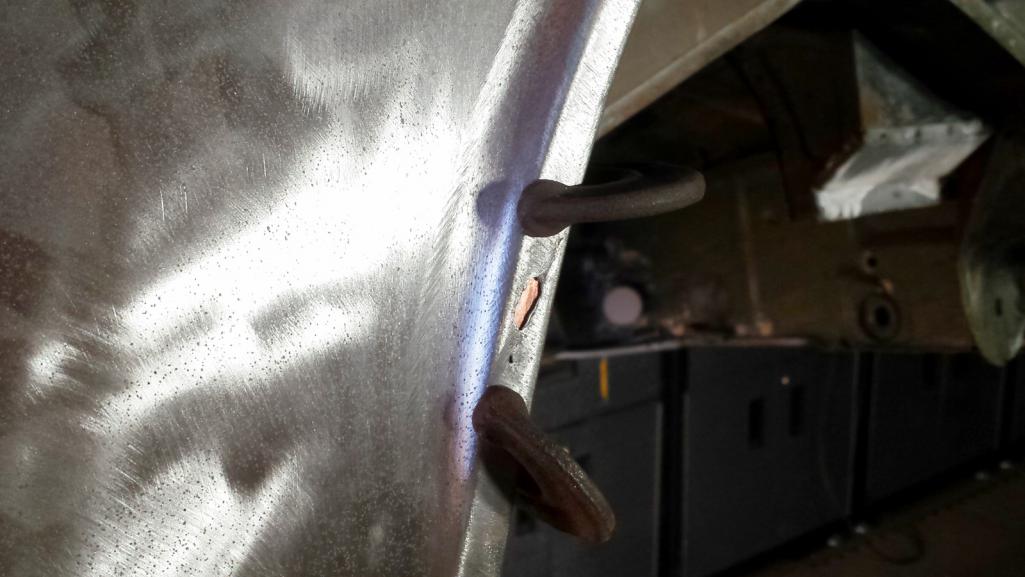 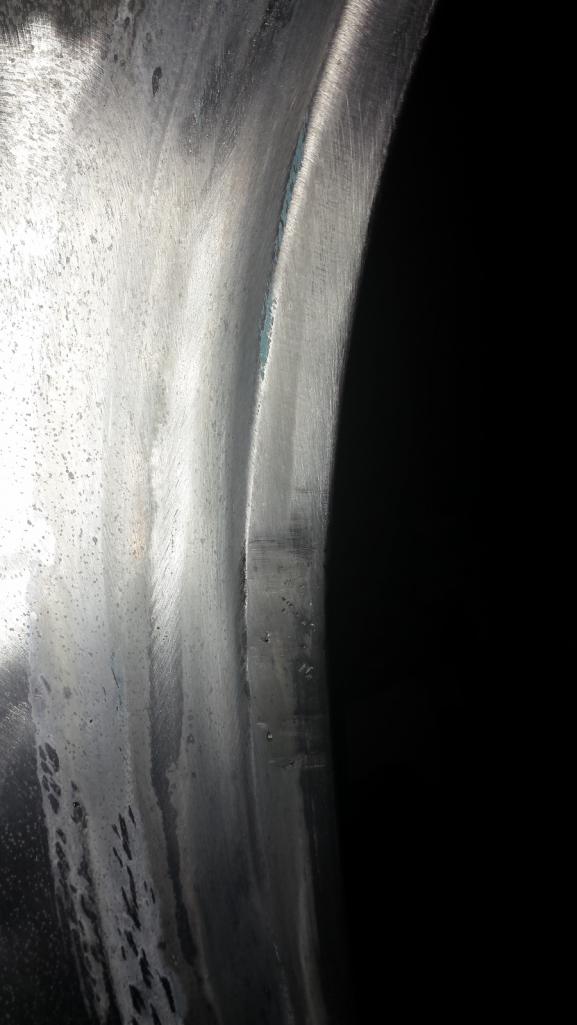 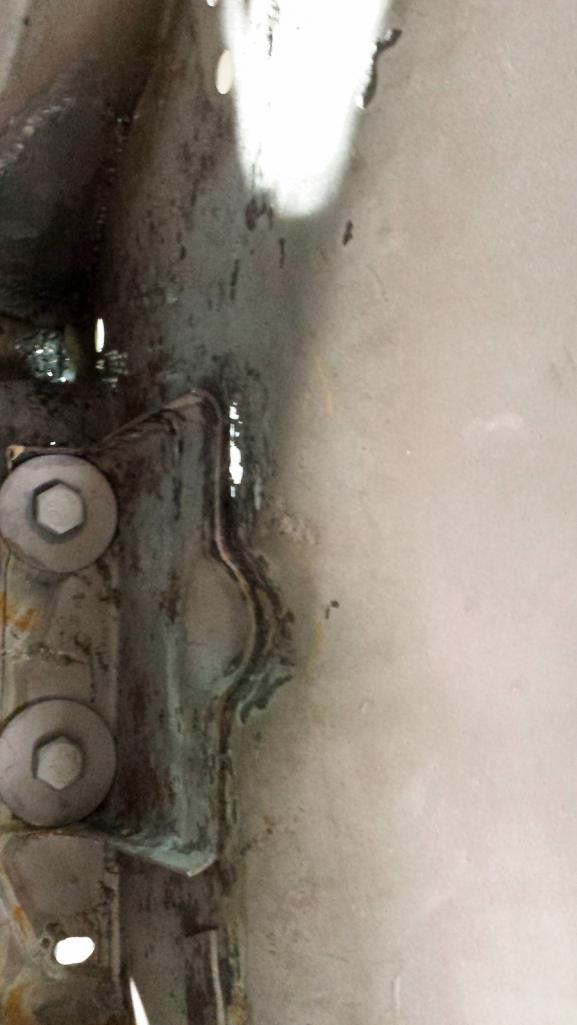 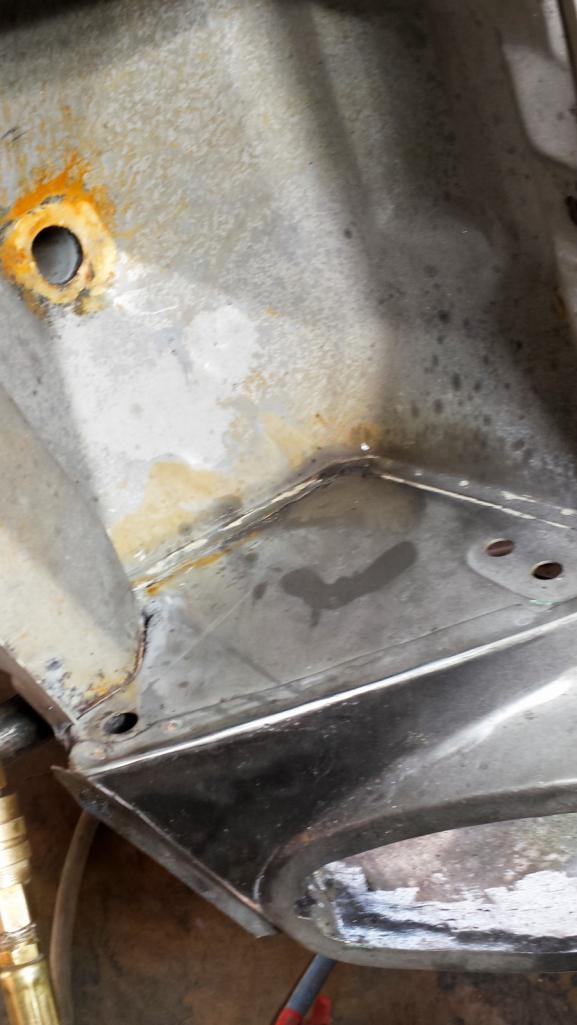 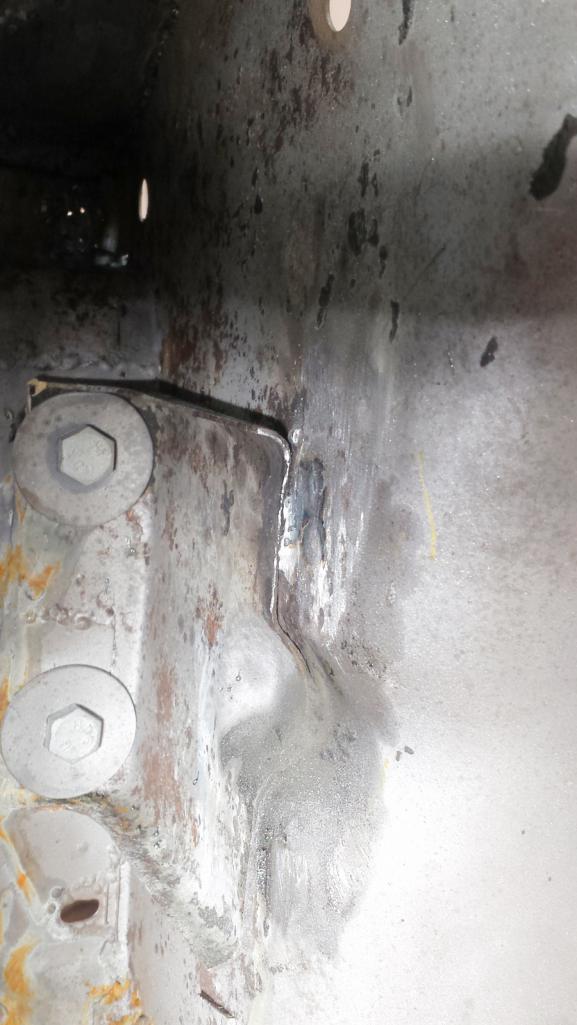 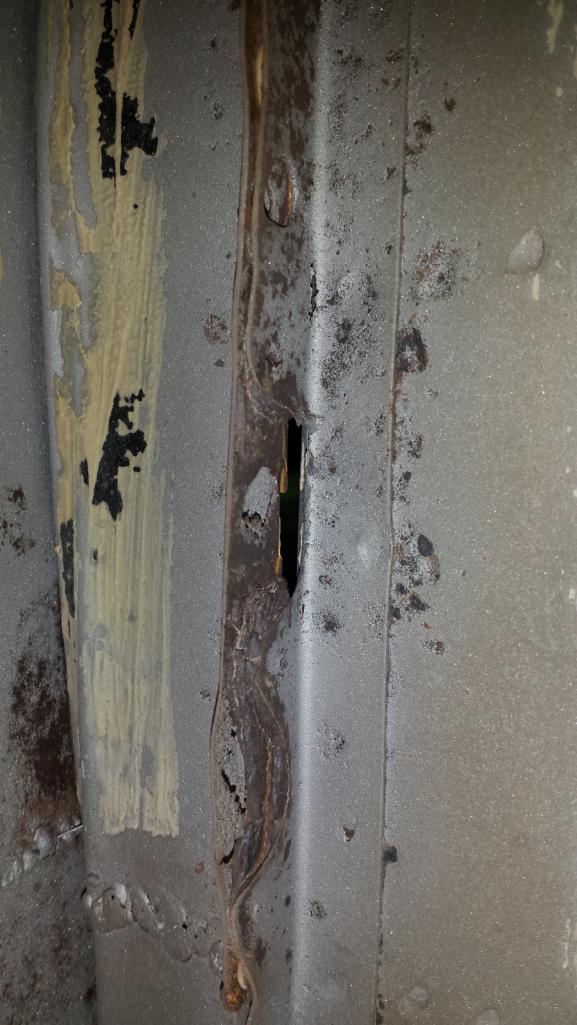 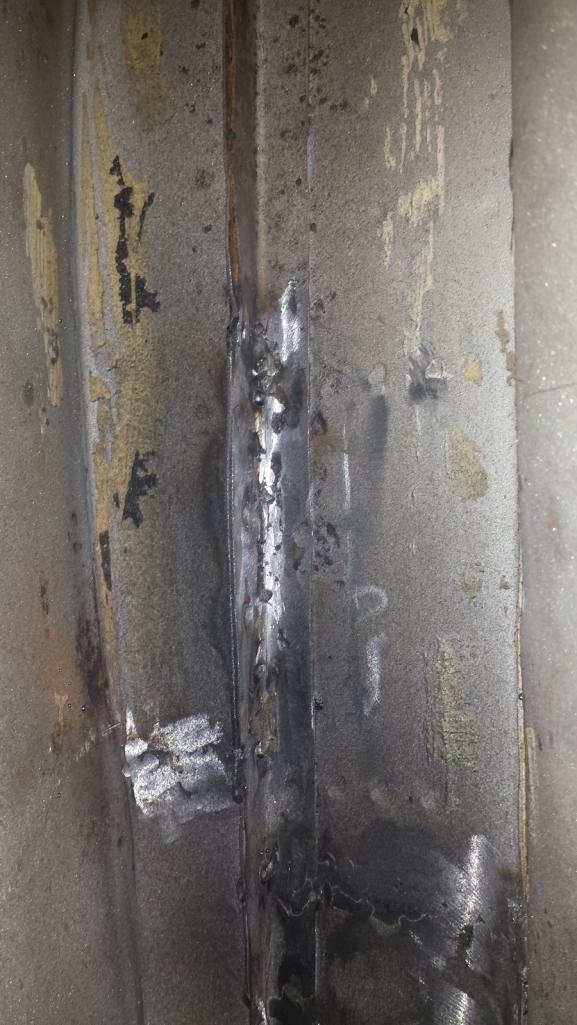 The last patch was the one I said I was going to ignore, but I think we all knew I couldn't (IMG:style_emoticons/default/dry.gif) I didn't get too crazy with it though, it will be sandwiched between layers of seam sealer. (IMG:http://www.914world.com/bbs2/uploads/post-20845-1535398209_thumb.jpg) 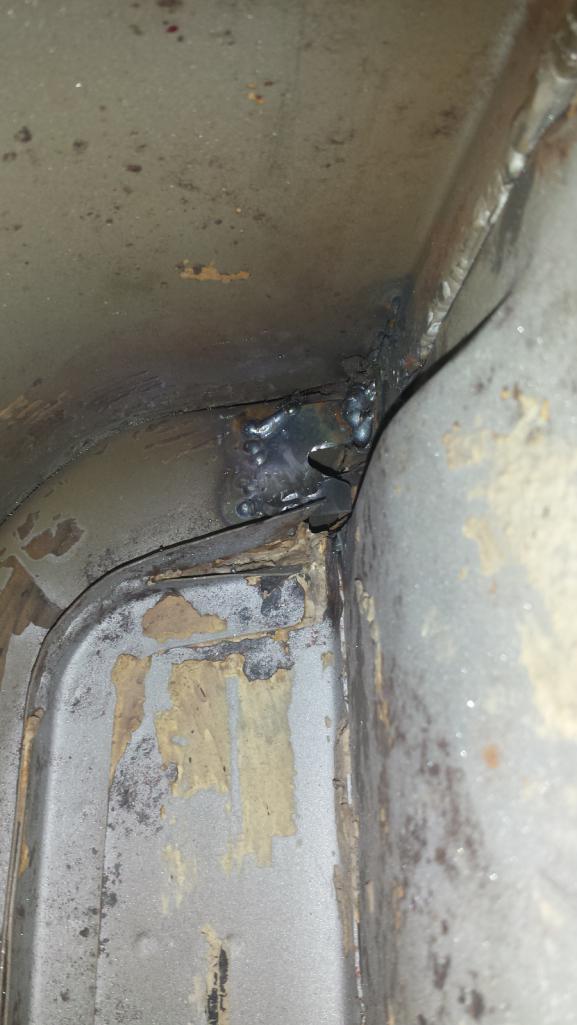 That is the absolute LAST rust repair! (IMG:style_emoticons/default/rocking nana.gif) (IMG:style_emoticons/default/monkeydance.gif) (IMG:style_emoticons/default/rocking nana.gif) (IMG:style_emoticons/default/monkeydance.gif) (IMG:style_emoticons/default/rocking nana.gif) (IMG:style_emoticons/default/monkeydance.gif) Now for the long slog of grinding, pinhole filling, and metal finish on the way to paint. (IMG:style_emoticons/default/smash.gif) (IMG:style_emoticons/default/welder.gif) |
| burton73 |
 Sep 9 2018, 02:05 PM Sep 9 2018, 02:05 PM
Post
#516
|
|
burton73     Group: Members Posts: 3,691 Joined: 2-January 07 From: Los Angeles Member No.: 7,414 Region Association: Southern California 
|
Hi Brent,
When does the weather start to turn for you up there? Bob B |
| defianty |
 Sep 9 2018, 03:28 PM Sep 9 2018, 03:28 PM
Post
#517
|
|
Senior Member    Group: Members Posts: 659 Joined: 9-August 06 From: Essex, UK Member No.: 6,621 Region Association: None  |
Looking good Brent!
|
| bbrock |
 Sep 9 2018, 05:23 PM Sep 9 2018, 05:23 PM
Post
#518
|
|
914 Guru      Group: Members Posts: 5,269 Joined: 17-February 17 From: Montana Member No.: 20,845 Region Association: Rocky Mountains 
|
Hi Brent, When does the weather start to turn for you up there? Bob B Hi Bob, Although we usually get our first dusting of snow at the house sometime in August (which is late this year), the serious snow typically doesn't start until end of October to end of November although I've seen 2 feet of the white stuff dump on Oct. 1. So I'm looking at anywhere from 1-3 months of good weather in front of me before Mother Nature shuts me down. And by good weather, I mean awesome weather for painting. Highs in the 70s, low humidity, and very few bugs. |
| bbrock |
 Sep 10 2018, 05:20 PM Sep 10 2018, 05:20 PM
Post
#519
|
|
914 Guru      Group: Members Posts: 5,269 Joined: 17-February 17 From: Montana Member No.: 20,845 Region Association: Rocky Mountains 
|
Doing cleanup
Up until now, my priority has been getting fresh metal onto the car. The longer a part sat in my overly cramped shop, the more likely for it to get stepped on, tripped over, or lost. That meant leaving a lot of metal finish work for later and a lot of embarrassing rough edges on the car. Now I finally get to clean up all the ugly crap that has been bugging the (IMG:style_emoticons/default/stromberg.gif) out of me. I'm starting from the front moving back: grinding welds, chasing pinholes, smoothing snaggle-toothed flanges, and stuff like that. Plan is to straighten, grind, and smooth as much as I can, then give the whole chassis phosphoric acid treatment inside and out. Then I will go over all weld seams with the kevlar reinforced and zinc enriched filler that Ben ( @mb911 ) turned me on to for final finishing. 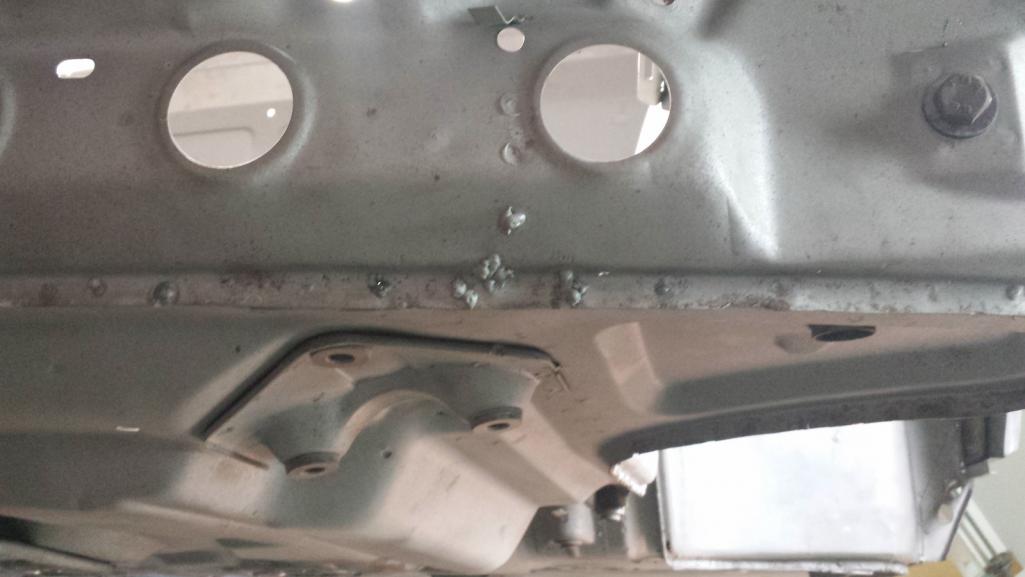 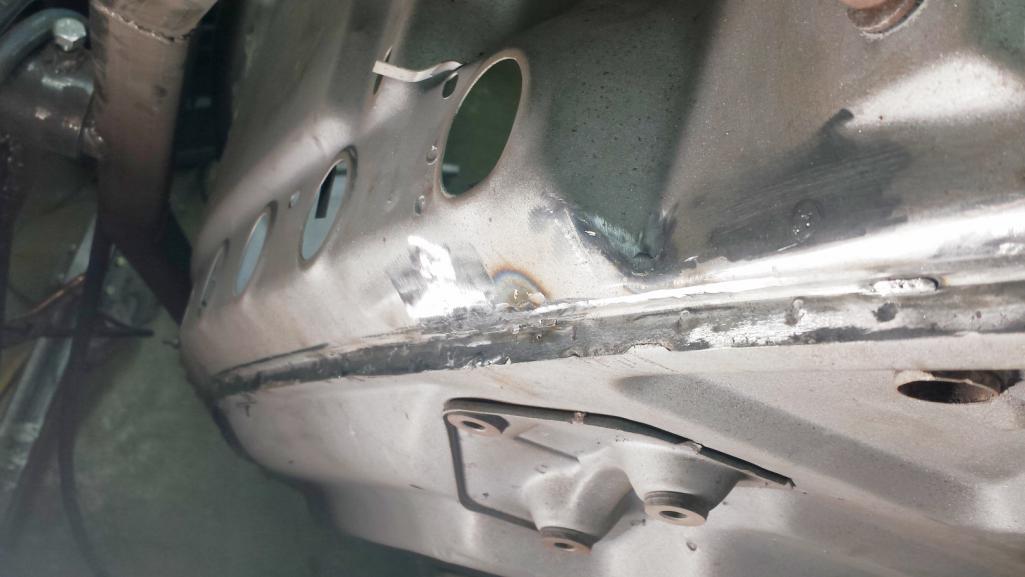 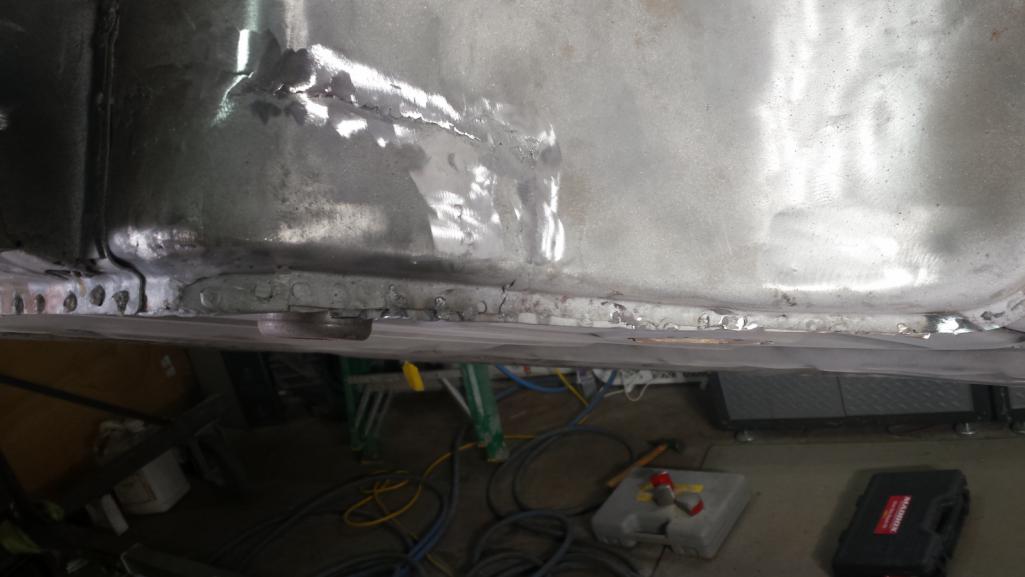 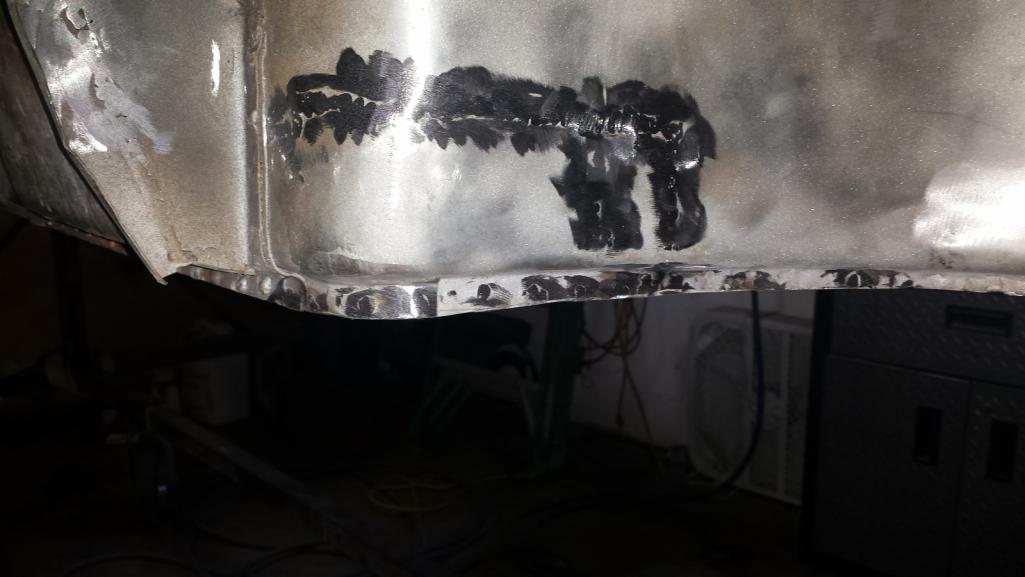 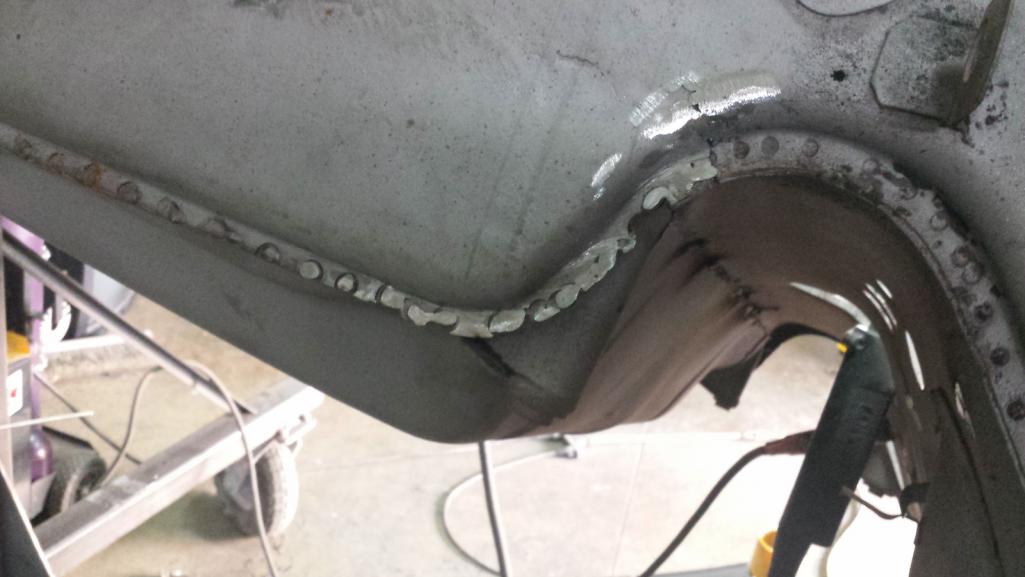 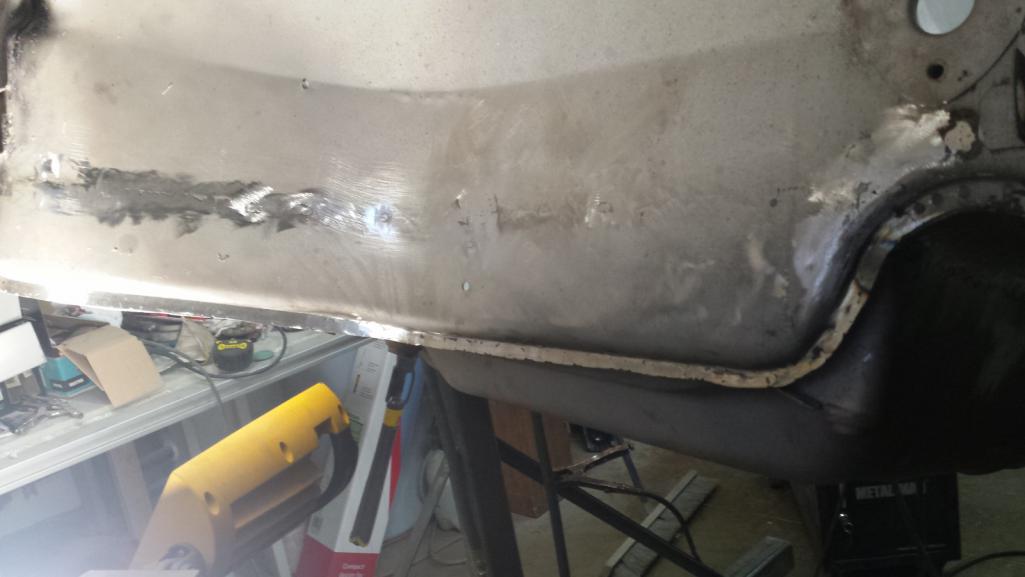 I need to figure out a way to mimic spot welds on those flanges. I've seen a few techniques on restoration forums but none that jump out as a great solution on flanges like these. One guy made a custom dimpler with vice grips which looks slick, but so much of these flanges are welds that I think the flange is too hard to dimple that way. I think I'll experiment with a small carbide burr to see if I can just grind little divots that will mimic spot welds when painted. |
| bbrock |
 Sep 10 2018, 05:28 PM Sep 10 2018, 05:28 PM
Post
#520
|
|
914 Guru      Group: Members Posts: 5,269 Joined: 17-February 17 From: Montana Member No.: 20,845 Region Association: Rocky Mountains 
|
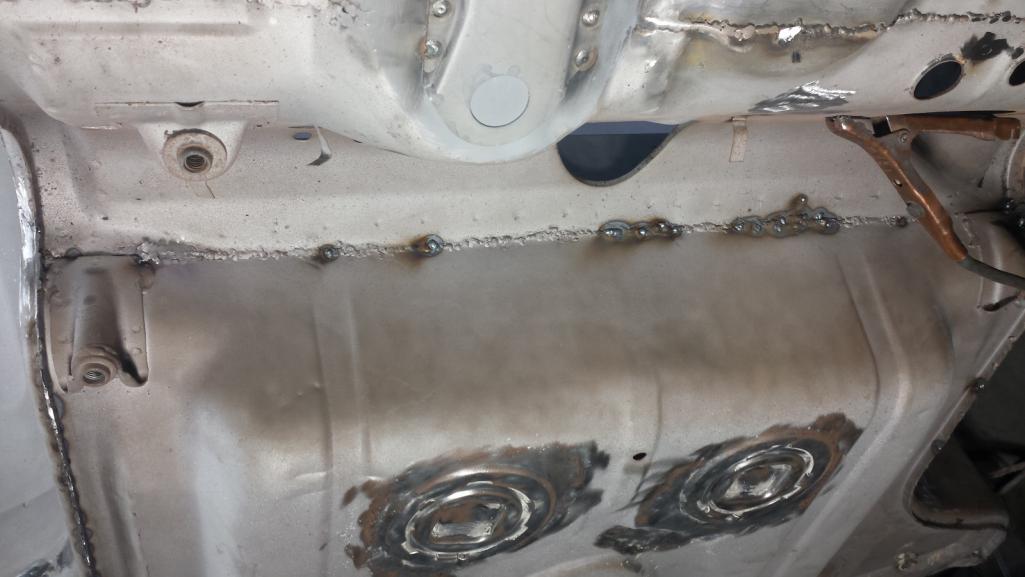
A few more pics. If you've followed from the beginning, you might remember the front trunk floor was the first patch on the project. Boy was I a shitty welder then. Still am, but less so. No surprise I had a lot of shrink around this weld but it isn't half bad either. It will only take a thin bit of filler to smooth out.
 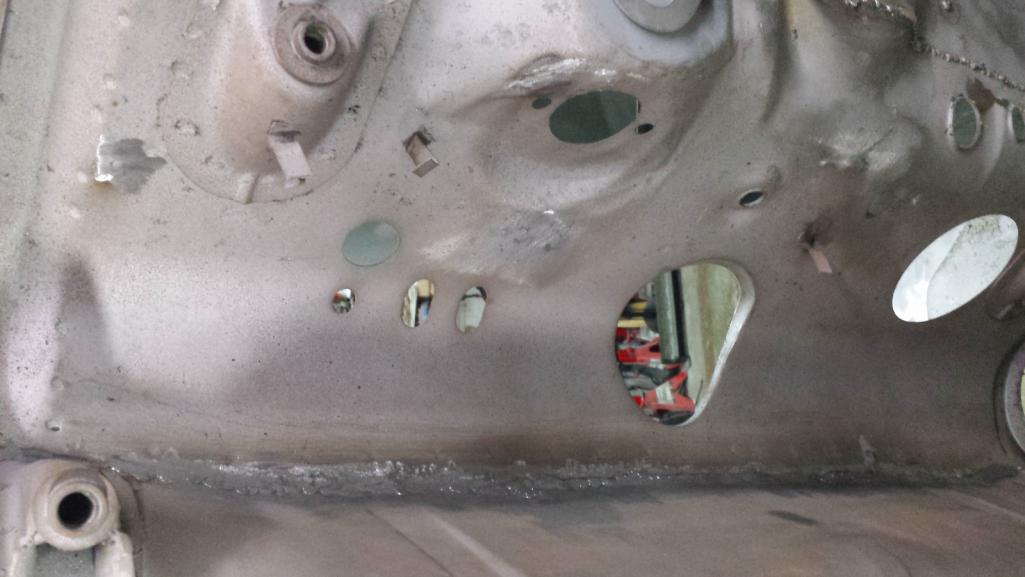 Welded up holes drilled for the fuel pump relocation above the steering rack. I'll be moving it to a late model access cover. Also had a half dozen rot holes from mouse and weasel piss to fill. If you can't see them, then I'm happy. (IMG:style_emoticons/default/smile.gif) Left a couple boogers down in the bottom that I can't get to with tools. They will be buried under sealer anyway. 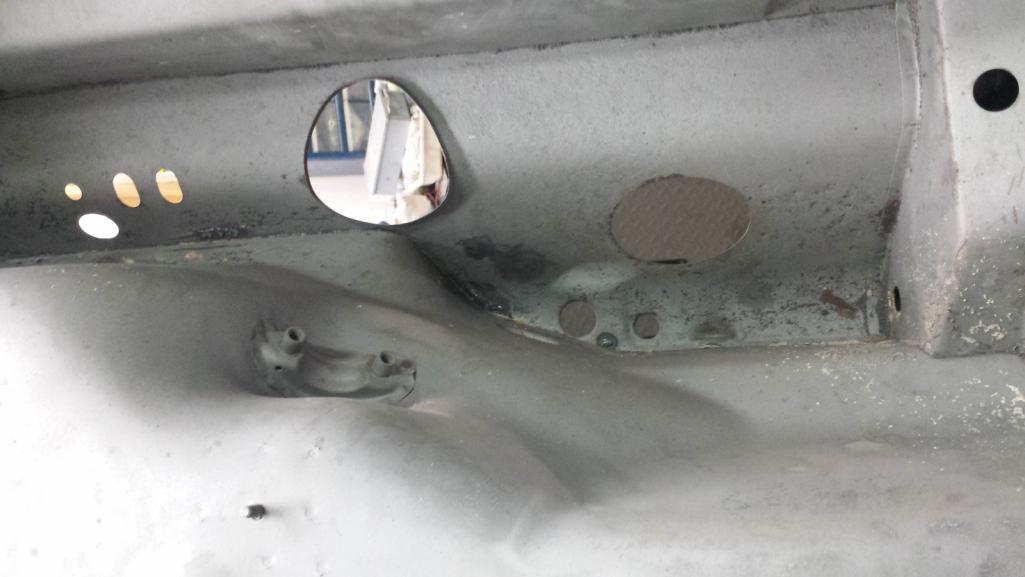 One last one for the road. 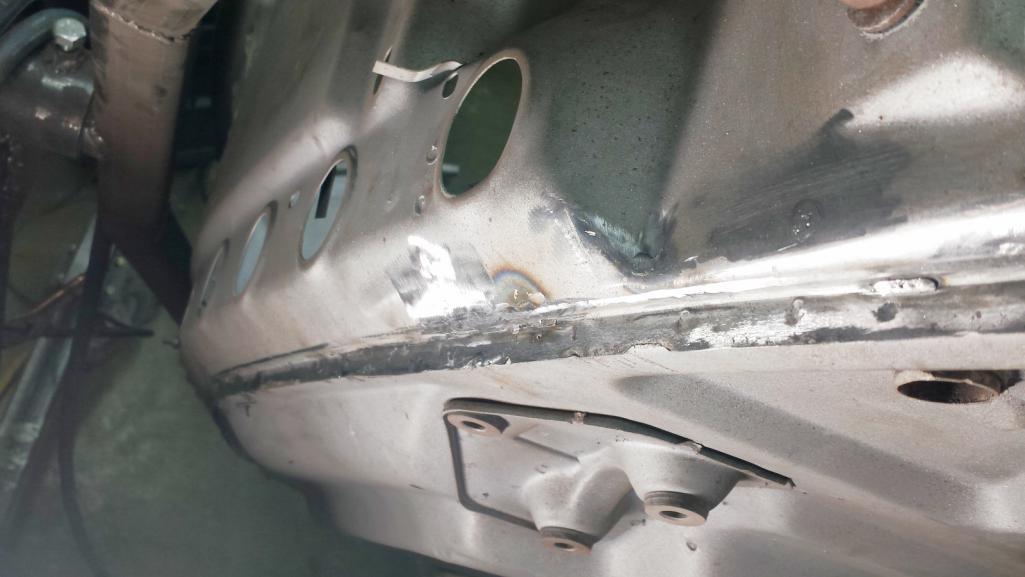 |
  |
2 User(s) are reading this topic (2 Guests and 0 Anonymous Users)
0 Members:

|
Lo-Fi Version | Time is now: 22nd December 2024 - 11:00 PM |
Invision Power Board
v9.1.4 © 2024 IPS, Inc.


