|
|
|
Porsche, and the Porsche crest are registered trademarks of Dr. Ing. h.c. F. Porsche AG.
This site is not affiliated with Porsche in any way. Its only purpose is to provide an online forum for car enthusiasts. All other trademarks are property of their respective owners. |
|
|

  |

| euro911 |
 Mar 24 2019, 03:15 AM Mar 24 2019, 03:15 AM
Post
#941
|
|
Retired & living the dream. God help me if I wake up!  Group: Members Posts: 8,880 Joined: 2-December 06 From: So.Cal. & No.AZ (USA) Member No.: 7,300 Region Association: Southern California |
They look spectacular (IMG:style_emoticons/default/aktion035.gif)
|
   |

 
|
| tygaboy |
Mar 24 2019, 08:20 AM
Post
#942
|
|
914 Guru Group: Members Posts: 5,551 Joined: 6-October 15 From: Petaluma, CA Member No.: 19,241 Region Association: Northern California |
It's official. You're nuts.
Oh, and: Your nuts! (IMG:style_emoticons/default/drooley.gif) Come for a visit and teach me how to plate. |
 |
|
| bbrock |
Mar 24 2019, 01:38 PM
Post
#943
|
|
914 Guru Group: Members Posts: 5,269 Joined: 17-February 17 From: Montana Member No.: 20,845 Region Association: Rocky Mountains |
QUOTE(tygaboy @ Mar 24 2019, 08:20 AM)  Oh my! (IMG:style_emoticons/default/blush.gif) Thanks, I guess? (IMG:style_emoticons/default/smile.gif) |
|
|
|
| bbrock |
Mar 24 2019, 05:57 PM
Post
#944
|
|
914 Guru Group: Members Posts: 5,269 Joined: 17-February 17 From: Montana Member No.: 20,845 Region Association: Rocky Mountains |
This pic is special for @tygaboy (IMG:style_emoticons/default/happy11.gif)
 Okay, let's fix that before you blow a fuse. (IMG:style_emoticons/default/biggrin.gif) A couple very important things to deal with in restoring the column housing. First is this critical stamping. Lose that, and the car will always pull to the right. 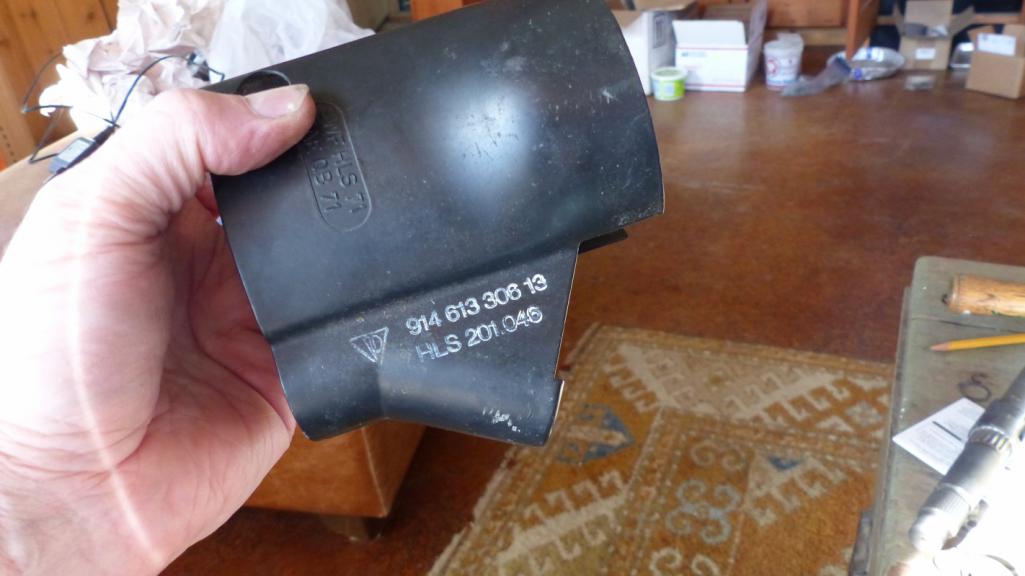 I don't know what this green splotch does but I really don't want to find out what happens if it is removed. (IMG:style_emoticons/default/blink.gif)  Trying to be careful, I started cleaning the piece with warm solution of Dawn dish soap and water and a soft toothbrush thinking that was safe. To my horror, the white stamping started wiping right off! (IMG:style_emoticons/default/yikes.gif) I finished cleaning CAREFULLY and just scuffed the original paint with 400 grit as it was still adhering well. I also sanded out some key nicks around the ignition lock housing. I didn't get them all out as I didn't want to sand that deep, but it's better. I rolled the masking around the stamping to soften the spray edge and help the paint blend. 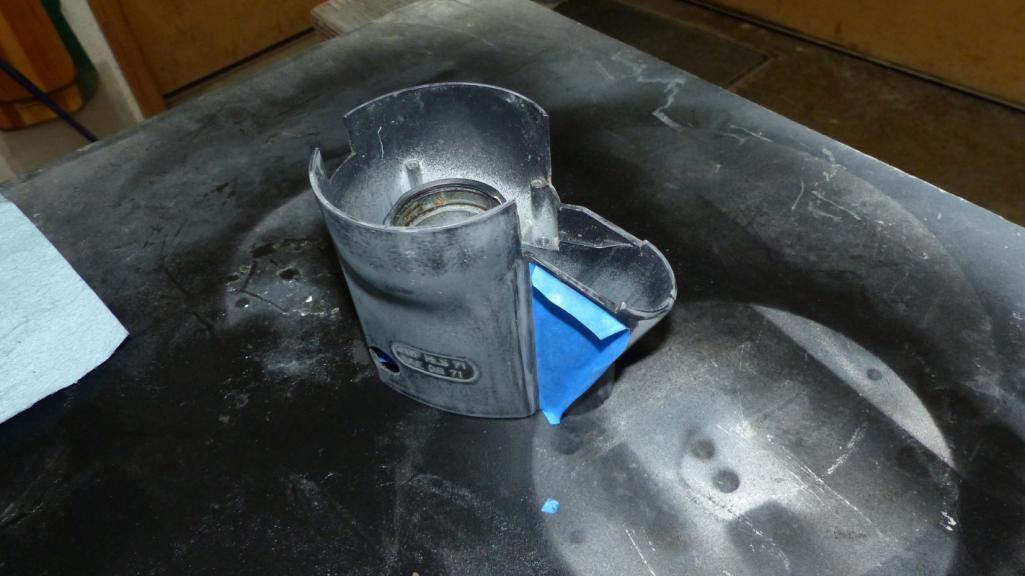 Boy, I sure hope there is enough of that stamp left. I don't really want to have to visit the stamp man again. Paint looks good though. You can't even see where the old meets the new. The flash really catches those key nicks though. It doesn't look that bad in life. Black is the correct color for that clamping bolt. Don't get that wrong or you will be sorry. (IMG:style_emoticons/default/laugh.gif) 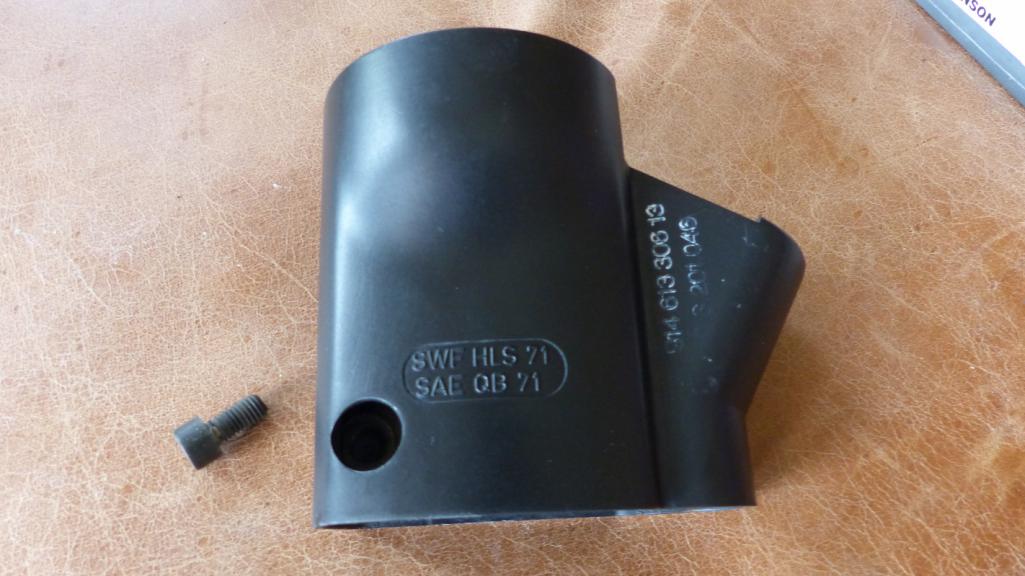 Green splotch is intact. That's a relief.  And here it is in place. I hope Mr. Baker appreciates that I dug the plastic collar out of storage just for him. It's a bit faded. I'll see what a treatment with Forever Black does for it. I suppose I'm going to hear about the missing switch levers though. (IMG:style_emoticons/default/screwy.gif) Maybe later. (IMG:style_emoticons/default/wavey.gif) 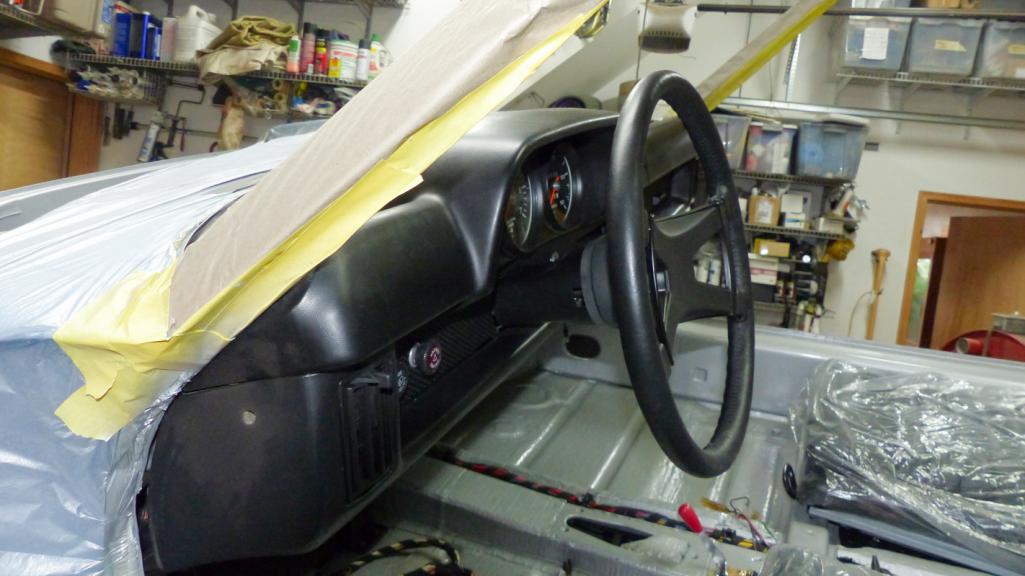 |
|
|
|
| tygaboy |
Mar 24 2019, 06:08 PM
Post
#945
|
|
914 Guru Group: Members Posts: 5,551 Joined: 6-October 15 From: Petaluma, CA Member No.: 19,241 Region Association: Northern California |
Oh my gosh... Thank you! (IMG:style_emoticons/default/lol-2.gif)
|
|
|
|
| KELTY360 |
Mar 24 2019, 06:10 PM
Post
#946
|
|
914 Neferati Group: Members Posts: 5,121 Joined: 31-December 05 From: Pt. Townsend, WA Member No.: 5,344 Region Association: Pacific Northwest |
QUOTE(bbrock @ Mar 24 2019, 03:57 PM) Lose that, and the car will always pull to the right. Admins, cleanup on aisle 3 please. Clearly a blatant political statement. (IMG:style_emoticons/default/stirthepot.gif) |
|
|
|
| Dion |
Mar 24 2019, 06:19 PM
Post
#947
|
|
RN Group: Members Posts: 2,839 Joined: 16-September 04 From: Audubon,PA Member No.: 2,766 Region Association: MidAtlantic Region |
QUOTE(KELTY360 @ Mar 24 2019, 04:10 PM) QUOTE(bbrock @ Mar 24 2019, 03:57 PM) Lose that, and the car will always pull to the right. Admins, cleanup on aisle 3 please. Clearly a blatant political statement. (IMG:style_emoticons/default/stirthepot.gif) (IMG:style_emoticons/default/av-943.gif) luv it! Oh and nice work there Brent. (IMG:style_emoticons/default/beer3.gif) pour yerself one. |
|
|
|
| bbrock |
Mar 24 2019, 08:27 PM
Post
#948
|
|
914 Guru Group: Members Posts: 5,269 Joined: 17-February 17 From: Montana Member No.: 20,845 Region Association: Rocky Mountains |
QUOTE(KELTY360 @ Mar 24 2019, 06:10 PM) QUOTE(bbrock @ Mar 24 2019, 03:57 PM) Lose that, and the car will always pull to the right. Admins, cleanup on aisle 3 please. Clearly a blatant political statement. (IMG:style_emoticons/default/stirthepot.gif) Okay, that's a good one. You get points for that. (IMG:style_emoticons/default/biggrin.gif) One more little side project before posting the main project for the weekend. I had to pull and prep the wiper assembly bracket to send off for plating. That area was ground zero for the mouse and weasel apocalypse that hit my car so... Eww!!!! I didn't take proper "before" pics but you can get a little sense here. Note the hair on the motor from dead animals. 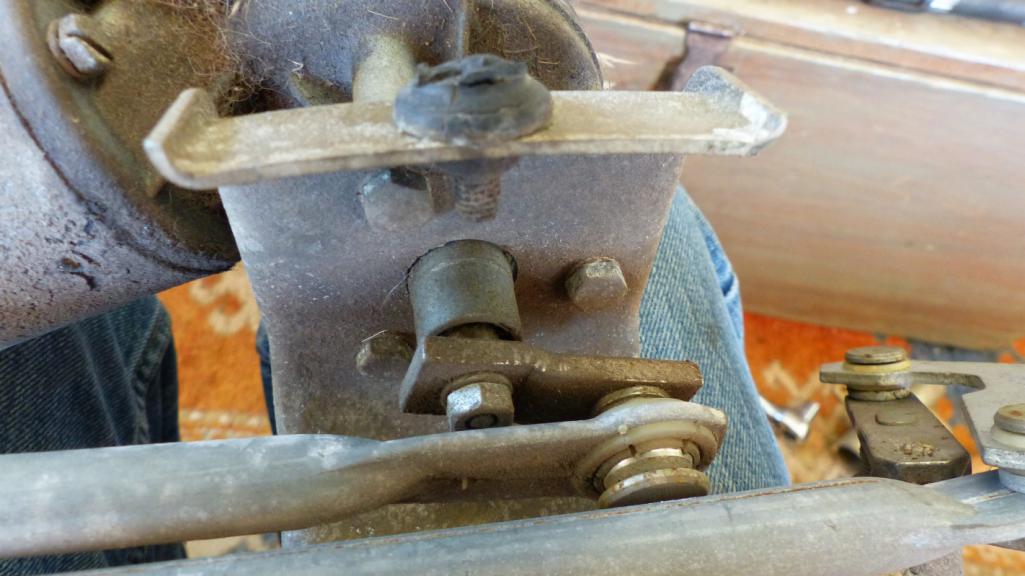 The pan was to just clean, blast, and wire wheel the bracket and leave the rest for later, but there are so many fiddly parts that I wanted to get them back together while my memory was fresh. 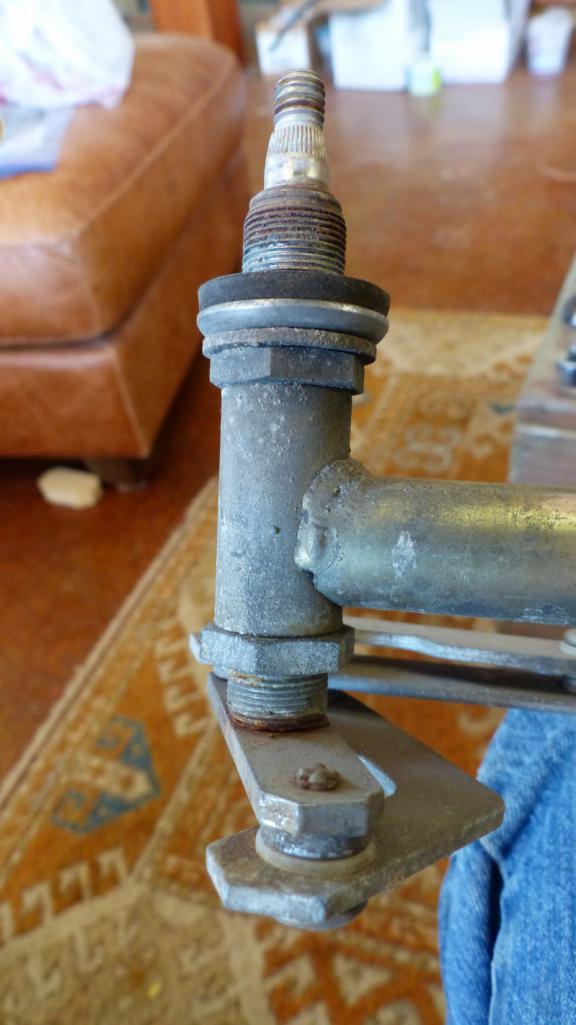 After a lot of scrubbing off the grease and pee crust and replating all the parts, here's where it sits now. 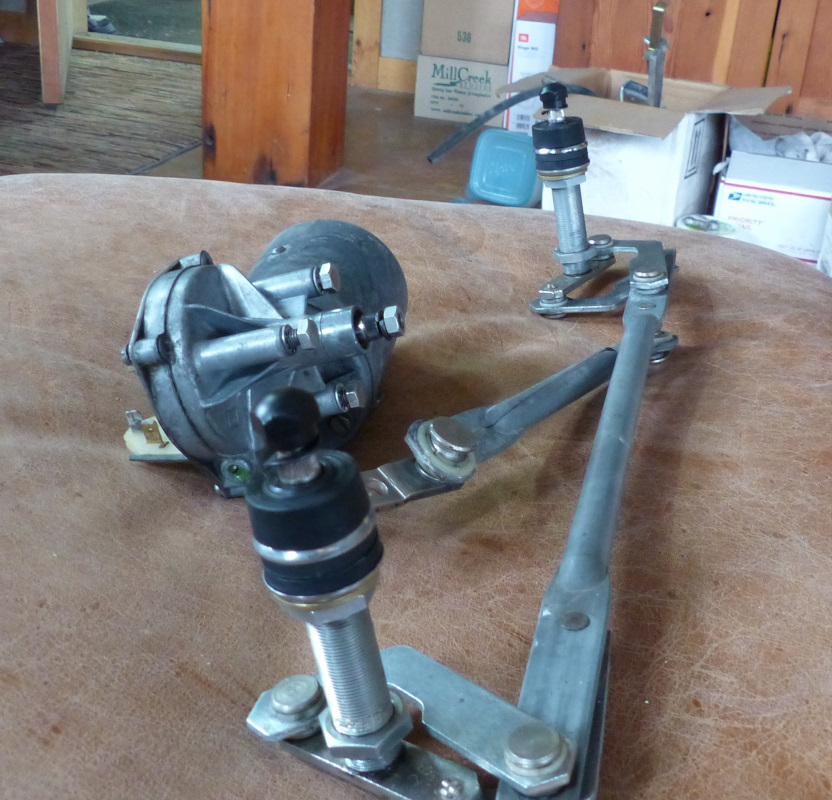 |
|
|
|
| bbrock |
Mar 24 2019, 09:35 PM
Post
#949
|
|
914 Guru Group: Members Posts: 5,269 Joined: 17-February 17 From: Montana Member No.: 20,845 Region Association: Rocky Mountains |
It's hard to believe this, but it's time to get tires for this tub. First I need to clean up this stack of wheels.
(IMG:http://www.914world.com/bbs2/uploads/post-20845-1551738206_thumb.jpg) 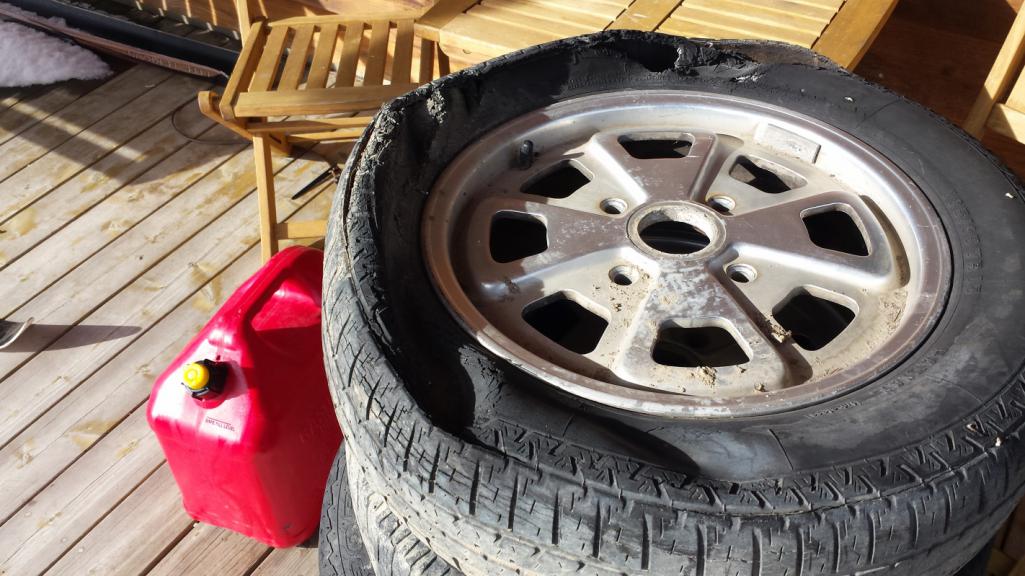 I tried @mepsteins trick of cutting off the tire and then using a pair of bolt cutters to cut the bead and remove the remainder. Cutting the tires was a piece of cake so, bein the idiot that I am, I plowed through three of them before thinking maybe I should make sure I could cut the beads. Needless to say, I could not. After 35 years, the rubber had hardened and cemented so tight to the rims that no about of pounding or prying would bet them loose enough to use the bolt cutters. Even worse, my closest neighbor has a hydraulic tire machine but I didn't want to bother him. Well, I got over that. Even with his machine, we had to fight to get the two intact tires off and only one side of each of the ones I had cut. I got the remainder off this morning by first grinding the rubber away with a paint stripping wheel and then cutting the bead cord with a cutoff wheel on a drill. 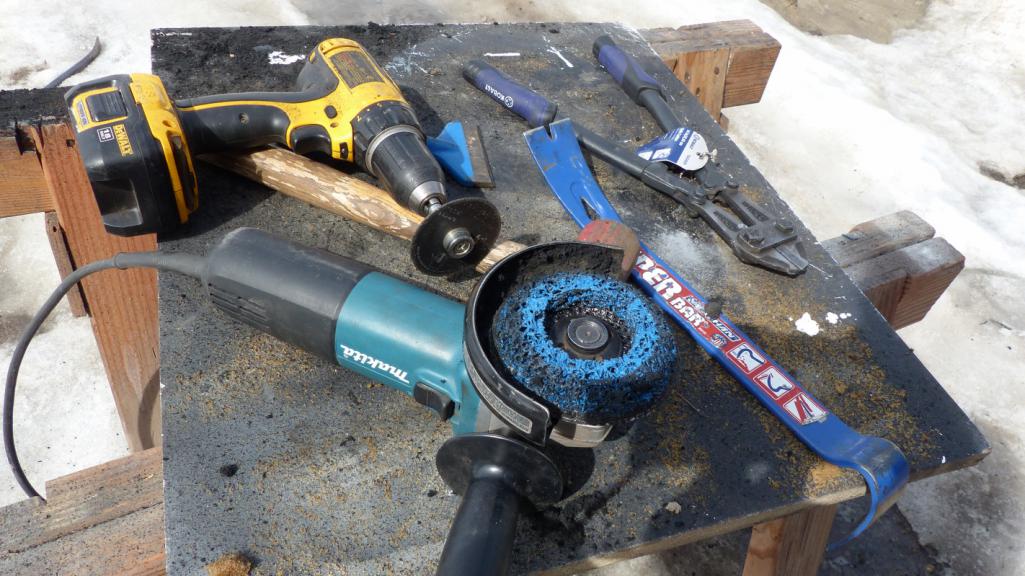 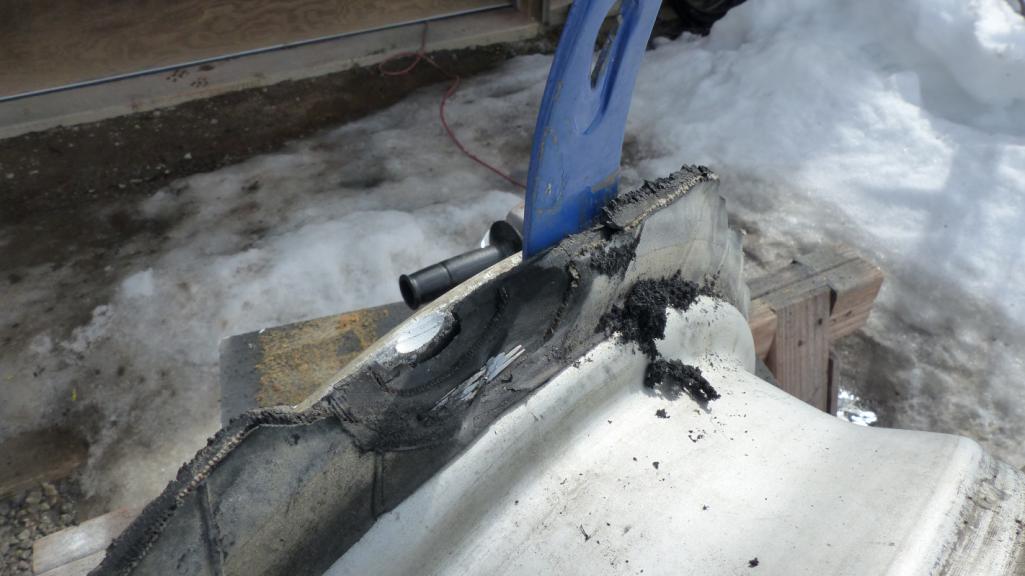 Then prying with a pry bar.  I finally had five naked and grungy rims.  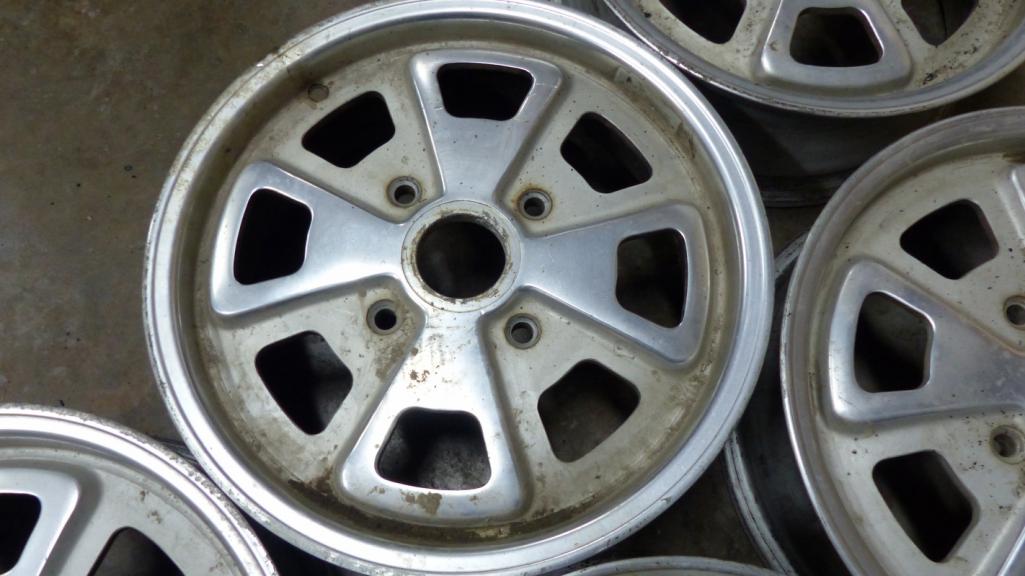 I picked one out and scrubbed it with dish soap and fine steel wool. The results are less than spectacular. There's a lot of scrapes, scratches and stains on these and I'd really like to send them off to one of the wheel wizards for professional restoration, but my bank account says otherwise so I'll have to clean them the best I can and live with them for awhile. Still, it's an improvement. 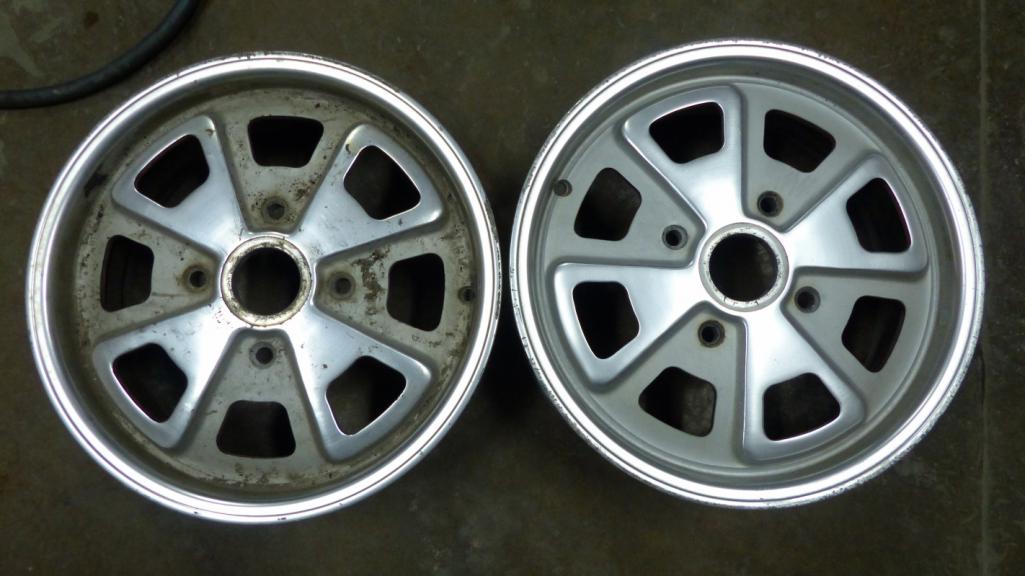 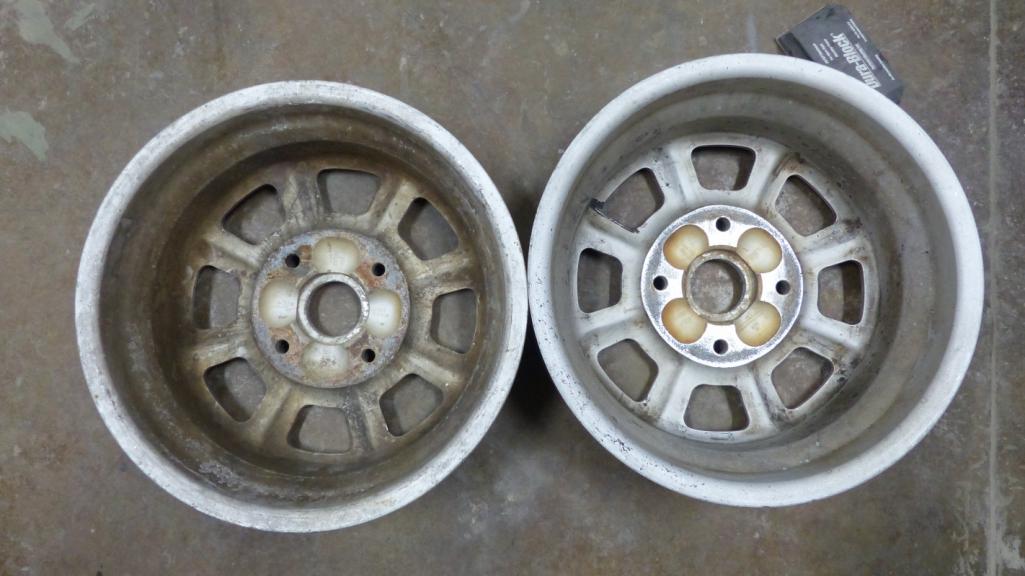 |
|
|
|
| bbrock |
Mar 24 2019, 09:47 PM
Post
#950
|
|
914 Guru Group: Members Posts: 5,269 Joined: 17-February 17 From: Montana Member No.: 20,845 Region Association: Rocky Mountains |
All of them have a fair amount of curb rash. I should at least be able to do something about that.
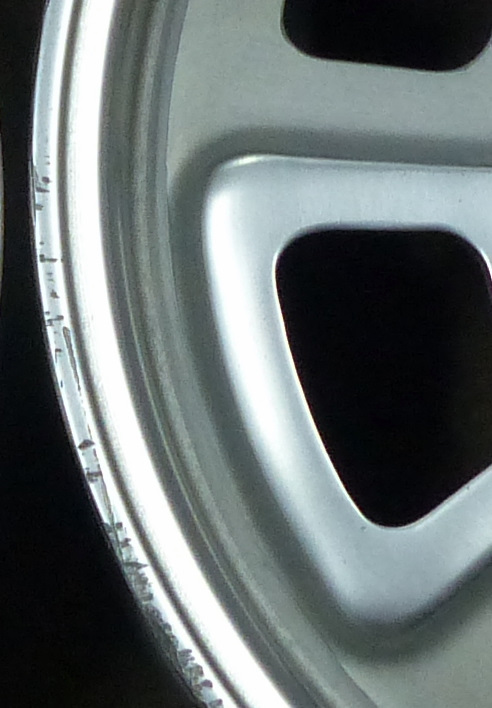 Here's how it looks after one pass with 220 grit on a random orbit palm sander. This is actually not bad. I can't get the deepest gouges out but I think if I take this to about 800 to 1000 grit, it should match the original sheen pretty close. I had to throw some bolts on there just to see how they look. (IMG:style_emoticons/default/smile.gif) 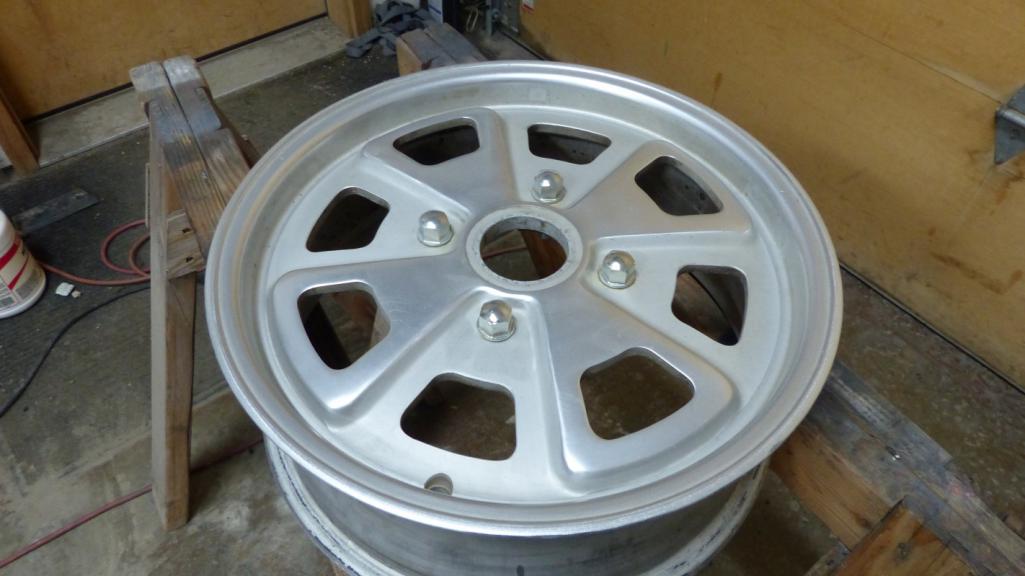 Some of the other damage I'll be dealing with on these wheels. Looks like somebody used sandpaper and scratched through the anodizing. 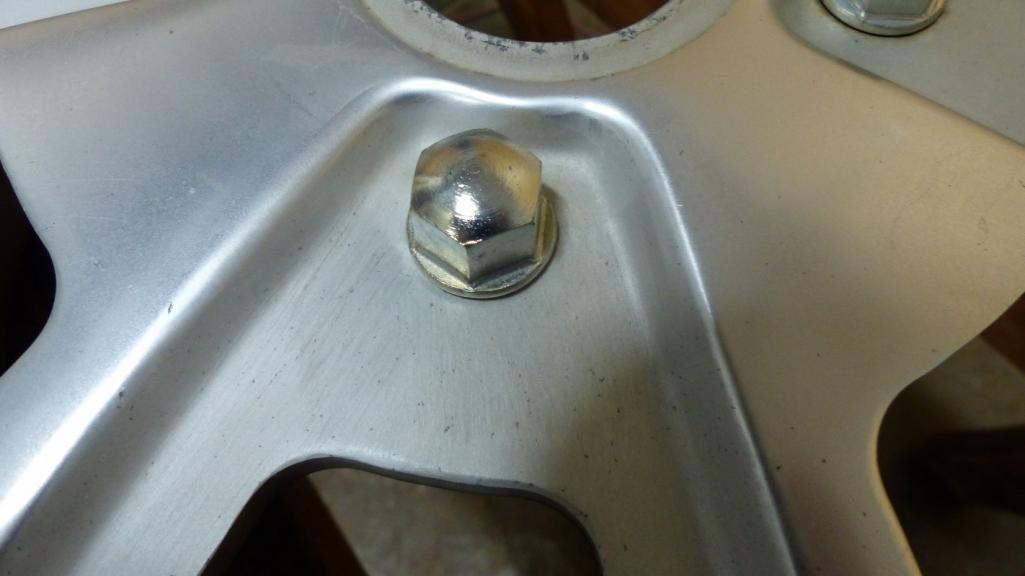 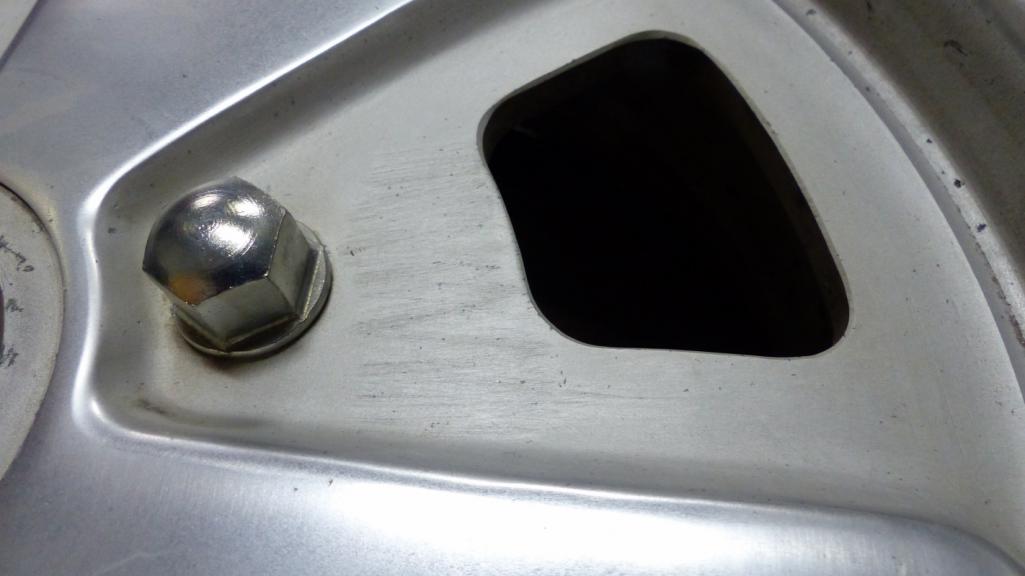 and deep stains and marks left by adhesive wheel weights. 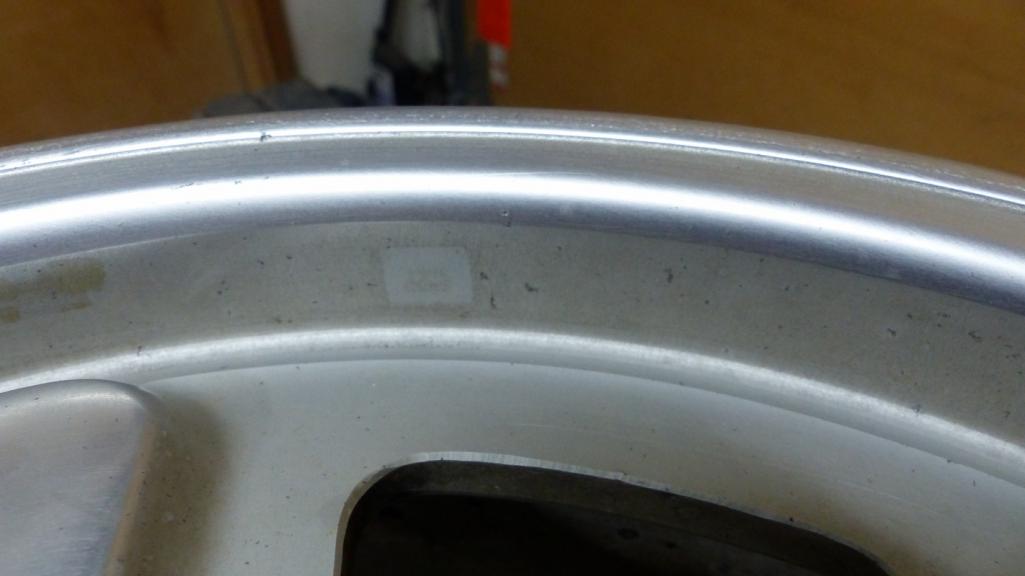 These wheels won't be perfect but they should be okay 10 footers. I'll do some research, but if anyone has tips or suggestions to share, I'm all ears. Ultimately, I think they'll need professional restoration but I can't swing that financially right now so I'll get them as good as I can and be happy with it. (IMG:style_emoticons/default/beerchug.gif) |
|
|
|
| bbrock |
Mar 29 2019, 10:49 PM
Post
#951
|
|
914 Guru Group: Members Posts: 5,269 Joined: 17-February 17 From: Montana Member No.: 20,845 Region Association: Rocky Mountains |
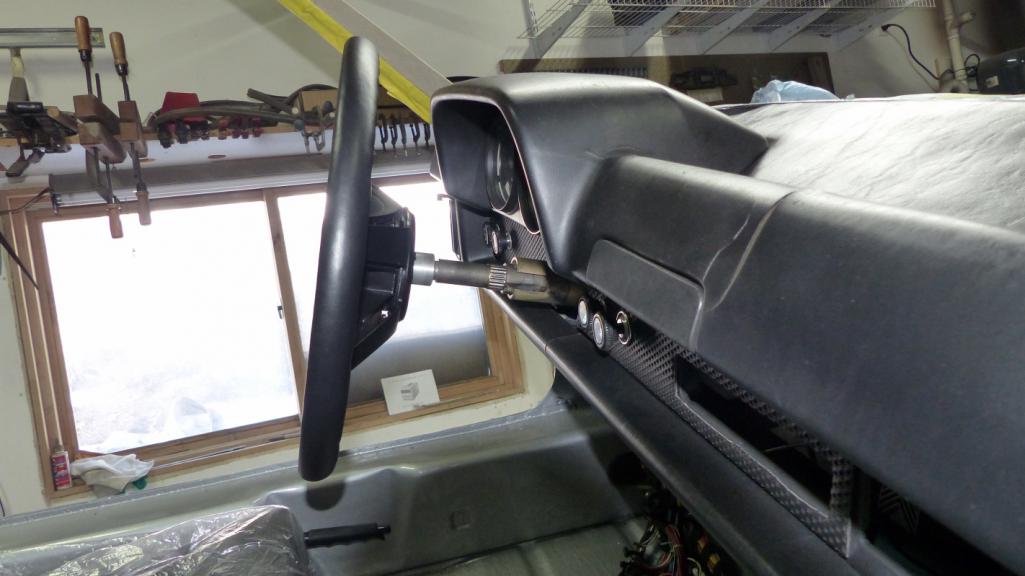
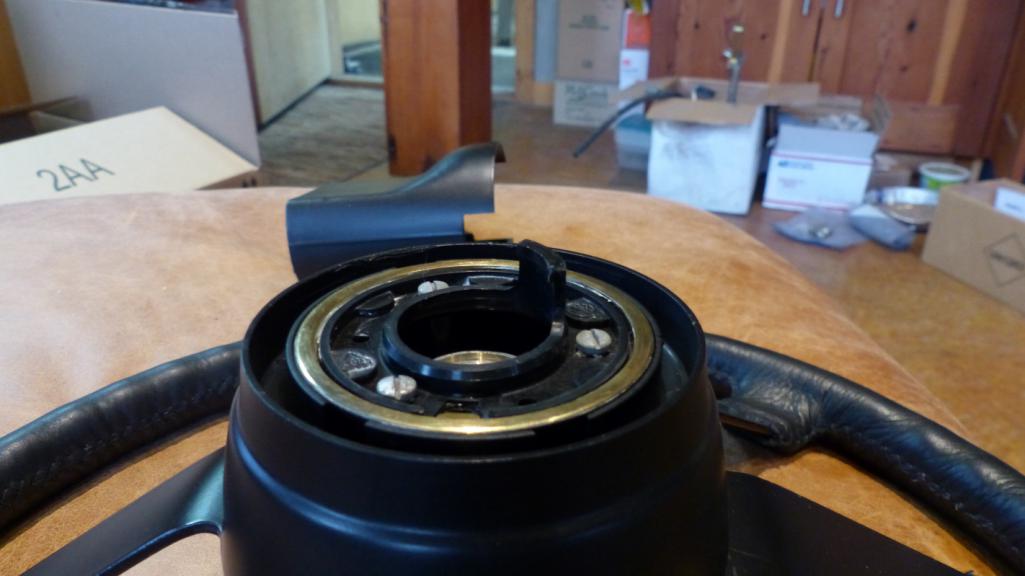
A bit of old business. Chris got into my head about my steering column so I decided to finish resto on that as a side project. I tried treating the plastic collar with Forever Black but it showed brush marks, so I just sanded and painted with SEM Trim Black instead. Not a great pic of the paint job, but here's my attempt at fancy photography after attaching the polished horn ring. The ring got a thin coat of dielectric grease after I snapped this pic.
 A couple details on the ignition lock. There are a couple parts in the catalog in the diagram between items 3 and 14 that are not listed. One is called a "rubber block" in the manual and I assume the other is a spring. 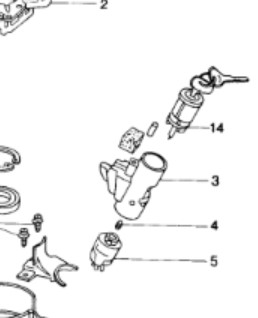 I've forgotten what thread or whose car this pic of the foam block is from, but here's what it should look like. (IMG:http://www.914world.com/bbs2/uploads_offsite/farm2.staticflickr.com-431-1537848316.1.jpg) I dug a spring that looked about right out of my assortment and cut a block from medium density foam. People blame the ignition switch for failure, but I'll bet it is these pieces missing that is the problem. (IMG:style_emoticons/default/laugh.gif) 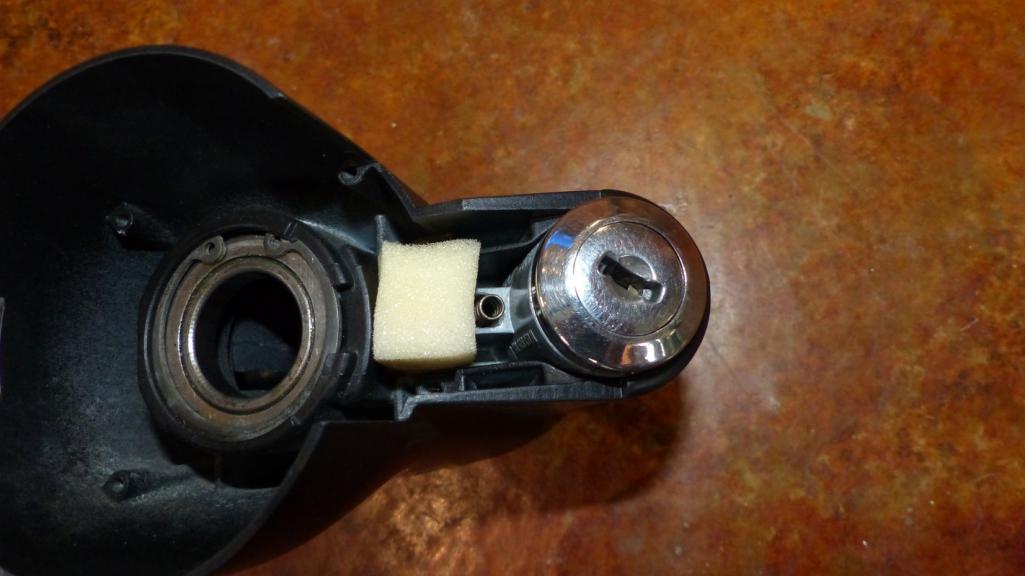 The horn contacts on the turn signal switch has deep grooves worn in them like so many do. I decided to buy it some time by adding silver solder to the contact points. Not the prettiest job because my silver solder is old and I didn't bother to clean the oxidation off before using it so a bit of contamination got in. It's only cosmetic. This should add years of life to this old part. 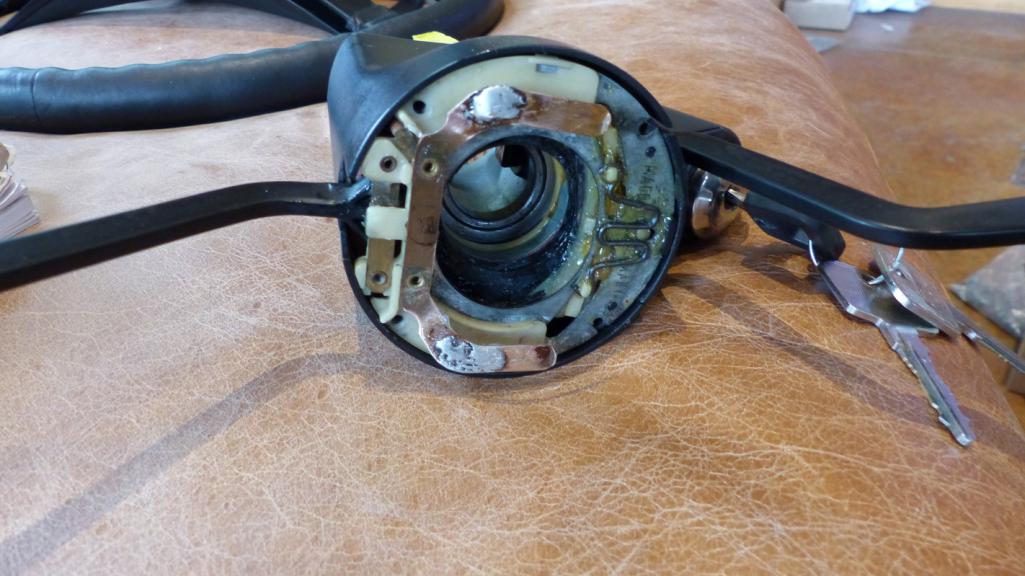 A good shot of the installed column has eluded me. This is the best I've done so far. 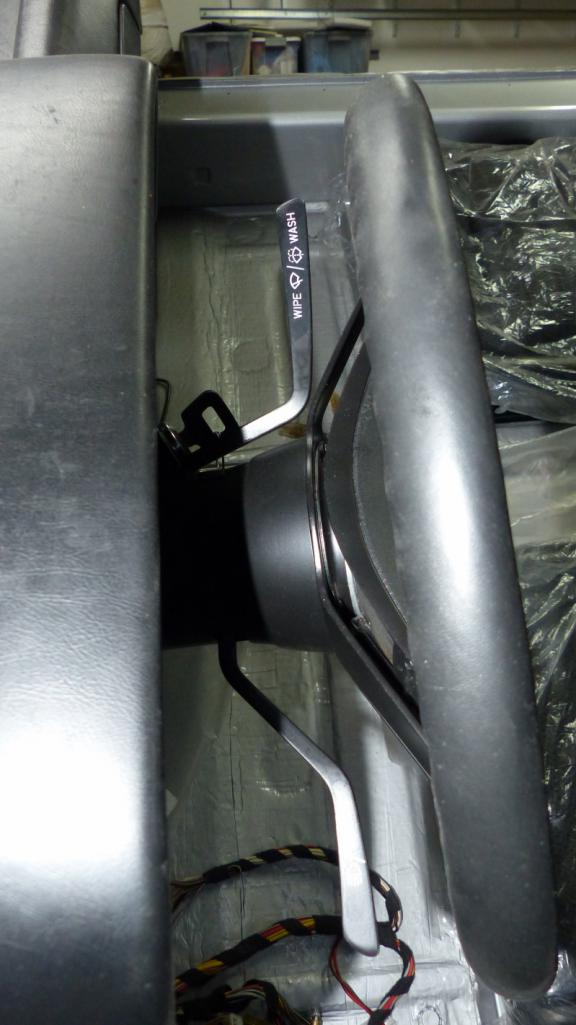 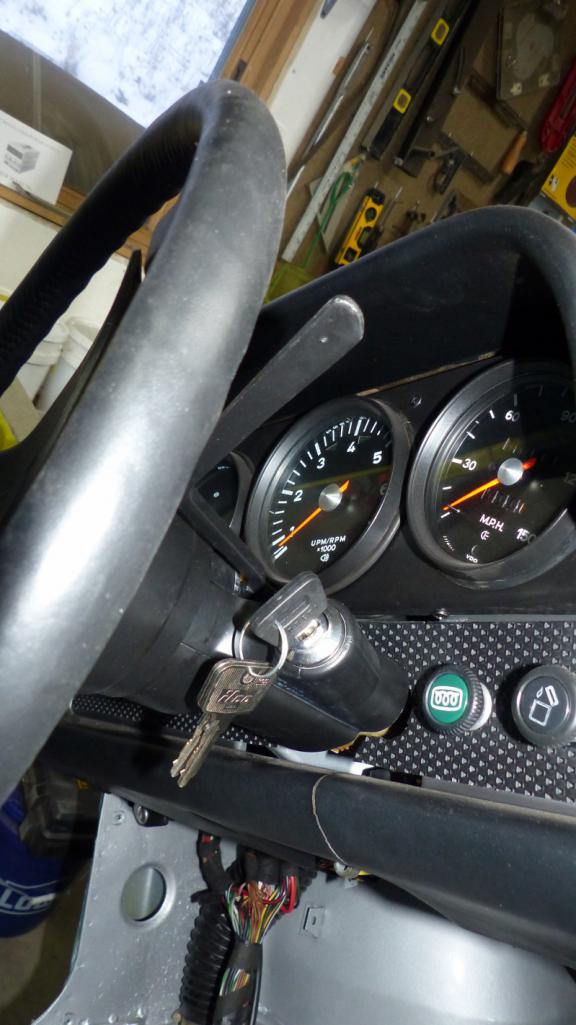 |
|
|
|
| bbrock |
Mar 29 2019, 11:09 PM
Post
#952
|
|
914 Guru Group: Members Posts: 5,269 Joined: 17-February 17 From: Montana Member No.: 20,845 Region Association: Rocky Mountains |
Strut Your Stuff
I found front shocks quite a bit cheaper than other vendors on Amazon but the trade-off was I had to wait almost 2 months for them to ship. I suspected Amazon was going to pull another bait and cancel number on me like they did with the bed liner. I was relieved when UPS dropped these in our parcel locker today. 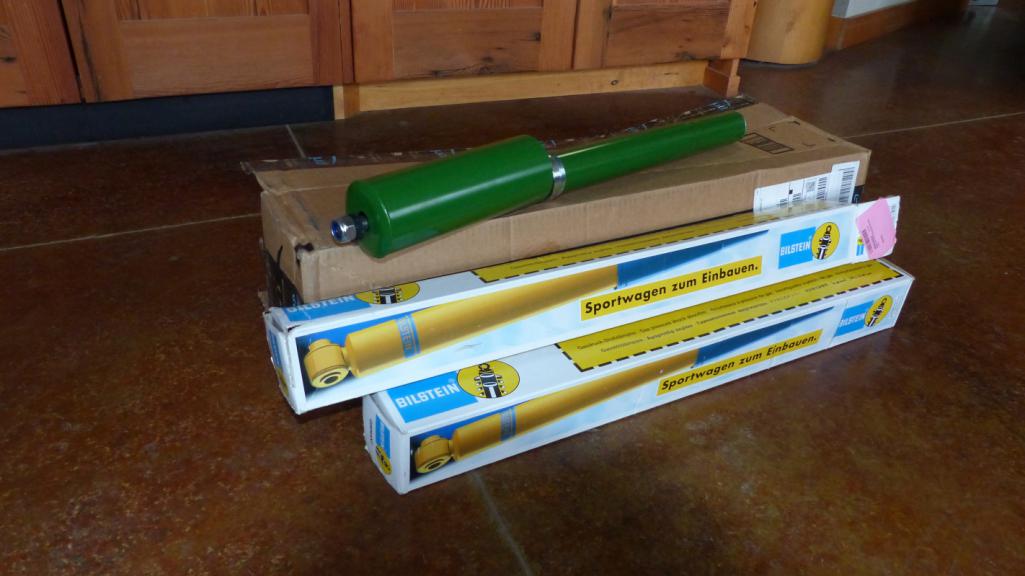 They come with new green hats; I guess so you can show off that you are sporting Bilsteins. That wasn't going to work for me and I opted for my freshly painted originals for the OEM "stealth" look. 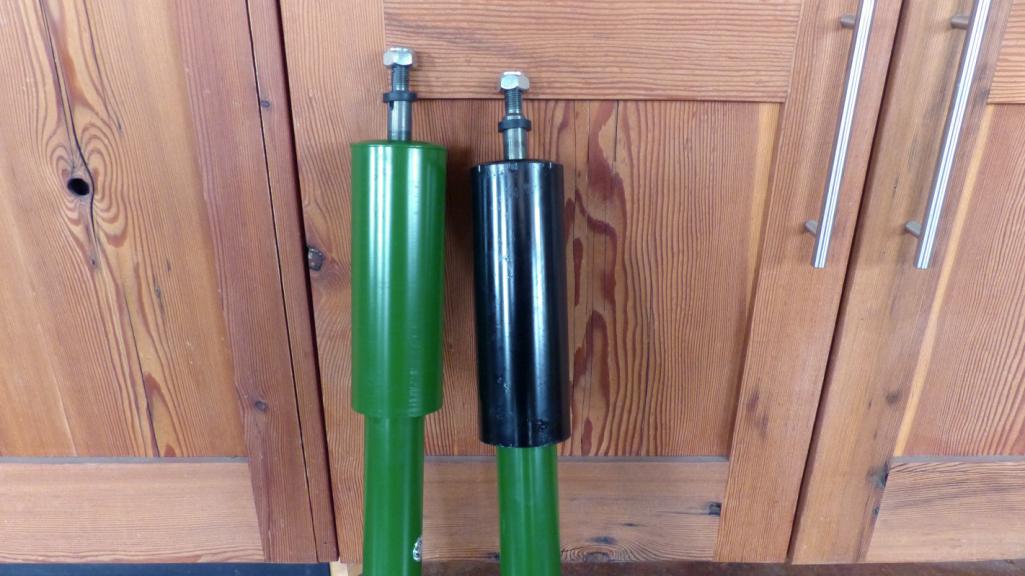 Here's the 'before' shot of those hats. A modest improvement I think.  Those gas shocks take some work to install because you have to compress them to squeeze them in under the fender. Not too bad though. 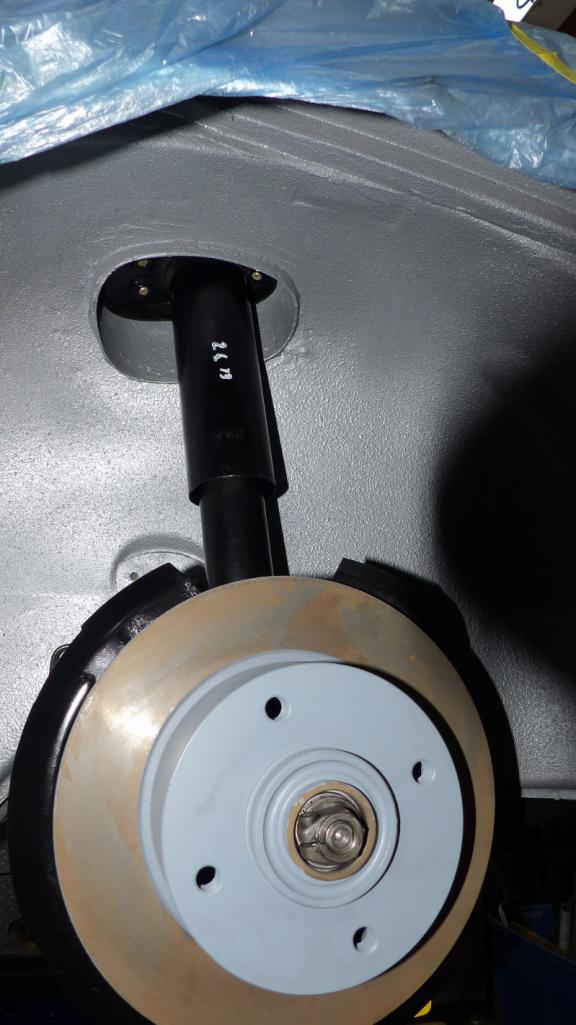 The critical step for a smooth ride. The stamp man cometh. (IMG:style_emoticons/default/shades.gif) 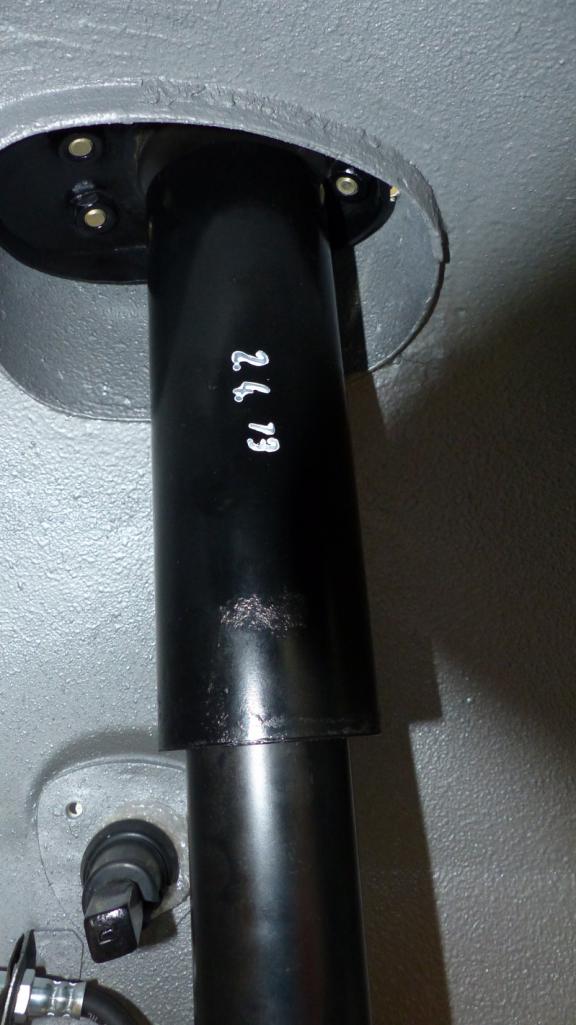 And a shot from up top. I need to order new lock tabs and make a tool to hold the strut top before I can torque it. I don't want to mar my freshly plated top plate with a pipe wrench which is how I used to do those. 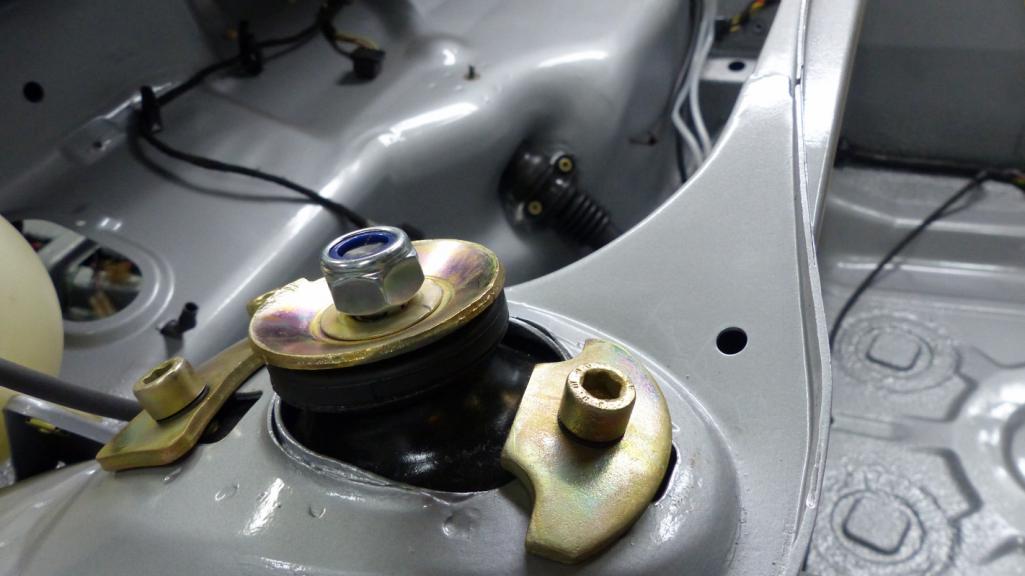 That's all for now. (IMG:style_emoticons/default/beer3.gif) |
|
|
|
| 914_7T3 |
Mar 29 2019, 11:15 PM
Post
#953
|
|
Please forgive me, I'm new to all of this! Group: Members Posts: 1,875 Joined: 3-April 17 From: Los Angeles, CA Member No.: 20,991 Region Association: Southern California |
|
|
|
|
| tygaboy |
Mar 30 2019, 08:10 AM
Post
#954
|
|
914 Guru Group: Members Posts: 5,551 Joined: 6-October 15 From: Petaluma, CA Member No.: 19,241 Region Association: Northern California |
Brent - Really, really nice work all around! You should be quite proud of the results you've achieved. Thanks for the great documenting of your work, too.
Lots of great info others will surely leverage! |
|
|
|
| sixnotfour |
Mar 30 2019, 10:17 AM
Post
#955
|
|
914 Wizard Group: Members Posts: 10,793 Joined: 12-September 04 From: Life Elevated..planet UT. Member No.: 2,744 Region Association: Rocky Mountains |
|
|
|
|
| defianty |
Mar 30 2019, 11:00 AM
Post
#956
|
|
Senior Member Group: Members Posts: 659 Joined: 9-August 06 From: Essex, UK Member No.: 6,621 Region Association: None |
Great work again. I've been working on my steering column this week too. Just waiting on a new bearing to arrive before I can get it all back together.
|
|
|
|
| narino |
Mar 30 2019, 11:34 AM
Post
#957
|
|
Member Group: Members Posts: 234 Joined: 14-August 07 From: Los Angeles, CA Member No.: 8,001 Region Association: None |
Holy crap Brent, amazing work and documentation. I hope your motivation is contagious via internet!
Also, nice to see another Wildcat on here. I grew up in dead middle of KS, a small town called McPherson. Between midnight bonfire parties and country road exploring I somehow graduated and did a turn at K-State. Nothing but fond memories of KS, good people and good times. |
|
|
|
| bbrock |
Mar 30 2019, 12:42 PM
Post
#958
|
|
914 Guru Group: Members Posts: 5,269 Joined: 17-February 17 From: Montana Member No.: 20,845 Region Association: Rocky Mountains |
QUOTE(narino @ Mar 30 2019, 11:34 AM) Holy crap Brent, amazing work and documentation. I hope your motivation is contagious via internet! Also, nice to see another Wildcat on here. I grew up in dead middle of KS, a small town called McPherson. Between midnight bonfire parties and country road exploring I somehow graduated and did a turn at K-State. Nothing but fond memories of KS, good people and good times. Thanks! I know McPherson well. My brother lived there for a stint and one of my office mates in grad school was from there and still lives there I think. Slowest main street traffic the country (IMG:style_emoticons/default/lol-2.gif) Hard to believe, but I was at K-State for 22 years! |
|
|
|
| barefoot |
Mar 30 2019, 01:50 PM
Post
#959
|
|
Senior Member Group: Members Posts: 1,363 Joined: 19-March 13 From: Charleston SC Member No.: 15,673 Region Association: South East States |
And a shot from up top. I need to order new lock tabs and make a tool to hold the strut top before I can torque it. I don't want to mar my freshly plated top plate with a pipe wrench which is how I used to do those. That's all for now. (IMG:style_emoticons/default/beer3.gif) [/quote] Just use a strap wrench, cheap at Harbor Freight. don't need to buy special single use tools !! |
|
|
|
| bbrock |
Mar 30 2019, 02:18 PM
Post
#960
|
|
914 Guru Group: Members Posts: 5,269 Joined: 17-February 17 From: Montana Member No.: 20,845 Region Association: Rocky Mountains |
QUOTE(barefoot @ Mar 30 2019, 01:50 PM) Just use a strap wrench, cheap at Harbor Freight. don't need to buy special single use tools !! Good idea. I was just going to find a piece of pipe the right ID and weld a dog into it to catch that tab. Then I read an old thread this morning where @cary just uses an impact wrench to tighten them up. Will probably give tht a try first. IIRC, once the plate gets enough "bite" into the rubber, you can torque without any tools to hold it in place. I like the strap wrench idea and it seems like I should have one around here somewhere. (IMG:style_emoticons/default/idea.gif) |
|
|
|
|
1 User(s) are reading this topic (1 Guests and 0 Anonymous Users)
0 Members:

|
Lo-Fi Version | Time is now: 22nd April 2025 - 03:11 PM |
Invision Power Board
v9.1.4 © 2025 IPS, Inc.