|
|
|
Porsche, and the Porsche crest are registered trademarks of Dr. Ing. h.c. F. Porsche AG.
This site is not affiliated with Porsche in any way. Its only purpose is to provide an online forum for car enthusiasts. All other trademarks are property of their respective owners. |
|
|

  |

| Superhawk996 |
 Apr 19 2020, 05:26 PM Apr 19 2020, 05:26 PM
Post
#301
|
|
914 Guru  Group: Members Posts: 7,012 Joined: 25-August 18 From: Woods of N. Idaho Member No.: 22,428 Region Association: Galt's Gulch |
Well after two rounds of measurement this afternoon, no change in the X or Y dimensions and the suspension points are still square to each other. Whew!
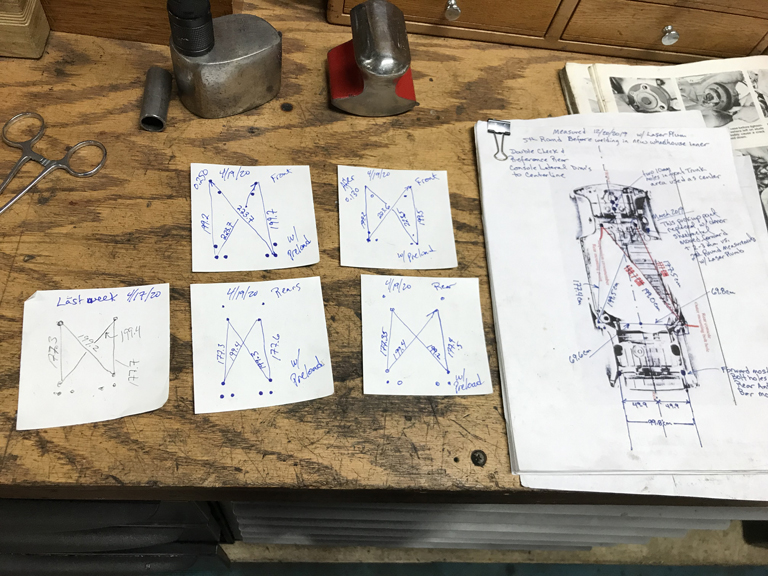 Adding an extra 6mm spacer is a lot easier to deal with than if the XY coordinates had shifted. At least it shifted up. That would give more negative camber which can be dialed out with shims. If it had shifed down in Z that would way worse and could result in postive camber with no way to dial it back toward negative camber! For the moment I'll be happy for this little gift. For now I'm going to leave Z height alone. Need more time to think about how this could have shifted purely in Z direction. (IMG:style_emoticons/default/idea.gif) |
   |

 
|
| Superhawk996 |
Apr 25 2020, 03:36 PM
Post
#302
|
|
914 Guru Group: Members Posts: 7,012 Joined: 25-August 18 From: Woods of N. Idaho Member No.: 22,428 Region Association: Galt's Gulch |
As usual, tools need fixin' before you can do actual work.
Air compressor has been running a really high duty cycle over the last couple years. Time to change the oil and the air filter. Air filter is a little bit less than a manly size. Hard to belive this is all there is for filtration. (IMG:style_emoticons/default/confused24.gif) Oh, well as long as it keeps working. 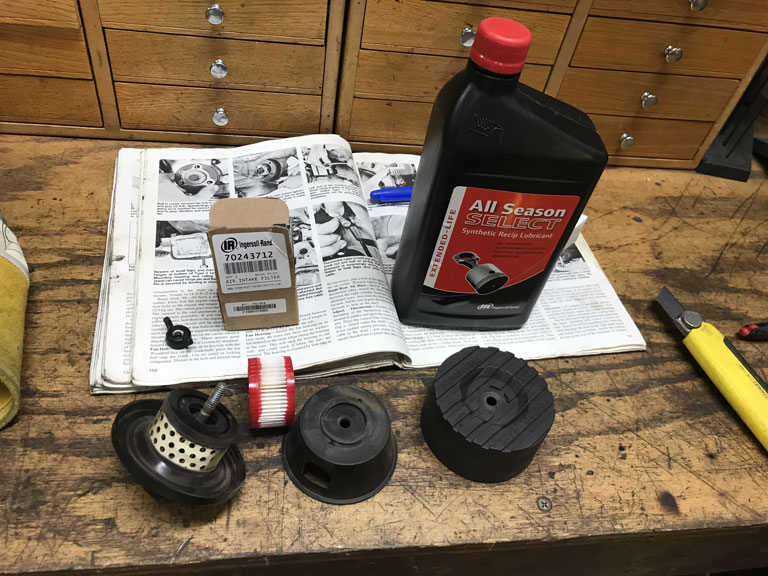 With that task buttoned up it's time to (IMG:style_emoticons/default/welder.gif) 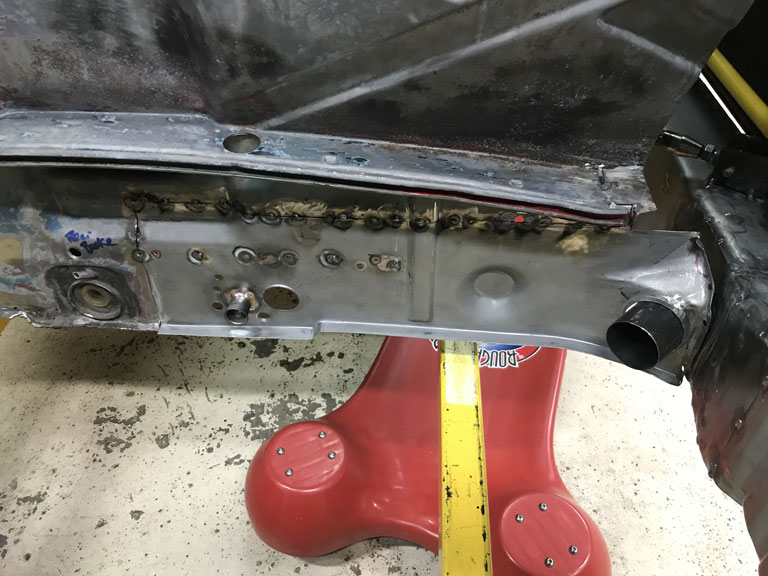 |
|
|
|
| Superhawk996 |
Apr 28 2020, 07:03 AM
Post
#303
|
|
914 Guru Group: Members Posts: 7,012 Joined: 25-August 18 From: Woods of N. Idaho Member No.: 22,428 Region Association: Galt's Gulch |
Finally, not only is the front attached to the rear, the passenger long is now tied cross car too!
 So here's the disaster of the week. This portion of the rear bulkhead welds over a U shaped channel that acts as the structure for the bulkhead and support for the 6 cylinder engine mount. Wouldn't you know it, but even though I had the vertical rib lined up perfectly when it was tacked, when I laid in the final weld bead, it shrunk inward. This caused the panel to tip in at the top. The nature of the vertical stiffening bead makes it stand out even more and it looks like (IMG:style_emoticons/default/bootyshake.gif) Honestly, I'm not sure how to prevent this when having to weld thin sheet metal to what was effectely a much thinker structural element. I've done this in the past with a better degree of success but in this case, it tipped in way more than I anticipated and the more I tried to "fix" it, the worse it got. At this point I think the only "fix" is to cut the weld across the bead, and then use a slide hammer to pull it out. I don't think the fix is worth it given that this area really isn't seen. Have some time to think about that one. 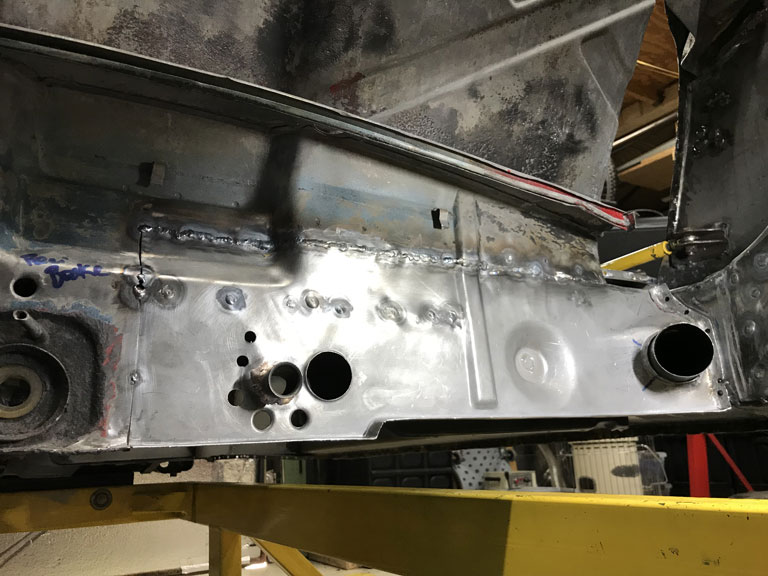 Certainly not the end of the world, but not really craftsmanship that I can be proud of. |
|
|
|
| Superhawk996 |
Apr 28 2020, 07:08 AM
Post
#304
|
|
914 Guru Group: Members Posts: 7,012 Joined: 25-August 18 From: Woods of N. Idaho Member No.: 22,428 Region Association: Galt's Gulch |
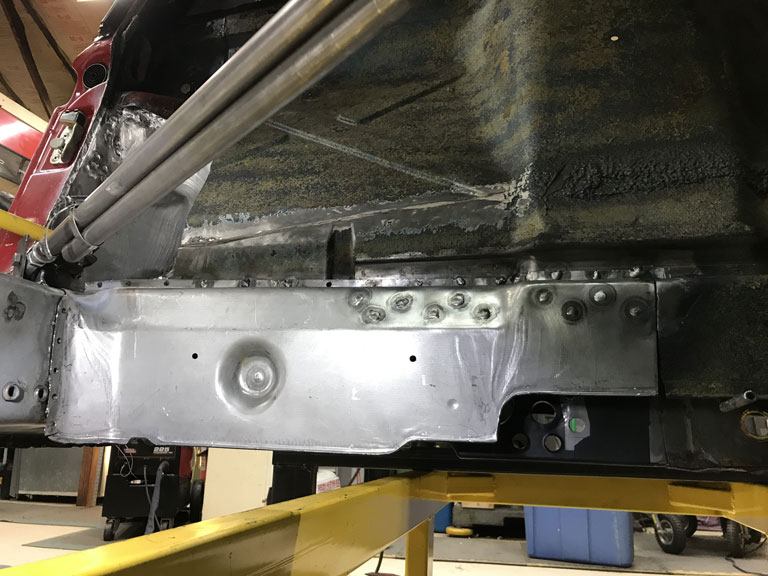
With the bulkhead attached to the long, I turned my attention toward wanting to mock up the tunnel.
I have a donor tunnel but it needs quite a bit of work before I can even get to the point of a mock up. Stripped the tar. 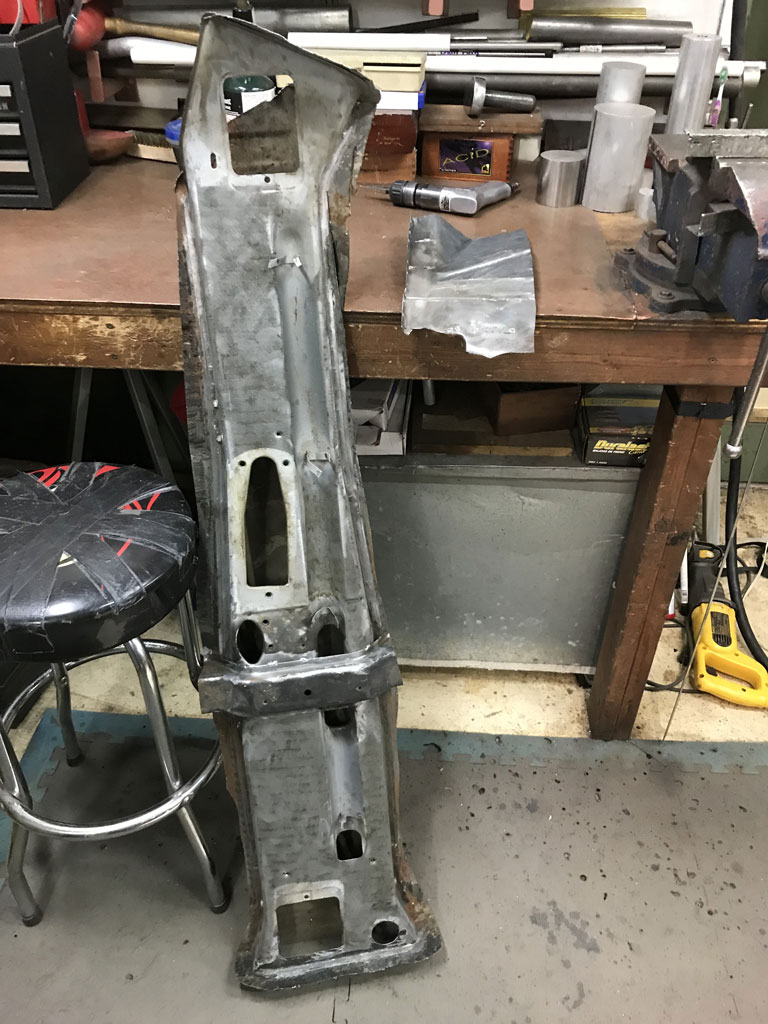 Spent a couple of solid hours drilling about 100 spot welds. I'll post some pictures of the tunnel internals once I get the last of the MIG welds cut and the tunnel split wide open. 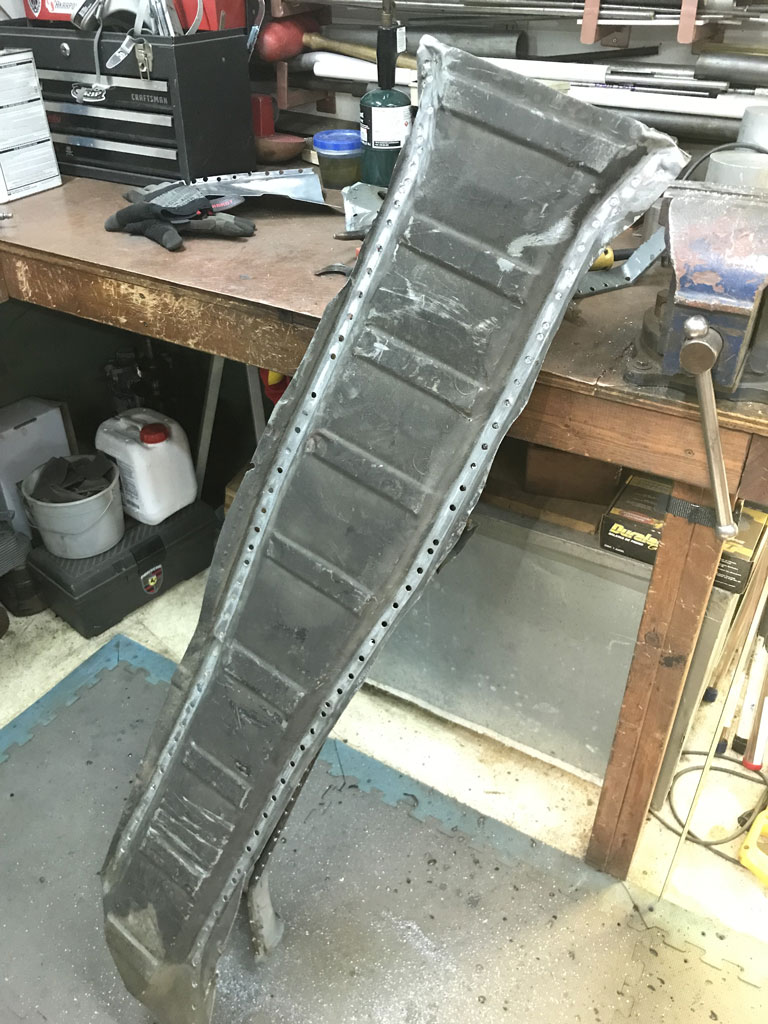 This tunnel had a broken clutch cable tube that was repaired with some bolted in hooks. It will be worth seeing the fix from the inside for those that may be struggling with broken clutch tubes. After that I'll have to source the metric size tubes from RD and then rebuild the tunnel internals. |
|
|
|
| bbrock |
Apr 28 2020, 07:42 AM
Post
#305
|
|
914 Guru Group: Members Posts: 5,269 Joined: 17-February 17 From: Montana Member No.: 20,845 Region Association: Rocky Mountains |
QUOTE(Superhawk996 @ Apr 28 2020, 07:03 AM)  Certainly not the end of the world, but not really craftsmanship that I can be proud of. If you can figure out a way to pull that out enough to make it an outie rather than innie, a shrinking disc could work miracles to straighten that out after grinding down the welds. That's how I dealt with similar troughs left after welding my rear quarter panels back on. Too bad that spot is double-walled. |
|
|
|
| Superhawk996 |
Apr 28 2020, 08:11 AM
Post
#306
|
|
914 Guru Group: Members Posts: 7,012 Joined: 25-August 18 From: Woods of N. Idaho Member No.: 22,428 Region Association: Galt's Gulch |
Hmm. Maybe, but I think the main issue with attempting the shrinking disc is two fold.
1) the vertical bead. Shrinking usually works for large less crowned surfaces. 2) The thing that sucked the bead in is the U shaped structure behind it. As that puddle weld cools, it pull the non structural sheet metal toward the stiffer cooler U channel behind it. might not hurt. What I tried to do was to shink the panel back toward the sheetmetal with a little TIG torch heat. What it did was exactly the opposite. It actually sucked it toward the U channel. If only I hadn't welded the interior side panel completely first. (IMG:style_emoticons/default/headbang.gif) Then I could have had easy access to the back side of that panel and I could probably have bumped out the lip of the U channel. (IMG:style_emoticons/default/chair.gif) |
|
|
|
| bbrock |
Apr 28 2020, 08:35 AM
Post
#307
|
|
914 Guru Group: Members Posts: 5,269 Joined: 17-February 17 From: Montana Member No.: 20,845 Region Association: Rocky Mountains |
QUOTE(Superhawk996 @ Apr 28 2020, 08:11 AM) Hmm. Maybe, but I think the main issue with attempting the shrinking disc is two fold. 1) the vertical bead. Shrinking usually works for large less crowned surfaces. 2) The thing that sucked the bead in is the U shaped structure behind it. As that puddle weld cools, it pull the non structural sheet metal toward the stiffer cooler U channel behind it. might not hurt. What I tried to do was to shink the panel back toward the sheetmetal with a little TIG torch heat. What it did was exactly the opposite. It actually sucked it toward the U channel. If only I hadn't welded the interior side panel completely first. (IMG:style_emoticons/default/headbang.gif) Then I could have had easy access to the back side of that panel and I could probably have bumped out the lip of the U channel. (IMG:style_emoticons/default/chair.gif) Ah! I forgot about it being "glued" to the U-channel. And yes, the bead wouldn't allow it to go perfect like you might get on a flat panel, but I had a patch on the inner firewall where the disc pulled a beaded area flat enough that a thin skim of reinforced filler could smooth it over. That U-channel is the killer though. Bummer. |
|
|
|
| Superhawk996 |
Apr 28 2020, 02:30 PM
Post
#308
|
|
914 Guru Group: Members Posts: 7,012 Joined: 25-August 18 From: Woods of N. Idaho Member No.: 22,428 Region Association: Galt's Gulch |
Parts for the 2.4L six finally came back home from thier winter vacation in AZ at Ollies. (IMG:style_emoticons/default/piratenanner.gif)
Just did a quick initial unpacking is encouraging. Case has cleaned up nicely after a media tumble. Has that nice grey magnesium look! 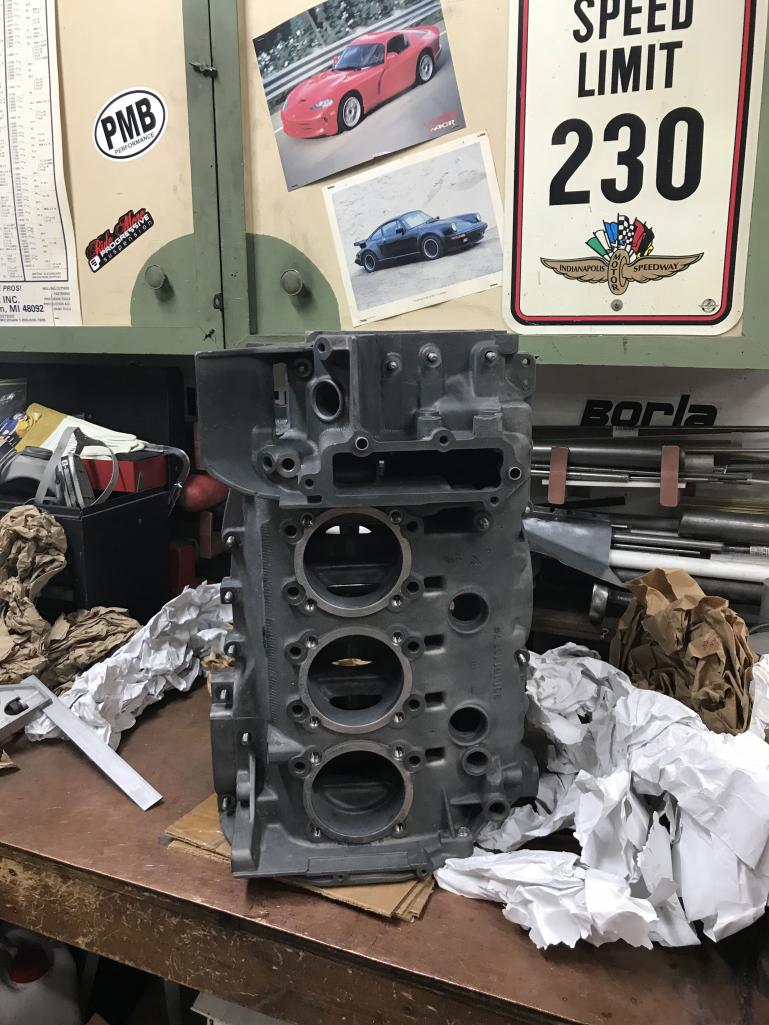 The engine mounting boss that cracked has been repaired very nicely. 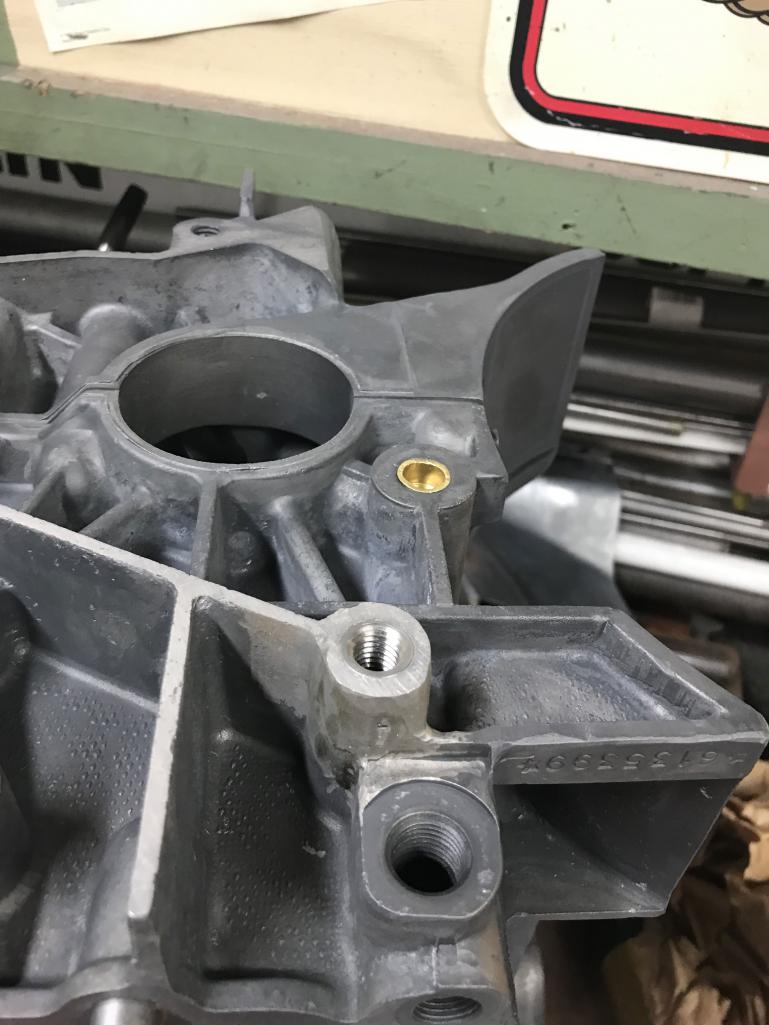 More unpacking still to be done. Will post some more pictures later of macining done to main bearings and addition of shuffle pins, etc. Now the problem is these parts go on the back burner until I figure out whether or not I have a job due to the ongoing panicdemic. (IMG:style_emoticons/default/mad.gif) |
|
|
|
| Superhawk996 |
Apr 28 2020, 05:36 PM
Post
#309
|
|
914 Guru Group: Members Posts: 7,012 Joined: 25-August 18 From: Woods of N. Idaho Member No.: 22,428 Region Association: Galt's Gulch |
Here's a comparison of the bearing web that was a little bit compromised by porosity.
Before: 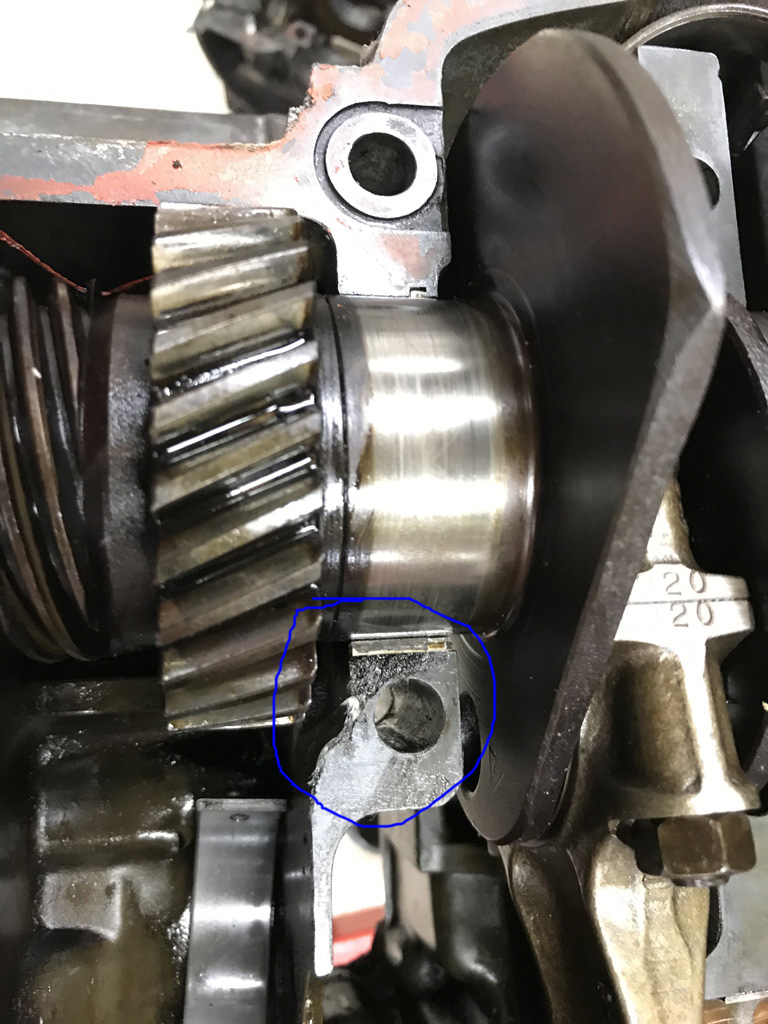 After: 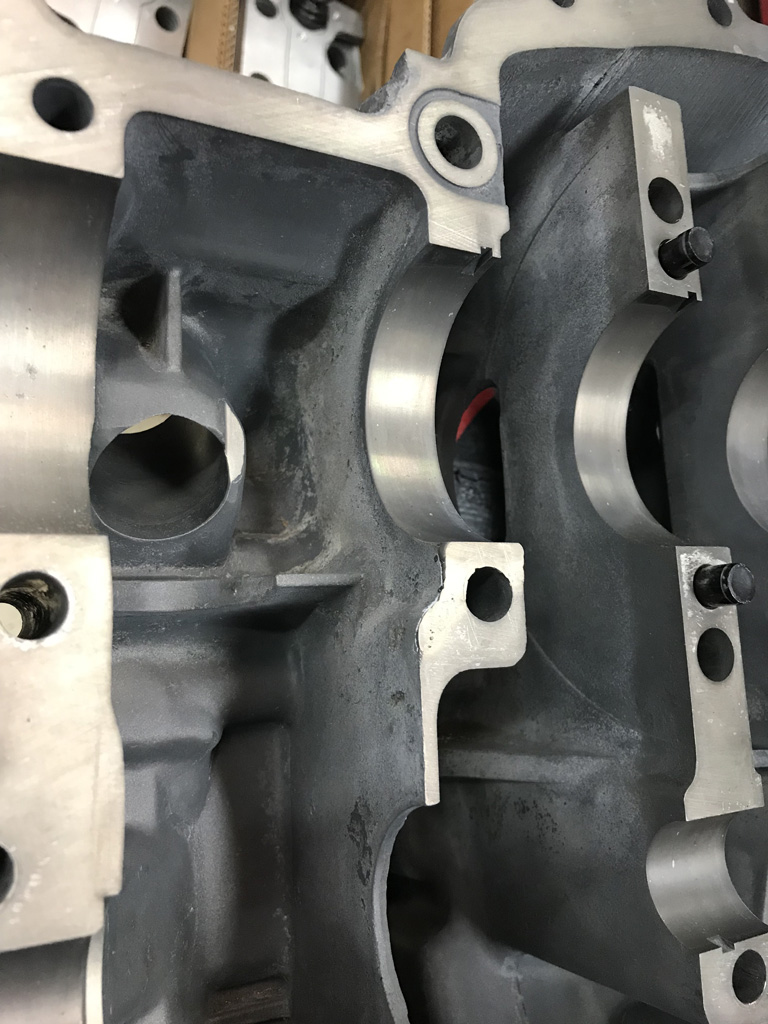 |
|
|
|
| Superhawk996 |
Apr 28 2020, 05:41 PM
Post
#310
|
|
914 Guru Group: Members Posts: 7,012 Joined: 25-August 18 From: Woods of N. Idaho Member No.: 22,428 Region Association: Galt's Gulch |
Main Bearing Saddle with porosity
Before: 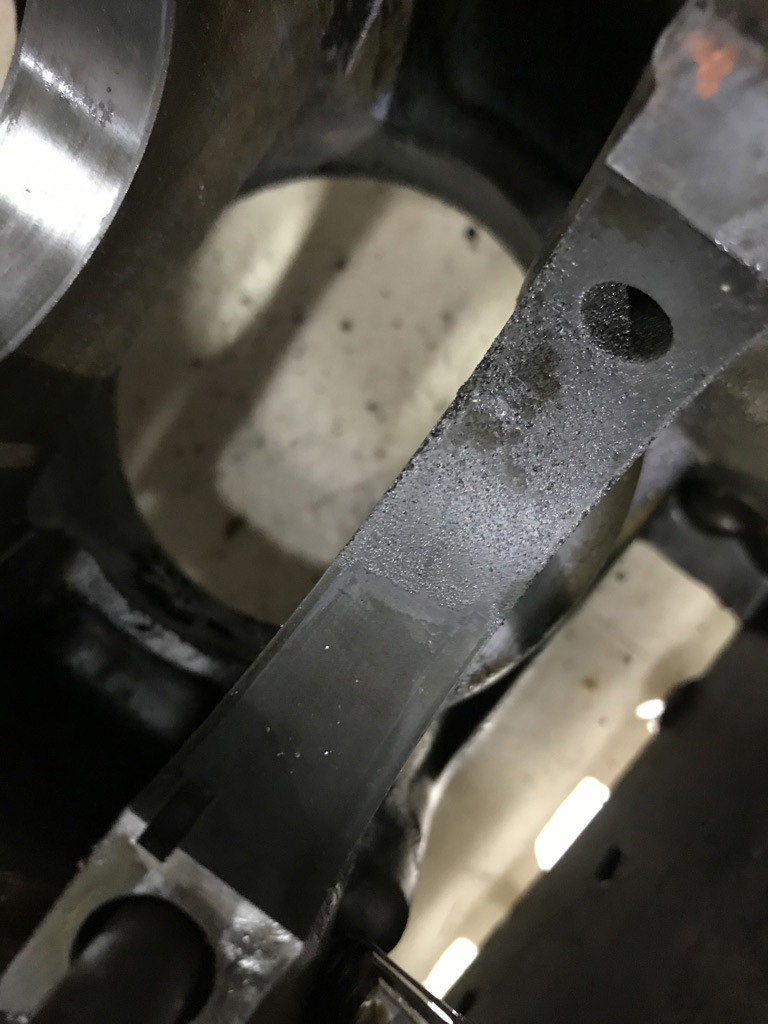 After line bore to standard bearing size: 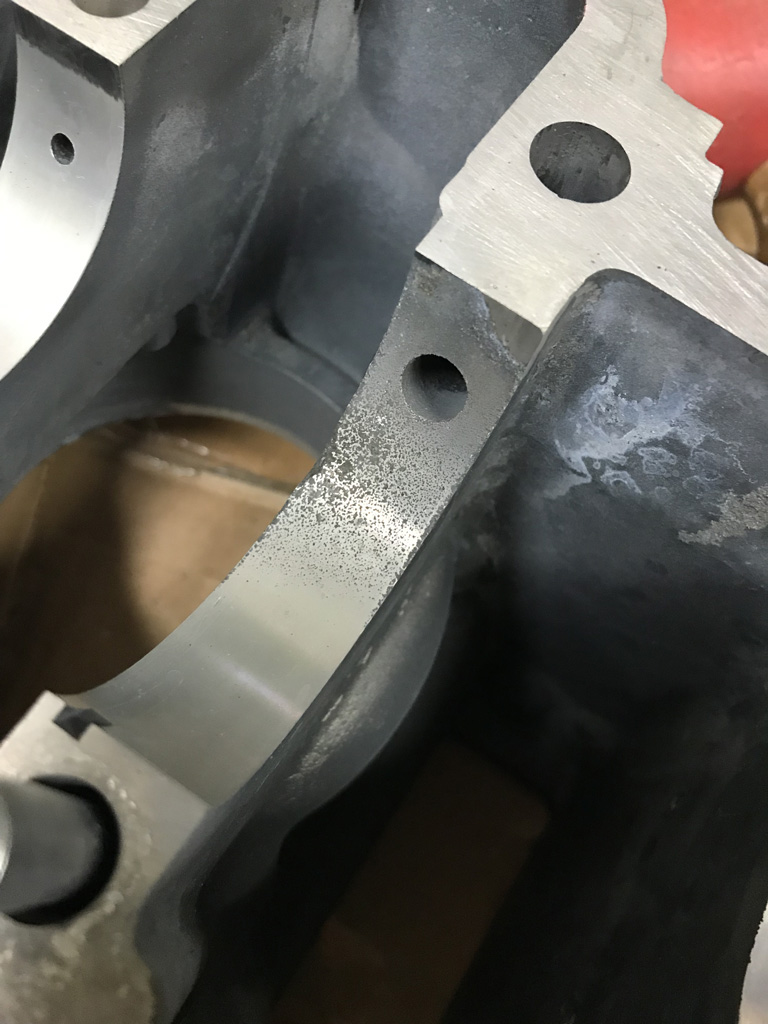 I'm very happy with the clean up on this main bearing saddle. Perfection was out of the question. In the end the bearing is well supported and the really crunch looking porosity is gone. |
|
|
|
| Superhawk996 |
Apr 28 2020, 05:49 PM
Post
#311
|
|
914 Guru Group: Members Posts: 7,012 Joined: 25-August 18 From: Woods of N. Idaho Member No.: 22,428 Region Association: Galt's Gulch |
Overall the case was updated with shuffle pins, the oil bypass modification, addition of case savers to all cylinder studs, cylinder decks were machined, and of course new case studs all around.
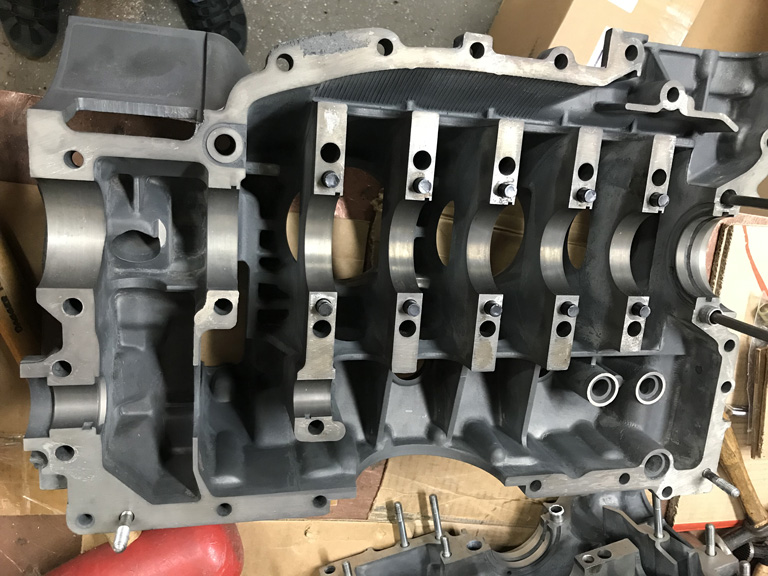 I'm pretty sure the shuffle pins are overkill for a street engine that will get built to E spec, but once this is put together, I wanted the case to outlive me. 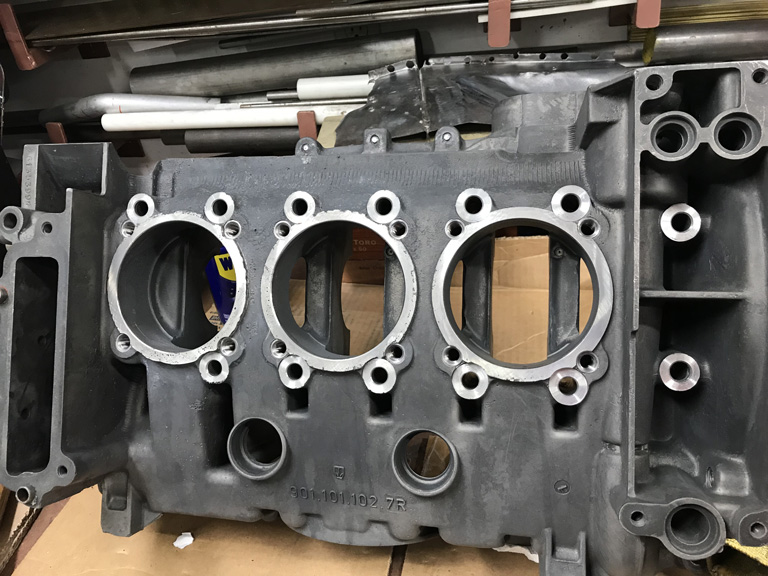 |
|
|
|
| Superhawk996 |
Apr 28 2020, 05:59 PM
Post
#312
|
|
914 Guru Group: Members Posts: 7,012 Joined: 25-August 18 From: Woods of N. Idaho Member No.: 22,428 Region Association: Galt's Gulch |
Heads turned out great. Amazing what a good hot tank and media tumble can do for making parts look new again.
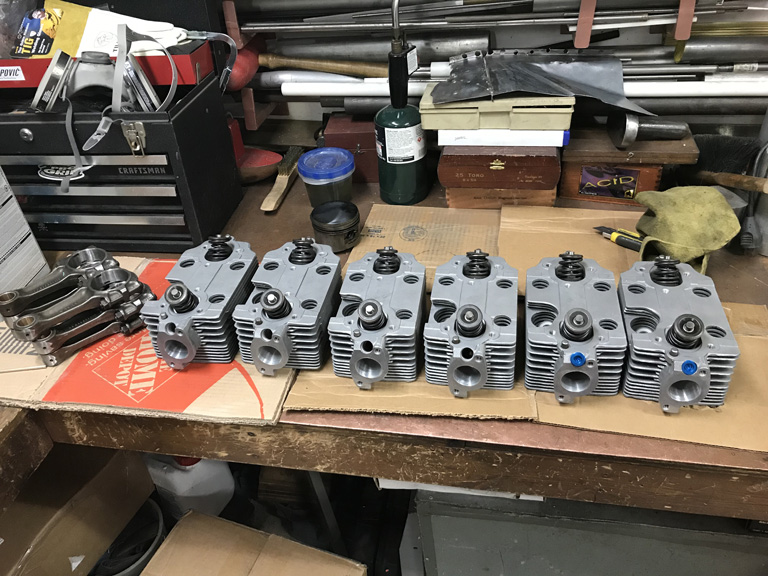 Heads were ported to 34mm to work with PMO ITB's. Since I found a bent valve and a cracked valve retainer at teardown, these are completely new valves, guides, springs, guide seals, and then the heads were surfaced. 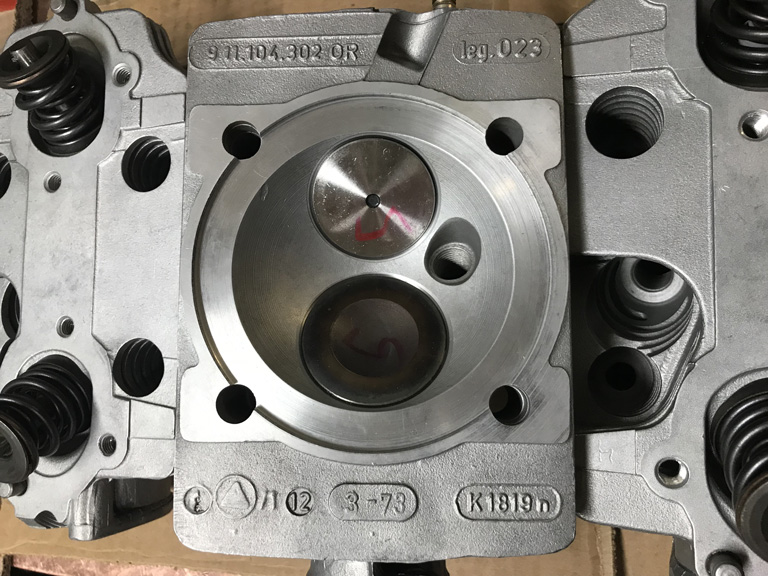 And of course, the rods were also had the small end bushings replaced and the big ends were resized. |
|
|
|
| Superhawk996 |
Apr 28 2020, 06:21 PM
Post
#313
|
|
914 Guru Group: Members Posts: 7,012 Joined: 25-August 18 From: Woods of N. Idaho Member No.: 22,428 Region Association: Galt's Gulch |
The big waste of time and money in this whole excercise was $140 spent trying to clean the oil cooler. Ollies spent a bunch of time getting it cleaned out but then it failed pressure testing. Unfortunatly they didn't mark where it was leaking. Trying to fix it is a non-starter since I don't feel like building up a fixture to pressure test it.
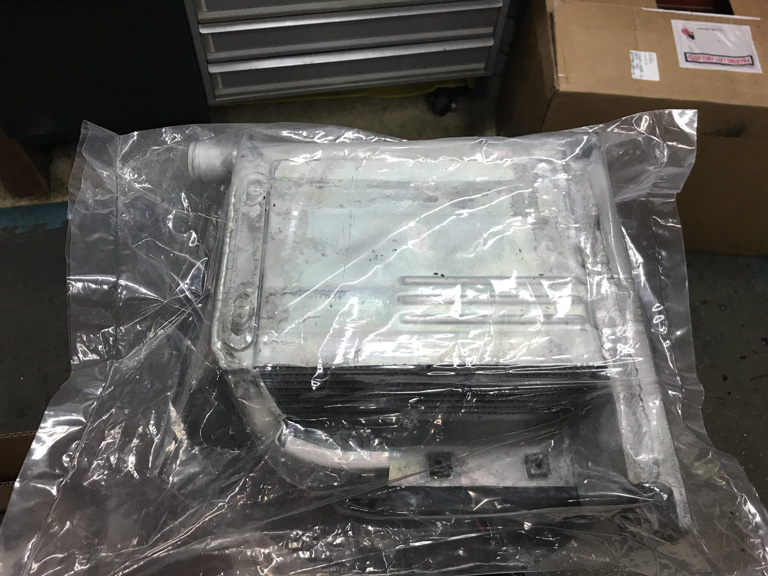 (IMG:style_emoticons/default/confused24.gif) could be worse. I started having second thoughts about cleaning it anyway. I hate reusing an oil cooler from an engine that I don't know the history of. It's always a little be hard to be sure that there isn't some schrapnel sitting in there just waiting to come out and destroy a new engine. The main drawback was that 911 engine coolers are so pricey it seemed like it might be worth the gamble if this one were to come back cleaned and pressure tested. Probably a sign that I was being foolish to use an old cooler on a fresh rebuild. |
|
|
|
| mepstein |
Apr 28 2020, 07:17 PM
Post
#314
|
|
914-6 GT in waiting Group: Members Posts: 19,855 Joined: 19-September 09 From: Landenberg, PA/Wilmington, DE Member No.: 10,825 Region Association: MidAtlantic Region |
We would reuse a cooler out of a running engine but not one that was from a broken engine. I used the Stompski gauge to pressure check. If it failed, the cooler got tossed. Past experience was if a cooler had one leak and was fixed, it would shortly develop another. Are you doing a front cooler? If so, ditch the engine cooler and just use the front one.
|
|
|
|
| Superhawk996 |
Apr 29 2020, 05:49 AM
Post
#315
|
|
914 Guru Group: Members Posts: 7,012 Joined: 25-August 18 From: Woods of N. Idaho Member No.: 22,428 Region Association: Galt's Gulch |
QUOTE(mepstein @ Apr 28 2020, 09:17 PM) Past experience was if a cooler had one leak and was fixed, it would shortly develop another. Are you doing a front cooler? If so, ditch the engine cooler and just use the front one. @mepstein Thanks for sharing that learning from your shop. Makes sense. If something like an oil cooler weld has fatigued, even though you fix the one spot, there are likely to be more sports right in the vicinity that are on the verge of going bad. Sort of the same thing I do with headlamps and tail lamps. When I replace them, I do it in pairs. Personal experience is roughly similar. By the time one reaches end of life, the other certainly isn't much further behind. No front cooler for me so I'll eventually spring for a new engine cooler once I get this engine project back on track. |
|
|
|
| porschetub |
Apr 29 2020, 08:51 PM
Post
#316
|
|
Advanced Member Group: Members Posts: 4,807 Joined: 25-July 15 From: New Zealand Member No.: 18,995 Region Association: None |
QUOTE(Superhawk996 @ Apr 29 2020, 12:21 PM) The big waste of time and money in this whole excercise was $140 spent trying to clean the oil cooler. Ollies spent a bunch of time getting it cleaned out but then it failed pressure testing. Unfortunatly they didn't mark where it was leaking. Trying to fix it is a non-starter since I don't feel like building up a fixture to pressure test it. (IMG:style_emoticons/default/confused24.gif) could be worse. I started having second thoughts about cleaning it anyway. I hate reusing an oil cooler from an engine that I don't know the history of. It's always a little be hard to be sure that there isn't some schrapnel sitting in there just waiting to come out and destroy a new engine. The main drawback was that 911 engine coolers are so pricey it seemed like it might be worth the gamble if this one were to come back cleaned and pressure tested. Probably a sign that I was being foolish to use an old cooler on a fresh rebuild. Strange practice doing it that way?,pressure test always comes first,have been through all the 911 cooler BS,had one fail with a steady drip,had to buy a replacement in my country that was $$$$,tested ok and washed it in solvent for several days ,SO much crap came out then got it ultrasonically cleaned (more crap)and then got a local alloy guru to weld on the angled oil fitting...really a hassle as the PO said the 914-6 cooler he supplied was fine (IMG:style_emoticons/default/headbang.gif) . 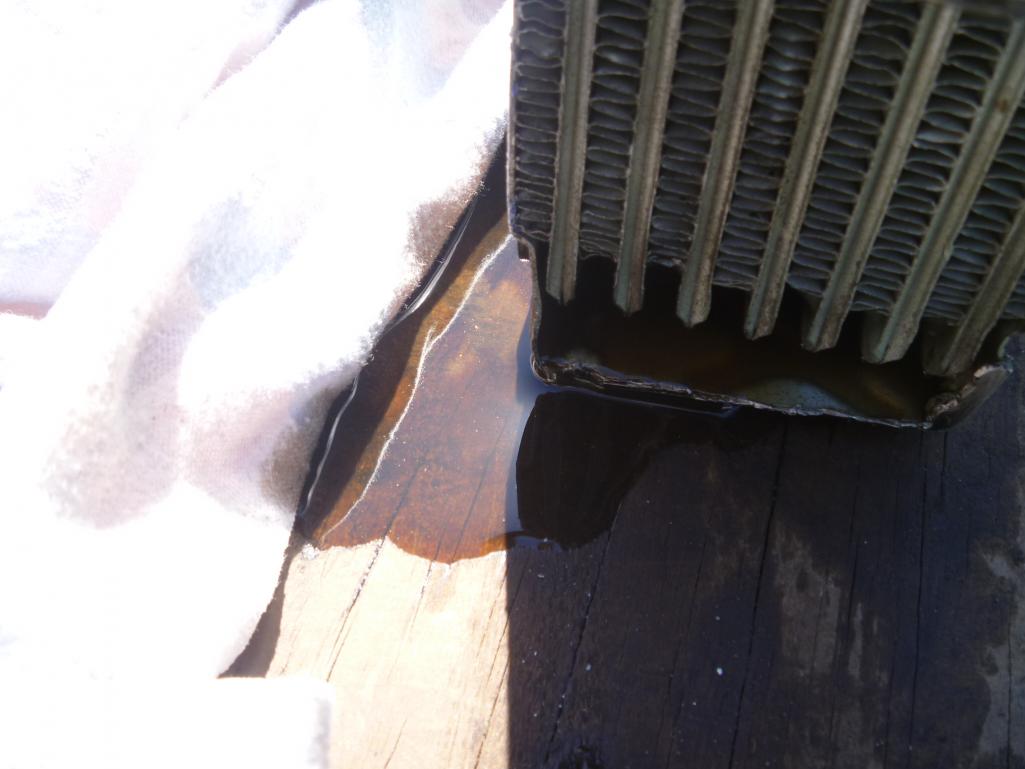 Pic shows old cooler with 20 psi on it,IMO in the 911 motor with a good oil pump they can reach high pressure on first startup with cold oil,a used cooler can be a gamble but my replacement has been fine. |
|
|
|
| Superhawk996 |
Apr 30 2020, 06:07 AM
Post
#317
|
|
914 Guru Group: Members Posts: 7,012 Joined: 25-August 18 From: Woods of N. Idaho Member No.: 22,428 Region Association: Galt's Gulch |
@porschetub
Sorry you had so much trouble too. Coolers are a PITA that is why I've always just replaced them as standard practice on Type 1 and Type 4 rebuilds I've done. I know Ollies went though several versions of clean and test. I'm not sure I ever got the full story. All I know for sure is that it wasn't clean like this when it went away, so they definately spent some time trying to save it. They said initially there was some sort of blockage that kept coming out of the ultrasonic tank as black stuff. I'd be willing to bet they tested 1st but with some sort of blockage it could have passed pressure test 1st and then failed later once they got the blockage cleared? Glad you got your cooler issued under control. Those leaks don't look fun at all. I've seen a number of 914/6 coolers pass though FS/WTB but I can't bring myself to pay that kind of money for a cooler that I have no idea where its been. . . . though that philosophy wasn't in practice back in my younger dating years. At this point I'd prefer a virgin cooler. (IMG:style_emoticons/default/happy11.gif) However, that expense of a new cooler will be put off until the panicdemic subsides and my job situation is a known entitiy. |
|
|
|
| mb911 |
Apr 30 2020, 06:36 AM
Post
#318
|
|
914 Guru Group: Members Posts: 7,550 Joined: 2-January 09 From: Burlington wi Member No.: 9,892 Region Association: Upper MidWest |
I can tell you from personal experience the new coolers are not as near nice as the original.. From a quality stand point.
Just did a mod the other day for someone.. This was used and clean but very nice. 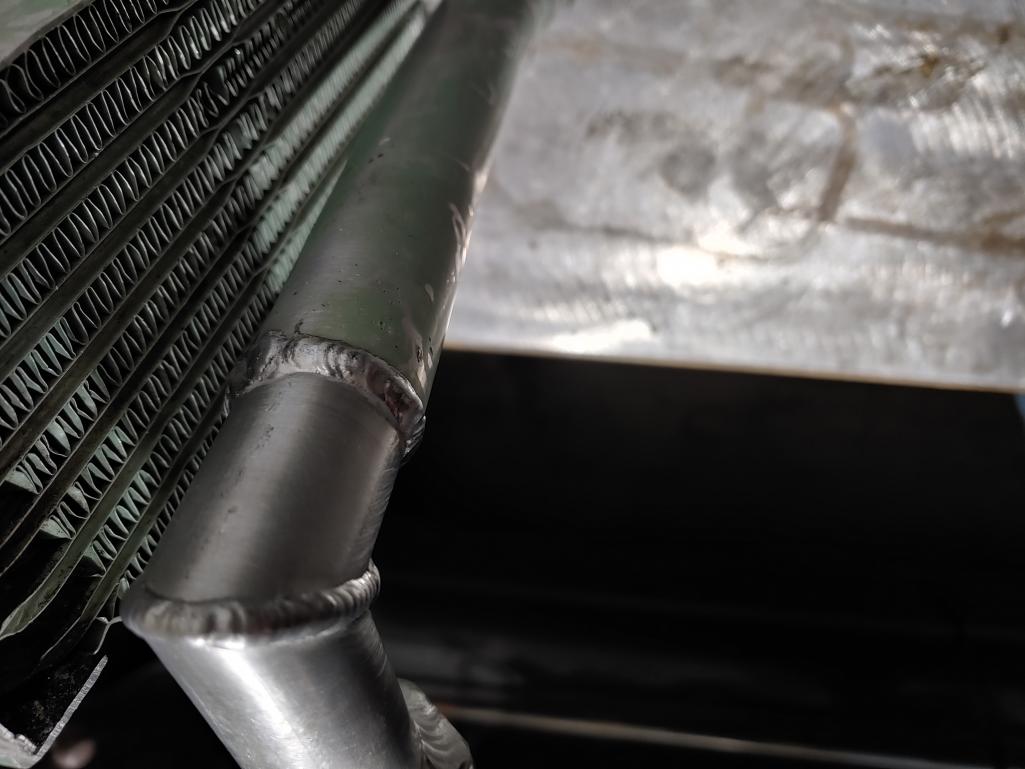 |
|
|
|
| FourBlades |
Apr 30 2020, 10:41 AM
Post
#319
|
|
From Wreck to Rockin Group: Members Posts: 2,056 Joined: 3-December 07 From: Brevard, FL Member No.: 8,414 Region Association: South East States |
Engine is looking great! That should last a long time. Getting a new cooler will be worth it just for not worrying about debris from the old one. Can't wait to see this car on the road! John |
|
|
|
| Superhawk996 |
Apr 30 2020, 11:02 AM
Post
#320
|
|
914 Guru Group: Members Posts: 7,012 Joined: 25-August 18 From: Woods of N. Idaho Member No.: 22,428 Region Association: Galt's Gulch |
QUOTE(FourBlades @ Apr 30 2020, 12:41 PM) Engine is looking great! That should last a long time. Getting a new cooler will be worth it just for not worrying about debris from the old one. Can't wait to see this car on the road! John @FourBlades Thanks John! It's such a long slog starting with a car that should have been scrapped. The encouragement from the forum certainly helps keep me motivated. Work in the short term will consist of the "free" work to fix the rust and replace the sheetmetal which was paid for over a year ago. No worries there. Likewise I have enough already paid for parts to put together one of the 2.0L four cyclinders in my posession at the moment. So the engine work is "free" at this point. Luckily I'm still working for now which is great. However, I don't know for how much longer as the L word is being rumored. The only upside to a layoff would be having time to work on the car with the parts that were previously paid for and sitting on hand. At this point, based on slow progress to date, I'm shooting to be on road next summer. More time on my hands would pull that forward substantially. |
|
|
|
|
1 User(s) are reading this topic (1 Guests and 0 Anonymous Users)
0 Members:

|
Lo-Fi Version | Time is now: 28th April 2025 - 11:01 PM |
Invision Power Board
v9.1.4 © 2025 IPS, Inc.