|
|

|
Porsche, and the Porsche crest are registered trademarks of Dr. Ing. h.c. F. Porsche AG.
This site is not affiliated with Porsche in any way. Its only purpose is to provide an online forum for car enthusiasts. All other trademarks are property of their respective owners. |
|
|
  |
| Gint |
 Oct 12 2020, 03:59 PM Oct 12 2020, 03:59 PM
Post
#381
|
|
Mike Ginter                Group: Admin Posts: 16,096 Joined: 26-December 02 From: Denver CO. Member No.: 20 Region Association: Rocky Mountains  |
2 years seems more like twenty minutes any more.
Ambitious project, but you're getting right to it. This is another thread I'm going to have to take the time to read all the way through. |
| Superhawk996 |
 Nov 29 2020, 08:06 PM Nov 29 2020, 08:06 PM
Post
#382
|
|
914 Guru      Group: Members Posts: 7,008 Joined: 25-August 18 From: Woods of N. Idaho Member No.: 22,428 Region Association: Galt's Gulch 
|
November wasn't terribly productive since I was traveling for a couple weeks.
Manged to get the area under the gas tank cleaned up, seam sealed and laid down a light coat of primer to keet it all from surface rusting. 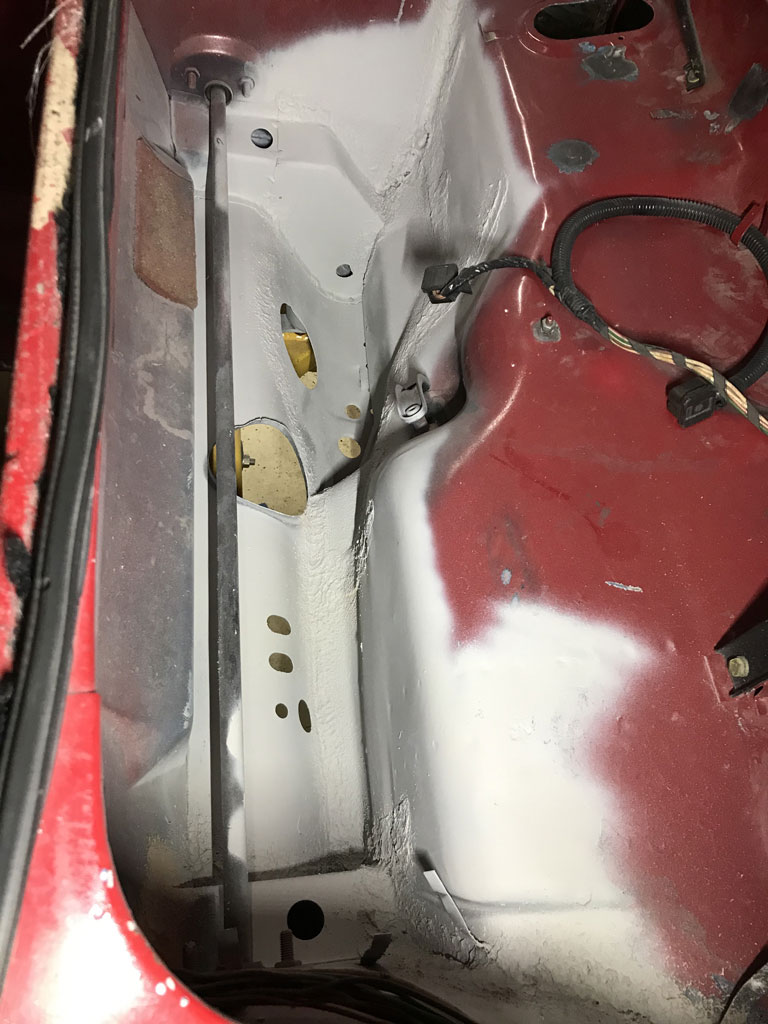 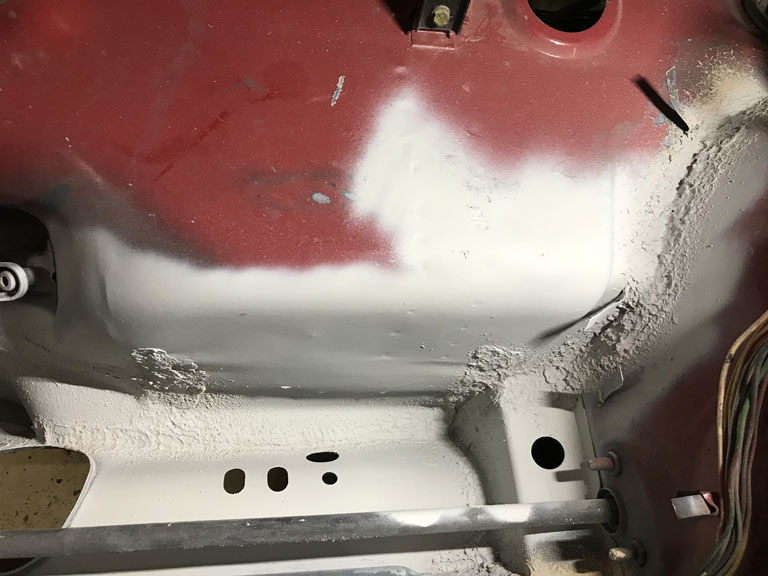 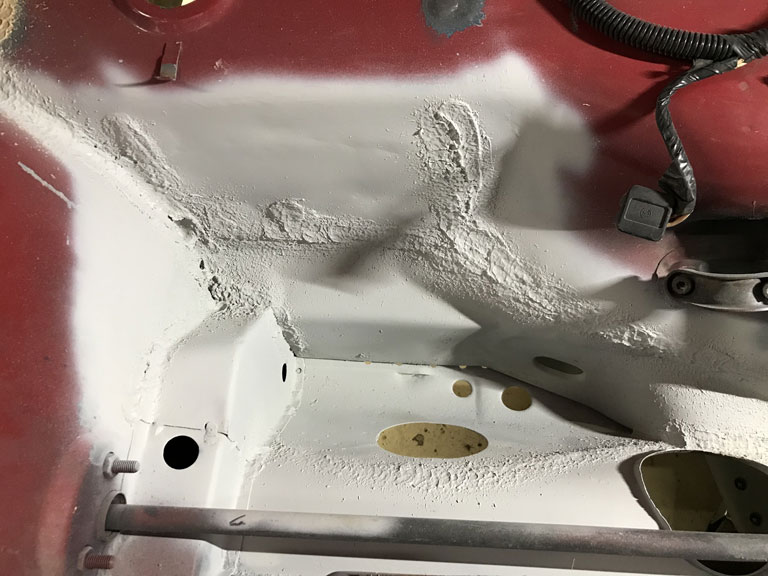 and did same for interior side. 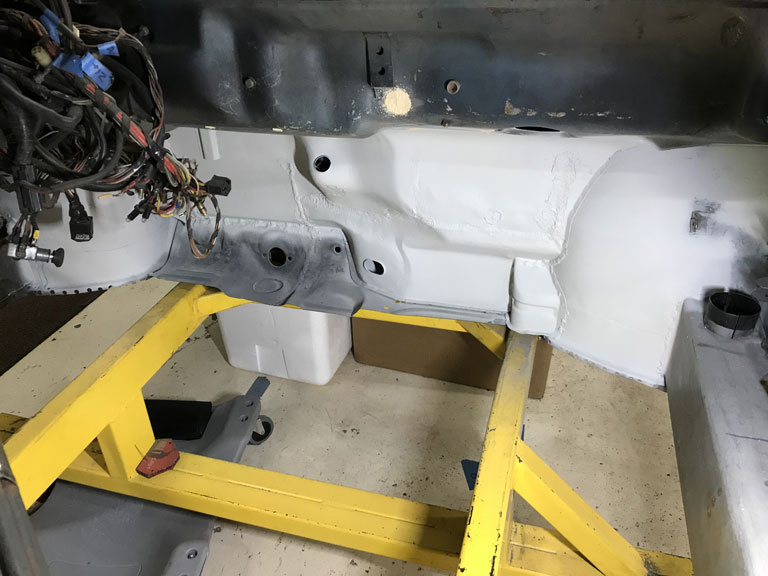 Then turned my attention toward the fun work of overhead welding in the driver side longitudinal patch to fill in the area that I cut out because it was rusted and it also allowed access to get the sand out of the driver side long. 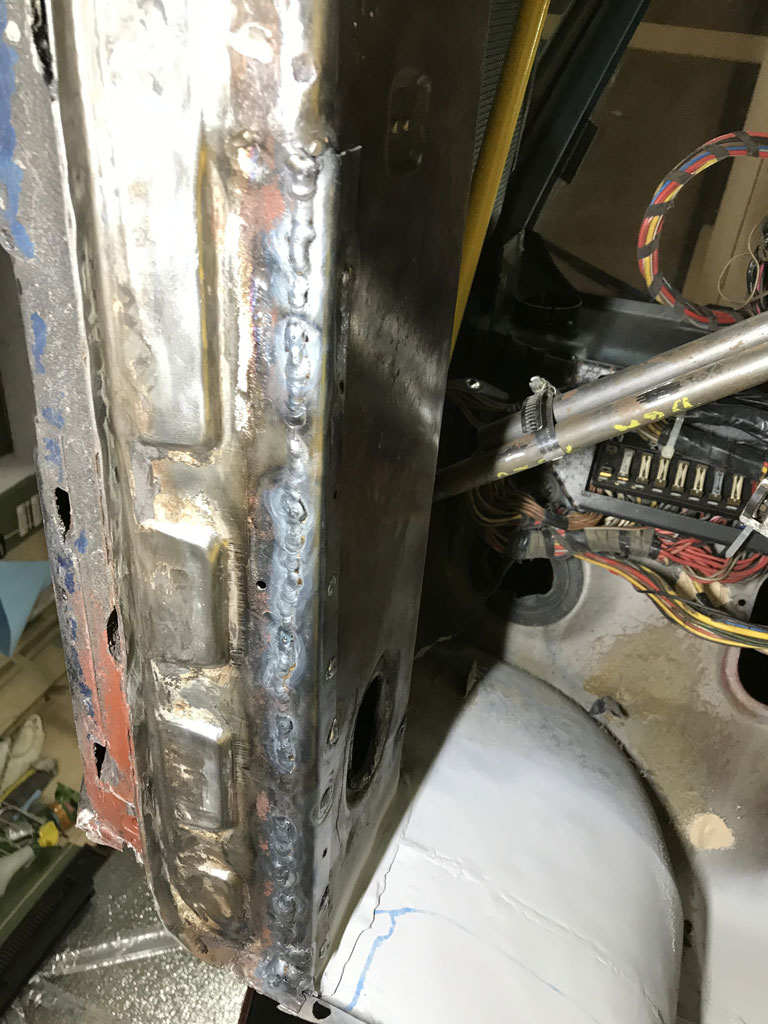 Brazed the parking brake cable tubes to the rear bulkhead. 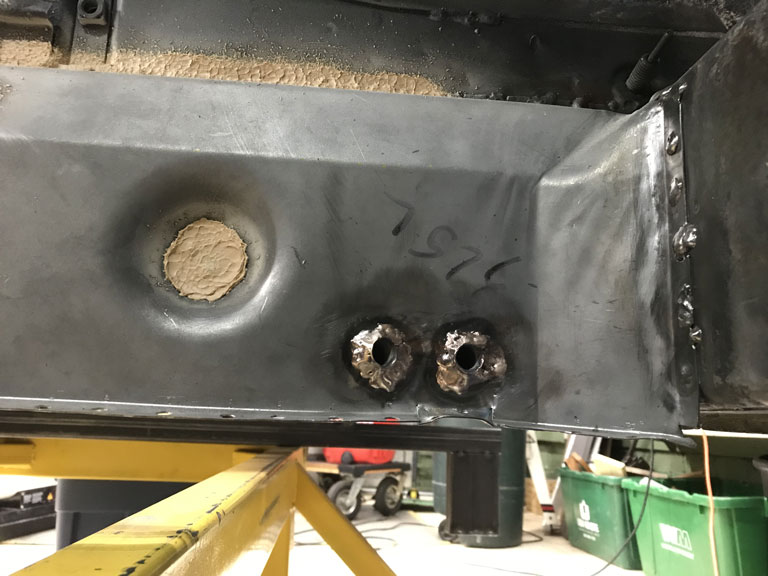 A good chunk of time has been spent playing with other miscellaneous parts. Lots of ultrasonic cleaning of fasteners and engine parts in anticipation of a rebuild this spring. And of course a simple job like just wanting to swap the rear caliper adjusting screws over from my old calipers to the new PMB calipers was 50/50. One was super easy. the other of course was stuck and pre-stripped. Not a hard project but easily a hour detour trying to get the 4mm hex cap off. Finally resorted to the old welding tricks. 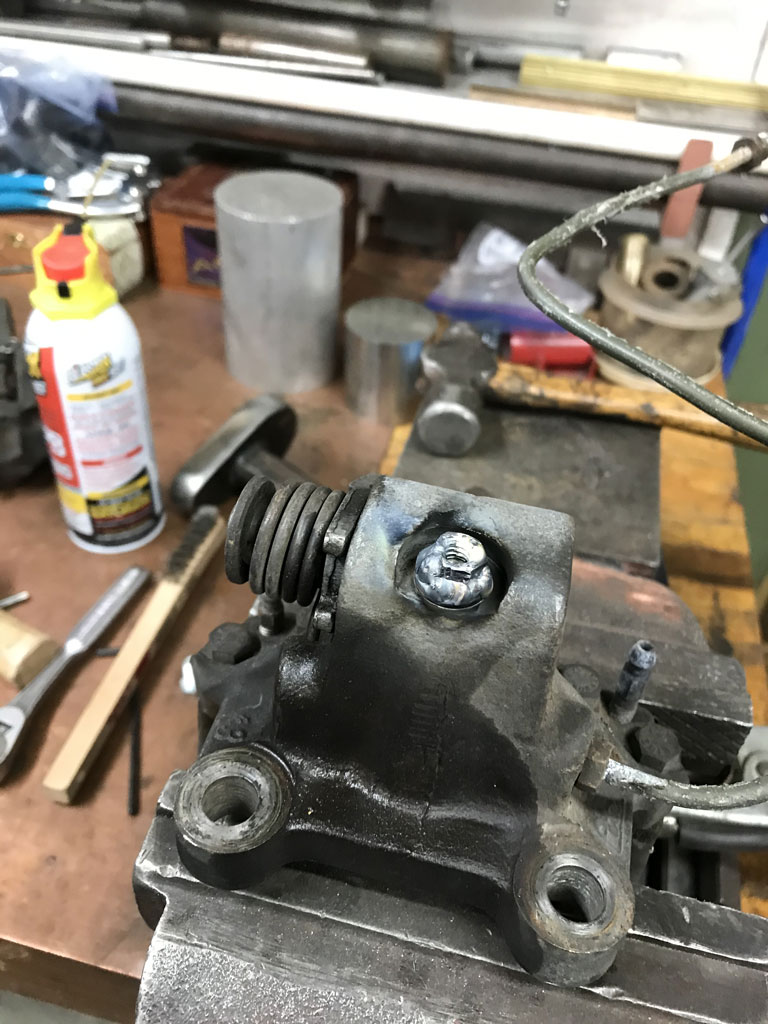 Bugger (IMG:style_emoticons/default/ar15.gif) Here's to hoping for a more productive December. (IMG:style_emoticons/default/beerchug.gif) |
| Jett |
 Nov 29 2020, 10:50 PM Nov 29 2020, 10:50 PM
Post
#383
|
|
Senior Member    Group: Members Posts: 1,683 Joined: 27-July 14 From: Seattle Member No.: 17,686 Region Association: Pacific Northwest 
|
Phil, just read this entire thread and was amazed by the passion and skill!
Can’t wait to see this one on the road! |
| bbrock |
 Nov 30 2020, 08:58 AM Nov 30 2020, 08:58 AM
Post
#384
|
|
914 Guru      Group: Members Posts: 5,269 Joined: 17-February 17 From: Montana Member No.: 20,845 Region Association: Rocky Mountains 
|
Nice work! (IMG:style_emoticons/default/beerchug.gif) That peddle area is not a fun place to work so I'm sure that feels good to have it done, and done well. I can sure relate to the hours spent trying to get a stubborn nut or bolt loose (IMG:style_emoticons/default/blink.gif) Looking forward to the December progress. (IMG:style_emoticons/default/popcorn[1].gif)
|
| Superhawk996 |
 Dec 12 2020, 07:26 PM Dec 12 2020, 07:26 PM
Post
#385
|
|
914 Guru      Group: Members Posts: 7,008 Joined: 25-August 18 From: Woods of N. Idaho Member No.: 22,428 Region Association: Galt's Gulch 
|
Driver side long is finally all prepped.
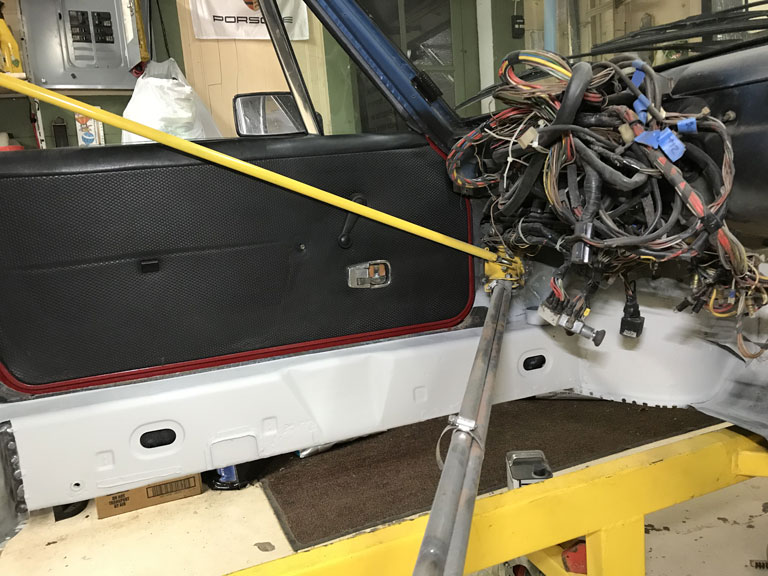 Rust repaired at the front edge with a patch, pinhole performations that got started under the fiber glass matt are filled. Who would think rust would start from inside the car! Stress crack at the hand brake divot was welded up. The entire long was treated with Ospho twice - wire wheeling out any neutralized rust twice. Finally prepped for a coat of epoxy primer to keep it from flash rusting in the future. Left an unpainted track where the new floor pan welds in. 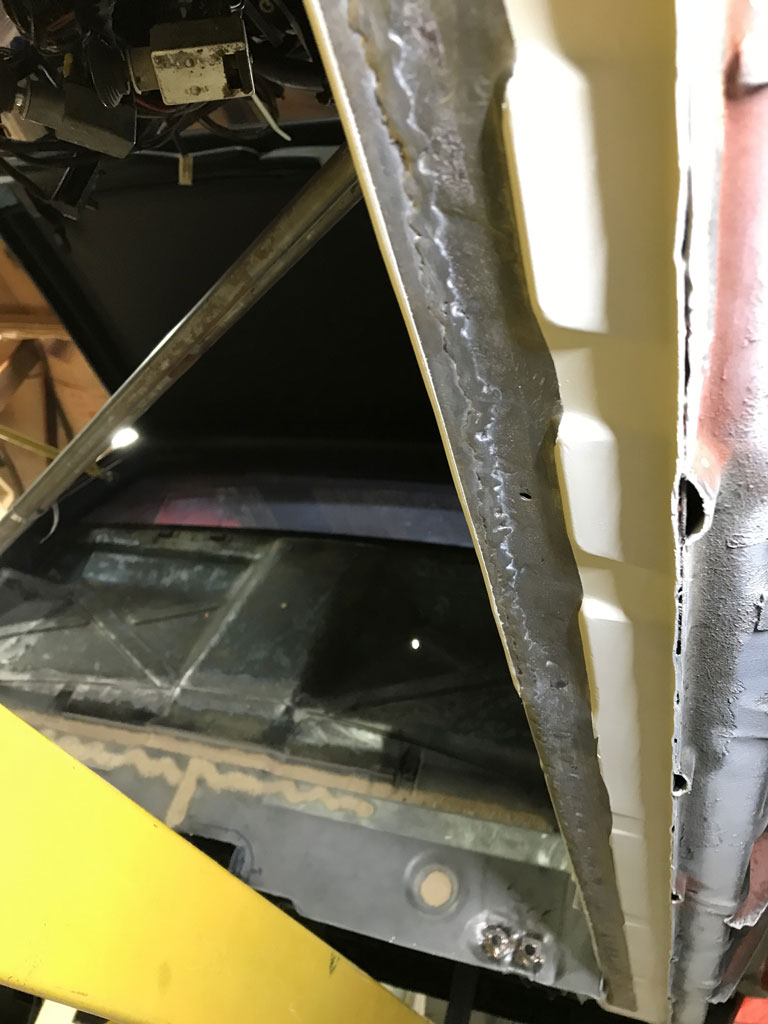 At this point, I'll start prepping the floor pan for welding tomorrow. Excited to be getting close to the milestone of having floor pans installed. |
| Superhawk996 |
 Dec 12 2020, 07:30 PM Dec 12 2020, 07:30 PM
Post
#386
|
|
914 Guru      Group: Members Posts: 7,008 Joined: 25-August 18 From: Woods of N. Idaho Member No.: 22,428 Region Association: Galt's Gulch 
|
The other exciting project for the day was inspecting and trial fitting a freshly ground crank from Ollies to see if the bearing clearance issues is fixed.
Remember from the last installment of the crank saga that I had bearing clearances that were at 0.004"+ and the OEM bearings didn't quite get it there. Crank went to Ollies to take the mains and rods to 0.010" under and for the rest of the complete spa treatment (Magnaflux, heat treat, balancing, micropolish, etc.). Initially checked it for straightness as a double check post heat treat. 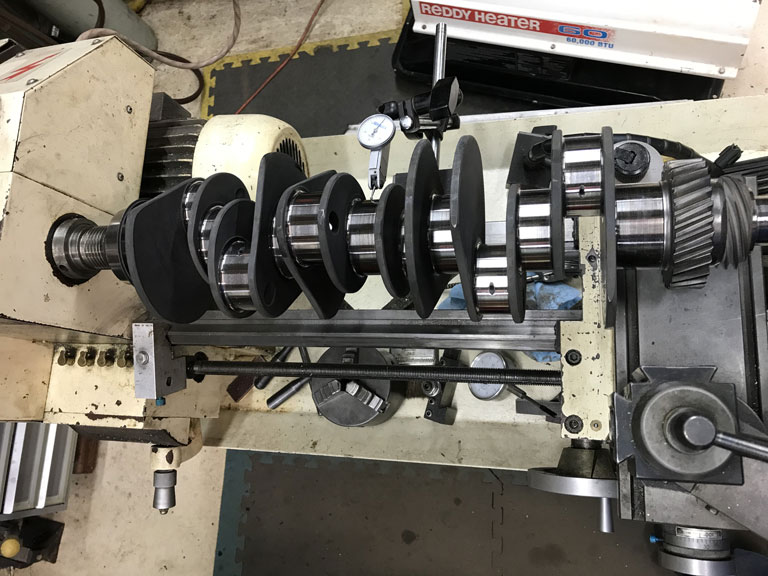 Then checked all journals on a go/no-go basis using gauge blocks to set up my micrometer. Then measured mains to get an idea of where they are at. Mostly running at 2.2334" vs spec of 2.2331" - 2.2338". Sweet. Then used plastigauge to check clearances. OEM 0.010" undersize bearings are used across all bearings. 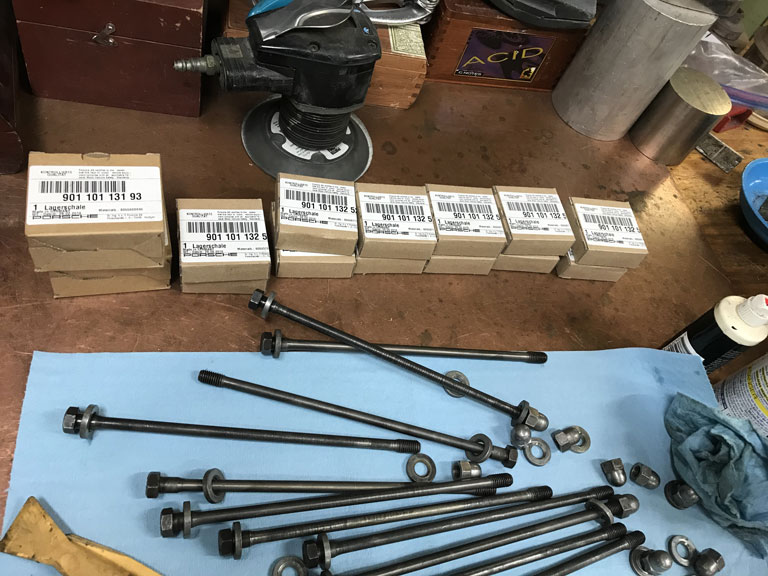 Bearing #7 is now at 0.002" and Bearing #1 is between 0.0015"-0.002". Huge improvment. 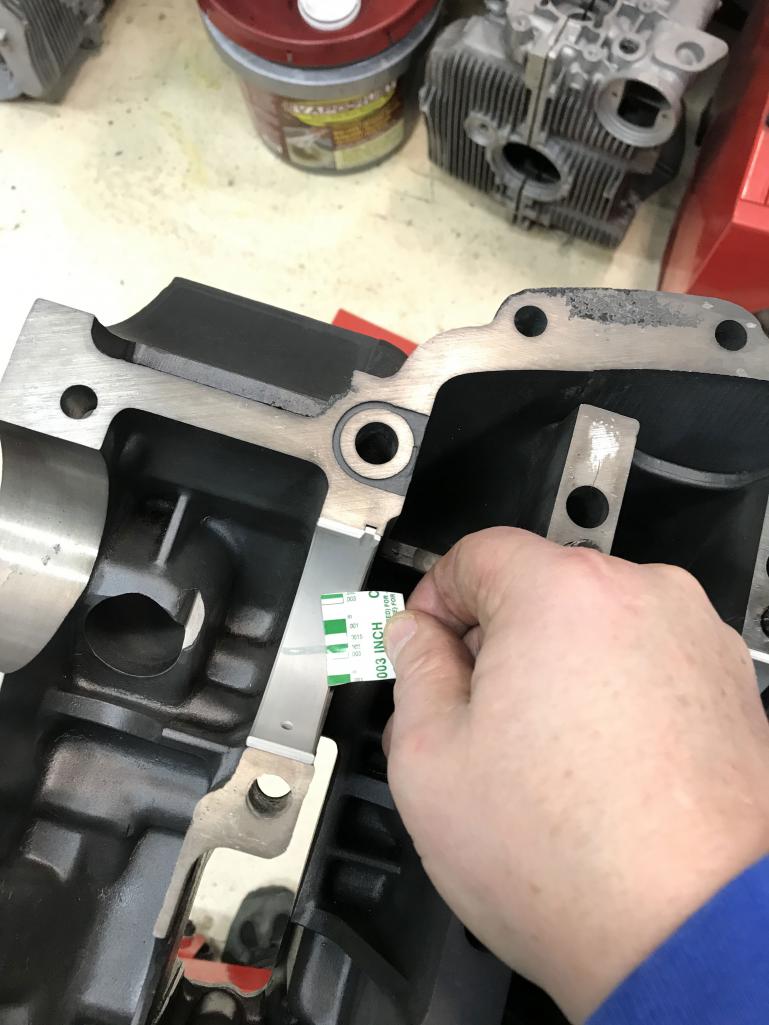 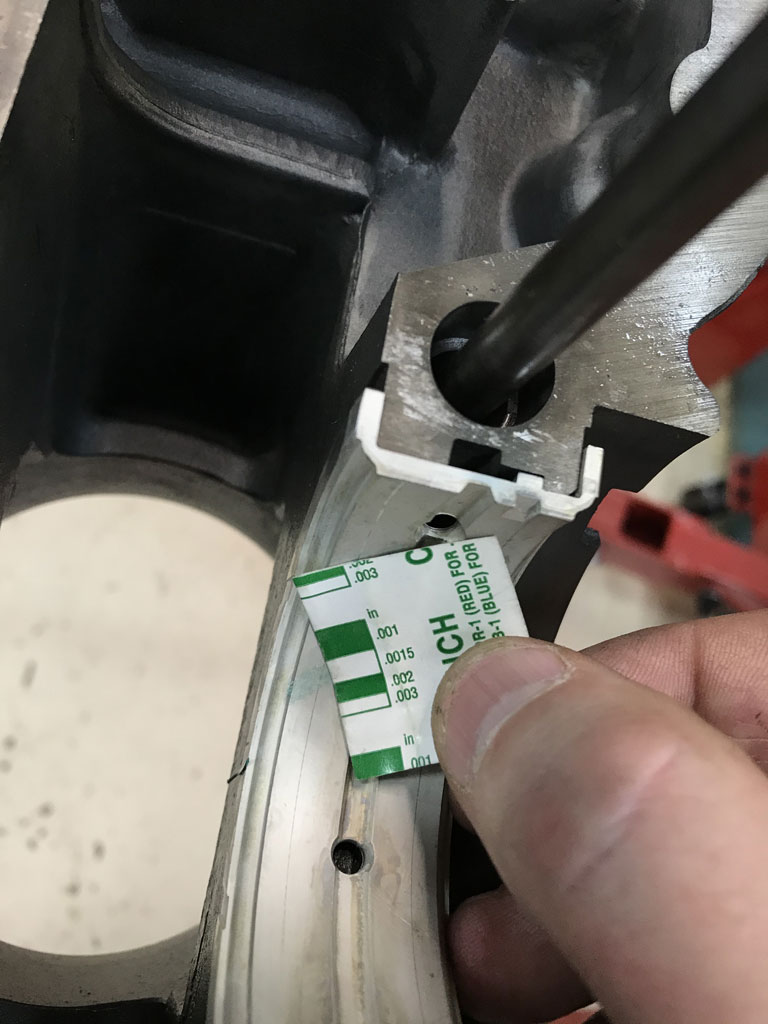 With good uniformity across all the rest of the bearings with absolutely no more than 0.003" clearance anywhere. Spec is 0.0011" - 0.0028". Success (IMG:style_emoticons/default/cheer.gif) 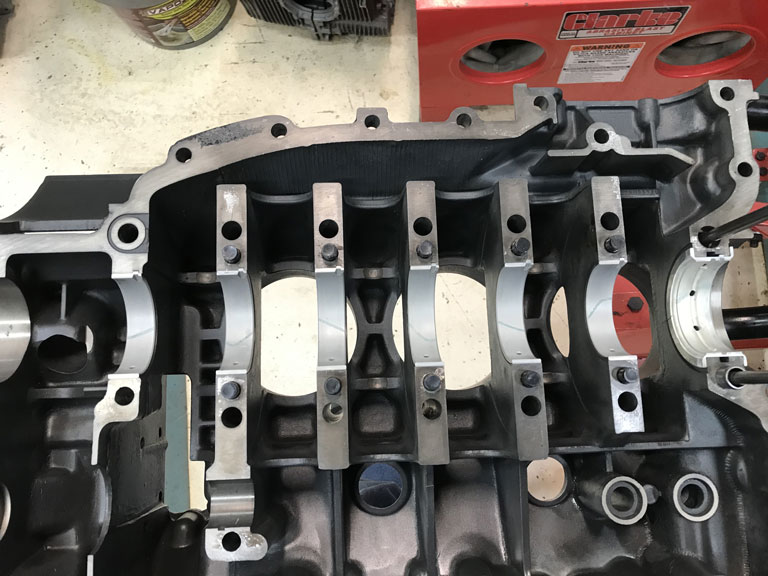 Unfortunately Ollies was unable to directly source the OEM rod bearings to me. Still waiting on those before I can plastigauge the rods. |
| bbrock |
 Dec 13 2020, 10:38 AM Dec 13 2020, 10:38 AM
Post
#387
|
|
914 Guru      Group: Members Posts: 5,269 Joined: 17-February 17 From: Montana Member No.: 20,845 Region Association: Rocky Mountains 
|
Nice work straightening out those crank clearances. Good to have that behind you.
Excited to see that floor pan go in. I think that was the most momentous milestone for me in my entire build. It was the moment when a rusted out heap of scrap became a solid chassis in my mind. (IMG:style_emoticons/default/popcorn[1].gif) |
| Superhawk996 |
 Dec 21 2020, 07:49 AM Dec 21 2020, 07:49 AM
Post
#388
|
|
914 Guru      Group: Members Posts: 7,008 Joined: 25-August 18 From: Woods of N. Idaho Member No.: 22,428 Region Association: Galt's Gulch 
|
Rod bearings arrived just in time for the weekend. (IMG:style_emoticons/default/piratenanner.gif)
Ollies Recommended Clevite 77 bearings which I purchased directly from thier supplier. Clevite is a subdivision of Mahle. These bearings have a Calico CT-1 dry film coating that is about 0.0003" thick. They are promoted as a race bearing which usually I wouldn't be game for but my thought was that they are still a Clevite 77 tri-metal bearing underneath. Worst thing should be that the dry film wears away, opens up clearance by 0.0003" and I'm no worse off. Asuming that I have good clearances to start with. As an added bonus they are substantially cheaper than Porsche OEM Rod bearings. Quick check of the bird forum shows quite a few successful users of Clevite bearings in 911 engines as a double check to Ollies recommendation. 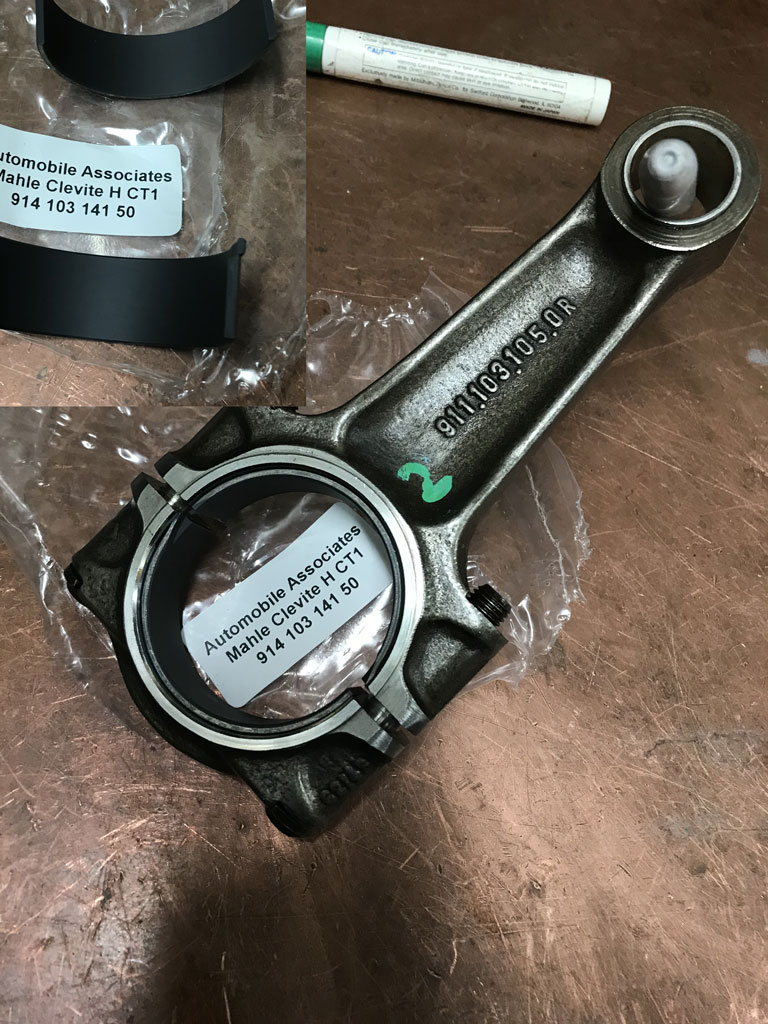 Spent pretty much a decent 8 hour day just trial fitting rod bearings and doing a mock assembly on the mains bearings. Last time I did the mains, I was only checking clearances and forgot to reassemble the crank and just give it a spin. At this point I'm getting sort of tired of removing, installing, and torquing the 11 case though bolts 13 acorn fasteners and the worst one that is hidden inside the cam chain area! So the rod bearings worked out great. All rods came up at 0.002" clearance with spec being 0.0011" - 0.0034". Perfect! (IMG:style_emoticons/default/clap56.gif) 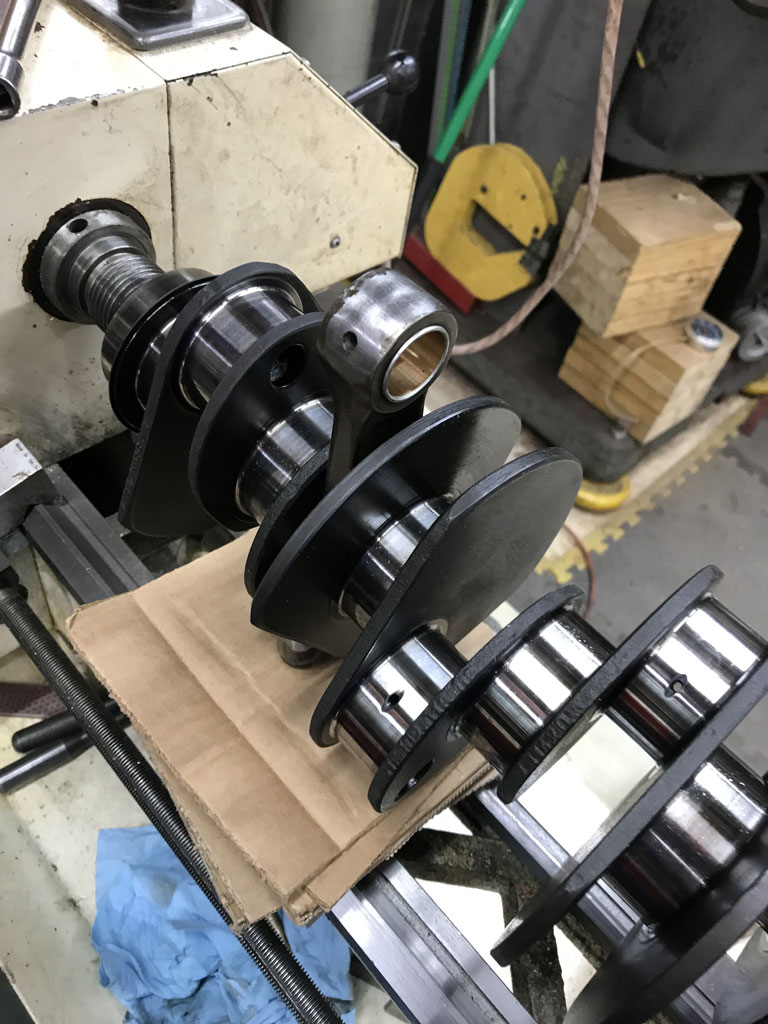 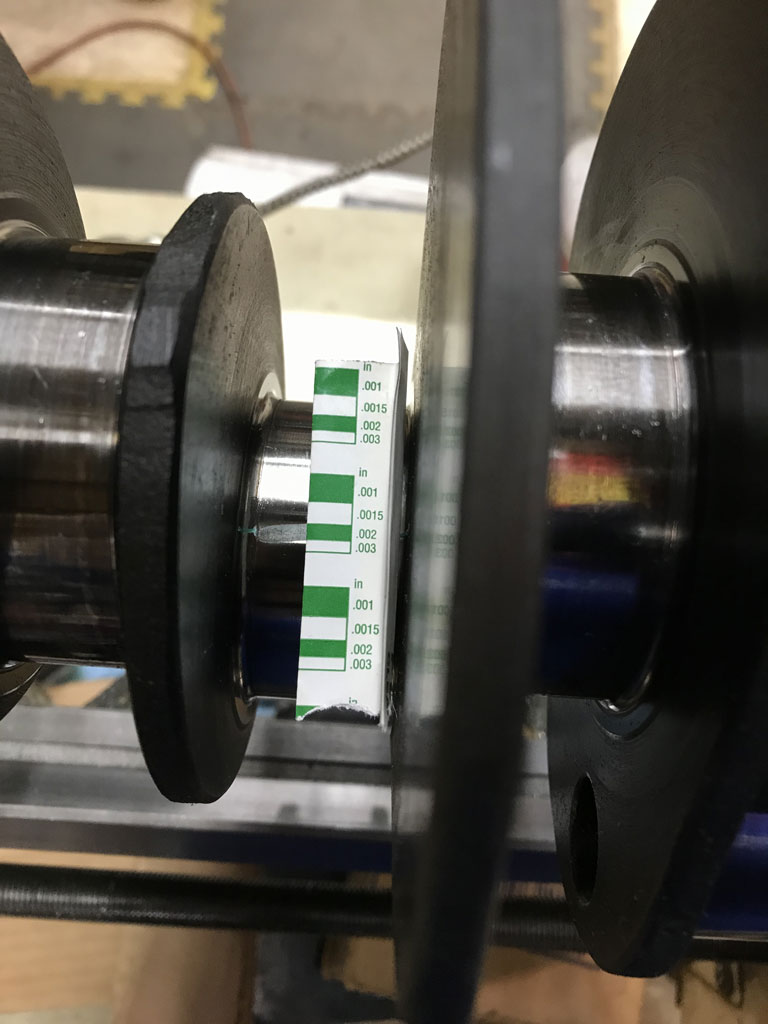 Then I moved on to mock up the whole crank into the case to make sure there are no assembly issues that would lead to binding or tight spots. Thankfully no issues but watching Ian's video a few weeks back of the Bumblebee motor binding after a line bore sure had me a bit apreshensive. Thankfully - no issues. Crank rotated perfectly with only light hand force. https://www.youtube.com/watch?v=x1rovlniCLo At this point I'm so relieved to have the bottom end fully sorted. (IMG:style_emoticons/default/sunglasses.gif) |
| mb911 |
 Dec 21 2020, 08:25 AM Dec 21 2020, 08:25 AM
Post
#389
|
|
914 Guru      Group: Members Posts: 7,549 Joined: 2-January 09 From: Burlington wi Member No.: 9,892 Region Association: Upper MidWest 
|
Rod bearings arrived just in time for the weekend. (IMG:style_emoticons/default/piratenanner.gif) Ollies Recommended Clevite 77 bearings which I purchased directly from thier supplier. Clevite is a subdivision of Mahle. These bearings have a Calico CT-1 dry film coating that is about 0.0003" thick. They are promoted as a race bearing which usually I wouldn't be game for but my thought was that they are still a Clevite 77 tri-metal bearing underneath. Worst thing should be that the dry film wears away, opens up clearance by 0.0003" and I'm no worse off. Asuming that I have good clearances to start with. As an added bonus they are substantially cheaper than Porsche OEM Rod bearings. Quick check of the bird forum shows quite a few successful users of Clevite bearings in 911 engines as a double check to Ollies recommendation.  Spent pretty much a decent 8 hour day just trial fitting rod bearings and doing a mock assembly on the mains bearings. Last time I did the mains, I was only checking clearances and forgot to reassemble the crank and just give it a spin. At this point I'm getting sort of tired of removing, installing, and torquing the 11 case though bolts 13 acorn fasteners and the worst one that is hidden inside the cam chain area! So the rod bearings worked out great. All rods came up at 0.002" clearance with spec being 0.0011" - 0.0034". Perfect! (IMG:style_emoticons/default/clap56.gif)  Then I moved on to mock up the whole crank into the case to make sure there are no assembly issues that would lead to binding or tight spots. Thankfully no issues but watching Ian's video a few weeks back of the Bumblebee motor binding after a line bore sure had me a bit apreshensive. Thankfully - no issues. Crank rotated perfectly with only light hand force. https://www.youtube.com/watch?v=x1rovlniCLo At this point I'm so relieved to have the bottom end fully sorted. (IMG:style_emoticons/default/sunglasses.gif) 1 tip I will give you is to buy the RSR rocker shaft seals.. I am now doing that in my engine over the winter.. Remember zero miles on my engine. |
| Superhawk996 |
 Dec 21 2020, 08:48 AM Dec 21 2020, 08:48 AM
Post
#390
|
|
914 Guru      Group: Members Posts: 7,008 Joined: 25-August 18 From: Woods of N. Idaho Member No.: 22,428 Region Association: Galt's Gulch 
|
1 tip I will give you is to buy the RSR rocker shaft seals.. I am now doing that in my engine over the winter.. Remember zero miles on my engine. @mb911 (IMG:style_emoticons/default/WTF.gif) Only 1 tip for free? (IMG:style_emoticons/default/happy11.gif) Will definately do the RSR seals as belt and supenders approach! (IMG:style_emoticons/default/headbang.gif) Rocker shafts. So much yet to be done. (IMG:style_emoticons/default/smash.gif) I haven't even cleaned & inspected my rocker shafts yet. I rember thinking that I probably was going to have to replace a few of the fasteners and/or the conical jambs. I guess we will see how they clean up and/or how pitted they are from corrosion. Still on purchse list: P&C's -- contemplating Nickies for weight save and way to push up C.R. a bit. Cams -- engine was CIS so I need E spec cams. New Oil Cooler -- Ollies was unable to clean the OEM part that came off this engine. Contemplating a new 4 rib pump -- just in case I need to go external cooler later (remember that C.R. bump?) but I'm really not wanting to mount an external cooler. Induction & EFI. Let's face it, this engine won't be installed & running for a long time! (IMG:style_emoticons/default/huh.gif) Plan is to put 2.0L four in 1st while I sort out the nuances of the 2.4L six build and conversion. |
| mb911 |
 Dec 21 2020, 08:54 AM Dec 21 2020, 08:54 AM
Post
#391
|
|
914 Guru      Group: Members Posts: 7,549 Joined: 2-January 09 From: Burlington wi Member No.: 9,892 Region Association: Upper MidWest 
|
1 tip I will give you is to buy the RSR rocker shaft seals.. I am now doing that in my engine over the winter.. Remember zero miles on my engine. @mb911 (IMG:style_emoticons/default/WTF.gif) Only 1 tip for free? (IMG:style_emoticons/default/happy11.gif) Will definately do the RSR seals as belt and supenders approach! (IMG:style_emoticons/default/headbang.gif) Rocker shafts. So much yet to be done. (IMG:style_emoticons/default/smash.gif) I haven't even cleaned & inspected my rocker shafts yet. I rember thinking that I probably was going to have to replace a few of the fasteners and/or the conical jambs. I guess we will see how they clean up and/or how pitted they are from corrosion. Still on purchse list: P&C's -- contemplating Nickies for weight save and way to push up C.R. a bit. Cams -- engine was CIS so I need E spec cams. New Oil Cooler -- Ollies was unable to clean the OEM part that came off this engine. Contemplating a new 4 rib pump -- just in case I need to go external cooler later (remember that C.R. bump?) but I'm really not wanting to mount an external cooler. Induction & EFI. Let's face it, this engine won't be running for a long time! (IMG:style_emoticons/default/huh.gif) I would not do nickies unless you are set on track.. I have cast iron with nikisal lining done by melenium and that sure saves a bunch of money. As far as rockers and shafts contact Craig Garrett he is in MI and has done, heads, rockers etc for me for the last 15 years. Then for oil pump just have your pump modified for improved flow. I believe that is about $250 from Supertec to have that done.. |
| Superhawk996 |
 Dec 21 2020, 09:23 AM Dec 21 2020, 09:23 AM
Post
#392
|
|
914 Guru      Group: Members Posts: 7,008 Joined: 25-August 18 From: Woods of N. Idaho Member No.: 22,428 Region Association: Galt's Gulch 
|
Not intended for track but I'm all about keeping the weight of the /6 conversion down for for improved handling and the weight/HP ratio low so I can at least keep up with a 2020 Toyota Camry (0-60 ~5.8 sec) (IMG:style_emoticons/default/laugh.gif).
Plus, how can you resist jewelry like this? 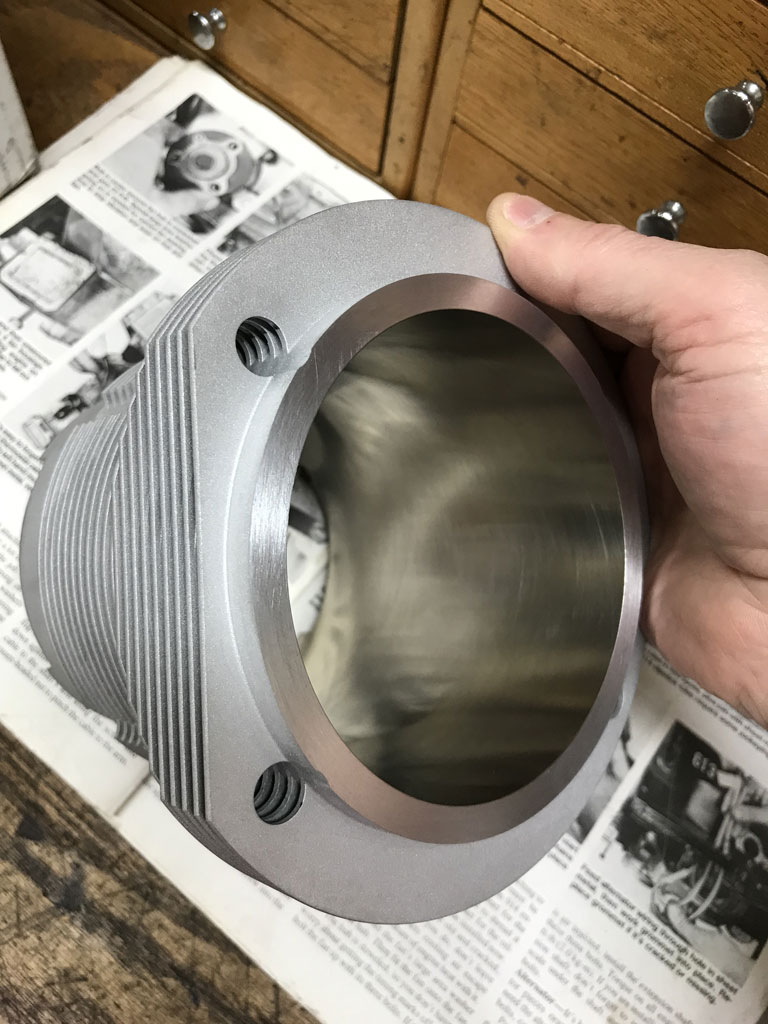 These are 100mm and slated to go toward GA004310. GA000099 stays 2.0L stock. |
| Superhawk996 |
 Dec 21 2020, 09:47 AM Dec 21 2020, 09:47 AM
Post
#393
|
|
914 Guru      Group: Members Posts: 7,008 Joined: 25-August 18 From: Woods of N. Idaho Member No.: 22,428 Region Association: Galt's Gulch 
|
In addition to the 2.4L engine work I was also able to get the driver side floor pan trimmed and tacked into position.
Prior to welding in the floor pan, I wanted to get another round of body measurements to make sure things hadn't moved around too much with the pedal box area repair. Things are pretty much the same as the last two measurements. Minor improvement in the cross car diagonal that came about from relocating the rear most driver side attachement point as part of the pedal box repair. 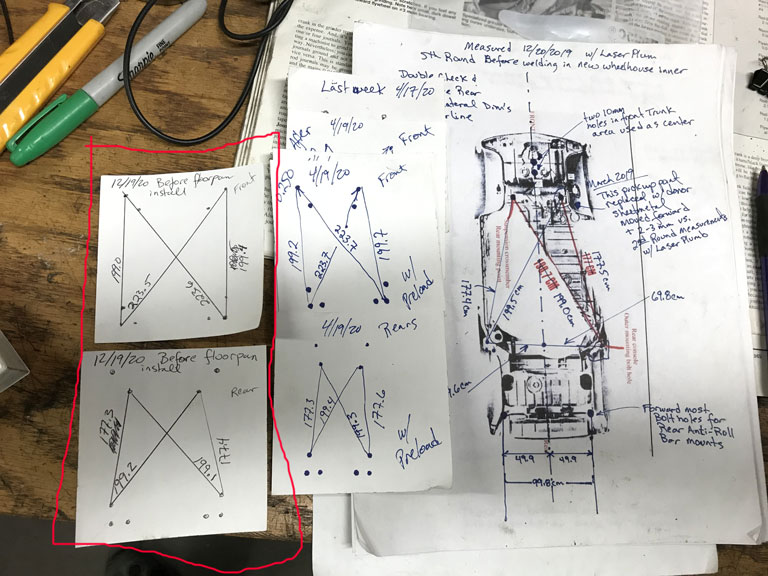 Here is the driver side floor, not yet fully installed. Since I chose not to go the rotisserie route, I'm having to do all welding overhead. Although not overly difficult, it does lead to a sore neck and shoulders after a while. I think I counted something like 65-70 hole punches when I was prepping the panel. I probably only got about 15 of them puddle welded this weekend. 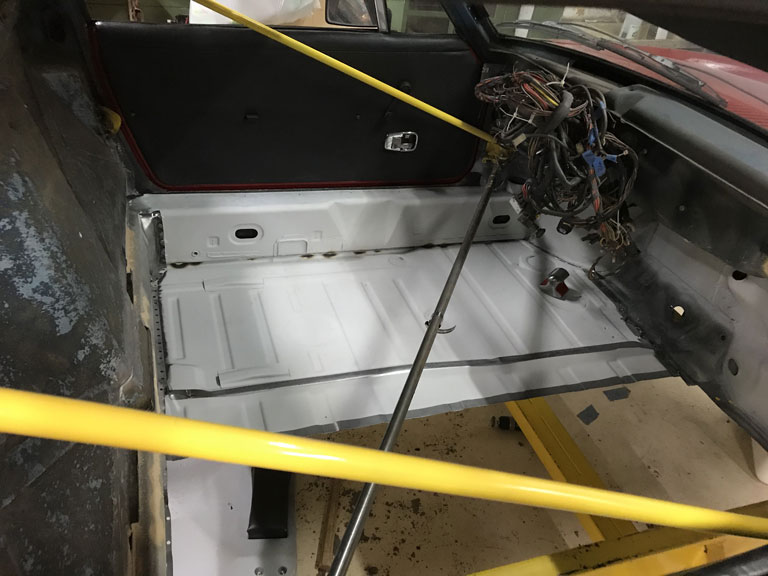 Next order of business is to rebuild the tunnel tubes. I belive the tunnel will need to be installed prior to the other 1/2 of the floorpan in order to be able to manipulate the tubes through the rear bulkhead exit holes. I'm on vacation for the holiday starting this week so I hope to make some decent progress among time spent with friends and family. Plus I need to tear down a old tail shift trans for another member to have the case. Lots to do! |
| 914werke |
 Dec 21 2020, 11:00 AM Dec 21 2020, 11:00 AM
Post
#394
|
|
"I got blisters on me fingers"           Group: Members Posts: 11,228 Joined: 22-March 03 From: USofA Member No.: 453 Region Association: Pacific Northwest 
|
would you be interested in a complete scabbed tunnel, all lines intact?
|
| Superhawk996 |
 Dec 21 2020, 11:11 AM Dec 21 2020, 11:11 AM
Post
#395
|
|
914 Guru      Group: Members Posts: 7,008 Joined: 25-August 18 From: Woods of N. Idaho Member No.: 22,428 Region Association: Galt's Gulch 
|
would you be interested in a complete scabbed tunnel, all lines intact? @914werke Thanks for the offer. Long ago I purchased a scabbed tunnel (lines cut) and it is pretty much all prepped to go in except for fabrication of the new tubes. I also already purchased the metric sized tube from RD so I'd be out all that coin and effort to change plans. Plus I intend to create a better attachement for the clutch tube to prevent ever having that break free in my lifetime. Thanks for reading the post and reaching out to try to speed things up. (IMG:style_emoticons/default/aktion035.gif) More than a few of your parts going into this build! (IMG:style_emoticons/default/piratenanner.gif) Recently received the throttle cable bracket that bolts to the case. Awesome work on those. (IMG:style_emoticons/default/first.gif) Same for the bronze shift bushing. I'm looking forward to that helping get some of the slop out of the usual linkage play. |
| mb911 |
 Dec 22 2020, 11:08 AM Dec 22 2020, 11:08 AM
Post
#396
|
|
914 Guru      Group: Members Posts: 7,549 Joined: 2-January 09 From: Burlington wi Member No.: 9,892 Region Association: Upper MidWest 
|
So will this be running this summer?
|
| Superhawk996 |
 Dec 22 2020, 01:14 PM Dec 22 2020, 01:14 PM
Post
#397
|
|
914 Guru      Group: Members Posts: 7,008 Joined: 25-August 18 From: Woods of N. Idaho Member No.: 22,428 Region Association: Galt's Gulch 
|
@mb911
Late summer or early fall with GA000099 2.0L engine is the goal. My intent is to finish the floor structure (tunnel & cross braces) and then sort of slam it together just good enough to drive it some in the fall when the temps are enjoyable. That might require just tacking some flat sheetmetal over the A/C condensor holes in the front trunk as short term solution. Then when winter sets in, put it back up on the cart and finish the Frunk up along with some other minor non-structural repairs (like pinholes in rear bulkhead from rusting behind engine sound deadner. Could begin to think about the /6 conversion stuff at that point. Really need to drive this little bastard. If you leave them on jack stands too long they get used to it and never come off them in pursuit of magical perfection (IMG:style_emoticons/default/laugh.gif) It's easy to lose sight of how many details and how much time it will take to put it back together from a tub. Last time I did it in 6 weeks including a quick paint job. USAF in the late 80's decided I had 12 weeks to either reenlist or get out due to Gramm-Rudman Act reductions in armed forces. I wasn't supposed to separate for another 9 months. I said Fuch that. It was a good lesson in how Gov't lies, and cheats folks. If you want out early, too bad! That will come with a dishonorable discharge. If they want you out early for budget reasons . . . well no issues there. . . . off you go, no matter what your life plans were. Strangely, 30+ years later the Gov't is still Fuching people! Go figure. (IMG:style_emoticons/default/happy11.gif) It was a (IMG:style_emoticons/default/stromberg.gif) show becuase I had just torn my 914 down for paint to a bare tub minus all glass! Got er' done. But, I was in my 20's and I didn't get much sleep for 6 weeks! |
| 930cabman |
 Dec 24 2020, 08:37 AM Dec 24 2020, 08:37 AM
Post
#398
|
|
Advanced Member     Group: Members Posts: 4,052 Joined: 12-November 20 From: Buffalo Member No.: 24,877 Region Association: North East States 
|
@mb911 Late summer or early fall with GA000099 2.0L engine is the goal. My intent is to finish the floor structure (tunnel & cross braces) and then sort of slam it together just good enough to drive it some in the fall when the temps are enjoyable. That might require just tacking some flat sheetmetal over the A/C condensor holes in the front trunk as short term solution. Then when winter sets in, put it back up on the cart and finish the Frunk up along with some other minor non-structural repairs (like pinholes in rear bulkhead from rusting behind engine sound deadner. Could begin to think about the /6 conversion stuff at that point. Really need to drive this little bastard. If you leave them on jack stands too long they get used to it and never come off them in pursuit of magical perfection (IMG:style_emoticons/default/laugh.gif) It's easy to lose sight of how many details and how much time it will take to put it back together from a tub. Last time I did it in 6 weeks including a quick paint job. USAF in the late 80's decided I had 12 weeks to either reenlist or get out due to Gramm-Rudman Act reductions in armed forces. I wasn't supposed to separate for another 9 months. I said Fuch that. It was a good lesson in how Gov't lies, and cheats folks. If you want out early, too bad! That will come with a dishonorable discharge. If they want you out early for budget reasons . . . well no issues there. . . . off you go, no matter what your life plans were. Strangely, 30+ years later the Gov't is still Fuching people! Go figure. (IMG:style_emoticons/default/happy11.gif) It was a (IMG:style_emoticons/default/stromberg.gif) show becuase I had just torn my 914 down for paint to a bare tub minus all glass! Got er' done. But, I was in my 20's and I didn't get much sleep for 6 weeks! Wow, quite the build you have there. Good plan to bang it together and get some seat time this coming summer. Another confirmed crazy man. Keep up the good work and hold the line, you will be crossing the finish line before you know. Don't you just love Plastigage? so long as the clearances check out, the crank is reasonably straight and the crank spins by hand when the case is clamped, all is good. |
| Superhawk996 |
 Dec 27 2020, 07:10 PM Dec 27 2020, 07:10 PM
Post
#399
|
|
914 Guru      Group: Members Posts: 7,008 Joined: 25-August 18 From: Woods of N. Idaho Member No.: 22,428 Region Association: Galt's Gulch 
|
What started out as a simple plan to build out the tunnel has come with some complications.
Started out easily enough by adding a doubler to the braket that support the clutch tube. 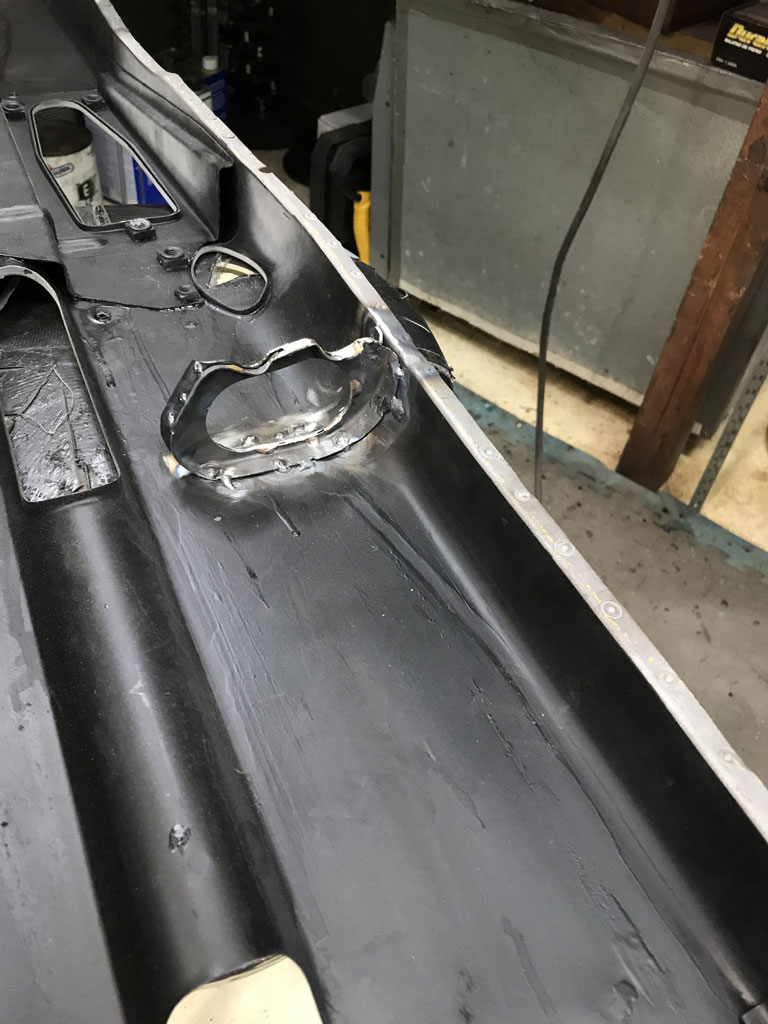 Fabrication of the clutch and throttle cable tubes was easy enough. The problem arises trying to install the tunnel with the driver side floorpan in place. Although I was able to do it, I don't see how I can do it with the heater cable tubes installed into the tunnel. The clutch and throttle cable tubes are as long as they can be while still allowing me to get the tunnel installed. Here are the max length tubes 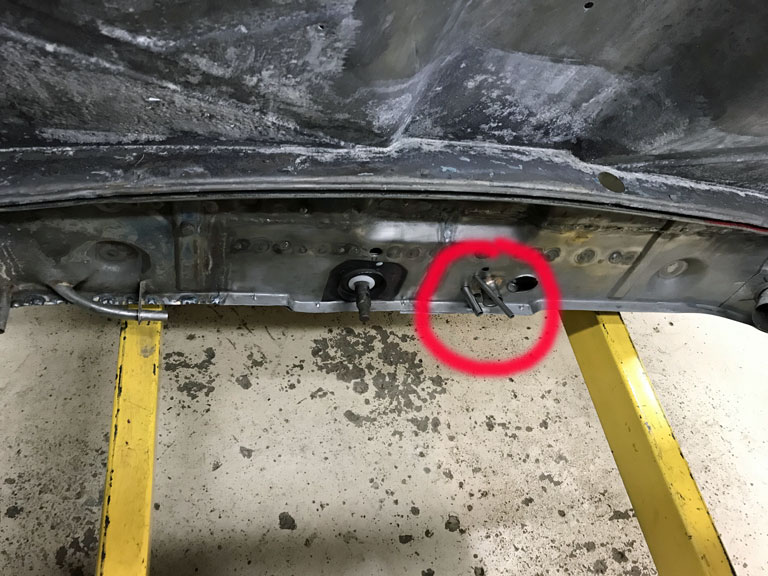 But from this other picture you get an idea of how long the tubes for the heater cables need to be. Oh so close, but, probably a smidge short. 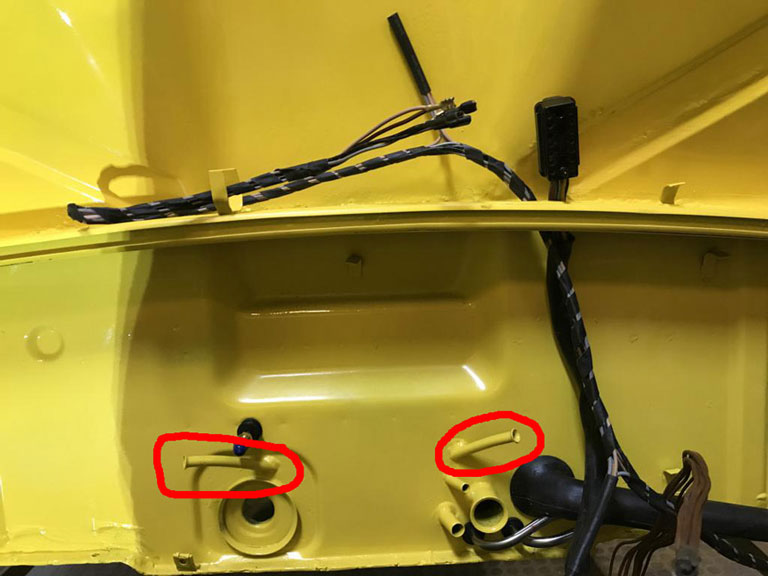 This left me in a bind. The driver side floor pan is tacked in about 12 places and will need to be removed. The heater cable tubes need to be installed with the Tunnel already installed. (IMG:style_emoticons/default/headbang.gif) Since I'm not sure of the original VW build sequence, I can only assume that the tunnel (with tubes was installed) was installed before other parts like the rear bulkhead and/or the floorpan. Bummer. (IMG:style_emoticons/default/dry.gif) So before I remove the floorpan to re-attack the tunnel heater cable tube problem, I figured I'd finish mocking up more of the floorpan to make install easier later on. Installed shifter to make sure tunnel is centered and that there is no binding of the shift rod as installed, etc. 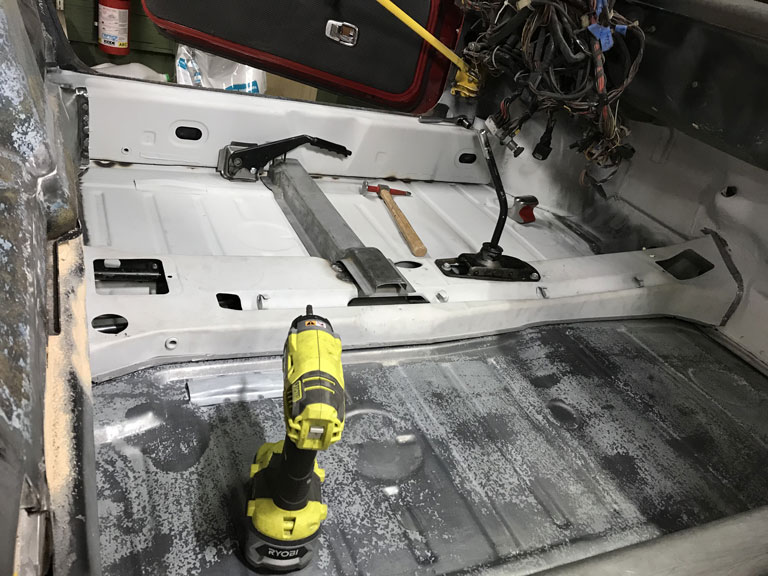 Tomorrow -- finish by mocking up the cross members and flanging them to the longs. Then I may try one more attempt to come up with a way to install the tunnel with the heater cable tubes in place by ovaling out the exit holes for a bit more clearance. Extra clearance can be brazed up as long as it's not too large. If that fails, the driver side floorpan has to come out. Then I will need to do the heater cable tube install from underneath (IMG:style_emoticons/default/wacko.gif) |
| bbrock |
 Dec 27 2020, 08:02 PM Dec 27 2020, 08:02 PM
Post
#400
|
|
914 Guru      Group: Members Posts: 5,269 Joined: 17-February 17 From: Montana Member No.: 20,845 Region Association: Rocky Mountains 
|
Looks like you've had your own trials to handle this weekend. How fantastic would it be to have an assembly sequence manual! Can't count the number of times I've had to assembly things twice, or even thrice because I didn't really this thingy-mi-bob needed to go in first. What ever you end up doing, I know it will be done right. Looking good! (IMG:style_emoticons/default/beerchug.gif)
|
  |
2 User(s) are reading this topic (2 Guests and 0 Anonymous Users)
0 Members:

|
Lo-Fi Version | Time is now: 27th April 2025 - 10:22 PM |
Invision Power Board
v9.1.4 © 2025 IPS, Inc.


