|
|
|
Porsche, and the Porsche crest are registered trademarks of Dr. Ing. h.c. F. Porsche AG.
This site is not affiliated with Porsche in any way. Its only purpose is to provide an online forum for car enthusiasts. All other trademarks are property of their respective owners. |
|
|

  |

| horizontally-opposed |
 May 20 2020, 02:33 PM May 20 2020, 02:33 PM
Post
#21
|
|
Advanced Member  Group: Members Posts: 3,456 Joined: 12-May 04 From: San Francisco Member No.: 2,058 Region Association: None |
I remember the first time I worked on it, I had all the same frustration with it and thought it wasn't possible.
Now, for whatever reason, I can get the seal in and out easy peasey. Problem I've got is the factory seal I bought 10~ years ago doesn't let the doors close (no matter what I've tried, with larger adjustment holes in the doors, loose trim holders, and more) and is now separating between two "sections" at the top of the A-pillar on the right side. Increasingly tempted to try the 914Rubber seal, which I hear has a better durometer than the seals offered by Porsche. In any event, I think you gain muscle memory with these...it's the gain that's painful. (IMG:style_emoticons/default/smash.gif) |
   |

 
|
| Mikey914 |
May 20 2020, 06:54 PM
Post
#22
|
|
The rubber man Group: Members Posts: 12,767 Joined: 27-December 04 From: Hillsboro, OR Member No.: 3,348 Region Association: None |
Watch the video.
The real key is that you DO NOT pull the sides through the channel. I can install one in a little less than an hour, only because I'm OCD with cutting the bottom to fit perfectly. In all fairness it gets much easier after you have done it a few times. The breakaway knife and soapy water to cut the bottom where it touches the triangle window seal make it easy. I cut it a little longer than I think I need it an shave it until I get a perfect fit. (IMG:style_emoticons/default/beer3.gif) |
|
|
|
| RiqueMar |
May 21 2020, 12:06 PM
Post
#23
|
|
Enrique Allen Mar Group: Members Posts: 2,220 Joined: 28-August 08 From: San Diego, CA Member No.: 9,478 Region Association: Southern California |
QUOTE(Mikey914 @ May 20 2020, 05:54 PM)  Watch the video. The real key is that you DO NOT pull the sides through the channel. I can install one in a little less than an hour, only because I'm OCD with cutting the bottom to fit perfectly. In all fairness it gets much easier after you have done it a few times. The breakaway knife and soapy water to cut the bottom where it touches the triangle window seal make it easy. I cut it a little longer than I think I need it an shave it until I get a perfect fit. (IMG:style_emoticons/default/beer3.gif) Instructions were great! Took me about 1.5 hours to complete. Thank you all (IMG:style_emoticons/default/piratenanner.gif) 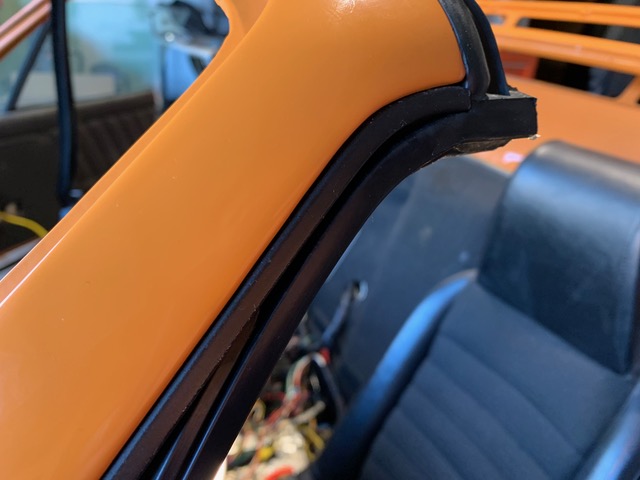 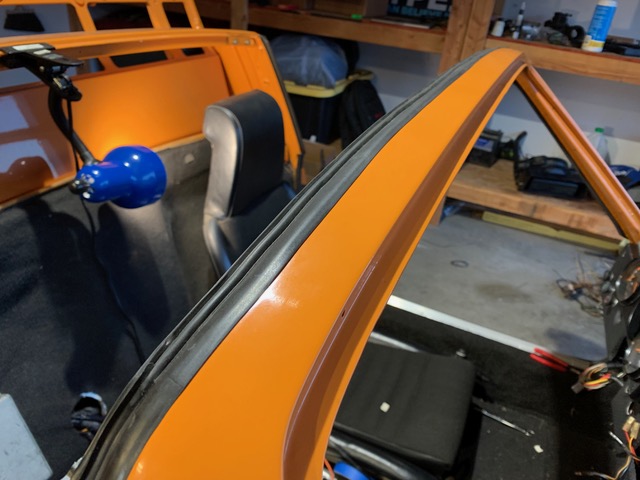 |
|
|
|
| iankarr |
May 21 2020, 01:18 PM
Post
#24
|
|
The wrencher formerly known as Cuddy_K Group: Members Posts: 2,555 Joined: 22-May 15 From: Heber City, UT Member No.: 18,749 Region Association: Intermountain Region |
Congrats!
|
|
|
|
| cpavlenko |
May 21 2020, 01:25 PM
Post
#25
|
|
Member Group: Members Posts: 489 Joined: 19-April 12 From: North Arizona Member No.: 14,400 Region Association: Southwest Region |
QUOTE(RiqueMar @ May 21 2020, 11:06 AM) QUOTE(Mikey914 @ May 20 2020, 05:54 PM) Watch the video. The real key is that you DO NOT pull the sides through the channel. I can install one in a little less than an hour, only because I'm OCD with cutting the bottom to fit perfectly. In all fairness it gets much easier after you have done it a few times. The breakaway knife and soapy water to cut the bottom where it touches the triangle window seal make it easy. I cut it a little longer than I think I need it an shave it until I get a perfect fit. (IMG:style_emoticons/default/beer3.gif) Instructions were great! Took me about 1.5 hours to complete. Thank you all (IMG:style_emoticons/default/piratenanner.gif) That looks great, nice job, I'll be tackling this soon. Great pictures of complete job. |
|
|
|
| pete000 |
May 21 2020, 02:57 PM
Post
#26
|
|
Senior Member Group: Members Posts: 1,886 Joined: 23-August 10 From: Bradenton Florida Member No.: 12,094 Region Association: South East States |
I was able to do mine with out too much drama. Not easy but its in and working great...
|
|
|
|
| chandler1969 |
Sep 28 2020, 12:49 PM
Post
#27
|
|
Member Group: Members Posts: 112 Joined: 2-January 06 From: Georgetown, Ky Member No.: 5,352 Region Association: None |
Replacing mine after ignoring for 10 years. I never drove it when it rained, only on nice days. Anyways, you can see the tab is gone (both sides). What impact will that have when installing the new seal? Also, I do not have the screw. What size should I get to replace?
I'm guessing it is easier to replace the main targa seal first then the lower seal, yes? Thanks! 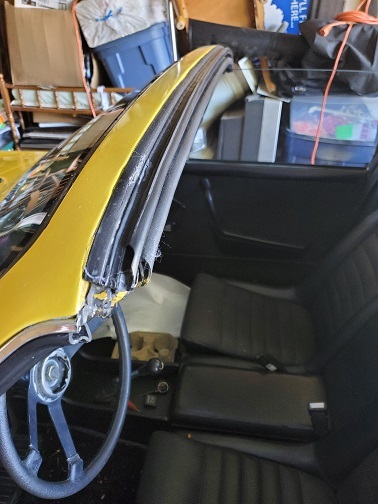 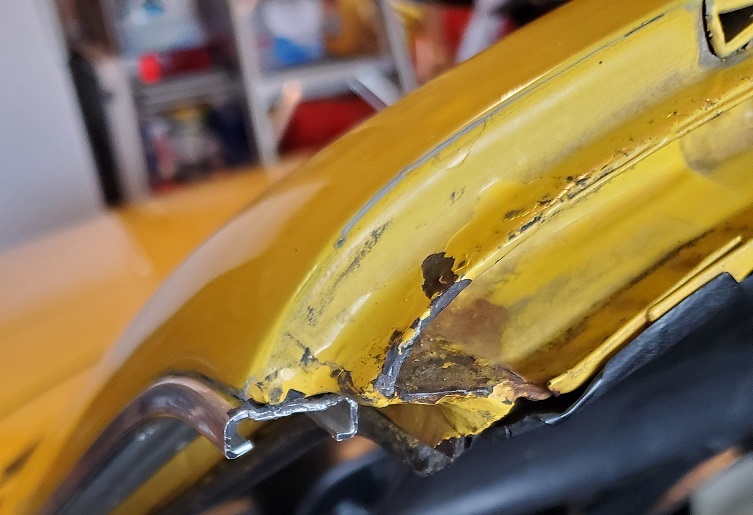 |
|
|
|
| 914e |
Sep 28 2020, 01:12 PM
Post
#28
|
|
Member Group: Members Posts: 497 Joined: 21-February 20 From: Arizona Member No.: 23,951 Region Association: Southwest Region |
QUOTE(Mikey914 @ May 20 2020, 05:54 PM) Watch the video. The real key is that you DO NOT pull the sides through the channel. I can install one in a little less than an hour, only because I'm OCD with cutting the bottom to fit perfectly. In all fairness it gets much easier after you have done it a few times. The breakaway knife and soapy water to cut the bottom where it touches the triangle window seal make it easy. I cut it a little longer than I think I need it an shave it until I get a perfect fit. (IMG:style_emoticons/default/beer3.gif) So what you are saying is I need more 914s. (IMG:style_emoticons/default/biggrin.gif) |
|
|
|
| IronHillRestorations |
Sep 28 2020, 01:31 PM
Post
#29
|
|
I. I. R. C. Group: Members Posts: 6,812 Joined: 18-March 03 From: West TN Member No.: 439 Region Association: None |
The original part has a slot in the top corners for the tabs at the top of the aluminum channel. Most all of the reproduction and so called OEM parts I've seen do not have this slot. Being able to slide that tab in the corner blocks allows to adjust that part of the seal a little by bending the aluminum tab.
|
|
|
|
| Mikey914 |
Sep 28 2020, 02:10 PM
Post
#30
|
|
The rubber man Group: Members Posts: 12,767 Joined: 27-December 04 From: Hillsboro, OR Member No.: 3,348 Region Association: None |
Even f you are missing the tab, you can make adjustments by anchoring the corners with the screw that holds it and starting the section on the track side and pulling to set the angle where it's correct before doing the entire track.
Mark |
|
|
|
| chandler1969 |
Sep 28 2020, 02:48 PM
Post
#31
|
|
Member Group: Members Posts: 112 Joined: 2-January 06 From: Georgetown, Ky Member No.: 5,352 Region Association: None |
QUOTE(Mikey914 @ Sep 28 2020, 12:10 PM) Even f you are missing the tab, you can make adjustments by anchoring the corners with the screw that holds it and starting the section on the track side and pulling to set the angle where it's correct before doing the entire track. Mark Thanks! I was thinking the same but knowing I have never done this, thought I would ask. |
|
|
|
| rbzymek |
Sep 28 2020, 03:34 PM
Post
#32
|
|
Member Group: Members Posts: 199 Joined: 5-April 19 From: Northville, MI Member No.: 23,013 Region Association: Upper MidWest |
QUOTE(chandler1969 @ Sep 28 2020, 02:48 PM) QUOTE(Mikey914 @ Sep 28 2020, 12:10 PM) Even f you are missing the tab, you can make adjustments by anchoring the corners with the screw that holds it and starting the section on the track side and pulling to set the angle where it's correct before doing the entire track. Mark Thanks! I was thinking the same but knowing I have never done this, thought I would ask. I would highly recommend a water based lubricant and avoid silicone grease. There is no solvent for silicone grease and it can cause problems in later paint processes. Many paint and injection molding operators prohibit it in the building. |
|
|
|
| chandler1969 |
Sep 29 2020, 02:07 PM
Post
#33
|
|
Member Group: Members Posts: 112 Joined: 2-January 06 From: Georgetown, Ky Member No.: 5,352 Region Association: None |
Got the top seal in. I think it turned out nice. Still need to find the right sized screws for the ends.
 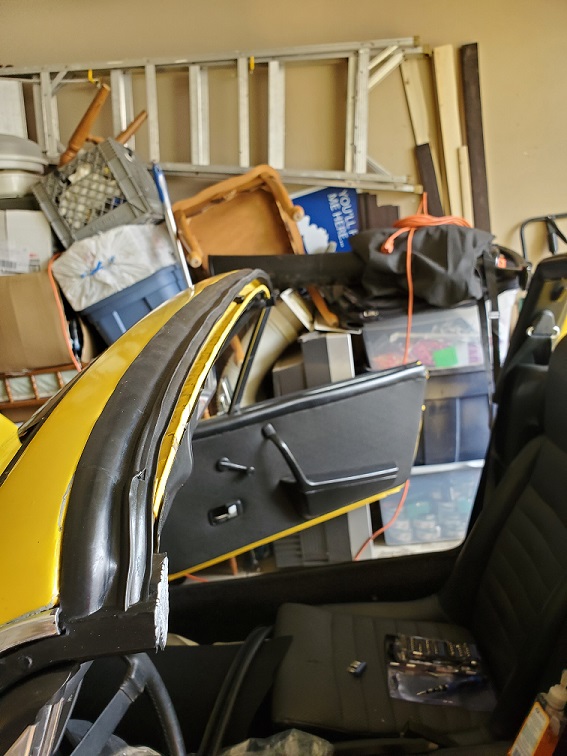  Thanks for all of the tips! Attached image(s) 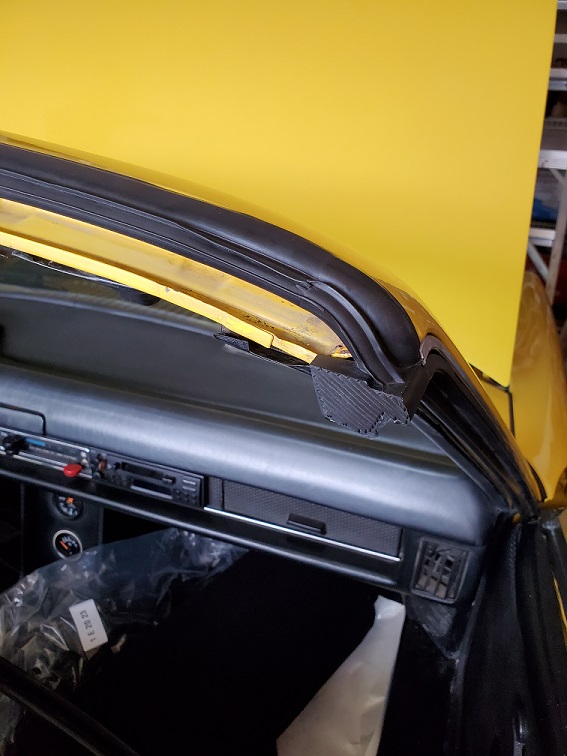
|
|
|
|
| Mikey914 |
Sep 29 2020, 10:06 PM
Post
#34
|
|
The rubber man Group: Members Posts: 12,767 Joined: 27-December 04 From: Hillsboro, OR Member No.: 3,348 Region Association: None |
I’ll source those this week and drop you some if you PM me your address.
I’m thinking I should just include with the seal (IMG:style_emoticons/default/beer.gif) |
|
|
|
| horizontally-opposed |
Jun 21 2021, 08:11 AM
Post
#35
|
|
Advanced Member Group: Members Posts: 3,456 Joined: 12-May 04 From: San Francisco Member No.: 2,058 Region Association: None |
Pulled the Porsche Classic seal yesterday, which was in worse condition than it looked to be after 10~ years of very light service, prepped/cleaned the guide trims, and am about to run this gauntlet.
Appreciate all of the inputs here, and it's hard to overstate how much this forum promotes and aids 914 ownership, @SirAndy . So, thank you! (IMG:style_emoticons/default/beerchug.gif) |
|
|
|
| Costa05 |
Oct 7 2021, 08:15 PM
Post
#36
|
|
Member Group: Members Posts: 320 Joined: 27-October 16 From: Phoenix, Arizona Member No.: 20,535 Region Association: Southwest Region |
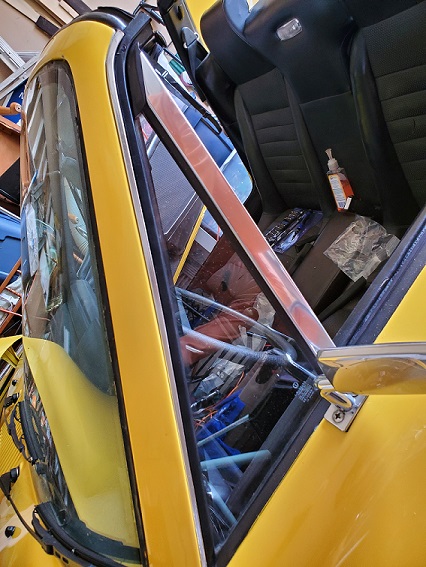
QUOTE(Mikey914 @ Sep 28 2020, 03:10 PM) Even f you are missing the tab, you can make adjustments by anchoring the corners with the screw that holds it and starting the section on the track side and pulling to set the angle where it's correct before doing the entire track. Mark Did the @mikey914 method this evening and it was not that bad once you develop a rhythm. Tabs were missing on mine. Went for it anyways. 2 hrs and done. Was fortunate my windshield is out as a quick clamp came in handy to pull the rubber tight into the small radius section at the top which was the tough part. Tool of choice was an old painters scraper dulled down on the edge. Used the square pointed corner to push and feed the rubber into the outer channel edge small bites at a time. Glycerin for the lube. Thank you all for the posts on this thread. 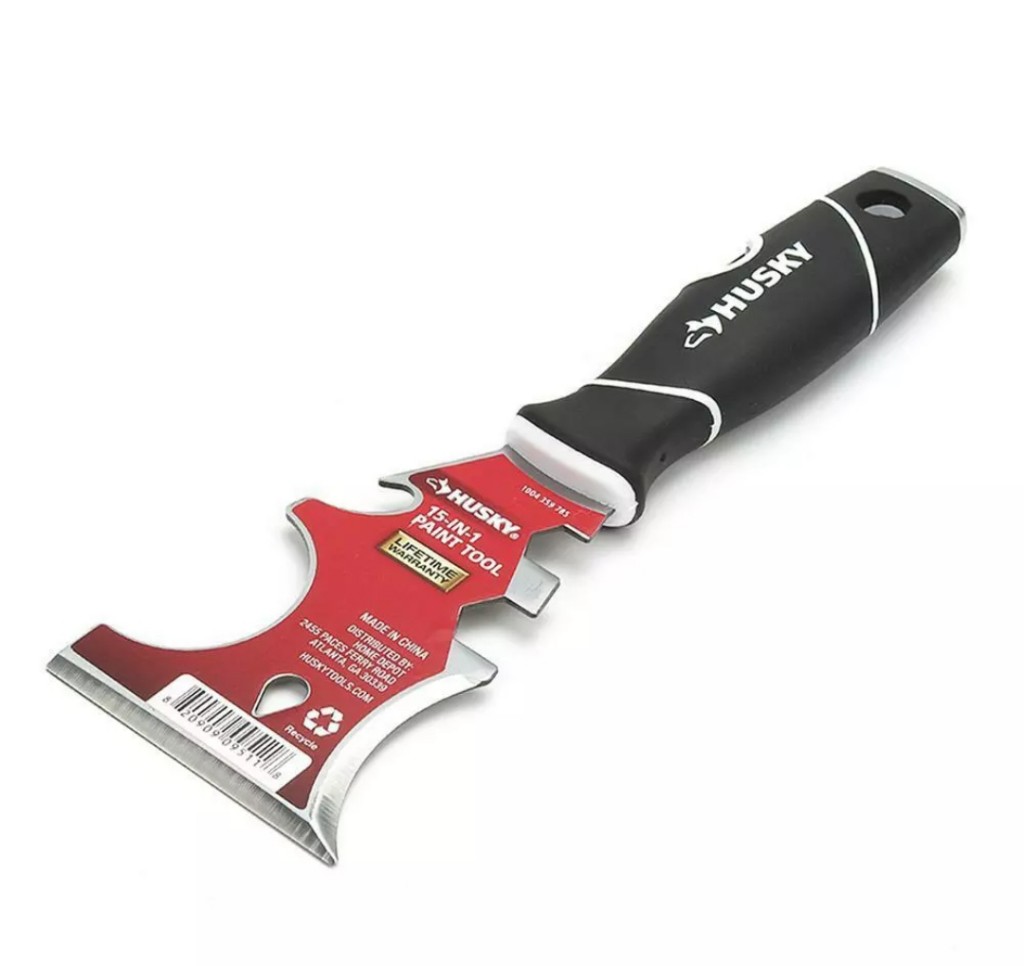 |
|
|
|
| Mikey914 |
Oct 7 2021, 10:59 PM
Post
#37
|
|
The rubber man Group: Members Posts: 12,767 Joined: 27-December 04 From: Hillsboro, OR Member No.: 3,348 Region Association: None |
It's not really a difficult seal to install, it just takes more time than you think it should and lots of patience. It is not fun, but you do get a sense of accomplishment when you are done. 2-3 hours is a normal range, you are on the low side ...good job!
|
|
|
|
| second wind |
Oct 7 2021, 11:51 PM
Post
#38
|
|
Senior Member Group: Members Posts: 862 Joined: 30-December 10 From: Los Angeles, California Member No.: 12,543 Region Association: Southern California |
[quote name='Chi-town' date='Mar 28 2019, 07:40 PM' post='2700785']
Most silicone paste have petroleum additives which will cause rubber to swell. Try 3M Dry Silicone spray and don't be bashful with it [/quo Hello Chi-town....have been thinking of you and worrying about you....you just disappeared for a long time and so glad you are back...hope to catch up soon....looking for a subi for my son...look forward to catching up..(IMG:style_emoticons/default/smile.gif) gg |
|
|
|
|
1 User(s) are reading this topic (1 Guests and 0 Anonymous Users)
0 Members:

|
Lo-Fi Version | Time is now: 19th April 2025 - 12:25 PM |
Invision Power Board
v9.1.4 © 2025 IPS, Inc.