|
|

|
Porsche, and the Porsche crest are registered trademarks of Dr. Ing. h.c. F. Porsche AG.
This site is not affiliated with Porsche in any way. Its only purpose is to provide an online forum for car enthusiasts. All other trademarks are property of their respective owners. |
|
|
  |
| ndfrigi |
 Aug 20 2020, 09:27 PM Aug 20 2020, 09:27 PM
Post
#1161
|
|
Advanced Member     Group: Members Posts: 2,965 Joined: 21-August 11 From: Orange County Member No.: 13,474 Region Association: Southern California 
|
|
| bkrantz |
 Aug 21 2020, 08:35 PM Aug 21 2020, 08:35 PM
Post
#1162
|
|
914 Guru      Group: Members Posts: 8,343 Joined: 3-August 19 From: SW Colorado Member No.: 23,343 Region Association: Rocky Mountains 
|
More forward progress today. Here are all the leads for under the cowl done, except for the wires that will go to the relocated fuel pump. I will finish these after I mount the pump.
Attached thumbnail(s) 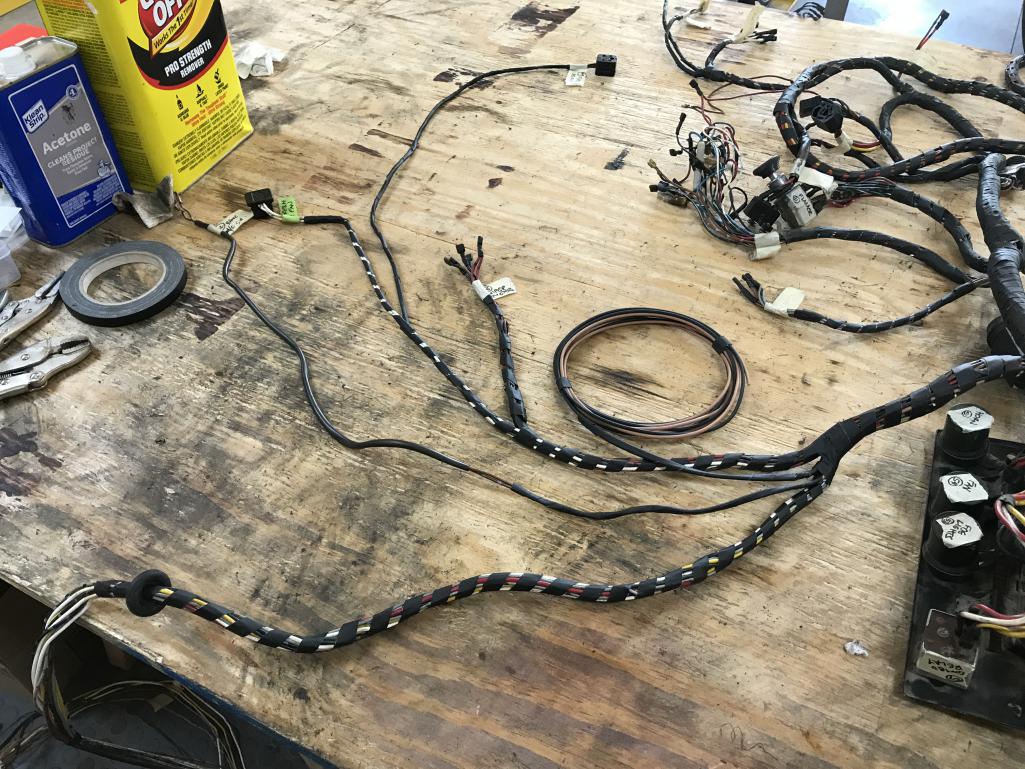
|
| bkrantz |
 Aug 21 2020, 08:36 PM Aug 21 2020, 08:36 PM
Post
#1163
|
|
914 Guru      Group: Members Posts: 8,343 Joined: 3-August 19 From: SW Colorado Member No.: 23,343 Region Association: Rocky Mountains 
|
I made some progress on the last section, that feeds all the front lights. Slow going due to lots of spots of PO red overspray.
Attached thumbnail(s) 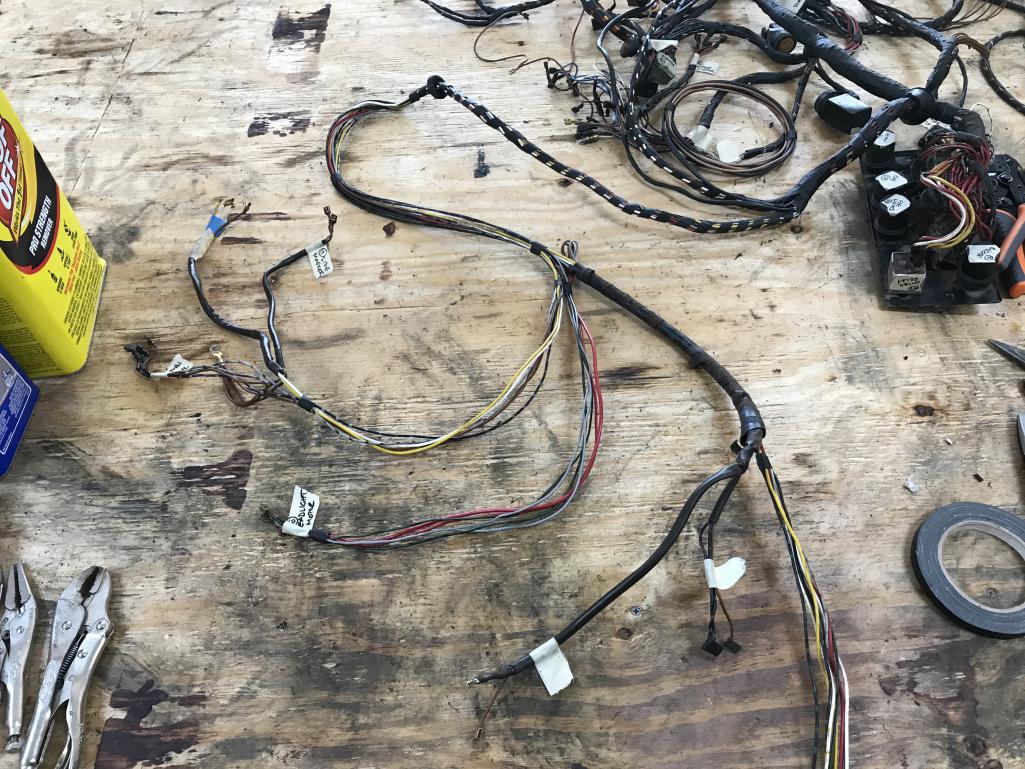
|
| autopro |
 Aug 21 2020, 08:50 PM Aug 21 2020, 08:50 PM
Post
#1164
|
|
Member   Group: Members Posts: 306 Joined: 14-January 18 From: San Diego / Tijuana Member No.: 21,797 Region Association: Southern California |
You are doing some great work wow! How are you removing the paint from the wires? Does it remove the markings on the wires when you do it? My harness is in very bad shape similar to yours and I will have to go through this process like you are doing.
|
| bkrantz |
 Aug 22 2020, 08:41 PM Aug 22 2020, 08:41 PM
Post
#1165
|
|
914 Guru      Group: Members Posts: 8,343 Joined: 3-August 19 From: SW Colorado Member No.: 23,343 Region Association: Rocky Mountains 
|
You are doing some great work wow! How are you removing the paint from the wires? Does it remove the markings on the wires when you do it? My harness is in very bad shape similar to yours and I will have to go through this process like you are doing. I have tried and use different things. The undercoating and greasy dirt come off easiest with GoofOff, but that does not work on paint. For light overspray, acetone works pretty well. For small spots of thicker paint (like between the original tape wrap), I scrape lightly with a new, sharp utility blade, and then use acetone. For really thick paint, I use a standard paint remover, but this does soften the sleeve material, so I use it carefully. See the example below. |
| bkrantz |
 Aug 22 2020, 08:44 PM Aug 22 2020, 08:44 PM
Post
#1166
|
|
914 Guru      Group: Members Posts: 8,343 Joined: 3-August 19 From: SW Colorado Member No.: 23,343 Region Association: Rocky Mountains 
|
Onto the final section today, working towards the front lights. Here's some nasty PO red (and gold???) overspray.
Attached thumbnail(s) 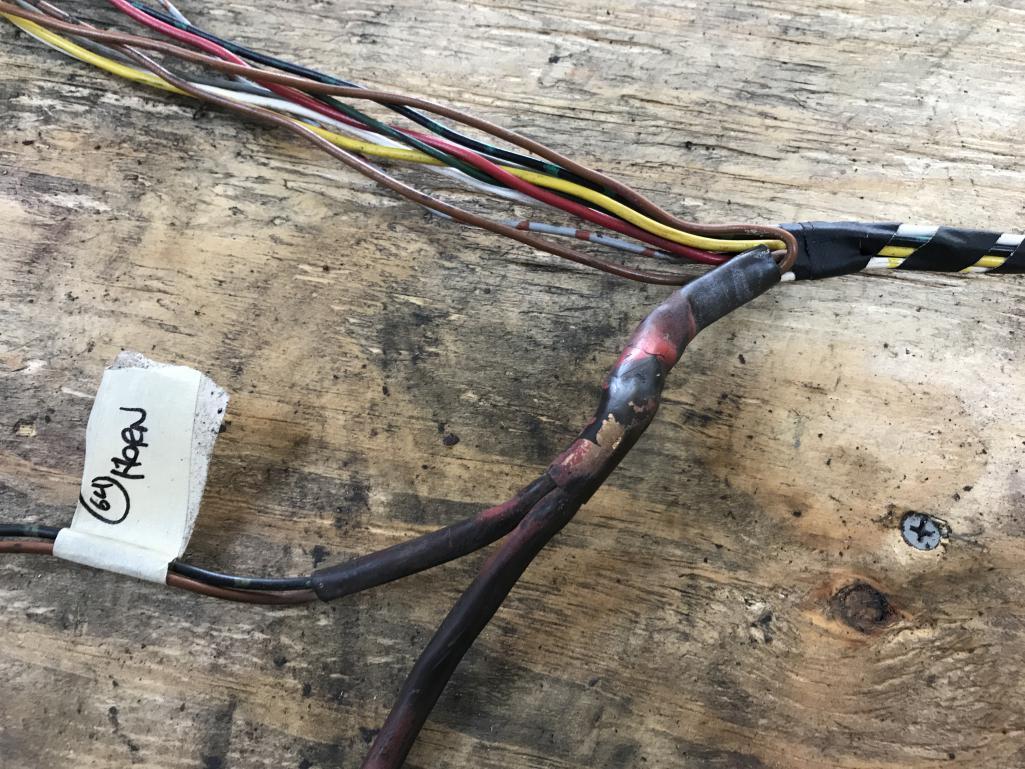
|
| bkrantz |
 Aug 22 2020, 08:45 PM Aug 22 2020, 08:45 PM
Post
#1167
|
|
914 Guru      Group: Members Posts: 8,343 Joined: 3-August 19 From: SW Colorado Member No.: 23,343 Region Association: Rocky Mountains 
|
After scraping and cleaning with acetone.
Attached thumbnail(s) 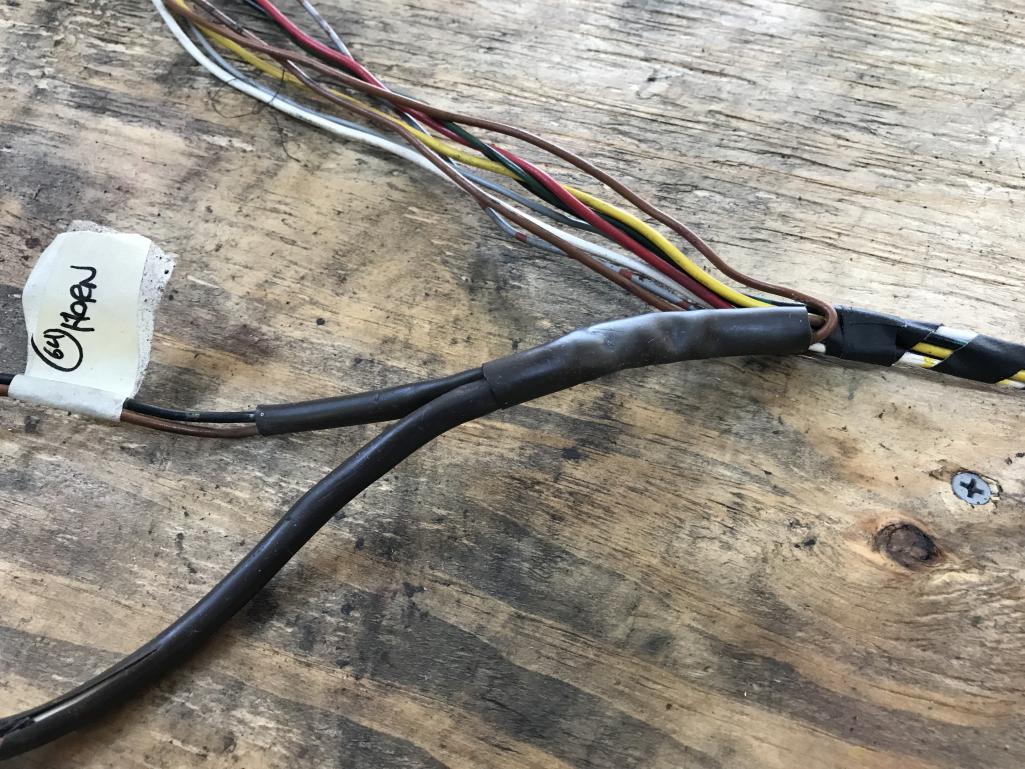
|
| bkrantz |
 Aug 22 2020, 08:46 PM Aug 22 2020, 08:46 PM
Post
#1168
|
|
914 Guru      Group: Members Posts: 8,343 Joined: 3-August 19 From: SW Colorado Member No.: 23,343 Region Association: Rocky Mountains 
|
And the final bit has even more paint.
Attached thumbnail(s) 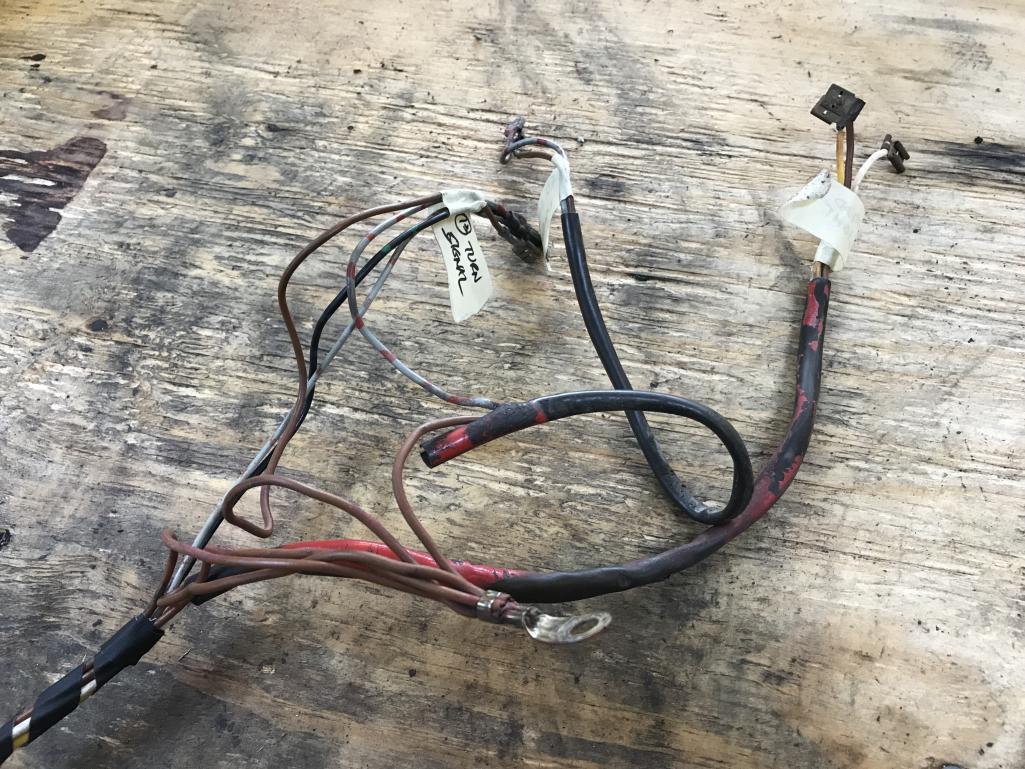
|
| bkrantz |
 Aug 22 2020, 08:47 PM Aug 22 2020, 08:47 PM
Post
#1169
|
|
914 Guru      Group: Members Posts: 8,343 Joined: 3-August 19 From: SW Colorado Member No.: 23,343 Region Association: Rocky Mountains 
|
The last section all wrapped up.
Attached thumbnail(s) 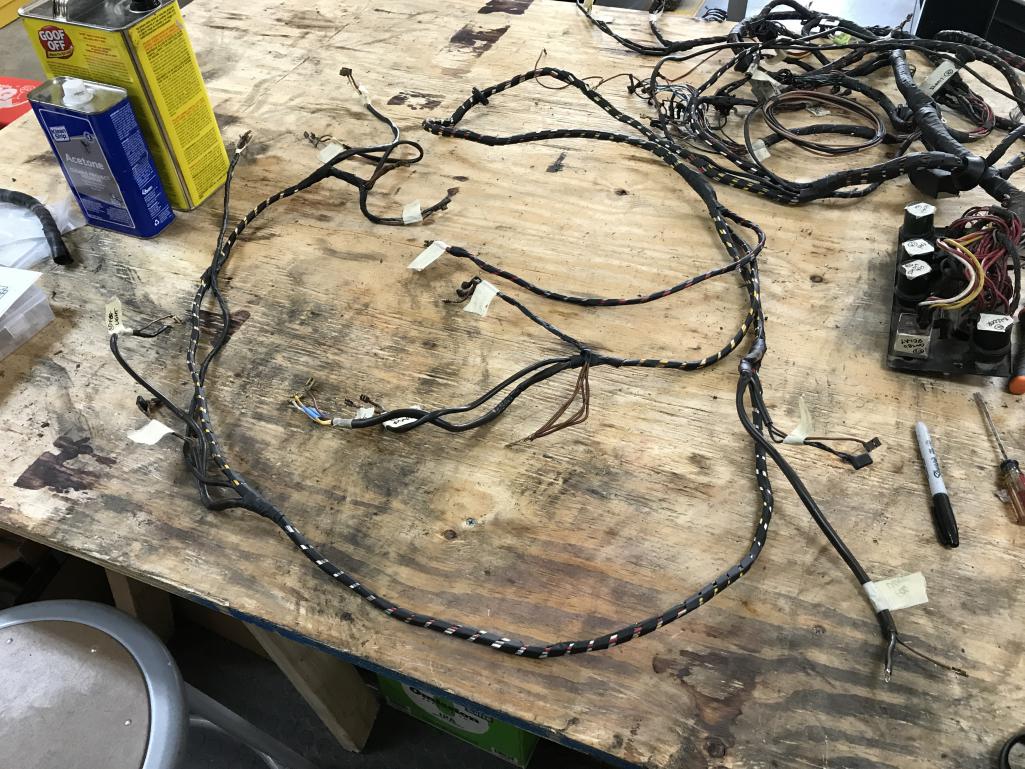
|
| bkrantz |
 Aug 22 2020, 08:49 PM Aug 22 2020, 08:49 PM
Post
#1170
|
|
914 Guru      Group: Members Posts: 8,343 Joined: 3-August 19 From: SW Colorado Member No.: 23,343 Region Association: Rocky Mountains 
|
That's it! The main harness all done, except for a few connectors that I will mount when I install the harness in the car.
Attached thumbnail(s) 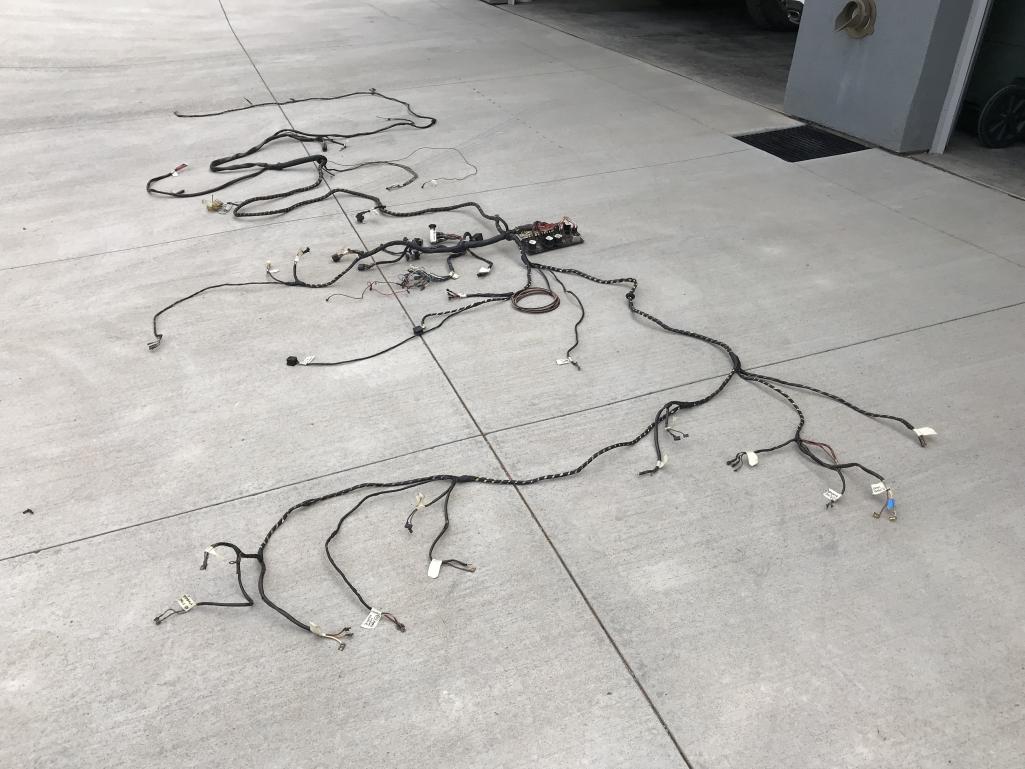
|
| bkrantz |
 Aug 22 2020, 08:51 PM Aug 22 2020, 08:51 PM
Post
#1171
|
|
914 Guru      Group: Members Posts: 8,343 Joined: 3-August 19 From: SW Colorado Member No.: 23,343 Region Association: Rocky Mountains 
|
While on a role, I attacked the ignition harness. This had a crimp connector in the middle of the power lead. In order to pull a new wire through the sleeve, I soldered it to the end of the old wire.
Attached thumbnail(s) 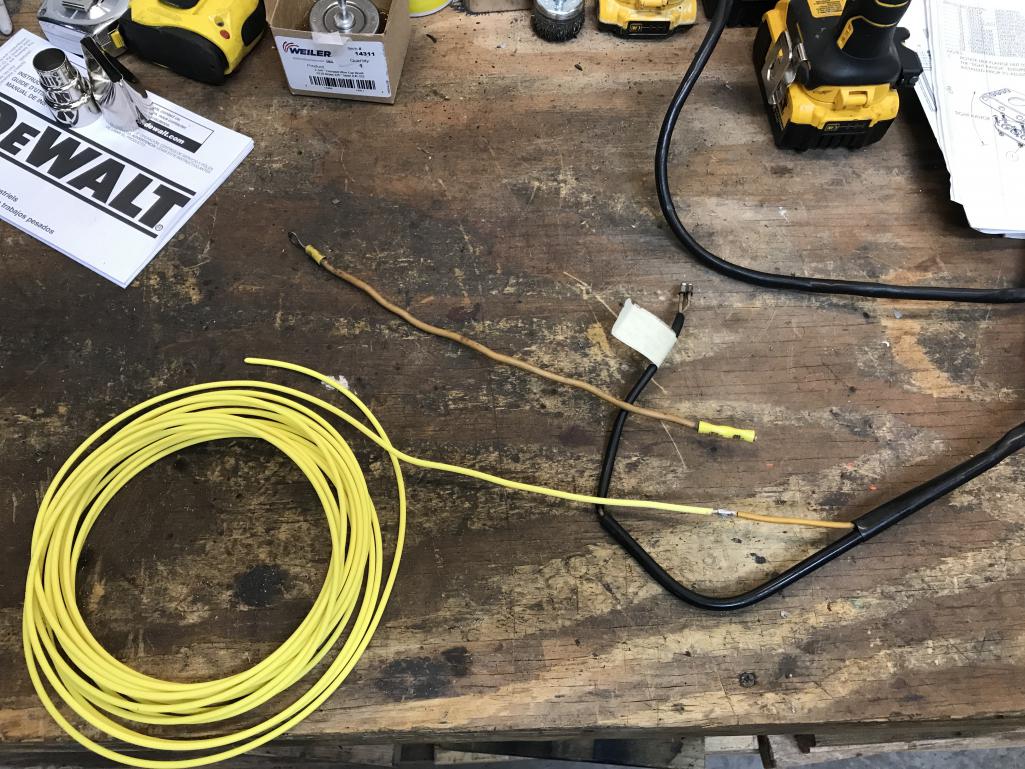
|
| bkrantz |
 Aug 22 2020, 08:52 PM Aug 22 2020, 08:52 PM
Post
#1172
|
|
914 Guru      Group: Members Posts: 8,343 Joined: 3-August 19 From: SW Colorado Member No.: 23,343 Region Association: Rocky Mountains 
|
After squirting some soapy water in the first sleeve, I pulled the new wire through.
Attached thumbnail(s) 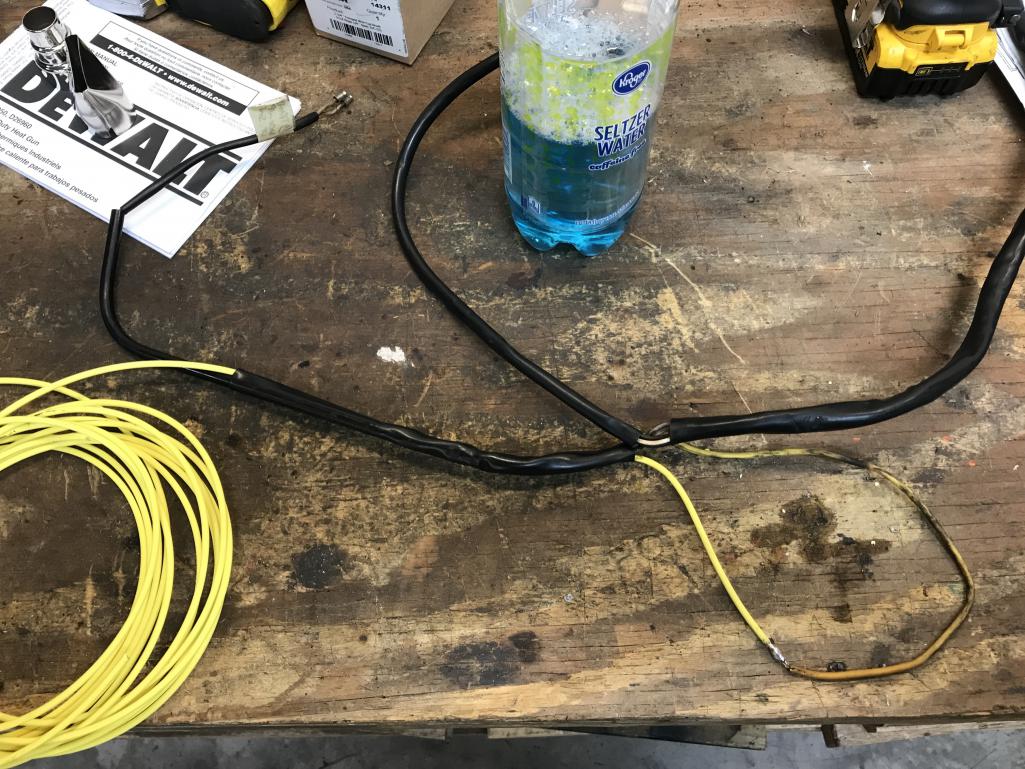
|
| bkrantz |
 Aug 22 2020, 08:53 PM Aug 22 2020, 08:53 PM
Post
#1173
|
|
914 Guru      Group: Members Posts: 8,343 Joined: 3-August 19 From: SW Colorado Member No.: 23,343 Region Association: Rocky Mountains 
|
And then did the same with the second sleeve, to get the new wire to the multi-pin plug.
Attached thumbnail(s) 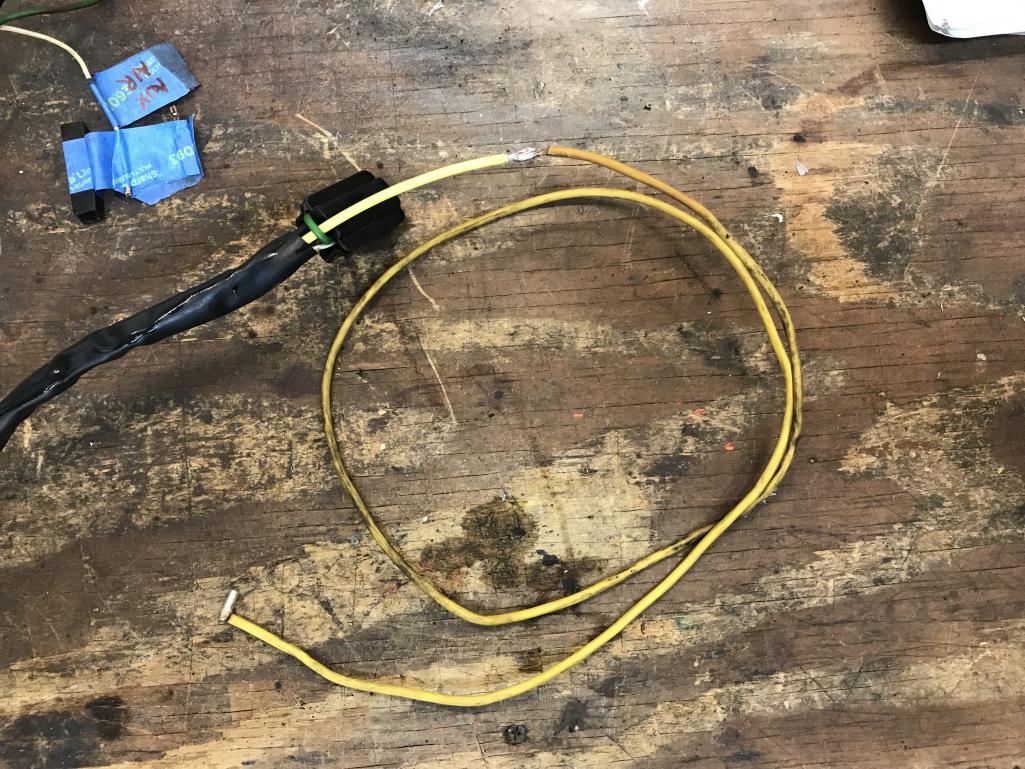
|
| bkrantz |
 Aug 22 2020, 08:54 PM Aug 22 2020, 08:54 PM
Post
#1174
|
|
914 Guru      Group: Members Posts: 8,343 Joined: 3-August 19 From: SW Colorado Member No.: 23,343 Region Association: Rocky Mountains 
|
And then I moved the pin connector from the end of the old wire...
Attached thumbnail(s) 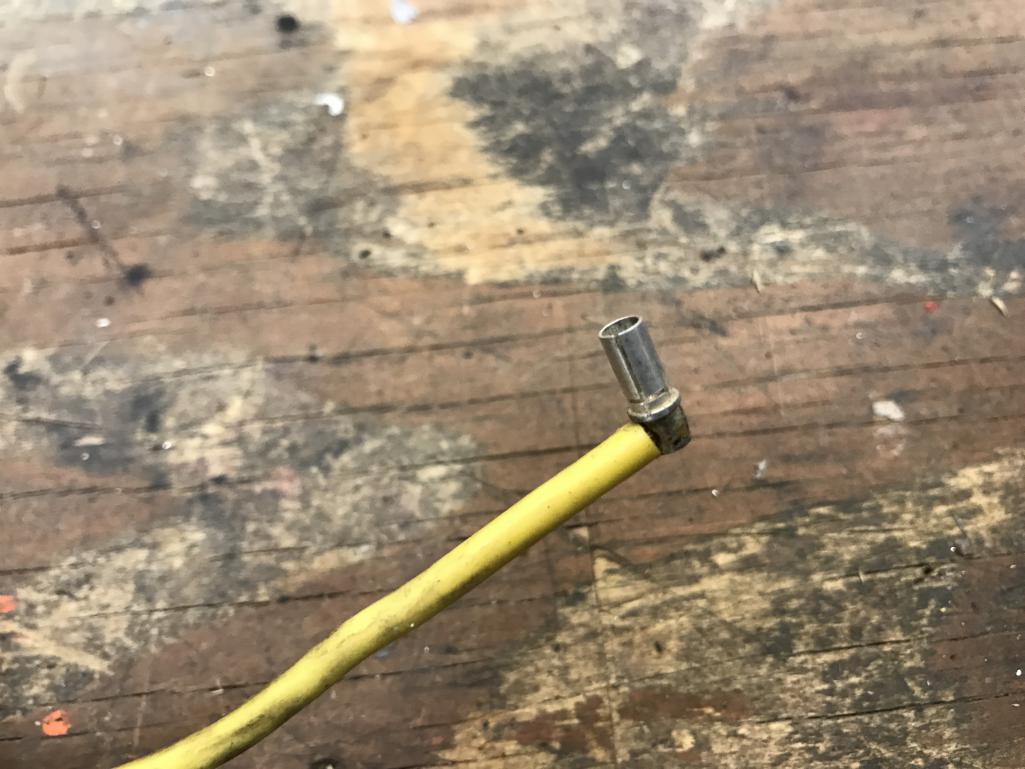
|
| bkrantz |
 Aug 22 2020, 08:55 PM Aug 22 2020, 08:55 PM
Post
#1175
|
|
914 Guru      Group: Members Posts: 8,343 Joined: 3-August 19 From: SW Colorado Member No.: 23,343 Region Association: Rocky Mountains 
|
to the new wire.
Attached thumbnail(s) 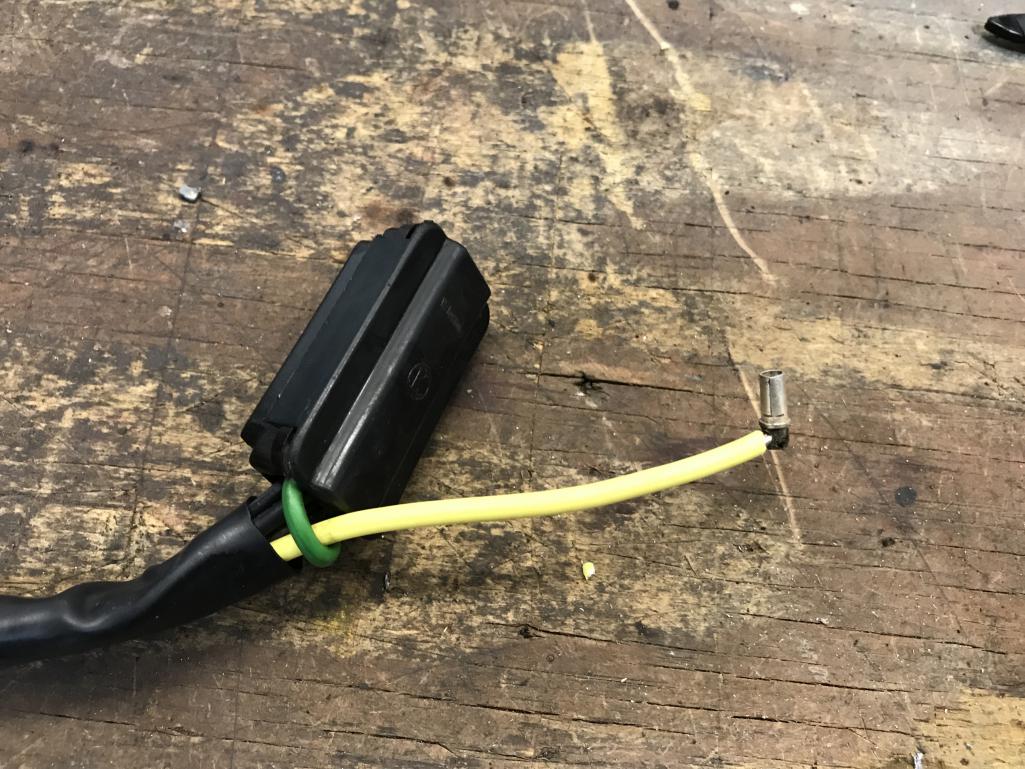
|
| bkrantz |
 Aug 22 2020, 08:56 PM Aug 22 2020, 08:56 PM
Post
#1176
|
|
914 Guru      Group: Members Posts: 8,343 Joined: 3-August 19 From: SW Colorado Member No.: 23,343 Region Association: Rocky Mountains 
|
Here's the pin back in the correct hole in the plug (I hope).
Attached thumbnail(s) 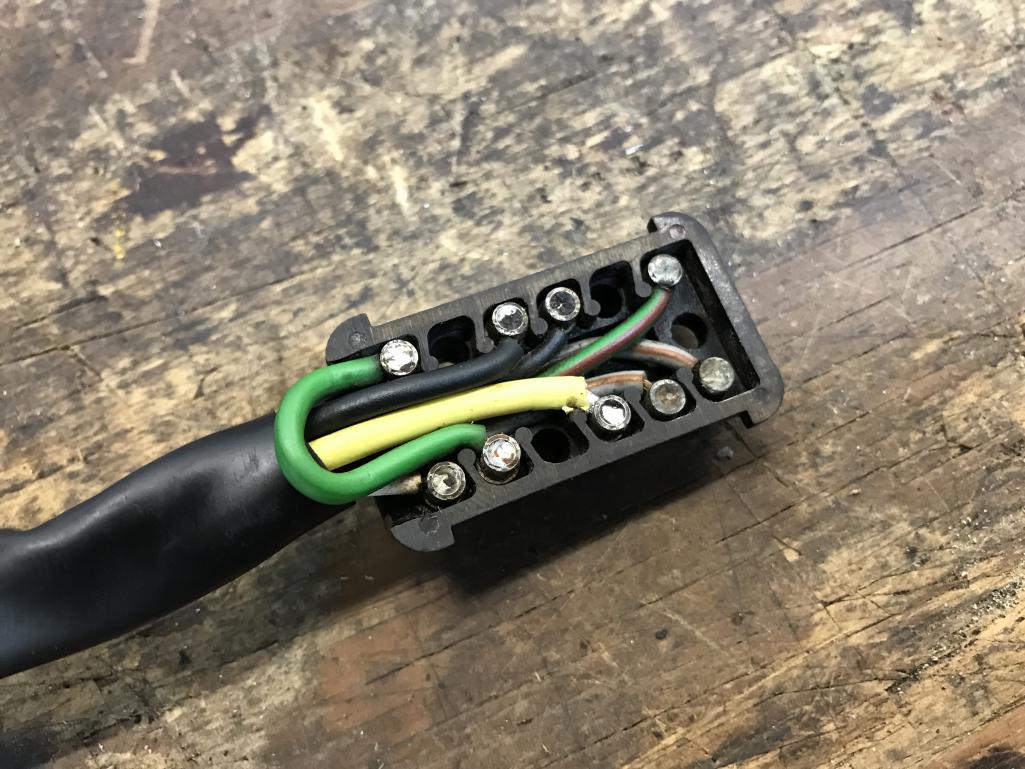
|
| bkrantz |
 Aug 22 2020, 08:56 PM Aug 22 2020, 08:56 PM
Post
#1177
|
|
914 Guru      Group: Members Posts: 8,343 Joined: 3-August 19 From: SW Colorado Member No.: 23,343 Region Association: Rocky Mountains 
|
And the plug cap back in place.
Attached thumbnail(s) 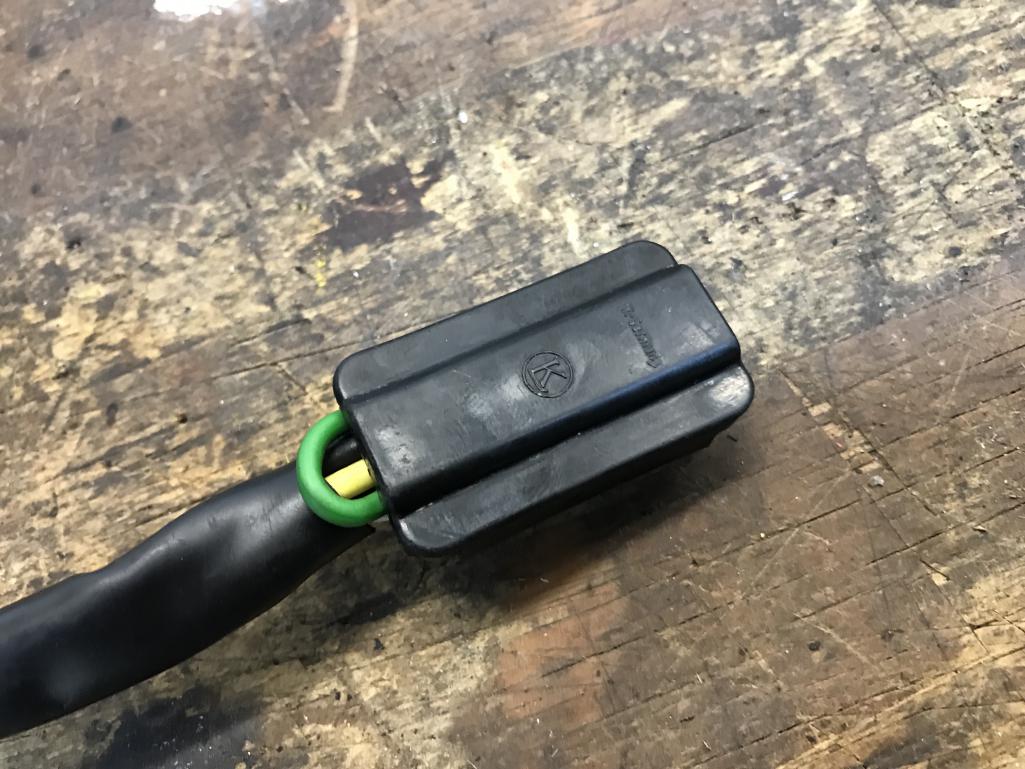
|
| bkrantz |
 Aug 22 2020, 08:58 PM Aug 22 2020, 08:58 PM
Post
#1178
|
|
914 Guru      Group: Members Posts: 8,343 Joined: 3-August 19 From: SW Colorado Member No.: 23,343 Region Association: Rocky Mountains 
|
And the ignition harness is ready to go (I will install the ring connector on the new wire when I have everything back on the engine).
Attached thumbnail(s) 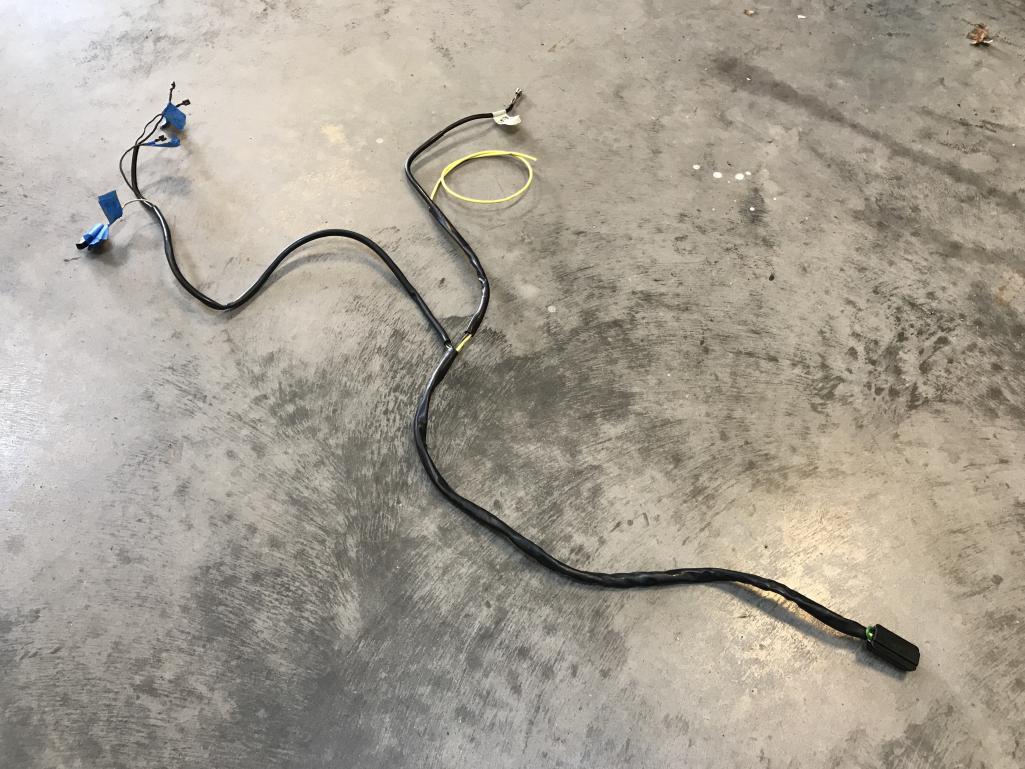
|
| djway |
 Aug 22 2020, 11:53 PM Aug 22 2020, 11:53 PM
Post
#1179
|
|
Senior Member    Group: Members Posts: 787 Joined: 16-October 15 From: Riverside Member No.: 19,266 Region Association: Southern California |
I don't remember, have you used a continuity tester on each line to confirm first you have a good circuit and that you have the correct wire to each point?
Easiest to check while out. Excellent work on the harness. |
| bkrantz |
 Aug 23 2020, 07:36 PM Aug 23 2020, 07:36 PM
Post
#1180
|
|
914 Guru      Group: Members Posts: 8,343 Joined: 3-August 19 From: SW Colorado Member No.: 23,343 Region Association: Rocky Mountains 
|
I don't remember, have you used a continuity tester on each line to confirm first you have a good circuit and that you have the correct wire to each point? Easiest to check while out. Excellent work on the harness. To be honest, I did some testing when I first inspected the harness, but found problems only where I could also see visible damage. After that I got lazy and did not test every wire or connector. |
  |
1 User(s) are reading this topic (1 Guests and 0 Anonymous Users)
0 Members:

|
Lo-Fi Version | Time is now: 21st April 2025 - 11:23 PM |
Invision Power Board
v9.1.4 © 2025 IPS, Inc.


