|
|

|
Porsche, and the Porsche crest are registered trademarks of Dr. Ing. h.c. F. Porsche AG.
This site is not affiliated with Porsche in any way. Its only purpose is to provide an online forum for car enthusiasts. All other trademarks are property of their respective owners. |
|
|
  |
| bkrantz |
 Jan 3 2020, 09:13 PM Jan 3 2020, 09:13 PM
Post
#121
|
|
914 Guru      Group: Members Posts: 8,329 Joined: 3-August 19 From: SW Colorado Member No.: 23,343 Region Association: Rocky Mountains 
|
Then some sections can come free, exposing the interior firewall space--and a bit of surface rust (but not looking bad).
Attached thumbnail(s) 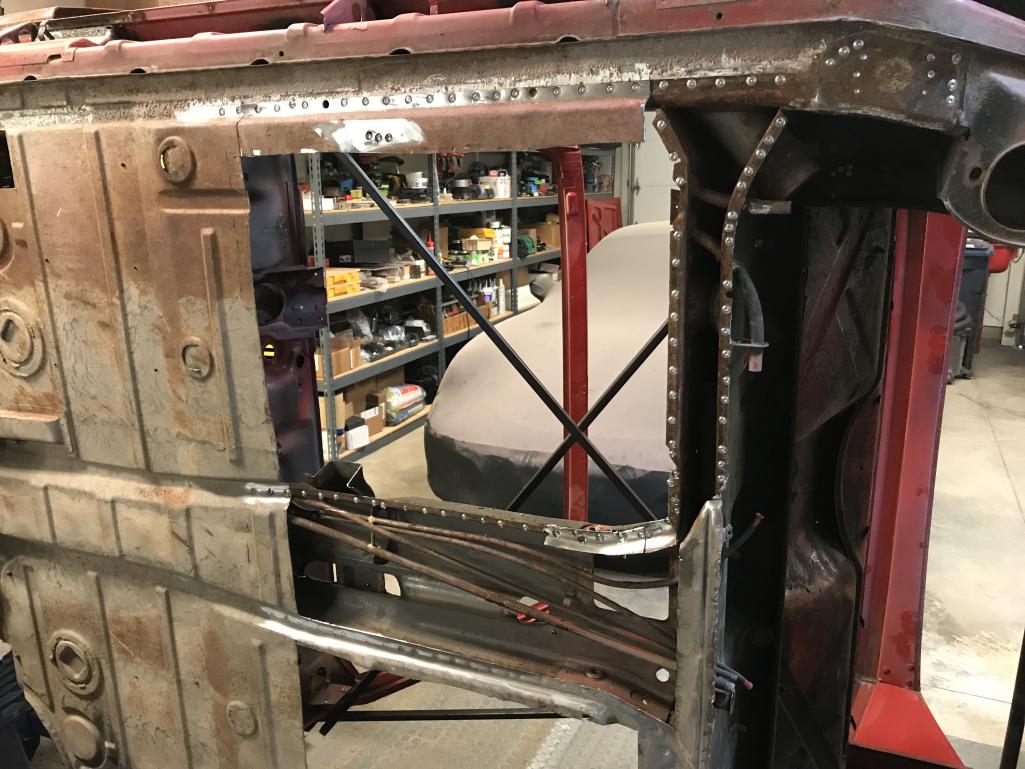
|
| bkrantz |
 Jan 4 2020, 09:17 PM Jan 4 2020, 09:17 PM
Post
#122
|
|
914 Guru      Group: Members Posts: 8,329 Joined: 3-August 19 From: SW Colorado Member No.: 23,343 Region Association: Rocky Mountains 
|
Only had about an hour in the garage today, so just finished up the rest of the left side. I will get the remaining interior remnants once I spin the car to horizontal.
Attached thumbnail(s) 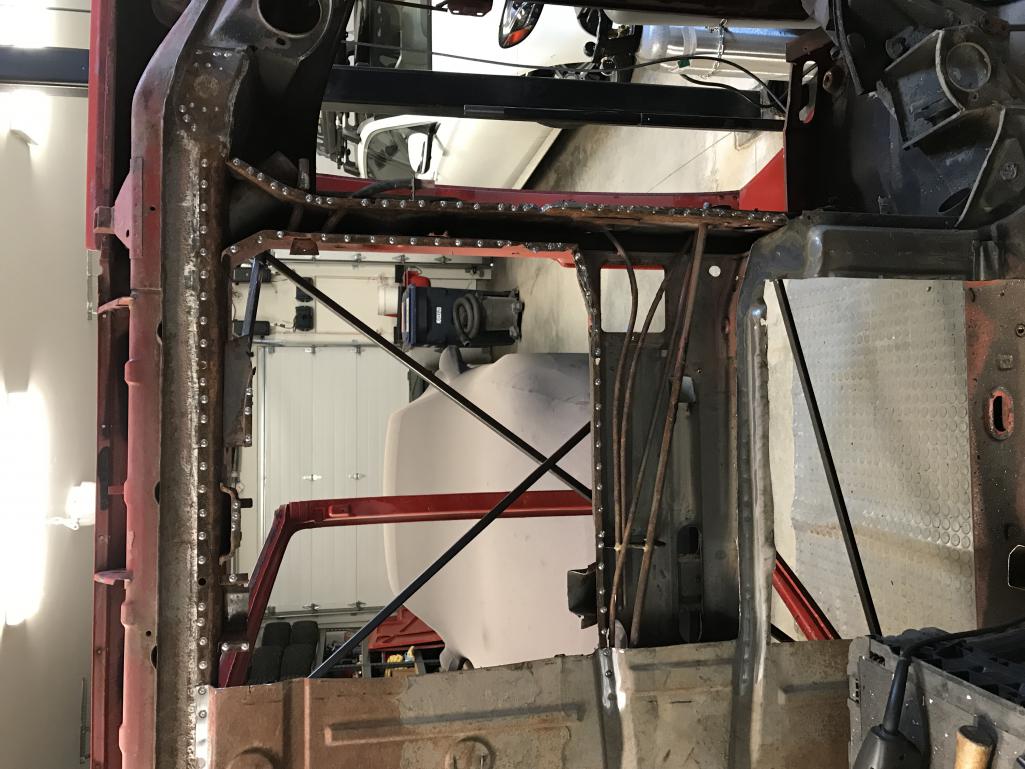
|
| bkrantz |
 Jan 4 2020, 09:19 PM Jan 4 2020, 09:19 PM
Post
#123
|
|
914 Guru      Group: Members Posts: 8,329 Joined: 3-August 19 From: SW Colorado Member No.: 23,343 Region Association: Rocky Mountains 
|
I discovered the trailing edge of the tunnel has welding, in addition to the spot welds.
Attached thumbnail(s) 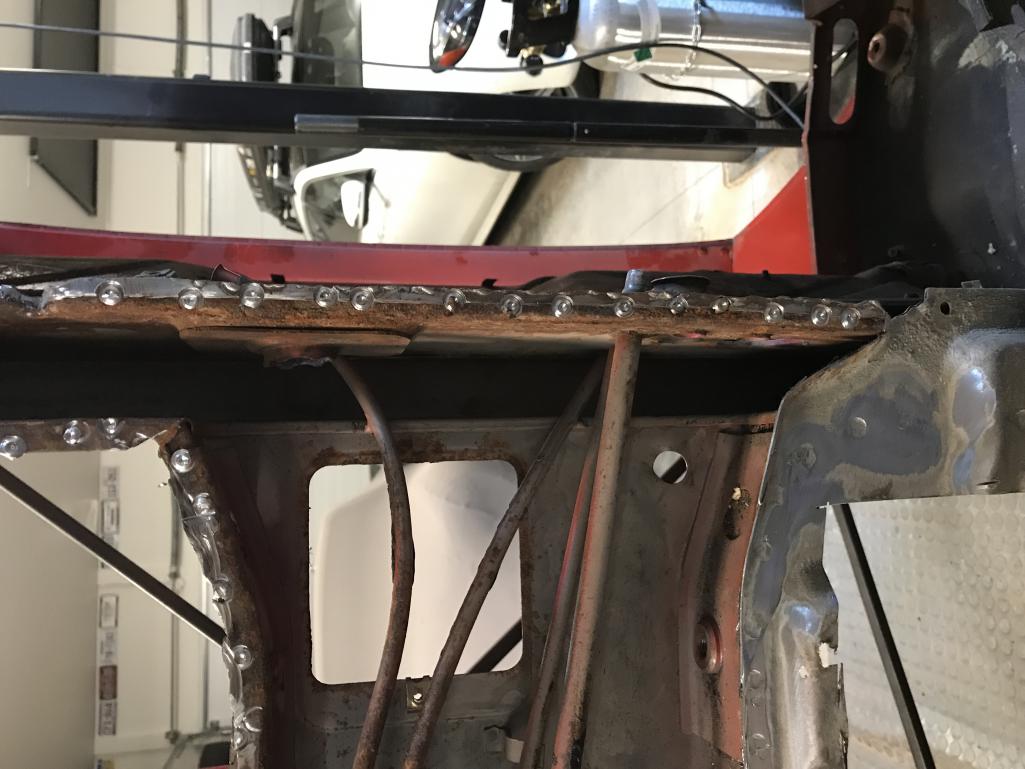
|
| bkrantz |
 Jan 4 2020, 09:21 PM Jan 4 2020, 09:21 PM
Post
#124
|
|
914 Guru      Group: Members Posts: 8,329 Joined: 3-August 19 From: SW Colorado Member No.: 23,343 Region Association: Rocky Mountains 
|
Getting ready to work on the right side, which was down near floor level. With the lift feature of the rotisserie, I was able to raise the car about 18 inches, and make the working height much better. Nice feature.
Attached thumbnail(s) 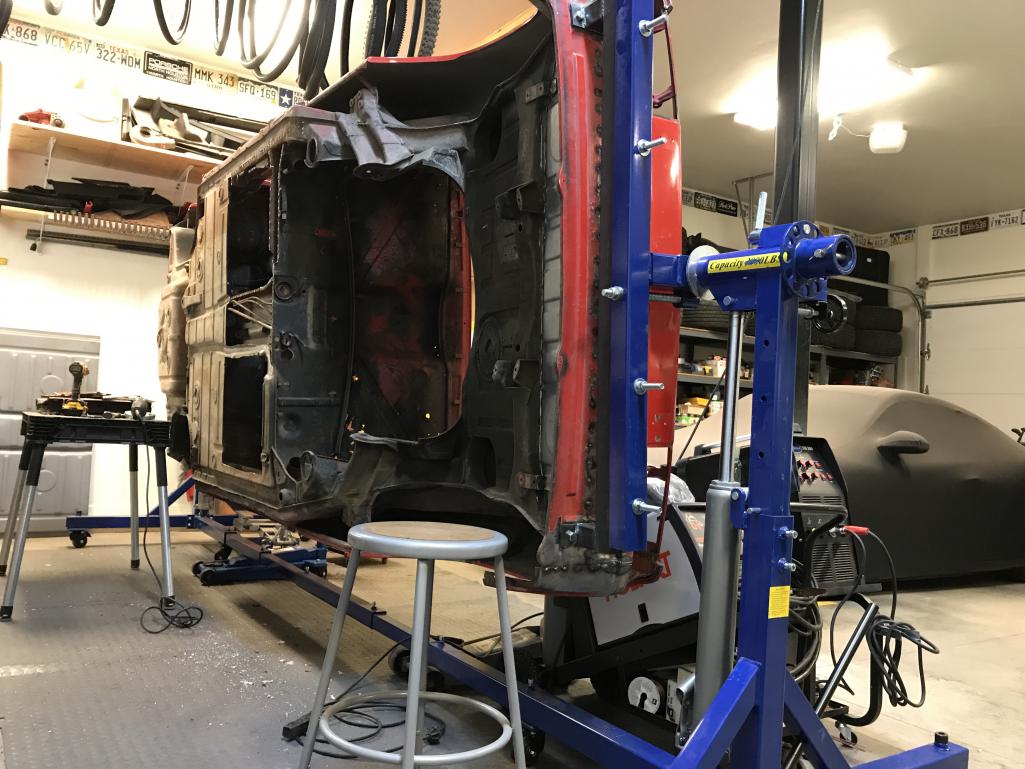
|
| sixnotfour |
 Jan 5 2020, 06:26 PM Jan 5 2020, 06:26 PM
Post
#125
|
|
914 Wizard           Group: Members Posts: 10,771 Joined: 12-September 04 From: Life Elevated..planet UT. Member No.: 2,744 Region Association: Rocky Mountains 

|
|
| bkrantz |
 Jan 5 2020, 09:08 PM Jan 5 2020, 09:08 PM
Post
#126
|
|
914 Guru      Group: Members Posts: 8,329 Joined: 3-August 19 From: SW Colorado Member No.: 23,343 Region Association: Rocky Mountains 
|
Got the other side done today. Now I need to grind off the spot weld remnants and clean up rusty metal--and look for any spots that need replacement.
Attached thumbnail(s) 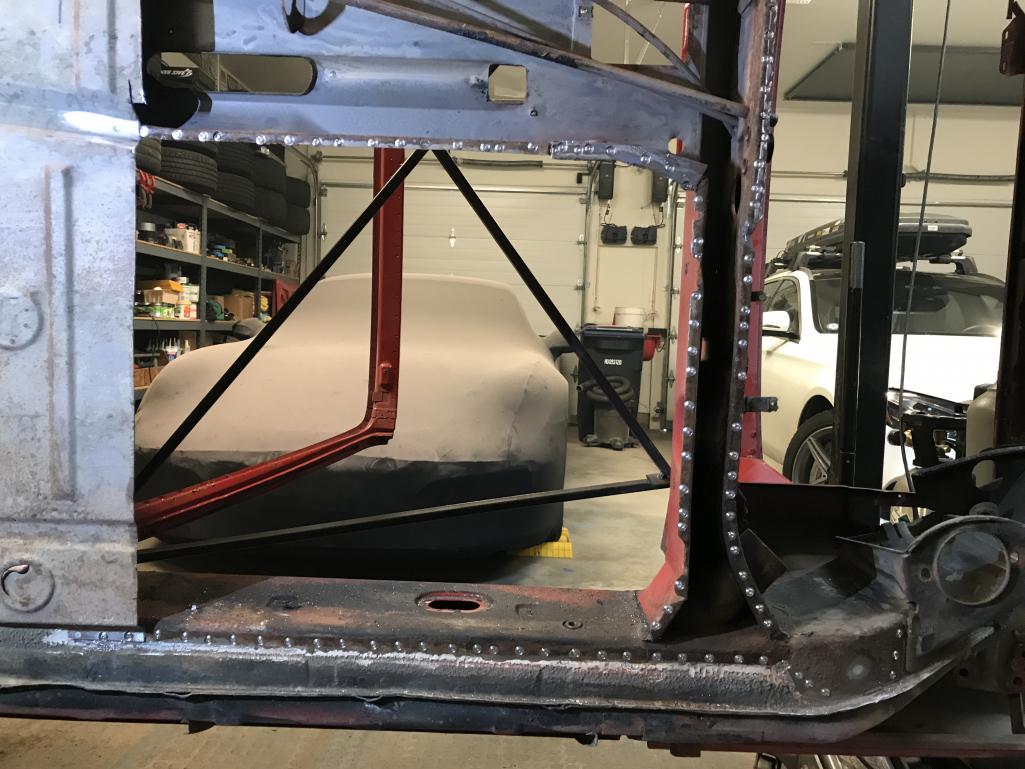
|
| bkrantz |
 Jan 5 2020, 09:09 PM Jan 5 2020, 09:09 PM
Post
#127
|
|
914 Guru      Group: Members Posts: 8,329 Joined: 3-August 19 From: SW Colorado Member No.: 23,343 Region Association: Rocky Mountains 
|
Here's the rear floor, in pieces after removal.
Attached thumbnail(s) 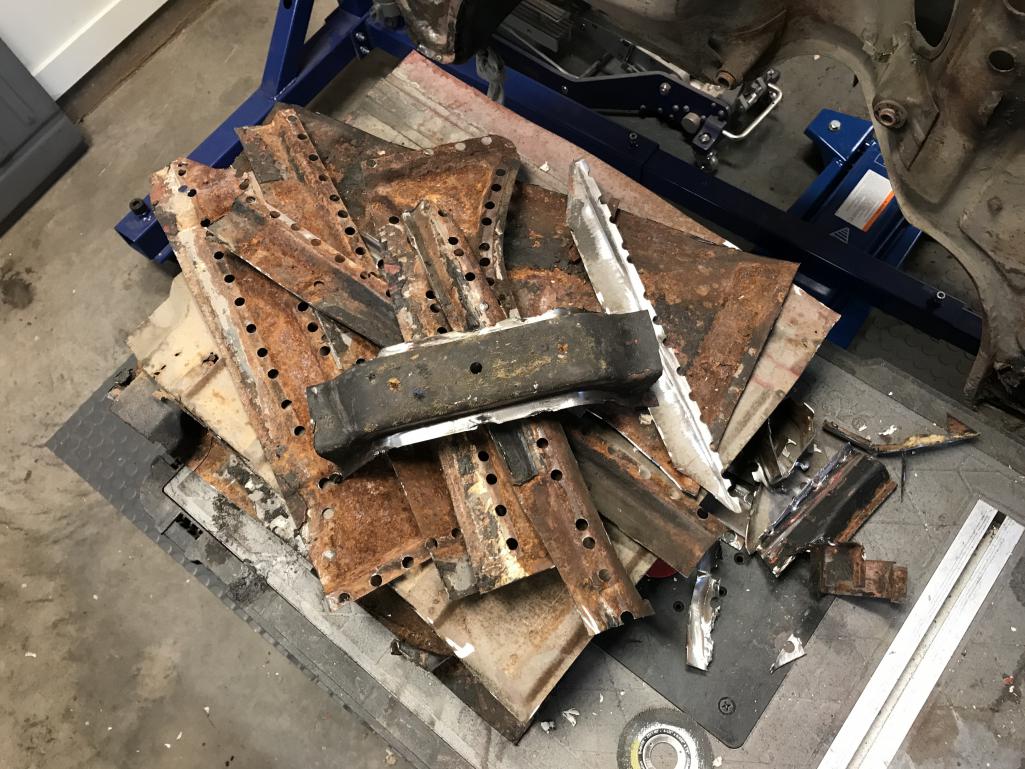
|
| bkrantz |
 Jan 5 2020, 09:11 PM Jan 5 2020, 09:11 PM
Post
#128
|
|
914 Guru      Group: Members Posts: 8,329 Joined: 3-August 19 From: SW Colorado Member No.: 23,343 Region Association: Rocky Mountains 
|
Interior cross brace is also fully gone. Ground off a few surface welds (not spot welds) at the center tunnel.
Attached thumbnail(s) 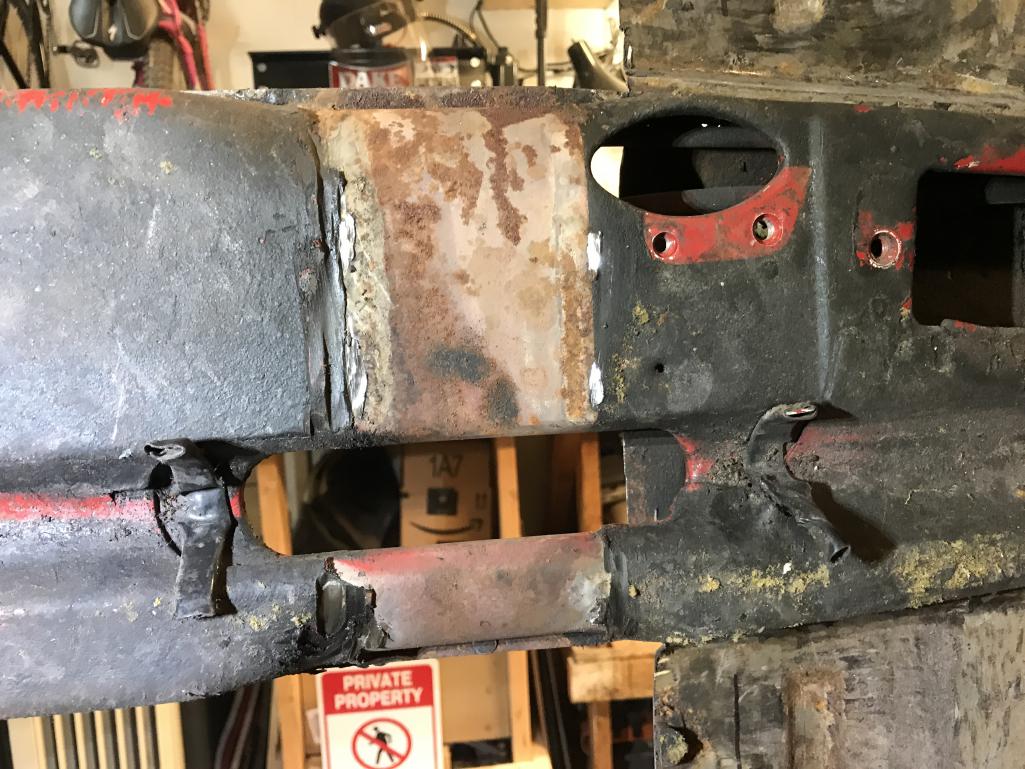
|
| bkrantz |
 Jan 5 2020, 09:14 PM Jan 5 2020, 09:14 PM
Post
#129
|
|
914 Guru      Group: Members Posts: 8,329 Joined: 3-August 19 From: SW Colorado Member No.: 23,343 Region Association: Rocky Mountains 
|
Before fitting the new floor I have a few things to fix, including a dent in the bottom of the right long. Probably a dumb attempt to jack the car up from the middle. The photo makes it look like only the flange is pushed in, but the flat surfaces are also bent.
Attached thumbnail(s) 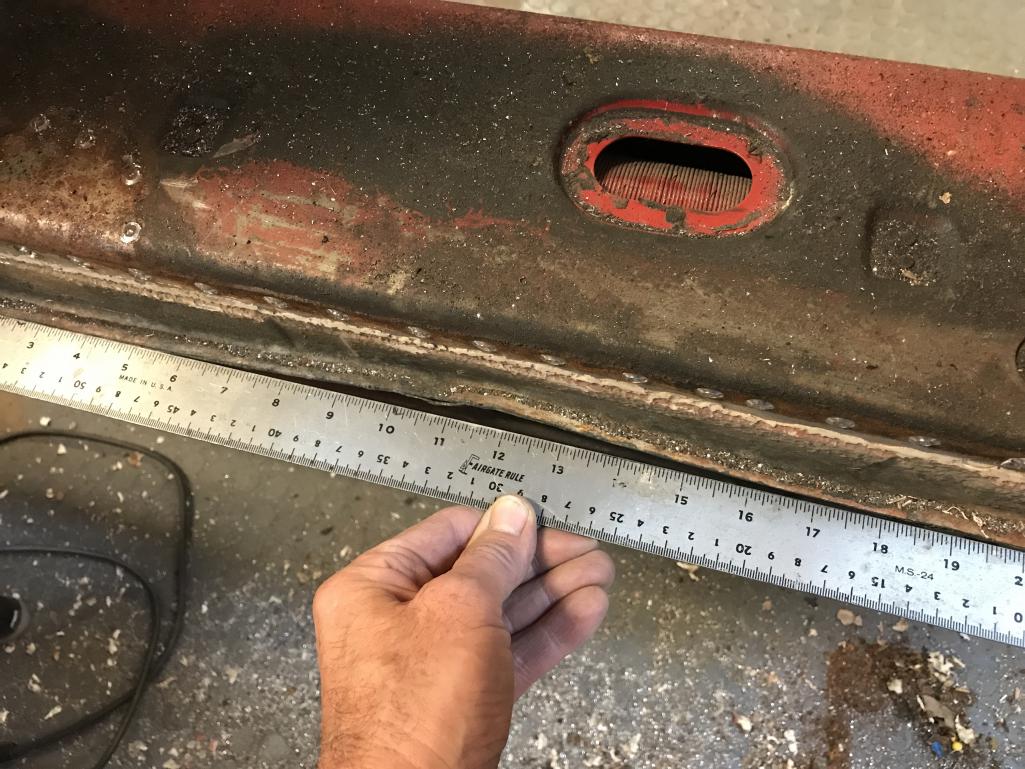
|
| altitude411 |
 Jan 5 2020, 09:22 PM Jan 5 2020, 09:22 PM
Post
#130
|
|
I drove my 6 into a tree    Group: Members Posts: 1,306 Joined: 21-September 14 From: montana Member No.: 17,932 Region Association: Rocky Mountains 
|
Fantastic work and photos. Thanks for posting. (IMG:style_emoticons/default/beerchug.gif) (IMG:style_emoticons/default/popcorn[1].gif)
|
| Kansas 914 |
 Jan 6 2020, 06:26 AM Jan 6 2020, 06:26 AM
Post
#131
|
|
Advanced Member     Group: Members Posts: 2,999 Joined: 1-March 03 From: Durango, Colorado Member No.: 373 Region Association: Rocky Mountains 
|
Fantastic work and photos. Thanks for posting. (IMG:style_emoticons/default/beerchug.gif) (IMG:style_emoticons/default/popcorn[1].gif) Agreed! You are really doing a terrific job documenting your work to the benefit of anyone that will face this task in the future. |
| bkrantz |
 Jan 6 2020, 09:28 PM Jan 6 2020, 09:28 PM
Post
#132
|
|
914 Guru      Group: Members Posts: 8,329 Joined: 3-August 19 From: SW Colorado Member No.: 23,343 Region Association: Rocky Mountains 
|
Fantastic work and photos. Thanks for posting. (IMG:style_emoticons/default/beerchug.gif) (IMG:style_emoticons/default/popcorn[1].gif) Agreed! You are really doing a terrific job documenting your work to the benefit of anyone that will face this task in the future. Thanks, Mike. Documentation makes it more fun for me. |
| bkrantz |
 Jan 6 2020, 09:32 PM Jan 6 2020, 09:32 PM
Post
#133
|
|
914 Guru      Group: Members Posts: 8,329 Joined: 3-August 19 From: SW Colorado Member No.: 23,343 Region Association: Rocky Mountains 
|
Now for the front corners. I had already explored the left side, so just some clean up (drill out the seam spot welds and clean up the sill surface). Sill looks solid.
Attached thumbnail(s) 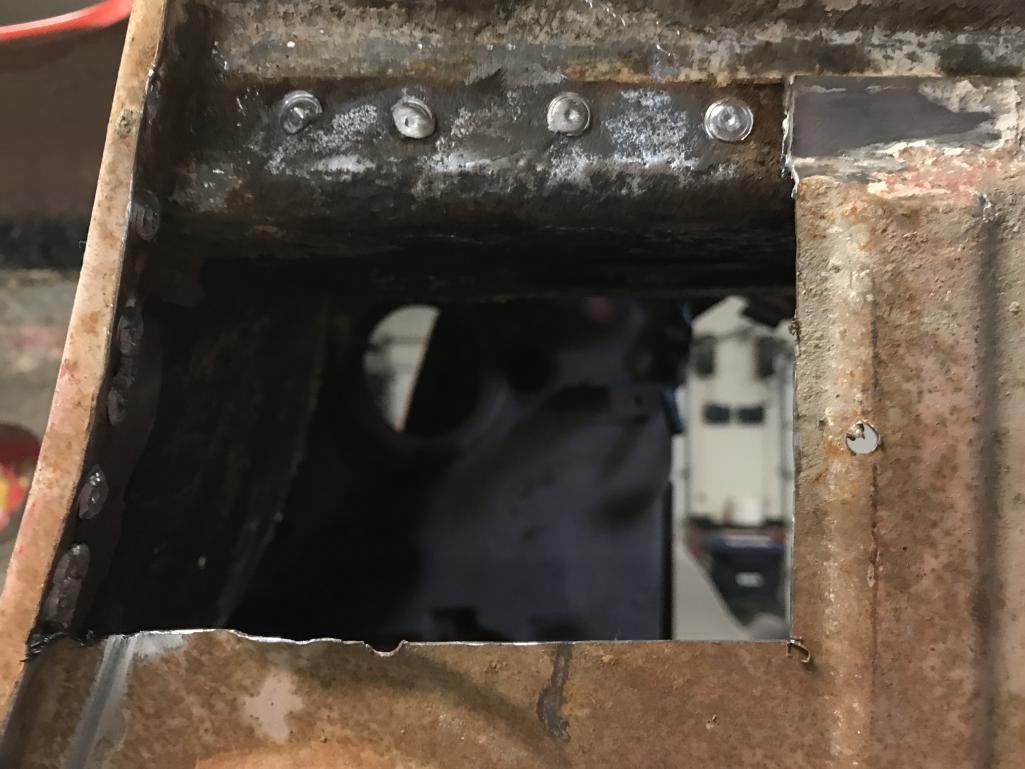
|
| bkrantz |
 Jan 6 2020, 09:34 PM Jan 6 2020, 09:34 PM
Post
#134
|
|
914 Guru      Group: Members Posts: 8,329 Joined: 3-August 19 From: SW Colorado Member No.: 23,343 Region Association: Rocky Mountains 
|
Right corner floor looks about the same, just a slightly bigger area cut out. But the inner sill has a rust hole!
Attached thumbnail(s) 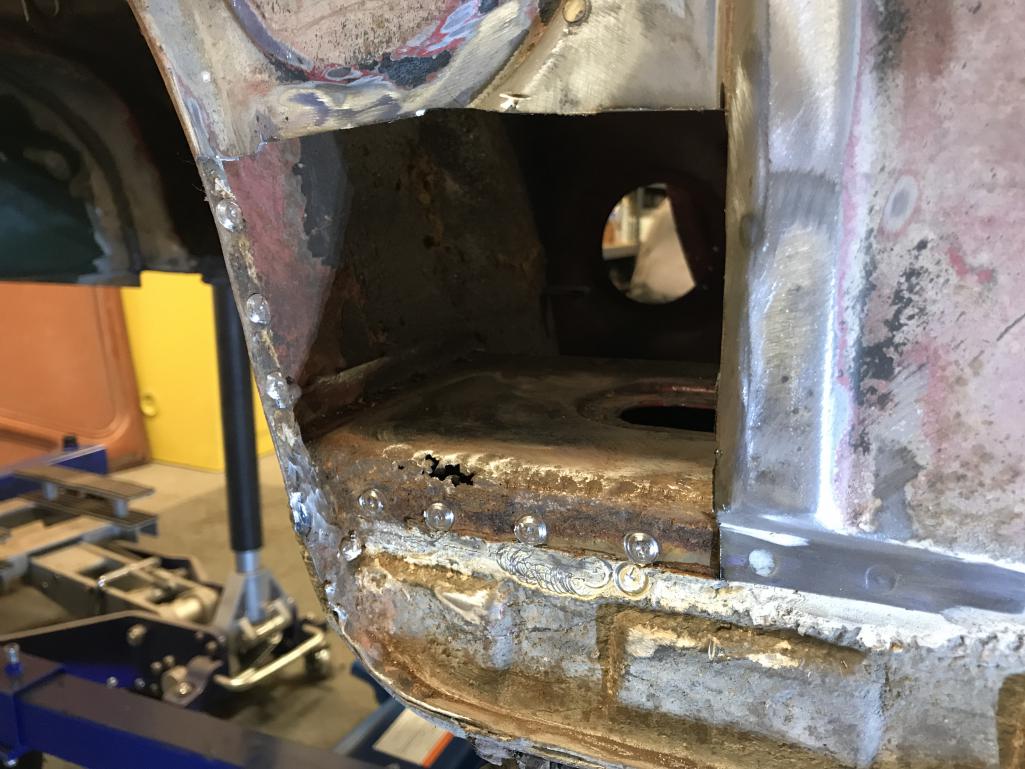
|
| bkrantz |
 Jan 6 2020, 09:36 PM Jan 6 2020, 09:36 PM
Post
#135
|
|
914 Guru      Group: Members Posts: 8,329 Joined: 3-August 19 From: SW Colorado Member No.: 23,343 Region Association: Rocky Mountains 
|
Fortunately, the rust-through on the sill is small, and the rust was eroding from outside in. This should be easy to patch before jabbing a new floor corner.
Attached thumbnail(s) 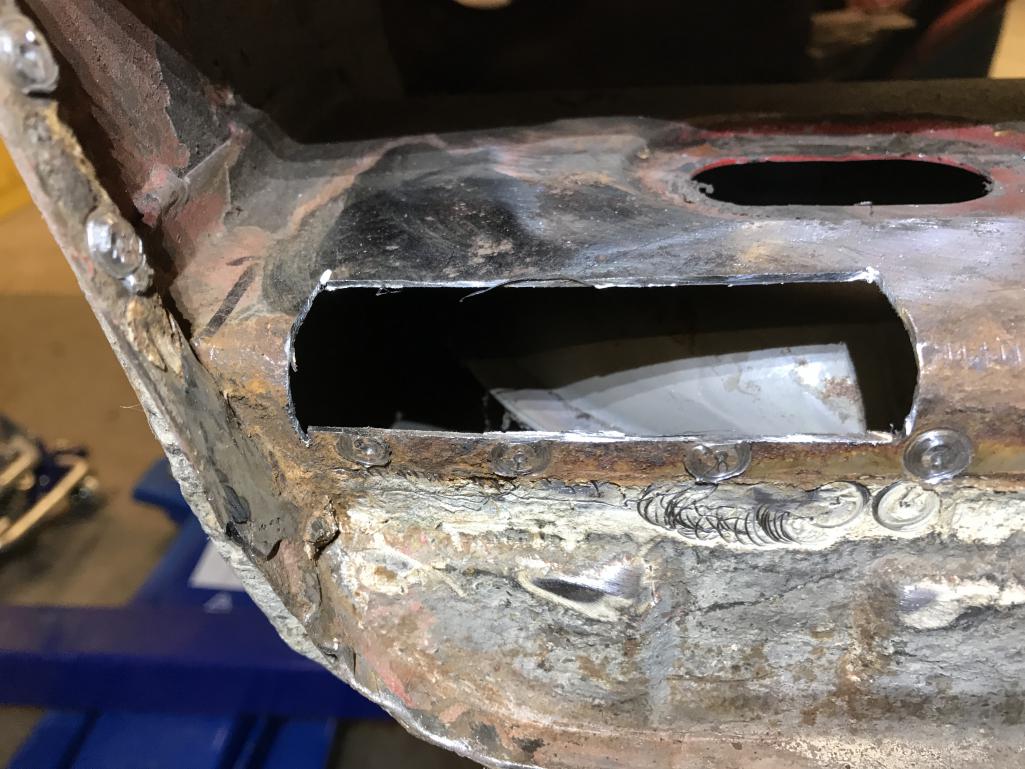
|
| bkrantz |
 Jan 6 2020, 09:39 PM Jan 6 2020, 09:39 PM
Post
#136
|
|
914 Guru      Group: Members Posts: 8,329 Joined: 3-August 19 From: SW Colorado Member No.: 23,343 Region Association: Rocky Mountains 
|
Another sill problem: the inside of the left sill has the classic web of cracks, near the folded recess for grabbing the parking brake lever.
Attached thumbnail(s) 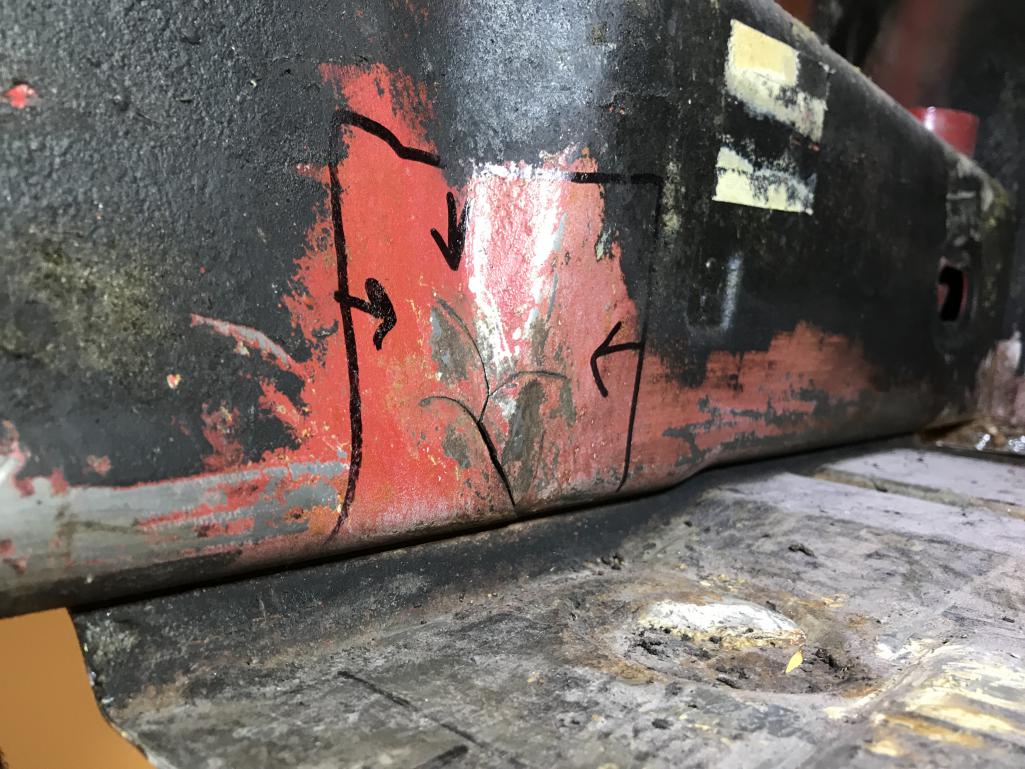
|
| bkrantz |
 Jan 6 2020, 09:41 PM Jan 6 2020, 09:41 PM
Post
#137
|
|
914 Guru      Group: Members Posts: 8,329 Joined: 3-August 19 From: SW Colorado Member No.: 23,343 Region Association: Rocky Mountains 
|
For better access I drilled out the rest of the spot welds to detach the left edge of the remaining floor. With the floor propped out, I ground a recess along each crack for better weld penetration.
Attached thumbnail(s) 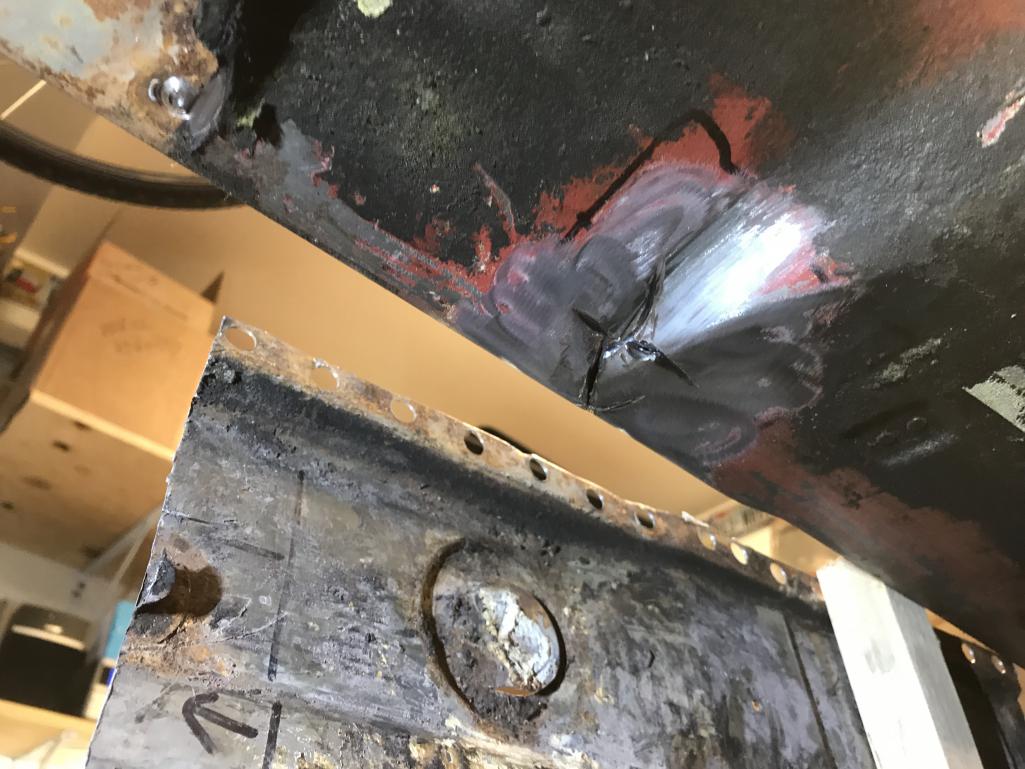
|
| bkrantz |
 Jan 6 2020, 09:43 PM Jan 6 2020, 09:43 PM
Post
#138
|
|
914 Guru      Group: Members Posts: 8,329 Joined: 3-August 19 From: SW Colorado Member No.: 23,343 Region Association: Rocky Mountains 
|
Just for fun before quitting today, I mounted the replacement floor section. Fits nicely, but will need trimming on all sides.
Attached thumbnail(s) 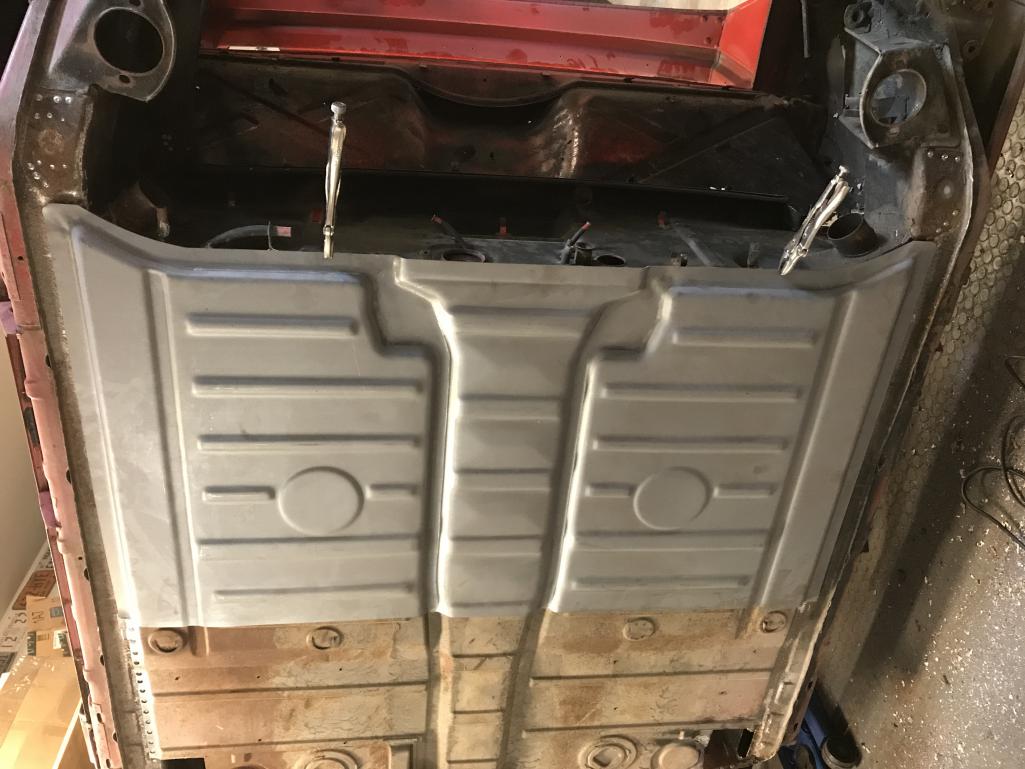
|
| bkrantz |
 Jan 6 2020, 09:44 PM Jan 6 2020, 09:44 PM
Post
#139
|
|
914 Guru      Group: Members Posts: 8,329 Joined: 3-August 19 From: SW Colorado Member No.: 23,343 Region Association: Rocky Mountains 
|
And looks good on the inside.
Attached thumbnail(s) 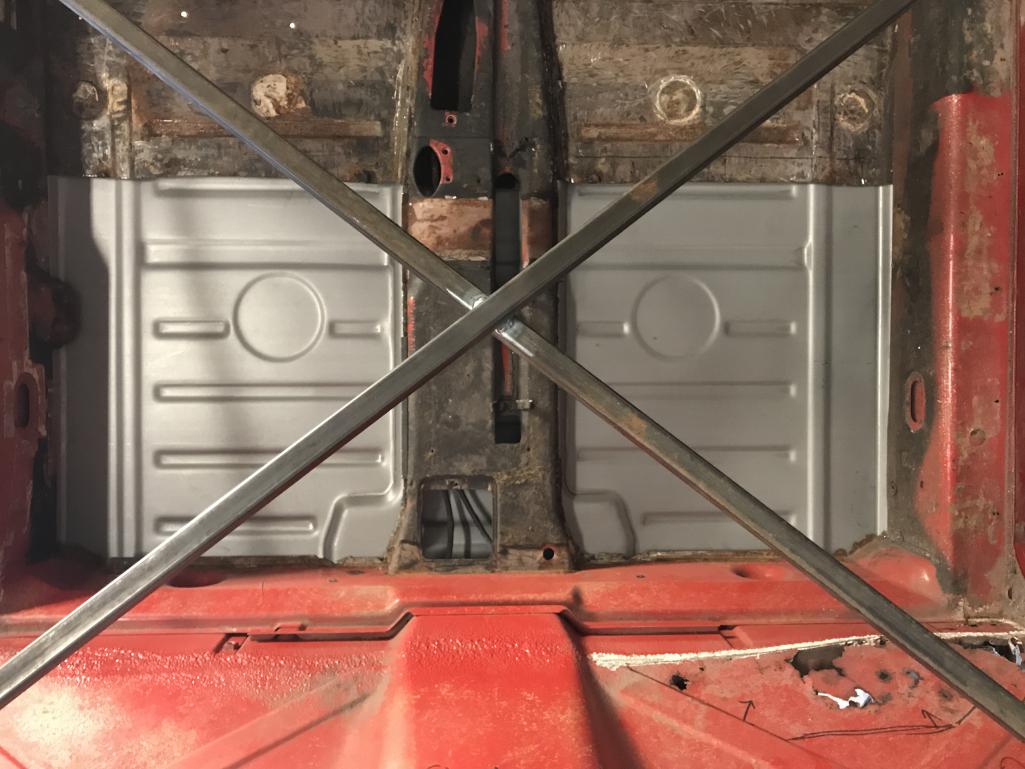
|
| bkrantz |
 Jan 7 2020, 09:17 PM Jan 7 2020, 09:17 PM
Post
#140
|
|
914 Guru      Group: Members Posts: 8,329 Joined: 3-August 19 From: SW Colorado Member No.: 23,343 Region Association: Rocky Mountains 
|
Just some trivial work today, straightening one of the rear floor triangle braces.
Attached thumbnail(s) 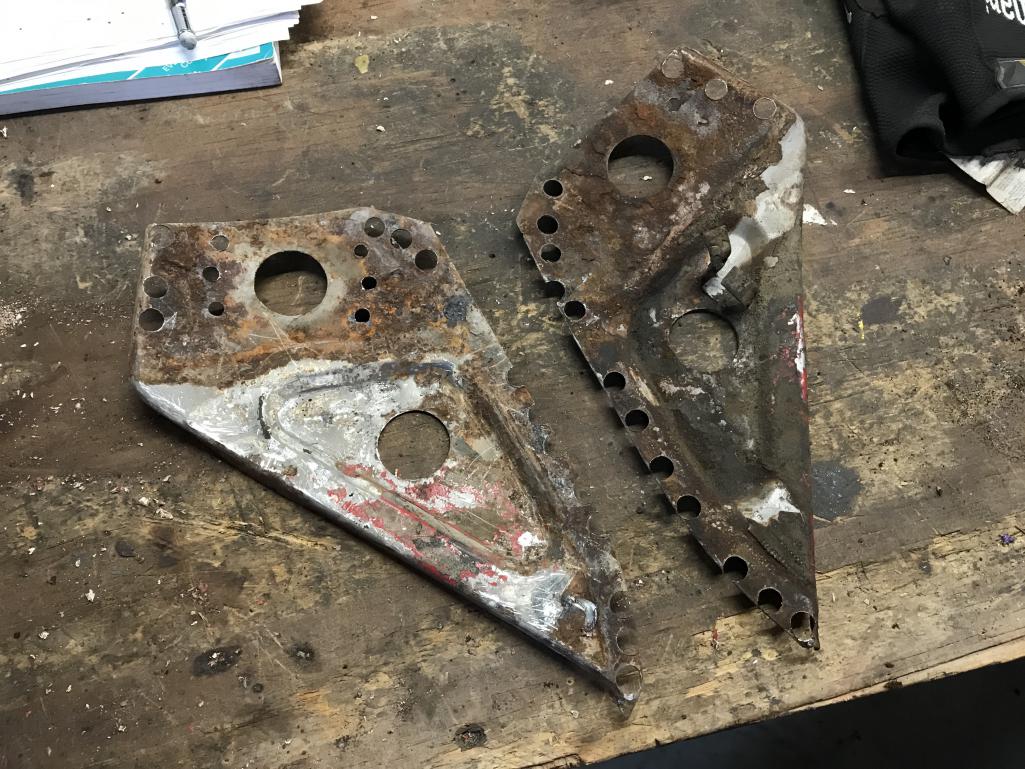
|
  |
1 User(s) are reading this topic (1 Guests and 0 Anonymous Users)
0 Members:

|
Lo-Fi Version | Time is now: 9th April 2025 - 10:58 PM |
Invision Power Board
v9.1.4 © 2025 IPS, Inc.


