|
|

|
Porsche, and the Porsche crest are registered trademarks of Dr. Ing. h.c. F. Porsche AG.
This site is not affiliated with Porsche in any way. Its only purpose is to provide an online forum for car enthusiasts. All other trademarks are property of their respective owners. |
|
|
  |
| bkrantz |
 Aug 27 2020, 07:28 PM Aug 27 2020, 07:28 PM
Post
#1201
|
|
914 Guru      Group: Members Posts: 8,343 Joined: 3-August 19 From: SW Colorado Member No.: 23,343 Region Association: Rocky Mountains 
|
Success! Too bad I can't upload a video, showing the balance wheel turning back and forth, the the movement ticking along. The "glass" needs a little cleanup and maybe some polish.
Attached thumbnail(s) 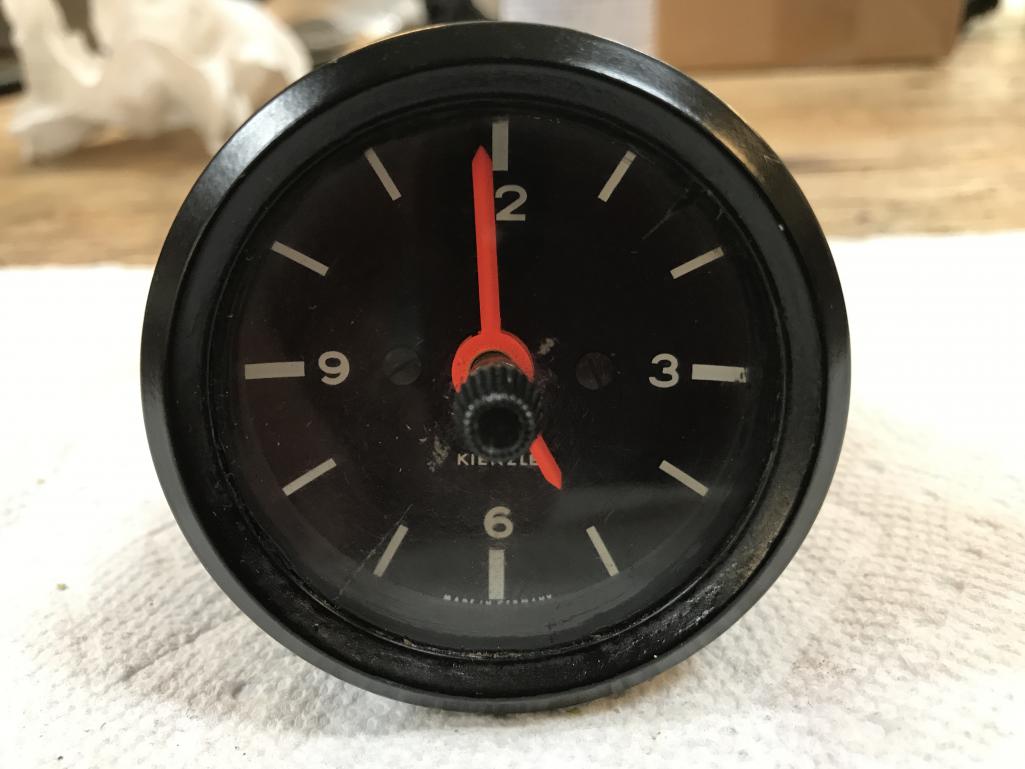
|
| bkrantz |
 Aug 27 2020, 07:31 PM Aug 27 2020, 07:31 PM
Post
#1202
|
|
914 Guru      Group: Members Posts: 8,343 Joined: 3-August 19 From: SW Colorado Member No.: 23,343 Region Association: Rocky Mountains 
|
I also made a trip out, first to the powder coat shop to collect the trailing arms, redone so the bearing cavity is properly bare. Any suggestions for metal treatment before pressing the new bearings in?
Attached thumbnail(s) 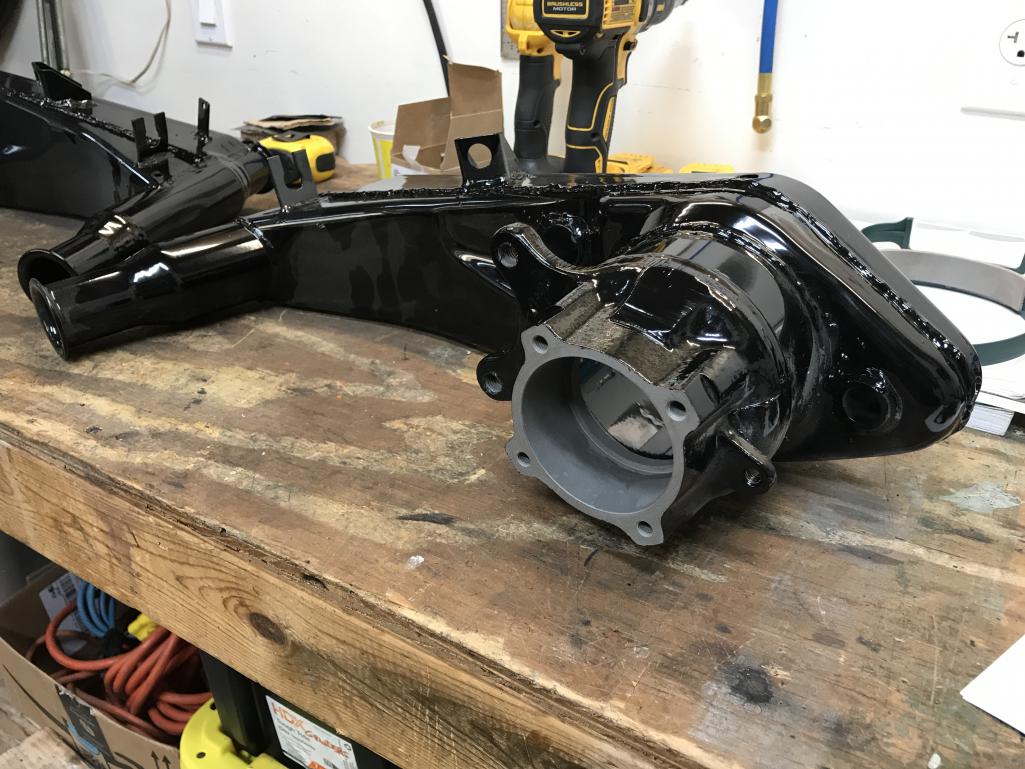
|
| bkrantz |
 Aug 27 2020, 07:37 PM Aug 27 2020, 07:37 PM
Post
#1203
|
|
914 Guru      Group: Members Posts: 8,343 Joined: 3-August 19 From: SW Colorado Member No.: 23,343 Region Association: Rocky Mountains 
|
And then a stop at the body shop. Unfortunately, no progress since last week.
Attached thumbnail(s) 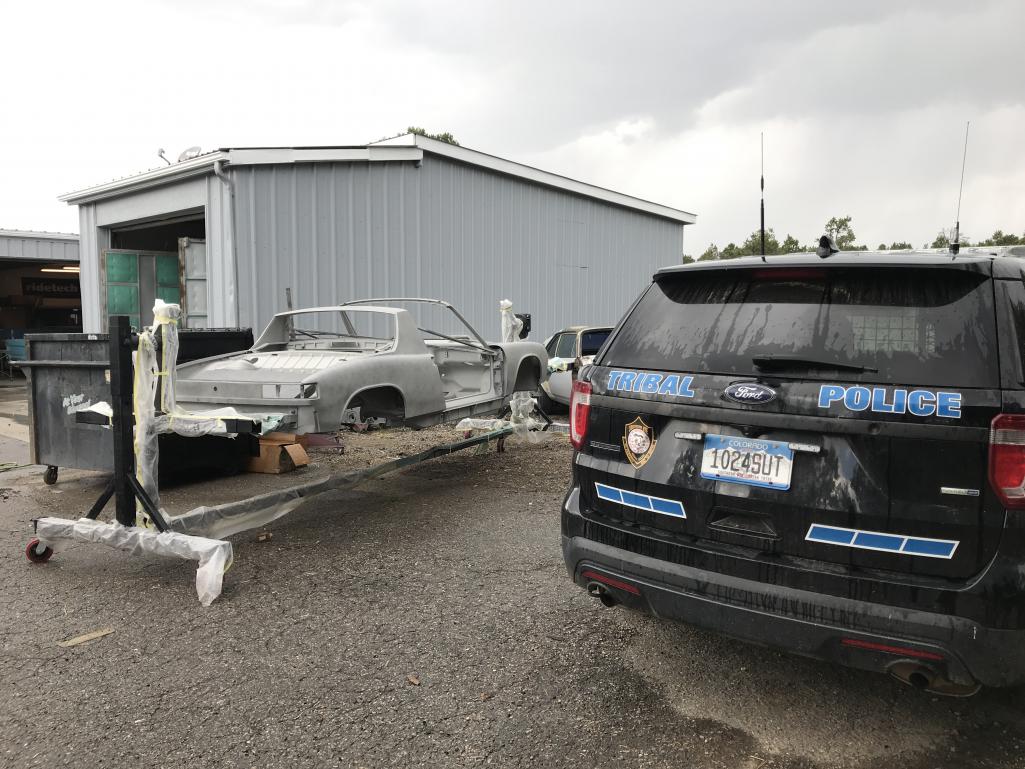
|
| bbrock |
 Aug 27 2020, 07:41 PM Aug 27 2020, 07:41 PM
Post
#1204
|
|
914 Guru      Group: Members Posts: 5,269 Joined: 17-February 17 From: Montana Member No.: 20,845 Region Association: Rocky Mountains 
|
Success! Too bad I can't upload a video, showing the balance wheel turning back and forth, the the movement ticking along. The "glass" needs a little cleanup and maybe some polish. (IMG:style_emoticons/default/cheer.gif) Can't remember if I read it in that article, but somewhere I read that the overload typically occurs when the original lubricant gets thick and waxy. Every time you hear that clock softly rewind itself, you will feel a wave of satisfaction now. On my trailing arms, I just smeared a very thin film of grease to help the new bearings slide in and called it good. Not sure if that was smart or not. |
| bkrantz |
 Aug 28 2020, 08:01 PM Aug 28 2020, 08:01 PM
Post
#1205
|
|
914 Guru      Group: Members Posts: 8,343 Joined: 3-August 19 From: SW Colorado Member No.: 23,343 Region Association: Rocky Mountains 
|
A bit more suspension work today. I cleaned up the axles for the trailing arms. Sorry, I did not get a before picture, but there was a bit of rubber crud stuck on the sections where the old bushings were.
This is after a bit of work with the wire brush, and some 800 grit emery paper. Attached thumbnail(s) 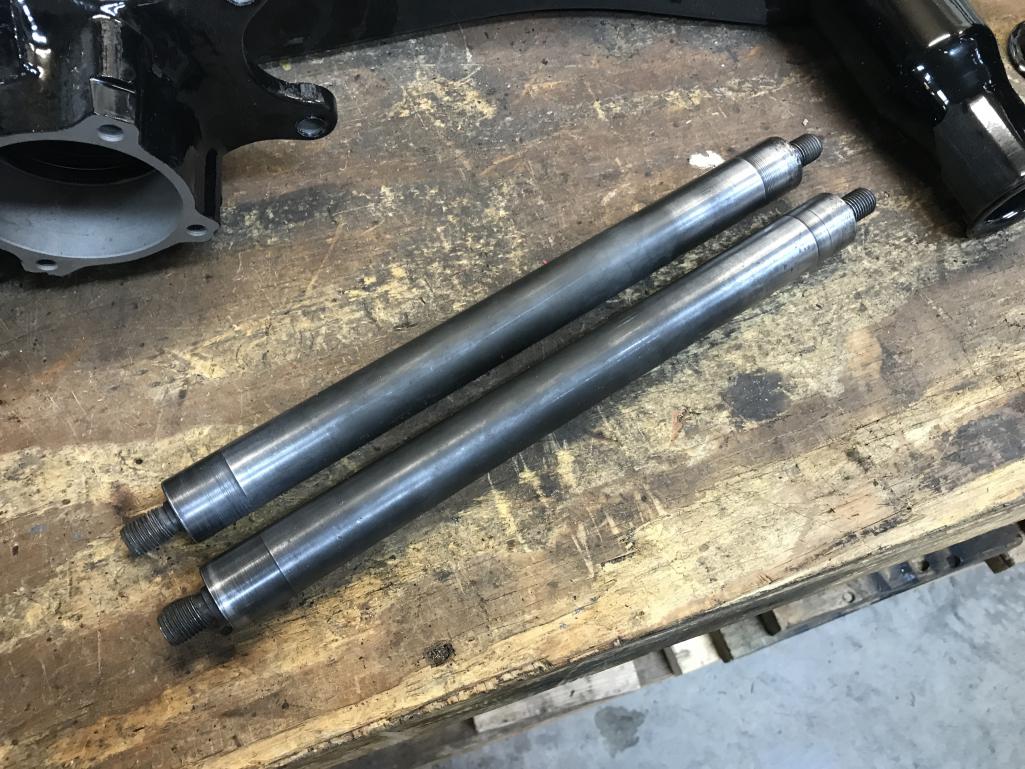
|
| bkrantz |
 Aug 28 2020, 08:03 PM Aug 28 2020, 08:03 PM
Post
#1206
|
|
914 Guru      Group: Members Posts: 8,343 Joined: 3-August 19 From: SW Colorado Member No.: 23,343 Region Association: Rocky Mountains 
|
I found a bit of pitting on one end of each axle--not sure if the inboard or outboard end.
Attached thumbnail(s) 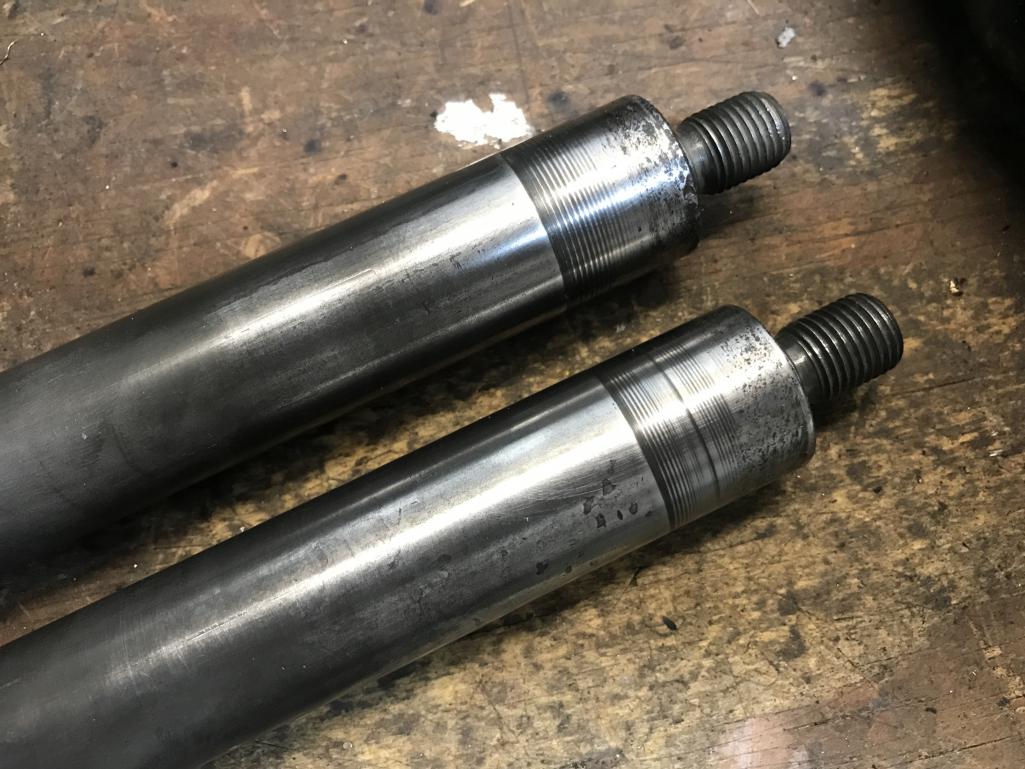
|
| bkrantz |
 Aug 28 2020, 08:05 PM Aug 28 2020, 08:05 PM
Post
#1207
|
|
914 Guru      Group: Members Posts: 8,343 Joined: 3-August 19 From: SW Colorado Member No.: 23,343 Region Association: Rocky Mountains 
|
Next up, the steering rack.
Attached thumbnail(s) 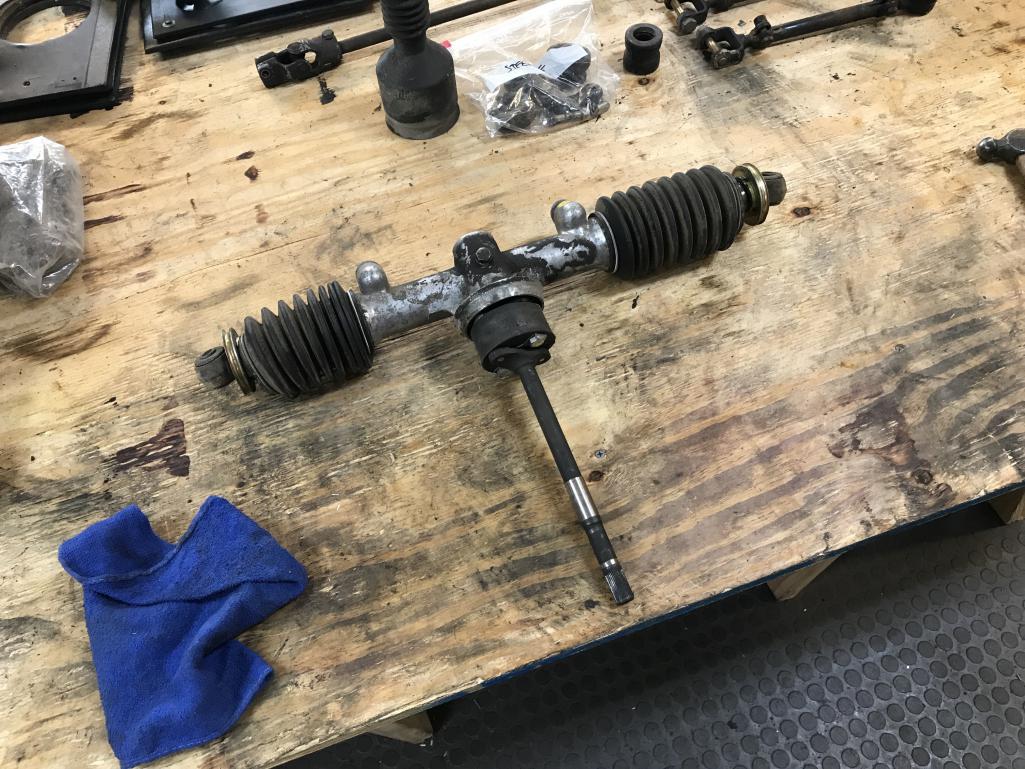
|
| bkrantz |
 Aug 28 2020, 08:08 PM Aug 28 2020, 08:08 PM
Post
#1208
|
|
914 Guru      Group: Members Posts: 8,343 Joined: 3-August 19 From: SW Colorado Member No.: 23,343 Region Association: Rocky Mountains 
|
I felt quite a bit of play in the rubber coupling.
Attached thumbnail(s) 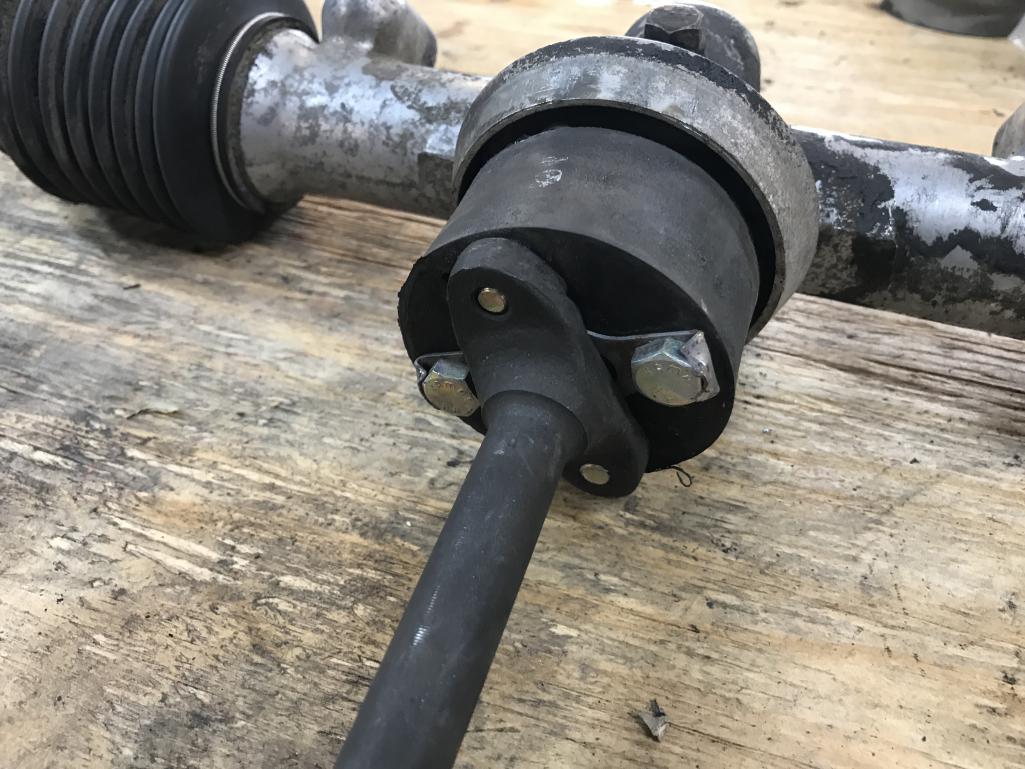
|
| bkrantz |
 Aug 28 2020, 08:10 PM Aug 28 2020, 08:10 PM
Post
#1209
|
|
914 Guru      Group: Members Posts: 8,343 Joined: 3-August 19 From: SW Colorado Member No.: 23,343 Region Association: Rocky Mountains 
|
Here's the problem: the holes in the coupler are just a bit larger than the bushings.
Attached thumbnail(s) 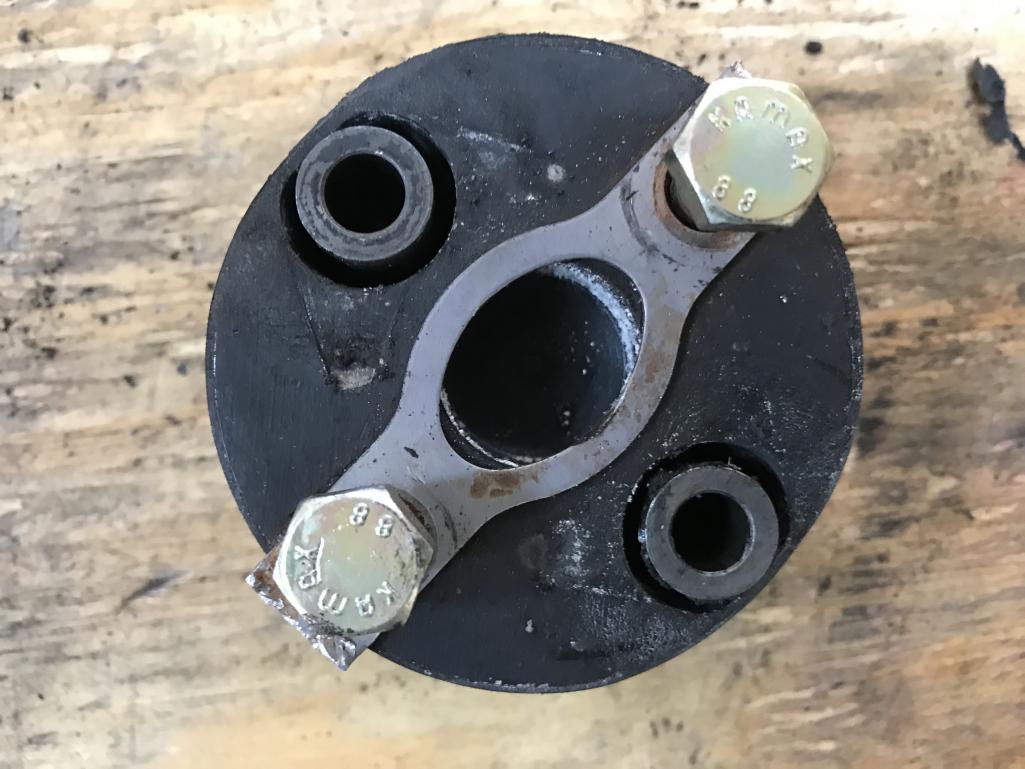
|
| bkrantz |
 Aug 28 2020, 08:15 PM Aug 28 2020, 08:15 PM
Post
#1210
|
|
914 Guru      Group: Members Posts: 8,343 Joined: 3-August 19 From: SW Colorado Member No.: 23,343 Region Association: Rocky Mountains 
|
I was able to loosen the lock rings/bellow supports, but one eye-bolt did not want to budge. It took quite a bit of leverage, with a wrench on the flats of the rack and the eye-bolt in the vise.
Attached thumbnail(s) 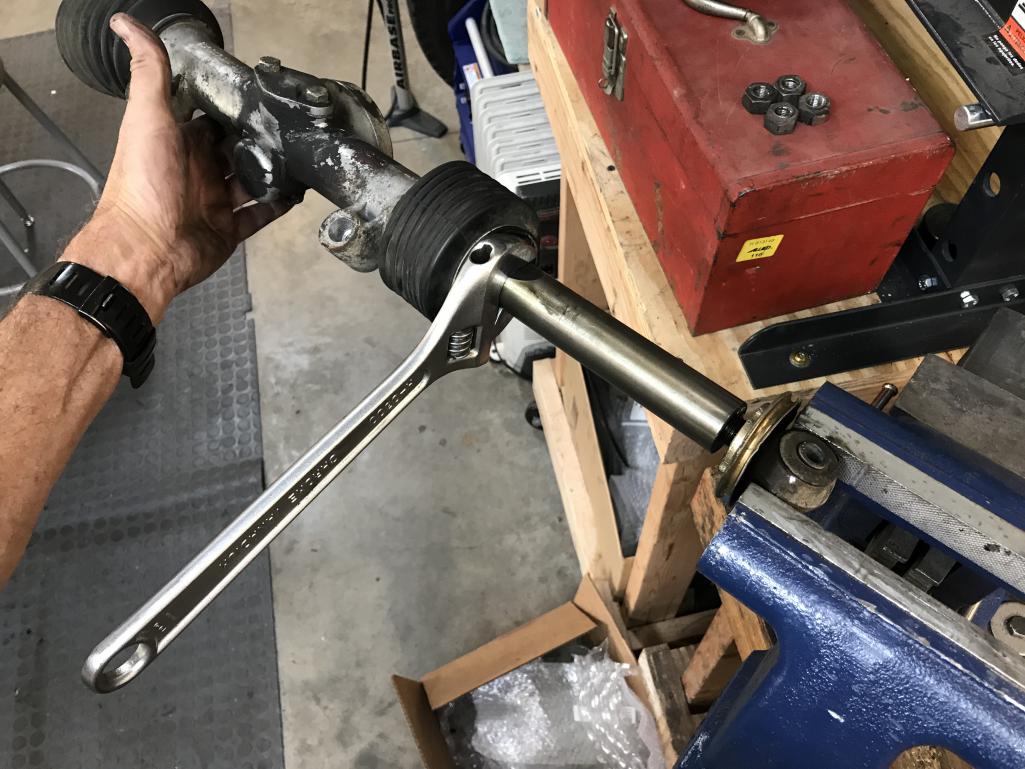
|
| bkrantz |
 Aug 28 2020, 08:17 PM Aug 28 2020, 08:17 PM
Post
#1211
|
|
914 Guru      Group: Members Posts: 8,343 Joined: 3-August 19 From: SW Colorado Member No.: 23,343 Region Association: Rocky Mountains 
|
The rack itself seems solid, with just a tiny perceptible play.
Attached thumbnail(s) 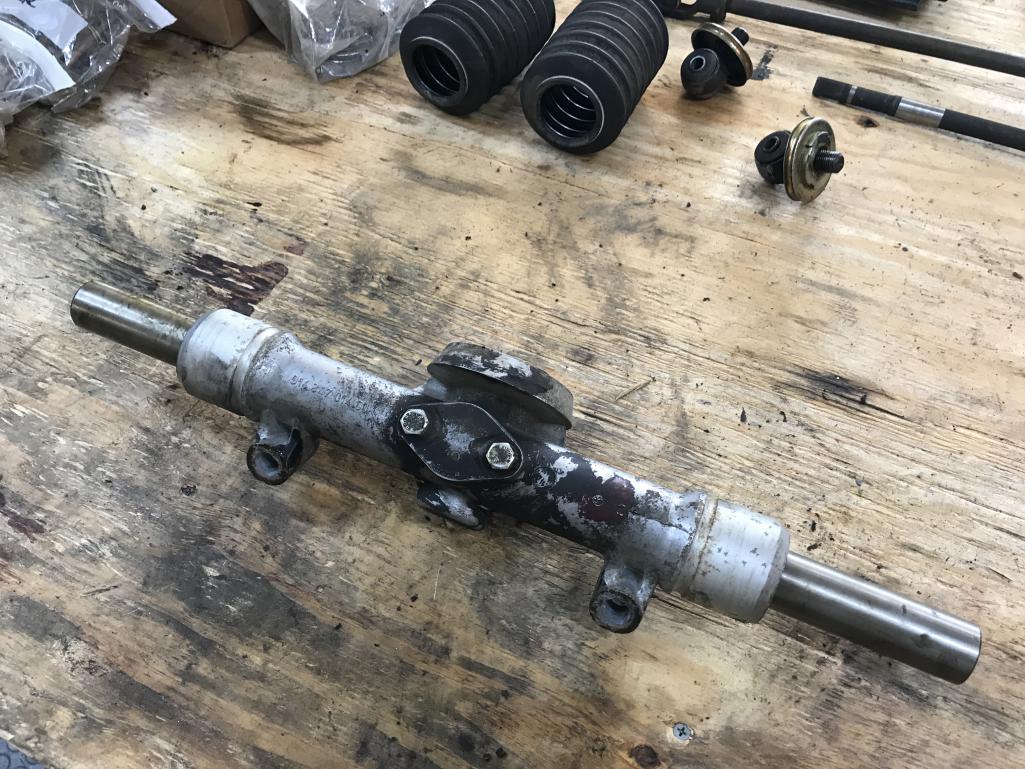
|
| bkrantz |
 Aug 30 2020, 07:23 PM Aug 30 2020, 07:23 PM
Post
#1212
|
|
914 Guru      Group: Members Posts: 8,343 Joined: 3-August 19 From: SW Colorado Member No.: 23,343 Region Association: Rocky Mountains 
|
Today, I tackled the rack disassembly. After a visit to the parts washer, it looked a bit cleaner.
Attached thumbnail(s) 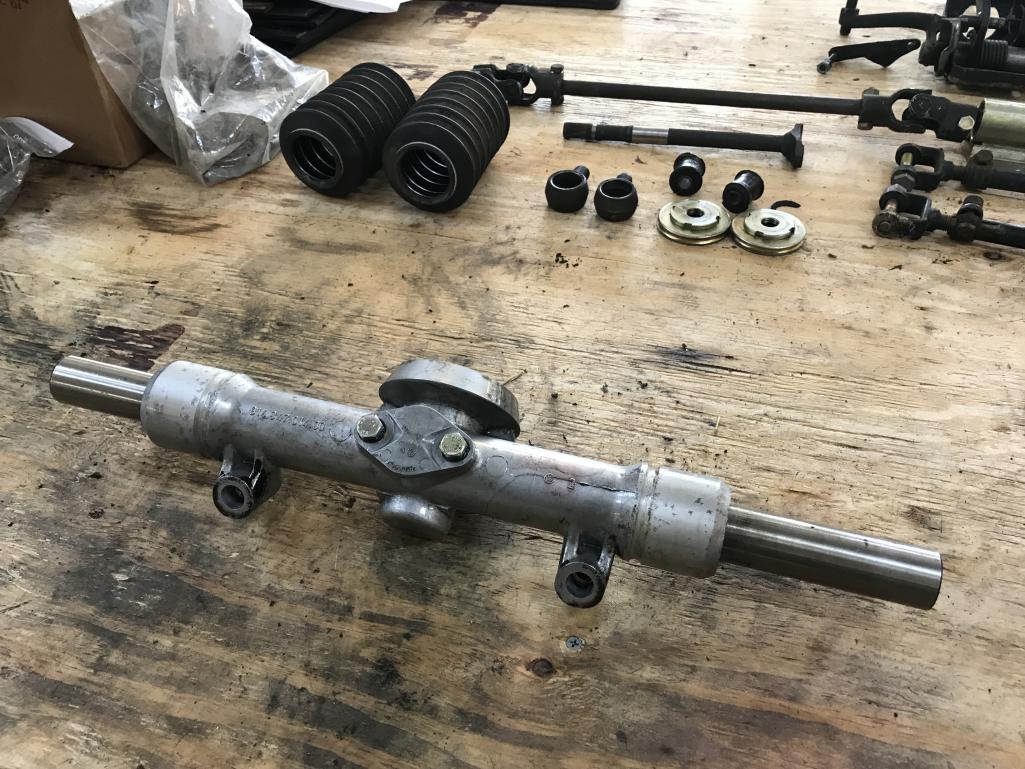
|
| bkrantz |
 Aug 30 2020, 07:24 PM Aug 30 2020, 07:24 PM
Post
#1213
|
|
914 Guru      Group: Members Posts: 8,343 Joined: 3-August 19 From: SW Colorado Member No.: 23,343 Region Association: Rocky Mountains 
|
First, I removed the the compression cover and parts (compression piston, spring, and shims). Sorry I did not get photos.
Next was the pinion retaining nut and input yoke. Mine came off with strong finger pull. Attached thumbnail(s) 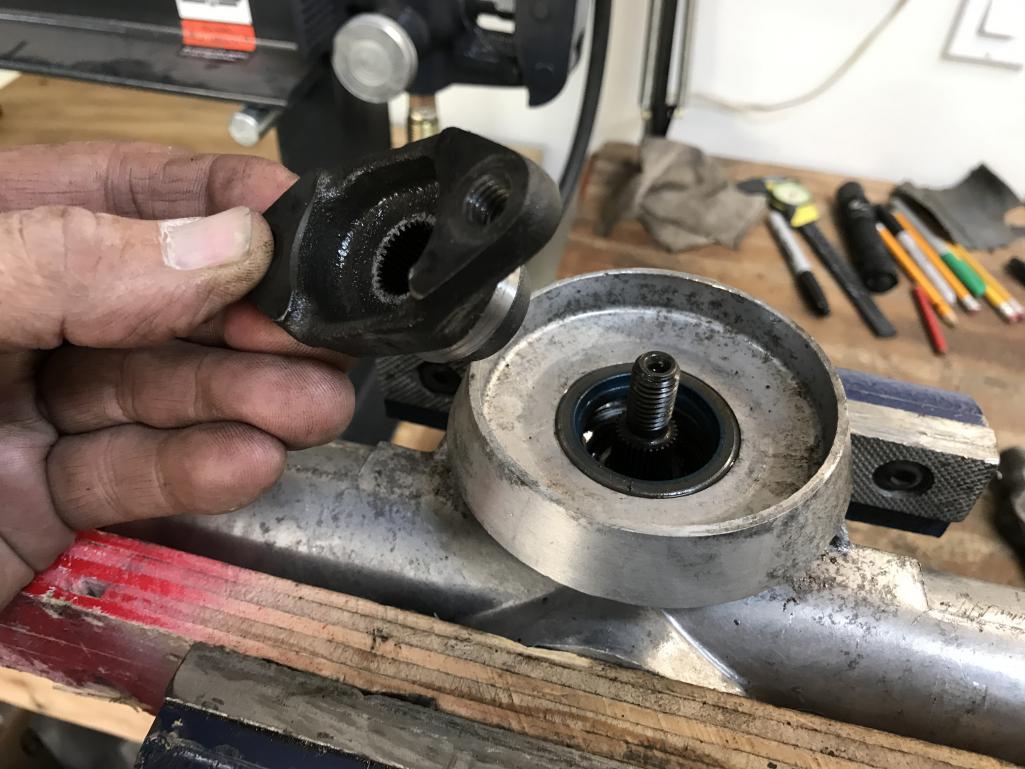
|
| bkrantz |
 Aug 30 2020, 07:26 PM Aug 30 2020, 07:26 PM
Post
#1214
|
|
914 Guru      Group: Members Posts: 8,343 Joined: 3-August 19 From: SW Colorado Member No.: 23,343 Region Association: Rocky Mountains 
|
Here's the pinion shaft seal in place.
Attached thumbnail(s) 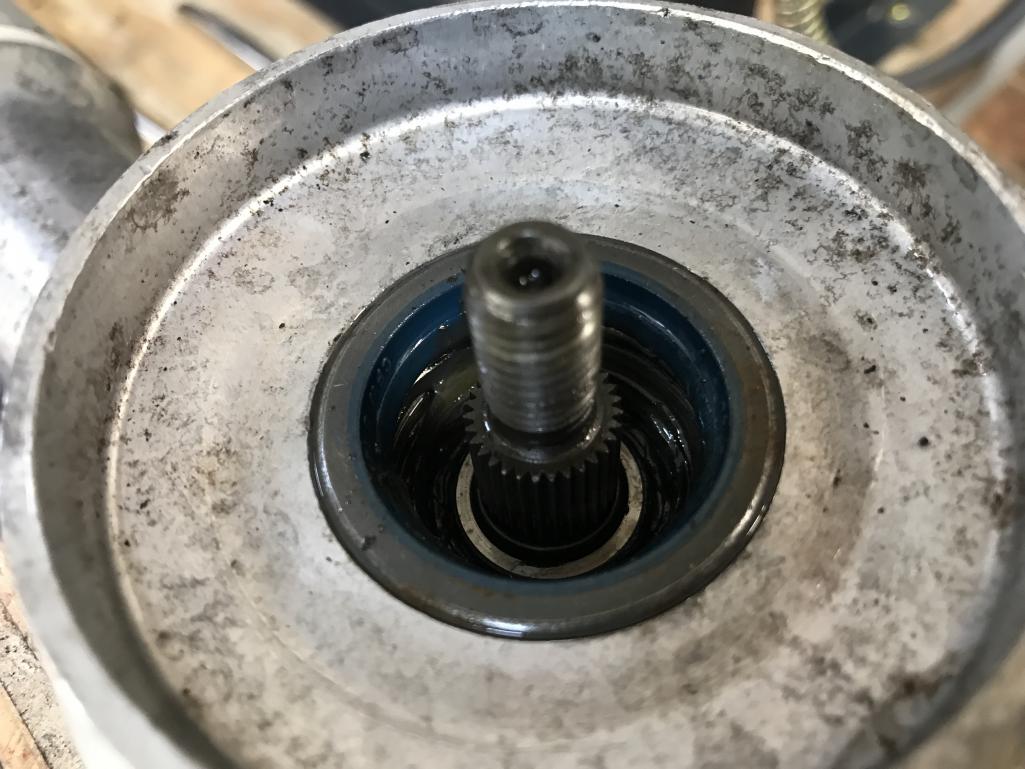
|
| bkrantz |
 Aug 30 2020, 07:27 PM Aug 30 2020, 07:27 PM
Post
#1215
|
|
914 Guru      Group: Members Posts: 8,343 Joined: 3-August 19 From: SW Colorado Member No.: 23,343 Region Association: Rocky Mountains 
|
I tried to remove this intact, but no dice.
Attached thumbnail(s) 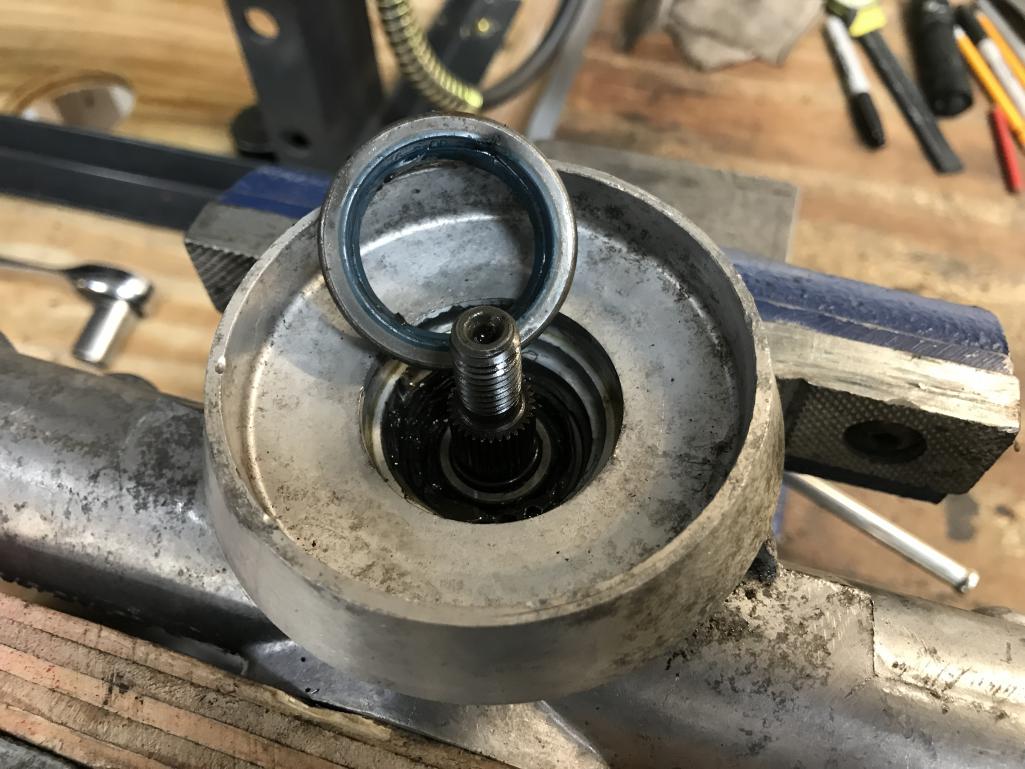
|
| bkrantz |
 Aug 30 2020, 07:28 PM Aug 30 2020, 07:28 PM
Post
#1216
|
|
914 Guru      Group: Members Posts: 8,343 Joined: 3-August 19 From: SW Colorado Member No.: 23,343 Region Association: Rocky Mountains 
|
Then I found the retaining ring for the upper pinion shaft shims and bearing.
Attached thumbnail(s) 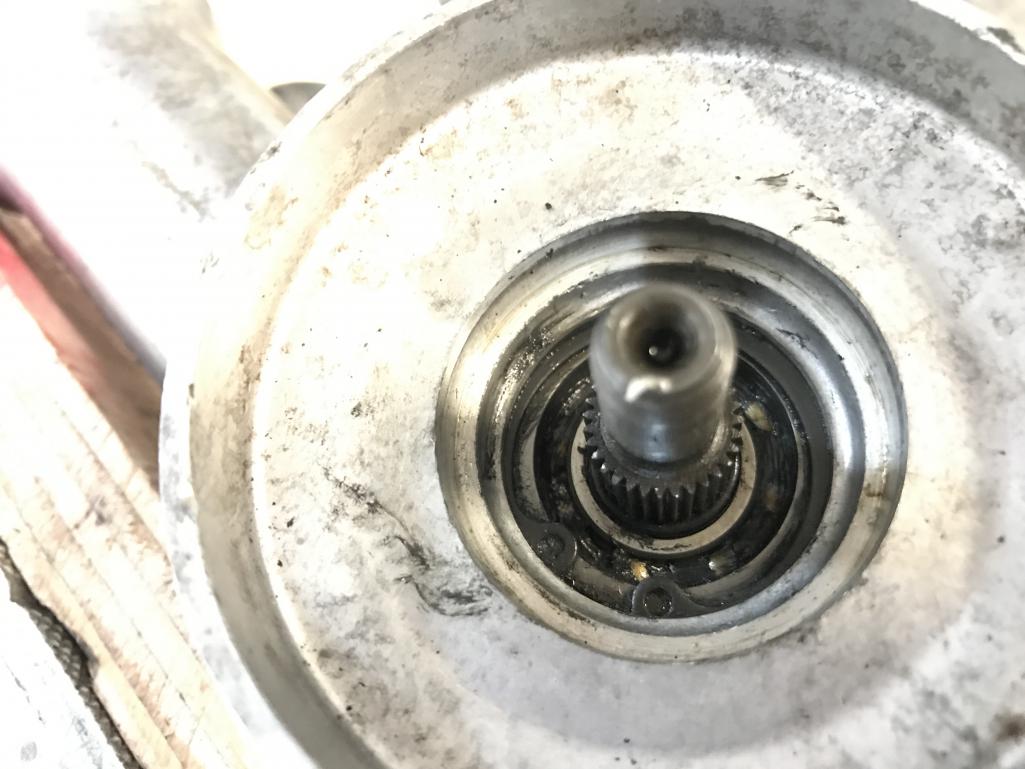
|
| bkrantz |
 Aug 30 2020, 07:28 PM Aug 30 2020, 07:28 PM
Post
#1217
|
|
914 Guru      Group: Members Posts: 8,343 Joined: 3-August 19 From: SW Colorado Member No.: 23,343 Region Association: Rocky Mountains 
|
No problem with snap ring pliers.
Attached thumbnail(s) 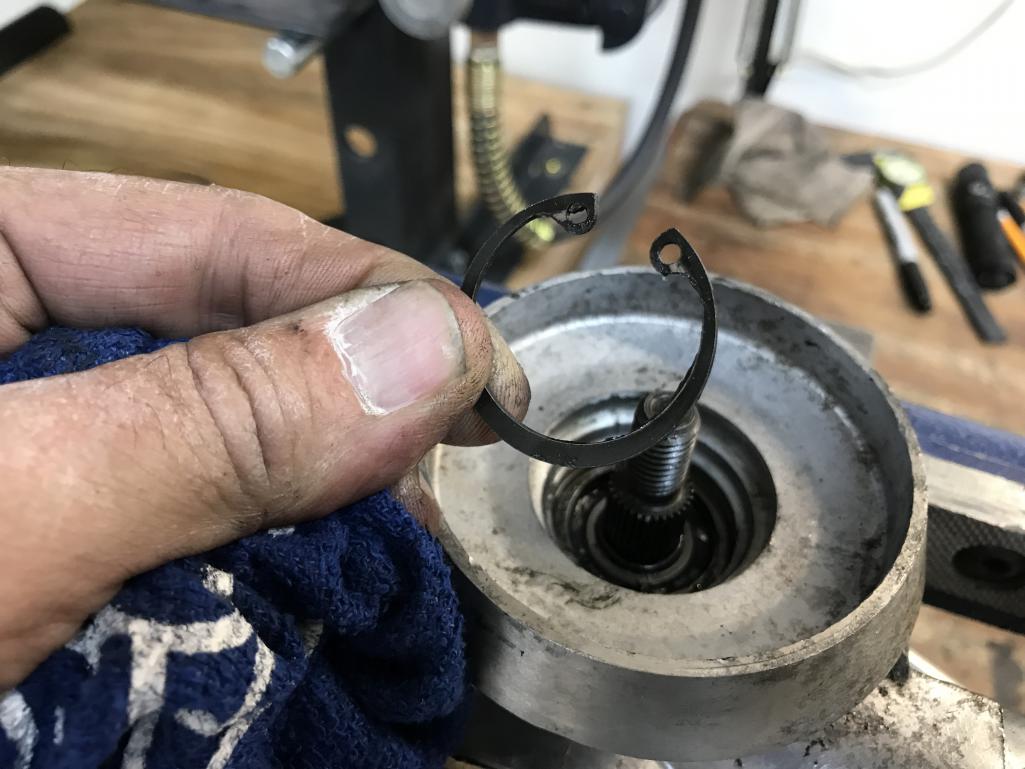
|
| bkrantz |
 Aug 30 2020, 07:30 PM Aug 30 2020, 07:30 PM
Post
#1218
|
|
914 Guru      Group: Members Posts: 8,343 Joined: 3-August 19 From: SW Colorado Member No.: 23,343 Region Association: Rocky Mountains 
|
I then pried out the pinion shaft. Although even the factory manual suggests prying against the housing flange, I would rather pry against something disposable.
Attached thumbnail(s) 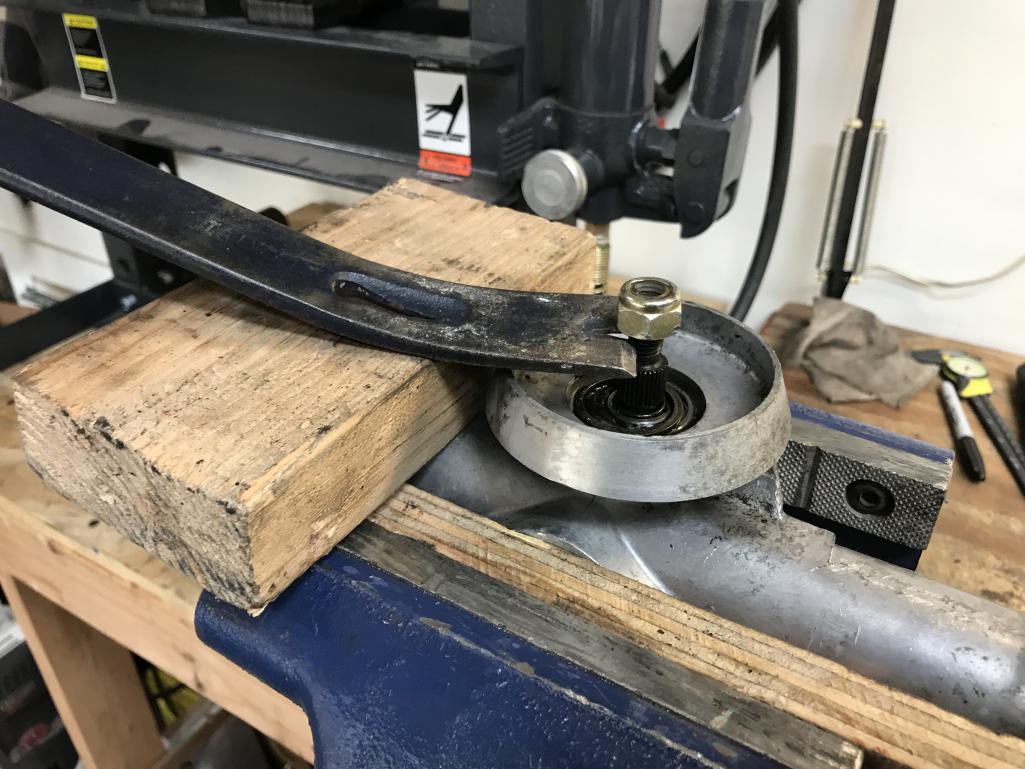
|
| bkrantz |
 Aug 30 2020, 07:31 PM Aug 30 2020, 07:31 PM
Post
#1219
|
|
914 Guru      Group: Members Posts: 8,343 Joined: 3-August 19 From: SW Colorado Member No.: 23,343 Region Association: Rocky Mountains 
|
The pinion shaft came out with good news: still lots of viscous grease, and no sign of contamination or drying out.
Attached thumbnail(s) 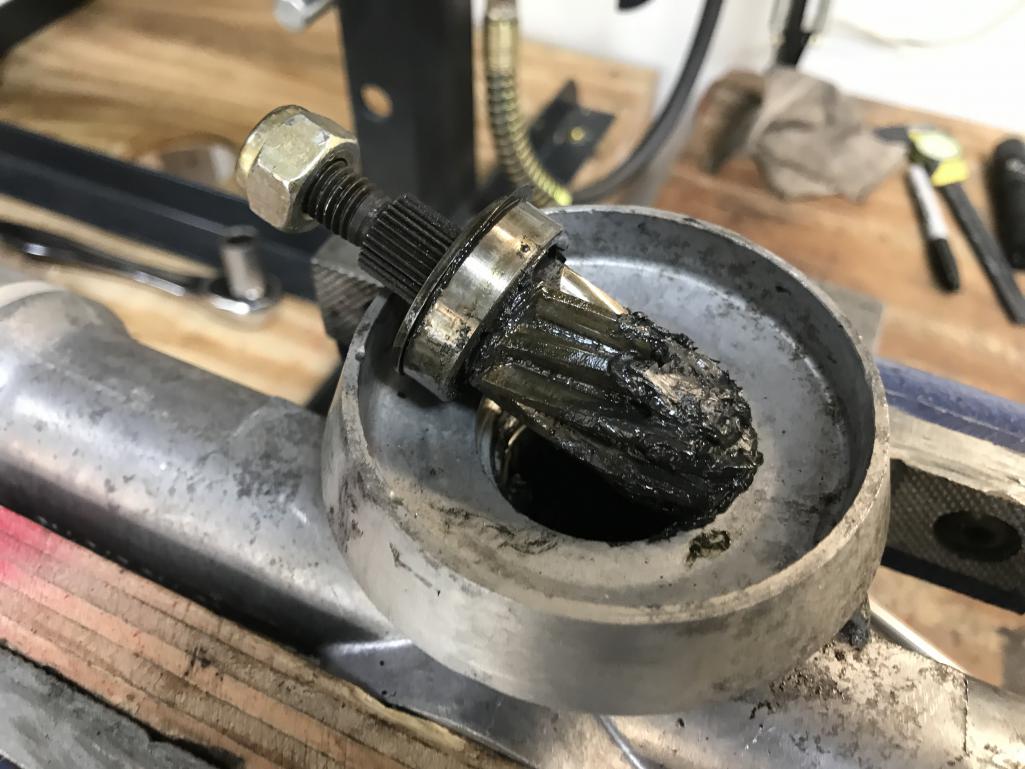
|
| bkrantz |
 Aug 30 2020, 07:33 PM Aug 30 2020, 07:33 PM
Post
#1220
|
|
914 Guru      Group: Members Posts: 8,343 Joined: 3-August 19 From: SW Colorado Member No.: 23,343 Region Association: Rocky Mountains 
|
With the pinion removed, the rack shaft slid out. It also looks in good shape.
Attached thumbnail(s) 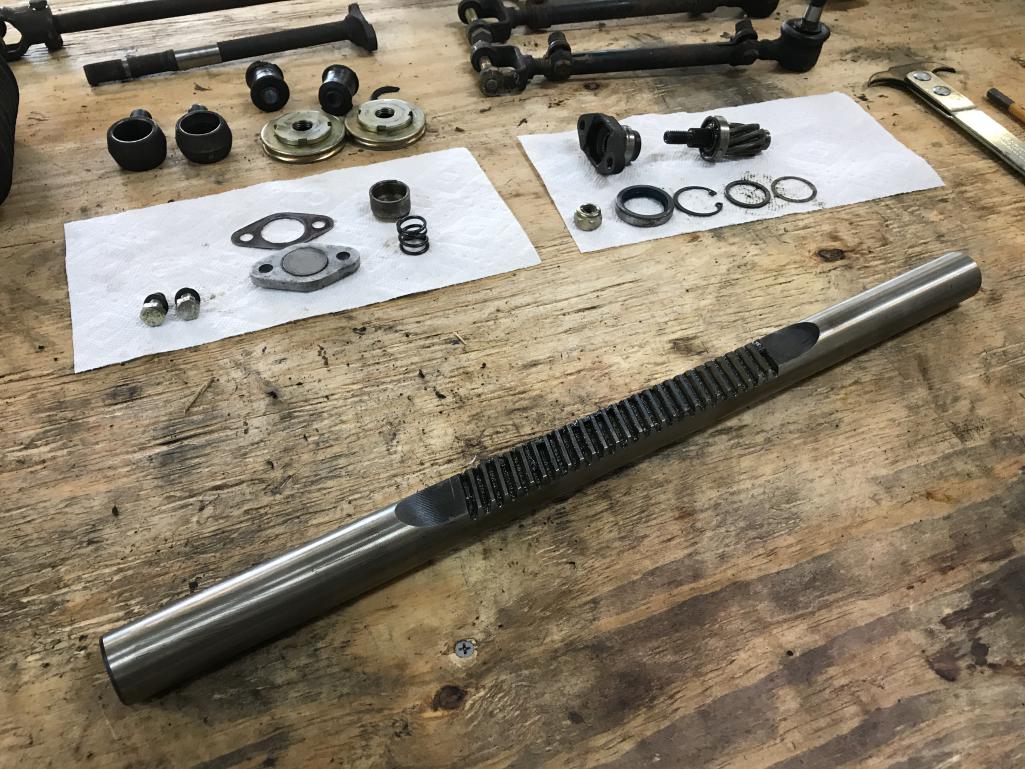
|
  |
1 User(s) are reading this topic (1 Guests and 0 Anonymous Users)
0 Members:

|
Lo-Fi Version | Time is now: 22nd April 2025 - 04:12 AM |
Invision Power Board
v9.1.4 © 2025 IPS, Inc.


