|
|
|
Porsche, and the Porsche crest are registered trademarks of Dr. Ing. h.c. F. Porsche AG.
This site is not affiliated with Porsche in any way. Its only purpose is to provide an online forum for car enthusiasts. All other trademarks are property of their respective owners. |
|
|

  |

| bkrantz |
 Mar 7 2021, 07:24 PM Mar 7 2021, 07:24 PM
Post
#2341
|
|
914 Guru  Group: Members Posts: 8,154 Joined: 3-August 19 From: SW Colorado Member No.: 23,343 Region Association: Rocky Mountains |
Speaking of the interior, I made some progress towards that today and tackled the dash top. I masked off the new paint near the areas to get adhesive. More to come about the paint and adhesive...
Attached thumbnail(s) 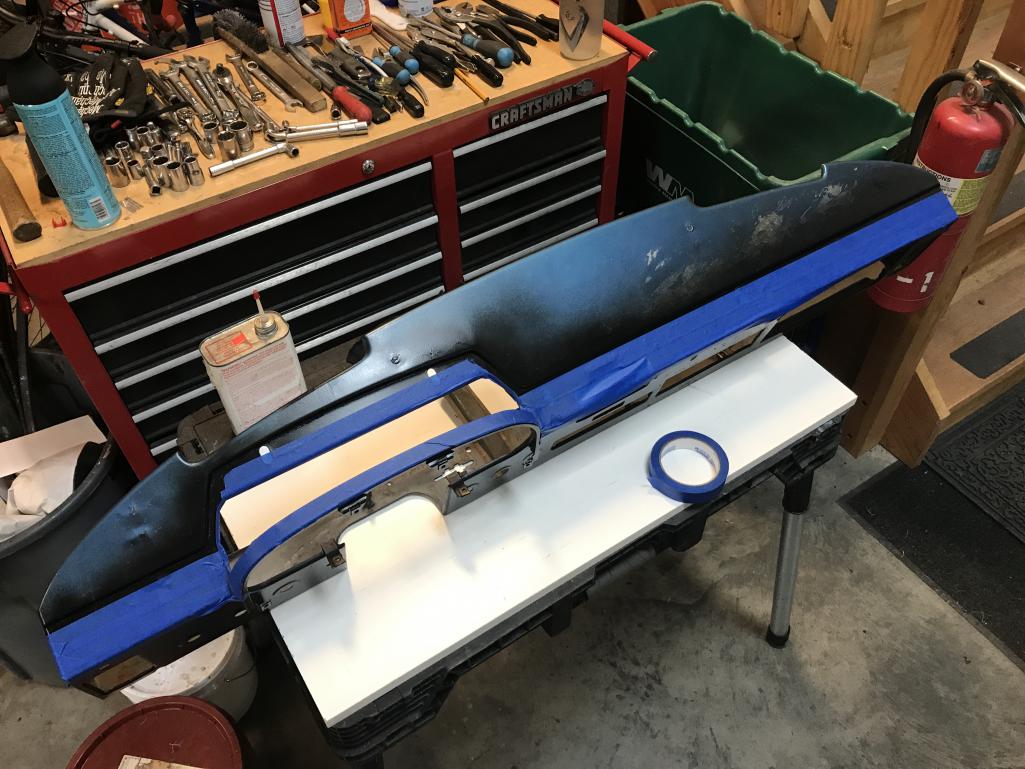
|
   |

 
|
| bkrantz |
Mar 7 2021, 07:25 PM
Post
#2342
|
|
914 Guru Group: Members Posts: 8,154 Joined: 3-August 19 From: SW Colorado Member No.: 23,343 Region Association: Rocky Mountains |
First step was to spray the dash and underside of padding with Weldwood Landau adhesive.
Attached thumbnail(s) 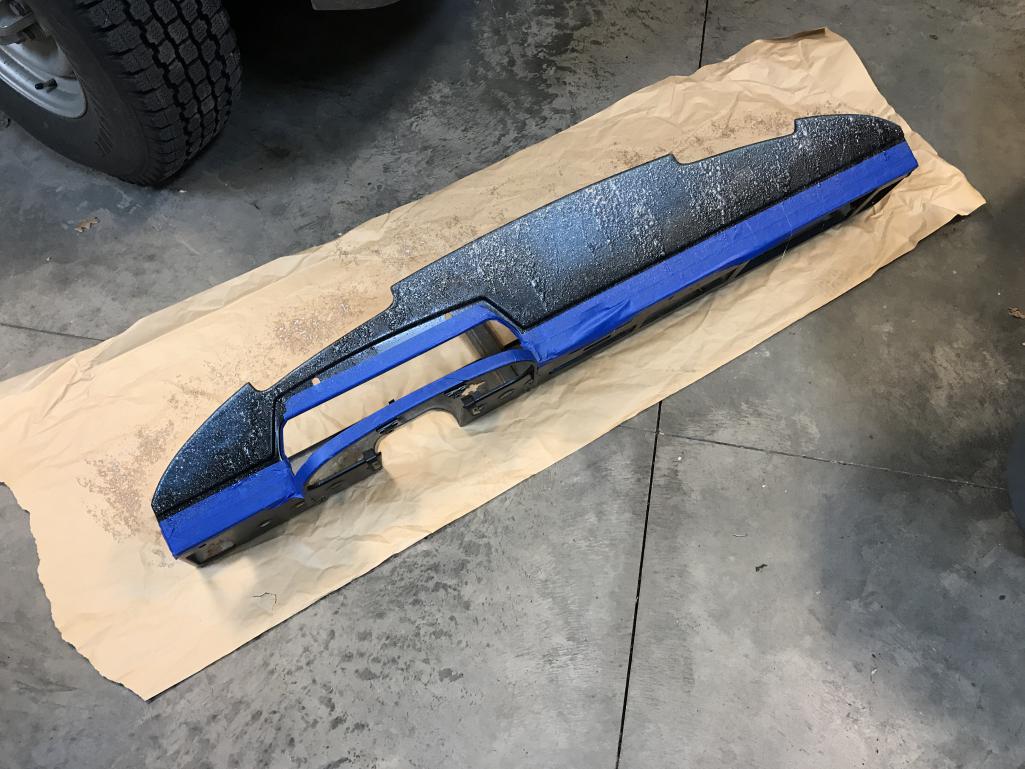
|
|
|
|
| bkrantz |
Mar 7 2021, 07:26 PM
Post
#2343
|
|
914 Guru Group: Members Posts: 8,154 Joined: 3-August 19 From: SW Colorado Member No.: 23,343 Region Association: Rocky Mountains |
Padding in place, with lots of overhang on all sides. I started adhering in the center, and then pulled the paper out gradually on both sides.
Attached thumbnail(s) 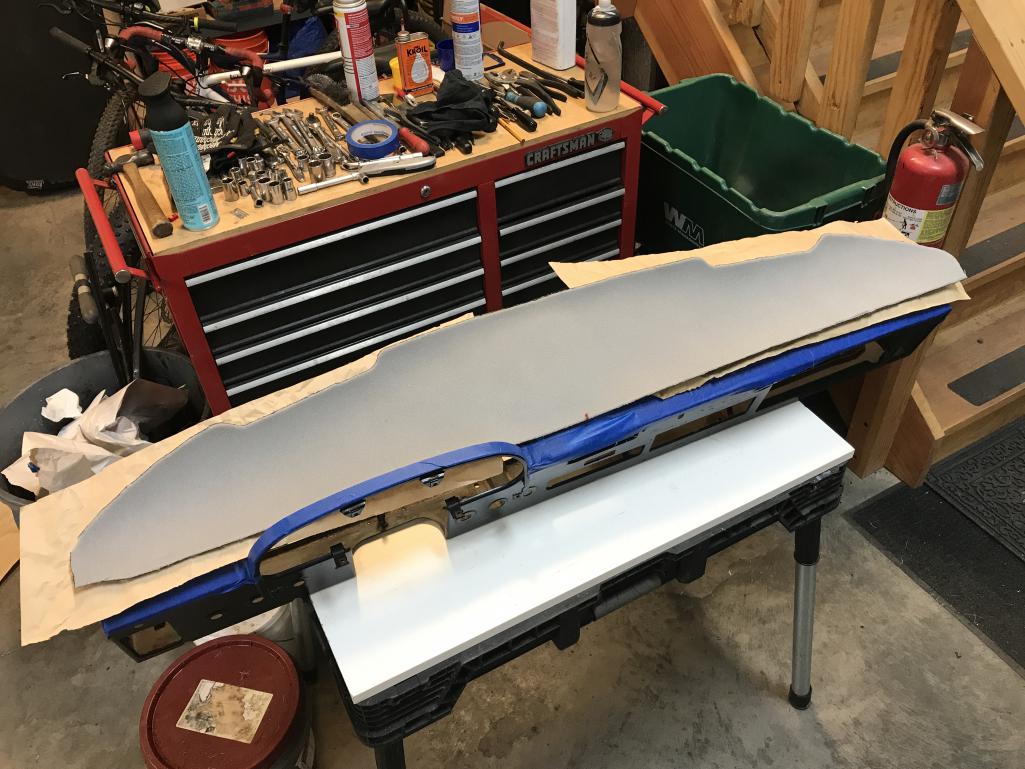
|
|
|
|
| bkrantz |
Mar 7 2021, 07:28 PM
Post
#2344
|
|
914 Guru Group: Members Posts: 8,154 Joined: 3-August 19 From: SW Colorado Member No.: 23,343 Region Association: Rocky Mountains |
Padding all stuck down. Very good adhesion.
Attached thumbnail(s) 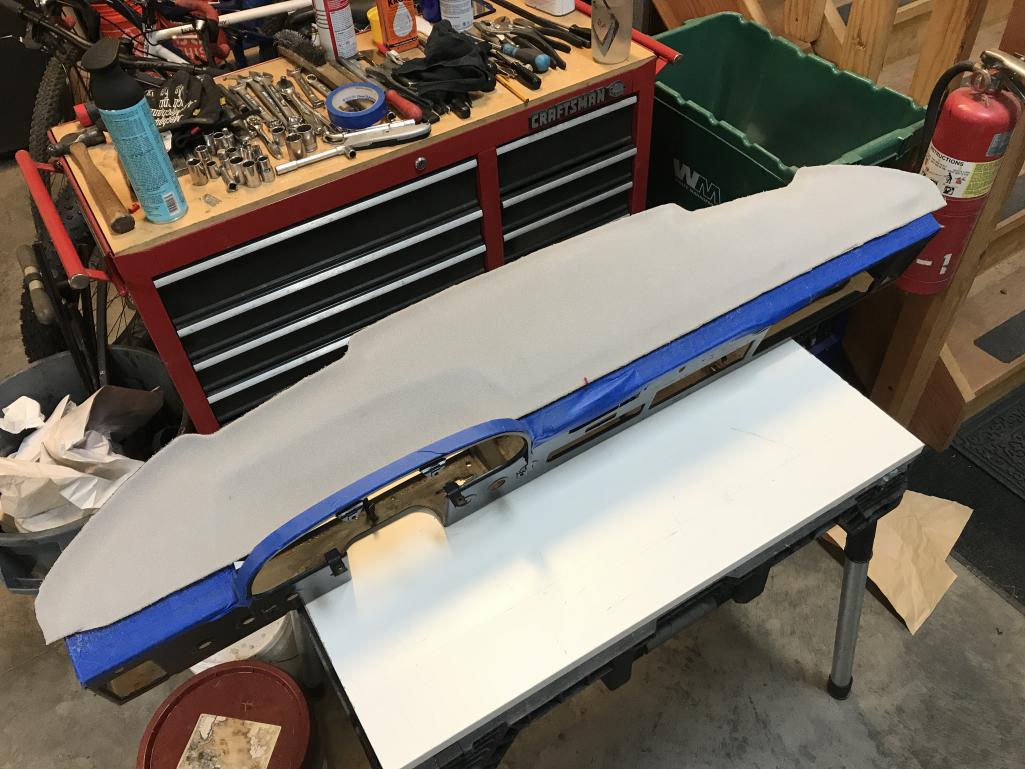
|
|
|
|
| bkrantz |
Mar 7 2021, 07:29 PM
Post
#2345
|
|
914 Guru Group: Members Posts: 8,154 Joined: 3-August 19 From: SW Colorado Member No.: 23,343 Region Association: Rocky Mountains |
And then trimmed all around with a new utility blade.
Attached thumbnail(s) 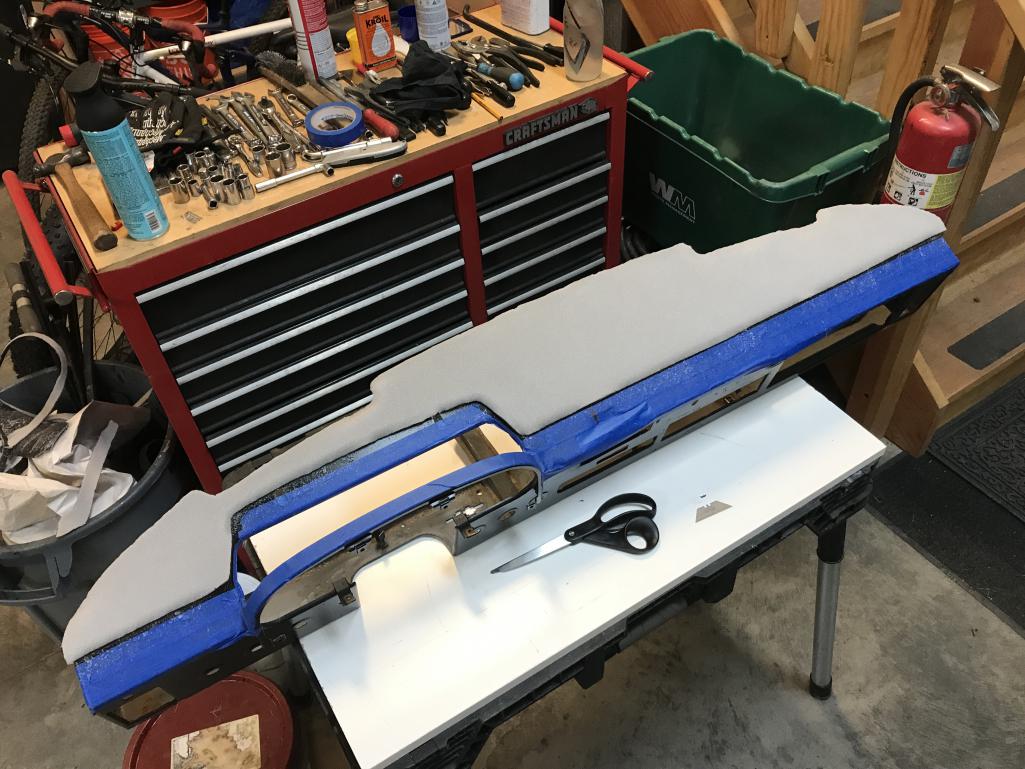
|
|
|
|
| bkrantz |
Mar 7 2021, 07:30 PM
Post
#2346
|
|
914 Guru Group: Members Posts: 8,154 Joined: 3-August 19 From: SW Colorado Member No.: 23,343 Region Association: Rocky Mountains |
After that, I got out the liquid Weldwood. I decided to do what the factory did and glue down only the edges of the vinyl.
Attached thumbnail(s) 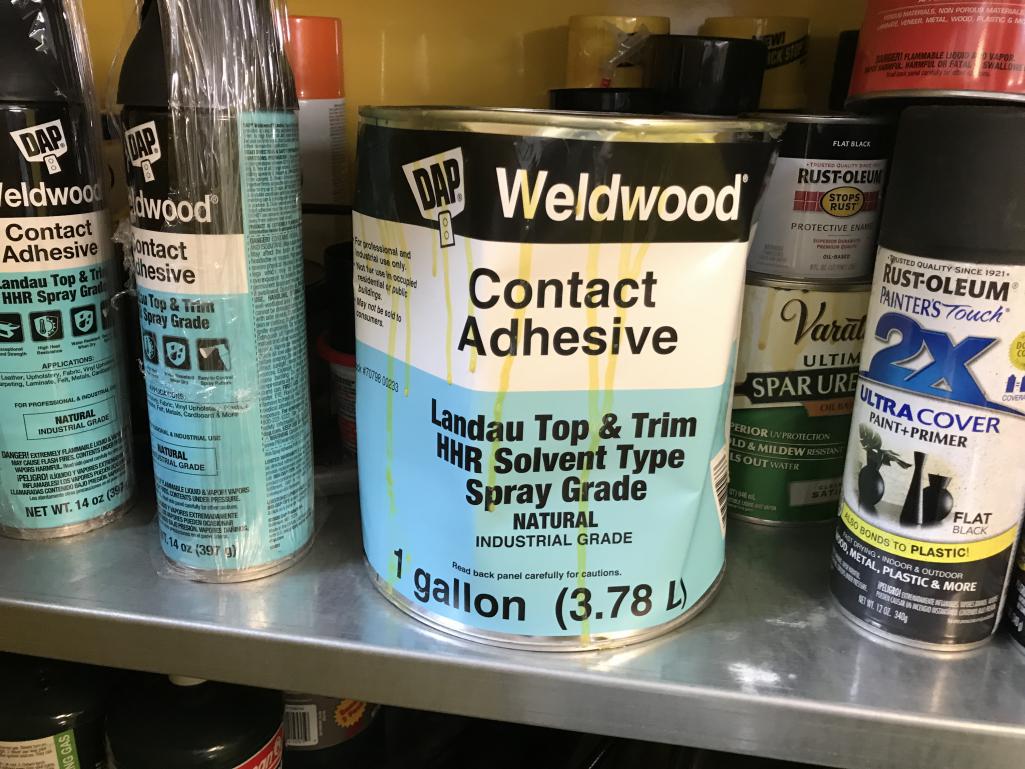
|
|
|
|
| bkrantz |
Mar 7 2021, 07:32 PM
Post
#2347
|
|
914 Guru Group: Members Posts: 8,154 Joined: 3-August 19 From: SW Colorado Member No.: 23,343 Region Association: Rocky Mountains |
Test fitting the vinyl. Again, lots of overlap.
Attached thumbnail(s) 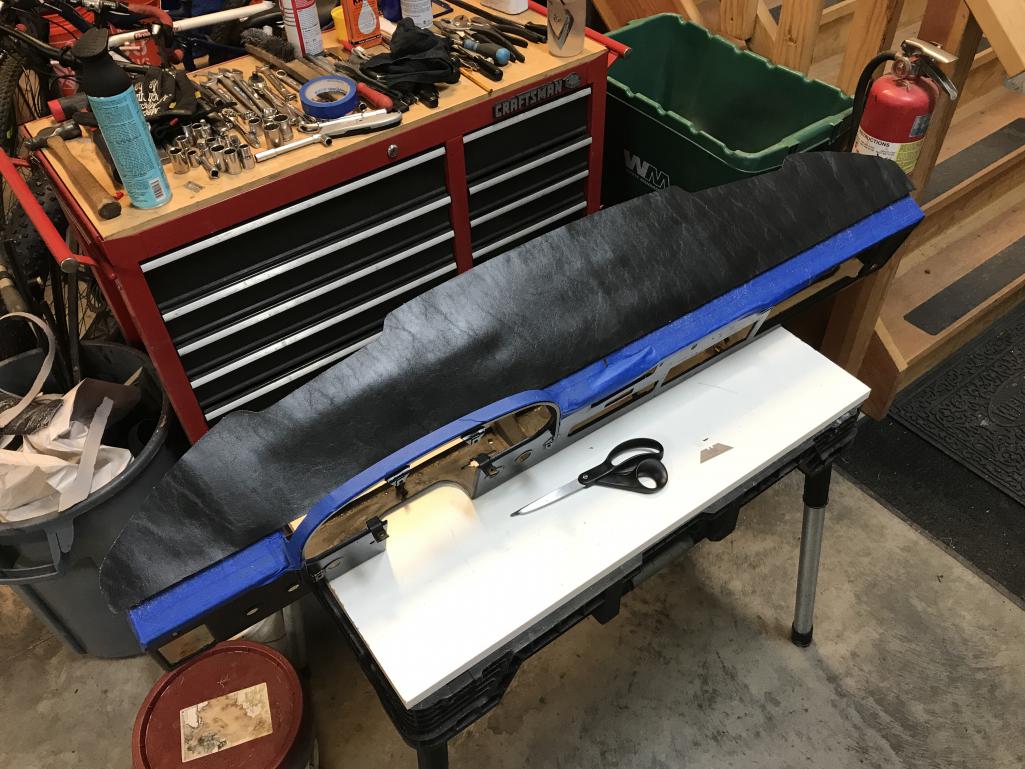
|
|
|
|
| bkrantz |
Mar 7 2021, 07:36 PM
Post
#2348
|
|
914 Guru Group: Members Posts: 8,154 Joined: 3-August 19 From: SW Colorado Member No.: 23,343 Region Association: Rocky Mountains |
I taped the ends to add some gentle tension.
Then I first glued along the inside edge, about 1/2 inch below the raised area (and foam padding). Sorry, no picture. I brushed adhesive onto the dash and the edge of the vinyl. On the first attempt, I realized the adhesive solvent was lifting the black paint (Rustoleum semi-gloss rattle can). I had to clean that up with acetone, and apply another coat of adhesive. Attached thumbnail(s) 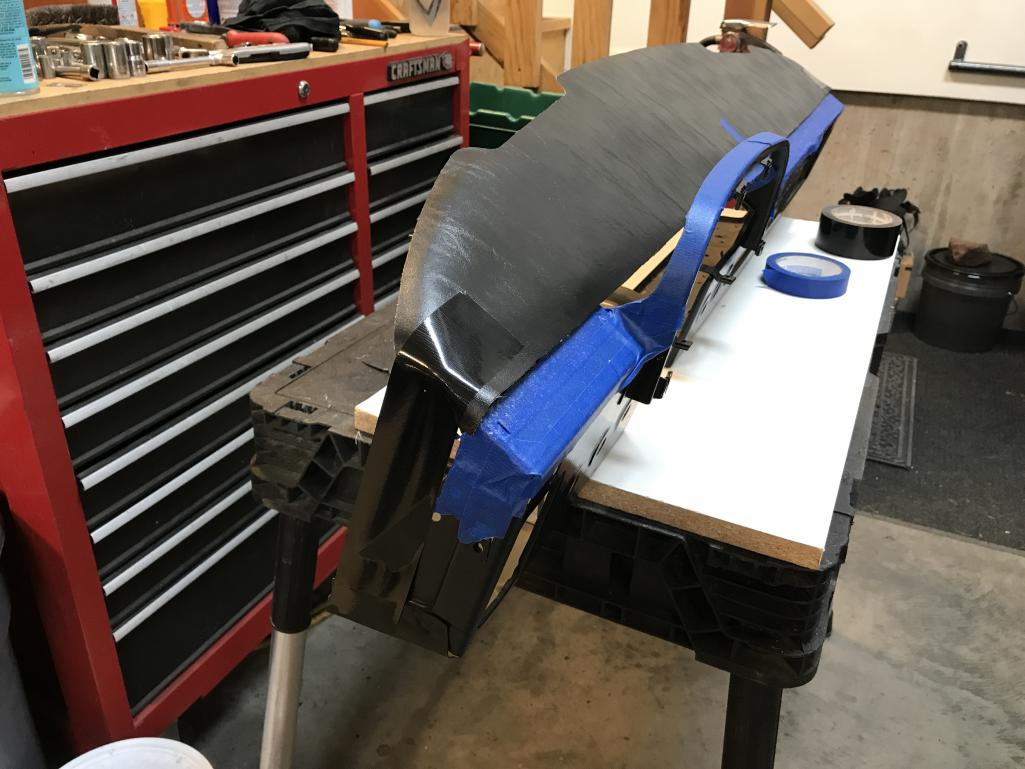
|
|
|
|
| bkrantz |
Mar 7 2021, 07:38 PM
Post
#2349
|
|
914 Guru Group: Members Posts: 8,154 Joined: 3-August 19 From: SW Colorado Member No.: 23,343 Region Association: Rocky Mountains |
Once the inner edge was stuck on, I brushed adhesive onto the leading edge of the vinyl and the underside of the dash.
Attached thumbnail(s) 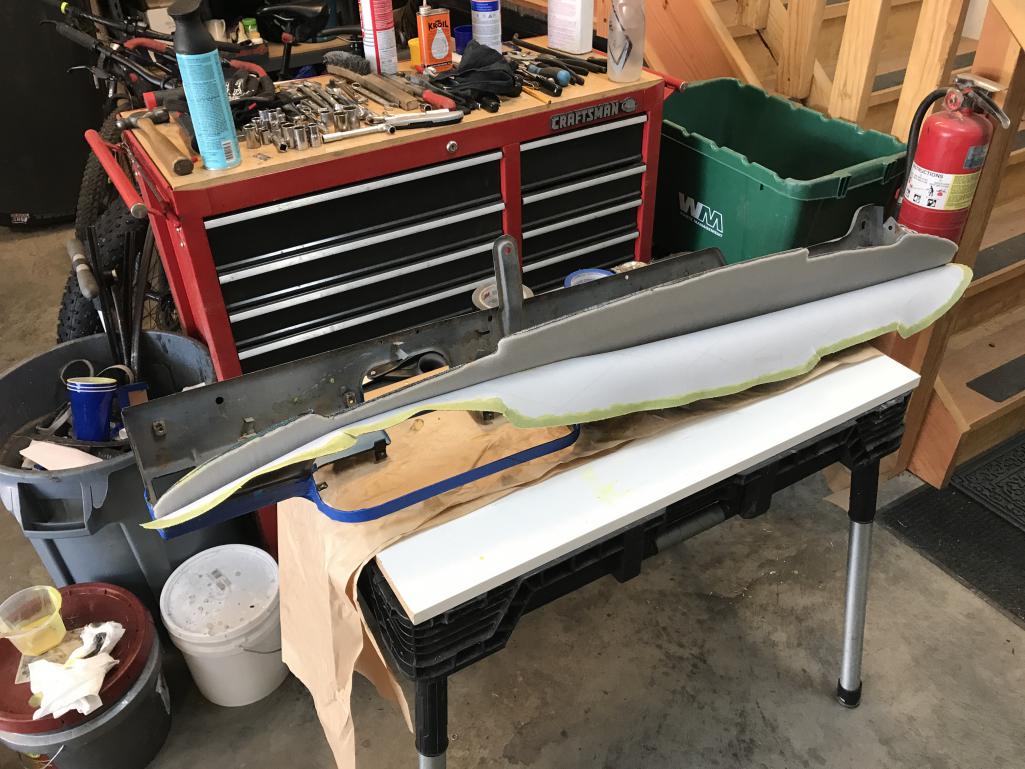
|
|
|
|
| bkrantz |
Mar 7 2021, 07:42 PM
Post
#2350
|
|
914 Guru Group: Members Posts: 8,154 Joined: 3-August 19 From: SW Colorado Member No.: 23,343 Region Association: Rocky Mountains |
While smoothing and gently stretching, I folded the vinyl over the edge and stuck it to the underside. For the defroster vent inner corners, I duplicated the cuts on the original vinyl (bisecting the corner angles).
Attached thumbnail(s) 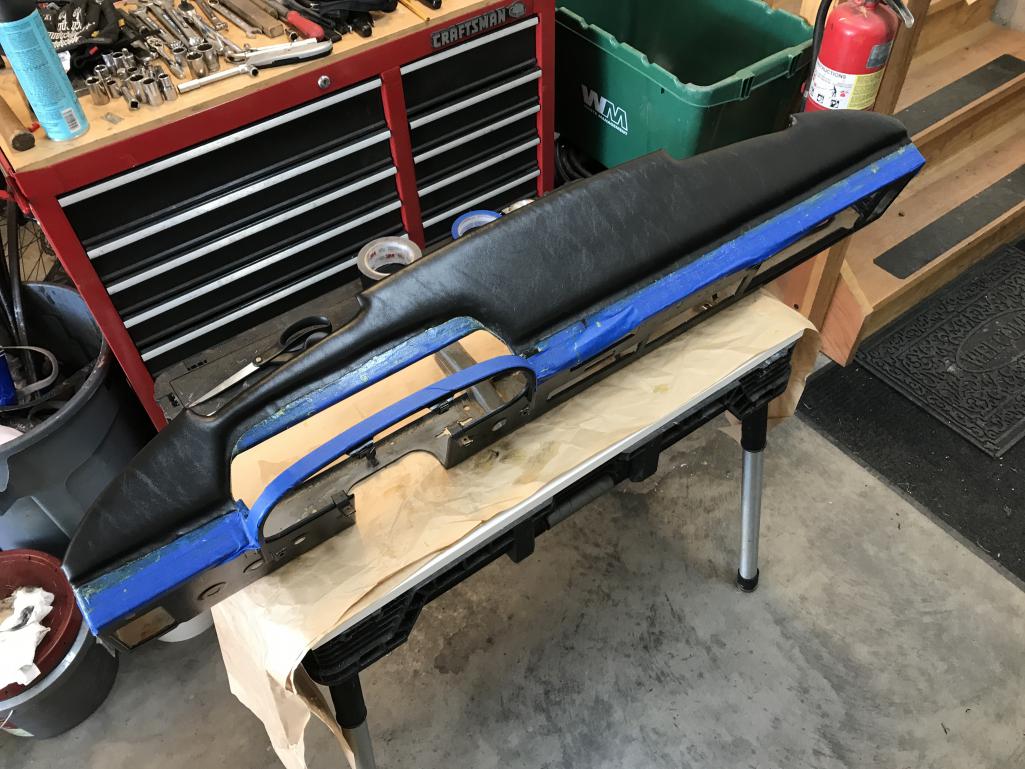
|
|
|
|
| bkrantz |
Mar 7 2021, 07:43 PM
Post
#2351
|
|
914 Guru Group: Members Posts: 8,154 Joined: 3-August 19 From: SW Colorado Member No.: 23,343 Region Association: Rocky Mountains |
Cleaned up and almost ready to install.
Attached thumbnail(s) 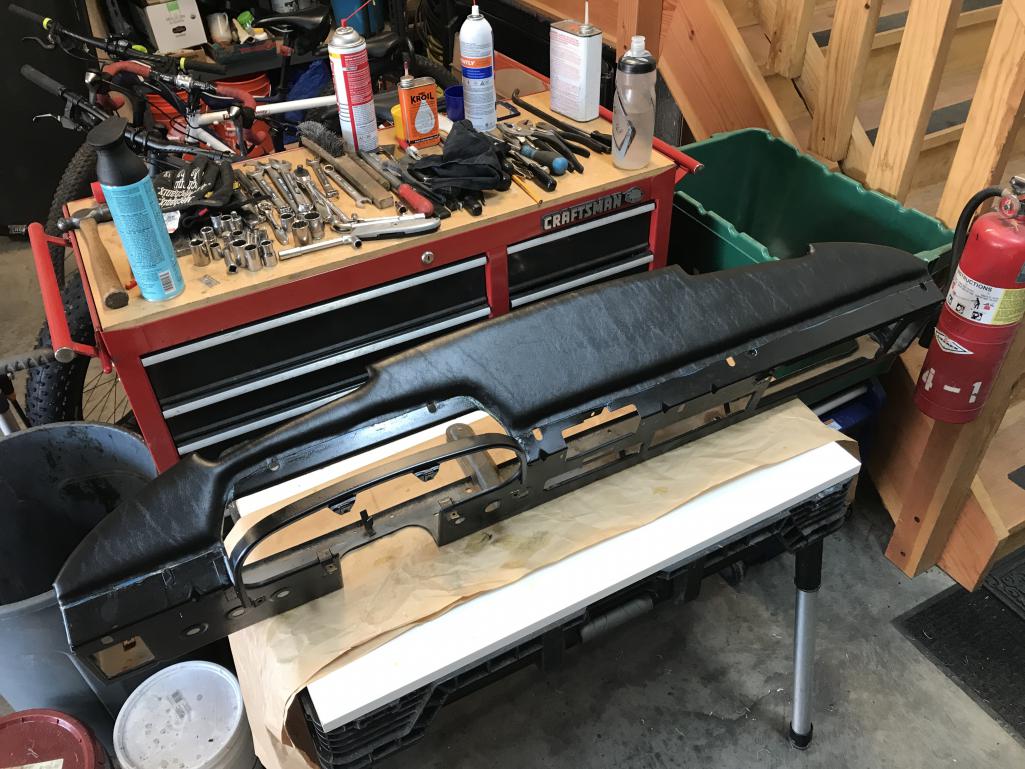
|
|
|
|
| bkrantz |
Mar 8 2021, 08:32 PM
Post
#2352
|
|
914 Guru Group: Members Posts: 8,154 Joined: 3-August 19 From: SW Colorado Member No.: 23,343 Region Association: Rocky Mountains |
Next step on the dash: installing the front plate. I used 3M high strength double-sided auto adhesive tape.
Attached thumbnail(s) 
|
|
|
|
| bkrantz |
Mar 8 2021, 08:33 PM
Post
#2353
|
|
914 Guru Group: Members Posts: 8,154 Joined: 3-August 19 From: SW Colorado Member No.: 23,343 Region Association: Rocky Mountains |
Stuck on, located by the holes for switches, etc.
Attached thumbnail(s) 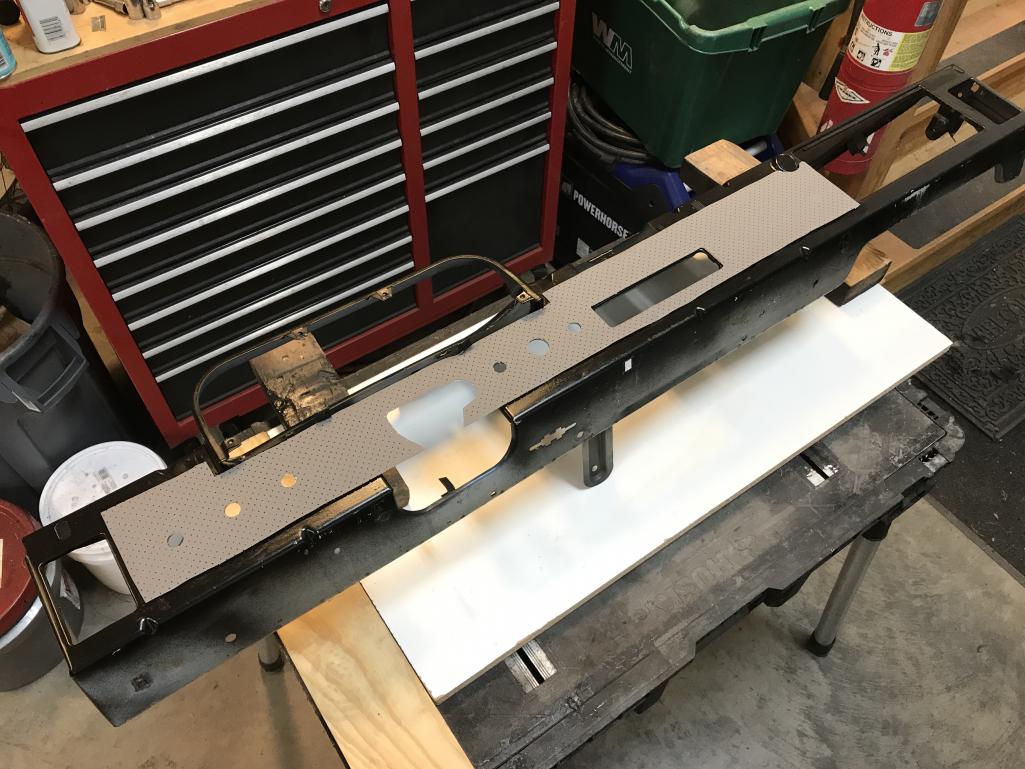
|
|
|
|
| bkrantz |
Mar 8 2021, 08:34 PM
Post
#2354
|
|
914 Guru Group: Members Posts: 8,154 Joined: 3-August 19 From: SW Colorado Member No.: 23,343 Region Association: Rocky Mountains |
Dash is starting to look like a dash.
Attached thumbnail(s) 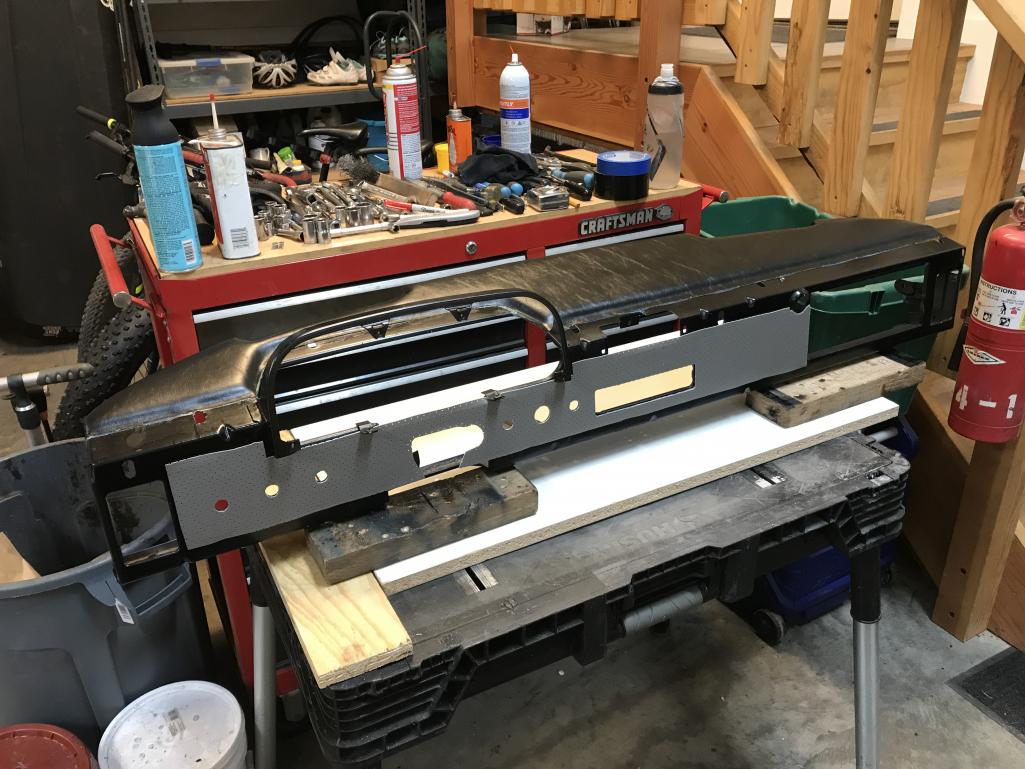
|
|
|
|
| bkrantz |
Mar 8 2021, 08:36 PM
Post
#2355
|
|
914 Guru Group: Members Posts: 8,154 Joined: 3-August 19 From: SW Colorado Member No.: 23,343 Region Association: Rocky Mountains |
I pulled out the original glove box. Its in pretty good shape, including the inner flocking, but has a bit of a bow along the front edge.
Attached thumbnail(s) 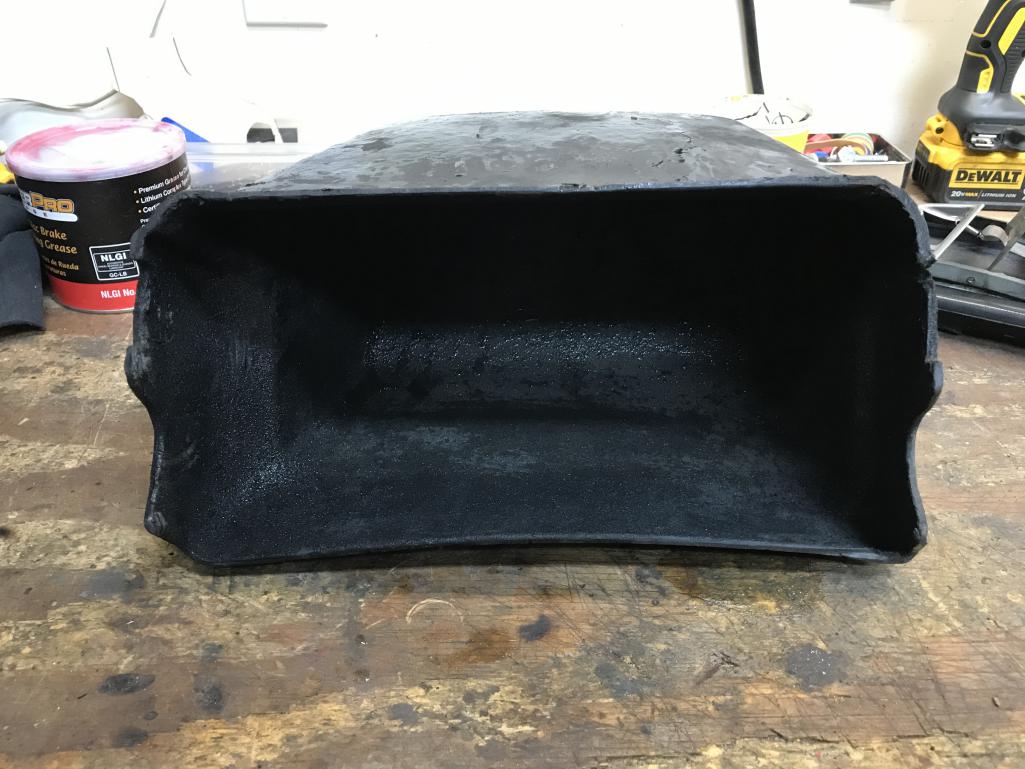
|
|
|
|
| bkrantz |
Mar 8 2021, 08:37 PM
Post
#2356
|
|
914 Guru Group: Members Posts: 8,154 Joined: 3-August 19 From: SW Colorado Member No.: 23,343 Region Association: Rocky Mountains |
I let the fiberboard soak and absorb some water, and then clamped the bowed edge--I hope it dries straight.
Attached thumbnail(s) 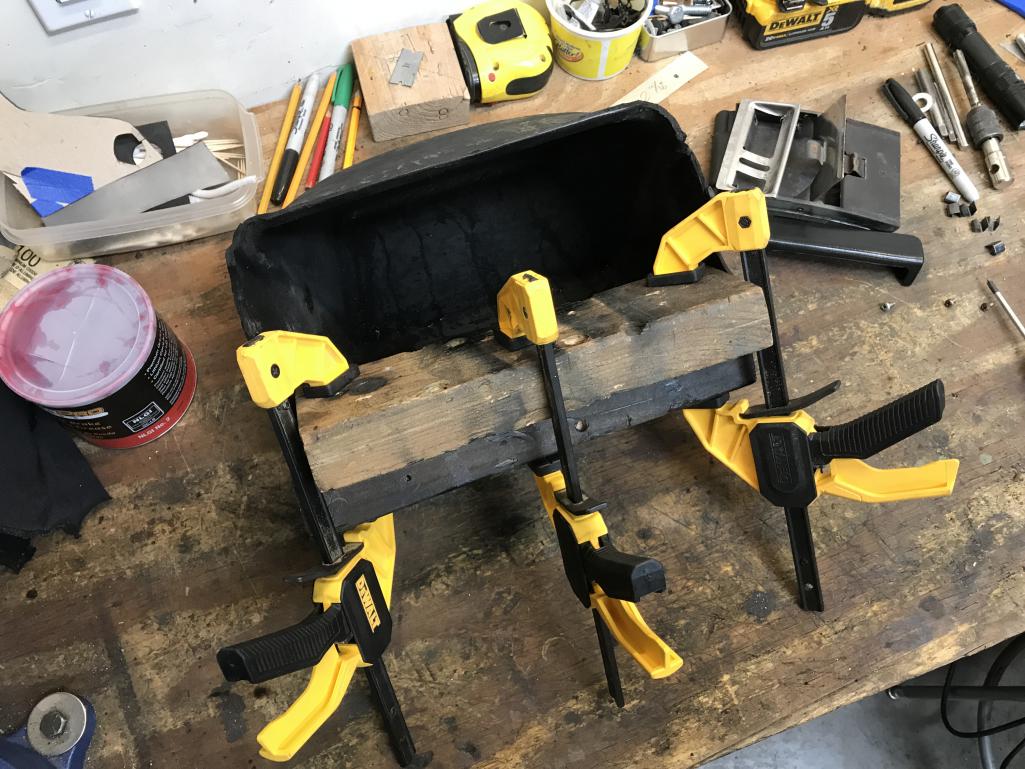
|
|
|
|
| djway |
Mar 8 2021, 10:05 PM
Post
#2357
|
|
Senior Member Group: Members Posts: 787 Joined: 16-October 15 From: Riverside Member No.: 19,266 Region Association: Southern California |
QUOTE(bkrantz @ Mar 8 2021, 06:37 PM)  I let the fiberboard soak and absorb some water, and then clamped the bowed edge--I hope it dries straight. I did one by holding it over a steaming pot of soup (IMG:style_emoticons/default/blink.gif) |
|
|
|
| gereed75 |
Mar 8 2021, 10:08 PM
Post
#2358
|
|
Senior Member Group: Members Posts: 1,311 Joined: 19-March 13 From: Pittsburgh PA Member No.: 15,674 Region Association: North East States |
I have thought of the thinned penetrating epoxies as a means of repairing fiberboard. They are designed to repair dry rotted wood by soaking in and then setting.
Seems would work on fiber board also. Get Rot is a brand name Among others https://www.amazon.com/Boat-Git-Rot-Penetra...998&sr=8-30 Have planned to use it to repair/re-enforce my back pad when I get around to it. Anyone have any experience with it? |
|
|
|
| bkrantz |
Mar 9 2021, 08:54 PM
Post
#2359
|
|
914 Guru Group: Members Posts: 8,154 Joined: 3-August 19 From: SW Colorado Member No.: 23,343 Region Association: Rocky Mountains |
QUOTE(djway @ Mar 8 2021, 09:05 PM) QUOTE(bkrantz @ Mar 8 2021, 06:37 PM) I let the fiberboard soak and absorb some water, and then clamped the bowed edge--I hope it dries straight. I did one by holding it over a steaming pot of soup (IMG:style_emoticons/default/blink.gif) Come on, you have to be more specific--what kind of soup? |
|
|
|
| djway |
Mar 9 2021, 10:37 PM
Post
#2360
|
|
Senior Member Group: Members Posts: 787 Joined: 16-October 15 From: Riverside Member No.: 19,266 Region Association: Southern California |
QUOTE(bkrantz @ Mar 9 2021, 06:54 PM) QUOTE(djway @ Mar 8 2021, 09:05 PM) QUOTE(bkrantz @ Mar 8 2021, 06:37 PM) I let the fiberboard soak and absorb some water, and then clamped the bowed edge--I hope it dries straight. I did one by holding it over a steaming pot of soup (IMG:style_emoticons/default/blink.gif) Come on, you have to be more specific--what kind of soup? Large pot homemade garden vegetable. (IMG:style_emoticons/default/chowtime.gif) |
|
|
|
|
3 User(s) are reading this topic (3 Guests and 0 Anonymous Users)
0 Members:

|
Lo-Fi Version | Time is now: 29th November 2024 - 01:50 PM |
Invision Power Board
v9.1.4 © 2024 IPS, Inc.