|
|
|
Porsche, and the Porsche crest are registered trademarks of Dr. Ing. h.c. F. Porsche AG.
This site is not affiliated with Porsche in any way. Its only purpose is to provide an online forum for car enthusiasts. All other trademarks are property of their respective owners. |
|
|

  |

| bbrock |
 Mar 9 2021, 10:59 PM Mar 9 2021, 10:59 PM
Post
#2361
|
|
914 Guru  Group: Members Posts: 5,269 Joined: 17-February 17 From: Montana Member No.: 20,845 Region Association: Rocky Mountains |
QUOTE(gereed75 @ Mar 8 2021, 09:08 PM)  I have thought of the thinned penetrating epoxies as a means of repairing fiberboard. They are designed to repair dry rotted wood by soaking in and then setting. Seems would work on fiber board also. Get Rot is a brand name Among others https://www.amazon.com/Boat-Git-Rot-Penetra...998&sr=8-30 Have planned to use it to repair/re-enforce my back pad when I get around to it. Anyone have any experience with it? I've used old fashioned wood glue to reinforce and repair the fiber board. For areas that are intact but floppy, I spritzed down the area to dampen with water and then painted over with wood glue to sort of dissolve int the dampness and soak into the fibers. To repair areas where chunks of fiber have come off but I still have them, I used the same technique but reinforced the repair with torn strips of brown paper applied like paper mache on both sides of the board. I then laid wax paper over the repair and clamped to hold the shape until dry. Worked great. I also straightened my glove box using the same process a bkrantz. Also works great but I guess I missed out on the soup going that route. |
   |

 
|
| gereed75 |
Mar 10 2021, 07:48 AM
Post
#2362
|
|
Senior Member Group: Members Posts: 1,311 Joined: 19-March 13 From: Pittsburgh PA Member No.: 15,674 Region Association: North East States |
[/quote] I’ve used old fashioned wood glue to reinforce and repair the fiber board. For areas that are intact but floppy, I spritzed down the area to dampen with water and then painted over with wood glue to sort of dissolve int the dampness and soak into the fibers. To repair areas where chunks of fiber have come off but I still have them, I used the same technique but reinforced the repair with torn strips of brown paper applied like paper mache on both sides of the board. I then laid wax paper over the repair and clamped to hold the shape until dry. Worked great.
I also straightened my glove box using the same process a bkrantz. Also works great but I guess I missed out on the soup going that route. [/quote] That is a great idea. I think the trick is to get the adhesive of choice to soak into the fiberboard. Any similar paper, like a brown paper bag, would supply the reinforcing fibers Basically a composite structure - fiber elements embedded in a bonding matrix. Not that it matters, but I wonder what the original adhesive used in fiberboard was? I’ll File the wood glue one away in the memory bank for future use! |
|
|
|
| bkrantz |
Mar 10 2021, 08:25 PM
Post
#2363
|
|
914 Guru Group: Members Posts: 8,154 Joined: 3-August 19 From: SW Colorado Member No.: 23,343 Region Association: Rocky Mountains |
Well, here's my glove box after drying in the clamps. Pretty straight. And since it only had a few small cracks, I will not try any glue or resin (for now).
Attached thumbnail(s) 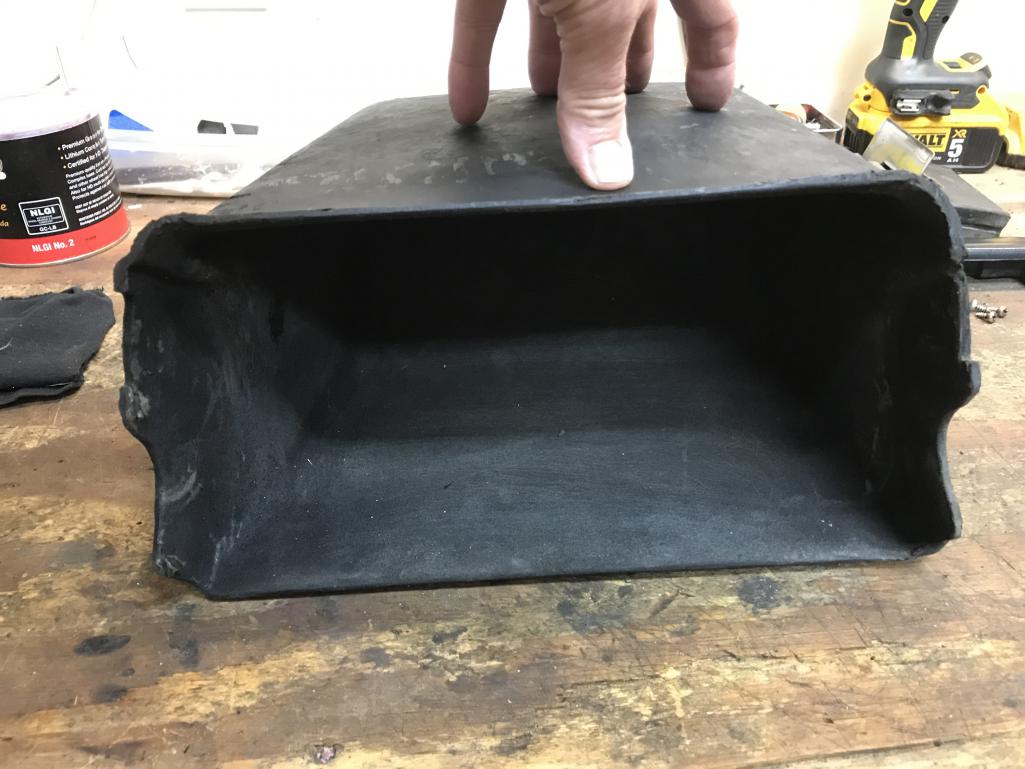
|
|
|
|
| bkrantz |
Mar 10 2021, 08:27 PM
Post
#2364
|
|
914 Guru Group: Members Posts: 8,154 Joined: 3-August 19 From: SW Colorado Member No.: 23,343 Region Association: Rocky Mountains |
Before I started working on the dash, I installed the "new" reflector panel I got from KevinW for the right tail light. Thanks again, Kevin.
Attached thumbnail(s) 
|
|
|
|
| bkrantz |
Mar 10 2021, 08:29 PM
Post
#2365
|
|
914 Guru Group: Members Posts: 8,154 Joined: 3-August 19 From: SW Colorado Member No.: 23,343 Region Association: Rocky Mountains |
After cleaning up the old glue and a bit of sanding to smooth out the mounting tabs, I glued it in place. Tail lights are now complete, except for LED bulbs.
Attached thumbnail(s) 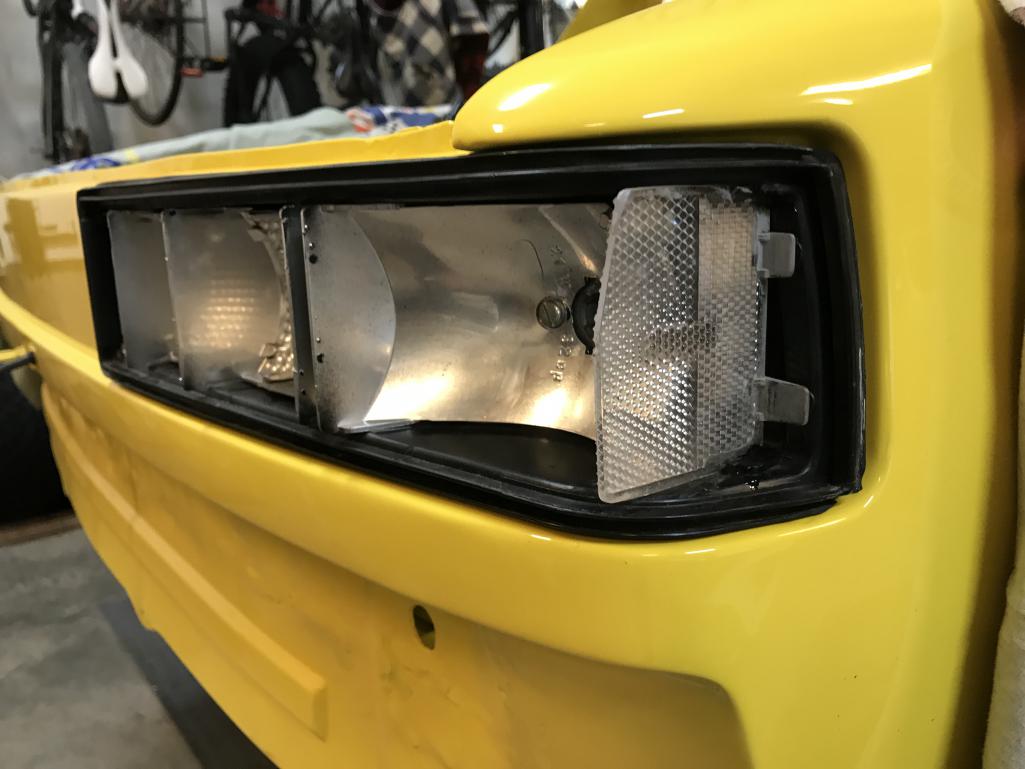
|
|
|
|
| bkrantz |
Mar 10 2021, 08:30 PM
Post
#2366
|
|
914 Guru Group: Members Posts: 8,154 Joined: 3-August 19 From: SW Colorado Member No.: 23,343 Region Association: Rocky Mountains |
Now, on to the dash. Here are the pieces for the glove box lock, and the door handle.
Attached thumbnail(s) 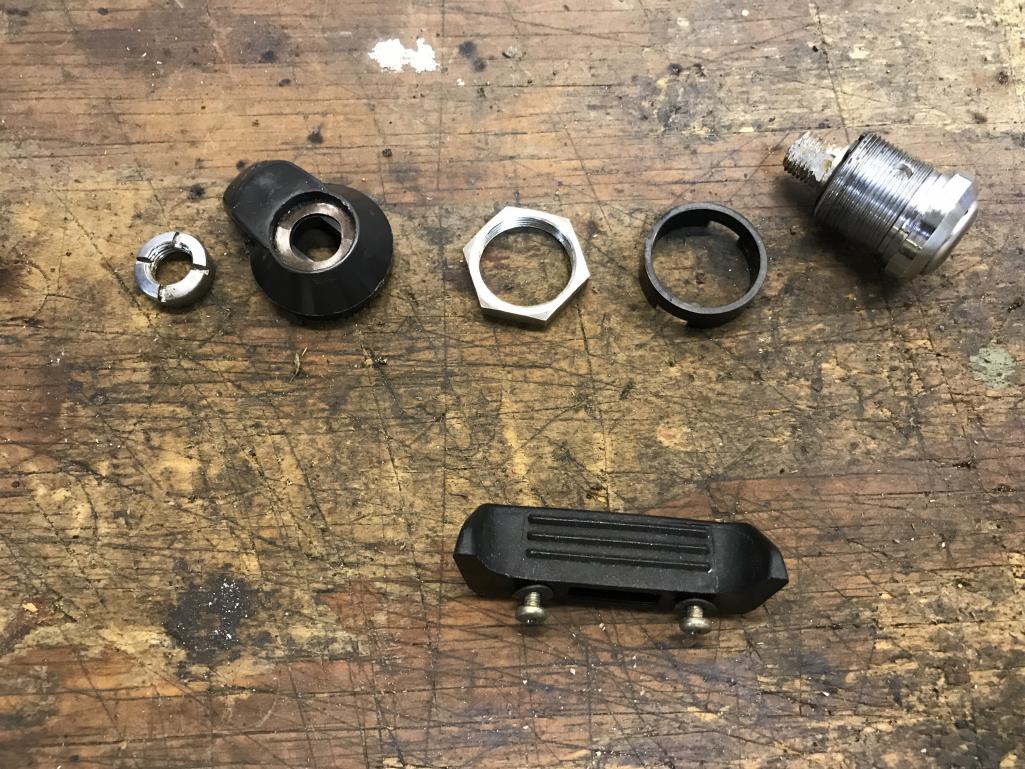
|
|
|
|
| bkrantz |
Mar 10 2021, 08:31 PM
Post
#2367
|
|
914 Guru Group: Members Posts: 8,154 Joined: 3-August 19 From: SW Colorado Member No.: 23,343 Region Association: Rocky Mountains |
Lock installed
Attached thumbnail(s) 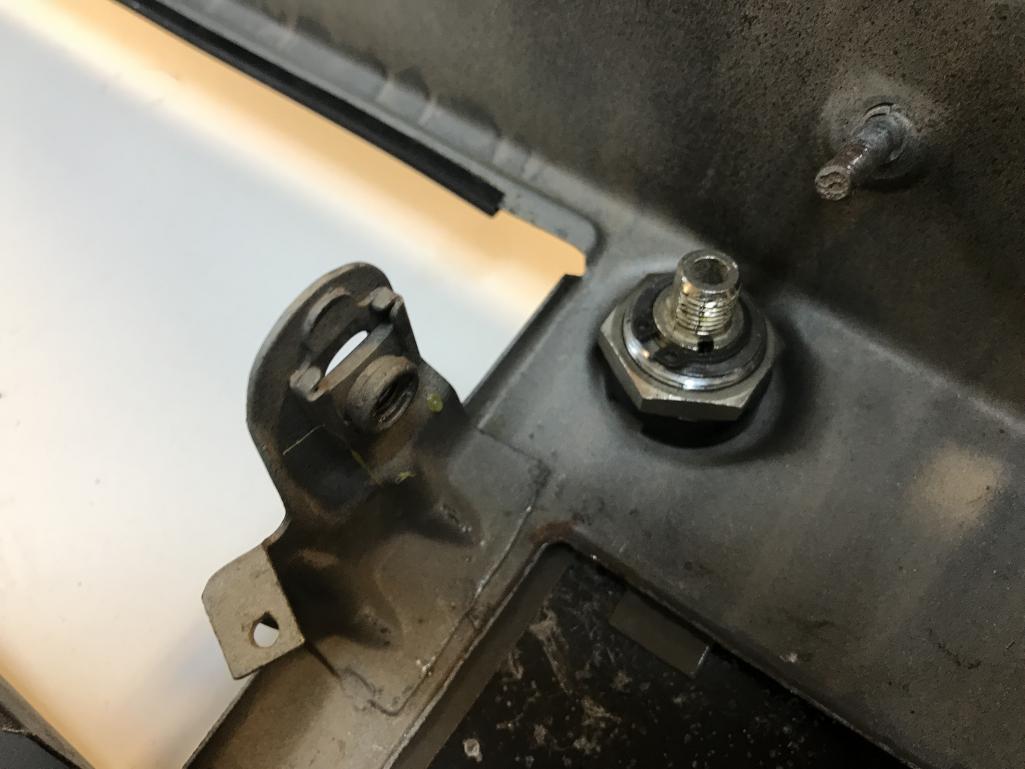
|
|
|
|
| bkrantz |
Mar 10 2021, 08:31 PM
Post
#2368
|
|
914 Guru Group: Members Posts: 8,154 Joined: 3-August 19 From: SW Colorado Member No.: 23,343 Region Association: Rocky Mountains |
Door with handle, and mounting hardware. The "original" pivot screws are a mixed pair, so I dug into my hardware stash for some that match.
Attached thumbnail(s) 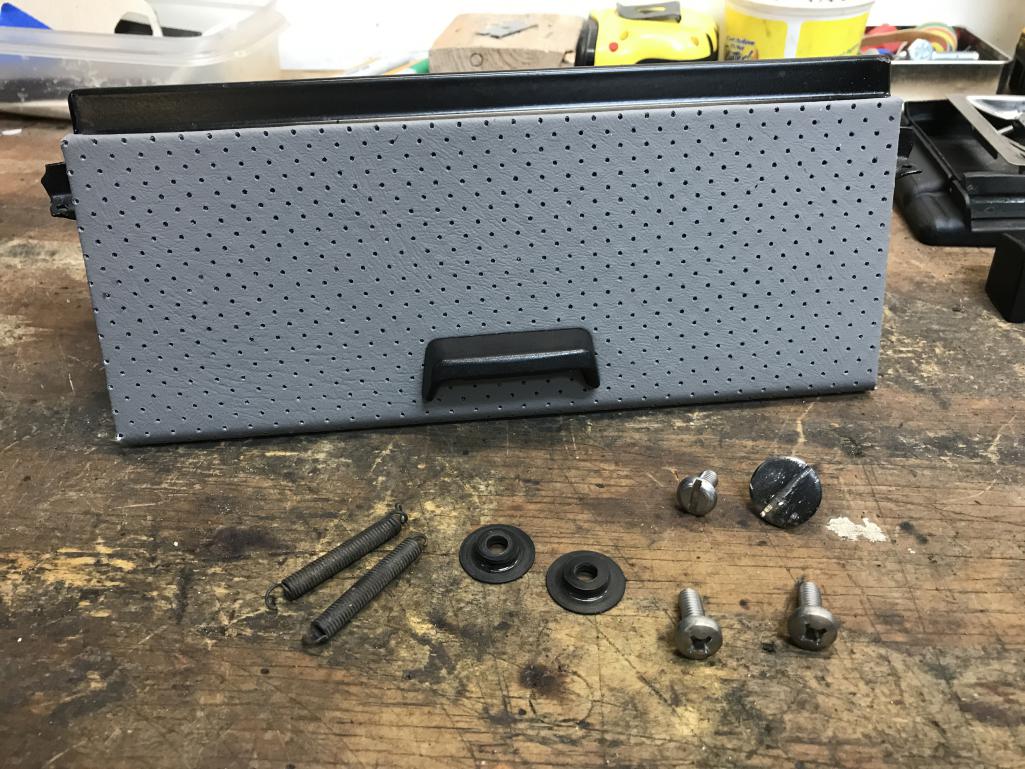
|
|
|
|
| bkrantz |
Mar 10 2021, 08:34 PM
Post
#2369
|
|
914 Guru Group: Members Posts: 8,154 Joined: 3-August 19 From: SW Colorado Member No.: 23,343 Region Association: Rocky Mountains |
Here's the door installed. Much easier with the dash on the work table.
Attached thumbnail(s) 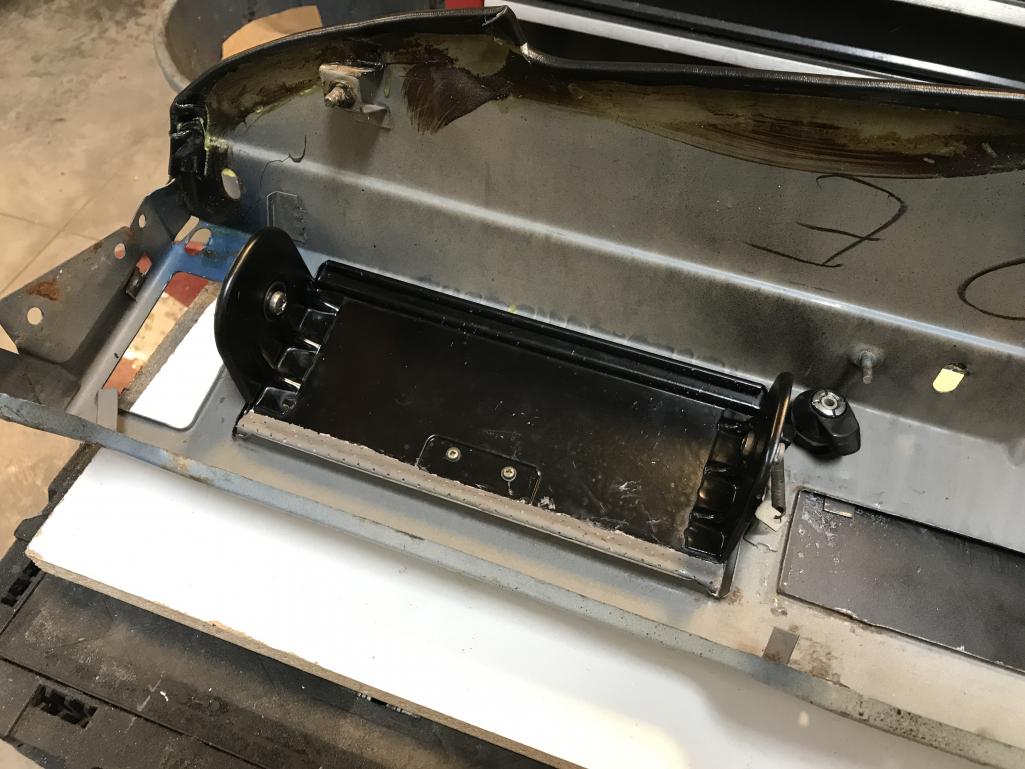
|
|
|
|
| bkrantz |
Mar 10 2021, 08:35 PM
Post
#2370
|
|
914 Guru Group: Members Posts: 8,154 Joined: 3-August 19 From: SW Colorado Member No.: 23,343 Region Association: Rocky Mountains |
Viewed from the outside--looks even.
Attached thumbnail(s) 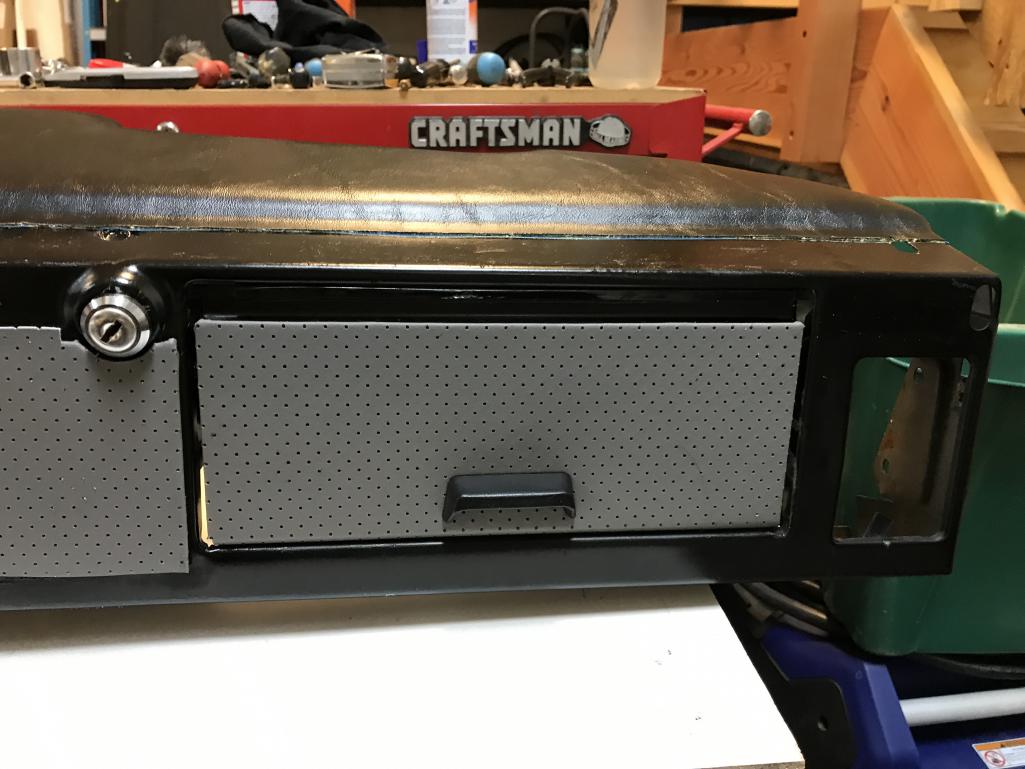
|
|
|
|
| bkrantz |
Mar 10 2021, 08:35 PM
Post
#2371
|
|
914 Guru Group: Members Posts: 8,154 Joined: 3-August 19 From: SW Colorado Member No.: 23,343 Region Association: Rocky Mountains |
Also easier to install the actual box now.
Attached thumbnail(s) 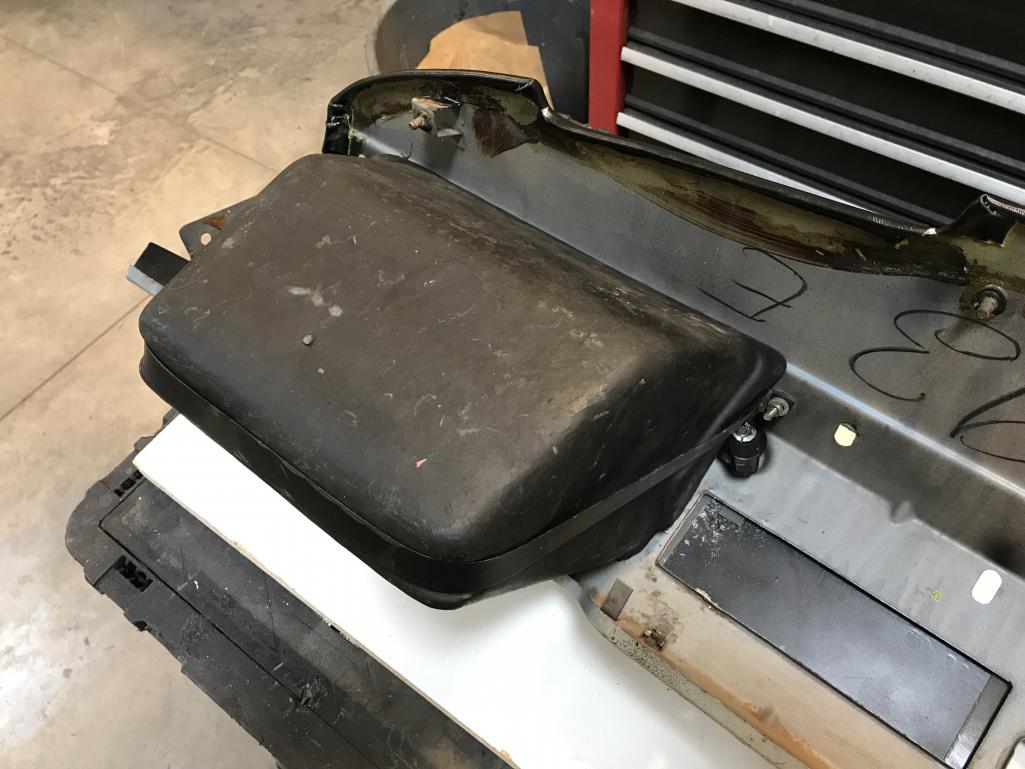
|
|
|
|
| bkrantz |
Mar 10 2021, 08:37 PM
Post
#2372
|
|
914 Guru Group: Members Posts: 8,154 Joined: 3-August 19 From: SW Colorado Member No.: 23,343 Region Association: Rocky Mountains |
OK, time for the 914 Rubber replacement dash top. Again, I think I prefer to install this before mounting the dash in the car, or at least see how everything fits.
Attached thumbnail(s) 
|
|
|
|
| bkrantz |
Mar 10 2021, 08:39 PM
Post
#2373
|
|
914 Guru Group: Members Posts: 8,154 Joined: 3-August 19 From: SW Colorado Member No.: 23,343 Region Association: Rocky Mountains |
First fitting attempt. The nylon mounting studs across the top of the dash fit well, along with the center stud on the face edge, but the stud mounts on the left and right side are a bit off. Time to enlarge the holes just a bit.
Attached thumbnail(s) 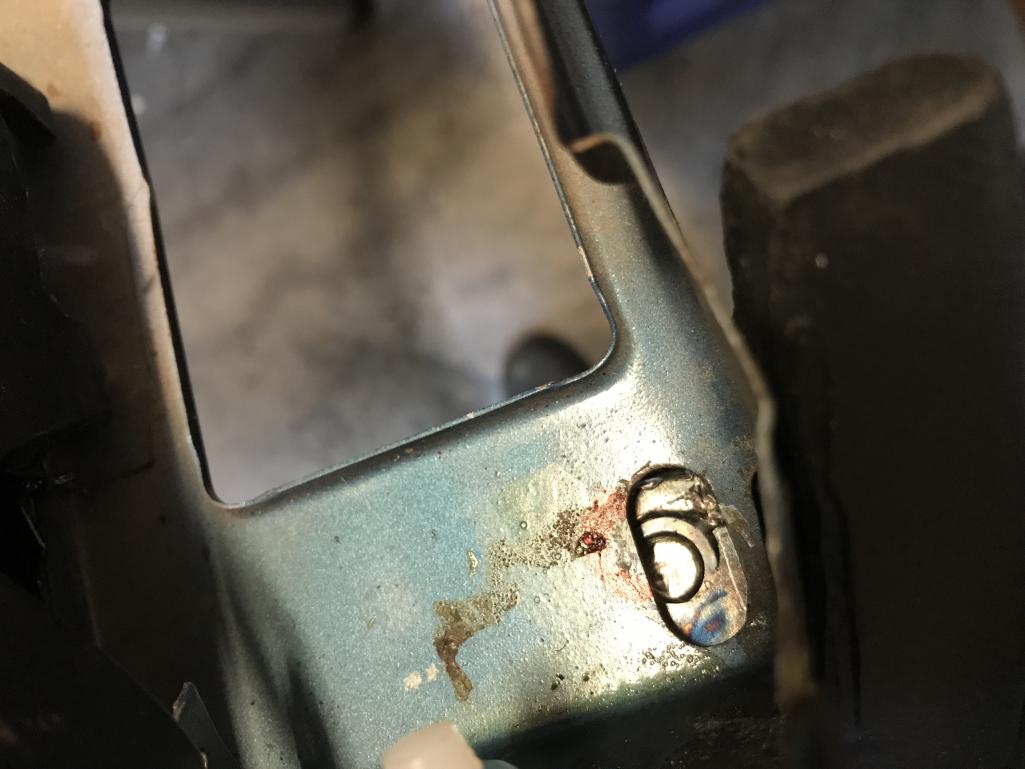
|
|
|
|
| bkrantz |
Mar 10 2021, 08:40 PM
Post
#2374
|
|
914 Guru Group: Members Posts: 8,154 Joined: 3-August 19 From: SW Colorado Member No.: 23,343 Region Association: Rocky Mountains |
I also realized that the ash tray bracket has to go on before the dash top.
Attached thumbnail(s) 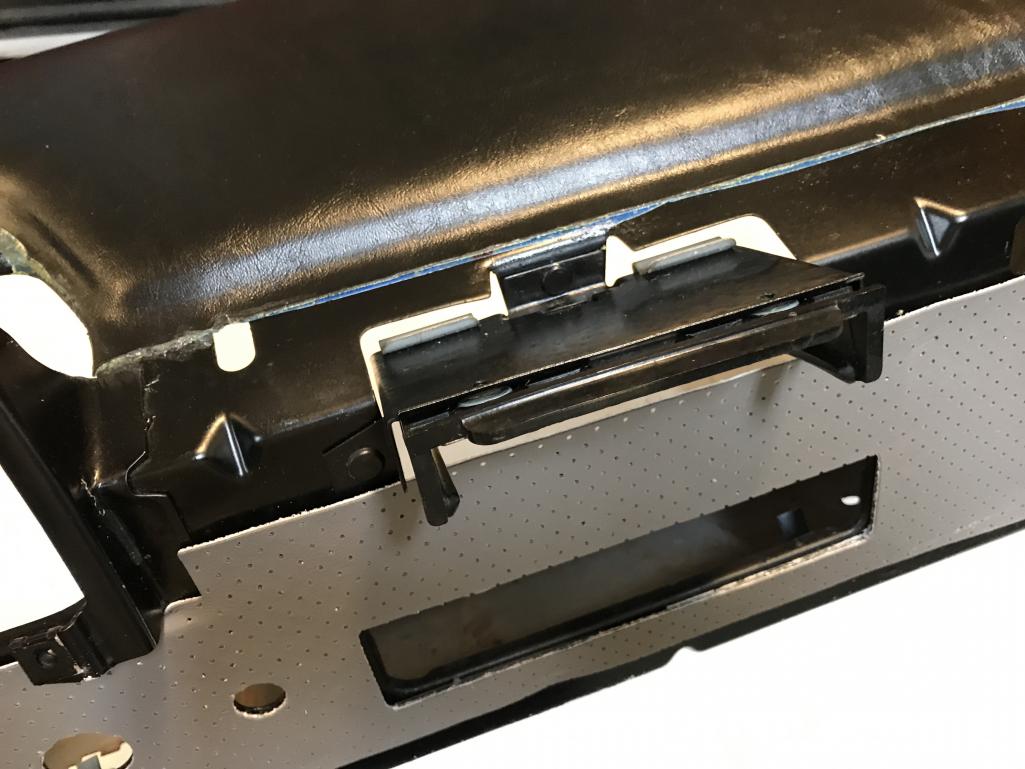
|
|
|
|
| bkrantz |
Mar 10 2021, 08:41 PM
Post
#2375
|
|
914 Guru Group: Members Posts: 8,154 Joined: 3-August 19 From: SW Colorado Member No.: 23,343 Region Association: Rocky Mountains |
Fitting attempt number two. All the studs and holes now line up, and the front looks good.
Attached thumbnail(s) 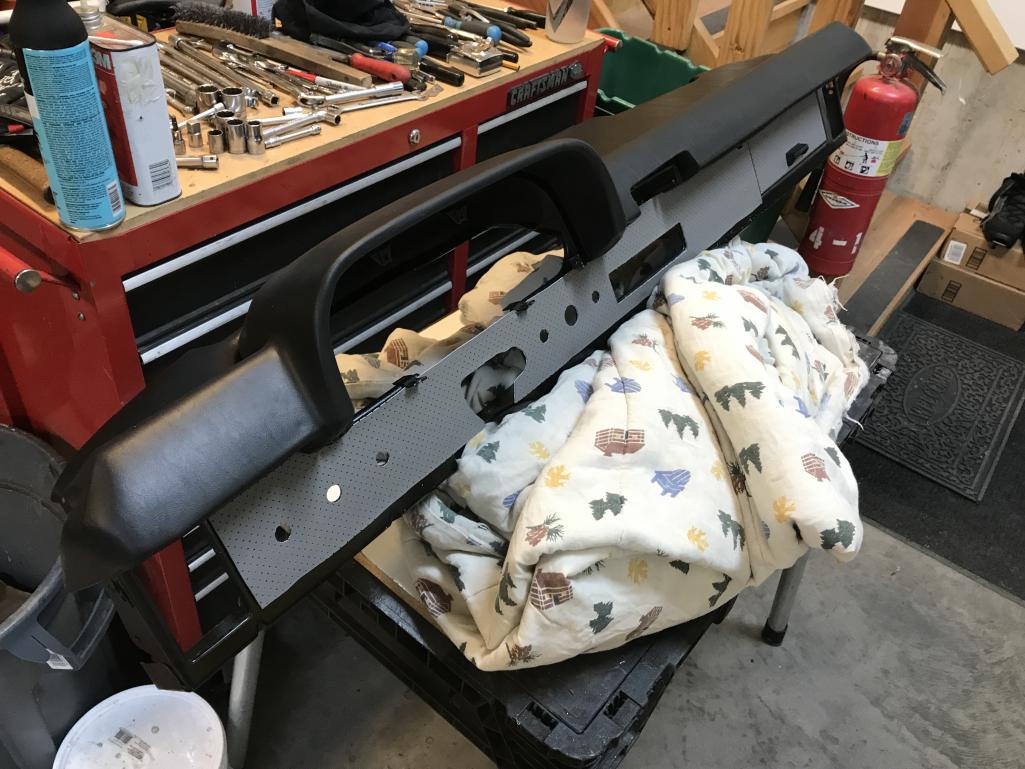
|
|
|
|
| bkrantz |
Mar 10 2021, 08:42 PM
Post
#2376
|
|
914 Guru Group: Members Posts: 8,154 Joined: 3-August 19 From: SW Colorado Member No.: 23,343 Region Association: Rocky Mountains |
The windshield side is not bad, but a few spots are less than great.
Attached thumbnail(s) 
|
|
|
|
| bkrantz |
Mar 10 2021, 08:46 PM
Post
#2377
|
|
914 Guru Group: Members Posts: 8,154 Joined: 3-August 19 From: SW Colorado Member No.: 23,343 Region Association: Rocky Mountains |
The match between the top and the new padded vinyl is good along the straight segments on right and left.
Attached thumbnail(s) 
|
|
|
|
| bkrantz |
Mar 10 2021, 08:47 PM
Post
#2378
|
|
914 Guru Group: Members Posts: 8,154 Joined: 3-August 19 From: SW Colorado Member No.: 23,343 Region Association: Rocky Mountains |
But along the instrument cowl, the gap is a bit large and shows the edge of the dash top, which is a little rough.
Attached thumbnail(s) 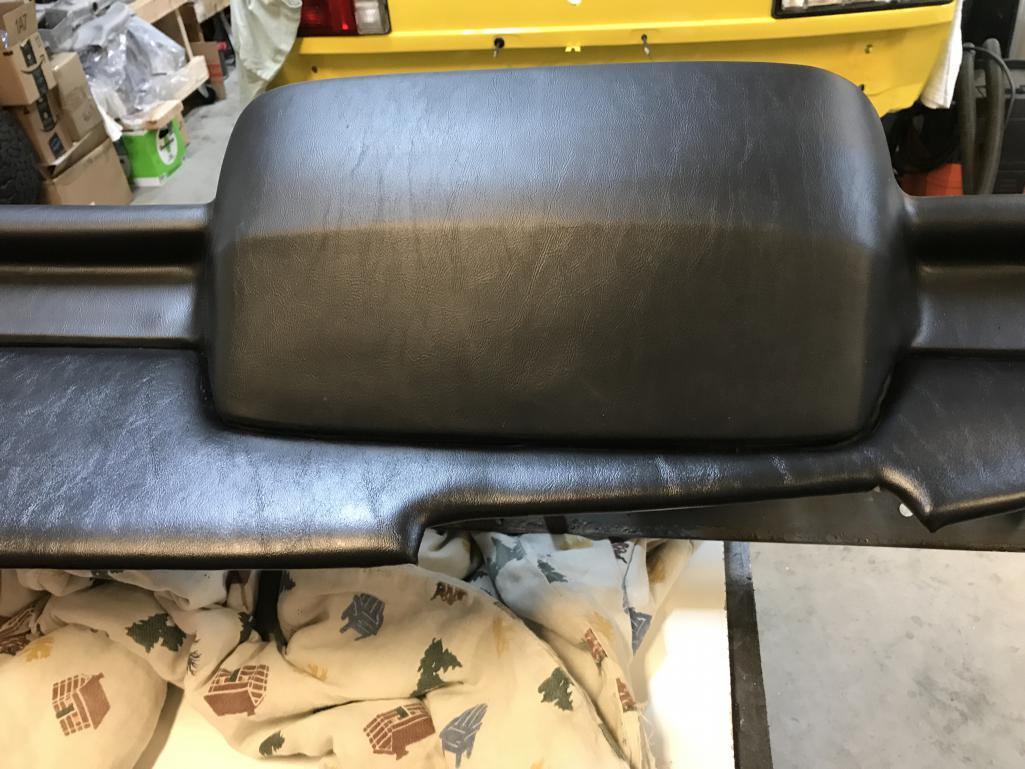
|
|
|
|
| bkrantz |
Mar 10 2021, 08:48 PM
Post
#2379
|
|
914 Guru Group: Members Posts: 8,154 Joined: 3-August 19 From: SW Colorado Member No.: 23,343 Region Association: Rocky Mountains |
The biggest gap is on the sides of the cowl. I have a few ideas to fix this.
Attached thumbnail(s) 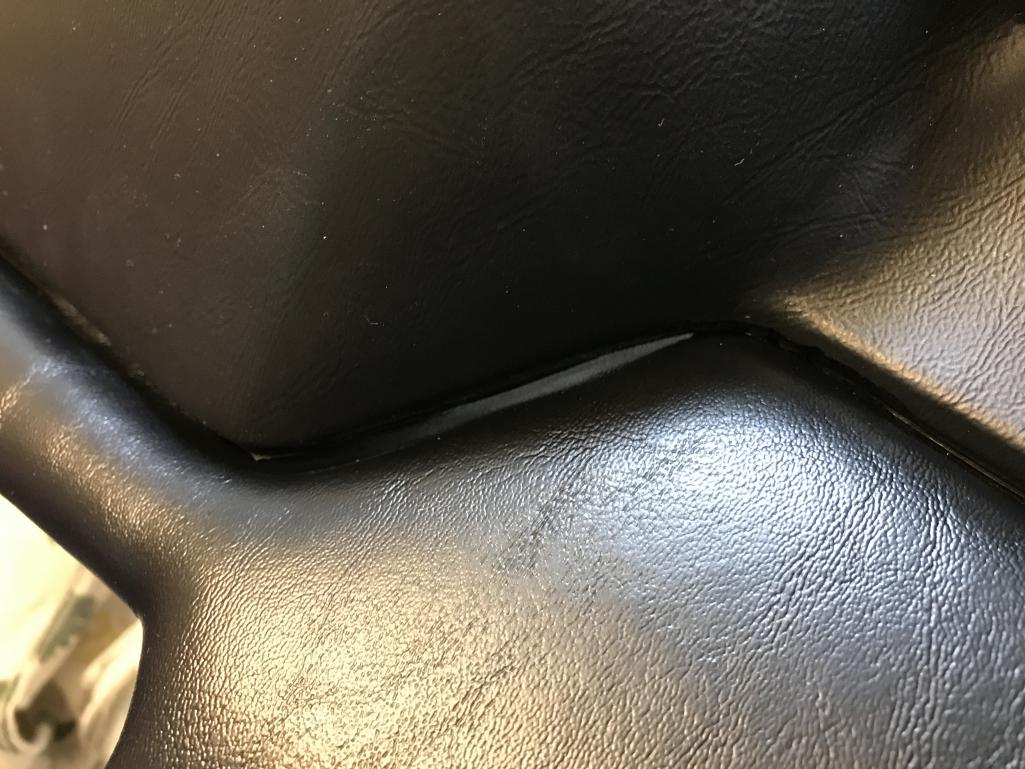
|
|
|
|
| bkrantz |
Mar 10 2021, 08:51 PM
Post
#2380
|
|
914 Guru Group: Members Posts: 8,154 Joined: 3-August 19 From: SW Colorado Member No.: 23,343 Region Association: Rocky Mountains |
Just for fun, and to check the fit, I installed the bottom dash knee bolster.
Attached thumbnail(s) 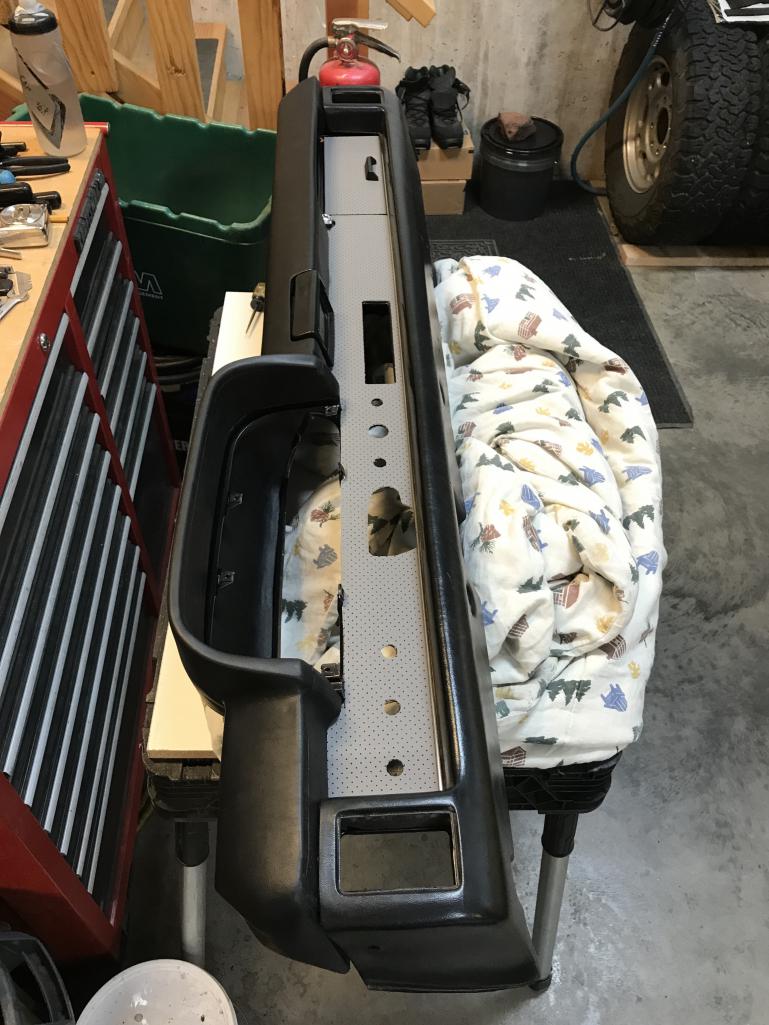
|
|
|
|
|
2 User(s) are reading this topic (2 Guests and 0 Anonymous Users)
0 Members:

|
Lo-Fi Version | Time is now: 29th November 2024 - 03:42 PM |
Invision Power Board
v9.1.4 © 2024 IPS, Inc.