|
|
|
Porsche, and the Porsche crest are registered trademarks of Dr. Ing. h.c. F. Porsche AG.
This site is not affiliated with Porsche in any way. Its only purpose is to provide an online forum for car enthusiasts. All other trademarks are property of their respective owners. |
|
|

  |

| bkrantz |
 Mar 10 2021, 08:53 PM Mar 10 2021, 08:53 PM
Post
#2381
|
|
914 Guru  Group: Members Posts: 8,154 Joined: 3-August 19 From: SW Colorado Member No.: 23,343 Region Association: Rocky Mountains |
I know the lower bolster has to come off to install the dash, but I like seeing how the whole thing will look.
Attached thumbnail(s) 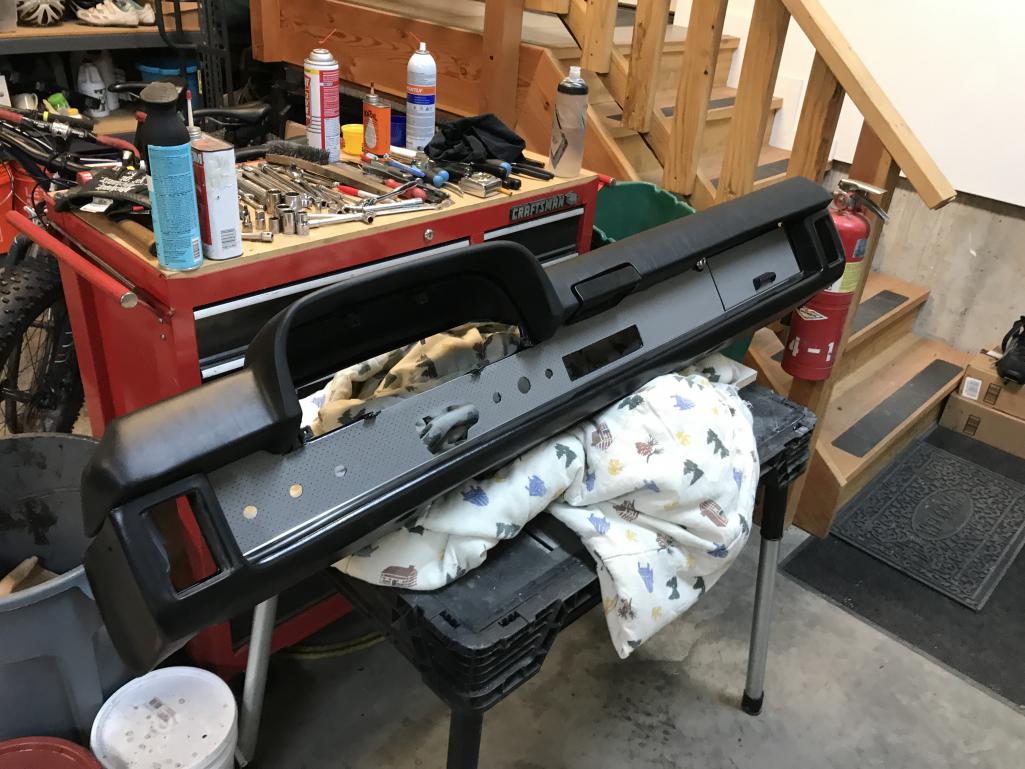
|
   |

 
|
| bkrantz |
Mar 10 2021, 08:54 PM
Post
#2382
|
|
914 Guru Group: Members Posts: 8,154 Joined: 3-August 19 From: SW Colorado Member No.: 23,343 Region Association: Rocky Mountains |
A few more things to deal with. The ash tray front is low, even with the bracket adjusted all the way up.
Attached thumbnail(s) 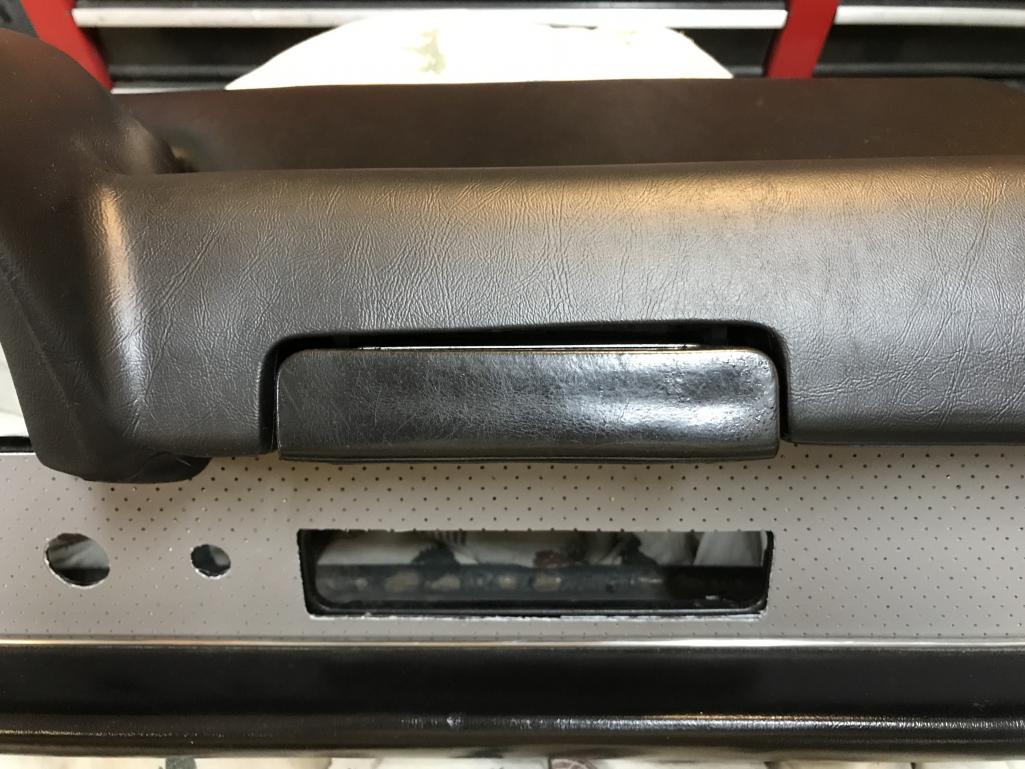
|
|
|
|
| bkrantz |
Mar 10 2021, 08:54 PM
Post
#2383
|
|
914 Guru Group: Members Posts: 8,154 Joined: 3-August 19 From: SW Colorado Member No.: 23,343 Region Association: Rocky Mountains |
And the side gaps are a bit big.
Attached thumbnail(s) 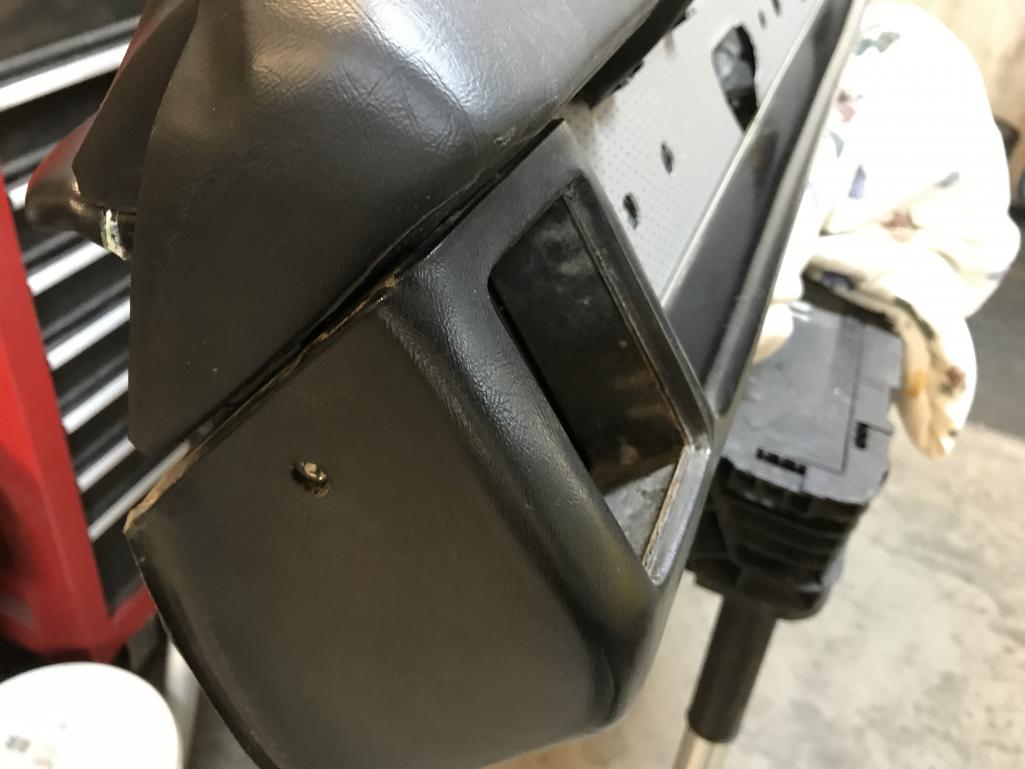
|
|
|
|
| raynekat |
Mar 10 2021, 09:49 PM
Post
#2384
|
|
Advanced Member Group: Members Posts: 2,164 Joined: 30-December 14 From: Coeur d'Alene, Idaho Member No.: 18,263 Region Association: Pacific Northwest |
QUOTE(bkrantz @ Mar 10 2021, 06:54 PM)  And the side gaps are a bit big. Compared to my gaps here.....yours look stellar. Wouldn't sweat it too much. |
|
|
|
| euro911 |
Mar 11 2021, 03:10 AM
Post
#2385
|
|
Retired & living the dream. God help me if I wake up! Group: Members Posts: 8,858 Joined: 2-December 06 From: So.Cal. & No.AZ (USA) Member No.: 7,300 Region Association: Southern California |
Looks great. After the fact, there's a re-flocking kit available for the glove box. I haven't done it (yet), but I've seen the results from some other members' applications and they turned out nice.
|
|
|
|
| bkrantz |
Mar 11 2021, 08:28 PM
Post
#2386
|
|
914 Guru Group: Members Posts: 8,154 Joined: 3-August 19 From: SW Colorado Member No.: 23,343 Region Association: Rocky Mountains |
QUOTE(raynekat @ Mar 10 2021, 08:49 PM) QUOTE(bkrantz @ Mar 10 2021, 06:54 PM) And the side gaps are a bit big. Compared to my gaps here.....yours look stellar. Wouldn't sweat it too much. Doug, I am way beyond being able to ignore things. (Help!) |
|
|
|
| bkrantz |
Mar 11 2021, 08:30 PM
Post
#2387
|
|
914 Guru Group: Members Posts: 8,154 Joined: 3-August 19 From: SW Colorado Member No.: 23,343 Region Association: Rocky Mountains |
Big day today--installing the dash. I got the top studs into their holes, and then bolted the underside bracket.
Attached thumbnail(s) 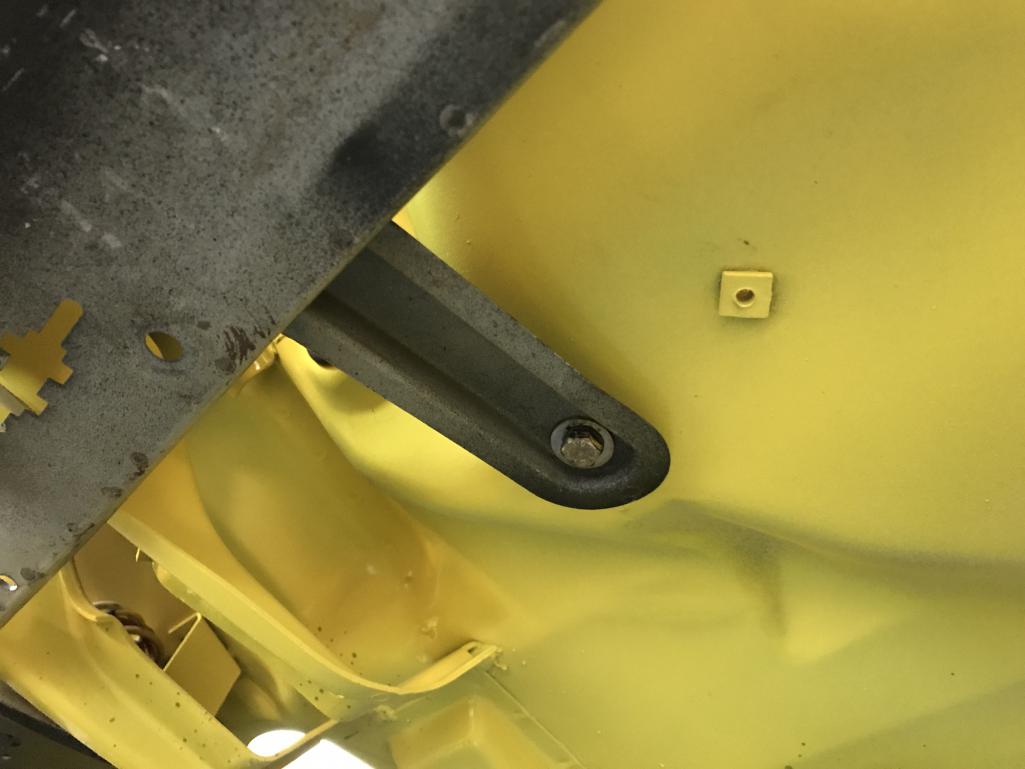
|
|
|
|
| bkrantz |
Mar 11 2021, 08:31 PM
Post
#2388
|
|
914 Guru Group: Members Posts: 8,154 Joined: 3-August 19 From: SW Colorado Member No.: 23,343 Region Association: Rocky Mountains |
Then the top studs, accessed from the frunk side.
Attached thumbnail(s) 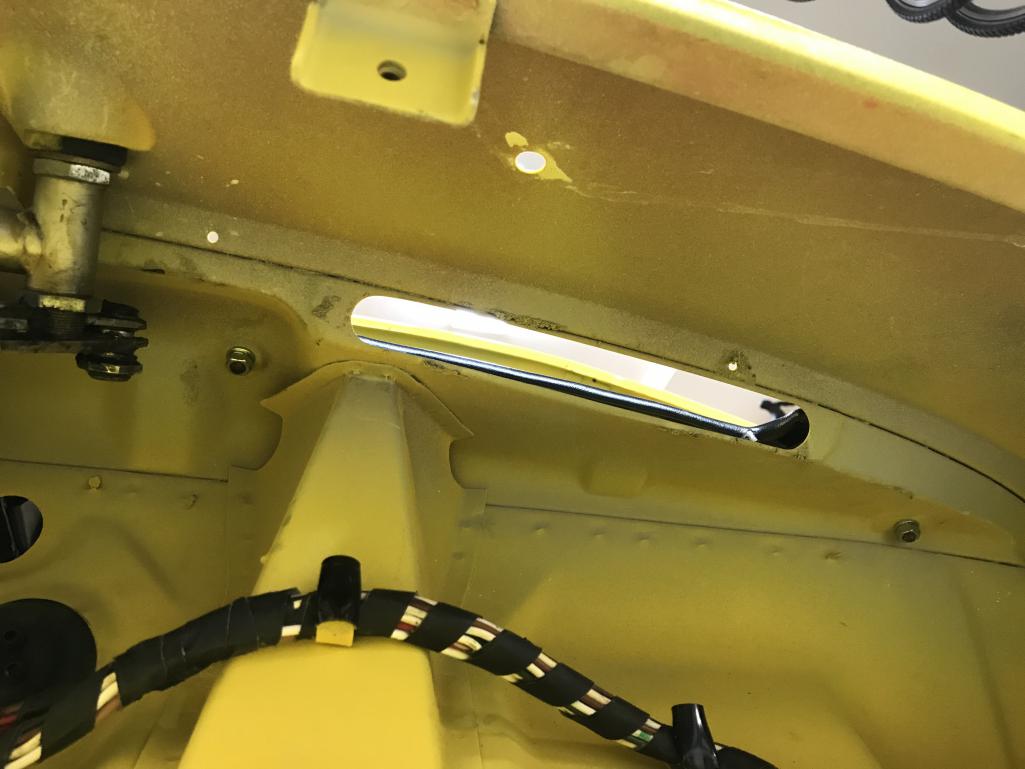
|
|
|
|
| bkrantz |
Mar 11 2021, 08:31 PM
Post
#2389
|
|
914 Guru Group: Members Posts: 8,154 Joined: 3-August 19 From: SW Colorado Member No.: 23,343 Region Association: Rocky Mountains |
Then the side screws.
Attached thumbnail(s) 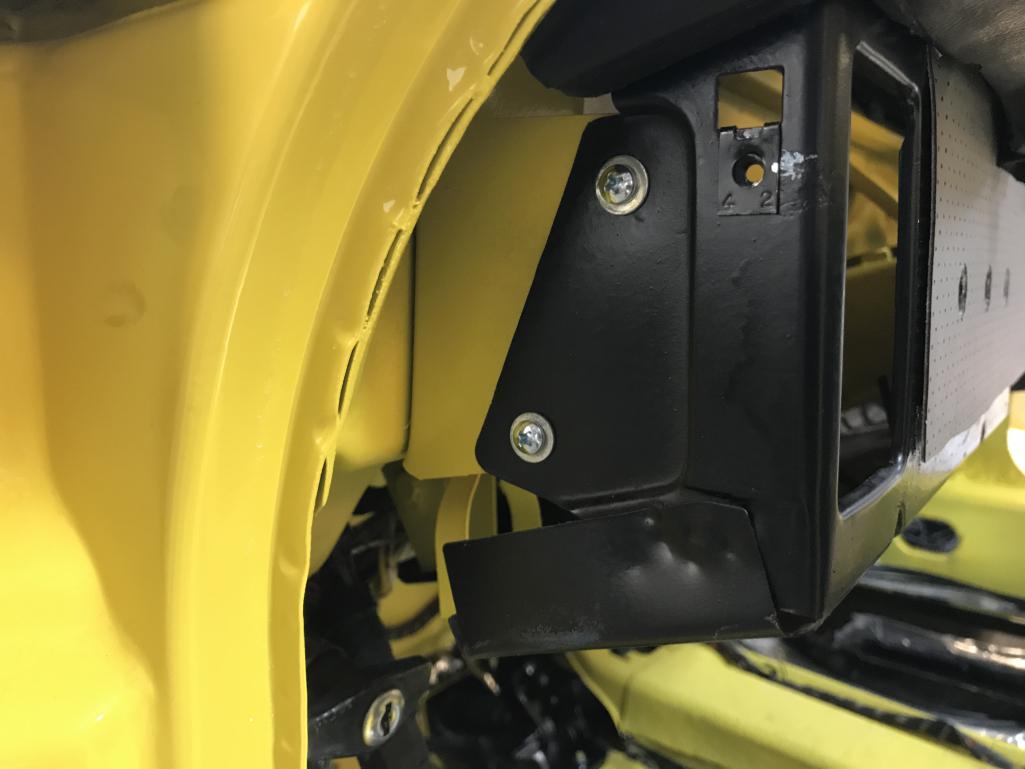
|
|
|
|
| bkrantz |
Mar 11 2021, 08:32 PM
Post
#2390
|
|
914 Guru Group: Members Posts: 8,154 Joined: 3-August 19 From: SW Colorado Member No.: 23,343 Region Association: Rocky Mountains |
And done! (I hope)
Attached thumbnail(s) 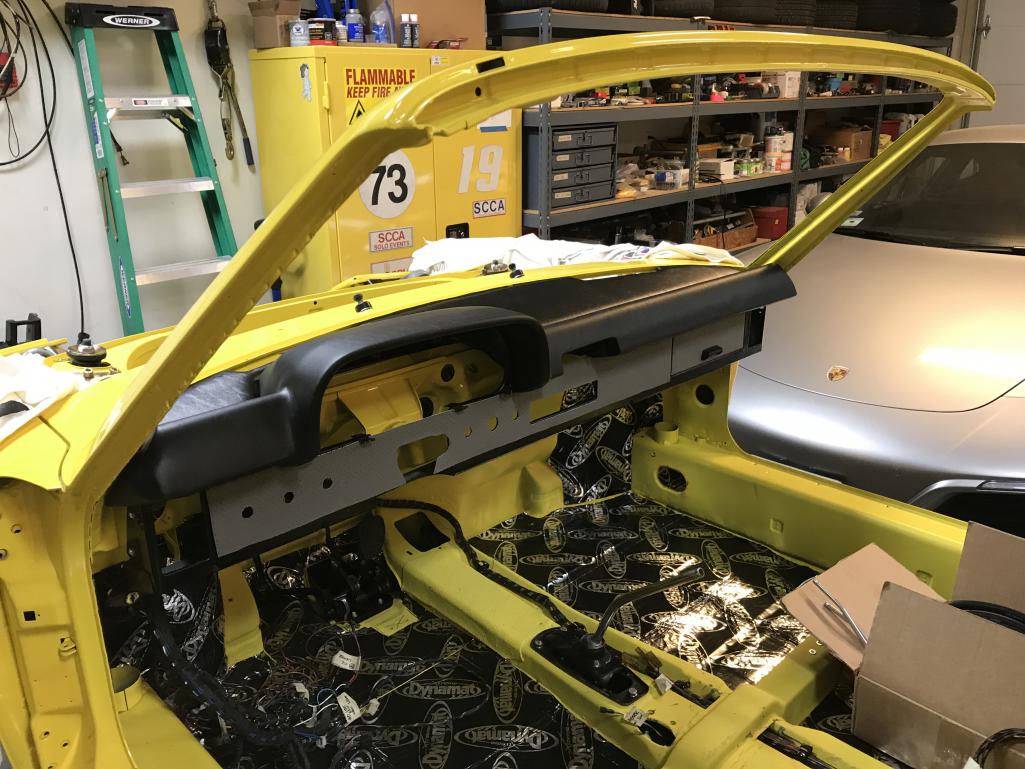
|
|
|
|
| bkrantz |
Mar 11 2021, 08:33 PM
Post
#2391
|
|
914 Guru Group: Members Posts: 8,154 Joined: 3-August 19 From: SW Colorado Member No.: 23,343 Region Association: Rocky Mountains |
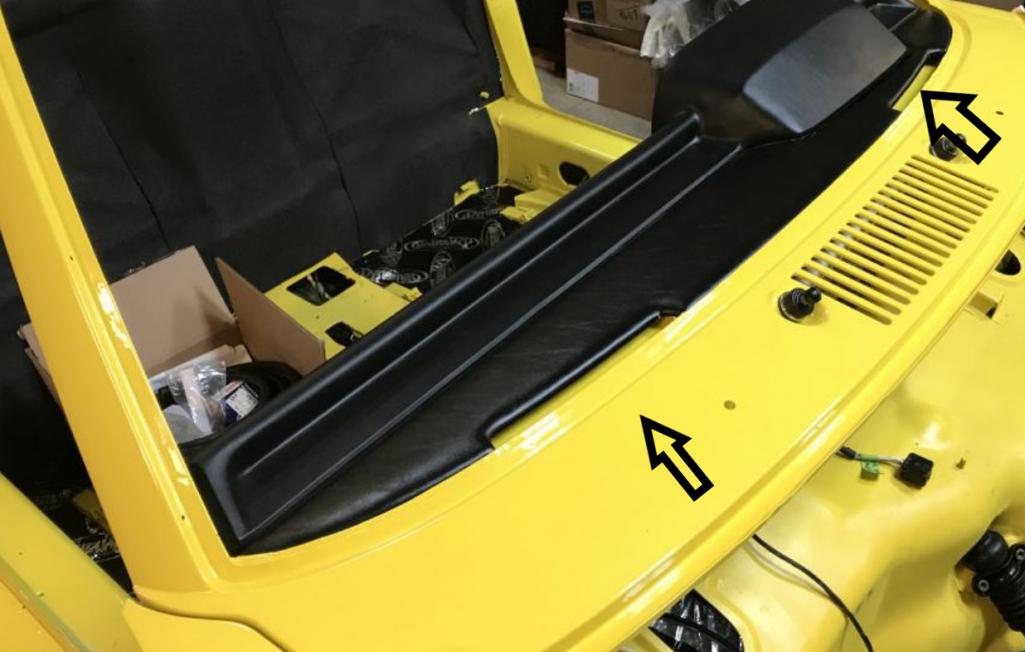
From the front. I still need to deal with the gap around the instrument cowl.
Attached thumbnail(s) 
|
|
|
|
| bkrantz |
Mar 11 2021, 08:34 PM
Post
#2392
|
|
914 Guru Group: Members Posts: 8,154 Joined: 3-August 19 From: SW Colorado Member No.: 23,343 Region Association: Rocky Mountains |
One more! I am excited since I have been waiting to get on with installing the blower, all the switches and gauges, and then testing the electrical system.
Attached thumbnail(s) 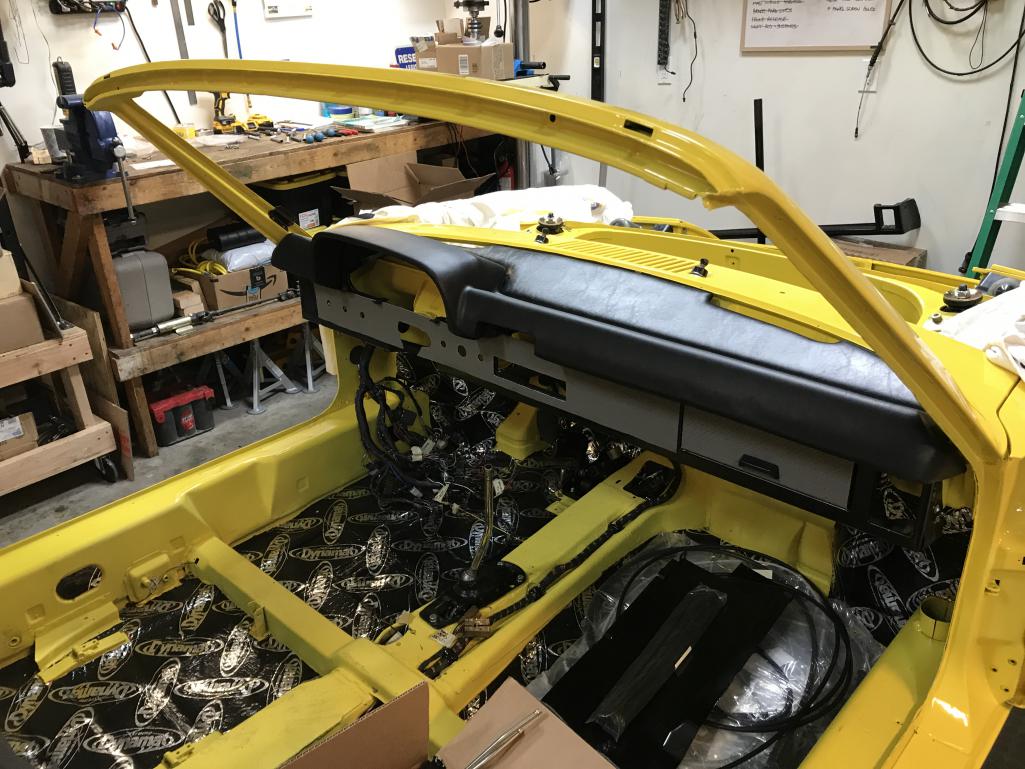
|
|
|
|
| ElCee |
Mar 12 2021, 02:20 AM
Post
#2393
|
|
Newbie Group: Members Posts: 6 Joined: 30-September 16 From: the Netherlands Member No.: 20,449 Region Association: None |
You better paint these two spots black.
 |
|
|
|
| NS914 |
Mar 12 2021, 09:03 AM
Post
#2394
|
|
Member Group: Members Posts: 198 Joined: 9-June 09 From: Dartmouth, Nova Scotia Member No.: 10,455 Region Association: Canada |
QUOTE(bkrantz @ Mar 11 2021, 10:33 PM) From the front. I still need to deal with the gap around the instrument cowl. Bob, your work and attention to detail is amazing...you like a number of other Teeners in our World are amazing! Thanks for posting such great images as well....you have me looking to remove my Muffler Shield and now and cleaning everything up underneath for sure. I will be sitting down over the weekend and likely longer to go back and read your whole thread! Much thanks, Grant |
|
|
|
| bkrantz |
Mar 12 2021, 08:23 PM
Post
#2395
|
|
914 Guru Group: Members Posts: 8,154 Joined: 3-August 19 From: SW Colorado Member No.: 23,343 Region Association: Rocky Mountains |
Thanks for the tip, ElCee.
And thanks, Grant. Glad to share. Most days taking photos as I work keeps me steady. |
|
|
|
| bkrantz |
Mar 12 2021, 08:26 PM
Post
#2396
|
|
914 Guru Group: Members Posts: 8,154 Joined: 3-August 19 From: SW Colorado Member No.: 23,343 Region Association: Rocky Mountains |
OK, add another error to my record. As I started to feed all the wiring across the inside of the dash, and install the pull switches left of the steering wheel, I found this. Can you figure out what I did wrong?
Attached thumbnail(s) 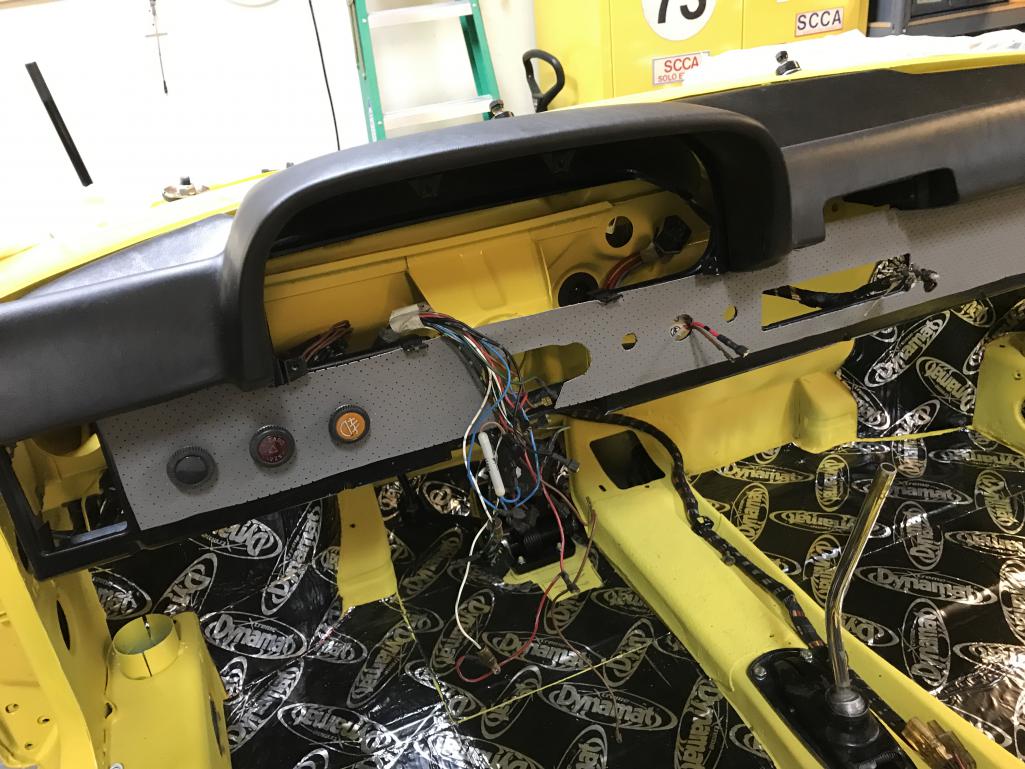
|
|
|
|
| bkrantz |
Mar 12 2021, 08:29 PM
Post
#2397
|
|
914 Guru Group: Members Posts: 8,154 Joined: 3-August 19 From: SW Colorado Member No.: 23,343 Region Association: Rocky Mountains |
After I mounted the front plate to the dash frame, I cut out all the holes in the dash face, without thinking. On my car, switches fill the 3 holes left of the steering wheel, and the cigarette lighter goes in the big hole on the right. But now I have 2 extra holes!
Attached thumbnail(s) 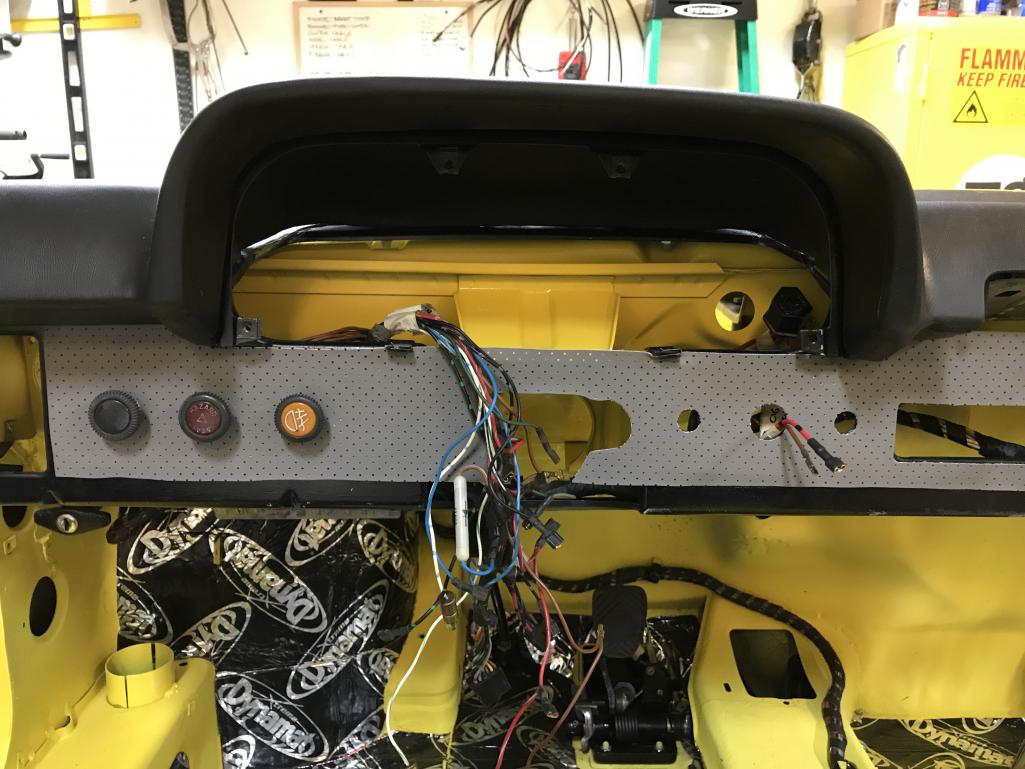
|
|
|
|
| bkrantz |
Mar 12 2021, 08:34 PM
Post
#2398
|
|
914 Guru Group: Members Posts: 8,154 Joined: 3-August 19 From: SW Colorado Member No.: 23,343 Region Association: Rocky Mountains |
While I think about what to do with the dash, I got going on the targa hoop vinyl and trim. A couple of weeks ago, I polished some aluminum trim, including the pieces that mount along the window sides of the sails. But I left the metal unprotected. Rather than clear coat, I decided to try a metal polish.
Attached thumbnail(s) 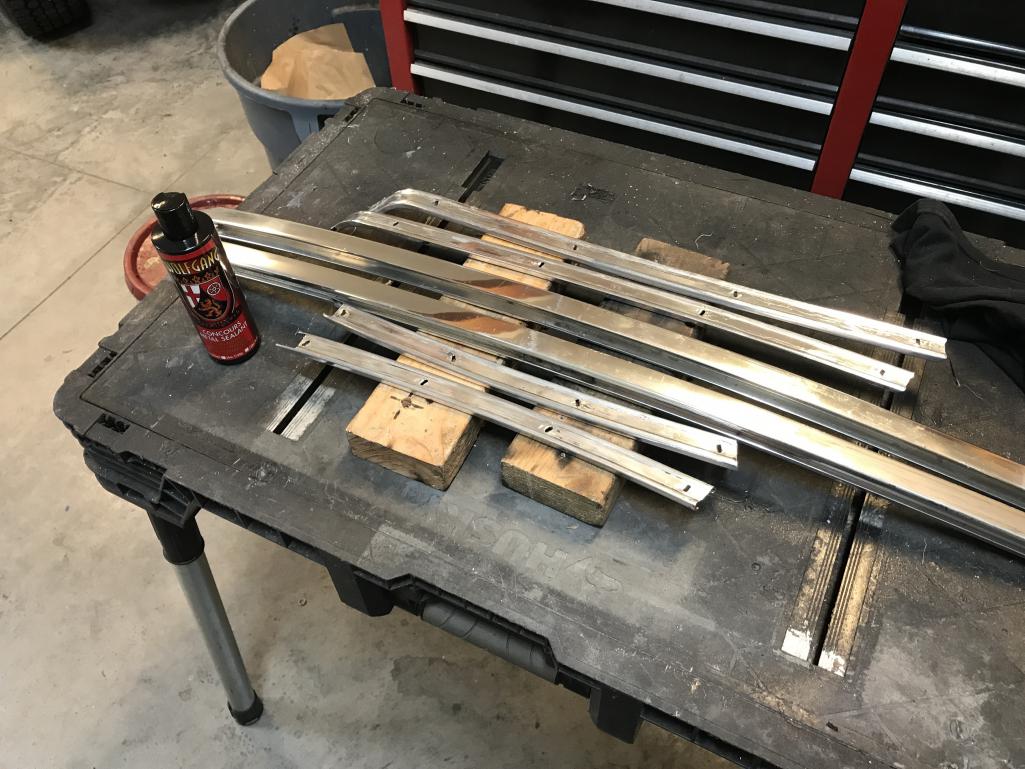
|
|
|
|
| bkrantz |
Mar 12 2021, 08:34 PM
Post
#2399
|
|
914 Guru Group: Members Posts: 8,154 Joined: 3-August 19 From: SW Colorado Member No.: 23,343 Region Association: Rocky Mountains |
We will see how this stuff holds up to time and weather.
Attached thumbnail(s) 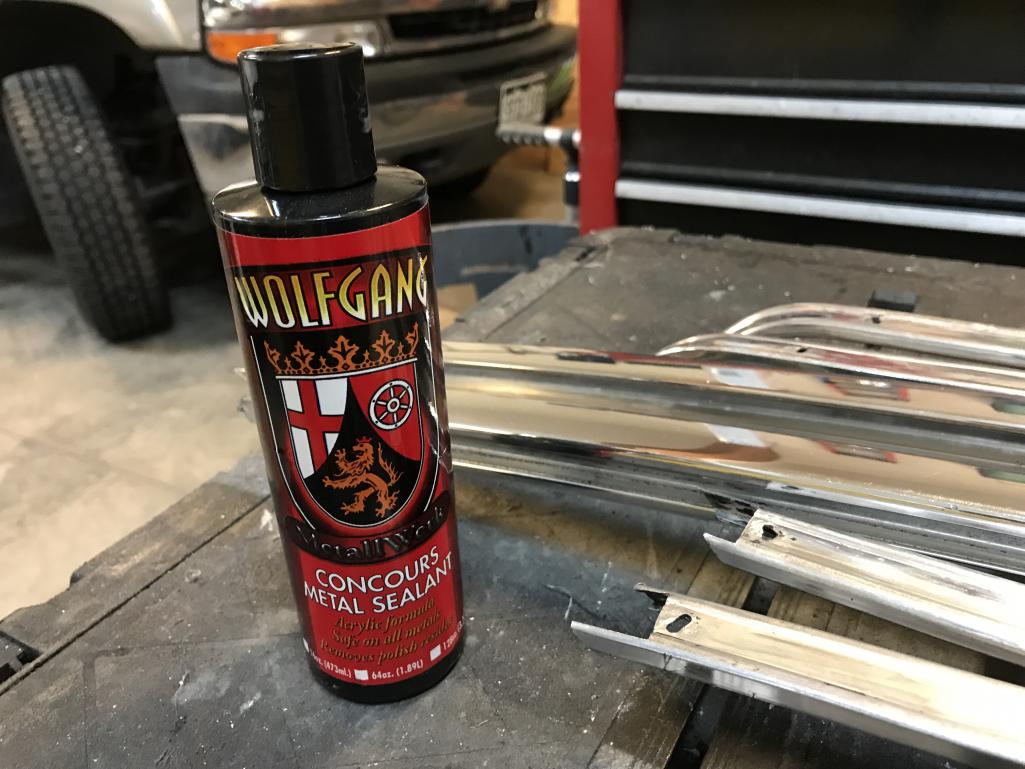
|
|
|
|
| bkrantz |
Mar 12 2021, 08:35 PM
Post
#2400
|
|
914 Guru Group: Members Posts: 8,154 Joined: 3-August 19 From: SW Colorado Member No.: 23,343 Region Association: Rocky Mountains |
On to installing the vinyl. I started with the top piece, and masked off the surrounding area.
Attached thumbnail(s) 
|
|
|
|
|
4 User(s) are reading this topic (4 Guests and 0 Anonymous Users)
0 Members:

|
Lo-Fi Version | Time is now: 29th November 2024 - 03:50 PM |
Invision Power Board
v9.1.4 © 2024 IPS, Inc.