|
|
|
Porsche, and the Porsche crest are registered trademarks of Dr. Ing. h.c. F. Porsche AG.
This site is not affiliated with Porsche in any way. Its only purpose is to provide an online forum for car enthusiasts. All other trademarks are property of their respective owners. |
|
|

  |

| DdHavtech |
 Mar 14 2021, 07:19 PM Mar 14 2021, 07:19 PM
Post
#2421
|
|
Newbie  Group: Members Posts: 8 Joined: 21-March 18 From: Ellicott City, MD Member No.: 21,993 Region Association: None |
On the sail panel vinyl - what is the correct way to trim it and not scratch into the nice new paint?
Very nice. |
   |

 
|
| bkrantz |
Mar 15 2021, 07:33 PM
Post
#2422
|
|
914 Guru Group: Members Posts: 8,154 Joined: 3-August 19 From: SW Colorado Member No.: 23,343 Region Association: Rocky Mountains |
QUOTE(DdHavtech @ Mar 14 2021, 06:19 PM)  On the sail panel vinyl - what is the correct way to trim it and not scratch into the nice new paint? Very nice. I used several new single-edge razor blades, and cut width moderate pressure--trying to cut the vinyl and only score the paint. I thought about pre-cutting the lower edge, but could not figure out how to make sure I glued it on exactly right. |
|
|
|
| bkrantz |
Mar 15 2021, 07:35 PM
Post
#2423
|
|
914 Guru Group: Members Posts: 8,154 Joined: 3-August 19 From: SW Colorado Member No.: 23,343 Region Association: Rocky Mountains |
A productive couple of hours today. I started with the fresh air control panel. It looks a little shabby but I cleaned and tested all the contacts.
Attached thumbnail(s) 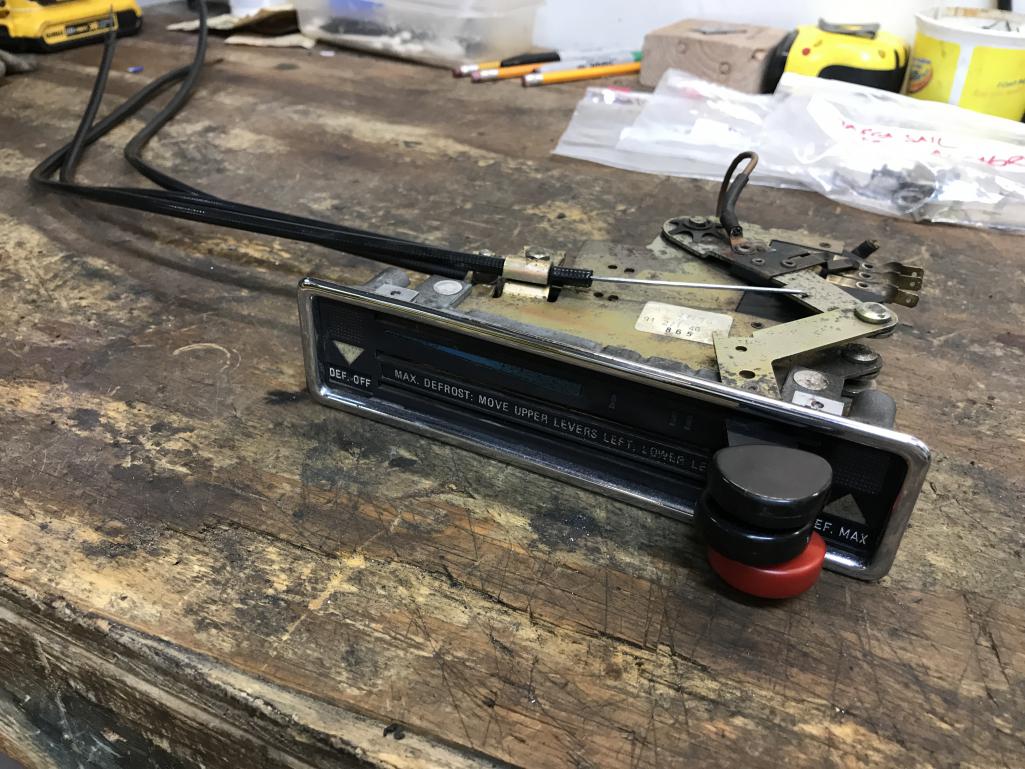
|
|
|
|
| bkrantz |
Mar 15 2021, 07:36 PM
Post
#2424
|
|
914 Guru Group: Members Posts: 8,154 Joined: 3-August 19 From: SW Colorado Member No.: 23,343 Region Association: Rocky Mountains |
Control panel in place, but at first I could not recall how to keep it in place.
Attached thumbnail(s) 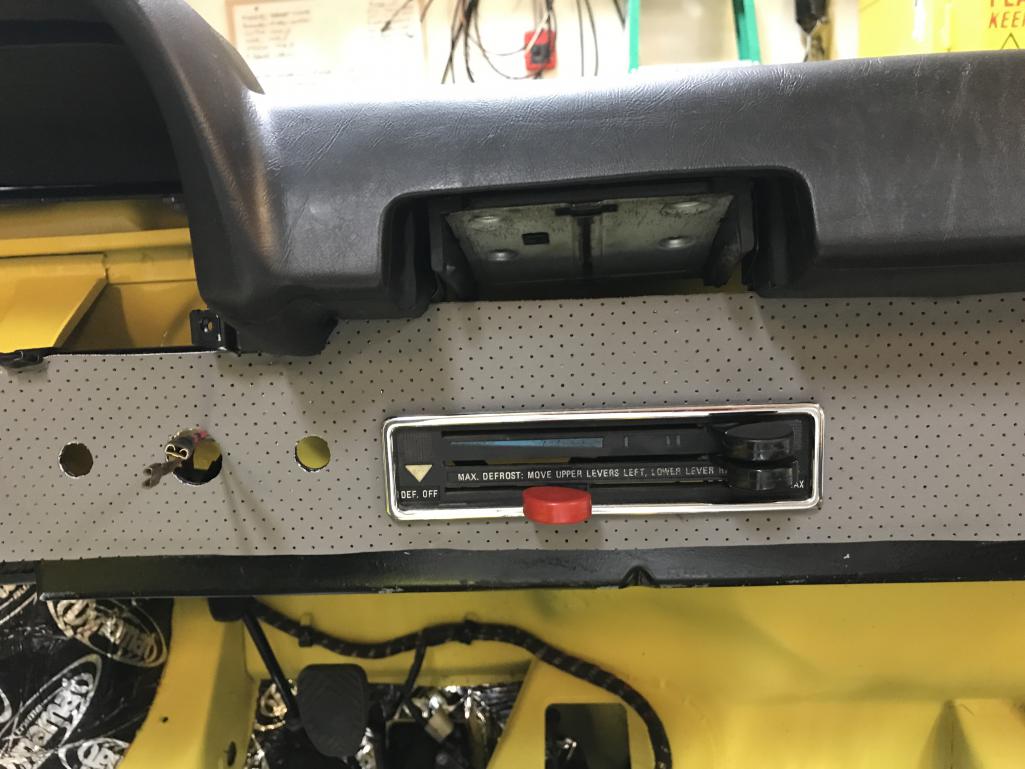
|
|
|
|
| bkrantz |
Mar 15 2021, 07:37 PM
Post
#2425
|
|
914 Guru Group: Members Posts: 8,154 Joined: 3-August 19 From: SW Colorado Member No.: 23,343 Region Association: Rocky Mountains |
Then I found (and remembered) the single bolt that goes through a bracket on the back side of the control panel and into the bulkhead. Also note the wires connected.
Attached thumbnail(s) 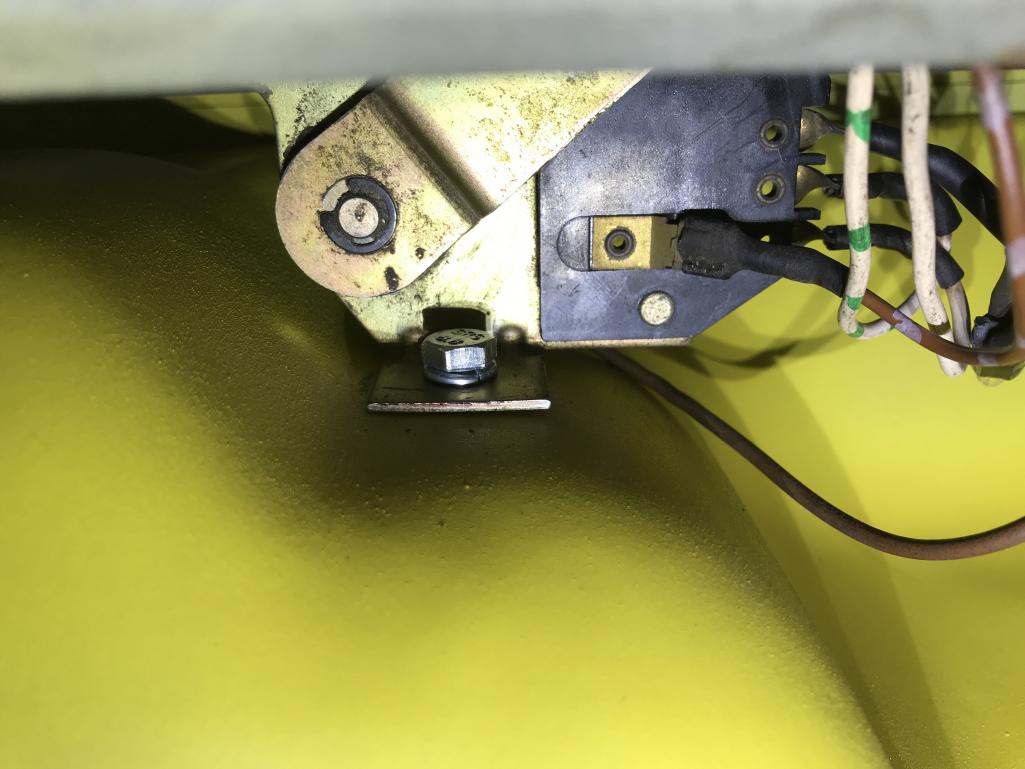
|
|
|
|
| bkrantz |
Mar 15 2021, 07:39 PM
Post
#2426
|
|
914 Guru Group: Members Posts: 8,154 Joined: 3-August 19 From: SW Colorado Member No.: 23,343 Region Association: Rocky Mountains |
And the 3 cables fed through the 3-hole rubber grommet.
Attached thumbnail(s) 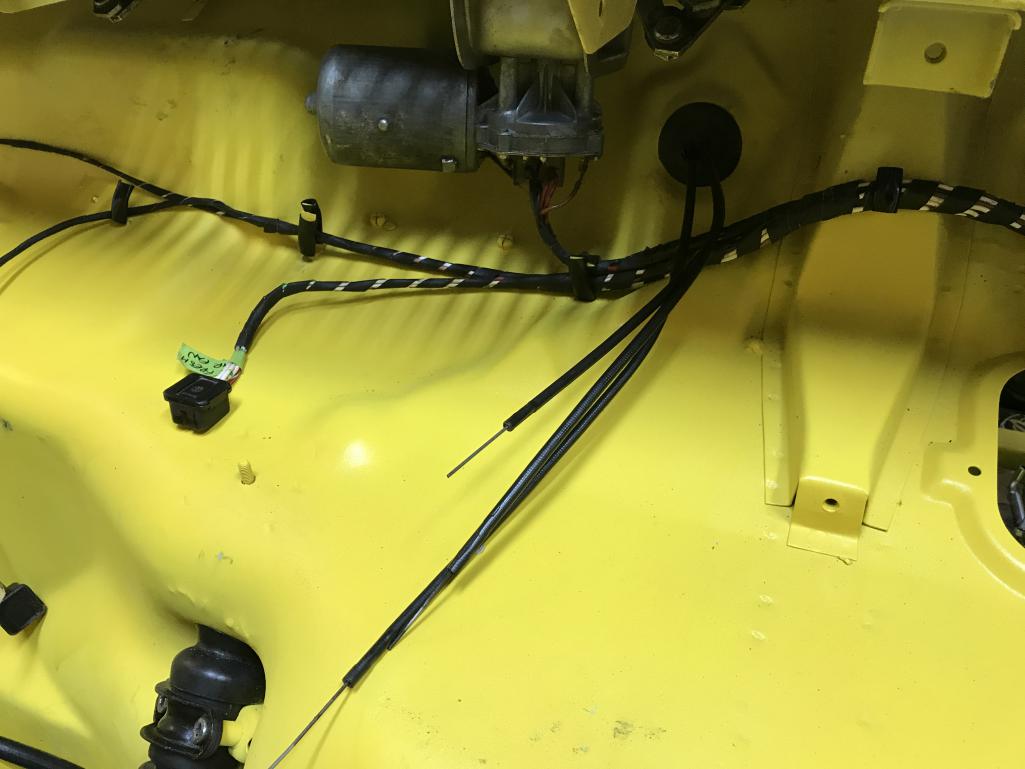
|
|
|
|
| bkrantz |
Mar 15 2021, 07:41 PM
Post
#2427
|
|
914 Guru Group: Members Posts: 8,154 Joined: 3-August 19 From: SW Colorado Member No.: 23,343 Region Association: Rocky Mountains |
Now its time for the dreaded fresh air box. I rebuilt this with the 914 Rubber kit, tested all the circuits, and have the new upper rubber gasket and plastic grill.
Attached thumbnail(s) 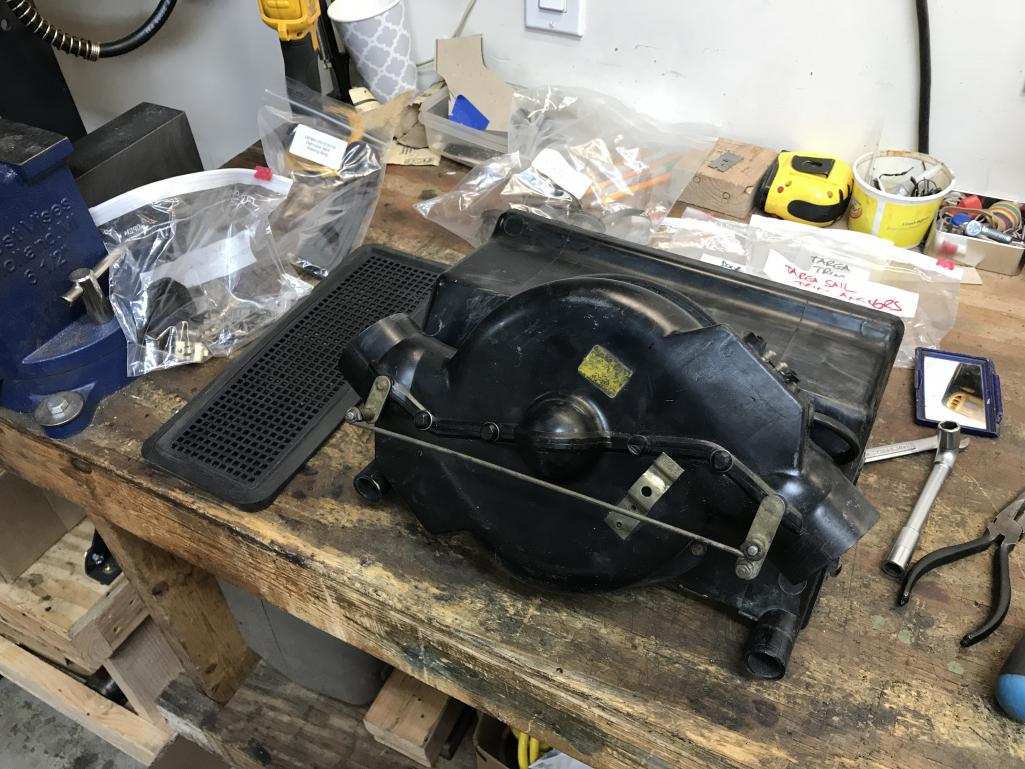
|
|
|
|
| bkrantz |
Mar 15 2021, 07:43 PM
Post
#2428
|
|
914 Guru Group: Members Posts: 8,154 Joined: 3-August 19 From: SW Colorado Member No.: 23,343 Region Association: Rocky Mountains |
Now I know I am getting old. I got tired of climbing into the frunk for better access, so I got out my ladder.
Attached thumbnail(s) 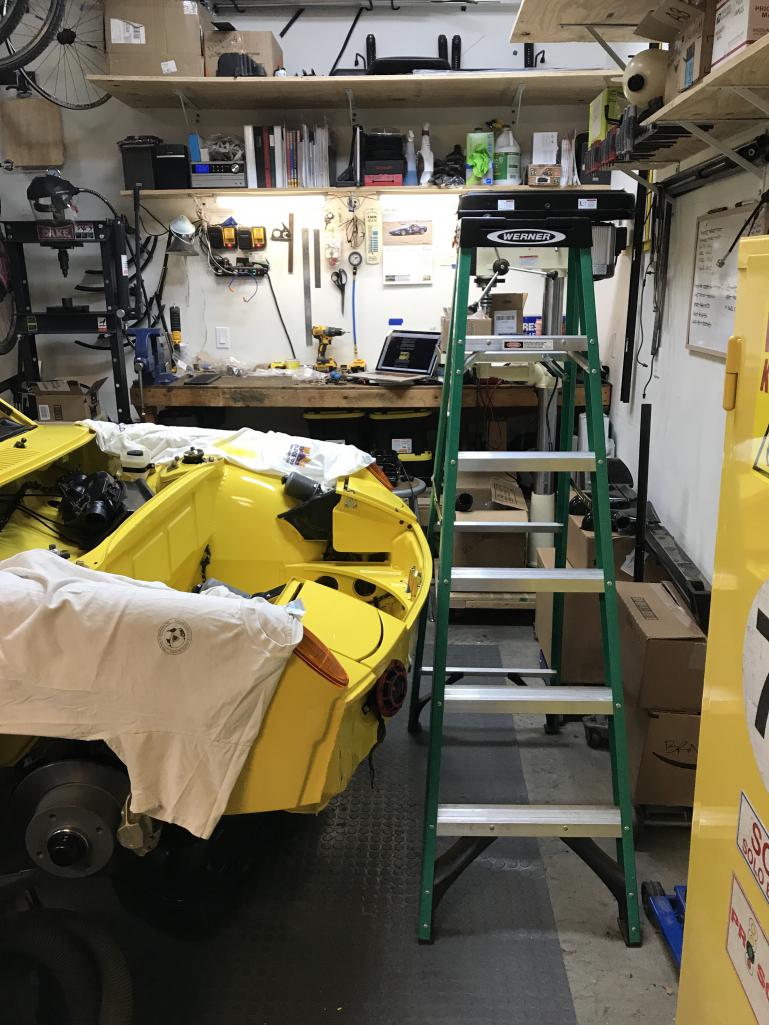
|
|
|
|
| bkrantz |
Mar 15 2021, 07:44 PM
Post
#2429
|
|
914 Guru Group: Members Posts: 8,154 Joined: 3-August 19 From: SW Colorado Member No.: 23,343 Region Association: Rocky Mountains |
OK, step one was attaching the control cable (from upper lever) to the box, and adjusting the position to match the lever throw.
Attached thumbnail(s) 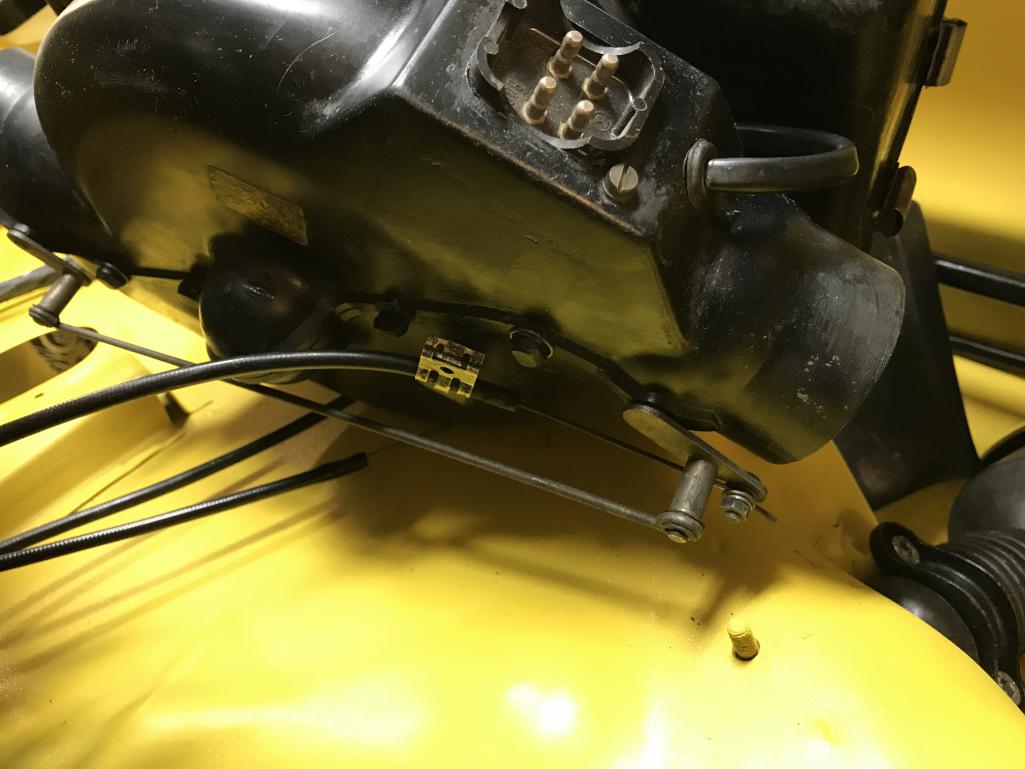
|
|
|
|
| bkrantz |
Mar 15 2021, 07:46 PM
Post
#2430
|
|
914 Guru Group: Members Posts: 8,154 Joined: 3-August 19 From: SW Colorado Member No.: 23,343 Region Association: Rocky Mountains |
Then the cable connector. I replaced the broken one that the PO had duct-taped in place.
Attached thumbnail(s) 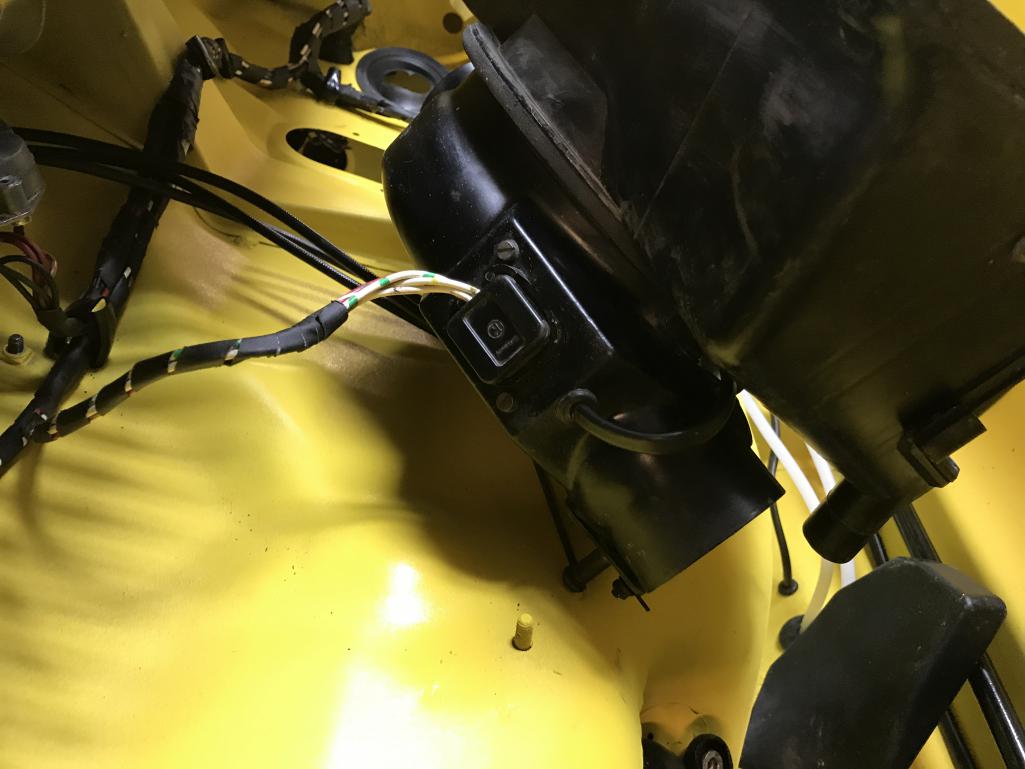
|
|
|
|
| bkrantz |
Mar 15 2021, 07:48 PM
Post
#2431
|
|
914 Guru Group: Members Posts: 8,154 Joined: 3-August 19 From: SW Colorado Member No.: 23,343 Region Association: Rocky Mountains |
Ready for my first attempt, with the rubber gasket and grill in place.
Attached thumbnail(s) 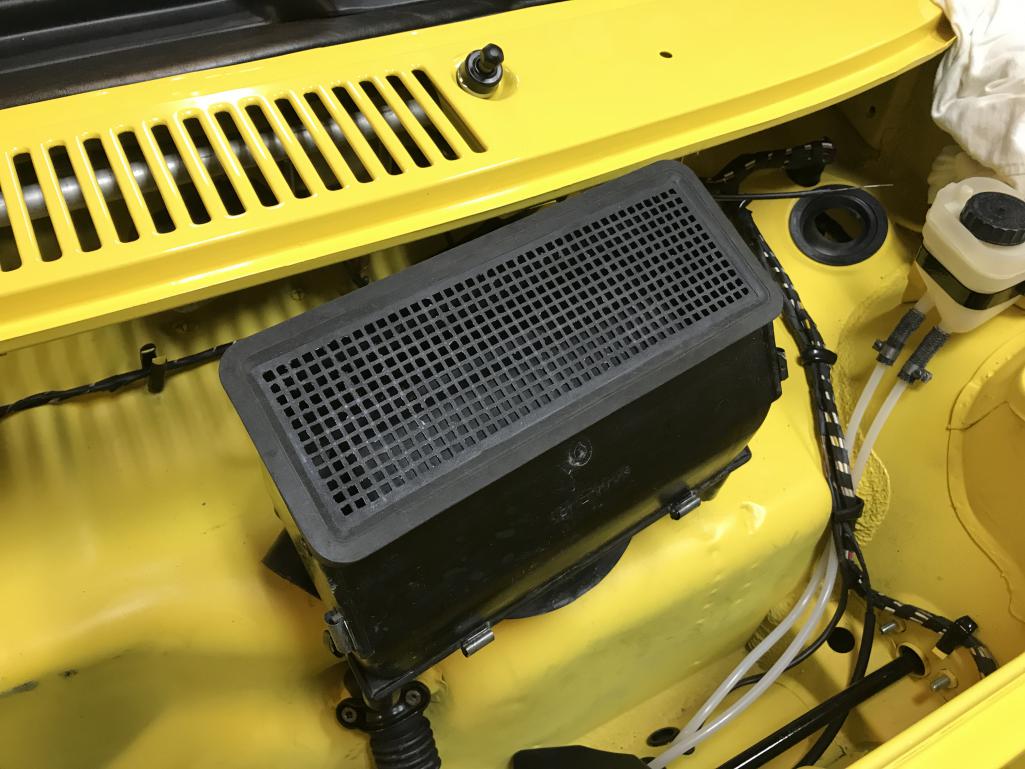
|
|
|
|
| bkrantz |
Mar 15 2021, 07:50 PM
Post
#2432
|
|
914 Guru Group: Members Posts: 8,154 Joined: 3-August 19 From: SW Colorado Member No.: 23,343 Region Association: Rocky Mountains |
1st attempt: I muscled the box into place but the gasket and grill were no longer in position, and no chance of getting my fingers in close to fix that. Notice the dirty foot print on the right.
Attached thumbnail(s) 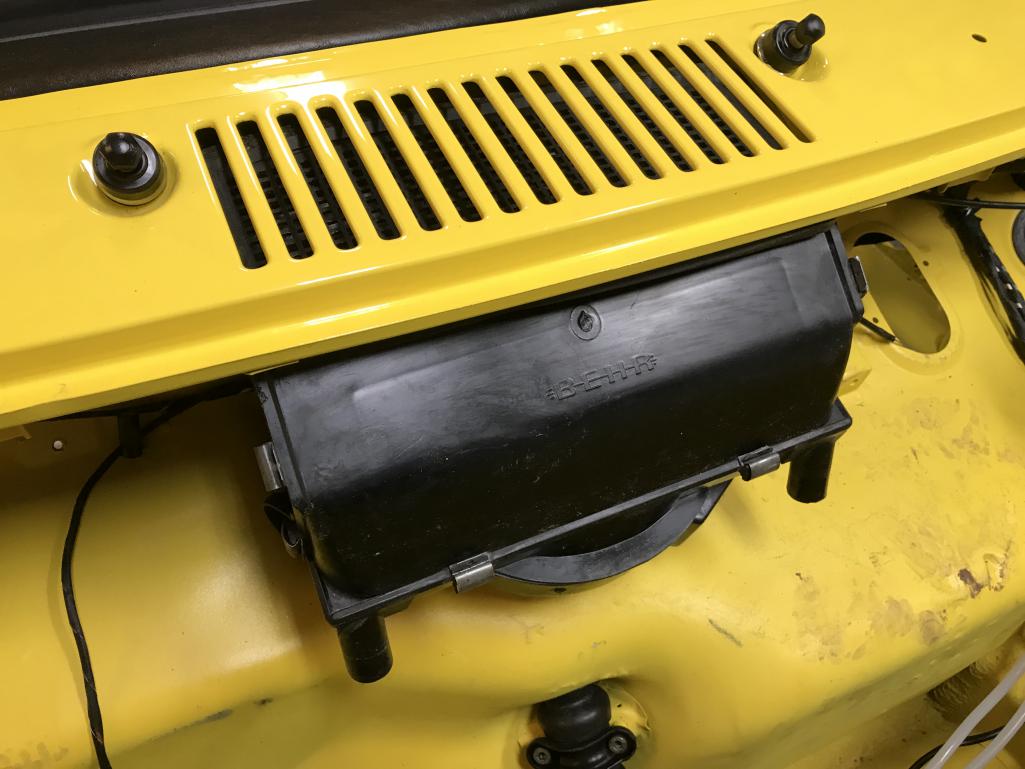
|
|
|
|
| bkrantz |
Mar 15 2021, 07:52 PM
Post
#2433
|
|
914 Guru Group: Members Posts: 8,154 Joined: 3-August 19 From: SW Colorado Member No.: 23,343 Region Association: Rocky Mountains |
2nd (or maybe 3rd) attempt: I used some long zip ties to hold the gasket and grill in place.
Attached thumbnail(s) 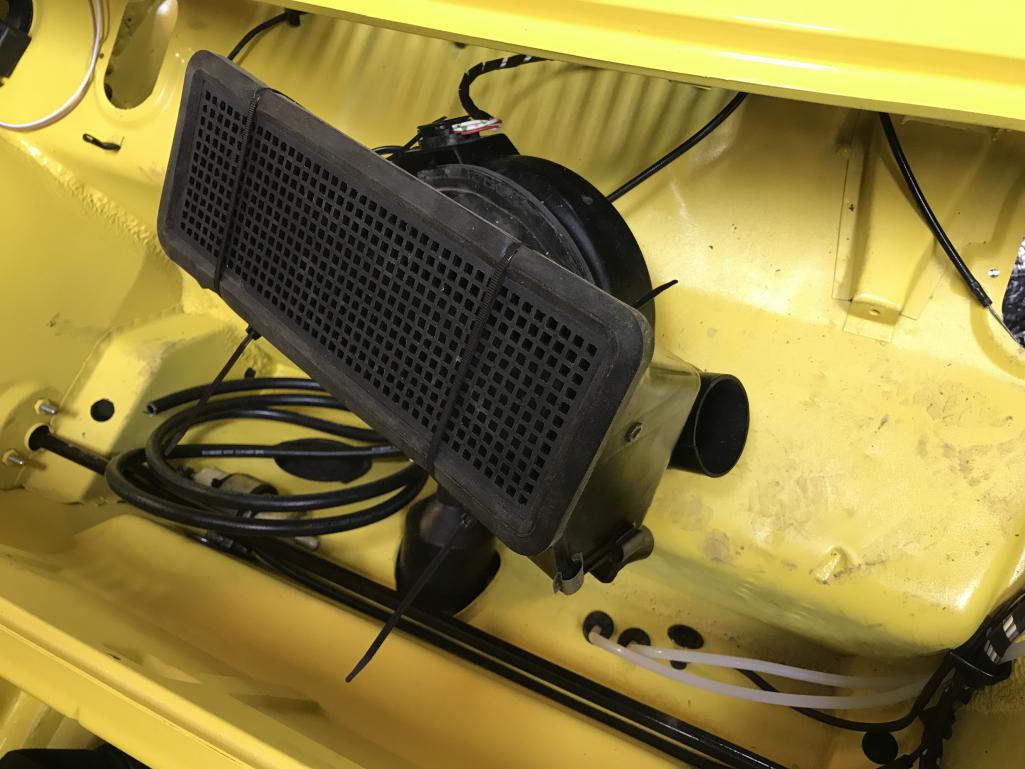
|
|
|
|
| bkrantz |
Mar 15 2021, 07:54 PM
Post
#2434
|
|
914 Guru Group: Members Posts: 8,154 Joined: 3-August 19 From: SW Colorado Member No.: 23,343 Region Association: Rocky Mountains |
I had enough muscle left to pull up on the cowl panel while pushing the box into place. So old, but not too old. (IMG:style_emoticons/default/aktion035.gif)
Attached thumbnail(s) 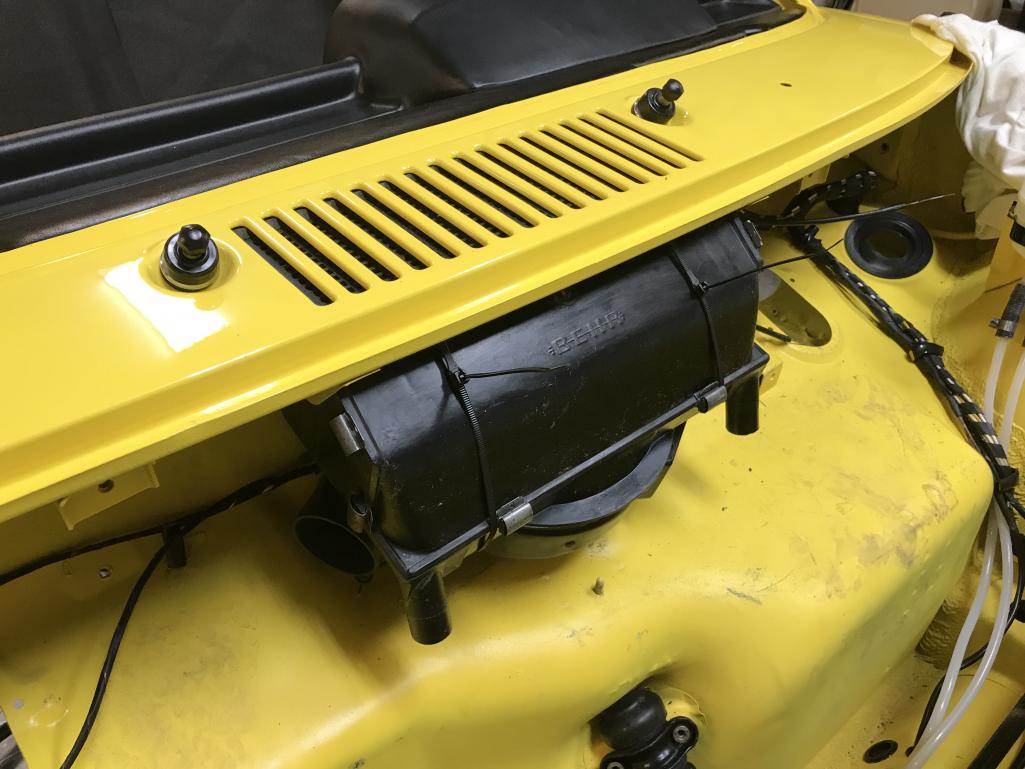
|
|
|
|
| bkrantz |
Mar 15 2021, 07:58 PM
Post
#2435
|
|
914 Guru Group: Members Posts: 8,154 Joined: 3-August 19 From: SW Colorado Member No.: 23,343 Region Association: Rocky Mountains |
Now for the last part: lifting the box against the new rubber gasket to align the side holes with the mounting brackets and get the bolts in place. I got the right side in with more muscle power, but could not get the left side without assist. For that, I used a 2x4 lever and my wonderful wife. I pulled on the lever while pushing the box to the rear, and she got the bolt started. Note that I pried against the lower corner of box, and not against the drain outlet.
Attached thumbnail(s) 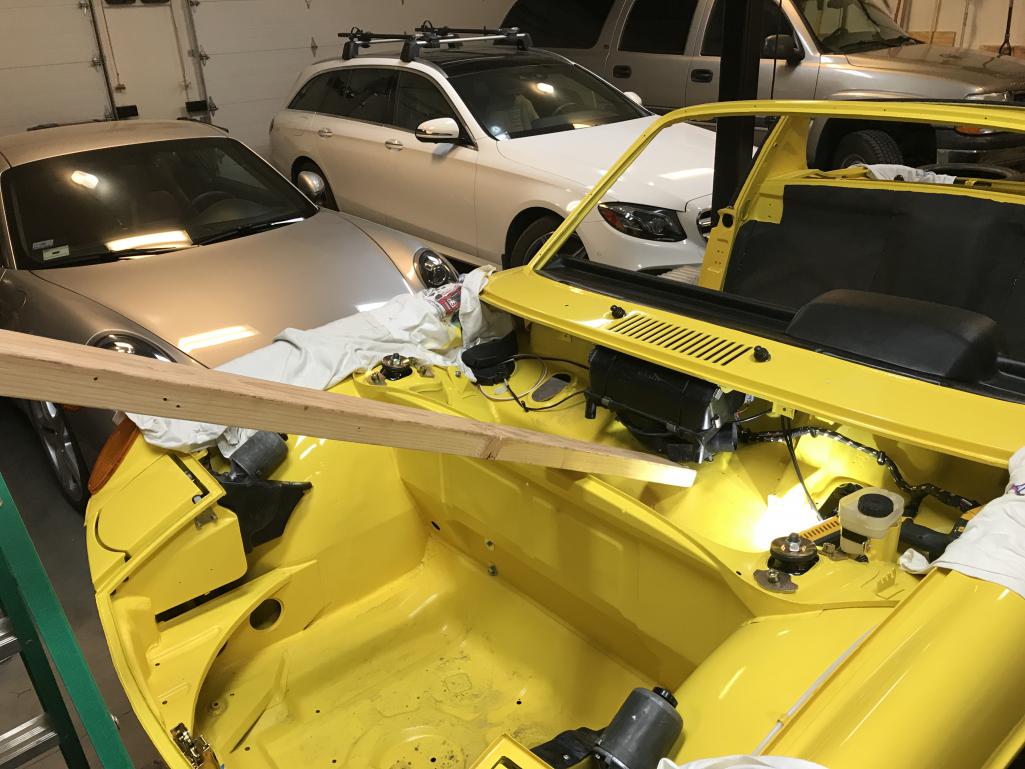
|
|
|
|
| bkrantz |
Mar 15 2021, 07:59 PM
Post
#2436
|
|
914 Guru Group: Members Posts: 8,154 Joined: 3-August 19 From: SW Colorado Member No.: 23,343 Region Association: Rocky Mountains |
All I had to do was snip the zip ties and pull them free, with some soapy water to help.
Attached thumbnail(s) 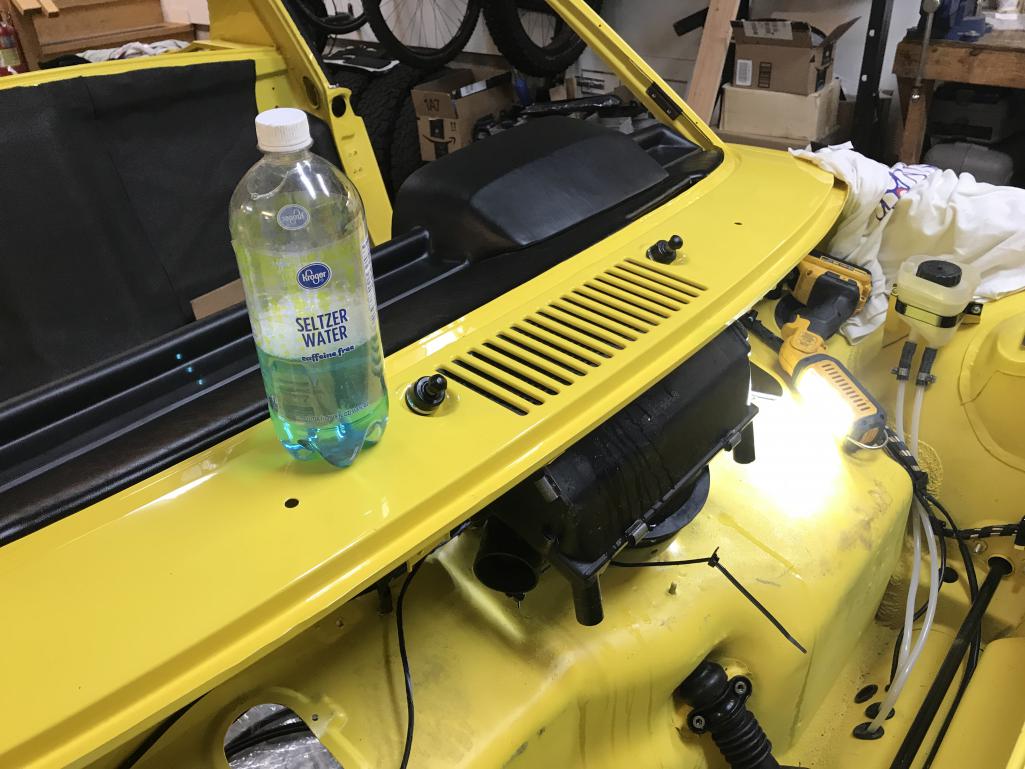
|
|
|
|
| bkrantz |
Mar 15 2021, 08:00 PM
Post
#2437
|
|
914 Guru Group: Members Posts: 8,154 Joined: 3-August 19 From: SW Colorado Member No.: 23,343 Region Association: Rocky Mountains |
Success! At least until I test it all later on.
Attached thumbnail(s) 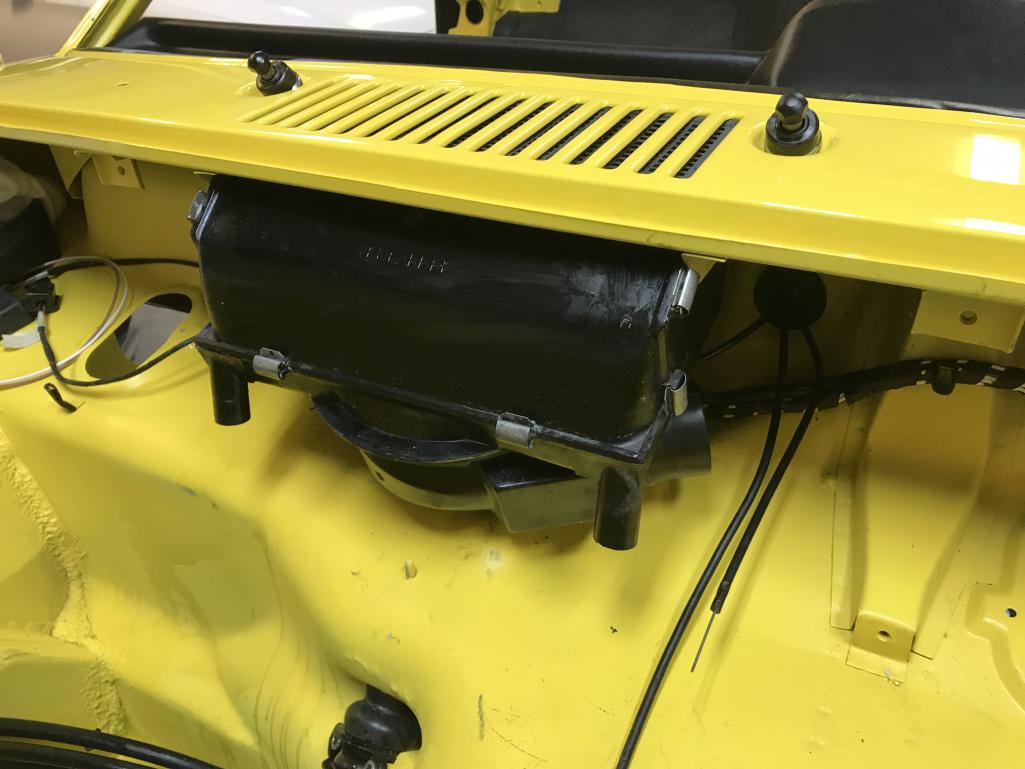
|
|
|
|
| euro911 |
Mar 15 2021, 09:47 PM
Post
#2438
|
|
Retired & living the dream. God help me if I wake up! Group: Members Posts: 8,858 Joined: 2-December 06 From: So.Cal. & No.AZ (USA) Member No.: 7,300 Region Association: Southern California |
QUOTE(ElCee @ Mar 12 2021, 01:20 AM) You better paint these two spots black. Aren't there a couple of plastic vent outlets that fit in there? (IMG:style_emoticons/default/confused24.gif) QUOTE(bkrantz @ Mar 12 2021, 07:29 PM) After I mounted the front plate to the dash frame, I cut out all the holes in the dash face, without thinking. On my car, switches fill the 3 holes left of the steering wheel, and the cigarette lighter goes in the big hole on the right. But now I have 2 extra holes! (IMG:http://www.914world.com/bbs2/uploads/post-23343-1615602562_thumb.jpg) Maybe you could install a couple of auxiliary electrical toggle switches with the bomber type safety covers to fill the extra holes... ? (They look cool) (IMG:style_emoticons/default/aktion035.gif) 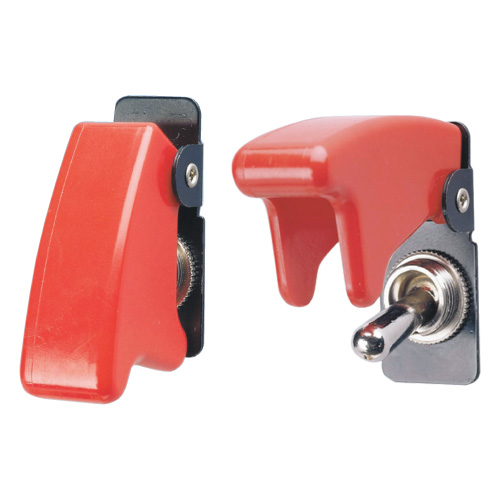 |
|
|
|
| raynekat |
Mar 15 2021, 10:33 PM
Post
#2439
|
|
Advanced Member Group: Members Posts: 2,164 Joined: 30-December 14 From: Coeur d'Alene, Idaho Member No.: 18,263 Region Association: Pacific Northwest |
Had to chuckle a bit when I saw the step ladder.
Thank goodness I've got long arms and did this all while leaning over the fenders. Ha Yeah, that 2 by 4 brought back some memories. And the dreaded screen on the top of the airbox. Now if you just don't have to remove the airbox 2 more times like I did for various stupid reasons. Looking good there Bob. And for one of the extra holes in the dash....might I suggest a rear fog light. (IMG:style_emoticons/default/wink.gif) 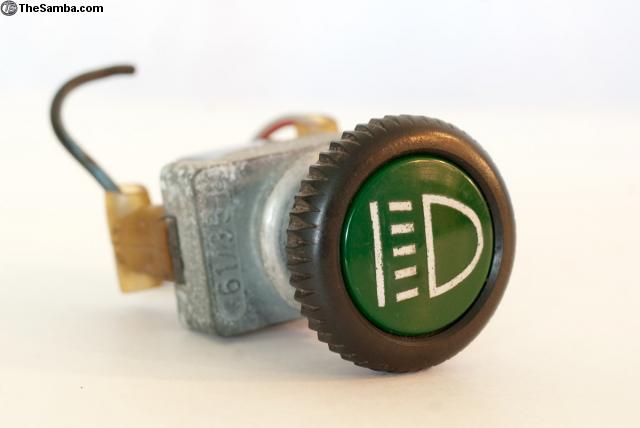  For the other, you could add one of those slick dual USB charging ports.  |
|
|
|
| CptTripps |
Mar 16 2021, 07:20 AM
Post
#2440
|
|
:: Punch and Pie :: Group: Members Posts: 3,584 Joined: 26-December 04 From: Mentor, OH Member No.: 3,342 Region Association: Upper MidWest |
QUOTE(raynekat @ Mar 16 2021, 12:33 AM) Do you have a link for where to buy one of these? That looks ideal to fix 2 issues I'm having. Voltage display and USB charging. |
|
|
|
|
3 User(s) are reading this topic (3 Guests and 0 Anonymous Users)
0 Members:

|
Lo-Fi Version | Time is now: 29th November 2024 - 06:01 PM |
Invision Power Board
v9.1.4 © 2024 IPS, Inc.